


Guide to repairing Shimano Sora ST3300 STI shifters
 12-26-20, 09:30 PM
#1

Senior Member
Thread Starter

Join Date: Aug 2009
Posts: 2,395
Mentioned: 14 Post(s)
Tagged: 0 Thread(s)
Quoted: 1562 Post(s)
Liked 1,734 Times
in
974 Posts
Guide to repairing Shimano Sora ST3300 STI shifters
Some years back forum member QuangVuong wrote a series of guides for repairing various Shimano STI’s. They were super helpful and I was able to refresh my RSX and 600 STI’s following his directions. Unfortunately he never did one for the Sora ST3300 (AKA thumb switch) shifter. So in the spirit of Each one Teach one, here it goes:
1. Unscrew the set screw with Allen wrench
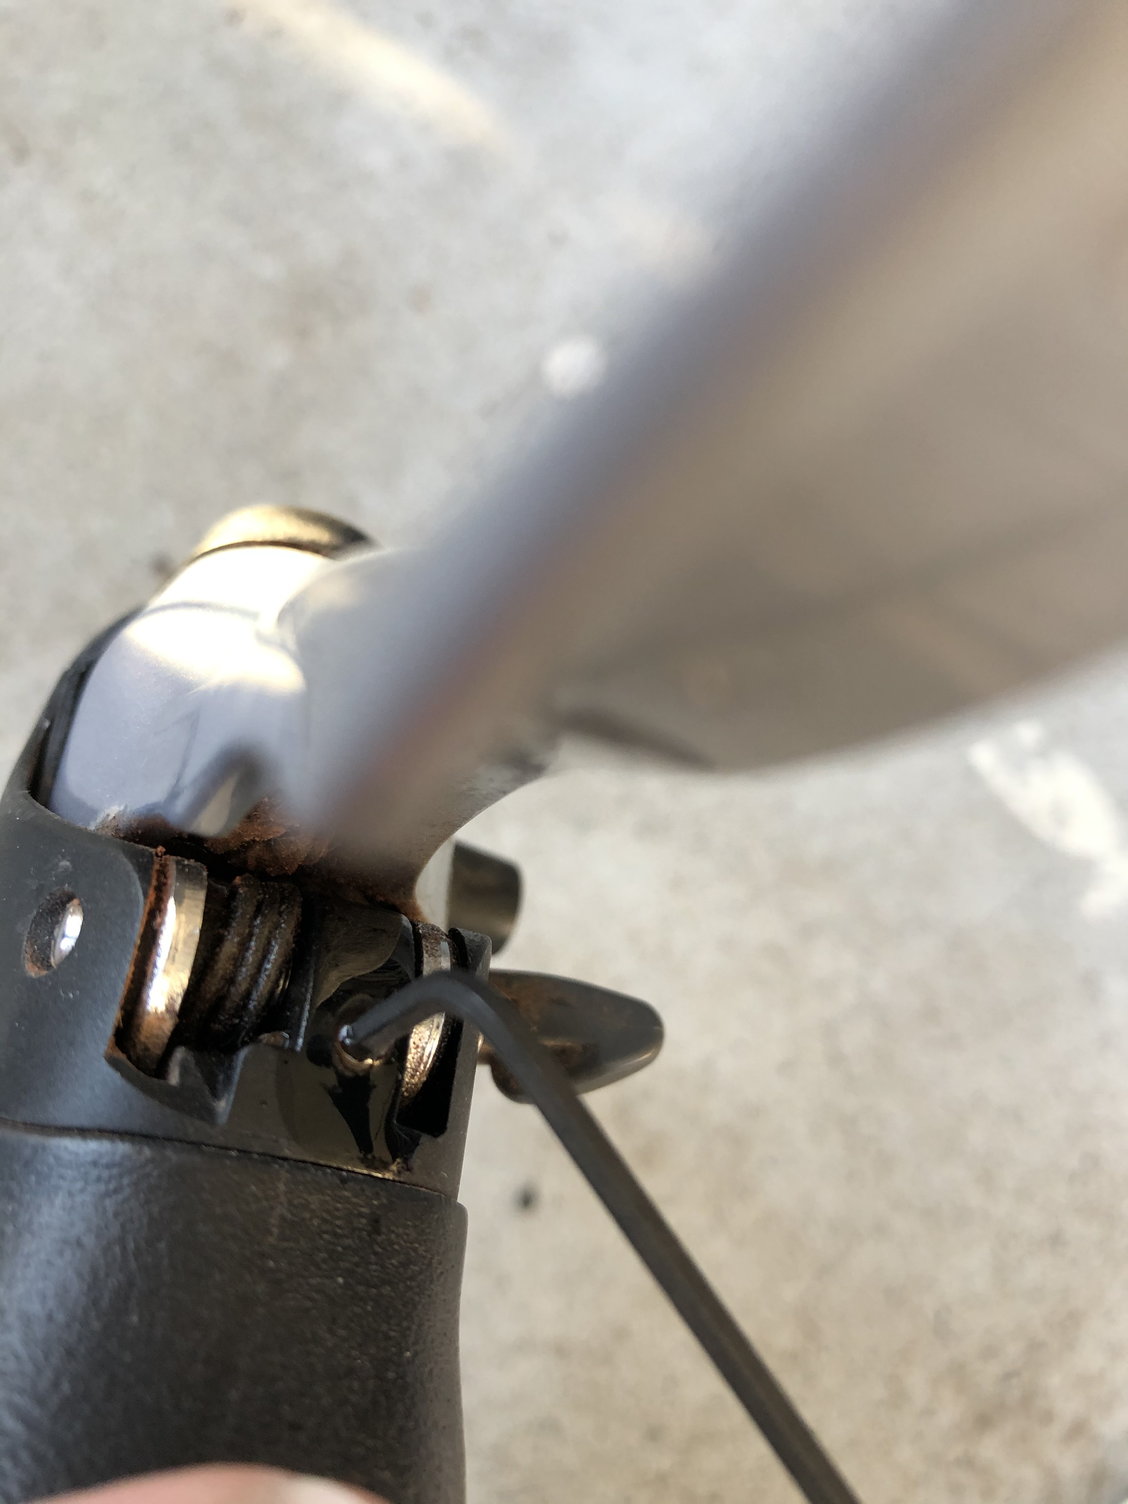
push pin out with Allen wrench
separated:
2.unscrew front cover screw:
and then unscrew the nut behind it- in this picture below I already took the nut off:
Turn over lever. Push it aside slightly to expose screw. Unscrew this screw:
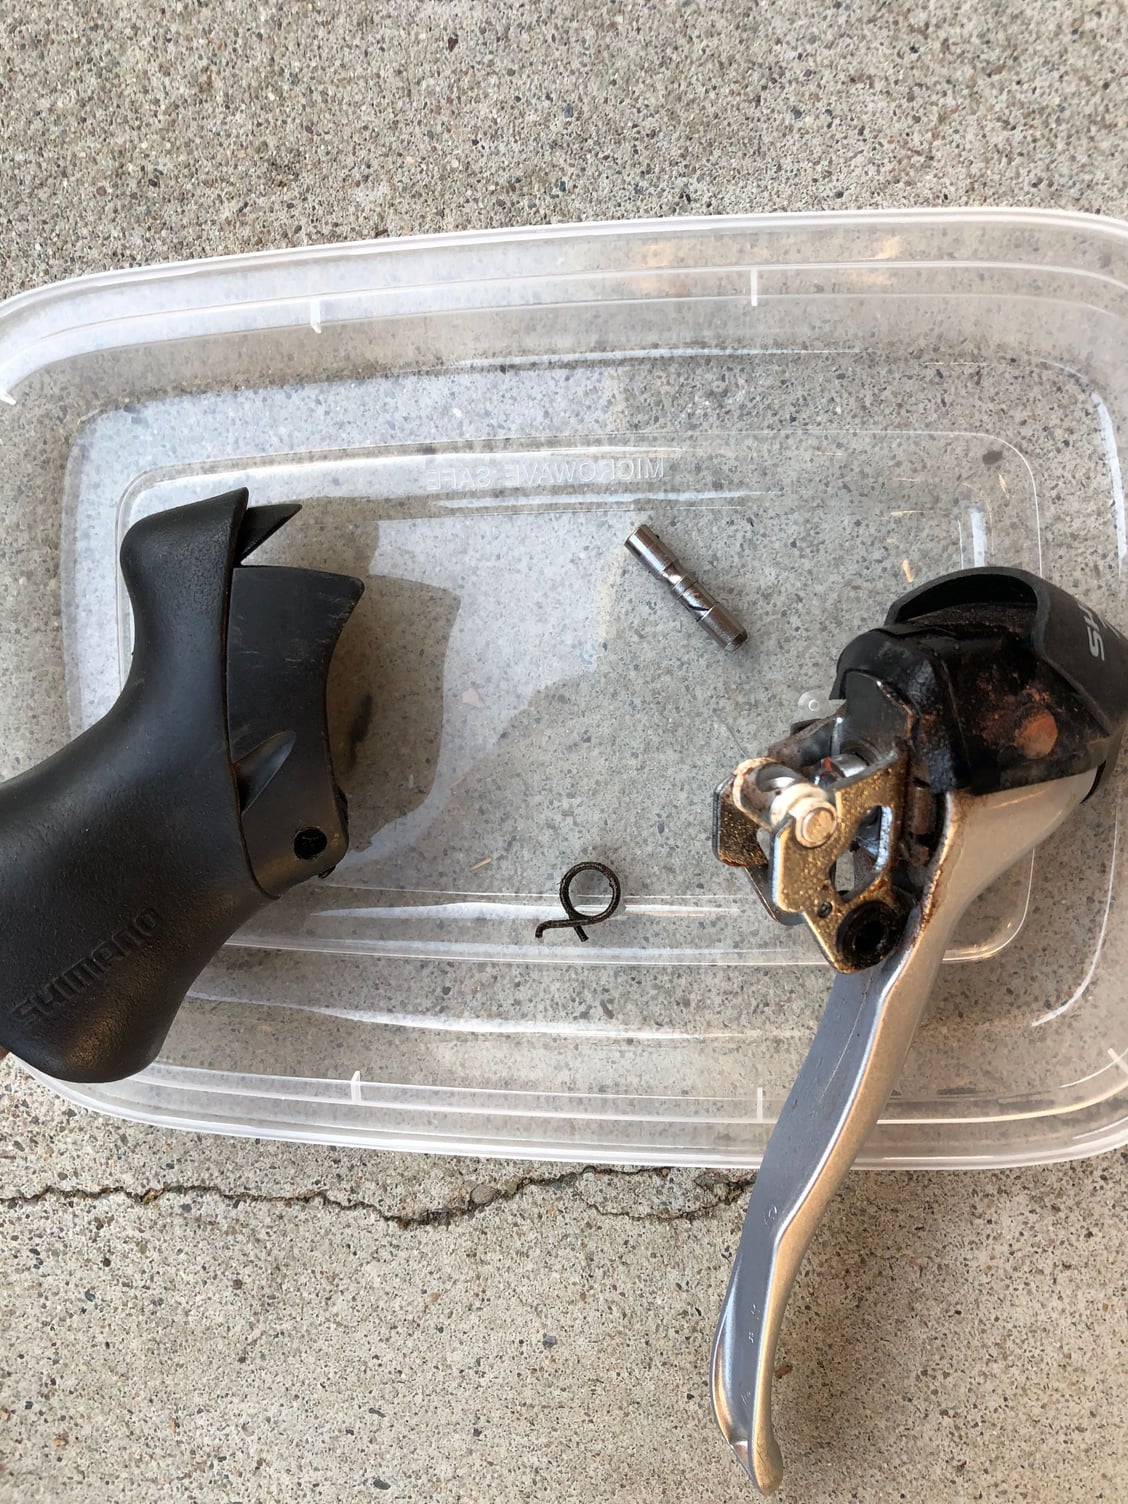
And then you can separate the mechanism from the lever
3. Some time during step 2, this plastic piece will come flying off.
Don’t freak. You can put it back on like this come reassembly time:
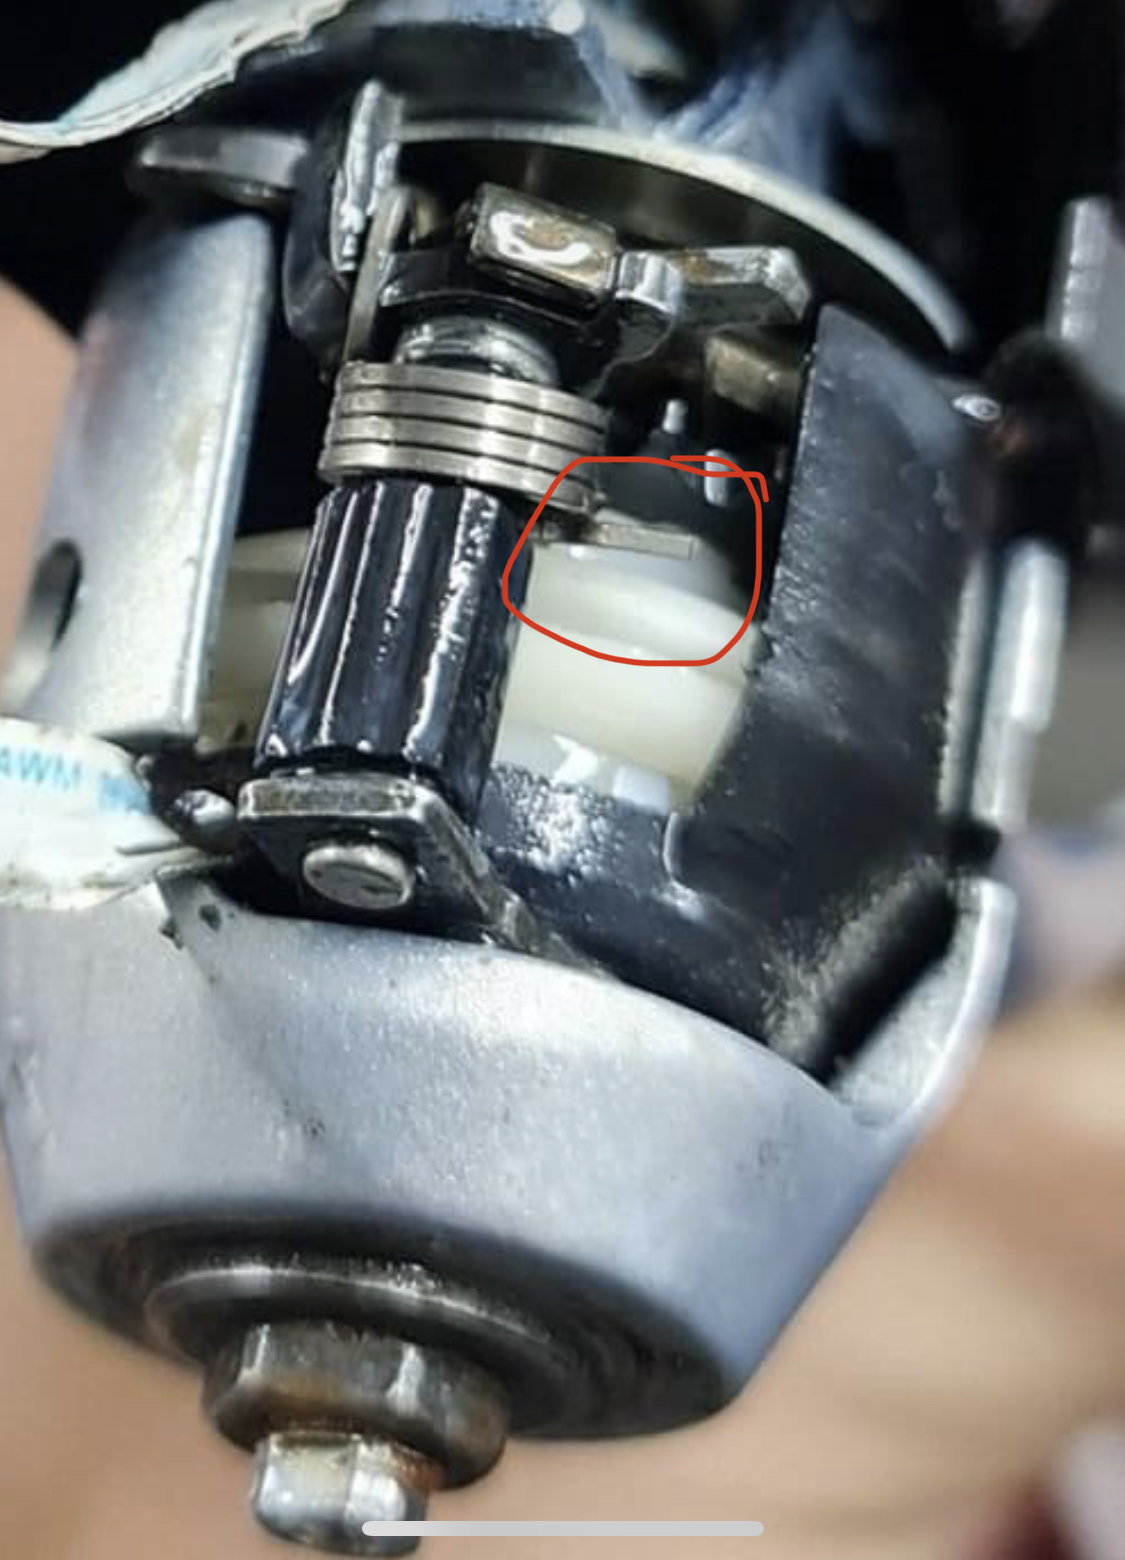
4. Cleaning the mechanism: I spray the mech thoroughly with WD40 and then use a tooth brush to scrub. Pay special attention to the escapement pawl:
The clock spring here gets weak over time and the pawl doesn’t want to follow the toothed wheel. If your Sora shifter only shifts two clicks and then flops free after that, this pawl is the culprit. Clean and Lube the heck out of this pawl so it moves freely again.
I use Finish Line Teflon dry lube , which is apparently recommended by Shimano.
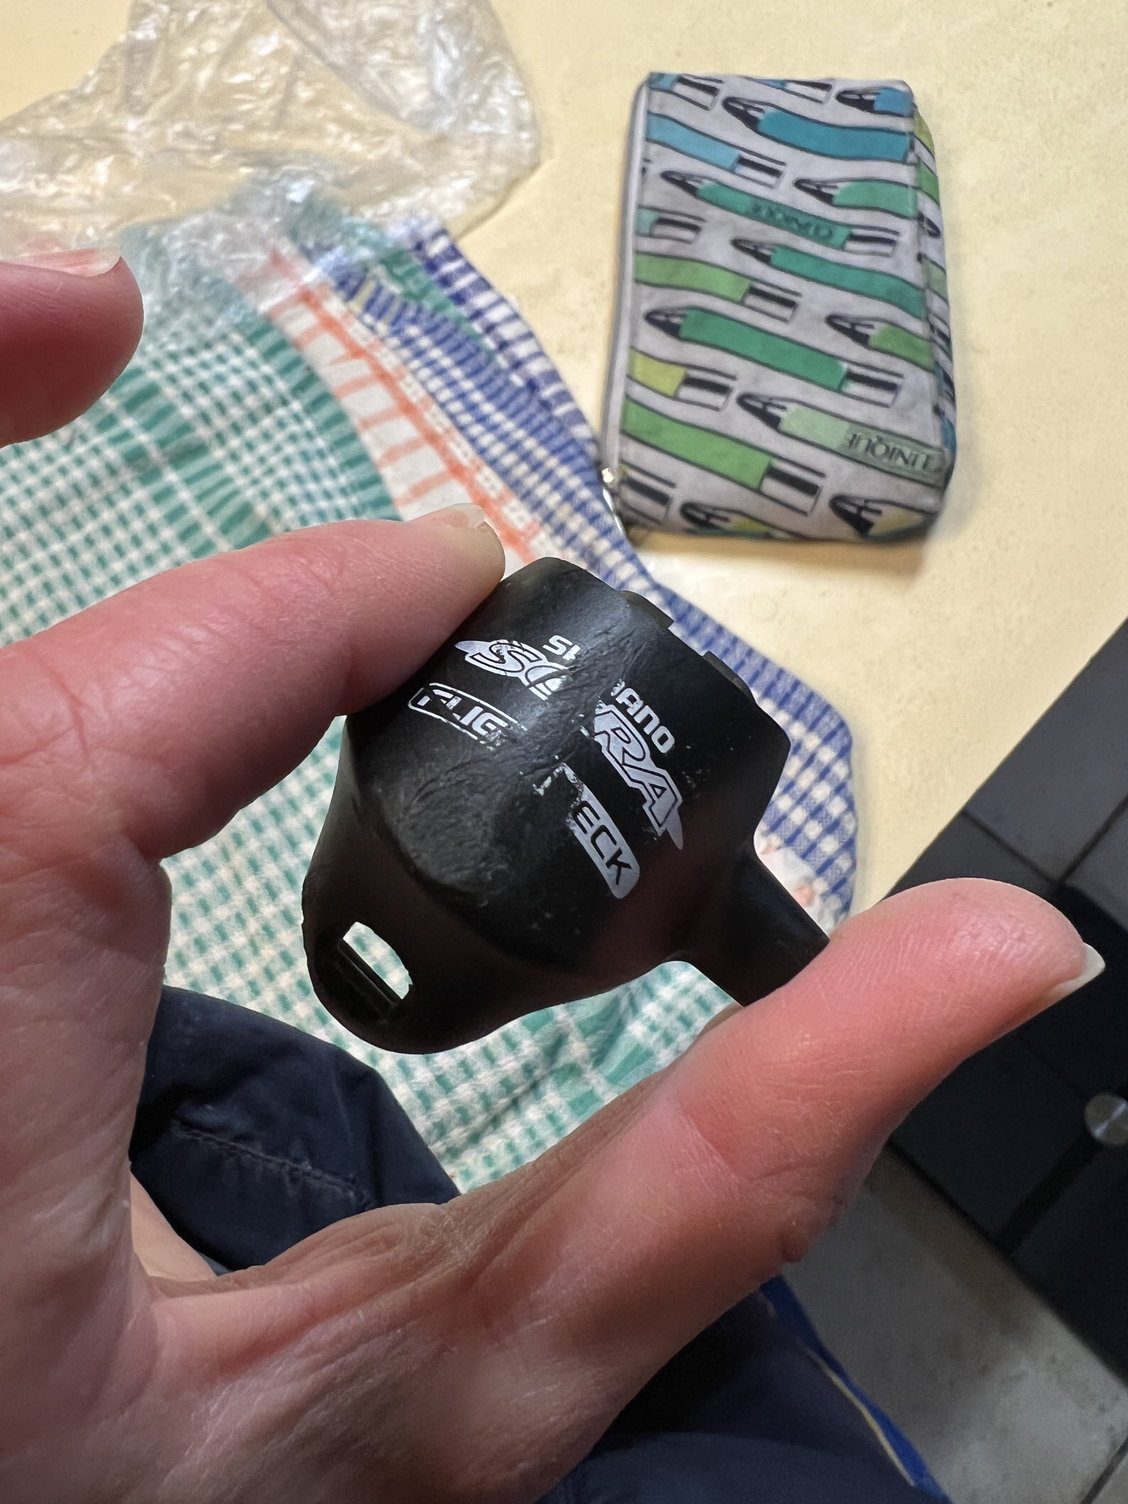
5. Body: while you have the shifter apart, now is the time to clean the body and rubber hood. Peel hood backwards to separate from body. You will see a secret compartment revealed:
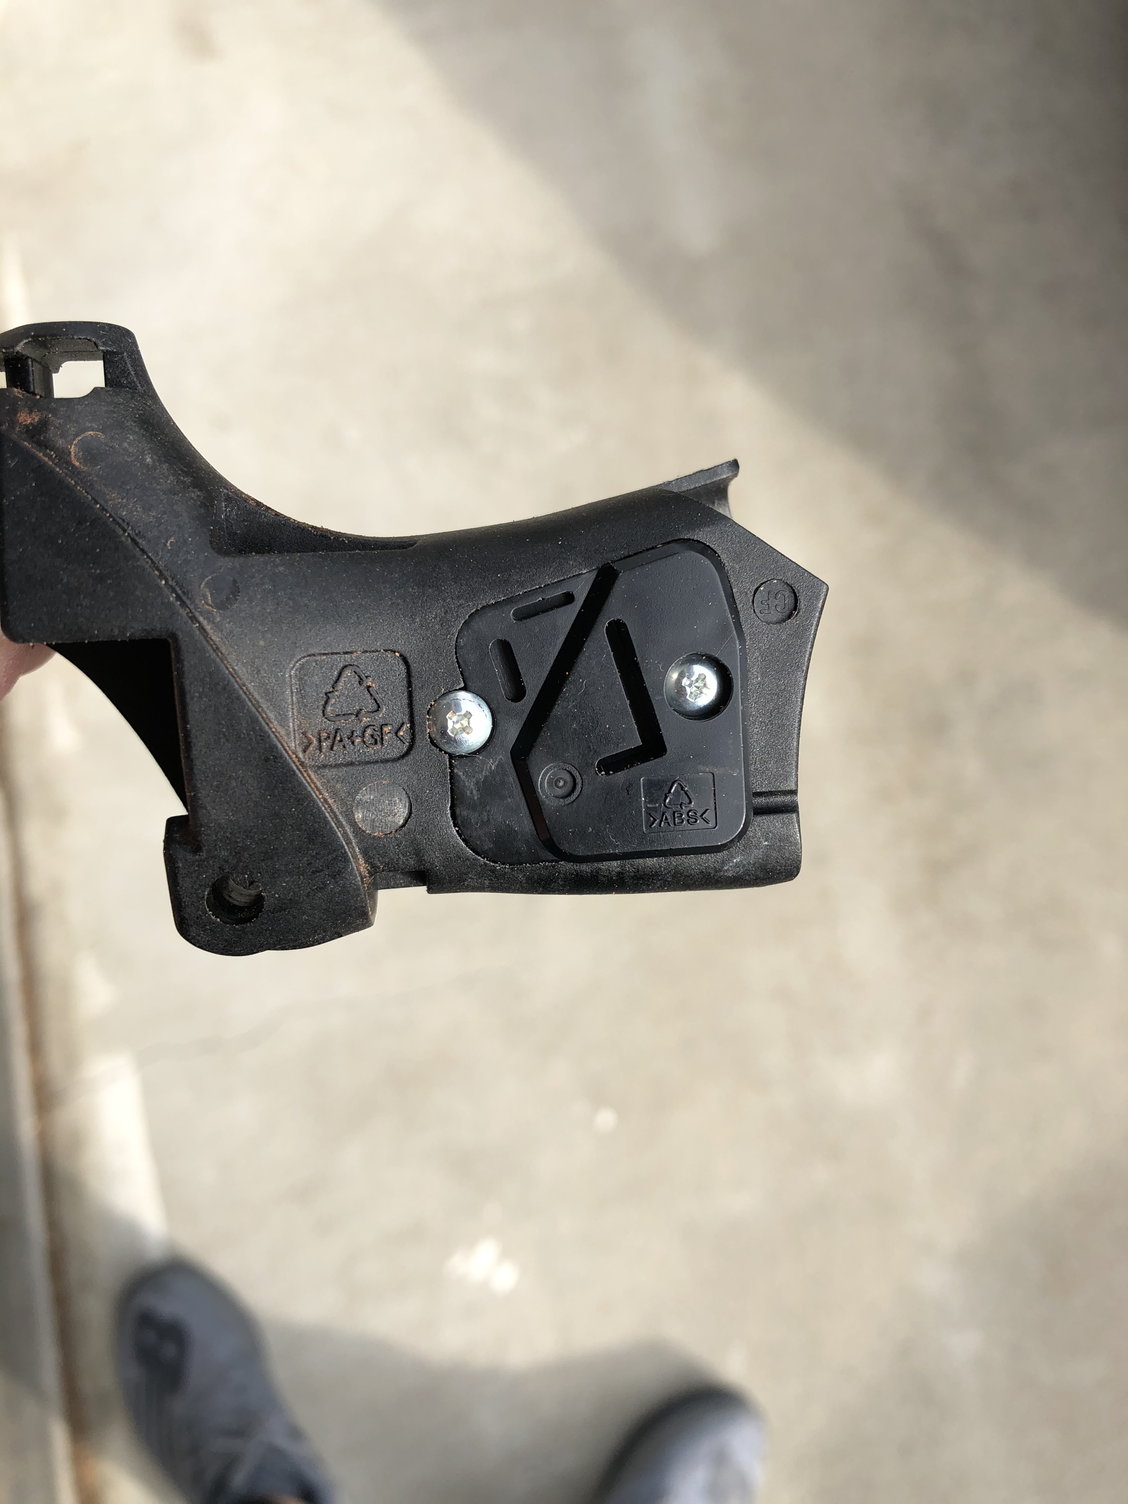
You have discovered the special power-up..... just kidding. You bought the cheap Shimano brifter. No power up for you. There is nothing inside that Flightdeck compartment.
Anyways to put the boot back on the body- smear a little bit of automotive Armor-All on the inside of the hood. It goes on way easier.
1. Unscrew the set screw with Allen wrench
push pin out with Allen wrench
separated:
2.unscrew front cover screw:
and then unscrew the nut behind it- in this picture below I already took the nut off:
Turn over lever. Push it aside slightly to expose screw. Unscrew this screw:
And then you can separate the mechanism from the lever
3. Some time during step 2, this plastic piece will come flying off.
Don’t freak. You can put it back on like this come reassembly time:
4. Cleaning the mechanism: I spray the mech thoroughly with WD40 and then use a tooth brush to scrub. Pay special attention to the escapement pawl:
The clock spring here gets weak over time and the pawl doesn’t want to follow the toothed wheel. If your Sora shifter only shifts two clicks and then flops free after that, this pawl is the culprit. Clean and Lube the heck out of this pawl so it moves freely again.
I use Finish Line Teflon dry lube , which is apparently recommended by Shimano.
5. Body: while you have the shifter apart, now is the time to clean the body and rubber hood. Peel hood backwards to separate from body. You will see a secret compartment revealed:
You have discovered the special power-up..... just kidding. You bought the cheap Shimano brifter. No power up for you. There is nothing inside that Flightdeck compartment.
Anyways to put the boot back on the body- smear a little bit of automotive Armor-All on the inside of the hood. It goes on way easier.
Last edited by icemilkcoffee; 12-26-20 at 09:34 PM.
 12-26-20, 09:30 PM
#2
Senior Member
Thread Starter
Join Date: Aug 2009
Posts: 2,395
Mentioned: 14 Post(s)
Tagged: 0 Thread(s)
Quoted: 1562 Post(s)
Liked 1,734 Times
in
974 Posts
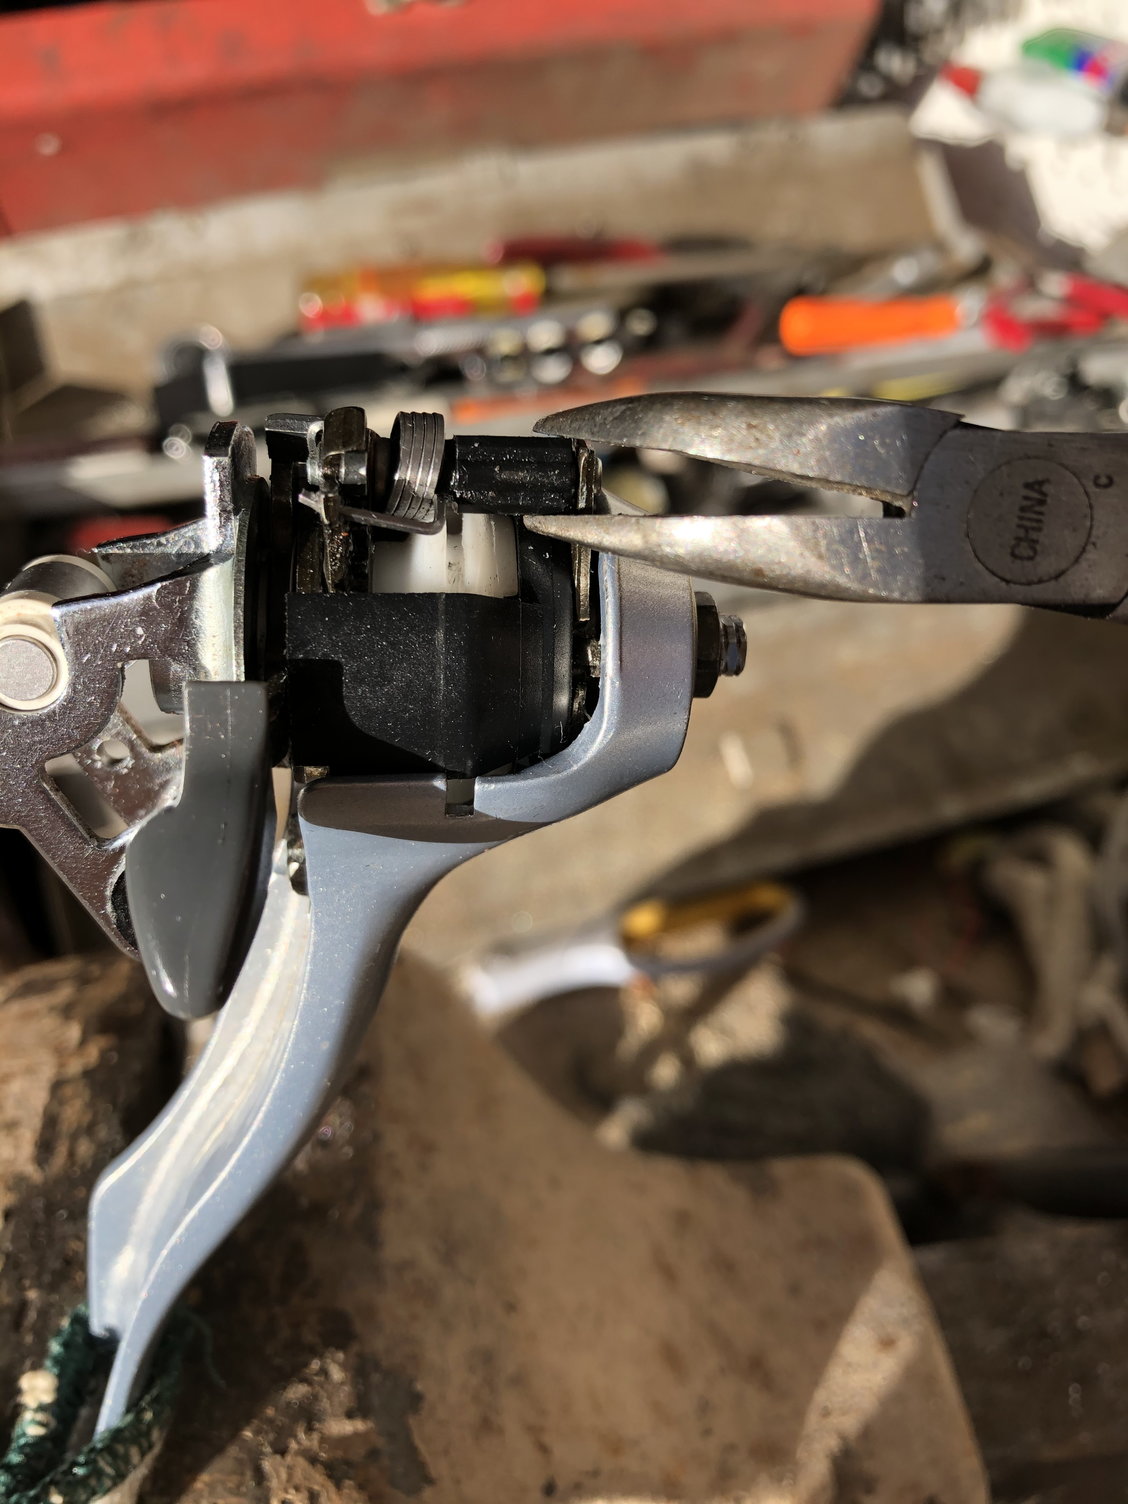
6. Putting the mechanism back in the lever. The problem here is that you have to wind the clockspring back. This step is a b*tch and a half- way more difficult than on the ST6400/ST-A550. Sorry I didn’t take any pics for this step- I had both hands full and my mouth was busy swearing.
The way to do it is to first put the spring in place in the lever body and then put the mechanism shaft through it. Now use a small needle nose pliers to wind the clock spring back until it catches the anchor point on the mechanism. Now the clockspring will be bulging out of place. Use a small flat screwdriver to push it back in place so you can seat the mechanism into the lever body. Now replace the nut and the screw behind the lever.
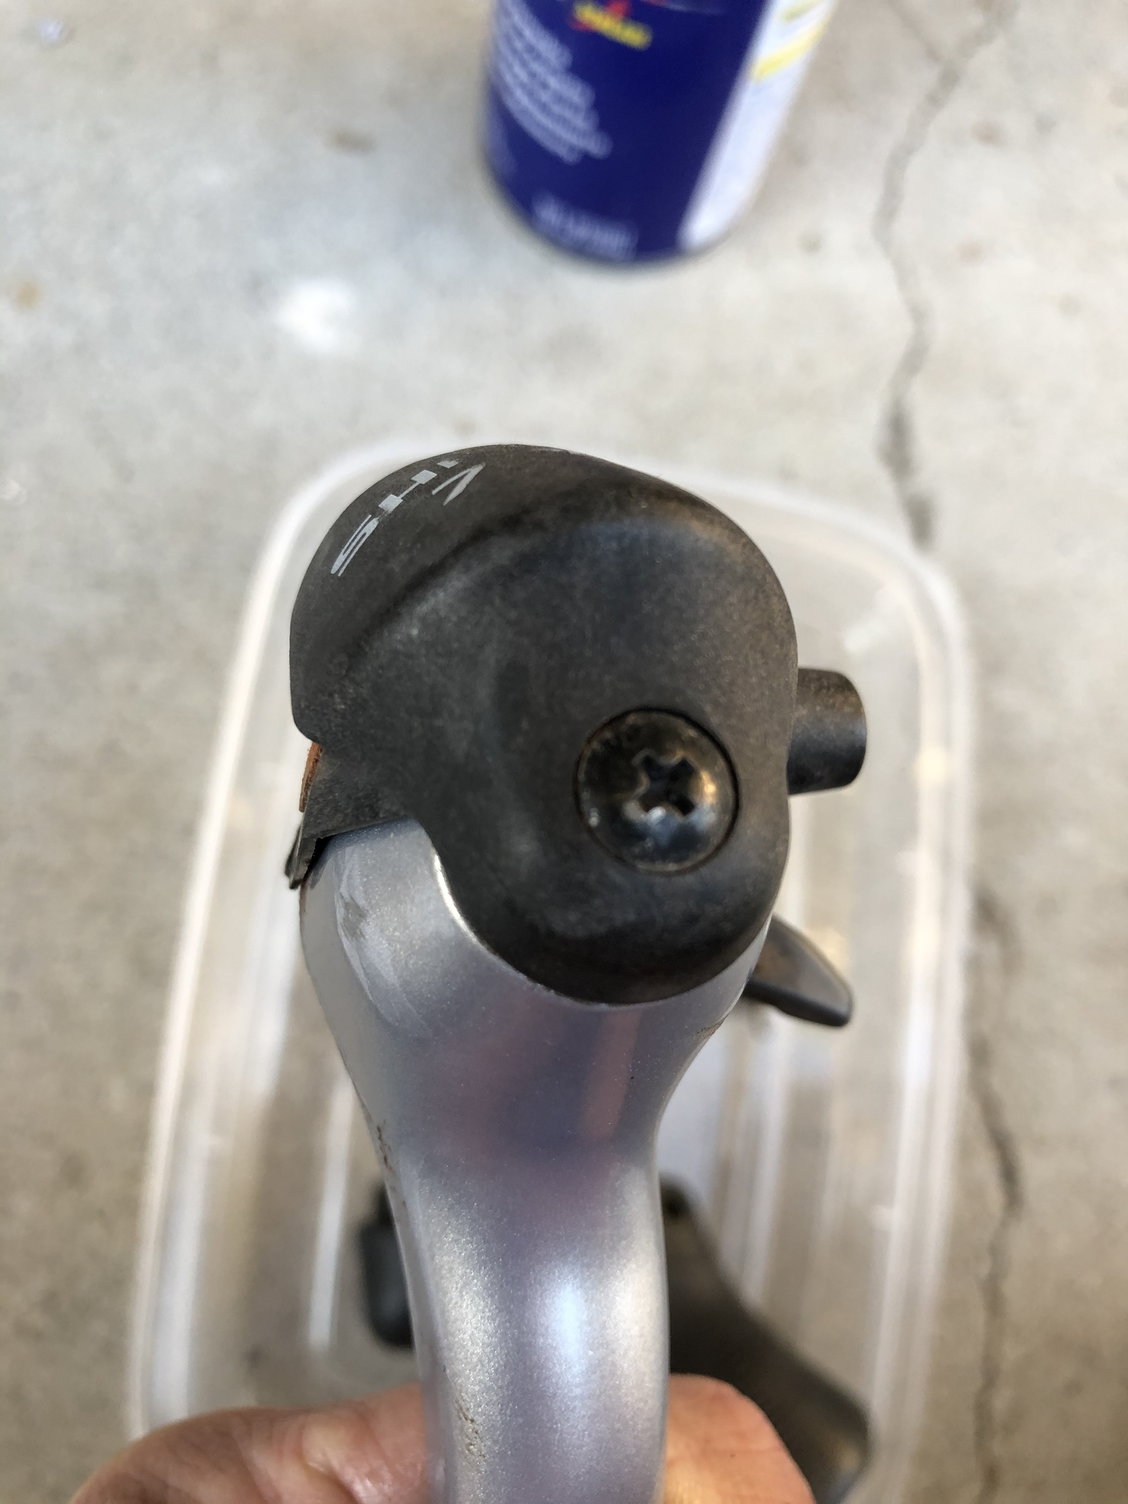
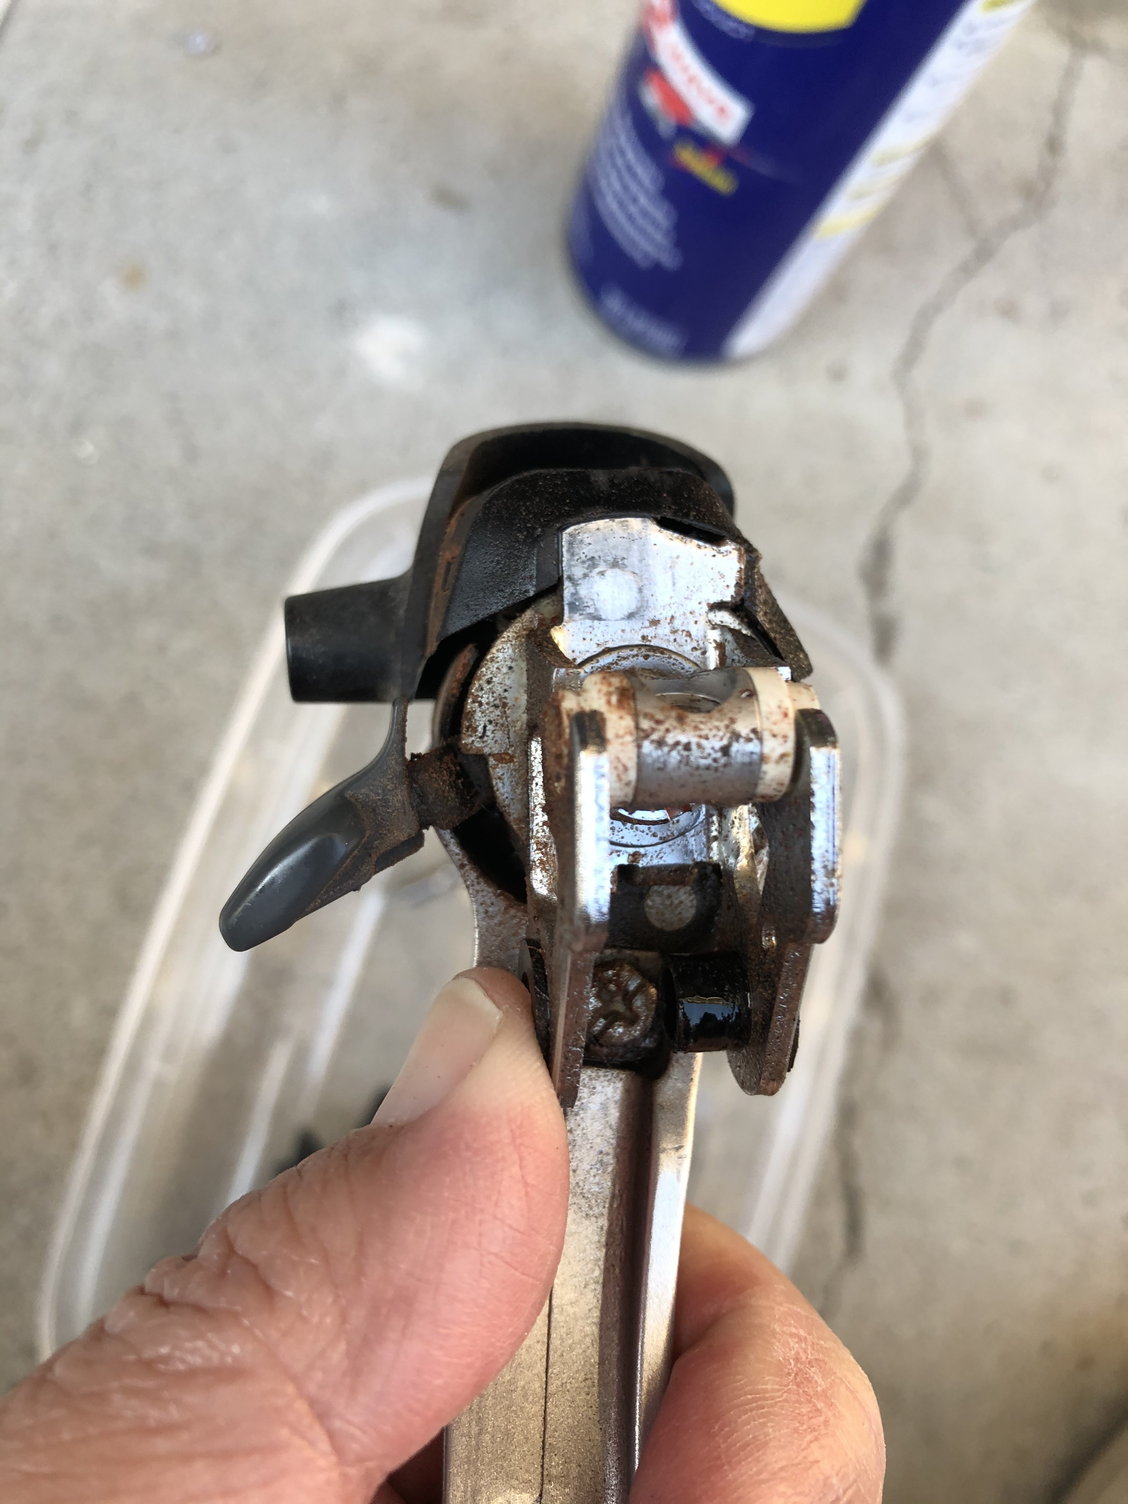
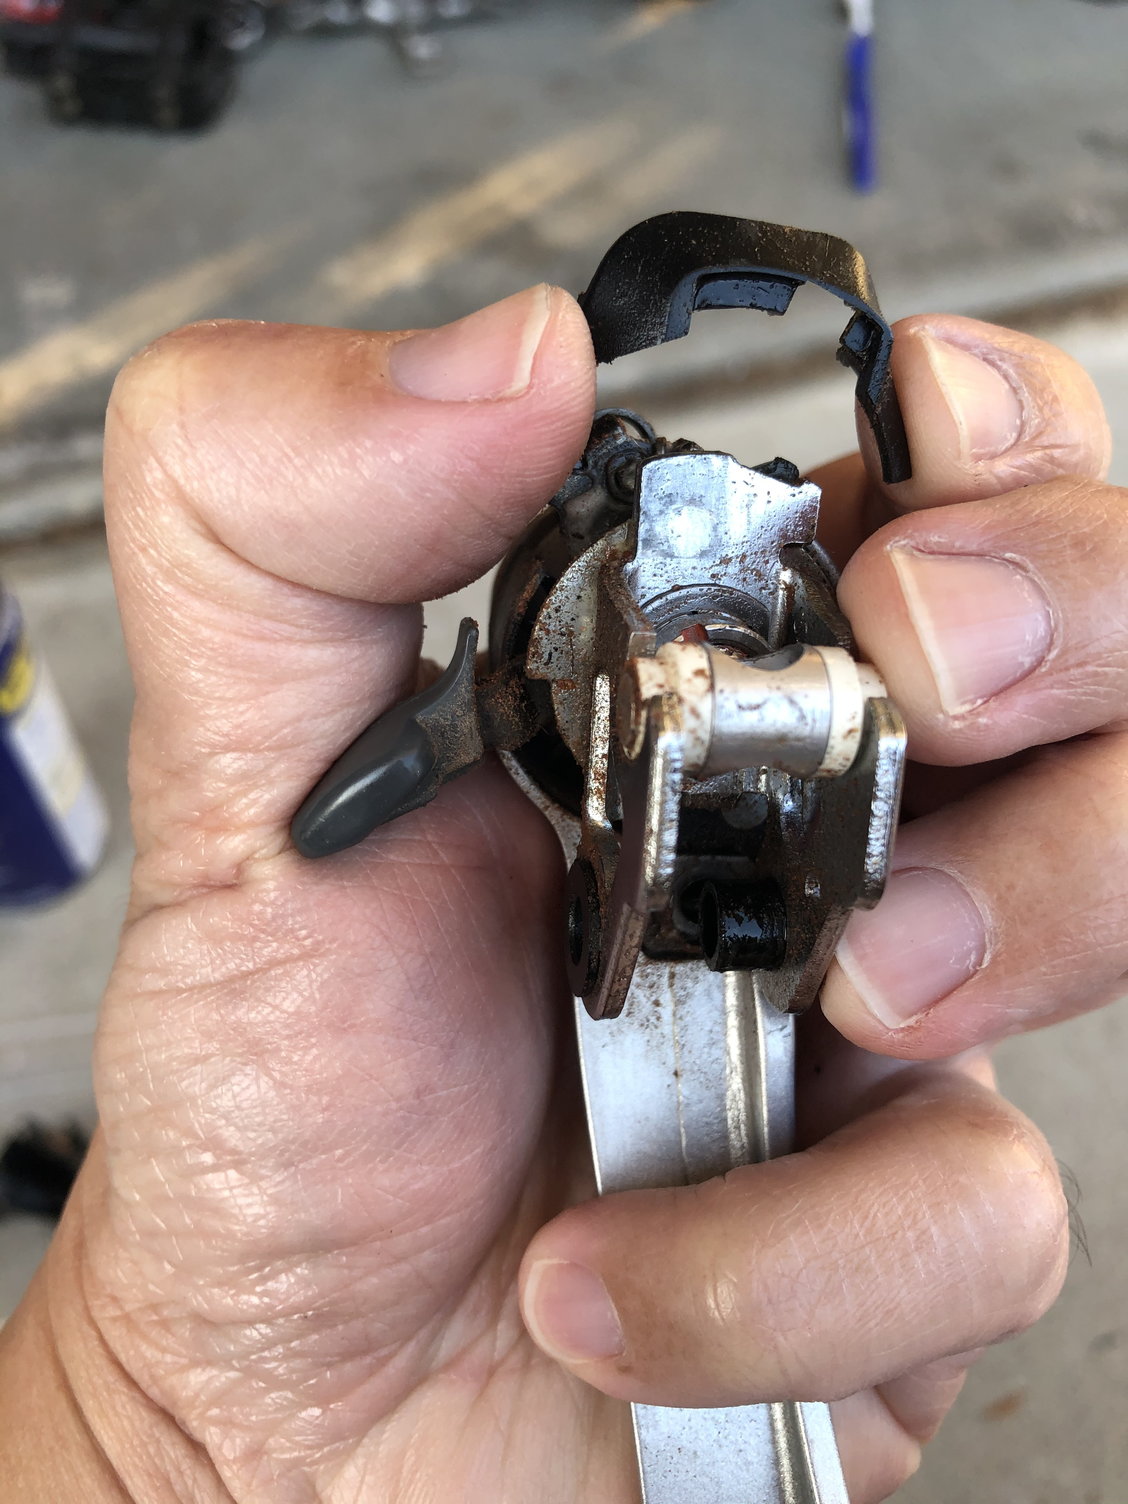
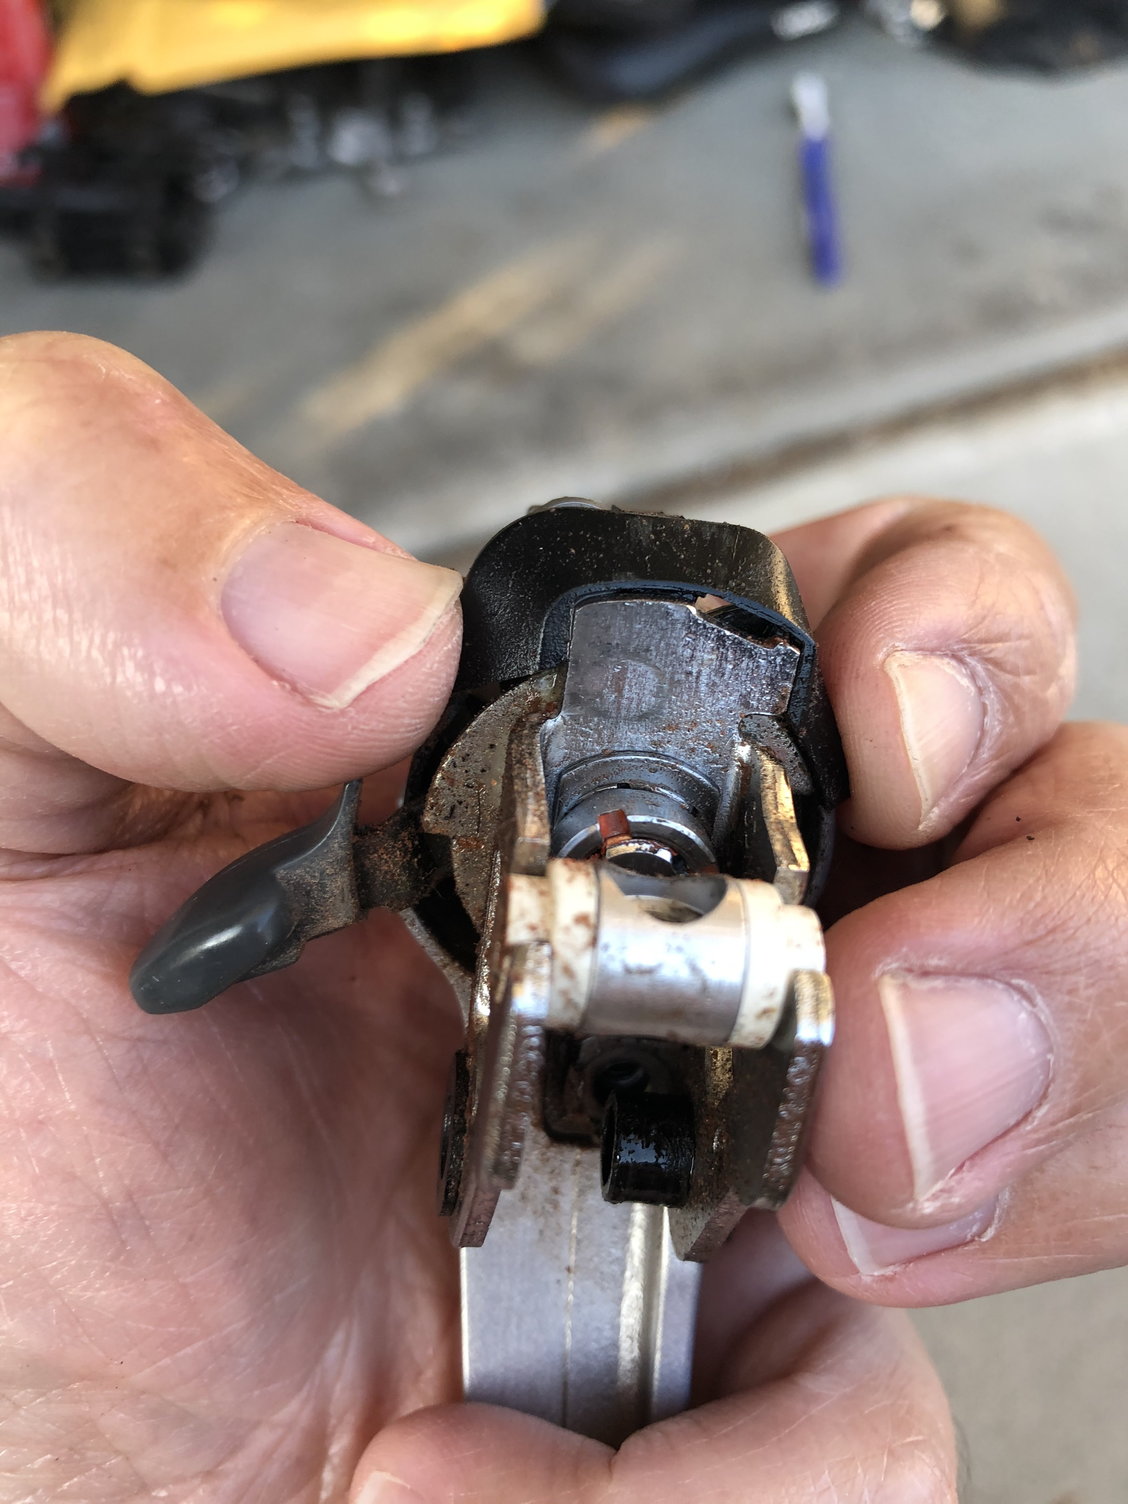
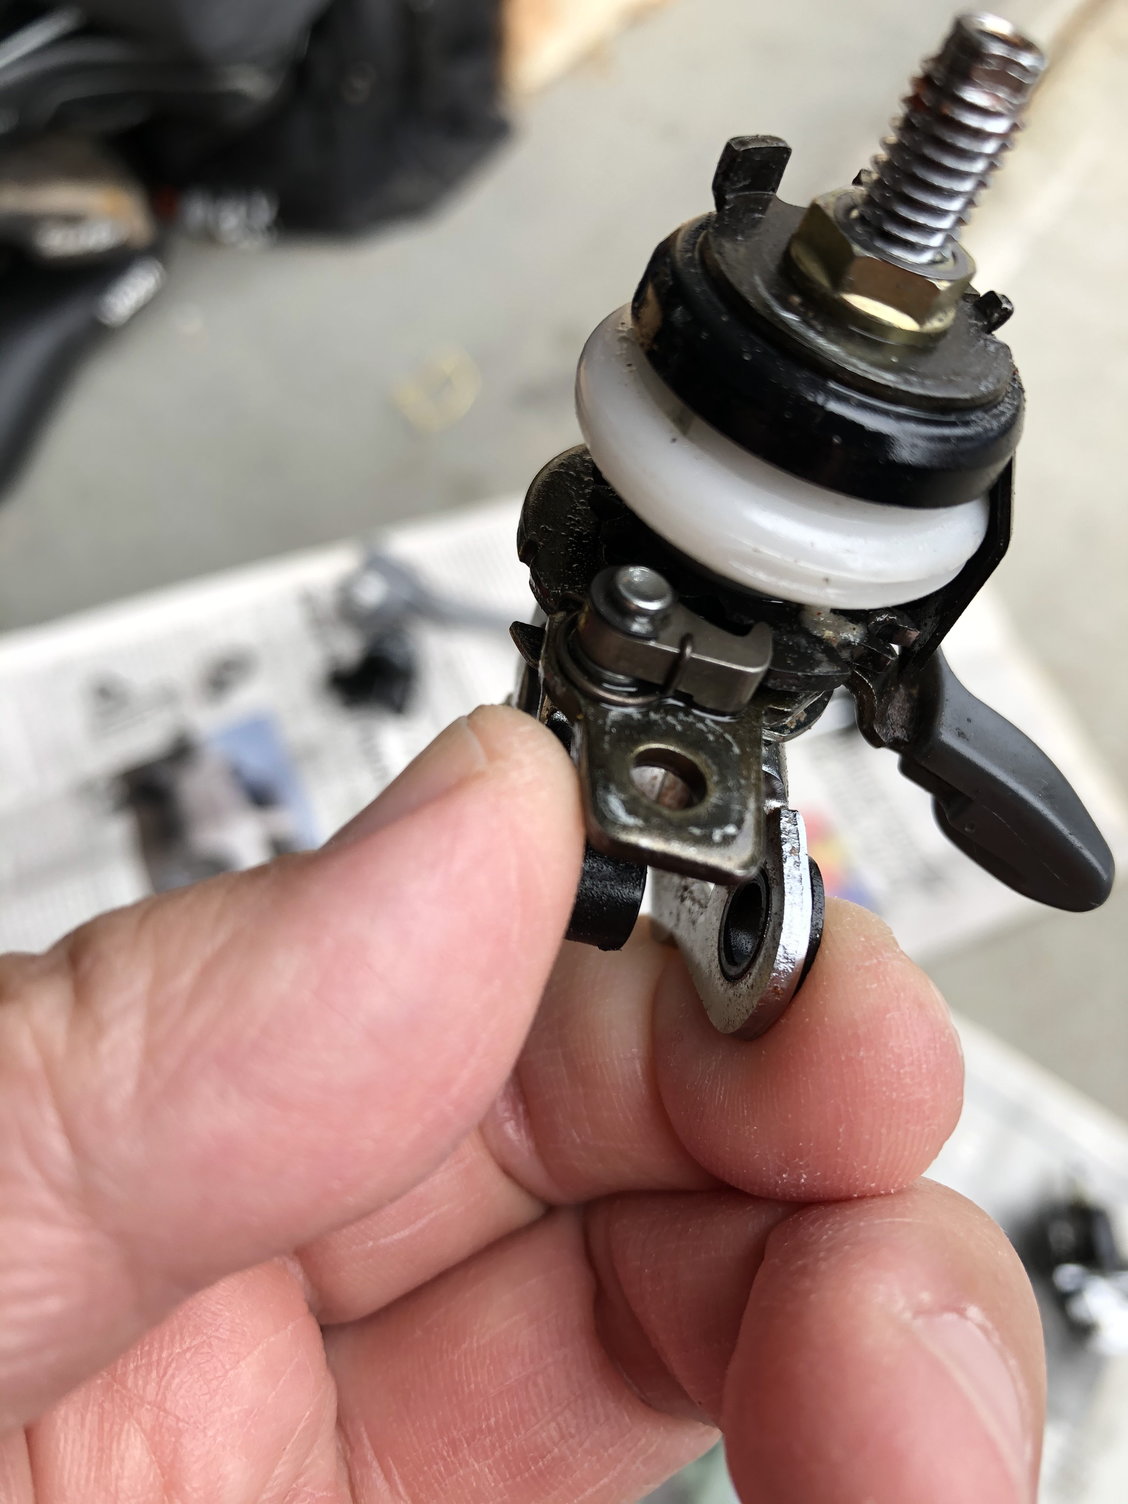
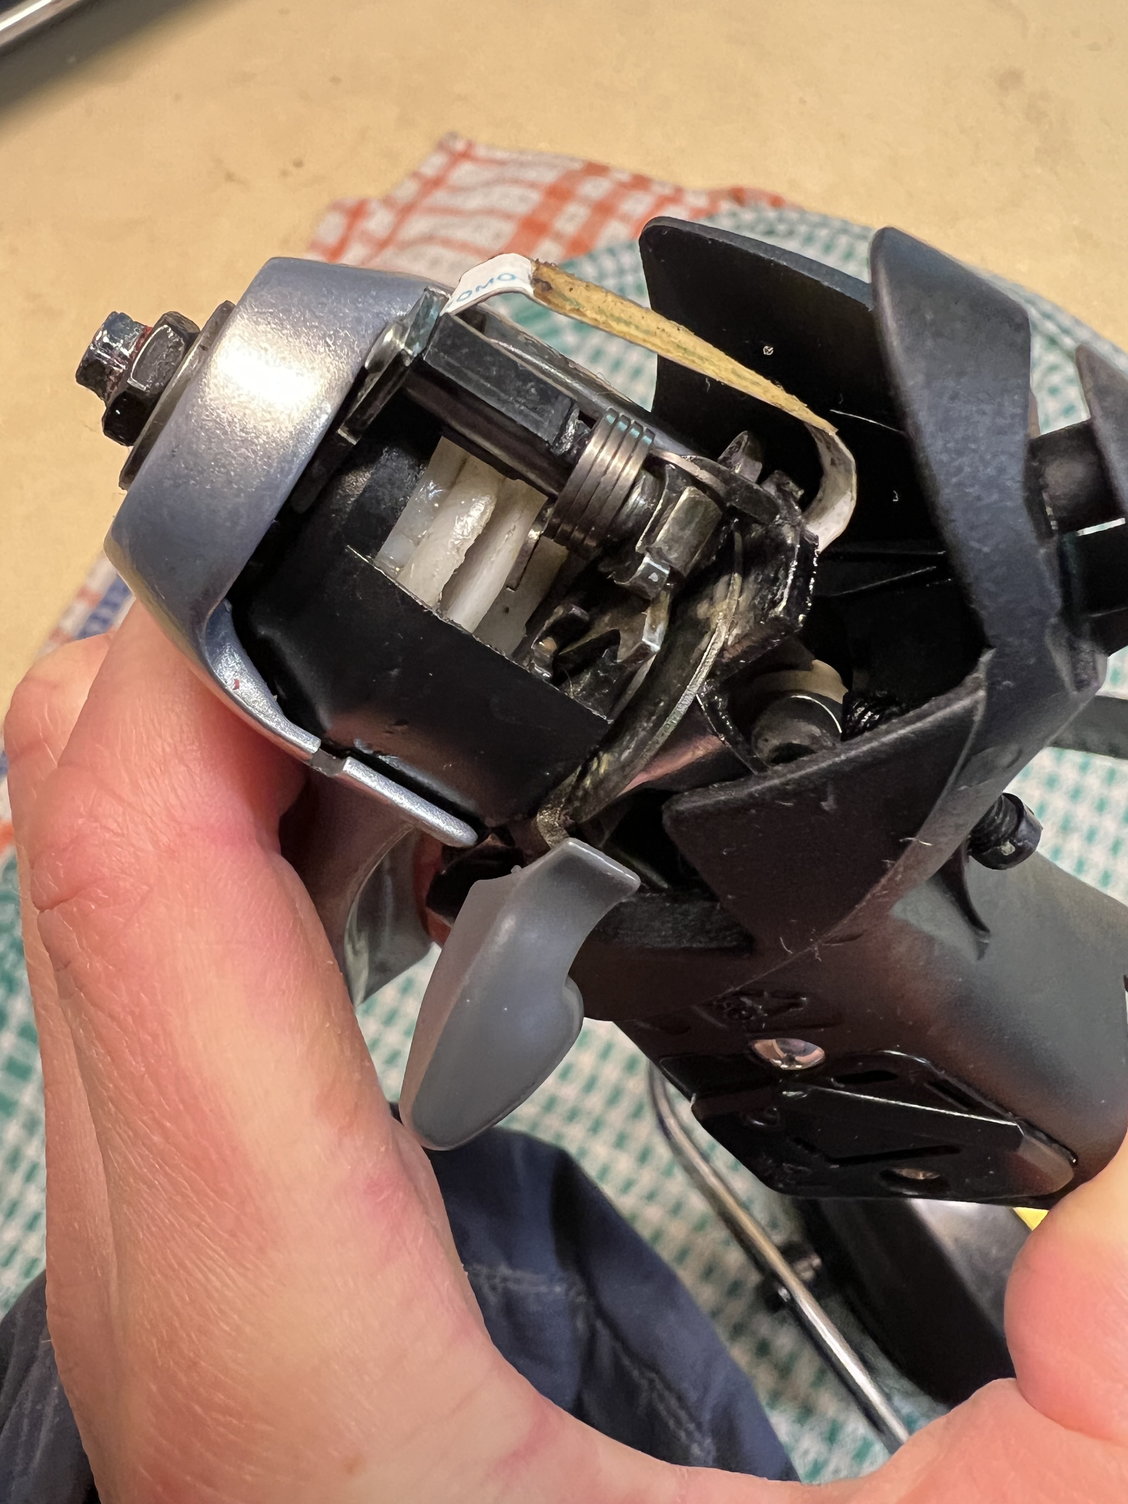
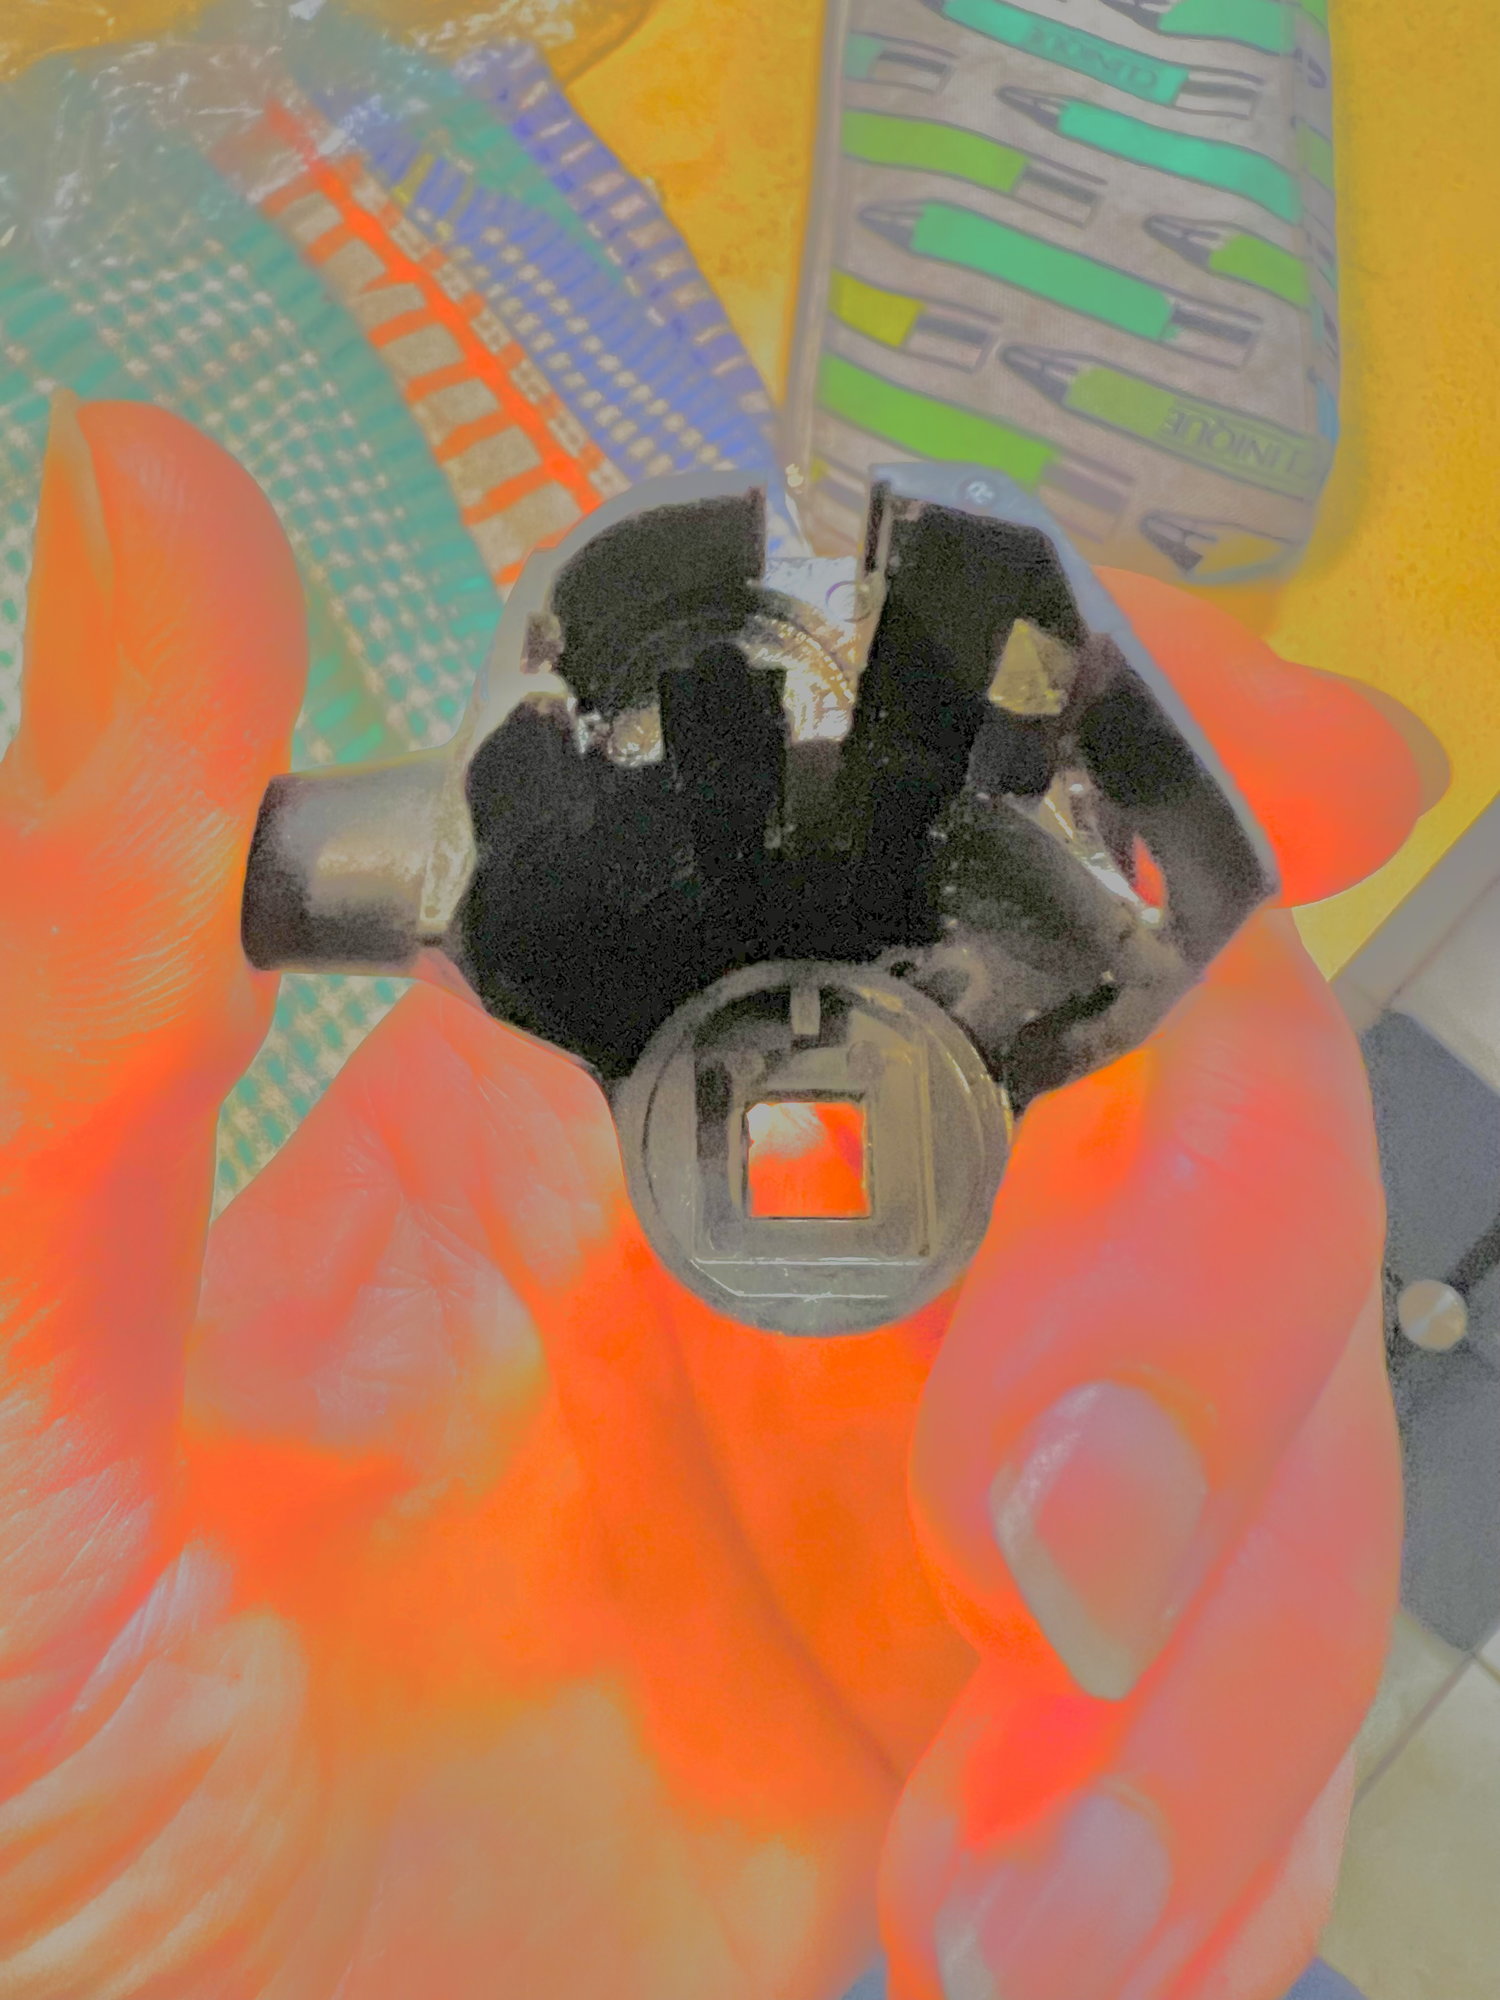
7. putting the black front cover back on. Before you can put the front cover back on, you need to rotate this shaft until the black plastic is on top. In this pic the plastic piece is facing the viewer:
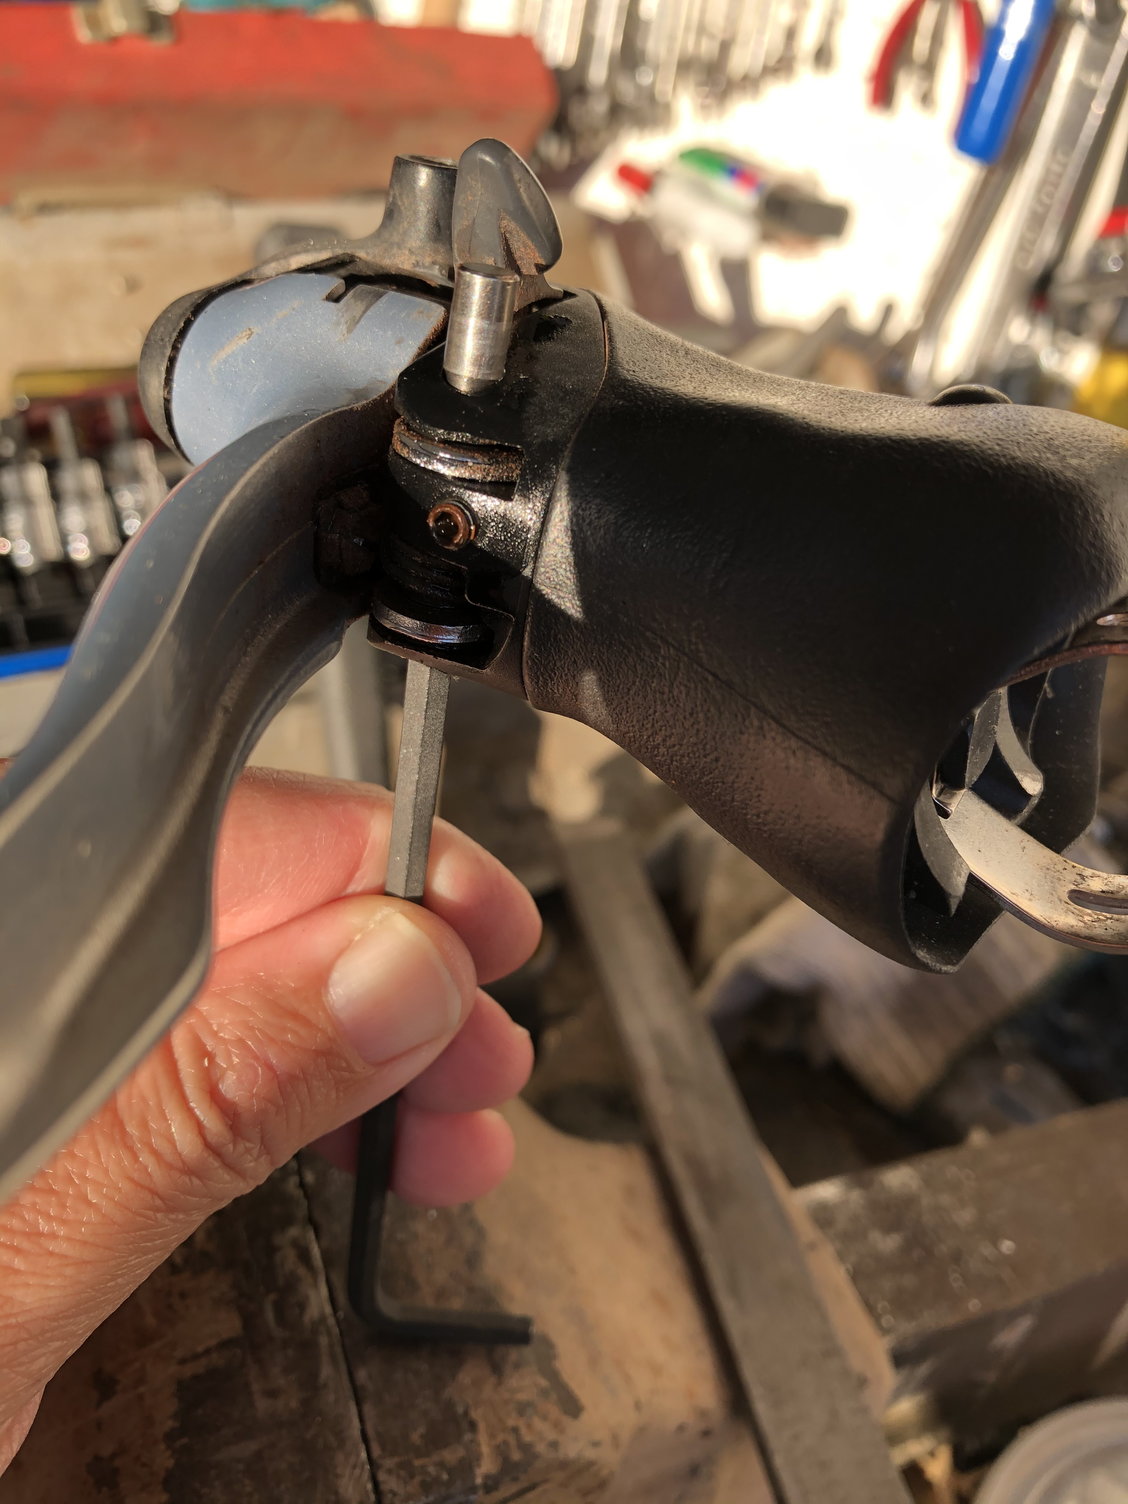
Now you can start to slide the front cover back on. But you will encounter the next impediment. You need to use a screwdriver to pry this spring up:
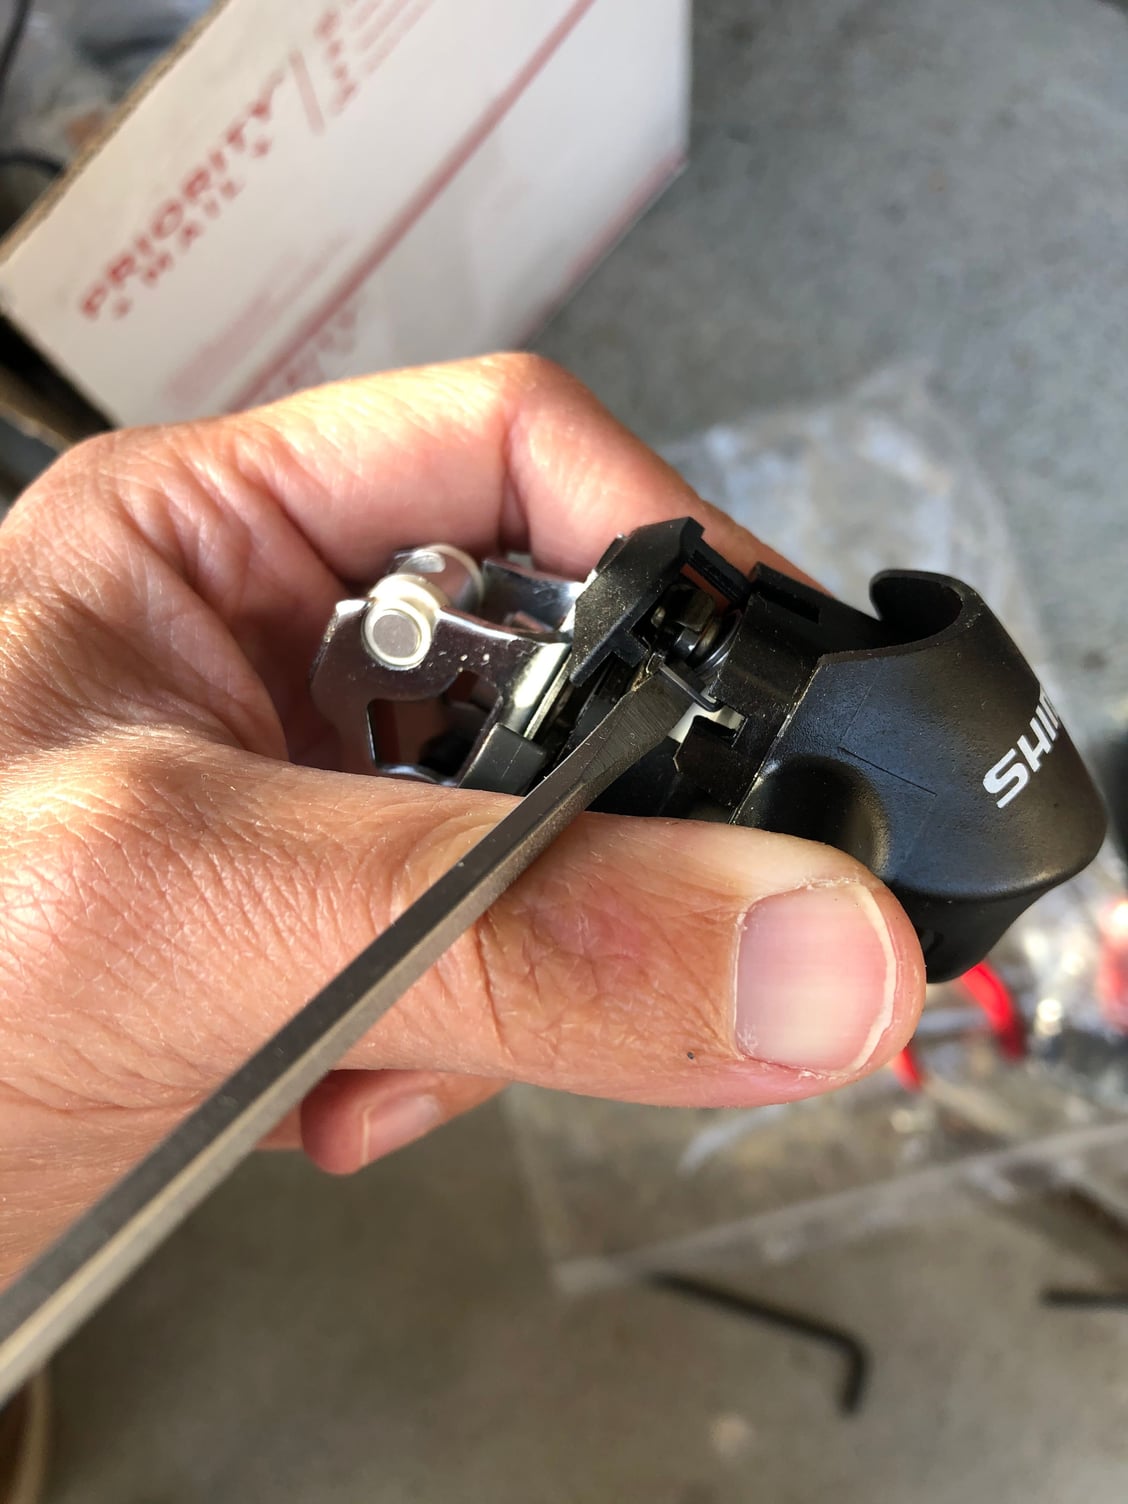
Such that it slides into a groove inside that front cover. Now you can slide that front cover close and replace the front black screw.
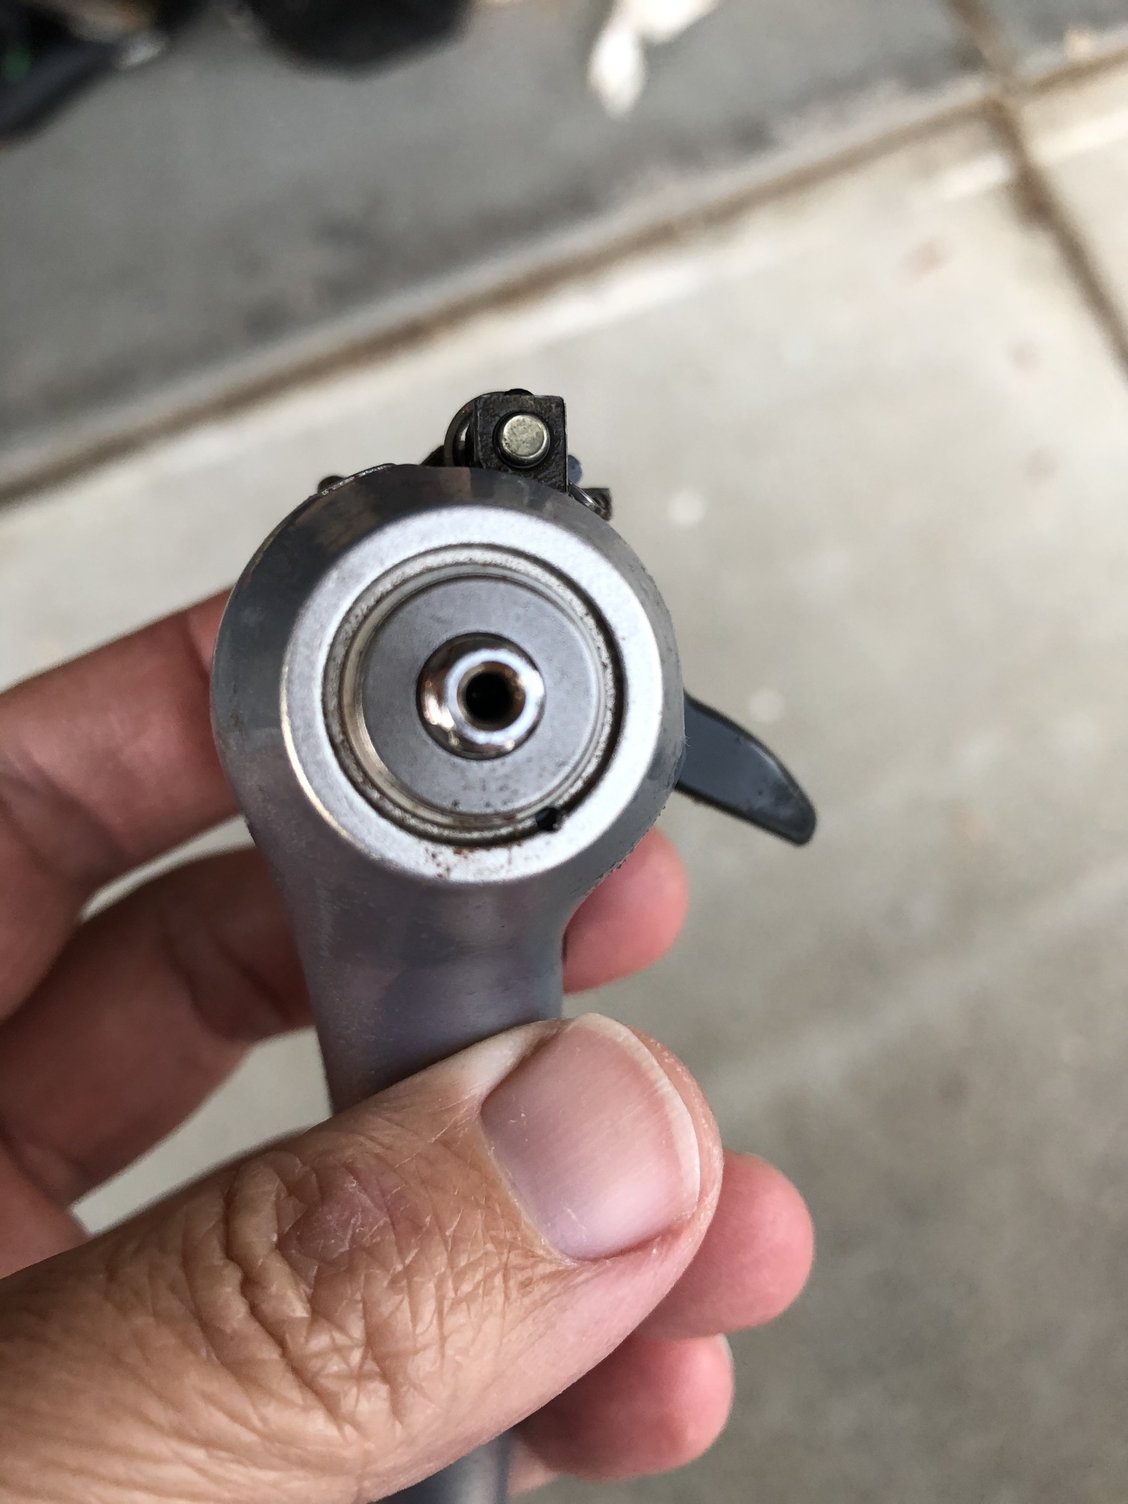
8. Now you can push the pivot pin back in. The rounded end goes in first. When it’s all the way in you can replace the set screw. Or not. As you can see here:
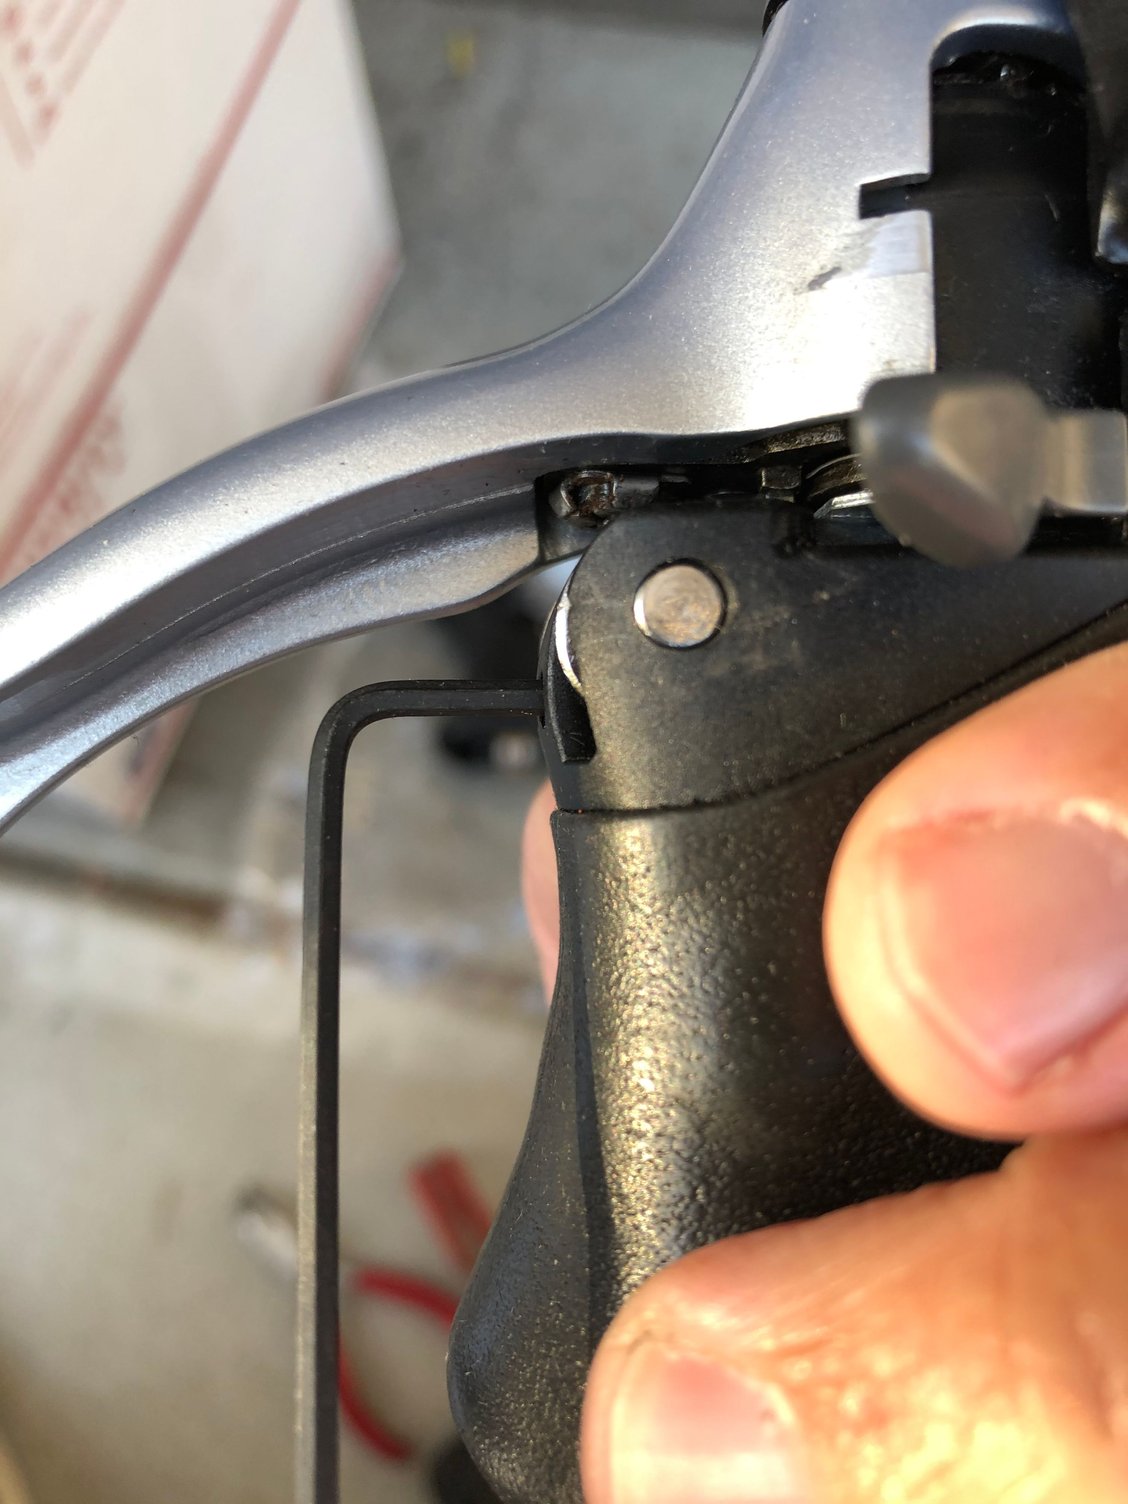
The set screw does not line up with any part of the pivot pin! So it does absolutely nothing! Must be a machining mistake from Shimano.
Anyways, there you have it.
The way to do it is to first put the spring in place in the lever body and then put the mechanism shaft through it. Now use a small needle nose pliers to wind the clock spring back until it catches the anchor point on the mechanism. Now the clockspring will be bulging out of place. Use a small flat screwdriver to push it back in place so you can seat the mechanism into the lever body. Now replace the nut and the screw behind the lever.
7. putting the black front cover back on. Before you can put the front cover back on, you need to rotate this shaft until the black plastic is on top. In this pic the plastic piece is facing the viewer:
Now you can start to slide the front cover back on. But you will encounter the next impediment. You need to use a screwdriver to pry this spring up:
Such that it slides into a groove inside that front cover. Now you can slide that front cover close and replace the front black screw.
8. Now you can push the pivot pin back in. The rounded end goes in first. When it’s all the way in you can replace the set screw. Or not. As you can see here:
The set screw does not line up with any part of the pivot pin! So it does absolutely nothing! Must be a machining mistake from Shimano.
Anyways, there you have it.
Likes For icemilkcoffee:
 04-15-22, 01:53 AM
#4
Noob

Join Date: Sep 2011
Location: Essex, UK
Posts: 76
Bikes: Specialized Rockhopper Expert Disc 2009, Ridgeback Nemesis (Afine 8) 2011
Mentioned: 0 Post(s)
Tagged: 0 Thread(s)
Quoted: 0 Post(s)
Likes: 0
Liked 1 Time
in
1 Post
Thanks for this guide, I bought an unfinished road bike project and both ST 3300’s has seized from rust and gunk. This gave me the tips I needed to reassemble after I chucked it in my ultrasonic cleaner. The insides look brand new and they function perfectly now! So refreshing to have a nice guide for disassembley and reassembly that’s not a 20 minute YouTube video 
Likes For mikezs:
09-27-23, 06:29 AM
#5
Newbie
Join Date: Mar 2010
Posts: 18
Mentioned: 0 Post(s)
Tagged: 0 Thread(s)
Quoted: 6 Post(s)
Likes: 0
Liked 0 Times
in
0 Posts
Spring arm into cover.. black plastic on top?
Hi thanks for the guide..
can you please assist?
you mention black plastic on top.. that black bar you have there?
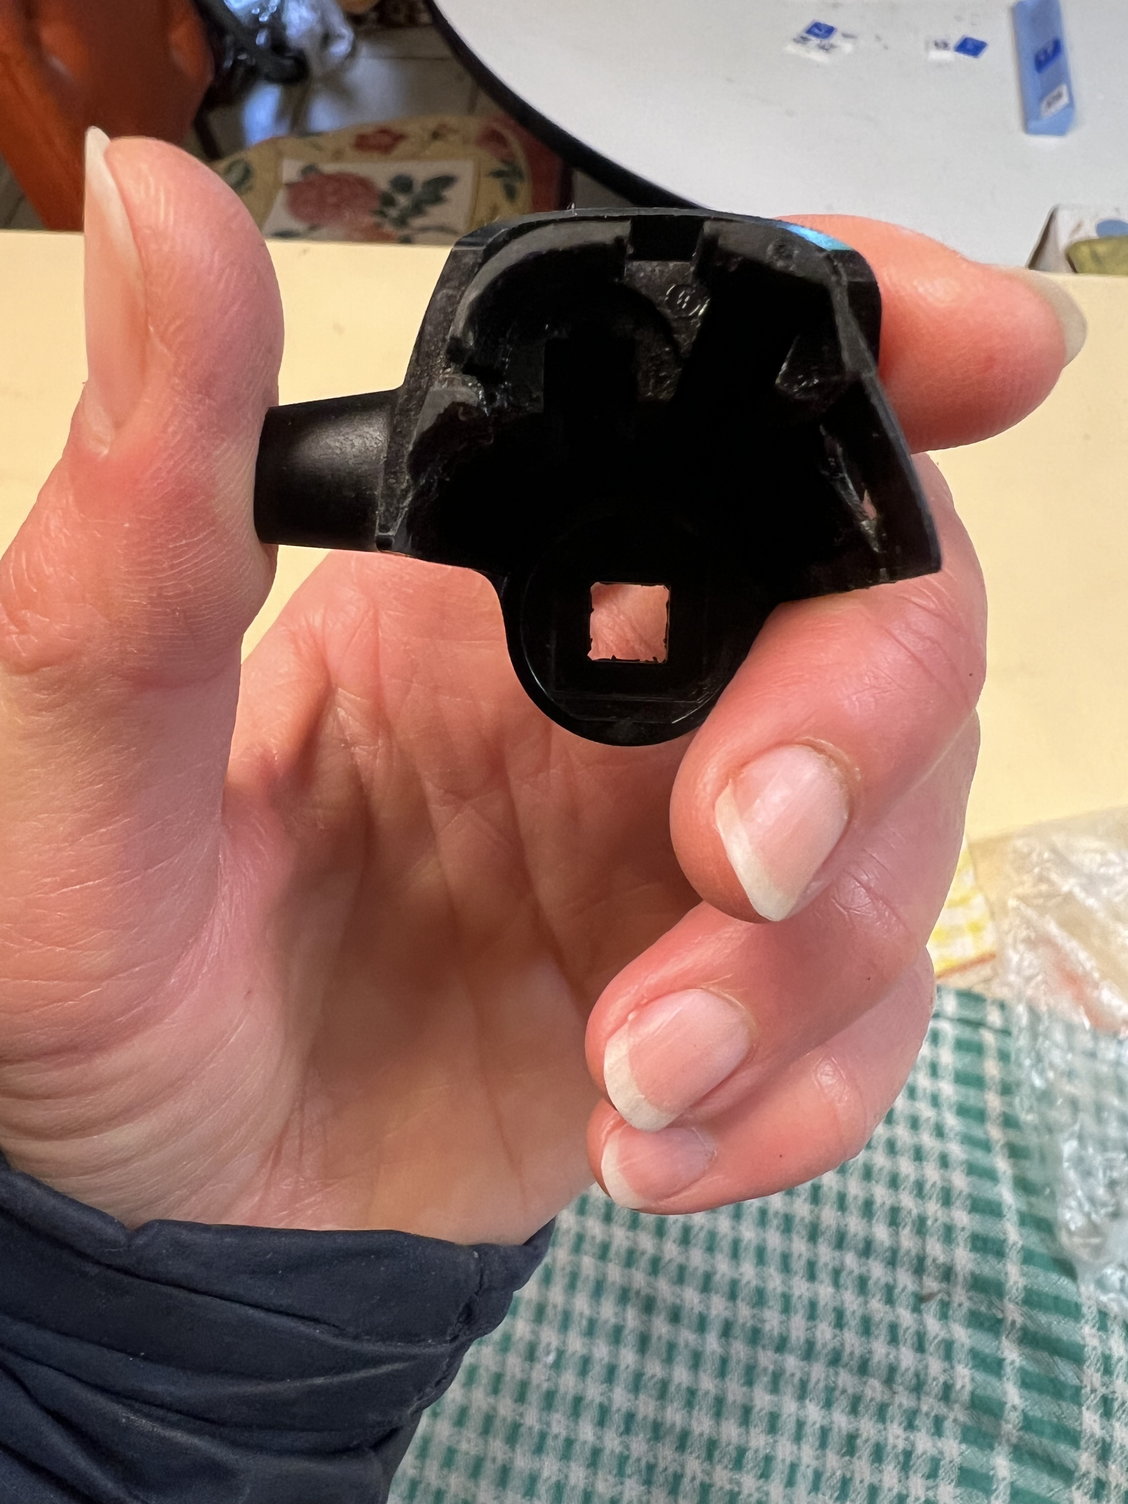
I can’t get the little spring arm into the inside of the cover
im trying with a flat head.. nail.. nothing works to pry into the slot..
What I think is the black plastic on top seems to be on top
do you have more pics of what you mean by the black plastic please?
thanks
is this the little arm I need to pry in?
can you please assist?
you mention black plastic on top.. that black bar you have there?
I can’t get the little spring arm into the inside of the cover
im trying with a flat head.. nail.. nothing works to pry into the slot..
What I think is the black plastic on top seems to be on top
do you have more pics of what you mean by the black plastic please?
thanks
is this the little arm I need to pry in?
09-27-23, 09:00 AM
#6
Senior Member
Thread Starter
Join Date: Aug 2009
Posts: 2,395
Mentioned: 14 Post(s)
Tagged: 0 Thread(s)
Quoted: 1562 Post(s)
Liked 1,734 Times
in
974 Posts
I think you got it. Try to slide the front cover back on. Is it going on? Once you start sliding the cover on you will see it will hang on that spring, and you have to push it in slightly to get the cover to slide on.


 09-27-23, 08:39 PM
#8
Senior Member
Thread Starter
Join Date: Aug 2009
Posts: 2,395
Mentioned: 14 Post(s)
Tagged: 0 Thread(s)
Quoted: 1562 Post(s)
Liked 1,734 Times
in
974 Posts
I can't quite say why you can't put your cover back on. Is the other end of the clock spring just floating free? Shouldn't it be anchored somewhere?
09-27-23, 08:47 PM
#9
Newbie
Join Date: Mar 2010
Posts: 18
Mentioned: 0 Post(s)
Tagged: 0 Thread(s)
Quoted: 6 Post(s)
Likes: 0
Liked 0 Times
in
0 Posts
then if it doesn’t go in its groove I’m assuming inside the cover it must get impeded? Or squashed .. who knows
09-27-23, 10:08 PM
#10
Newbie
Join Date: Mar 2010
Posts: 18
Mentioned: 0 Post(s)
Tagged: 0 Thread(s)
Quoted: 6 Post(s)
Likes: 0
Liked 0 Times
in
0 Posts
how many square washers should be installed inside the cover please if you get what I’m saying.. the exploded diagram doesn’t show
