


How to test symmetry
 09-19-06, 09:50 PM
#1
Life is short Ride hard
Thread Starter
Join Date: Jun 2006
Location: In the middle of nowhere
Posts: 1,114
Bikes: not enough
Mentioned: 0 Post(s)
Tagged: 0 Thread(s)
Quoted: 0 Post(s)
Likes: 0
Liked 0 Times
in
0 Posts
How to test symmetry
Hello,
How do you test symmetry on a full suspended bicycle such as a C'dale Active SL 100.
How do you test symmetry on a full suspended bicycle such as a C'dale Active SL 100.
 09-20-06, 07:28 AM
#2

Making a kilometer blurry

Define "symmetry of a bicycle." I have no idea what you're talking about. Bicycles are assymetric. Some parts are symmetric, but the drivetrain is on the right, so the the form, frame, and all drivetrain components (other than the chain) are assymetric.
09-20-06, 08:19 AM
#3
Life is short Ride hard
Thread Starter
Join Date: Jun 2006
Location: In the middle of nowhere
Posts: 1,114
Bikes: not enough
Mentioned: 0 Post(s)
Tagged: 0 Thread(s)
Quoted: 0 Post(s)
Likes: 0
Liked 0 Times
in
0 Posts

but I own this type of frame

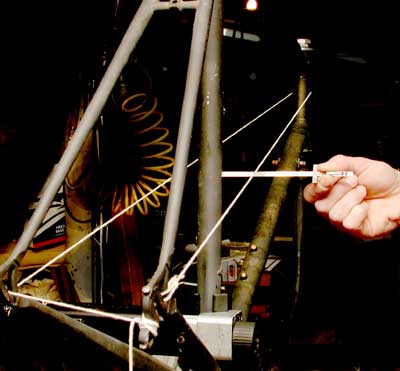
these symmetry or alignment test show a continous seat post
09-20-06, 09:01 AM
#4
Making a kilometer blurry
Originally Posted by ryanparrish
but I own this type of frame
these symmetry or alignment test show a continous seat post
If you want to homebrew this, here's what I'd do:
Find as level of a floor as you can and drop a 8'x4' sheet of MDF or nice plywood on it. If the floor is out of level (it always is), you can make a lattice out of on-edge 2x4s to make the board stronger. Shim the board as it goes onto the lattice to keep it flat. Then use shims to make the entire structure level on the floor. This can all be done with scraps or less than $50 of supplies from the local building center.
Remove your cranks, bb, fork, headset, and wheels.
Rest the BB shell on the board and secure the frame with strings it so that the rear dropouts are level. Test this by attaching (packing tape?) a steel rod into the dropouts, such that enough of it sticks out to test for level with an 8" level. The strings can be placed on the left, right, head, and tail of the board, and tied onto the frame at the seatpost clamp and headset (just the head string). Tighten and loosen the strings until the rear dropouts are level.
Use a rod to make sure that the BB shell is also level (tape it up to the top of the shell, making sure it goes straight through -- not crooked at all. A bigger rod would be better here, if available. Maybe a large dowel or broom handle.
The rest of the tests will have to be done with plumb lines or projections.
Shoot a laser through the head tube so it's just grazing the left or rightmost side of the interior of the tube, and have a helper mark on the board where it hits the board. Then do the same with the other side of the head tube.
Mark the centerline of the bottom bracket on the board, and where the edges of the shell are.
Drop a plumb line from the center of each rear dropout down to the board, and mark those two points.
Remove the frame from the board, and use rulers to find the centers of the BB shell, dropouts, and head tube from the marks. Snap a line from the center of the head tube to the center of the dropouts. It should go through the center of the BB.
If that all passes, your frame is probably good enough.
09-20-06, 09:27 AM
#5
Life is short Ride hard
Thread Starter
Join Date: Jun 2006
Location: In the middle of nowhere
Posts: 1,114
Bikes: not enough
Mentioned: 0 Post(s)
Tagged: 0 Thread(s)
Quoted: 0 Post(s)
Likes: 0
Liked 0 Times
in
0 Posts
Okies thank you that sounds complex I might have to take it to a shop or have a friend help me
