


Project - 1980 Nishiki Sport
 01-05-14, 06:16 PM
#76
Mike J
Join Date: Nov 2013
Location: Jacksonville Florida
Posts: 1,588
Bikes: 1975 Peugeot PX-50L, 1971 Peugeot PX-10, 1974 Peugeot PX-8
Mentioned: 27 Post(s)
Tagged: 0 Thread(s)
Quoted: 392 Post(s)
Likes: 0
Liked 6 Times
in
6 Posts
How I came up with the parts was, a guy was selling an older 70's Schwinn in a way-too-tall frame, horrible paint, junk wheels, and had half-way converted it to a fixie, and he was selling the bike for $40, still had the old parts he took off. That's how I get my parts bin full, buy whole junk bikes with good components, and put away the components, then, next time I need a brake set, I don't have to pay through the nose. I mean, $69 at my LBS for a Technomic stem, and I got one for the bike from a flea market for 50 cents.
 01-18-14, 05:37 PM
#77
Senior Member
Thread Starter
Join Date: Mar 2010
Location: Minnesota and Southern California
Posts: 628
Bikes: Specialized Tarmac (carbon), Specialized Roubaix (carbon, wifey), Raleigh Super Course (my favorite), and 2 Centurion project bikes.
Mentioned: 0 Post(s)
Tagged: 0 Thread(s)
Quoted: 1 Post(s)
Likes: 0
Liked 1 Time
in
1 Post
Palms Cycle called; the repainting job on my frame and fork are complete. I'll pick it up tomorrow or Monday. Then I'll begin putting it all back together.
This will be my first try at assembling a bicycle from scratch. The original "high normal" front derailleur is trash, so I'll have to replace it with a "low normal" version; hoping I can suss out how to anchor the cable housing for the new setup. The new Nishiki decals from Velocal are also waiting in the garage. They're the top end, UV resistant ones, and I think there's a caution NOT to clear coat over them after they're applied. I'm a little nervous about putting them on.
All other original parts - the freewheel hub, crank, stem post etc, - have been cleaned up and appear in good shape. Cables, housing and chain will of course be renewed. I suppose the proper, sequential order of installing all the parts will come to me as I go. Any tips from those here more experienced than I in rebuilding a 1980s steelie is, as always, appreciated. Best - DB
Last edited by Duane Behrens; 01-18-14 at 05:41 PM.
01-18-14, 07:37 PM
#78
Mike J
Join Date: Nov 2013
Location: Jacksonville Florida
Posts: 1,588
Bikes: 1975 Peugeot PX-50L, 1971 Peugeot PX-10, 1974 Peugeot PX-8
Mentioned: 27 Post(s)
Tagged: 0 Thread(s)
Quoted: 392 Post(s)
Likes: 0
Liked 6 Times
in
6 Posts
Palms Cycle called; the repainting job on my frame and fork are complete. I'll pick it up tomorrow or Monday. Then I'll begin putting it all back together.
This will be my first try at assembling a bicycle from scratch. The original "high normal" front derailleur is trash, so I'll have to replace it with a "low normal" version; hoping I can suss out how to anchor the cable housing for the new setup. The new Nishiki decals from Velocal are also waiting in the garage. They're the top end, UV resistant ones, and I think there's a caution NOT to clear coat over them after they're applied. I'm a little nervous about putting them on.
All other original parts - the freewheel hub, crank, stem post etc, - have been cleaned up and appear in good shape. Cables, housing and chain will of course be renewed. I suppose the proper, sequential order of installing all the parts will come to me as I go. Any tips from those here more experienced than I in rebuilding a 1980s steelie is, as always, appreciated. Best - DB
This will be my first try at assembling a bicycle from scratch. The original "high normal" front derailleur is trash, so I'll have to replace it with a "low normal" version; hoping I can suss out how to anchor the cable housing for the new setup. The new Nishiki decals from Velocal are also waiting in the garage. They're the top end, UV resistant ones, and I think there's a caution NOT to clear coat over them after they're applied. I'm a little nervous about putting them on.
All other original parts - the freewheel hub, crank, stem post etc, - have been cleaned up and appear in good shape. Cables, housing and chain will of course be renewed. I suppose the proper, sequential order of installing all the parts will come to me as I go. Any tips from those here more experienced than I in rebuilding a 1980s steelie is, as always, appreciated. Best - DB
Good luck, let us know how it's going.
Last edited by jj1091; 01-18-14 at 07:50 PM.
01-18-14, 08:26 PM
#79
Senior Member
Thread Starter
Join Date: Mar 2010
Location: Minnesota and Southern California
Posts: 628
Bikes: Specialized Tarmac (carbon), Specialized Roubaix (carbon, wifey), Raleigh Super Course (my favorite), and 2 Centurion project bikes.
Mentioned: 0 Post(s)
Tagged: 0 Thread(s)
Quoted: 1 Post(s)
Likes: 0
Liked 1 Time
in
1 Post
Good news on the rebuild being ready to start, Duane. I can only say that the best advice you can adhere to is to have patience. There'll be plenty to deal with, just take each one component as a whole project. Finish that project, then move on. Things will happen, like you get the rear wheel on, and the freewheel scrapes the dropout, so you have to move washers and nuts from one side to the other to equalize where the wheel centers. Then, maybe the brake caliper won't center and rubs the rim all the time because you moved too many washers and nuts from one side to the other and the wheel is too far off center. Stuff like that. Just be patient, especially when adjusting the front and rear derailleurs, sometimes it takes a while on a new build. So, be patient. Did I mention the part about being patient?
Good luck, let us know how it's going.
Good luck, let us know how it's going.
01-19-14, 03:55 PM
#80
Live to Ride!

Join Date: Jul 2013
Posts: 264
Bikes: Airborne Goblin - Airborne Griffin - Airborne Black Plague
Mentioned: 0 Post(s)
Tagged: 0 Thread(s)
Quoted: 0 Post(s)
Likes: 0
Liked 0 Times
in
0 Posts
I have been following your thread with much interest as I have a 77 Nishiki Custom sport that I am considering rebuilding. Right now, it hangs on the wall as art - but I would love to see it on the road again.

01-19-14, 07:28 PM
#81
Senior Member
Thread Starter
Join Date: Mar 2010
Location: Minnesota and Southern California
Posts: 628
Bikes: Specialized Tarmac (carbon), Specialized Roubaix (carbon, wifey), Raleigh Super Course (my favorite), and 2 Centurion project bikes.
Mentioned: 0 Post(s)
Tagged: 0 Thread(s)
Quoted: 1 Post(s)
Likes: 0
Liked 1 Time
in
1 Post
01-19-14, 08:05 PM
#82
Live to Ride!
Join Date: Jul 2013
Posts: 264
Bikes: Airborne Goblin - Airborne Griffin - Airborne Black Plague
Mentioned: 0 Post(s)
Tagged: 0 Thread(s)
Quoted: 0 Post(s)
Likes: 0
Liked 0 Times
in
0 Posts
I hope you'll get your back on the road as well. And I hope you'll find the log of my experience helpful. So far, it's been great fun pulling this one all apart. I just got the painted frame back today. This evening, I'll read up the Zinn manual . . . and try to remember how to put it all back together. :-) I think I'll start by taking the bottom bracket and rear hub bearings down to the LBS. I'll let them inspect them and tell me whether they need to be replaced. While I'm there, I'll also ask them to press the headset bearing cups back in. And as mentioned, I need to buy a new, clamp-on front derailleur. Total costs to date, including new paint, tubes and tires = app. $200. That total will go higher, and I may have to sell it at a slight loss. But it will be good practice for when I finally get used steelie in my size, 56cm. Anyway - here is the frame, fresh from the paint shop. And someone's foot. . .

01-20-14, 10:05 AM
#83
Senior Member
Join Date: Apr 2008
Location: St. Pete, Florida
Posts: 1,258
Mentioned: 1 Post(s)
Tagged: 0 Thread(s)
Quoted: 83 Post(s)
Likes: 0
Liked 1 Time
in
1 Post
Assuming this is "wet" paint (not powdercoat), be sure to give the paint plenty of time to cure before you start assembling. I like to allow at least a week. If it's below 65 deg F where you're keeping the frame, it could take considerably longer.
01-20-14, 10:09 AM
#84
Senior Member
Thread Starter
Join Date: Mar 2010
Location: Minnesota and Southern California
Posts: 628
Bikes: Specialized Tarmac (carbon), Specialized Roubaix (carbon, wifey), Raleigh Super Course (my favorite), and 2 Centurion project bikes.
Mentioned: 0 Post(s)
Tagged: 0 Thread(s)
Quoted: 1 Post(s)
Likes: 0
Liked 1 Time
in
1 Post
Good news on the rebuild being ready to start, Duane. I can only say that the best advice you can adhere to is to have patience. There'll be plenty to deal with, just take each one component as a whole project. Finish that project, then move on. Things will happen, like you get the rear wheel on, and the freewheel scrapes the dropout, so you have to move washers and nuts from one side to the other to equalize where the wheel centers. Then, maybe the brake caliper won't center and rubs the rim all the time because you moved too many washers and nuts from one side to the other and the wheel is too far off center. Stuff like that. Just be patient, especially when adjusting the front and rear derailleurs, sometimes it takes a while on a new build. So, be patient. Did I mention the part about being patient?
Good luck, let us know how it's going.
Good luck, let us know how it's going.
Working on the BOTTOM BRACKET. On Sheldon Brown's advice, I'm going to replace the 9 caged bearings on each side with 11 loose bearings. A bit more of a fiddle installing them, but worthwhile in smoother operation, apparently. Some sites recommend installing the fixed (right) cup with a special tool, but I seem to have tightened it well, applying torque carefully with the large adjustable wrench. I'll have to get the proper spanner to set the lock ring on the left side; I hope the LBS will have one they can sell me, as well as the plastic inner sleeve, which I don't remember seeing on disassembly. I now wish I would have taken more detailed photos during the disassembly process.
01-20-14, 11:26 AM
#86
Se�or Member

Join Date: Feb 2013
Posts: 5,066
Mentioned: 5 Post(s)
Tagged: 0 Thread(s)
Quoted: 649 Post(s)
Liked 292 Times
in
215 Posts
this is the opposite of what most people do
but make that bike your own
then ride the hell out of it
01-20-14, 11:36 AM
#87
Live to Ride!
Join Date: Jul 2013
Posts: 264
Bikes: Airborne Goblin - Airborne Griffin - Airborne Black Plague
Mentioned: 0 Post(s)
Tagged: 0 Thread(s)
Quoted: 0 Post(s)
Likes: 0
Liked 0 Times
in
0 Posts
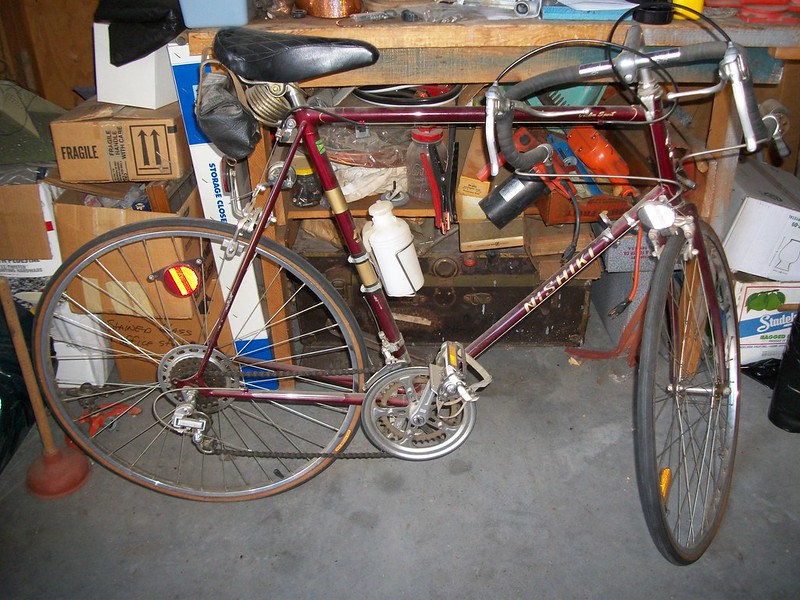
Those are the original stem mounts that came with the bike - right now there are bar end shifters on there - just a pic with all the original goodies.
01-20-14, 01:16 PM
#88
Mike J
Join Date: Nov 2013
Location: Jacksonville Florida
Posts: 1,588
Bikes: 1975 Peugeot PX-50L, 1971 Peugeot PX-10, 1974 Peugeot PX-8
Mentioned: 27 Post(s)
Tagged: 0 Thread(s)
Quoted: 392 Post(s)
Likes: 0
Liked 6 Times
in
6 Posts
You're absolutely correct. I'm going waaaay slow, and why not? Nobody's paying me to finish this project as fast as I can in order to earn my salary.
Working on the BOTTOM BRACKET. On Sheldon Brown's advice, I'm going to replace the 9 caged bearings on each side with 11 loose bearings. A bit more of a fiddle installing them, but worthwhile in smoother operation, apparently. Some sites recommend installing the fixed (right) cup with a special tool, but I seem to have tightened it well, applying torque carefully with the large adjustable wrench. I'll have to get the proper spanner to set the lock ring on the left side; I hope the LBS will have one they can sell me, as well as the plastic inner sleeve, which I don't remember seeing on disassembly. I now wish I would have taken more detailed photos during the disassembly process.
Working on the BOTTOM BRACKET. On Sheldon Brown's advice, I'm going to replace the 9 caged bearings on each side with 11 loose bearings. A bit more of a fiddle installing them, but worthwhile in smoother operation, apparently. Some sites recommend installing the fixed (right) cup with a special tool, but I seem to have tightened it well, applying torque carefully with the large adjustable wrench. I'll have to get the proper spanner to set the lock ring on the left side; I hope the LBS will have one they can sell me, as well as the plastic inner sleeve, which I don't remember seeing on disassembly. I now wish I would have taken more detailed photos during the disassembly process.
Cool deal on the rebuild start, I know you've been waiting with anticipation. I learned the hard way about the caged bearings. Out riding and started hearing a grinding noise from my rear wheel. Rode gently back to the car, and upon getting it disassembled back at the house, found that I'd put the caged bearing in backwards. Didn't really harm the raceways, but the bearing cage had broken in two. Now, I don't even think about needing the cages, just do what you're doing and take the bearings out and add a couple extra ones. Much smoother and no chance of damage. Kind of hard to get a round bearing in backwards.
I've had a few with the plastic inner sleeve, the only one I kept was on an old Raleigh tourer that had internal wiring for the dynamo rear light, which routed through the downtube, then into and through the BB, then into the lower rear stay to the dropout. The plastic BB sleeve kept the wire from being rubbed on by the BB spindle as the wire passed through the frame. I don't really know what use the plastic sleeve is, seems just to be an extra thing I don't want to worry about.
The BB fixed cup thing made me have to go out and get a new adjustable wrench, since the LBS wanted $10 to do it, and the wrench large enough for that cup was only $12. For the spanner wrench on the left side lock ring, I just hand tighten it, then put an old leather belt around it and tighten the ring with some large vise-grips. The leather grips the ring teeth and keeps the wrench from scoring up the lock ring. But then, I'm sorta cheap that way. The lock ring doesn't need much torque, and I've never had one loosen up on me with my old-belt-protector-tool.
As far as photos, just zoom in on the thousands of photos here and you'll see the precise setups needed. Most of these guys know what they're doing. I used their photos to tell me how to set my bars pointing towards the rear derailleur, how to wrap bar tape, all sorts of stuff.
Also, about the other reply on your paint drying-time. Good advice. Sure, you can assemble everything presently, but I'd definitely wait for decals and graphics for a week after the paint was applied. Have fun.
Go make some coffee 'cause you know you won't sleep till you're done....
01-20-14, 01:25 PM
#89
Senior Member
Join Date: May 2012
Location: western Massachusetts (greater Springfield area)
Posts: 699
Bikes: Velosolex St. Tropez, LeMond Zurich (spine bike), Rotator swb recumbent
Mentioned: 2 Post(s)
Tagged: 0 Thread(s)
Quoted: 67 Post(s)
Likes: 0
Liked 67 Times
in
32 Posts
For the spanner wrench on the left side lock ring, I just hand tighten it, then put an old leather belt around it and tighten the ring with some large vise-grips. The leather grips the ring teeth and keeps the wrench from scoring up the lock ring. But then, I'm sorta cheap that way. The lock ring doesn't need much torque, and I've never had one loosen up on me with my old-belt-protector-tool.
01-20-14, 08:28 PM
#90
Senior Member
Thread Starter
Join Date: Mar 2010
Location: Minnesota and Southern California
Posts: 628
Bikes: Specialized Tarmac (carbon), Specialized Roubaix (carbon, wifey), Raleigh Super Course (my favorite), and 2 Centurion project bikes.
Mentioned: 0 Post(s)
Tagged: 0 Thread(s)
Quoted: 1 Post(s)
Likes: 0
Liked 1 Time
in
1 Post
Cool deal on the rebuild start, I know you've been waiting with anticipation. I learned the hard way about the caged bearings. Out riding and started hearing a grinding noise from my rear wheel. Rode gently back to the car, and upon getting it disassembled back at the house, found that I'd put the caged bearing in backwards. Didn't really harm the raceways, but the bearing cage had broken in two. Now, I don't even think about needing the cages, just do what you're doing and take the bearings out and add a couple extra ones. Much smoother and no chance of damage. Kind of hard to get a round bearing in backwards.
I've had a few with the plastic inner sleeve, the only one I kept was on an old Raleigh tourer that had internal wiring for the dynamo rear light, which routed through the downtube, then into and through the BB, then into the lower rear stay to the dropout. The plastic BB sleeve kept the wire from being rubbed on by the BB spindle as the wire passed through the frame. I don't really know what use the plastic sleeve is, seems just to be an extra thing I don't want to worry about.
The BB fixed cup thing made me have to go out and get a new adjustable wrench, since the LBS wanted $10 to do it, and the wrench large enough for that cup was only $12. For the spanner wrench on the left side lock ring, I just hand tighten it, then put an old leather belt around it and tighten the ring with some large vise-grips. The leather grips the ring teeth and keeps the wrench from scoring up the lock ring. But then, I'm sorta cheap that way. The lock ring doesn't need much torque, and I've never had one loosen up on me with my old-belt-protector-tool.
As far as photos, just zoom in on the thousands of photos here and you'll see the precise setups needed. Most of these guys know what they're doing. I used their photos to tell me how to set my bars pointing towards the rear derailleur, how to wrap bar tape, all sorts of stuff.
Also, about the other reply on your paint drying-time. Good advice. Sure, you can assemble everything presently, but I'd definitely wait for decals and graphics for a week after the paint was applied. Have fun.
Go make some coffee 'cause you know you won't sleep till you're done....
Can't remember where I read it but somewhere is the suggestion that, if you're going to ditch the caged bearings for loose bearings, you'll go from 9 to 11 bearings on each side, and that those bearings should be the larger 1/4" size. No? yes? no?
The new paint is apparently powder-coat with a final clear coat. In any case I'll wait a week or two before applying the Velocals. Plenty of other work to do. The frame is at the LBS now, getting the headset cups pressed back in.
And you're right, these projects do have a way of consuming your idle time. Which is why I started this project. Thanks again. DB
01-21-14, 05:38 PM
#91
Mike J
Join Date: Nov 2013
Location: Jacksonville Florida
Posts: 1,588
Bikes: 1975 Peugeot PX-50L, 1971 Peugeot PX-10, 1974 Peugeot PX-8
Mentioned: 27 Post(s)
Tagged: 0 Thread(s)
Quoted: 392 Post(s)
Likes: 0
Liked 6 Times
in
6 Posts
Lots of great responses, but this one was exceptional. Thanks. If I wasn't so addicted to purchasing shiny new tools, I'd go the leather belt route. :-)
Can't remember where I read it but somewhere is the suggestion that, if you're going to ditch the caged bearings for loose bearings, you'll go from 9 to 11 bearings on each side, and that those bearings should be the larger 1/4" size. No? yes? no?
The new paint is apparently powder-coat with a final clear coat. In any case I'll wait a week or two before applying the Velocals. Plenty of other work to do. The frame is at the LBS now, getting the headset cups pressed back in.
And you're right, these projects do have a way of consuming your idle time. Which is why I started this project. Thanks again. DB
Yeah, I put in 11, but maybe someone else can chime in on larger bearings. I've never done that, I just put two more in of the same size.
Idle time? What's that? I started riding again about four years ago, had two bikes over three years. THEN the gods frowned on me and showed me an old ten-speed for $49.95 and it's been downhill from there. I've got 4 of the durn things in my shop right now, er, my third bedroom. Gone through about a dozen in the last 6 months. See, you're doomed, Duane, the first one is your first mistake....
Later, JJ
01-21-14, 11:55 PM
#92
Senior Member
Thread Starter
Join Date: Mar 2010
Location: Minnesota and Southern California
Posts: 628
Bikes: Specialized Tarmac (carbon), Specialized Roubaix (carbon, wifey), Raleigh Super Course (my favorite), and 2 Centurion project bikes.
Mentioned: 0 Post(s)
Tagged: 0 Thread(s)
Quoted: 1 Post(s)
Likes: 0
Liked 1 Time
in
1 Post
Starting the Re-Build
Last edited by Duane Behrens; 01-22-14 at 07:47 AM.
01-22-14, 08:59 AM
#93
Senior Member
Join Date: Aug 2005
Location: Pittsburgh, PA
Posts: 33,656
Bikes: '96 Litespeed Catalyst, '05 Litespeed Firenze, '06 Litespeed Tuscany, '20 Surly Midnight Special, All are 3x10. It is hilly around here!
Mentioned: 39 Post(s)
Tagged: 0 Thread(s)
Quoted: 2026 Post(s)
Likes: 0
Liked 1,096 Times
in
742 Posts
Those plastic sleeves were used in cup-and-cone bottom brackets to keep dirt and water coming down the seattube from contaminating the grease. Obviously they are not needed with cartridge bottom brackets but have reappeared with external bearing bottom brackets to keep crud off the exposed spindle.
 01-22-14, 04:49 PM
#95
Mike J
Join Date: Nov 2013
Location: Jacksonville Florida
Posts: 1,588
Bikes: 1975 Peugeot PX-50L, 1971 Peugeot PX-10, 1974 Peugeot PX-8
Mentioned: 27 Post(s)
Tagged: 0 Thread(s)
Quoted: 392 Post(s)
Likes: 0
Liked 6 Times
in
6 Posts
Hey, I'm seeing some shiny stuff! The paint looks nice. Good job.
01-22-14, 04:55 PM
#96
Mike J
Join Date: Nov 2013
Location: Jacksonville Florida
Posts: 1,588
Bikes: 1975 Peugeot PX-50L, 1971 Peugeot PX-10, 1974 Peugeot PX-8
Mentioned: 27 Post(s)
Tagged: 0 Thread(s)
Quoted: 392 Post(s)
Likes: 0
Liked 6 Times
in
6 Posts
Those plastic sleeves were used in cup-and-cone bottom brackets to keep dirt and water coming down the seattube from contaminating the grease. Obviously they are not needed with cartridge bottom brackets but have reappeared with external bearing bottom brackets to keep crud off the exposed spindle.
01-22-14, 07:33 PM
#97
Senior Member
Thread Starter
Join Date: Mar 2010
Location: Minnesota and Southern California
Posts: 628
Bikes: Specialized Tarmac (carbon), Specialized Roubaix (carbon, wifey), Raleigh Super Course (my favorite), and 2 Centurion project bikes.
Mentioned: 0 Post(s)
Tagged: 0 Thread(s)
Quoted: 1 Post(s)
Likes: 0
Liked 1 Time
in
1 Post
The clamps are lined with a dual-density foam. No mars or scratches on removing it from the clamp. Still, you're right; better to clamp down on the seat post. Thanks. DB
01-23-14, 08:41 AM
#98
Senior Member
Thread Starter
Join Date: Mar 2010
Location: Minnesota and Southern California
Posts: 628
Bikes: Specialized Tarmac (carbon), Specialized Roubaix (carbon, wifey), Raleigh Super Course (my favorite), and 2 Centurion project bikes.
Mentioned: 0 Post(s)
Tagged: 0 Thread(s)
Quoted: 1 Post(s)
Likes: 0
Liked 1 Time
in
1 Post
"Big deal - he got the rear wheel on," you think. But it's a bit more than that. Setting the cup-and cone bearing system so that
(a) there is just BARELY no play in the axle, and yet
(b) the wheel still rolls freely
took me about a half hour to accomplish this morning. Park Tool's website has a great primer on this. Their method involves installing the wheel assembly OUTBOARD of the bike, with the cog side clamped to the left of the left rear dropout. It worked incredibly well:
https://www.parktool.com/blog/repair-...and-adjustment
01-23-14, 05:06 PM
#99
Mike J
Join Date: Nov 2013
Location: Jacksonville Florida
Posts: 1,588
Bikes: 1975 Peugeot PX-50L, 1971 Peugeot PX-10, 1974 Peugeot PX-8
Mentioned: 27 Post(s)
Tagged: 0 Thread(s)
Quoted: 392 Post(s)
Likes: 0
Liked 6 Times
in
6 Posts
"Big deal - he got the rear wheel on," you think. But it's a bit more than that. Setting the cup-and cone bearing system so that
(a) there is just BARELY no play in the axle, and yet
(b) the wheel still rolls freely
took me about a half hour to accomplish this morning. Park Tool's website has a great primer on this. Their method involves installing the wheel assembly OUTBOARD of the bike, with the cog side clamped to the left of the left rear dropout. It worked incredibly well:
https://www.parktool.com/blog/repair-...and-adjustment
Yeah, the wheel bearing-play adjustment can sometimes be a pain, on some bikes it makes you go buy yet another tool so you can have 2 spanner wrenches to get the nuts locked down, otherwise when you assemble the wheel on the frame and tighten-down the axle nuts, it loosens itself up and the play manages to get back in there. Somebody taught me long ago to put two nuts on the extreme outboard side of any axle or all-thread and tighten them both towards each other very tight, then whatever you do to the other side, the axle won't turn when you put a 2nd wrench on the double-nutted side and then tighten the opposite side. A sort of lock-nut arrangement that works when it seems like your only option is to put a vise-grip on the axle itself to hold it from turning, which, well, you know how that helps the axle threads...
Nice job so far. I bet you've been out on the street rolling it around with tiptoes making it go, haven't you?
01-25-14, 12:46 AM
#100
Senior Member
Thread Starter
Join Date: Mar 2010
Location: Minnesota and Southern California
Posts: 628
Bikes: Specialized Tarmac (carbon), Specialized Roubaix (carbon, wifey), Raleigh Super Course (my favorite), and 2 Centurion project bikes.
Mentioned: 0 Post(s)
Tagged: 0 Thread(s)
Quoted: 1 Post(s)
Likes: 0
Liked 1 Time
in
1 Post
Taking my time and working 40 hours a week, I DID get the brakes, brake cables, levers and seat installed tonight.