


C&V Photo Tips and Techniques
 10-02-10, 11:41 PM
#1
Senior Member
Thread Starter
Join Date: Sep 2007
Location: Scottsdale, AZ
Posts: 4,466
Bikes: many
Mentioned: 0 Post(s)
Tagged: 0 Thread(s)
Quoted: 18 Post(s)
Likes: 0
Liked 16 Times
in
13 Posts
C&V Photo Tips and Techniques
I think it is fair to say that this forum, more than any other, relies on photos. It's like photos by car collectors -- classic cars, funny cars, mod cars, etc.
I suggest we collect C&V photo tips and techniques. Understand, any photo is good and no one will ever criticize. (If they do, they have me to deal with). However, given how much attention and enthusiasm we give to photos, let's collect tips and increase the quality and quanity of C&V photos. This site is really an historical record.
I just sort of hack along with photography, but I'll be happy to start:
1) It's all about light.
2) The human eye and brain will work together to extrapolate an image in poor light conditions, similar to a sophisticated computer enhancement program.
3) The camera sees harsh physics based reality.
4) Train yourself to see like the camera sees. For example, if there is glare, the camera will record glare. If it is high noon and the scene looks washed out, that's what the camera will record. Mornings and late afternoons are best. Cloudy days are great. Monet only painted flowers on cloudy days because of how the colors came true.
These are just a few suggestions. Please add more.
Best Regards,
RFC
 10-02-10, 11:49 PM
#2
Senior Member

Join Date: Jun 2007
Location: WA state
Posts: 4,809
Mentioned: 2 Post(s)
Tagged: 0 Thread(s)
Quoted: 13 Post(s)
Likes: 0
Liked 7 Times
in
6 Posts
I would say the most important thing is to photograph the bike from the drive side, and make sure the picture is properly exposed. If you can accomplish this you can take pics better than most I see.
10-03-10, 06:23 AM
#3

Forum Moderator

Join Date: Jul 2007
Location: Kalamazoo MI
Posts: 20,650
Bikes: Fuji SL2.1 Carbon Di2 Cannondale Synapse Alloy 4 Trek Checkpoint ALR-5 Viscount Aerospace Pro Colnago Classic Rabobank Schwinn Waterford PMount Raleigh C50 Cromoly Hybrid Legnano Tipo Roma Pista
Mentioned: 59 Post(s)
Tagged: 0 Thread(s)
Quoted: 3091 Post(s)
Liked 6,601 Times
in
3,785 Posts
Learn how to use you camera's Macro function.
Don't shoot with the flash on.
To show the bike off best, shoot with a neutral background. Preferably with a color different than the bike.
Use a tripod.
Clean your bike.
Don't shoot with the flash on.
To show the bike off best, shoot with a neutral background. Preferably with a color different than the bike.
Use a tripod.
Clean your bike.
__________________
10-03-10, 06:34 AM
#4

Bike Junkie

Join Date: Jun 2005
Location: South of Raleigh, North of New Hill, East of Harris Lake, NC
Posts: 9,622
Bikes: Specialized Tarmac, Specialized Roubaix, Giant OCR-C, Specialized Stumpjumper FSR, Stumpjumper Comp, 88 & 92Nishiki Ariel, 87 Centurion Ironman, 92 Paramount, 84 Nishiki Medalist
Mentioned: 2 Post(s)
Tagged: 0 Thread(s)
Quoted: 68 Post(s)
Likes: 0
Liked 37 Times
in
27 Posts
This is all good advice, but it depends upon the application. If you're taking a pic for us here on the C&V, then the advice about the focus on the bike is right on.
When taking a pic for a flip on CL, the background is just as important as the bike. Buyers are turned on by a pleasent setting with flowers in the background, a nice home, or for a MTB with a sus fork, a pic taken on single track.
While many, and I do me many, folks like the white garage door, I find it blank and adds nothing to the photo.
I guess I'll never make it as a photographer.
__________________
Roccobike BF Official Thread Terminator
Roccobike BF Official Thread Terminator
10-03-10, 06:59 AM
#5
Senior Member
Join Date: Jul 2008
Location: West of St. Louis
Posts: 864
Bikes: (3) 1970's Raleigh Sports, (1) 1968 Robin Hood 3 speed, 1974 Raleigh Grand Prix, 1976 Raleigh Grand Prix, 1969 Peugeot UO-18, 1971 Peugeot UO-08, 1980 Giant road bike, 1954 Humber, 1940ish Hercules Popular, 1963 Dunelt, 2007 Trek 3700 mountain bike
Mentioned: 0 Post(s)
Tagged: 0 Thread(s)
Quoted: 1 Post(s)
Likes: 0
Liked 4 Times
in
4 Posts
non-drive side.
It may seem like the natural thing to do; you walk a bike from the left side so when you position it for photos, you just step back from it and that's the side you see. But please, all of the good bits are on the opposite side!
10-03-10, 08:50 AM
#6
Senior Member
Thread Starter
Join Date: Sep 2007
Location: Scottsdale, AZ
Posts: 4,466
Bikes: many
Mentioned: 0 Post(s)
Tagged: 0 Thread(s)
Quoted: 18 Post(s)
Likes: 0
Liked 16 Times
in
13 Posts
A few thoughts on backgrounds. Garage doors are easy to use and produce a clinical Jack Web "just the facts" photo. Not my favorite either. If you were doing a family portrait, would you line them up against the garage door? Do the manufacturers of high end sport cars photograph these beauties against a garage door? How about SI swimsuit models? Garage door?
Even a neutral wooden fence or concrete wall is better than a garage door. Both provide a different feel and texture. The garage door provides nothing.
Look at what what 55rad did with these photos for ebay. A very simple set up, but much better than a garage door. Also, he used a wide aperture to soften the background while keeping the frame in focus.
https://cgi.ebay.com/ws/eBayISAPI.dll...=STRK:MEWAX:IT
Less neutral backgrounds can contribute to or detract from your photo. Again, see what the camera sees and adjust.
Try to pick a complementary background, both in terms of color and context.
Try to eliminate distracting aspects of the scene, i.e., the garden hose.
Avoid overly busy backgrounds unless that is part of the story, i.e., rider in a race photographed coming around a curve through the crowd.
The bike does not have to be centered in the photo. Think in terms of thirds, both horizontally and vertically.
Here are a couple of my hack examples.
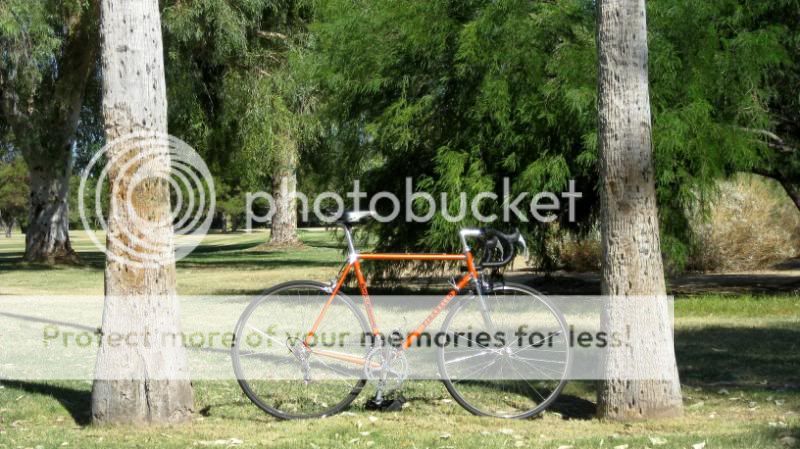
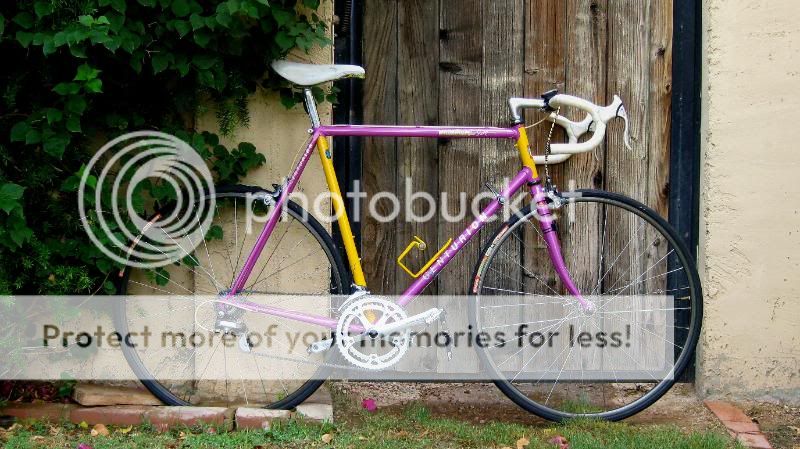
The Pinarello -- This is just an ok shot. I used the palms to frame the bike. The background is not bad, but would have been better if the grass was greener (we are transitioning to winter grass down here). Also, the black wrapped handlebars are a little lost in the dark green.
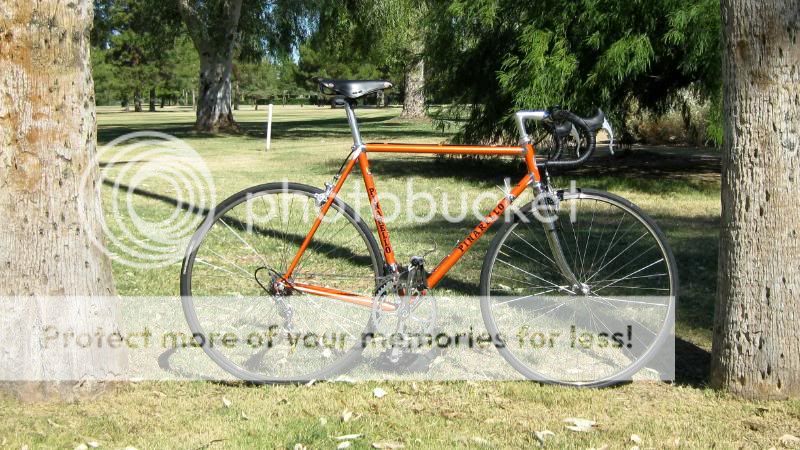
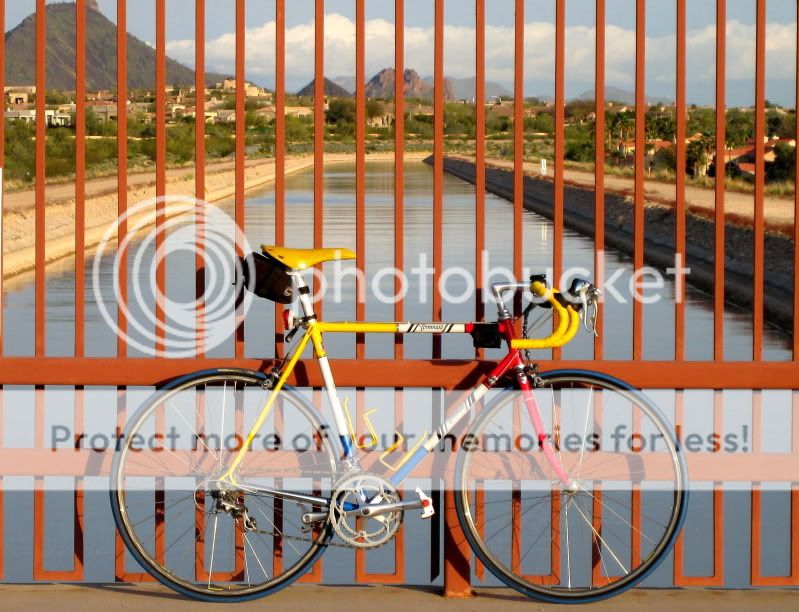
The Ironman -- This was an attempt to do two things: 1) Highlight the brightness of the bike by setting it against a gloomy background, similar to the "darkroom" technique of highlighting a colorful object by turning the rest of the photo B&W; and 2) Putting the bike into a scene that begs a story, again a sort of contrast. I would have "eliminated" the garden hose, but I was already trespassing.
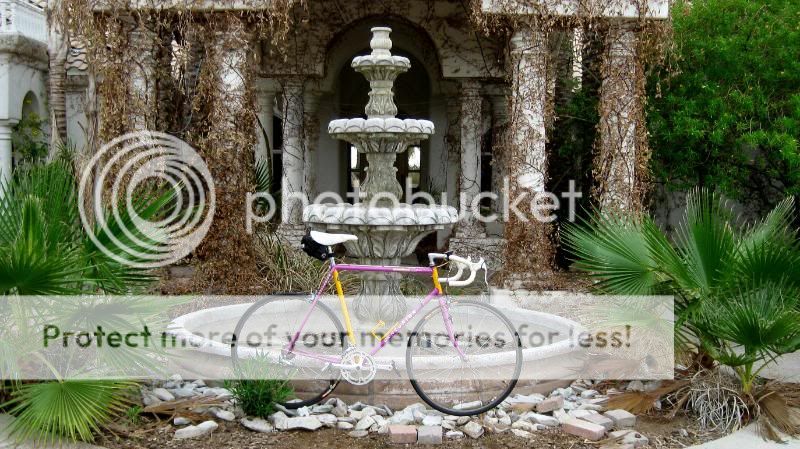
The Tomasso was an experiment in contrasting lines and color.
Even a neutral wooden fence or concrete wall is better than a garage door. Both provide a different feel and texture. The garage door provides nothing.
Look at what what 55rad did with these photos for ebay. A very simple set up, but much better than a garage door. Also, he used a wide aperture to soften the background while keeping the frame in focus.
https://cgi.ebay.com/ws/eBayISAPI.dll...=STRK:MEWAX:IT
Less neutral backgrounds can contribute to or detract from your photo. Again, see what the camera sees and adjust.
Try to pick a complementary background, both in terms of color and context.
Try to eliminate distracting aspects of the scene, i.e., the garden hose.
Avoid overly busy backgrounds unless that is part of the story, i.e., rider in a race photographed coming around a curve through the crowd.
The bike does not have to be centered in the photo. Think in terms of thirds, both horizontally and vertically.
Here are a couple of my hack examples.
The Pinarello -- This is just an ok shot. I used the palms to frame the bike. The background is not bad, but would have been better if the grass was greener (we are transitioning to winter grass down here). Also, the black wrapped handlebars are a little lost in the dark green.
The Ironman -- This was an attempt to do two things: 1) Highlight the brightness of the bike by setting it against a gloomy background, similar to the "darkroom" technique of highlighting a colorful object by turning the rest of the photo B&W; and 2) Putting the bike into a scene that begs a story, again a sort of contrast. I would have "eliminated" the garden hose, but I was already trespassing.
The Tomasso was an experiment in contrasting lines and color.
Last edited by RFC; 10-03-10 at 10:03 AM.
10-03-10, 10:49 AM
#7
Senior Member
Thread Starter
Join Date: Sep 2007
Location: Scottsdale, AZ
Posts: 4,466
Bikes: many
Mentioned: 0 Post(s)
Tagged: 0 Thread(s)
Quoted: 18 Post(s)
Likes: 0
Liked 16 Times
in
13 Posts
Come on. I know there are many excellent photographers out there on the forum. Your thoughts and examples.
Last edited by RFC; 10-03-10 at 10:53 AM.
10-03-10, 11:30 AM
#8
FBoD Member at Large

Join Date: Aug 2008
Location: Woodbury, MN
Posts: 6,094
Mentioned: 3 Post(s)
Tagged: 0 Thread(s)
Quoted: 30 Post(s)
Likes: 0
Liked 7 Times
in
7 Posts
Excellent examples RFC...but those should also serve to illustrate the difference in harsh sun/noon pics and cloudy day/early/late day pic. The Pinarello was in harsh sun, the Centurion share or cloudy. Saturation is better and the exposure is easier to manage without the specular highlights.
I would recommend some of the following (in addition to what's already been suggested):
- If you camera can, underexpose by 1/2 to a full stop...most P&S cameras over expose. My Canon 5D does by about 1/3 - 1/2 stop consistently, I always keep it set 1/2 stop under.
- Don't overdo sharpening, contrast, or saturation adjustments.
- Be sure the camera is vertical or horizontal. Horizontal lines should be!
10-03-10, 11:55 AM
#9
Senior Member

Join Date: Aug 2008
Location: San Francisco
Posts: 1,332
Bikes: 1989 Team Miyata, 1989 Miyata 1400, 1989 Miyata 1400, 1986 Miyata 610, 2007 Specialized Stumpjumper Hardtail
Mentioned: 3 Post(s)
Tagged: 0 Thread(s)
Quoted: 16 Post(s)
Likes: 0
Liked 0 Times
in
0 Posts
If you shoot indoors you want to use a large light source. A large light source softens shadows and creates smooth and broad highlights on a frame instead of sharp, bright ones that and small light source creates which can be distracting. On-camera flash which is what all point-and-shoot cameras have is the exact opposite of a large light source. Make sure you turn this off.
The shot below is done using a soft box which is basically a light inside of a box that has a large piece of white translucent fabric on the end of it. The fabric is lit up by the light behind it and becomes the light source. In this case it's a 2x3' light source. Most people don't have a soft box or strobes but this effect can be roughly replicated by bouncing a light off a wall or ceiling. This effectively makes the light source the size of the wall you're bouncing it off of.

The shot below is done using a soft box which is basically a light inside of a box that has a large piece of white translucent fabric on the end of it. The fabric is lit up by the light behind it and becomes the light source. In this case it's a 2x3' light source. Most people don't have a soft box or strobes but this effect can be roughly replicated by bouncing a light off a wall or ceiling. This effectively makes the light source the size of the wall you're bouncing it off of.
10-03-10, 12:06 PM
#10
Full Member
I am always on the lookout for nice examples. I think I have a few collected and will try to dig them up to post.
re tips.
As a general tip for outdoors photos avoid harsh sunlight. Early morning or late evening light is best.
Try some unusual angles to bring some freshness. We get tired sometimes of seeing the same angles all the time. So mix the traditional with the new. I have a few examples I have found that I can post on this.
Avoid distracting content as mentioned above.
RFC - I hope you don't mind if I comment on some of your photos to illustrate. In your examples above the tree trunks are distracting without adding anything to the photo, as well as the railings in the other example. The vertical lines take the viewers eye away from the lines of the bike.
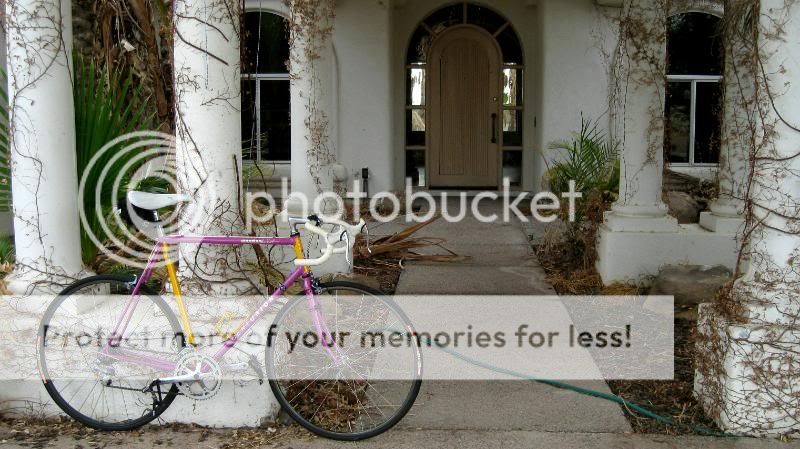
However in your other example below, is a really excellent backdrop
This is a winner because as well as having nice contrast it also has the most important element of a photo. It tells a story. You can almost imagine the owner of the bike on the far side of that door getting ready for a nice long bike ride. It might be even better suited to a much older bike but it's still really good.
As I said I'll try to dig up a few examples that I've found over the last few months. Someone also posted a list of features that you should include when showing a bike for sale purposes. I'll try to dig that up too.
re tips.
As a general tip for outdoors photos avoid harsh sunlight. Early morning or late evening light is best.
Try some unusual angles to bring some freshness. We get tired sometimes of seeing the same angles all the time. So mix the traditional with the new. I have a few examples I have found that I can post on this.
Avoid distracting content as mentioned above.
RFC - I hope you don't mind if I comment on some of your photos to illustrate. In your examples above the tree trunks are distracting without adding anything to the photo, as well as the railings in the other example. The vertical lines take the viewers eye away from the lines of the bike.
However in your other example below, is a really excellent backdrop
This is a winner because as well as having nice contrast it also has the most important element of a photo. It tells a story. You can almost imagine the owner of the bike on the far side of that door getting ready for a nice long bike ride. It might be even better suited to a much older bike but it's still really good.
As I said I'll try to dig up a few examples that I've found over the last few months. Someone also posted a list of features that you should include when showing a bike for sale purposes. I'll try to dig that up too.
10-03-10, 12:08 PM
#11

PanGalacticGargleBlaster

Join Date: Apr 2009
Location: Smugglers Notch, Vermont
Posts: 7,531
Bikes: Upright and Recumbent....too many to list, mostly Vintage.
Mentioned: 0 Post(s)
Tagged: 0 Thread(s)
Quoted: 19 Post(s)
Likes: 0
Liked 5 Times
in
4 Posts
Proper use of Depth-of-Field will make for a much better picture of just a single subject, such as your bike, regardless of the background. Of course a Nice background helps
This was taken by forum member EM42...this is what I'm talking about.
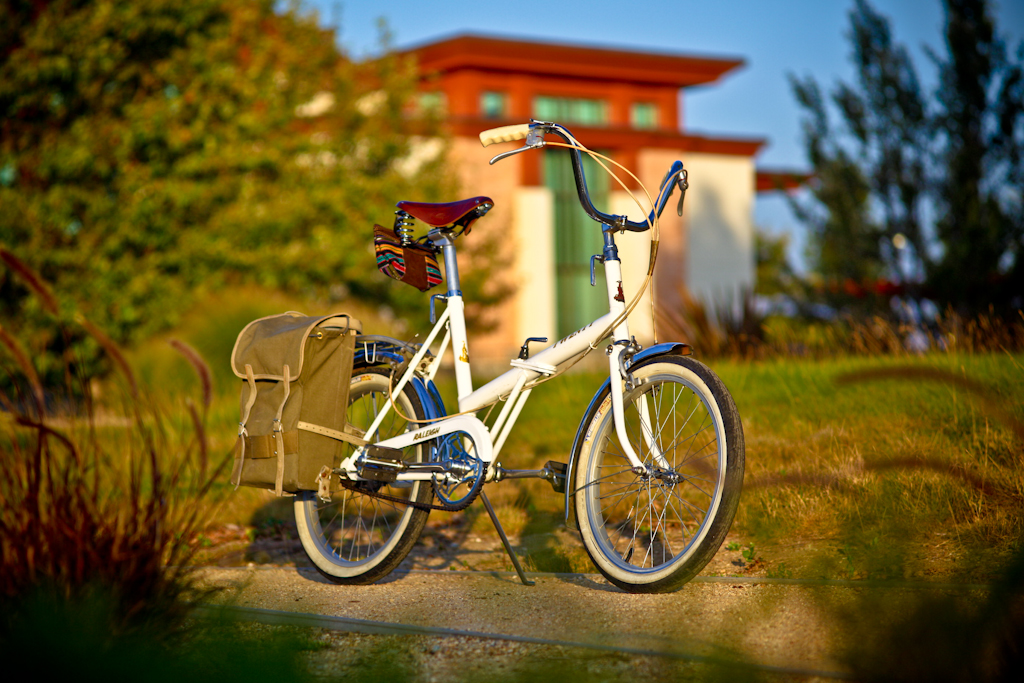
Without Aperture and Shutter control you can't really take a picture like that with most point and shoot cameras, but a Full bodied SLR can help you produce photos with great contrast between the subject and the background.
This was taken by forum member EM42...this is what I'm talking about.
Without Aperture and Shutter control you can't really take a picture like that with most point and shoot cameras, but a Full bodied SLR can help you produce photos with great contrast between the subject and the background.
__________________
--Don't Panic.
--Don't Panic.
10-03-10, 12:23 PM
#12
Junior Member
Join Date: Jul 2010
Posts: 23
Bikes: 74 Raleigh Tourist
Mentioned: 0 Post(s)
Tagged: 0 Thread(s)
Quoted: 0 Post(s)
Likes: 0
Liked 1 Time
in
1 Post
All these are very nice shots. Are we talking photography in general or photos of bikes? For example, the bike in front of the red rust railings on the bridge over the canal is a very cool shot. I can't however tell what kind of bike it is. I love the depth of field in the shot of the Raleigh folder. Can I get this with my Fujifilm point and shoot or do I need big glass? Like a f1 or something?
The lightbox shot is great. Can't I use the flash on my point n shoot to trigger the light box?
A photo contest would be fun. Especially if it were sponsored.... hmmmmmm.
Anybody remember the famous photo of the bicycle which was taken at such a shutter speed that the wheels appeared oblong? Maybe I can find it...
10-03-10, 12:29 PM
#13
Senior Member
Thread Starter
Join Date: Sep 2007
Location: Scottsdale, AZ
Posts: 4,466
Bikes: many
Mentioned: 0 Post(s)
Tagged: 0 Thread(s)
Quoted: 18 Post(s)
Likes: 0
Liked 16 Times
in
13 Posts
Excellent examples RFC...but those should also serve to illustrate the difference in harsh sun/noon pics and cloudy day/early/late day pic. The Pinarello was in harsh sun, the Centurion share or cloudy. Saturation is better and the exposure is easier to manage without the specular highlights.
I would recommend some of the following (in addition to what's already been suggested):
- If you camera can, underexpose by 1/2 to a full stop...most P&S cameras over expose. My Canon 5D does by about 1/3 - 1/2 stop consistently, I always keep it set 1/2 stop under.
- Don't overdo sharpening, contrast, or saturation adjustments.
- Be sure the camera is vertical or horizontal. Horizontal lines should be!
I would recommend some of the following (in addition to what's already been suggested):
- If you camera can, underexpose by 1/2 to a full stop...most P&S cameras over expose. My Canon 5D does by about 1/3 - 1/2 stop consistently, I always keep it set 1/2 stop under.
- Don't overdo sharpening, contrast, or saturation adjustments.
- Be sure the camera is vertical or horizontal. Horizontal lines should be!
10-03-10, 12:32 PM
#14
Senior Member
Thread Starter
Join Date: Sep 2007
Location: Scottsdale, AZ
Posts: 4,466
Bikes: many
Mentioned: 0 Post(s)
Tagged: 0 Thread(s)
Quoted: 18 Post(s)
Likes: 0
Liked 16 Times
in
13 Posts
If you shoot indoors you want to use a large light source. A large light source softens shadows and creates smooth and broad highlights on a frame instead of sharp, bright ones that and small light source creates which can be distracting. On-camera flash which is what all point-and-shoot cameras have is the exact opposite of a large light source. Make sure you turn this off.
The shot below is done using a soft box which is basically a light inside of a box that has a large piece of white translucent fabric on the end of it. The fabric is lit up by the light behind it and becomes the light source. In this case it's a 2x3' light source. Most people don't have a soft box or strobes but this effect can be roughly replicated by bouncing a light off a wall or ceiling. This effectively makes the light source the size of the wall you're bouncing it off of.
The shot below is done using a soft box which is basically a light inside of a box that has a large piece of white translucent fabric on the end of it. The fabric is lit up by the light behind it and becomes the light source. In this case it's a 2x3' light source. Most people don't have a soft box or strobes but this effect can be roughly replicated by bouncing a light off a wall or ceiling. This effectively makes the light source the size of the wall you're bouncing it off of.
10-03-10, 12:33 PM
#15
Senior Member
Thread Starter
Join Date: Sep 2007
Location: Scottsdale, AZ
Posts: 4,466
Bikes: many
Mentioned: 0 Post(s)
Tagged: 0 Thread(s)
Quoted: 18 Post(s)
Likes: 0
Liked 16 Times
in
13 Posts
Good comments all. Let's keep the examples and analysis going. This is very useful.
10-03-10, 12:46 PM
#16
Full Member
10-03-10, 12:58 PM
#17
Full Member
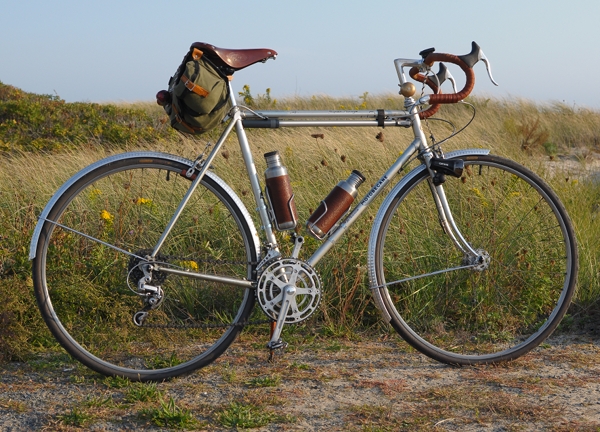
Even though it doesn't show the components very well and the backdrop could be better I've always liked this photo. I think it's because it shows the seat tube decal and head tube decal from a very similar angle and your eye is drawn naturally from one to the other.
4..jpg
4..jpg
10-03-10, 01:05 PM
#18
Senior Member
Thread Starter
Join Date: Sep 2007
Location: Scottsdale, AZ
Posts: 4,466
Bikes: many
Mentioned: 0 Post(s)
Tagged: 0 Thread(s)
Quoted: 18 Post(s)
Likes: 0
Liked 16 Times
in
13 Posts
Even though it doesn't show the components very well and the backdrop could be better I've always liked this photo. I think it's because it shows the seat tube decal and head tube decal from a very similar angle and your eye is drawn naturally from one to the other.
Attachment 172225
Attachment 172225
10-03-10, 01:21 PM
#19
Full Member
A few links...
Photographing Your Masi
https://bhovey.com/Masi/MasiPhoto/Photo.htm
This is really good advice on what to photograph if you're trying to sell a bike.
Ray Dobbins setup, if you want to put some time into it.
https://www.raydobbins.com/photosetup.htm
Photographing Your Masi
https://bhovey.com/Masi/MasiPhoto/Photo.htm
This is really good advice on what to photograph if you're trying to sell a bike.
Ray Dobbins setup, if you want to put some time into it.
https://www.raydobbins.com/photosetup.htm
10-03-10, 01:52 PM
#20
Lug Princess

Join Date: Jun 2009
Location: Easthaven Isle, ME
Posts: 910
Mentioned: 1 Post(s)
Tagged: 0 Thread(s)
Quoted: 4 Post(s)
Likes: 0
Liked 5 Times
in
5 Posts
As some have already mentioned, I think one of the most crucial things to deal with in "bicycle photography" is figuring out how to strike that precarious balance between a beautiful shot (that may not provide sufficient information about the bike) and a technical shot (that may not be interesting enough to look at). When you start playing around with depth of field and seeking the golden light, it is easy to go overboard and focus on the romantic ambiance of a shot instead of on the clear visibility of components. Likewise, when you try to get everything into sharp focus, the results can come out dull and clinical looking. It is difficult to strike that balance just right, and I would even say that the ability to do so in the realm of professional photography.
However, if you just want nice, clear bike pictures without getting too obsessed about making them perfect, there are some easy steps to follow (assuming a simple point and shoot digital camera):
. shoot outdoors; no basement shots or livingroom carpet shots
. wait for sunny day and photograph between 3pm and sunset
. de-clutter background
. ensure that background is in contrasting colour and is either considerably lighter or considerably darker than bike
. to attain accurate perspective, crouch in front of bike, so that camera is just above drivetrain
. do not use zoom feature; stand just far enough away so that bicycle fills most of frame
. take a few full size shots from different points of view (side, front, back) and close-ups of important components
You should get some great shots following those simple steps.
10-03-10, 02:01 PM
#21
Senior Member
Thread Starter
Join Date: Sep 2007
Location: Scottsdale, AZ
Posts: 4,466
Bikes: many
Mentioned: 0 Post(s)
Tagged: 0 Thread(s)
Quoted: 18 Post(s)
Likes: 0
Liked 16 Times
in
13 Posts
As some have already mentioned, I think one of the most crucial things to deal with in "bicycle photography" is figuring out how to strike that precarious balance between a beautiful shot (that may not provide sufficient information about the bike) and a technical shot (that may not be interesting enough to look at). When you start playing around with depth of field and seeking the golden light, it is easy to go overboard and focus on the romantic ambiance of a shot instead of on the clear visibility of components. Likewise, when you try to get everything into sharp focus, the results can come out dull and clinical looking. It is difficult to strike that balance just right, and I would even say that the ability to do so in the realm of professional photography.
However, if you just want nice, clear bike pictures without getting too obsessed about making them perfect, there are some easy steps to follow (assuming a simple point and shoot digital camera):
. shoot outdoors; no basement shots or livingroom carpet shots
. wait for sunny day and photograph between 3pm and sunset
. de-clutter background
. ensure that background is in contrasting colour and is either considerably lighter or considerably darker than bike
. to attain accurate perspective, crouch in front of bike, so that camera is just above drivetrain
. do not use zoom feature; stand just far enough away so that bicycle fills most of frame
. take a few full size shots from different points of view (side, front, back) and close-ups of important components
You should get some great shots following those simple steps.
10-03-10, 02:36 PM
#22
Curmudgeon in Training

Join Date: May 2009
Location: Rural Retreat, VA
Posts: 1,956
Bikes: 1974 Gazelle Champion Mondial, 2010 Cannondale Trail SL, 1988 Peugeot Nice, 1992ish Stumpjumper Comp,1990's Schwinn Moab
Mentioned: 1 Post(s)
Tagged: 0 Thread(s)
Quoted: 19 Post(s)
Likes: 0
Liked 9 Times
in
8 Posts
Never use a flash. Ever.
Use 1/3's. By this I mean... the obvious way to take a picture is to center the subject in the frame. But if you find a way to make the focal point at a 1/3 line (vertical or horizontal) it'll make for a nicer photograph. Give it a try. I can't explain it but it works. The photo of the folder exhibits this a bit as the eye goes to the front wheel, which is on an approximate 1/3 line both horizontally and vertically.
Don't photograph in front of white back grounds. It only serves to wash out your colors. Go for a cool gray. Somewhere between 10 and 20 percent. Also remember that if you're photographing a reflective (glossy) surface, it will reflect the colors of anything around. Eliminate undesirable colors.
10-03-10, 03:28 PM
#23
Photographer

Join Date: May 2006
Location: The other Cape, Cape Ann
Posts: 3,116
Mentioned: 27 Post(s)
Tagged: 0 Thread(s)
Quoted: 105 Post(s)
Liked 98 Times
in
53 Posts
I tend to document rather than create beauty shots. I've found a location nearby that has a south facing beach house with an overhang, it makes a perfect "open shade" on a sunny day. It tends to be bright, clean and free of shadows.


Scott
Scott
__________________
ClassicFuji.posthaven.com.archive
IG @scottryder.surf.cycle
IG @scottryder.fine.art
ClassicFuji.posthaven.com.archive
IG @scottryder.surf.cycle
IG @scottryder.fine.art
 10-03-10, 03:43 PM
#25
Senior Member
Join Date: Aug 2005
Location: Northern Virginia
Posts: 307
Mentioned: 0 Post(s)
Tagged: 0 Thread(s)
Quoted: 2 Post(s)
Likes: 0
Liked 0 Times
in
0 Posts
Some photos I took around Dupont Circle in Washington DC.
I saw these bikes in one night (August 2010) as I was walking around. One Basso and one Woodrup.
The all white bike is a Ghost or Memorial bike for 22 yo Alice Swanson who was killed as she was riding to work in DC in July 2008. Originally there were 22 ghost bikes. This is the only one that I found that night.
If you are curious about the ghost bike:
https://www.washingtonpost.com/wp-dyn...091003213.html
Photo wise, I play with the angles of the camera, get low and compose the shot but keeping the bike as an off center focus pt. Mainly as part of the composition.
The composition of the Woodrup is not that great due to the trash can. I don't know, I am just learning as I go along...