


Cleaning old centerpull brakes ?
 03-26-11, 09:10 AM
#1

Senior Member
Thread Starter
Join Date: May 2010
Location: Austin,Texas
Posts: 801
Bikes: 73 Super Sport, 86 Tempo, 86 Peloton, 87 Super Sport, 83 Peugeot PFN10, 76 Super Course MK IV, 94 Univega Alpina 5.5
Mentioned: 2 Post(s)
Tagged: 1 Thread(s)
Quoted: 175 Post(s)
Liked 70 Times
in
34 Posts
Cleaning old centerpull brakes ?
i want to try and reuse my old Schwinn Approved Weinmann centerpull brakes on my 73 Super Sport build. I tried a little Simichrome polish and it looks like they will polish up well.
How should I go about cleaning off 35 years of grime and some surface rust on the steel parts? Oxalic Acid? At what strength? Rusty springs?
How should I go about cleaning off 35 years of grime and some surface rust on the steel parts? Oxalic Acid? At what strength? Rusty springs?

 03-26-11, 10:04 AM
#3
Senior Member

Do not use oxalic acid. Oxalic acid is for removing rust, not cleaning. A part must be clean and free of grease/oil for oxalic acid to work. Most importantly it is for rust (steel parts), aluminum does not rust. I put a pair of dirty, grimy, greasy, grubby Weinmanns into one of my ultrasonic cleaners last night. I have two, one for kerosene and another for Simple Green. I ran the cleaner with kerosene and let them stay in there overnight. Later I'll scrub them with a nylon brush, rinse and then run in a heated cycle in the Simple Green cleaner. I've done several sets this way. They BLING.
As jeepr said, 0000 steel wool will finish them up nicely.
As jeepr said, 0000 steel wool will finish them up nicely.
__________________
Bikes on Flickr
I prefer email to private messages. You can contact me at justinhughes@me.com
Bikes on Flickr
I prefer email to private messages. You can contact me at justinhughes@me.com
03-26-11, 12:52 PM
#4
Senior Member

Join Date: Apr 2007
Location: Thunder Bay, Ontario, Canada - burrrrr!
Posts: 11,674
Bikes: 1958 Rabeneick 120D, 1968 Legnano Gran Premio, 196? Torpado Professional, 2000 Marinoni Piuma
Mentioned: 210 Post(s)
Tagged: 0 Thread(s)
Quoted: 1372 Post(s)
Likes: 0
Liked 1,751 Times
in
938 Posts
__________________
"98% of the bikes I buy are projects".
"98% of the bikes I buy are projects".
03-26-11, 04:05 PM
#5
Senior Member
Join Date: Mar 2007
Location: Saskatchewan
Posts: 2,465
Mentioned: 0 Post(s)
Tagged: 0 Thread(s)
Quoted: 3 Post(s)
Likes: 0
Liked 6 Times
in
5 Posts
The problem with old parts is they were not anodized or protected in any way. So they show their age.
I prefer the patina that old parts show with age. A brightly polished set of brakes wasn't found on most older bikes even when when they were new.
I prefer the patina that old parts show with age. A brightly polished set of brakes wasn't found on most older bikes even when when they were new.
03-26-11, 04:13 PM
#6
Senior Member

Join Date: Dec 2007
Location: The Sunny South
Posts: 1,906
Mentioned: 1 Post(s)
Tagged: 0 Thread(s)
Quoted: 29 Post(s)
Likes: 0
Liked 3 Times
in
2 Posts
+1........ cleaned, functional and well adjusted is what a vintage "working" bike requires. I sit in the recliner with a good western on TV and polish parts by hand. Several rags; 0000 steel wool, WD-40 and elbow grease is all that is required....
03-26-11, 05:12 PM
#7
Senior Member
Join Date: May 2010
Location: Hurricane Alley , Florida
Posts: 3,903
Bikes: Treks (USA), Schwinn Paramount, Schwinn letour,Raleigh Team Professional, Gazelle GoldLine Racing, 2 Super Mondias, Carlton Professional.
Mentioned: 10 Post(s)
Tagged: 0 Thread(s)
Quoted: 78 Post(s)
Liked 30 Times
in
22 Posts
I cleaned and polished a set of center pulls off my Schwinn Le Tour. I took each one apart, keeping the red bushings, pivots and bolts as one, as in left and right pivot assemblies. I removed all scratches with 1000 grit wet or dry sand paper, the used Mothers polish to give it all a nice shine. I replaced all the bolts and nut with grade 8 Chrome hardware. Don't forget to lube the pivots. Once they were back together I gave them a good coat of car wax. I think they came out ok...
Front

Front
05-24-17, 01:00 PM
#8
Senior Member
Join Date: May 2017
Posts: 96
Bikes: 1973 Raleigh Competition, 2010 Rivendell A. Homer Hilsen, 2010's Bike Friday Pocket Companion
Mentioned: 0 Post(s)
Tagged: 0 Thread(s)
Quoted: 19 Post(s)
Likes: 0
Liked 0 Times
in
0 Posts
Simichrome. Have used it for years with great results.
05-24-17, 01:31 PM
#9
Senior Member
For cleaning up the old grease and dirt first, WD40 works well. You can also use: kerosene, paint thinner, orange cleaner, detergent and water, whatever.
As has been pointed out, do not use oxalic acid on aluminum. It will eat it the metal and turn it black. Not necessarily in that order.
You can use oxalic acid on the chromed steel bolts and steel springs if they are rusty. Disassemble first of course.
+1 on simichrome for polish. Good on both chrome and aluminum. It's still my favorite. Polish after you get the grease and dirt off. Polish is not cleaner.
05-24-17, 01:42 PM
#10
Senior Member
Join Date: Apr 2007
Location: Thunder Bay, Ontario, Canada - burrrrr!
Posts: 11,674
Bikes: 1958 Rabeneick 120D, 1968 Legnano Gran Premio, 196? Torpado Professional, 2000 Marinoni Piuma
Mentioned: 210 Post(s)
Tagged: 0 Thread(s)
Quoted: 1372 Post(s)
Likes: 0
Liked 1,751 Times
in
938 Posts
I just did this last night. First, using a fine brass brush, I cleaned of the heavy caked on grime and most of the oxidation(rust) on steel parts, including the galvanized spring...

Then I used my five dollar rotary polisher to shine up the alloy bits and pieces...
[IMG]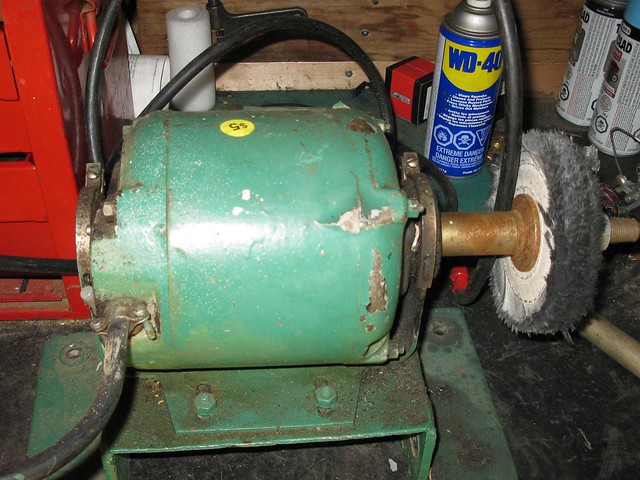 [/IMG]

Then I rubbed the chrome with aluminum foil and did the same to the galvanized springs(they clean up very will with the foil, as do galvanized spokes)...

When everything is cleaned and polished, dab some grease on anything that slides or rotates, this includes the yoke and yoke cable(which cleans up well with aluminum foil)
The brakes are now waiting to be installed and adjusted, in preparation to get my Peugeot ready to go(I mean stop).
Then I used my five dollar rotary polisher to shine up the alloy bits and pieces...
[IMG]
[/IMG]Then I rubbed the chrome with aluminum foil and did the same to the galvanized springs(they clean up very will with the foil, as do galvanized spokes)...
When everything is cleaned and polished, dab some grease on anything that slides or rotates, this includes the yoke and yoke cable(which cleans up well with aluminum foil)
The brakes are now waiting to be installed and adjusted, in preparation to get my Peugeot ready to go(I mean stop).
__________________
"98% of the bikes I buy are projects".
"98% of the bikes I buy are projects".
Last edited by randyjawa; 05-24-17 at 02:25 PM.
05-24-17, 05:31 PM
#11
Senior Member
Challenger cleaner, spray and rinse.
05-24-17, 05:45 PM
#12
Senior Member

Join Date: Nov 2015
Posts: 4,487
Mentioned: 102 Post(s)
Tagged: 0 Thread(s)
Quoted: 1639 Post(s)
Likes: 0
Liked 829 Times
in
538 Posts
Best way to clean and polish 8s to do a complete disassembly of the components, down to the last nut and bolt. Blast it with your favorite grunge melting solvent and brush and wash off all the grit and old grease off all the parts before you even start to do any sort of polishing work.
I know most here do that already, but I'm still surprised to come across components that were never taken apart for cleaning and servicing and you can see it is nice and clean at the exterior, but really nasty in the nooks a crannies....
I know most here do that already, but I'm still surprised to come across components that were never taken apart for cleaning and servicing and you can see it is nice and clean at the exterior, but really nasty in the nooks a crannies....
05-24-17, 07:00 PM
#13
Senior Member
The sites where the ends of the steel spring bear upon aluminum alloy studs/nubs benefit from a drop or two of WD40. Same treatment is good in the brake levers, on the cable carrier and the pivots where the lever meets the lever body.
05-24-17, 07:29 PM
#14
PM me your cotters

Join Date: Jun 2015
Location: ATL
Posts: 3,241
Mentioned: 80 Post(s)
Tagged: 0 Thread(s)
Quoted: 1137 Post(s)
Liked 590 Times
in
422 Posts
Evapo-rust. Environmentally friendly and it's liquid so no worries about surrounding AND no abrasion. It actually works as advertised.
Before/after 24 hours soaking, I didn't lift a finger, no abrasives = no scratching to introduce more rust later, no effort!:
(full disclosure: I degreased a bit with PB blaster and a toothbrush first, but that's not what did this)

Before/after 24 hours soaking, I didn't lift a finger, no abrasives = no scratching to introduce more rust later, no effort!:
(full disclosure: I degreased a bit with PB blaster and a toothbrush first, but that's not what did this)
05-24-17, 07:41 PM
#15
PM me your cotters
Join Date: Jun 2015
Location: ATL
Posts: 3,241
Mentioned: 80 Post(s)
Tagged: 0 Thread(s)
Quoted: 1137 Post(s)
Liked 590 Times
in
422 Posts
I just realized this a a zombie thread bumped by a newbie.
But hey, more on this. I wish I would've taken a pic of the springs before/after - I disassembled, soaked the steel and chrome parts in Evapo-rust, used Mothers Mag & Aluminum on the alloy parts, then reassembled with a bit of lube.
Left is after - no polishing the chrome or steel at all. Right caliper is what the other looked like before. I polished the crome after to get an awesome lustre, not pictured.

