


Show Your Vintage MTB Drop Bar Conversions
 06-11-14, 06:17 PM
#3126
Spin Forest! Spin!

Join Date: Sep 2007
Location: Arrid Zone-a
Posts: 5,956
Bikes: I used to have many. And I Will again.
Mentioned: 2 Post(s)
Tagged: 0 Thread(s)
Quoted: 7 Post(s)
Likes: 0
Liked 11 Times
in
10 Posts
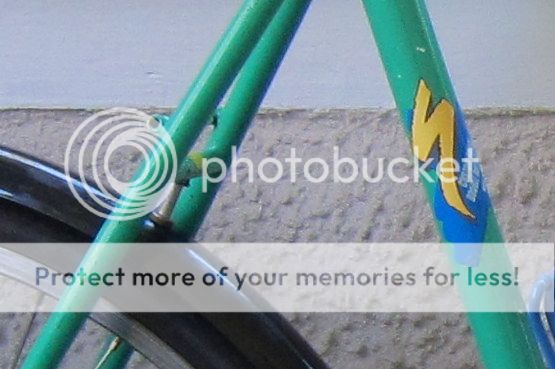
That is really too bad about the rear fender, are you just lacking the proper hardware? (i.e. long enough bolts and spacers) I had to drill my my rear fender at the upper mount since the seat stay bridge only had a downward facing hole. then a spacer there and another spacer at the hole near the bottom bracket, I got a pretty clean fender line as a result.
not trying to bash on your bike, it looks very capable and thought out. But that rear fender doesnt look very happy.
not trying to bash on your bike, it looks very capable and thought out. But that rear fender doesnt look very happy.
I think I can see the threaded boss is facing downward on the bridge.
Just remove the fender mount, and drill a hole through the fender to mate with the boss. If you don't wish to drill a hole through the fender, then cut off the mount's tab, and drill a hole through that. Attach with a bugle-head stainless steel screw and a thin rubber or plastic washer. Screw head should be flush enough to allow the fender to snap into place.
 06-11-14, 10:13 PM
#3127
Senior Member
Join Date: Sep 2012
Location: NEW ZEALAND
Posts: 778
Bikes: Marin Bolinas ridge, Carlton Corsa 5, Falcon Olympic 12, 98 Shesh Rockhopper,
Mentioned: 3 Post(s)
Tagged: 0 Thread(s)
Quoted: 88 Post(s)
Liked 0 Times
in
0 Posts
Nothing wrong with the cable tie, fenders can be attached via cable ties, I set up a customers bike in this way, he came back in after eight months of touring around NZ, the fenders were in the exact same position as when I set them up, he then told me they were the original ties too . . . priceless, he reckons they made less noise than his mates that were installed in the conventional manner.
I would definitely not drill the frame, unless the aesthetics are bothering you that much? I would not want any drills bits near the lovely finish on your bike, it is a bike after all, I do not think the cable ties will affect anything, function over beauty for me.
There is a hole underneath the bridge? I if anything would drill a hole the fender and attach underneath, you could do away with the bulky mount then too.
Last edited by Bicycle Addict; 06-12-14 at 02:09 PM.
06-12-14, 06:16 AM
#3128

Senior Member
Join Date: Oct 2012
Location: Twin Cities, Minnesota, USA
Posts: 1,257
Bikes: 2017 Salsa Carbon Mukluk frame built with XT, 2018 Kona Rove NRB build with Sram Apex 1,2008 Salsa El Mariachi, 1986 Centurion Ironman
Mentioned: 11 Post(s)
Tagged: 0 Thread(s)
Quoted: 286 Post(s)
Liked 100 Times
in
65 Posts
@RALEIGH_COMP, @WNG and @Bicycle Addict, thanks for all the good advice. Finishing my son's Schwinn High Sierra build is next up, but when I'm done with that I'll tackle the fenders and see if I can dial in the aesthetics.
I'm with DA in believing that function trumps form, especially with a communter build, but if I can improve on the aesthetics without too much money or hastle or messing things up, why not?
I will definitely not be drilling the bridge. On other projects i've used an aluminum sleeve spacer to bridge distances between attachment points. No reason that can't be done on both the seatstay and chainstay bridges. I have no issue with drilling a hole in the fender. It's just plastic. I will likely lose the black seatstay attachment entirely, drill the hole in the fender, use a machine screw with a shallow head, a washer between the head and the underside of the fender, washers on either side of aluminum sleeve above the fender and thread the screw into the mount on the underside of the stay bridge (not yet sure whether it's threaded or just a pass through. If the former I will put a lock nut on top, same as with the chainstay bridge). Again, thanks for all your good advice. When I finish I will post a new pic. (BA, I'm not sure how to successfully give you a "mention" with the space in your moniker.)
__________________
Don't complain about the weather and cower in fear. It's all good weather. Just different.
Don't complain about the weather and cower in fear. It's all good weather. Just different.
Last edited by revcp; 06-12-14 at 06:20 AM.
06-12-14, 11:15 AM
#3129
Chainstay Brake Mafia
Join Date: Mar 2011
Location: California
Posts: 6,007
Mentioned: 5 Post(s)
Tagged: 0 Thread(s)
Quoted: 16 Post(s)
Likes: 0
Liked 11 Times
in
10 Posts
drilling a hole in the fender sounds easier but i just bent a piece of metal into an L shape to make a bracket
06-12-14, 11:58 AM
#3130
Rides Majestic
Join Date: Jan 2013
Location: Westfield, MA
Posts: 1,339
Bikes: 1983 Univega Gran Turismo, 1970 Schwinn Super Sport, 2001 Univega Modo Vincere, Self-Built Nashbar Touring, 1974 Peugeot U08, 1974 Atala Grand Prix, 1986 Ross Mt. Hood, 80's Maruishi MT-18
Mentioned: 0 Post(s)
Tagged: 0 Thread(s)
Quoted: 3 Post(s)
Likes: 0
Liked 7 Times
in
6 Posts
@revcp: how about a p-clamp wrapped around the bridge? You could have the hole either up or down to get a nice fender line. 5/8 in. Rubber Insulated Metal Clamps (2-Pack)-67792 at The Home Depot
06-12-14, 02:20 PM
#3131
Senior Member

I had an 87 Stumpjumper and the bridge was threaded on the bottom, although the top was also drilled. I put a circle of tape over the top hole to keep the rain out and bolted the fender as you plan to do.
06-12-14, 02:32 PM
#3132
Senior Member
Join Date: Sep 2012
Location: NEW ZEALAND
Posts: 778
Bikes: Marin Bolinas ridge, Carlton Corsa 5, Falcon Olympic 12, 98 Shesh Rockhopper,
Mentioned: 3 Post(s)
Tagged: 0 Thread(s)
Quoted: 88 Post(s)
Liked 0 Times
in
0 Posts
@RALEIGH_COMP, @WNG and @Bicycle Addict, thanks for all the good advice. Finishing my son's Schwinn High Sierra build is next up, but when I'm done with that I'll tackle the fenders and see if I can dial in the aesthetics.
I'm with DA in believing that function trumps form, especially with a communter build, but if I can improve on the aesthetics without too much money or hastle or messing things up, why not?
I will definitely not be drilling the bridge. On other projects i've used an aluminum sleeve spacer to bridge distances between attachment points. No reason that can't be done on both the seatstay and chainstay bridges. I have no issue with drilling a hole in the fender. It's just plastic. I will likely lose the black seatstay attachment entirely, drill the hole in the fender, use a machine screw with a shallow head, a washer between the head and the underside of the fender, washers on either side of aluminum sleeve above the fender and thread the screw into the mount on the underside of the stay bridge (not yet sure whether it's threaded or just a pass through. If the former I will put a lock nut on top, same as with the chainstay bridge). Again, thanks for all your good advice. When I finish I will post a new pic. (BA, I'm not sure how to successfully give you a "mention" with the space in your moniker.)
I'm with DA in believing that function trumps form, especially with a communter build, but if I can improve on the aesthetics without too much money or hastle or messing things up, why not?
I will definitely not be drilling the bridge. On other projects i've used an aluminum sleeve spacer to bridge distances between attachment points. No reason that can't be done on both the seatstay and chainstay bridges. I have no issue with drilling a hole in the fender. It's just plastic. I will likely lose the black seatstay attachment entirely, drill the hole in the fender, use a machine screw with a shallow head, a washer between the head and the underside of the fender, washers on either side of aluminum sleeve above the fender and thread the screw into the mount on the underside of the stay bridge (not yet sure whether it's threaded or just a pass through. If the former I will put a lock nut on top, same as with the chainstay bridge). Again, thanks for all your good advice. When I finish I will post a new pic. (BA, I'm not sure how to successfully give you a "mention" with the space in your moniker.)
When drilling the guard I think with the gap(with current tyres) you should be OK with any old M5
By the way I think I understand the mention thing(when someone likes something you have said, they mention it?)
Also @revcp what is a "monkier" ?
Last edited by Bicycle Addict; 06-14-14 at 05:51 PM.
06-13-14, 04:41 AM
#3133
Senior Member
Join Date: Oct 2012
Location: Twin Cities, Minnesota, USA
Posts: 1,257
Bikes: 2017 Salsa Carbon Mukluk frame built with XT, 2018 Kona Rove NRB build with Sram Apex 1,2008 Salsa El Mariachi, 1986 Centurion Ironman
Mentioned: 11 Post(s)
Tagged: 0 Thread(s)
Quoted: 286 Post(s)
Liked 100 Times
in
65 Posts
revcp Thanks for the mention, going back to your comment about alu spacers to bridge gaps. . . I pull everything apart before binning it, the sleeves that are with the jockey wheels on rear derailleurs make great spacers, they do need some paint first as they are steel, but with no cost or hassle attached a little extra time is no big deal.
When drilling the guard I think with the gap(with current tyres) you should be OK with any old M5
By the way I think I understand the mention thing(when someone likes something you have said, they mention it?)
Also @revcp what is a "monkier" ?
When drilling the guard I think with the gap(with current tyres) you should be OK with any old M5
By the way I think I understand the mention thing(when someone likes something you have said, they mention it?)
Also @revcp what is a "monkier" ?
__________________
Don't complain about the weather and cower in fear. It's all good weather. Just different.
Don't complain about the weather and cower in fear. It's all good weather. Just different.
06-13-14, 05:15 AM
#3134
Full Member
Join Date: Sep 2005
Location: Malden, MA.
Posts: 403
Bikes: 2009 Masi, 2014 Specialized Crossroads 1975 Schwinn Unicycle
Mentioned: 0 Post(s)
Tagged: 0 Thread(s)
Quoted: 12 Post(s)
Likes: 0
Liked 2 Times
in
2 Posts
Hi Raleigh Comp, I'd make a spacer between the brake bridge & fender. I'd use brass or steel. I'd make a wooden piece first, and try getting the spacer's thickness, and try getting an eye pleasing fender line. My Home Depot's has enough Metric fasteners, to give me ideas. Cheers, ChrisL
06-13-14, 01:56 PM
#3135
Senior Member
Bicycle Addict - functionally, I'm sure zip ties are more than sufficient, but they are not very pretty! And I dont think anyone suggested drilling the frame either...
TireLever-07 - I didn't have the fender mounting issue.
And I dont think anyone suggested drilling the frame either...TireLever-07 - I didn't have the fender mounting issue.
__________________
https://sundaybikeride.wordpress.com/
https://sundaybikeride.wordpress.com/
06-13-14, 05:41 PM
#3136
Senior Member
Join Date: Oct 2004
Location: Toronto, Ontario
Posts: 1,744
Bikes: Miele Azsora, Kuwahara Cascade
Mentioned: 1 Post(s)
Tagged: 0 Thread(s)
Quoted: 5 Post(s)
Likes: 0
Liked 2 Times
in
2 Posts
^ Depends where you're putting them, really. Zip ties at the seat stay bridge would be ugly, but at the chainstay bridge, they're pretty much invisible. Half the fenders I've installed included zip ties here because it's a five second fix with zero aesthetic or functional disadvantage instead of pondering engineering solutions for every possible weird business I've seen down there.
06-13-14, 10:32 PM
#3137
Senior Member
Join Date: Sep 2012
Location: NEW ZEALAND
Posts: 778
Bikes: Marin Bolinas ridge, Carlton Corsa 5, Falcon Olympic 12, 98 Shesh Rockhopper,
Mentioned: 3 Post(s)
Tagged: 0 Thread(s)
Quoted: 88 Post(s)
Liked 0 Times
in
0 Posts
Bicycle Addict - functionally, I'm sure zip ties are more than sufficient, but they are not very pretty! And I dont think anyone suggested drilling the frame either...
TireLever-07 - I didn't have the fender mounting issue.
And I dont think anyone suggested drilling the frame either...TireLever-07 - I didn't have the fender mounting issue.
In some cases you need to then let all of the air out of the tyre everytime you remove/install etc, for this reason we do not put spacers in because we are mostly setting these up on touring bikes and need to think of a tourist trying to repair a flat in the middle of nowhere
For example it is easier to pump a tyre with a hand pump off the bike(60-100 psi), rather than trying to hold a fully loaded tourer in the air and pump(with a hand pump needing 2 hands) until the tyre is holding 30-40psi so it can then sit on the ground and support the weight of the bike to continuing pumping to the recommended pressure.
Cable ties provide a very quick and extremely effective solution on the road, they are quieter too.
I do not know anyone that is building or has built a commuter bike that has done things so they look "pretty" We run guards to stop road muck and water flying up at us, not for beauty.
Bikes in most cases look very good indeed with guards attached, that is a bonus though with something purchased and installed for one function only.
I personally think that most of the bolt systems look out of place and in most (not all) cases look clunky/bulky, Planet bikes front fender installation is done with a cable tie with various holes drilled to ensure a nice line up on a variety of different bikes.
Last edited by Bicycle Addict; 06-14-14 at 05:43 PM.
06-13-14, 10:36 PM
#3138
Senior Member
^ Depends where you're putting them, really. Zip ties at the seat stay bridge would be ugly, but at the chainstay bridge, they're pretty much invisible. Half the fenders I've installed included zip ties here because it's a five second fix with zero aesthetic or functional disadvantage instead of pondering engineering solutions for every possible weird business I've seen down there.
")
Bicycle addict- Ok
__________________
https://sundaybikeride.wordpress.com/
https://sundaybikeride.wordpress.com/
Last edited by RALEIGH_COMP; 06-13-14 at 10:46 PM.
06-14-14, 11:13 AM
#3139
Senior Member
Join Date: Oct 2004
Location: Toronto, Ontario
Posts: 1,744
Bikes: Miele Azsora, Kuwahara Cascade
Mentioned: 1 Post(s)
Tagged: 0 Thread(s)
Quoted: 5 Post(s)
Likes: 0
Liked 2 Times
in
2 Posts
Or you can put two zip ties that you already have down there, five seconds and it's done. Zero aesthetic disadvantage, zero practical disadvantage, quicker, and no chance of rattling or bolts working themselves loose.
You are of course welcome to use whatever solution you like, I'm just saying that zip ties at the chainstay bridge are basically invisible and that I find them to be 100% more practical than bothering with bolts and nuts and spacers and odd bridges.
06-14-14, 09:09 PM
#3140
Senior Member

Join Date: Jan 2009
Location: SoCal
Posts: 834
Mentioned: 0 Post(s)
Tagged: 0 Thread(s)
Quoted: 6 Post(s)
Likes: 0
Liked 10 Times
in
10 Posts
I love seeing late 80's Mongoose bikes!
It's a simple thing really and you need not be astonished... in 1986 John Tomac was and already racing for Mongoose BMX Factory Team as he was the 1984 Cruiser Class National Champion, that year he turned professional as a mountain biker and left BMX behind. He then lent his winning racing experience to the designers at Mongoose and the 1987 bikes benefitted from his input. The 1987 race season opened with John racing on his signature model and mountain bike racing was forever changed! All the 1987 Mongoose trail bikes benefitted from John's input, the slack cruiser angles became steeper as did the straight gauge tubing give way to triple butting. I own a Johnny T. signature 'Goose and it's hands down the best rigid 80's bike that I've ever owned (aside from my '89 Yeti FRO, god bless FTW), that's saying something as I own 80's Panasonic MC 7500's, Cimarrons, and Stumpjumpers! Nothing rides and responds as well the Johnny T. signature 'Goose! There's a reason why John Tomac was champ, it didn't matter if he was riding a Mongoose, a Raleigh, a Yeti, or a Giant... he was World Champion riding on each maker.
Yeah, so what, Farmer John has been my hero since my BMX racing day in SoCal in the late 70's, he still inspires!!!
-D-
p.s. You can easily cold set that 126mm to 130mm and stick an 8 speed cluster in there.
Last edited by neo_pop_71; 06-14-14 at 09:18 PM.
06-15-14, 02:22 PM
#3141
Senior Member

Join Date: Jan 2011
Location: Utah
Posts: 781
Mentioned: 9 Post(s)
Tagged: 0 Thread(s)
Quoted: 27 Post(s)
Likes: 0
Liked 7 Times
in
4 Posts
That Mongoose is sweet.
Those tires reminded me that I took a couple new pictures. I got these cool tanwall Velociraptors along with a wheelset I picked up. They're too aggressive for most of the riding I do, but I had to put them on for a bit, just because they look cool. Day & night:
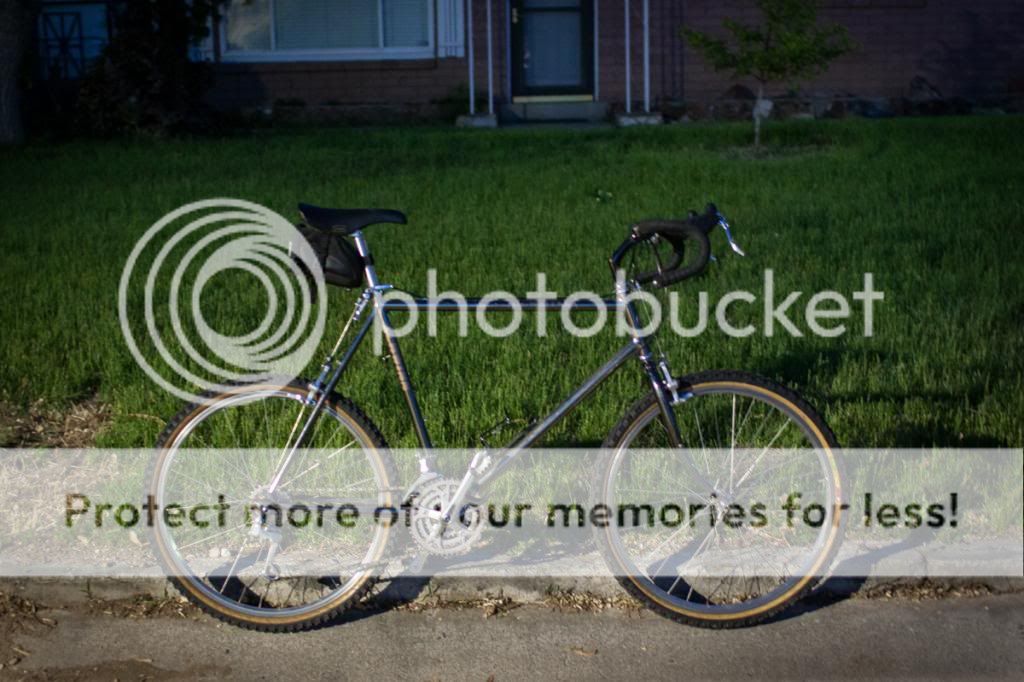
Those tires reminded me that I took a couple new pictures. I got these cool tanwall Velociraptors along with a wheelset I picked up. They're too aggressive for most of the riding I do, but I had to put them on for a bit, just because they look cool. Day & night:

 06-15-14, 03:38 PM
#3142
Senior Member
Join Date: Jan 2009
Location: SoCal
Posts: 834
Mentioned: 0 Post(s)
Tagged: 0 Thread(s)
Quoted: 6 Post(s)
Likes: 0
Liked 10 Times
in
10 Posts
That Mongoose is sweet.
Those tires reminded me that I took a couple new pictures. I got these cool tanwall Velociraptors along with a wheelset I picked up. They're too aggressive for most of the riding I do, but I had to put them on for a bit, just because they look cool. Day & night:
Those tires reminded me that I took a couple new pictures. I got these cool tanwall Velociraptors along with a wheelset I picked up. They're too aggressive for most of the riding I do, but I had to put them on for a bit, just because they look cool. Day & night:
I'm glad you and your Schwinn are back in the thread again... your High Sierra is by far my favorite! I love the roller cam brakes, especially having the rear on the seat stays as opposed to the more common chain stays, and the slick look of black chrome with silver and black accents really put your High Sierra over the top! I'm always pleased to see it back up for "share" time!
I'm in the process of redoing my '88 Schwinn Cimarron, I'm simplifying the drivetrain (dumping the STI brifters for bar ends) and unifying the look with cream/gray with silver and black accents. So far so good, I hope to have it done this week after the gray Fat Frank tires arrive. Seeing yours has rejuvenated me to finish up my bike so I can go enjoy it!
Thanks again for sharing and inspiring!
Cheers,
-D-
p.s. Happy Father's Day to any Bike Forum dads!
06-15-14, 08:01 PM
#3143
Senior Member
Join Date: Jan 2011
Location: Utah
Posts: 781
Mentioned: 9 Post(s)
Tagged: 0 Thread(s)
Quoted: 27 Post(s)
Likes: 0
Liked 7 Times
in
4 Posts
Wow, thanks neo_pop! I have a few things I am thinking about tweaking - I think a black seatpost and black outer chainring would look pretty sweet... set off the silver of those brakes a little more. Not high on my priority list, though. It's great fun to ride. I appreciate your kind words - it means a lot coming from someone with so many amazing vintage ATBs.
06-15-14, 09:00 PM
#3144

Thrifty Bill
Thread Starter

Join Date: Jan 2008
Location: Mountains of Western NC
Posts: 23,524
Bikes: 86 Katakura Silk, 87 Prologue X2, 88 Cimarron LE, 1975 Sekai 4000 Professional, 73 Paramount, plus more
Mentioned: 96 Post(s)
Tagged: 0 Thread(s)
Quoted: 1236 Post(s)
Liked 964 Times
in
628 Posts
Ink and Silver, looks great and I love the roller cam brakes!
06-17-14, 06:36 AM
#3146
Full Member
I'm in the process of redoing my '88 Schwinn Cimarron, I'm simplifying the drivetrain (dumping the STI brifters for bar ends) and unifying the look with cream/gray with silver and black accents. So far so good, I hope to have it done this week after the gray Fat Frank tires arrive. Seeing yours has rejuvenated me to finish up my bike so I can go enjoy it!
06-17-14, 10:16 AM
#3147
Full Member
Top tube is just too long
Hi everyone,
I know that 2006 is probably not yet C&V but I don't know where else to turn for good advice. The top tube on my KHS Solo One is just too long. What would you do?
Can you recommend a 31.8mm bar (not a drop bar, obviously) that has some "retreat" on it? If no such thing exists I'll just go back to a riser bar.
PS I'm not aware of a stem setup that gives me significantly shorter reach than this 120mm 45� one. (E.g. 80mm stem no improvement).
Last edited by belacqua; 06-17-14 at 10:36 AM.
06-17-14, 11:01 AM
#3148
Spin Forest! Spin!
Join Date: Sep 2007
Location: Arrid Zone-a
Posts: 5,956
Bikes: I used to have many. And I Will again.
Mentioned: 2 Post(s)
Tagged: 0 Thread(s)
Quoted: 7 Post(s)
Likes: 0
Liked 11 Times
in
10 Posts
The 120mm extension is really misleading as the degree of offset is factored in.
Find out what the true extension is by drawing intersecting lines up from the steerer and horizontally back from the bar clamp.
You seem to be constrained by the lack of steerer tube. Your bar is quite shallow as is. A stem with more than 45 degree offset is needed, but don't know if such exists.
A 0-offset seat post will gain you an inch, allowing the saddle to go more forward.
The pedaling geometry will change some though.
06-17-14, 11:38 AM
#3149
Senior Member
Join Date: Oct 2004
Location: Toronto, Ontario
Posts: 1,744
Bikes: Miele Azsora, Kuwahara Cascade
Mentioned: 1 Post(s)
Tagged: 0 Thread(s)
Quoted: 5 Post(s)
Likes: 0
Liked 2 Times
in
2 Posts
^The way it's set up, I'm tempted to say you should just find a different frame for a drop bar conversion. Any more tweaks will be incremental at best, and could compromise the geometry/handling of the bike.