


First attempt at re-covering a Wrights saddle


 01-28-14, 08:29 AM
#27
Still learning

I realize we are discussing old school technique here, but in making the mold or last, wouldn't this be a perfect application for 3D printing? I know little about the tech, but I would think you could get the print to shrink enough to account for the leather thickness?
01-28-14, 08:33 AM
#28
a77impala
Flaring the nose rivets is difficult, that's why I use steel rivets. Steel rivets have hollow shafts, copper are solid. I use a punch that has been ground to fit the rivet, it is still a pain. The rivet head is resting on my anvil, be careful the rivet head is flat or you can mar the leather.
You almost need three hands!
You almost need three hands!
Last edited by a77impala; 01-28-14 at 09:57 AM.
01-28-14, 08:56 AM
#29
Senior Member
Thread Starter
Join Date: Jul 2008
Location: Columbus OH
Posts: 356
Bikes: '73 Flandria 3 speed, '84 Lotus Legend Compe, '87 Merckx Corsa Extra, '94 Kona Kilauea
Mentioned: 1 Post(s)
Tagged: 0 Thread(s)
Quoted: 5 Post(s)
Likes: 0
Liked 0 Times
in
0 Posts
It's something I think about often since I work in this everyday- it's often faster to do it the old fashioned way, and very few people have those skills anymore.
edit: I take that back, I could probably model it in 30 minutes, it took an hour to make by hand. But I most likely would not have modeled it right the first time and would have to reprint it. Those compound curves are difficult to measure so you have to eyeball it. Lots of wasted plastic.
Last edited by lotekmod; 01-28-14 at 09:03 AM.
01-28-14, 08:59 AM
#30

multimodal commuter

Join Date: Nov 2006
Location: NJ, NYC, LI
Posts: 19,808
Bikes: 1940s Fothergill, 1959 Allegro Special, 1963? Claud Butler Olympic Sprint, Lambert 'Clubman', 1974 Fuji "the Ace", 1976 Holdsworth 650b conversion rando bike, 1983 Trek 720 tourer, 1984 Counterpoint Opus II, 1993 Basso Gap, 2010 Downtube 8h, and...
Mentioned: 584 Post(s)
Tagged: 0 Thread(s)
Quoted: 1908 Post(s)
Liked 574 Times
in
339 Posts
I use leather that's even thicker than Impala's. I've measured some of mine at 6 or 7 mm. It's not easy to work with it, and even so, sometimes they get too soft. Not good!
Now, about those nose rivets....

I got a cutoff piece of steel I-beam from a fabricator in Trenton NJ. I gave him $5 for it which I think was about $4 more than he was expecting. It's about the size of a sixpack of beer, if you want a visual. If I poke a solid copper rivet all the way through the holes in both the leather and the side of the nose piece, so a good 2 or 3 mm of it is sticking out on the inside of the nose piece, there is still room inside the nose piece for the anvil. It helps to round off the corner of the anvil with a file or grinder. Anyway, with the anvil inside the nose piece, you can smack the head of the rivet with the hammer a few times and mushroom the other end of the rivet against the anvil. It's a bit tricky, but it works.
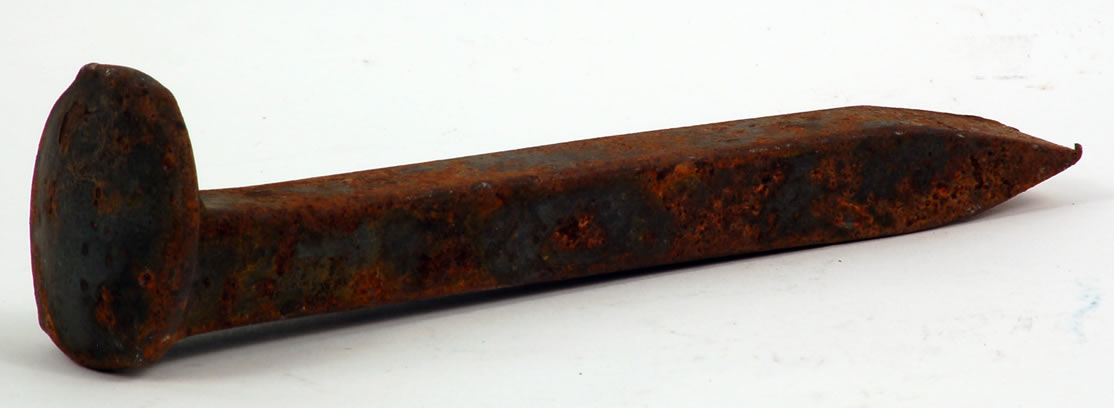
Another way to do it is to use a railroad spike as a punch. You put the nose of the saddle down on the anvil, with the head of the rivet resting on the anvil, and the head of the spike resting on the other end of the rivet, and smack the point of the spike with the hammer.
Finally, when you're all done, you have to do something to harden the leather. Impala? Amir? Want to tell us what you've done? Lately I've been using beeswax, but I'm not convinced it's enough.
Oh, yeah, about the 3D printing idea... I'm pretty sure it would work, and a plastic (nylon) mold would certainly be hard enough for this purpose. But it would be really expensive. I've had stamps (for the skirts of the saddle) 3-D printed for $5 or $8, depending on the thickness; they're about the size of a credit card. A solid piece the size of a saddle would be, i dunno, I'm guessing hundreds of dollars. More to the point, I don't believe a mold is really the way to go. Impala and I have both developed techniques that don't require a mold at all.
Now, about those nose rivets....
I got a cutoff piece of steel I-beam from a fabricator in Trenton NJ. I gave him $5 for it which I think was about $4 more than he was expecting. It's about the size of a sixpack of beer, if you want a visual. If I poke a solid copper rivet all the way through the holes in both the leather and the side of the nose piece, so a good 2 or 3 mm of it is sticking out on the inside of the nose piece, there is still room inside the nose piece for the anvil. It helps to round off the corner of the anvil with a file or grinder. Anyway, with the anvil inside the nose piece, you can smack the head of the rivet with the hammer a few times and mushroom the other end of the rivet against the anvil. It's a bit tricky, but it works.
Another way to do it is to use a railroad spike as a punch. You put the nose of the saddle down on the anvil, with the head of the rivet resting on the anvil, and the head of the spike resting on the other end of the rivet, and smack the point of the spike with the hammer.
Finally, when you're all done, you have to do something to harden the leather. Impala? Amir? Want to tell us what you've done? Lately I've been using beeswax, but I'm not convinced it's enough.
Oh, yeah, about the 3D printing idea... I'm pretty sure it would work, and a plastic (nylon) mold would certainly be hard enough for this purpose. But it would be really expensive. I've had stamps (for the skirts of the saddle) 3-D printed for $5 or $8, depending on the thickness; they're about the size of a credit card. A solid piece the size of a saddle would be, i dunno, I'm guessing hundreds of dollars. More to the point, I don't believe a mold is really the way to go. Impala and I have both developed techniques that don't require a mold at all.
__________________
www.rhmsaddles.com.
www.rhmsaddles.com.
Last edited by rhm; 01-28-14 at 09:04 AM.
01-28-14, 09:06 AM
#31
a77impala
rhm, a railroad spike, priceless, I have a junk Brooks as my next project, I will use that method. As far as getting the leather hard, I mount the leather wet and shape it on the frame, I let it air dry and it ends up as firm as a new saddle. I condition with Proofide that's all.
The leather I use is very stiff to begin with, maybe a special tanning process for saddle leather, I don't know.
The leather I use is very stiff to begin with, maybe a special tanning process for saddle leather, I don't know.
01-28-14, 09:07 AM
#32
Abuse Magnet

Join Date: Jun 2012
Location: Colorado
Posts: 1,869
Bikes: '91 Mtn Tek Vertical, '74 Raleigh Sports, '72 Raleigh Twenty, '84 Univega Gran Turismo, '09 Surly Karate Monkey, '92 Burley Rock-n-Roll, '86 Miyata 310, '76 Raleigh Shopper
Mentioned: 5 Post(s)
Tagged: 0 Thread(s)
Quoted: 151 Post(s)
Liked 174 Times
in
88 Posts
Check a well-stocked farm implement shop for copper rivets.
01-28-14, 10:19 AM
#33
AmiableNitrite Member

Join Date: Mar 2009
Location: From California, currently in Utah
Posts: 267
Bikes: '74 Alex Singer -'81 Mercian(sold) - '72 Motobecane GR(sold) - '73 Legnano(sold) - '6? Dawes Galaxy(sold) - '87 Masi GC(sold)
Mentioned: 1 Post(s)
Tagged: 0 Thread(s)
Quoted: 5 Post(s)
Liked 4 Times
in
3 Posts
I should like to bring up a few points and reiterate what several experienced folks have said here.
As a disclaimer, I use to do leather tooling back in the '70s and may not remember things correctly.
*My old '70s Brooks Pro and my newer Pro both measure out at 4 to 5mm thick and have solid rivets.
*Leather has a grain and direction.
*Leather, in the size for a saddle, can be soft and then very hard and dense in other areas.
*After you wet or soak leather, you must let the leather sit and absorb the water. This can take a while depending on the density. Try this on a scrape, you will be surprised to see that upon slicing open, the center will still be dry.
*After wetting the leather, we would cover the face with plastic wrap or glass to let it absorb evenly and not evaporate.
There are two very good youtube videos about Brooks saddles that have a lot of information. You should watch these over and over, as they provide a great amount of information in a short time span.
* Of note: notice when the leather is being punched-out, that it is all in the same direction and not higgley-piggely. That is because leather has different directions of stretching.
There are many youtube videos on riveting leather.
And a video of riveting:
01-28-14, 11:26 AM
#34
Senior Member
Thread Starter
Join Date: Jul 2008
Location: Columbus OH
Posts: 356
Bikes: '73 Flandria 3 speed, '84 Lotus Legend Compe, '87 Merckx Corsa Extra, '94 Kona Kilauea
Mentioned: 1 Post(s)
Tagged: 0 Thread(s)
Quoted: 5 Post(s)
Likes: 0
Liked 0 Times
in
0 Posts
Thanks for all the great tips everyone. My Olde Timey hardware store where I hope to get the rivets also keeps Olde Timey hours- they close at 5:30 and I can't get there until 6pm. This project is stalled until the weekend. Lots of time to watch videos on riveting.
RHM- I like your saddle making tools. I can picture them hanging on a pegboard above your bench .
.
RHM- I like your saddle making tools. I can picture them hanging on a pegboard above your bench
.
01-28-14, 12:18 PM
#35
Senior Member
Join Date: Jun 2006
Posts: 20,305
Mentioned: 130 Post(s)
Tagged: 0 Thread(s)
Quoted: 3464 Post(s)
Liked 2,828 Times
in
1,995 Posts
Yes, but if it took an hour to fashion one by hand from a 2x6 the CAD time alone would surpass that, then you still have to have it printed out. A saddle is not a small part, equals a decent amount of printer time, time is money, and not accounting for materials.
01-28-14, 12:54 PM
#36
Senior Member

Join Date: Apr 2005
Location: Wherever
Posts: 16,748
Mentioned: 92 Post(s)
Tagged: 0 Thread(s)
Quoted: 556 Post(s)
Likes: 0
Liked 132 Times
in
78 Posts
*After you wet or soak leather, you must let the leather sit and absorb the water. This can take a while depending on the density. Try this on a scrape, you will be surprised to see that upon slicing open, the center will still be dry.
*After wetting the leather, we would cover the face with plastic wrap or glass to let it absorb evenly and not evaporate.
*After wetting the leather, we would cover the face with plastic wrap or glass to let it absorb evenly and not evaporate.
FWIW, I dislike the technique used rivet setting video. To me it only makes sense to use the proper anvil behind the post piece, to help prevent bending the post, and a concave anvil when setting a rivet with the head down. I bent a lot of rivets in the 70's because I didn't own the right tools. Which are inexpensive nowadays. Unless you buy them from that guy's web site. Yeesh. He's charging at least double what rivet setting tools can be had for.
01-28-14, 02:35 PM
#37
Senior Member
Another thread on recovering saddles, where I had hope to consolidate the information.
Why not drill the holes?
I sit the shaped dried leather on the saddle frame, mark and then drill holes
I use thicker leather 6.2mm to 7mm
No concerns at premature stretching
and how I set the rivets in the nosepiece
and if you don't want to use rivets
Philip
I sit the shaped dried leather on the saddle frame, mark and then drill holes
I use thicker leather 6.2mm to 7mm
No concerns at premature stretching
and how I set the rivets in the nosepiece
and if you don't want to use rivets
Philip
01-28-14, 02:56 PM
#38
Banned
Join Date: Aug 2013
Posts: 6,480
Mentioned: 93 Post(s)
Tagged: 0 Thread(s)
Quoted: 1361 Post(s)
Likes: 0
Liked 423 Times
in
282 Posts
Great thread and nice work by those of you. Although I'll probably never attempt replacing a leather saddle, its interesting to see the process and different ways.
Not much to share here but thought about the rivets. Have an old brake shoe rivet machine in the shop, like the image depicted. One depresses a pedal to close, leaving the hands free to position the brake shoe backing and liner. Various rivets are available and the machine probably could fit the type used in bike saddles.

Not much to share here but thought about the rivets. Have an old brake shoe rivet machine in the shop, like the image depicted. One depresses a pedal to close, leaving the hands free to position the brake shoe backing and liner. Various rivets are available and the machine probably could fit the type used in bike saddles.
01-28-14, 03:07 PM
#39
a77impala
I guess if you are letting the leather dry before mounting and drill from the bottom you could drill. I rivet the leather on wet and form it on the frame, hard to drill wet leather. Leather then dries and shrinks on the frame.
01-28-14, 03:43 PM
#40
Senior Member

you guys are the pros - doing excellent work. From the sidelines, would a standard rivet setter for an air hammer be of use?

01-28-14, 03:48 PM
#41
Senior Member
Join Date: Apr 2005
Location: Wherever
Posts: 16,748
Mentioned: 92 Post(s)
Tagged: 0 Thread(s)
Quoted: 556 Post(s)
Likes: 0
Liked 132 Times
in
78 Posts
Not much to share here but thought about the rivets. Have an old brake shoe rivet machine in the shop, like the image depicted. One depresses a pedal to close, leaving the hands free to position the brake shoe backing and liner. Various rivets are available and the machine probably could fit the type used in bike saddles.
Interesting approach, Impala. Do you notice any distortion of your shape as the leather dries? Or does it just sort of snug up.
BTW, speaking of drying leather, I got an interesting surprise when doing my brake hoods, when I thought, after drying for two or 3 days they must be bone dry…something that small. Au contraire! I noticed that all of the sets of prototypes I did became useless, after they continued to shrink for up to a week. Ended up too short. And I had cut them long to accommodate for shrinkage. I thought.
The lesson, FWIW? If it were me I wouldn't sit on those new saddle tops too soon. Might take a week to thoroughly dry. Again, FWIW.
01-28-14, 04:21 PM
#42
Banned
Join Date: Aug 2013
Posts: 6,480
Mentioned: 93 Post(s)
Tagged: 0 Thread(s)
Quoted: 1361 Post(s)
Likes: 0
Liked 423 Times
in
282 Posts
We used the brake riveter for re-shoeing old tractor brake linings. Then it became cheaper to buy new replacement brakes complete with the metal backing and bonded lining. Probably the large truck class still use re-rivet linings but the factories that do them use modern pneumatic machines.
Someday I'll have to un-bury it and see how a leather saddle would maneuver. Leverage is easy and applies quite an amount of pressure. Rivets are consistent, perfect and fast technique. Foot pressure by feel is all that controls the amount and its not like a 'hammer or punch machine'.
Someday I'll have to un-bury it and see how a leather saddle would maneuver. Leverage is easy and applies quite an amount of pressure. Rivets are consistent, perfect and fast technique. Foot pressure by feel is all that controls the amount and its not like a 'hammer or punch machine'.
Last edited by crank_addict; 01-28-14 at 04:28 PM.
01-28-14, 05:07 PM
#43
a77impala
[QUOTE
Interesting approach, Impala. Do you notice any distortion of your shape as the leather dries? Or does it just sort of snug up.
The leather just snugs up, I think would be a better fit than mounting after drying. Although I have never used that method.
Interesting approach, Impala. Do you notice any distortion of your shape as the leather dries? Or does it just sort of snug up.
The leather just snugs up, I think would be a better fit than mounting after drying. Although I have never used that method.
01-28-14, 05:59 PM
#44
Senior Member

Join Date: Sep 2011
Location: Baltimore MD
Posts: 3,332
Bikes: '72 Motobecane Grand Record, '72 Gitane tandem, '72 Raleigh Super Course, '73 Raleigh Gran Sport, '73 Colnago Super, '76 Fiorelli Coppi, '78 Raleigh SBDU Team Pro, '78 Trek 930, '81 Holdsworth Special 650B, '86 Masi GC, ’94 Bridgestone RB-T
Mentioned: 67 Post(s)
Tagged: 0 Thread(s)
Quoted: 786 Post(s)
Liked 518 Times
in
281 Posts
BTW, speaking of drying leather, I got an interesting surprise when doing my brake hoods, when I thought, after drying for two or 3 days they must be bone dry…something that small. Au contraire! I noticed that all of the sets of prototypes I did became useless, after they continued to shrink for up to a week. Ended up too short. And I had cut them long to accommodate for shrinkage. I thought.
The lesson, FWIW? If it were me I wouldn't sit on those new saddle tops too soon. Might take a week to thoroughly dry. Again, FWIW.
The lesson, FWIW? If it were me I wouldn't sit on those new saddle tops too soon. Might take a week to thoroughly dry. Again, FWIW.
__________________
The man who dies with the most toys�is dead. - Rootboy
The man who dies with the most toys�is dead. - Rootboy
01-28-14, 08:10 PM
#45
Senior Member
Join Date: Apr 2005
Location: Wherever
Posts: 16,748
Mentioned: 92 Post(s)
Tagged: 0 Thread(s)
Quoted: 556 Post(s)
Likes: 0
Liked 132 Times
in
78 Posts
Yeah. Granted, I have to really saturate my leather hoods, much more so than a saddle blank. Yet I found damp leather takes a long time to dry to the core. Hence the ovens Brooks uses.
Edit: I learned a long time ago, as have many of us, that one shouldn't dry leather, mostly in reference to shoes and boots, close to a direct heat source. Better to let leather dry at room temperature, away from heat.
I suppose Brooks dries their saddles in ovens as a necessity due to production demands.
Last edited by rootboy; 01-29-14 at 07:40 AM.
01-29-14, 07:18 AM
#46
Senior Member
Thread Starter
Join Date: Jul 2008
Location: Columbus OH
Posts: 356
Bikes: '73 Flandria 3 speed, '84 Lotus Legend Compe, '87 Merckx Corsa Extra, '94 Kona Kilauea
Mentioned: 1 Post(s)
Tagged: 0 Thread(s)
Quoted: 5 Post(s)
Likes: 0
Liked 0 Times
in
0 Posts
I'll let everyone know how the dry fit method ends up. I don't really understand why leather shrinks when you wet it. Is this a one shot deal, as in it only shrinks the first time you wet it or could it shrink a little more with a second wetting? I can always use the tension screw (gasp!) to get it a little tighter. As for the shape, right now it fits perfectly on the frame. It is the exact shape of the old leather and I can still reshape it slightly after mounting it by wetting those areas.
01-29-14, 07:42 AM
#47
a77impala
Wet leather stretches, when it dries it will shrink a little. That's why you shouldn't let your saddle get soaked when riding, it will stretch but not shrink back to original size. I rode a 75 mile MS ride in the rain, after my saddle dried I had to retension it.
When I form a saddle it stretches to the shape I want but does not return to its original shape when drying. If I stretch it to much it will be ruined so I am very careful when shaping.
I once tried to dry a new saddle cover in the oven and it shrivelled up and was ruined, to hot, now I air dry only.
Also if your leather is to thin it will stretch just in normal riding and require constant tensioning, I learned that the hard way also.
Sorry I am going on and on, I hope your saddle turns out perfect!
01-29-14, 08:02 AM
#48
Senior Member
Thread Starter
Join Date: Jul 2008
Location: Columbus OH
Posts: 356
Bikes: '73 Flandria 3 speed, '84 Lotus Legend Compe, '87 Merckx Corsa Extra, '94 Kona Kilauea
Mentioned: 1 Post(s)
Tagged: 0 Thread(s)
Quoted: 5 Post(s)
Likes: 0
Liked 0 Times
in
0 Posts
I don't mind any and all information and advice. The phrase "Jack of all trades, master of none" is the story of my life. I know a little bit about an awful lot.
I'm aware that the thinner 3mm leather might stretch while riding, we'll see what happens. The 3mm leather was significantly cheaper than 5mm, and since I didn't know if I would get even this far in the process I still think it was worth the $15 for the experience. If it only lasts half a season then I'll do it again with thicker leather and maybe try your wet apply method.
I'm aware that the thinner 3mm leather might stretch while riding, we'll see what happens. The 3mm leather was significantly cheaper than 5mm, and since I didn't know if I would get even this far in the process I still think it was worth the $15 for the experience. If it only lasts half a season then I'll do it again with thicker leather and maybe try your wet apply method.
01-29-14, 08:14 AM
#49
New Orleans
Join Date: Jan 2006
Posts: 2,794
Mentioned: 1 Post(s)
Tagged: 0 Thread(s)
Quoted: 157 Post(s)
Likes: 0
Liked 3 Times
in
3 Posts
Cool stuff?
Are their adhesives now that would allow a no rivet saddle?
The rivets are CLOSE to the edges-but not at the edges-
What actually prevents those edges from lifting?
Granted the copper rivets-look waaaay cool
Original iron rivets-not as cool looking-must have been cheaper.
Are their adhesives now that would allow a no rivet saddle?
The rivets are CLOSE to the edges-but not at the edges-
What actually prevents those edges from lifting?
Granted the copper rivets-look waaaay cool
Original iron rivets-not as cool looking-must have been cheaper.
01-29-14, 09:24 AM
#50
a77impala
[QUOTE=phoebeisis;16449574]Cool stuff?
What actually prevents those edges from lifting?
The leather is 5mm thick, and pretty stiff.
The copper rivets are very hard to peen, steel easy, they are hollow. Price is irrelevant, steel $.20 each, copper $.50 at Ace.
What actually prevents those edges from lifting?
The leather is 5mm thick, and pretty stiff.
The copper rivets are very hard to peen, steel easy, they are hollow. Price is irrelevant, steel $.20 each, copper $.50 at Ace.