


Nashbar Touring Frame Build
 11-20-11, 12:11 PM
#1
Senior Member
Thread Starter

Join Date: Jun 2009
Location: North County San Diego
Posts: 1,664
Mentioned: 1 Post(s)
Tagged: 0 Thread(s)
Quoted: 0 Post(s)
Likes: 0
Liked 0 Times
in
0 Posts
Nashbar Touring Frame Build
This frame has been on my short list for a while because of the good reviews and the price. Over the years I slowly built up a pile of parts that I could either go through the headache of selling or the headache of attaching to a frame so I took the challenge of sticking them on a frame  .
.
I thought I would use this thread to post my progress and pictures for anybody interested. It's worth mentioning that I really don't know what I'm doing...aside from being able to adjust derailleur and basic tune-ups my skills and bike knowledge are pretty limited. I have a few common tools but that's about it.
Any advice is appreciated and please feel free to ask questions.
Anyway, on to the pictures:
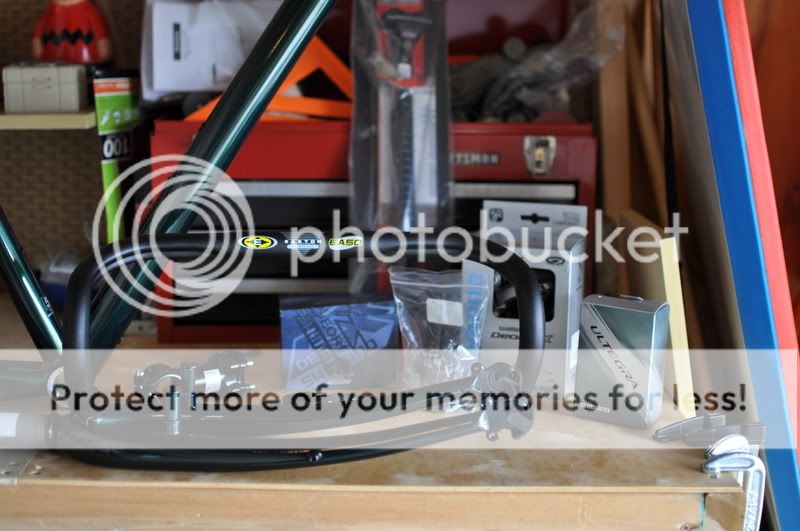
Some of the parts I'm using:
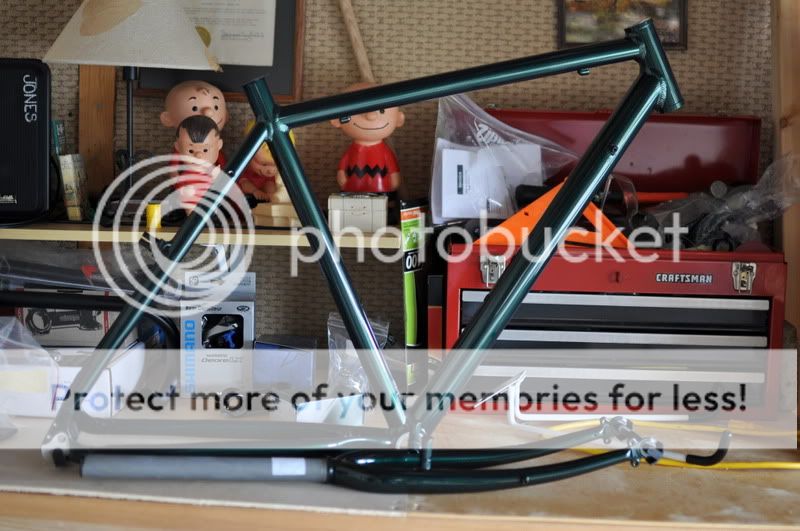
The frame & fork - bought through Nashbar for $89 and arrived earlier than anticipated so I went to work on it:
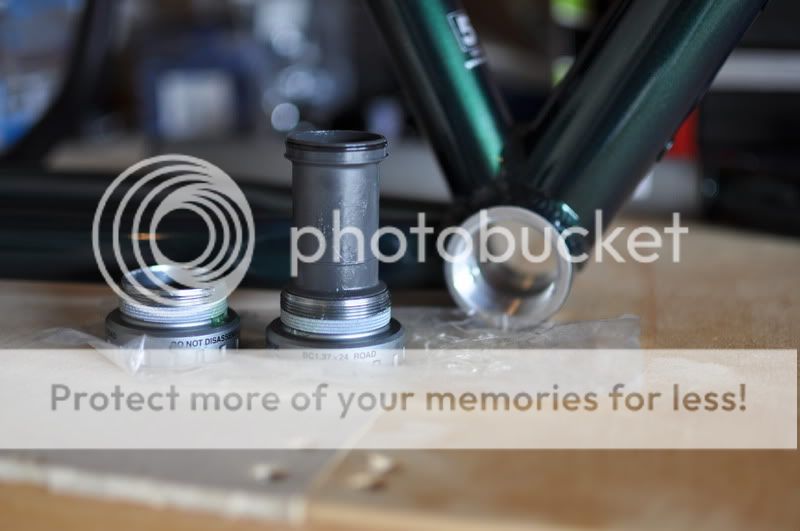
First component attached was the Ultegra bottom bracket:
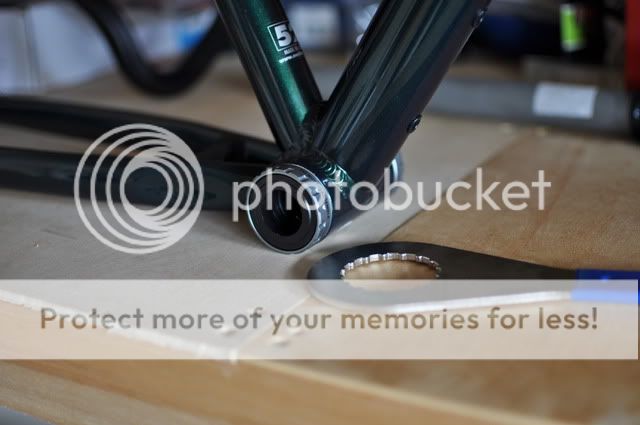
After some anti-seize grease, the bottom bracket was installed:
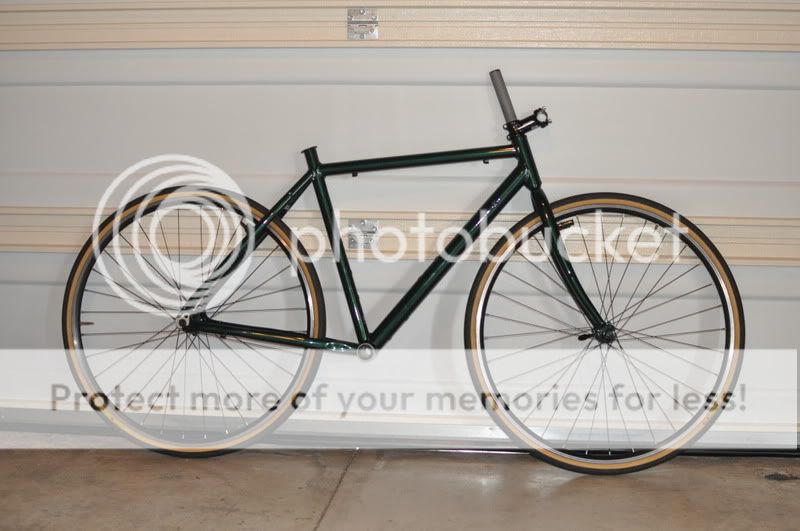
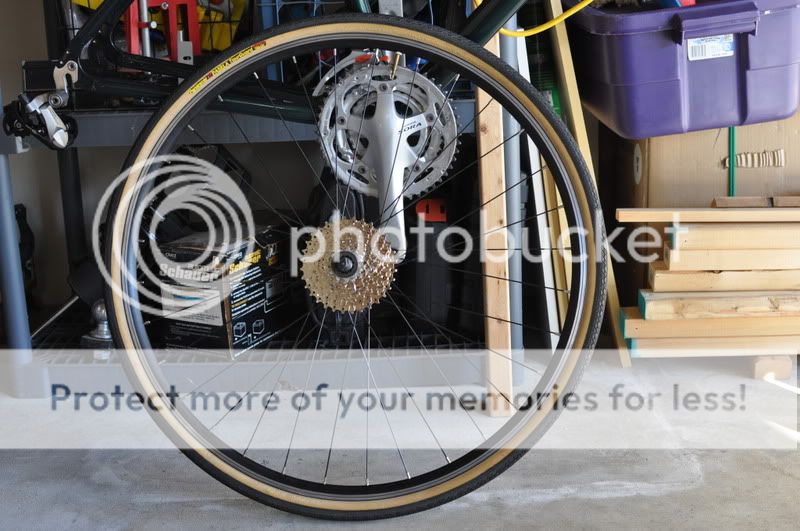
With a little curiosity, I loosely assembled some of the parts, just to see what it would look like. Wheels are Maddux DRX4000 and the tires are Panaracer Pasela 32mm:
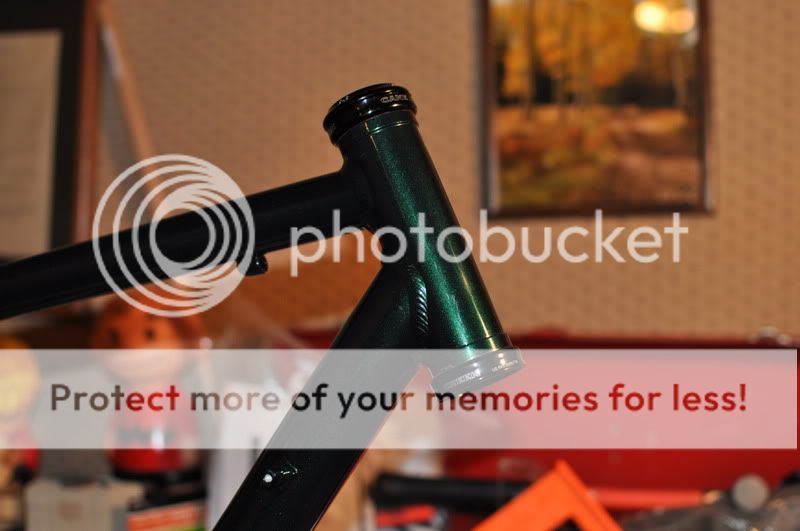
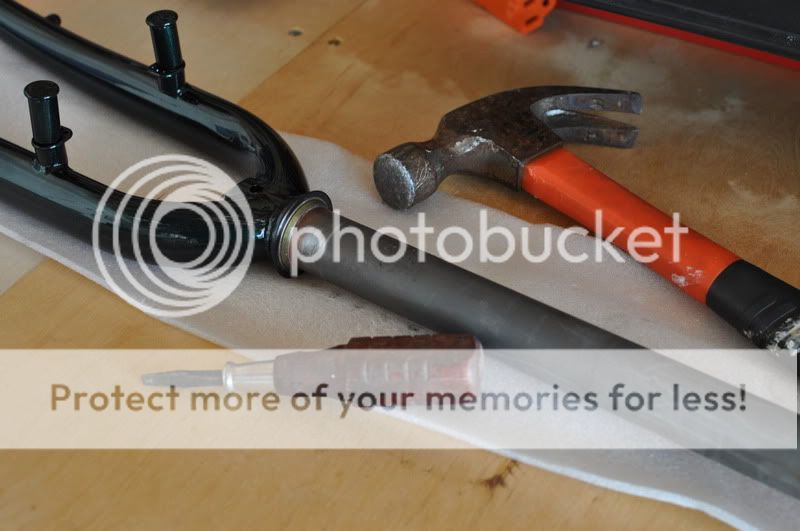
After staring at the partial bike against the garage door, it was time to figure out the headset (Cane Creek S-3).
**This is where my bike assembly knowledge tends to go downhill**
I present to you my home made headset press:
***Please note! You need much thicker washers or a lot more than what I used. Otherwise the washers will begin to cave in because of the pressure**
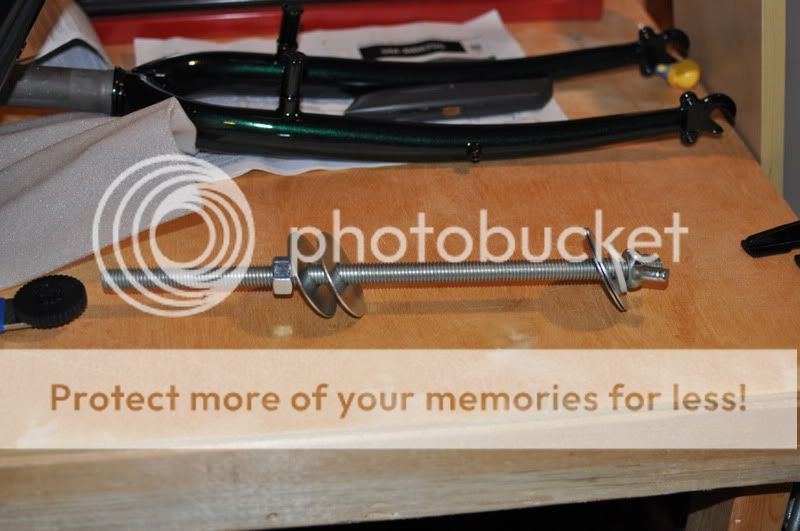
Here goes nothing:
.I thought I would use this thread to post my progress and pictures for anybody interested. It's worth mentioning that I really don't know what I'm doing...aside from being able to adjust derailleur and basic tune-ups my skills and bike knowledge are pretty limited. I have a few common tools but that's about it.
Any advice is appreciated and please feel free to ask questions.
Anyway, on to the pictures:
Some of the parts I'm using:
The frame & fork - bought through Nashbar for $89 and arrived earlier than anticipated so I went to work on it:
First component attached was the Ultegra bottom bracket:
After some anti-seize grease, the bottom bracket was installed:
With a little curiosity, I loosely assembled some of the parts, just to see what it would look like. Wheels are Maddux DRX4000 and the tires are Panaracer Pasela 32mm:
After staring at the partial bike against the garage door, it was time to figure out the headset (Cane Creek S-3).
**This is where my bike assembly knowledge tends to go downhill**
I present to you my home made headset press:
***Please note! You need much thicker washers or a lot more than what I used. Otherwise the washers will begin to cave in because of the pressure**
Here goes nothing:
Last edited by megalowmatt; 12-07-11 at 10:15 AM.
 11-20-11, 12:16 PM
#2
Senior Member
Thread Starter
Join Date: Jun 2009
Location: North County San Diego
Posts: 1,664
Mentioned: 1 Post(s)
Tagged: 0 Thread(s)
Quoted: 0 Post(s)
Likes: 0
Liked 0 Times
in
0 Posts
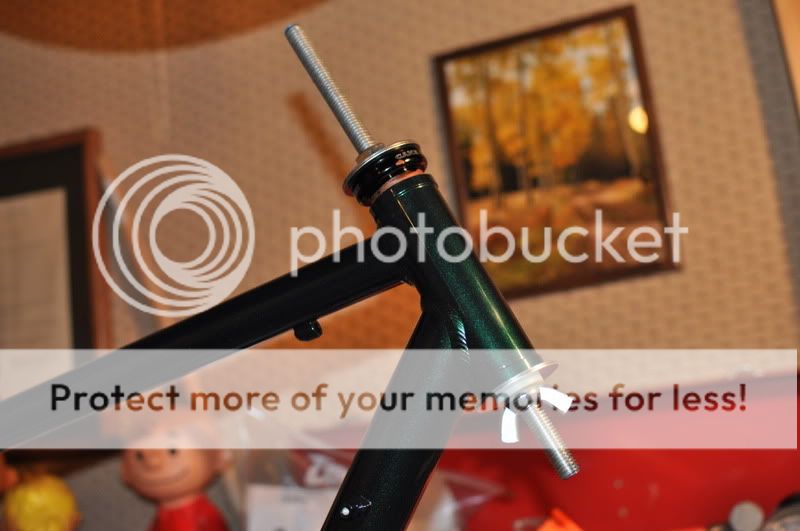
As it turned out, I needed a lot more pressure than I could get by just turning that wing nut with my bare fingers (note the nut now installed in place of the wing nut), so I took advantage of the leverage of a couple crescent wrenches.
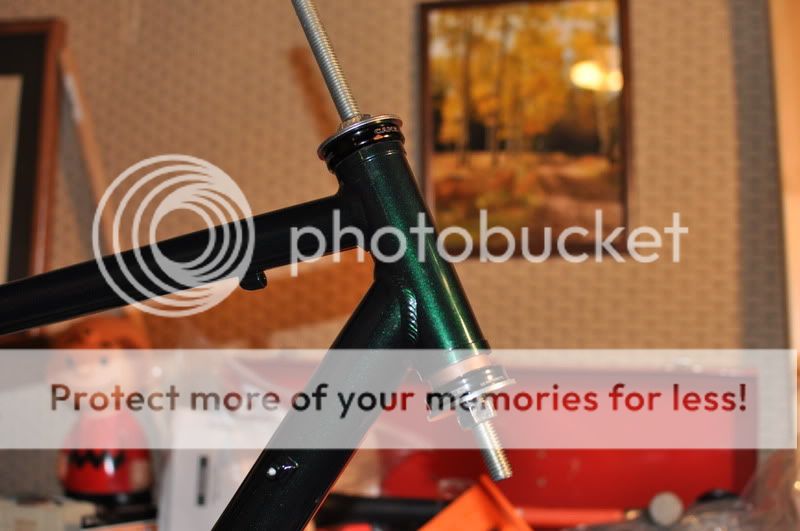
Success with the top! Now on to the bottom:
The bottom did not go as smoothly as the top...it started to go in at an angle, so I took a break. After some thought I re positioned my ghetto press, slowed down and it made it in:
It was now time for a sushi dinner
A tale of mistakes coming next...
Success with the top! Now on to the bottom:
The bottom did not go as smoothly as the top...it started to go in at an angle, so I took a break. After some thought I re positioned my ghetto press, slowed down and it made it in:
It was now time for a sushi dinner
A tale of mistakes coming next...
Last edited by megalowmatt; 11-20-11 at 01:36 PM.
11-20-11, 12:29 PM
#3
Senior Member
Join Date: Nov 2009
Posts: 7,075
Mentioned: 2 Post(s)
Tagged: 0 Thread(s)
Quoted: 2 Post(s)
Likes: 0
Liked 4 Times
in
4 Posts
the way those tires contrast the "british racing green" is very hot.
ive debating getting my wife that frame. this makes me think about it more...
ive debating getting my wife that frame. this makes me think about it more...
 11-20-11, 01:44 PM
#5
Senior Member
Join Date: Jul 2007
Location: Reno, NV
Posts: 400
Mentioned: 0 Post(s)
Tagged: 0 Thread(s)
Quoted: 0 Post(s)
Likes: 0
Liked 0 Times
in
0 Posts
Congratulations on picking up what must be the all time best deals in bike frames. I've built up two of these and have only one complaint - a less than durable paint that will scratch very easily.
By the way, I used a 2x4 and dead blow hammer to install my headsets without any problems. The key is to check the alignment of the peices at every step. Back off and start over if anything begins to go crooked.
By the way, I used a 2x4 and dead blow hammer to install my headsets without any problems. The key is to check the alignment of the peices at every step. Back off and start over if anything begins to go crooked.
11-20-11, 03:11 PM
#6
Senior Member
Thread Starter
Join Date: Jun 2009
Location: North County San Diego
Posts: 1,664
Mentioned: 1 Post(s)
Tagged: 0 Thread(s)
Quoted: 0 Post(s)
Likes: 0
Liked 0 Times
in
0 Posts
I agree about the paint - in the day or so I have had it I have noticed it scratches pretty easily.
The color is awesome! I'm a sucker for green frames.
As to impressions on the frame as a whole, it is really nice. I''ve read that the welds bother some people but I am fine with them. The fork is definitely on the heavy side.
Made a bit more progress so I'll be posting additional pictures tonight.
The color is awesome! I'm a sucker for green frames.
As to impressions on the frame as a whole, it is really nice. I''ve read that the welds bother some people but I am fine with them. The fork is definitely on the heavy side.
Made a bit more progress so I'll be posting additional pictures tonight.
11-20-11, 08:01 PM
#7
Senior Member
Join Date: Oct 2006
Location: Pittsburgh, PA
Posts: 111
Bikes: Jamis Aurora 2006
Mentioned: 0 Post(s)
Tagged: 0 Thread(s)
Quoted: 0 Post(s)
Likes: 0
Liked 0 Times
in
0 Posts
I'm in the middle of building up the same frame for a winter commuter. I got the frame used so the headset was already in place, only problem so far is that the water bottle mount limits how low I can install the FD. Here's a picture from before I installed the crankset (Race Face 53/39) and ran cables. 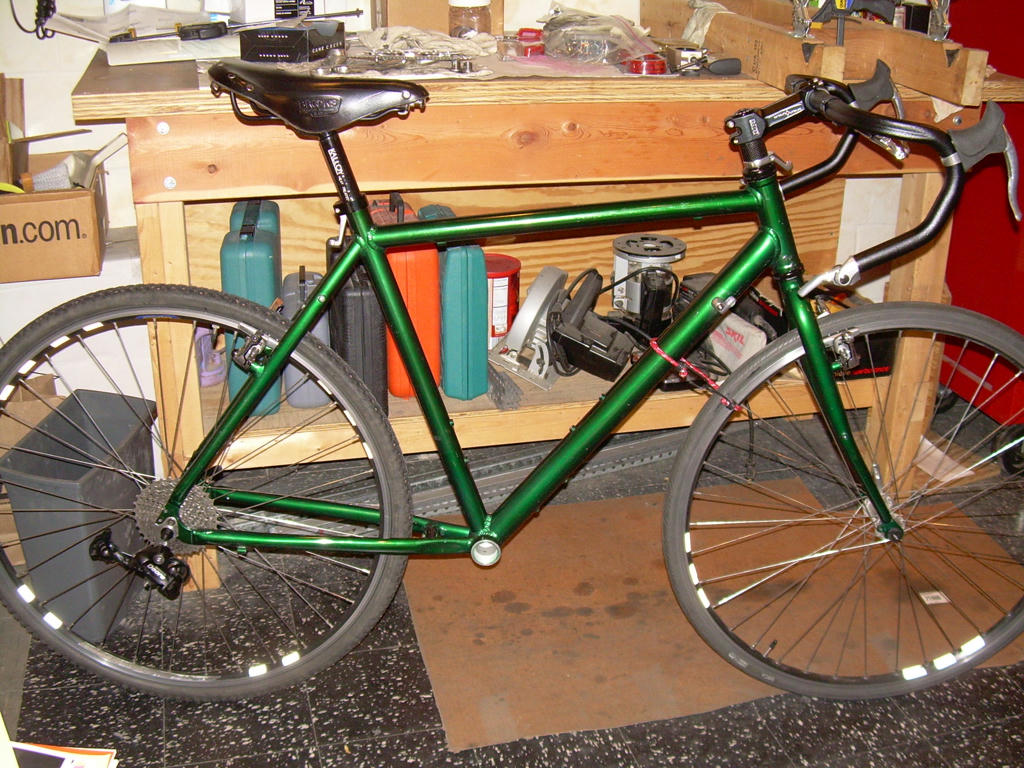 Just have to install fenders, rear rack, studded tires and handlebar tape and I'll be all done. Enjoy your build, it's a lot of fun.
Just have to install fenders, rear rack, studded tires and handlebar tape and I'll be all done. Enjoy your build, it's a lot of fun.
Last edited by ehsiung; 11-20-11 at 08:03 PM. Reason: fixed image link
11-20-11, 08:43 PM
#8
Senior Member
Thread Starter
Join Date: Jun 2009
Location: North County San Diego
Posts: 1,664
Mentioned: 1 Post(s)
Tagged: 0 Thread(s)
Quoted: 0 Post(s)
Likes: 0
Liked 0 Times
in
0 Posts
ehsiung- thanks for the picture. What are you using for bar-end shifters? Considering I will be using a 9-speed cassette, from what I can tell my only option is the Dura Ace ones. That will probably be my most expensive single item purchase for this build unless I can find them really cheap.
Yeah I was aware of the front derailleur issue and bought a shimano xt top swing model. It allows for the clamp to be mounted below the bottom seat tube braze-on. That explanation will be part of the next round of pictures.
Yeah I was aware of the front derailleur issue and bought a shimano xt top swing model. It allows for the clamp to be mounted below the bottom seat tube braze-on. That explanation will be part of the next round of pictures.
11-20-11, 10:53 PM
#9
Senior Member
Thread Starter
Join Date: Jun 2009
Location: North County San Diego
Posts: 1,664
Mentioned: 1 Post(s)
Tagged: 0 Thread(s)
Quoted: 0 Post(s)
Likes: 0
Liked 0 Times
in
0 Posts
Ok as promised on to the next part - the mistake.
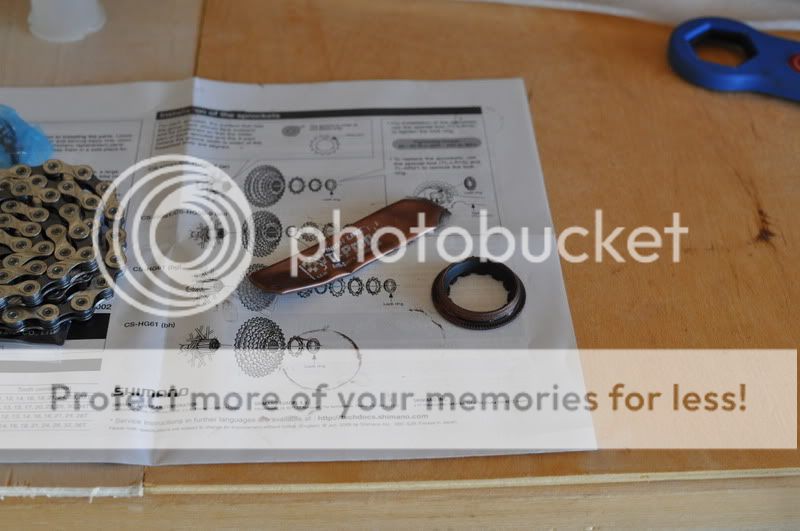
Well I was feeling pretty good after the sushi and my confidence was high after pressing that head set in, so I thought I would give the crown race a go. For those that don't know, the crown race is the bottom most part of the headset that gets pressed on to kind of a shoulder on the fork. I only say this because I had no idea how all this worked until I actually started doing it, so if my experience will help anybody else it could save some aggravation.
The crown race is that brass ring on the tube of the fork (it's supposed to be pressed all the way down to the shoulder):
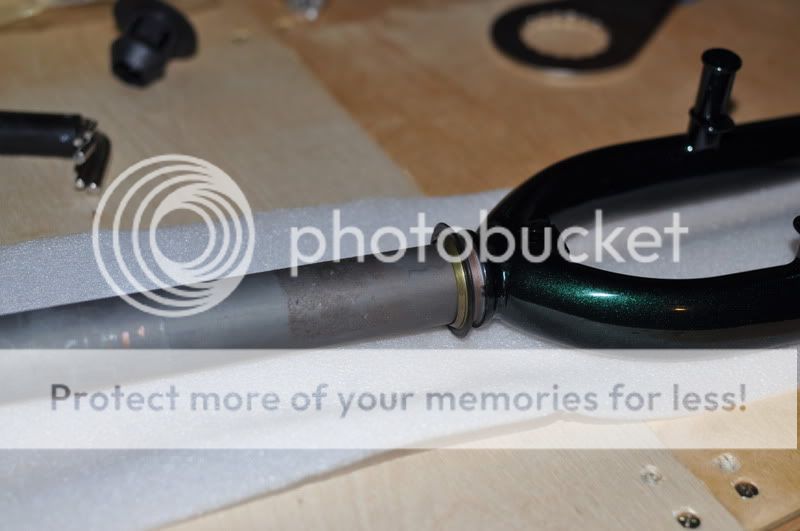
Anyway, to make a long story short, I'm pretty sure I tweaked the crown race trying to press it on to the shoulder. I'll save the specifics but I tried some internet suggestions to no avail. No doubt this is where experience and the right tools come in to play. Just to be safe, I ordered another crown race ($10) and I will take it to the shop to have somebody who knows what they are doing install this.
Moving on...so far so good on the other components-
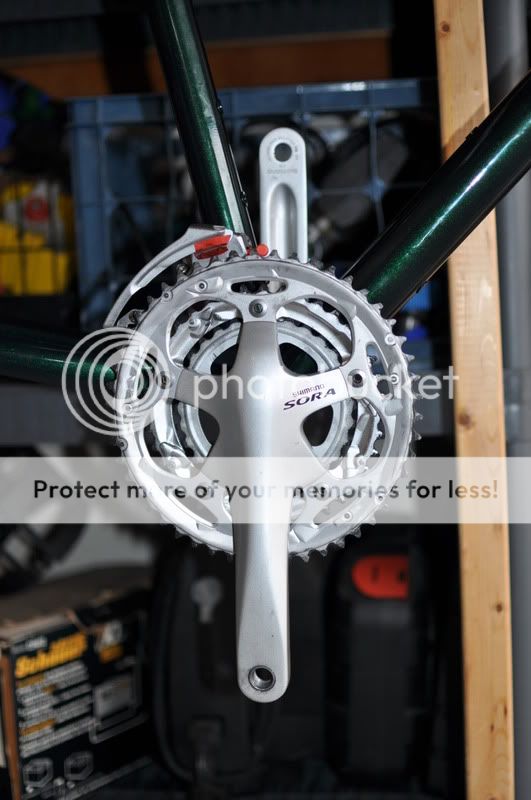
Shimano Sora triple crankset:
In researching components for this frame I found that the bottom seat tube braze-on can be an issue with some front derailleurs in that they need to be mounted very close to the braze-on or even over the opening, causing some to file the braze-on as well as making bottle cage mounting difficult. I ended up choosing a Shimano LX top swing derailleur. This seems to allow enough clearance and no issues with interference.
Front derailleur:
To my surprise the frame came with a derailleur hanger. I had planned on ordering one but didn't know what to order so this saved me the hassle.
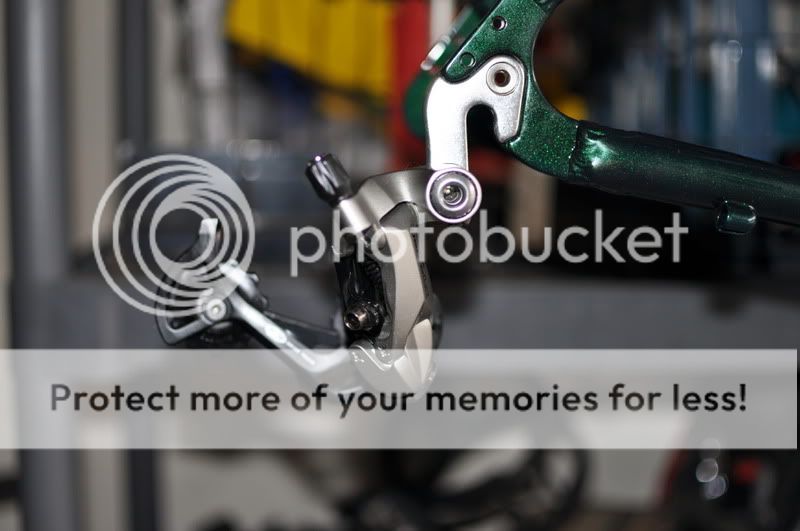
Rear Deore XT derailleur:
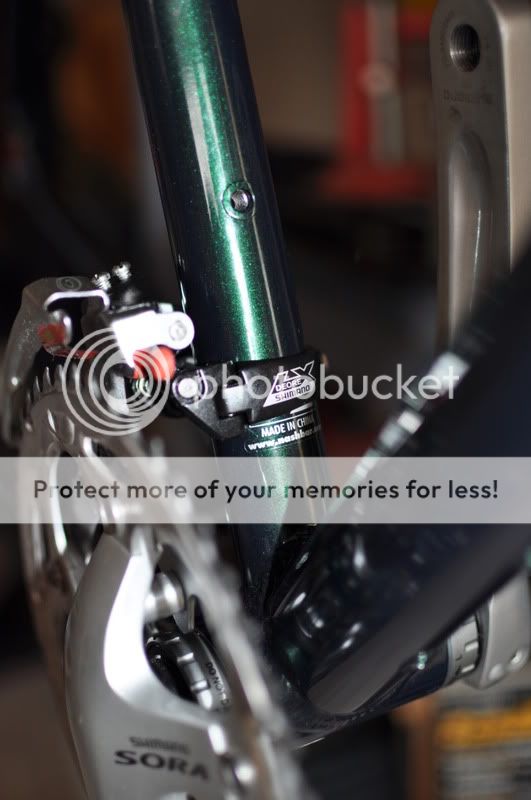
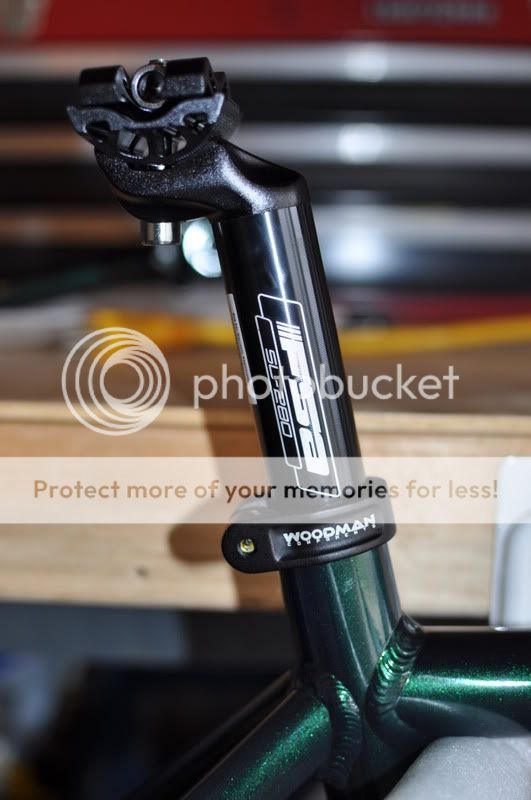
FSA seatpost & Woodman seat clamp:
Here's how I'm working on it for the time being:
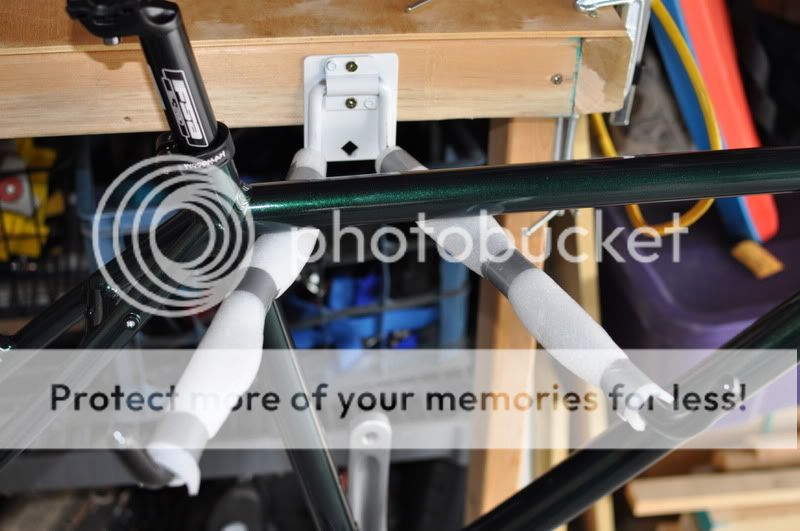
I think one of those Park repair stands is in my near future.
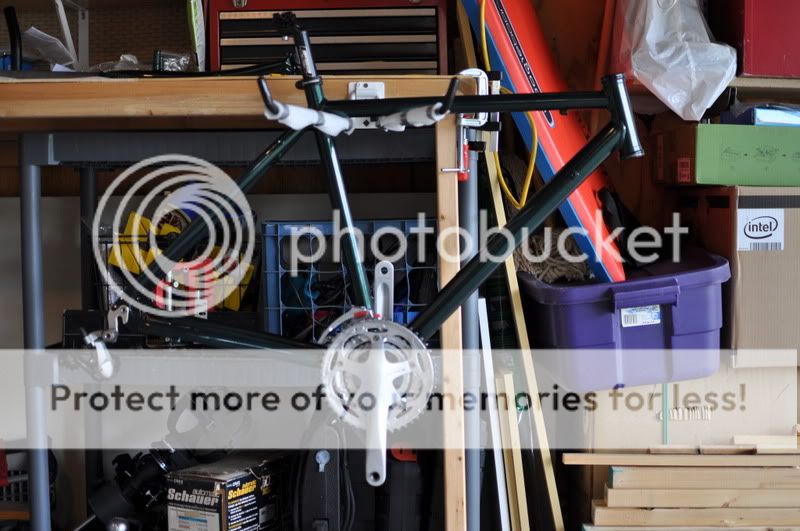
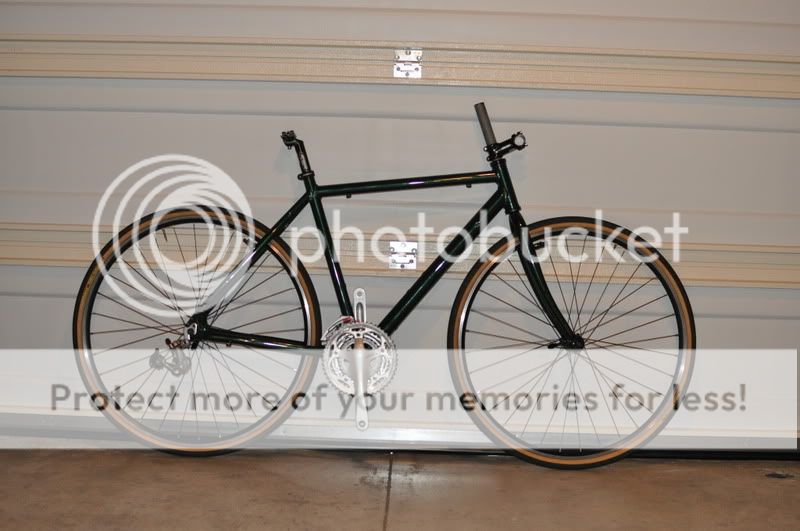
And of course, the garage door shot:
So far, save for the crown race issue, I'm happy with how all the parts are coming together. Next week I should be receiving the 9-speed cassette and chain.
Thanks for looking!
Well I was feeling pretty good after the sushi and my confidence was high after pressing that head set in, so I thought I would give the crown race a go. For those that don't know, the crown race is the bottom most part of the headset that gets pressed on to kind of a shoulder on the fork. I only say this because I had no idea how all this worked until I actually started doing it, so if my experience will help anybody else it could save some aggravation.
The crown race is that brass ring on the tube of the fork (it's supposed to be pressed all the way down to the shoulder):
Anyway, to make a long story short, I'm pretty sure I tweaked the crown race trying to press it on to the shoulder. I'll save the specifics but I tried some internet suggestions to no avail. No doubt this is where experience and the right tools come in to play. Just to be safe, I ordered another crown race ($10) and I will take it to the shop to have somebody who knows what they are doing install this.
Moving on...so far so good on the other components-
Shimano Sora triple crankset:
In researching components for this frame I found that the bottom seat tube braze-on can be an issue with some front derailleurs in that they need to be mounted very close to the braze-on or even over the opening, causing some to file the braze-on as well as making bottle cage mounting difficult. I ended up choosing a Shimano LX top swing derailleur. This seems to allow enough clearance and no issues with interference.
Front derailleur:
To my surprise the frame came with a derailleur hanger. I had planned on ordering one but didn't know what to order so this saved me the hassle.
Rear Deore XT derailleur:
FSA seatpost & Woodman seat clamp:
Here's how I'm working on it for the time being:
I think one of those Park repair stands is in my near future.
And of course, the garage door shot:
So far, save for the crown race issue, I'm happy with how all the parts are coming together. Next week I should be receiving the 9-speed cassette and chain.
Thanks for looking!
Last edited by megalowmatt; 11-20-11 at 10:59 PM.
11-21-11, 07:06 AM
#10
Senior Member
Join Date: Oct 2006
Location: Pittsburgh, PA
Posts: 111
Bikes: Jamis Aurora 2006
Mentioned: 0 Post(s)
Tagged: 0 Thread(s)
Quoted: 0 Post(s)
Likes: 0
Liked 0 Times
in
0 Posts
ehsiung- thanks for the picture. What are you using for bar-end shifters? Considering I will be using a 9-speed cassette, from what I can tell my only option is the Dura Ace ones. That will probably be my most expensive single item purchase for this build unless I can find them really cheap.
Thanks for posting this thread, I'm enjoying the pictures.
11-21-11, 10:27 AM
#11
Senior Member
Join Date: Oct 2009
Location: Virginia/DC
Posts: 1,454
Bikes: quite a few
Mentioned: 0 Post(s)
Tagged: 0 Thread(s)
Quoted: 1 Post(s)
Likes: 0
Liked 0 Times
in
0 Posts
Nice thread. Of all the bike mechanic stuff I've read and researched about, doing a headset/fork seems the scariest to me, and your experience has only confirmed that in my mind! I have a MTB with a cheap suspension fork I'd like to upgrade to a rigid fork but I'm not sure at all about actually doing the replacement.
11-21-11, 11:26 AM
#12


Unlisted member

Join Date: Dec 2005
Location: Chicagoland
Posts: 6,192
Bikes: Specialized Hardrock
Mentioned: 29 Post(s)
Tagged: 0 Thread(s)
Quoted: 1376 Post(s)
Liked 432 Times
in
297 Posts
Looks great! I rebuilt the front end of my first motorcycle, and found that the specialized tools for some tasks were the only way to get some of the parts together/apart.
11-21-11, 11:28 AM
#13

The Rock Cycle

Thanks for the stories and the pictures. I'd never be able to get one of these frames, they don't make them small enough for me, and I prefer not to ride alu frames. But I still find them very intriguing. It really does look like a great frame for a great price. I enjoy seeing people's builds of them.
__________________
Gunnar Sport
Specialized Ruby
Salsa Vaya Ti
Novara Randonee x2
Motobecane Fantom CXX
Jamis Dakar XCR
Gunnar Sport
Specialized Ruby
Salsa Vaya Ti
Novara Randonee x2
Motobecane Fantom CXX
Jamis Dakar XCR
11-21-11, 12:12 PM
#15
Get on your bikes & ride!
Join Date: May 2006
Location: Lextown
Posts: 1,069
Bikes: See signature (it varys day to day)
Mentioned: 0 Post(s)
Tagged: 0 Thread(s)
Quoted: 1 Post(s)
Likes: 0
Liked 1 Time
in
1 Post
Looks great so far. Your "work stand" looks like mine. It has been a somewhat permanent solution that started out as temporary. I have built up no less than 10 bikes and use it daily for tune ups.
Here is an eBay link to a decent home mechanic grade set of headset tools.
https://www.ebay.com/itm/260475781192...84.m1439.l2649
Here is an eBay link to a decent home mechanic grade set of headset tools.
https://www.ebay.com/itm/260475781192...84.m1439.l2649
__________________
Litespeed Classic
Soma Double Cross DC
Litespeed Classic
Soma Double Cross DC
11-23-11, 10:54 AM
#16
Senior Member
Thread Starter
Join Date: Jun 2009
Location: North County San Diego
Posts: 1,664
Mentioned: 1 Post(s)
Tagged: 0 Thread(s)
Quoted: 0 Post(s)
Likes: 0
Liked 0 Times
in
0 Posts
Looks great so far. Your "work stand" looks like mine. It has been a somewhat permanent solution that started out as temporary. I have built up no less than 10 bikes and use it daily for tune ups.
Here is an eBay link to a decent home mechanic grade set of headset tools.
https://www.ebay.com/itm/260475781192...84.m1439.l2649
Here is an eBay link to a decent home mechanic grade set of headset tools.
https://www.ebay.com/itm/260475781192...84.m1439.l2649
Nice thread. Of all the bike mechanic stuff I've read and researched about, doing a headset/fork seems the scariest to me, and your experience has only confirmed that in my mind! I have a MTB with a cheap suspension fork I'd like to upgrade to a rigid fork but I'm not sure at all about actually doing the replacement.
11-23-11, 11:04 AM
#17
Senior Member
Thread Starter
Join Date: Jun 2009
Location: North County San Diego
Posts: 1,664
Mentioned: 1 Post(s)
Tagged: 0 Thread(s)
Quoted: 0 Post(s)
Likes: 0
Liked 0 Times
in
0 Posts
Yeah, the Dura Ace SL-BS77 shifters. There are other 9-speed bar end shifters but, believe it or not, the Dura Ace was the cheapest ($92 at Amazon). Since I bought the frame and fork used for $50, and I'm re-using a lot of old parts (wheelset, saddle, cassette, RD), the shifters are by far the most expensive component for my build.
Wish I'd known about this a few weeks earlier!
Thanks for posting this thread, I'm enjoying the pictures.
Wish I'd known about this a few weeks earlier!
Thanks for posting this thread, I'm enjoying the pictures.
11-23-11, 11:07 AM
#18
Senior Member
Join Date: Nov 2011
Location: Springfield, MA
Posts: 1,060
Bikes: 2012 Motobecane Fantom CXX, 2012 Motobecane Fantom CX, 1997 Bianchi Nyala, 200? Burley Rock 'n Roll
Mentioned: 0 Post(s)
Tagged: 0 Thread(s)
Quoted: 3 Post(s)
Likes: 0
Liked 0 Times
in
0 Posts
Maybe for the crown race you could see if there is a size of pvc pipe that just fits over the steerer tube. That would allow you to apply consistent pressure on the race as you tap it down the tube. Light impact from the PVC probably won't harm the brass. Just a thought.
I'm enjoying this thread. Makes me want to do one for myself!
Jim S.
I'm enjoying this thread. Makes me want to do one for myself!
Jim S.
11-23-11, 11:24 AM
#19
Senior Member
Thread Starter
Join Date: Jun 2009
Location: North County San Diego
Posts: 1,664
Mentioned: 1 Post(s)
Tagged: 0 Thread(s)
Quoted: 0 Post(s)
Likes: 0
Liked 0 Times
in
0 Posts
Well I am still waiting for the replacement crown race to come in. In taking a closer look at the original, I don't think I damaged it but I won't take any chances and just have the new one installed.
If it wasn't for the crown race set back, progress should have been further along by now. In the mean time I was still able to move forward...
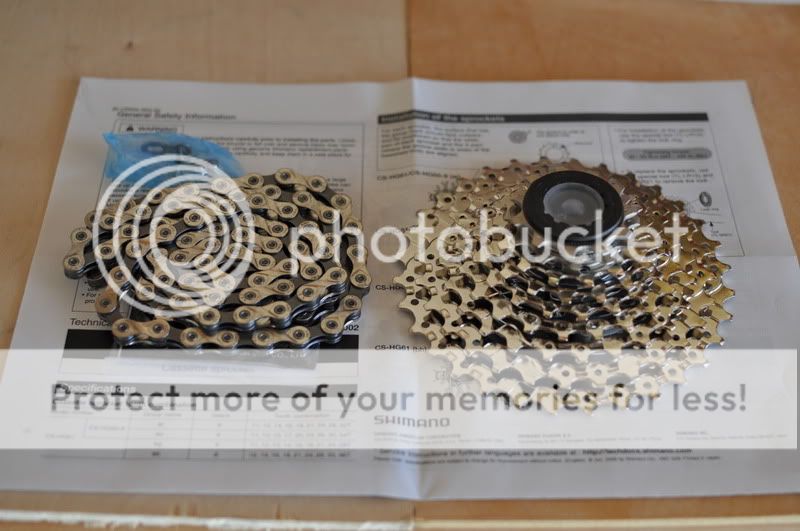
9-speed cassette and chain arrived yesterday:
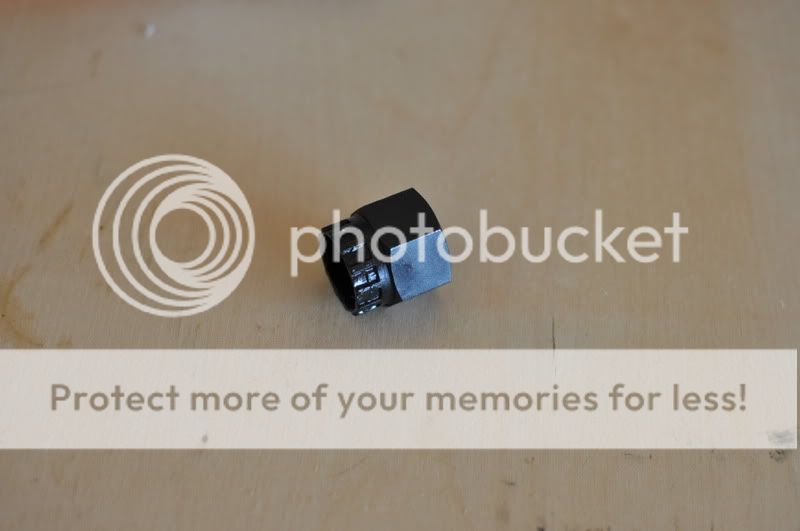
Here's the tool used to install the cassette:
The ridges pair with the ring in on the top of the cassette and it kind of "ratchets" in.
I have been greasing everything that has threads with anti-seize grease:
And the finished product:
I meant to mention something about the frame earlier - In researching this frame I found several comments from people thinking this Nashbar touring frame ran "big" or "tall" I think were the descriptions. In comparison to my other frames this is not my experience at all. In fact, using my non-scientific methods, this frame seems less "crowded" on the standover than my Bianchi San Jos8 with 28mm tires. While I didn't use standover measurements to select which size to order this frame is similar in dimensions to the Bianchi aside from the longer wheelbase.
If it wasn't for the crown race set back, progress should have been further along by now. In the mean time I was still able to move forward...
9-speed cassette and chain arrived yesterday:
Here's the tool used to install the cassette:
The ridges pair with the ring in on the top of the cassette and it kind of "ratchets" in.
I have been greasing everything that has threads with anti-seize grease:
And the finished product:
I meant to mention something about the frame earlier - In researching this frame I found several comments from people thinking this Nashbar touring frame ran "big" or "tall" I think were the descriptions. In comparison to my other frames this is not my experience at all. In fact, using my non-scientific methods, this frame seems less "crowded" on the standover than my Bianchi San Jos8 with 28mm tires. While I didn't use standover measurements to select which size to order this frame is similar in dimensions to the Bianchi aside from the longer wheelbase.
Last edited by megalowmatt; 11-23-11 at 11:29 AM.
11-23-11, 05:46 PM
#21
Senior Member
Thread Starter
Join Date: Jun 2009
Location: North County San Diego
Posts: 1,664
Mentioned: 1 Post(s)
Tagged: 0 Thread(s)
Quoted: 0 Post(s)
Likes: 0
Liked 0 Times
in
0 Posts
Thanksgiving Eve Success!
After taking another close look at the crown race I determined there was really no damage done in my earlier attempt at mounting it onto the fork. Thanks to a little googling I watched some dude on YouTube seat one in four smacks with a hammer and screwdriver. Without hesitation I manned up and did the deed.
More pictures and progress to follow...
More pictures and progress to follow...
11-23-11, 09:44 PM
#22
Senior Member
Thread Starter
Join Date: Jun 2009
Location: North County San Diego
Posts: 1,664
Mentioned: 1 Post(s)
Tagged: 0 Thread(s)
Quoted: 0 Post(s)
Likes: 0
Liked 0 Times
in
0 Posts
Probably the best day of progress after getting that crown race installed.
As I mentioned in my last post, a closer inspection of the crown race did not reveal any deformation from the earlier attempt at installation. Armed with some YouTube knowledge, a hammer, screwdriver and determination I was able to press the thing on with 6 or 7 hits.
Crown race installed on fork:
Once past this step I knew things would progress pretty quickly. The next step was to get an idea of how it all fit together and try to determine measurements for cutting the steer tube.
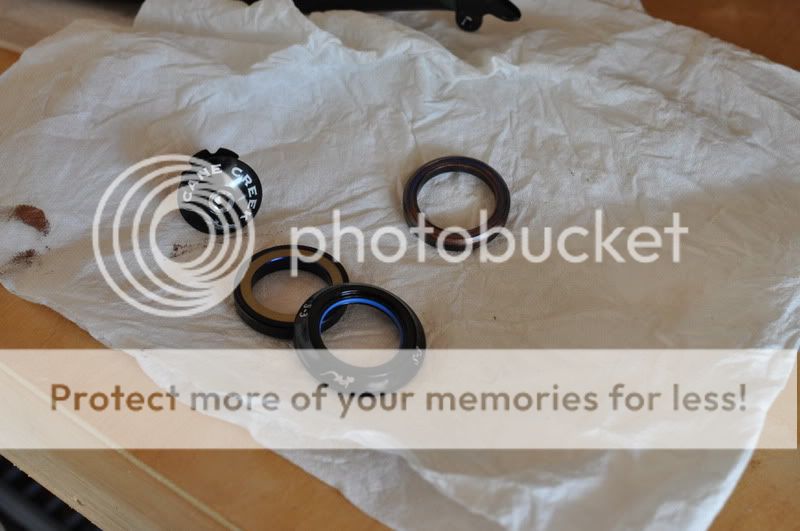
For anybody doing this, I suggest keeping all the headset parts together as much as possible. There's a diagram in the user manual but i think it would be difficult to determine which parts are which if it were to all fall apart.
Here's the head set top & bottom bearings, cap & star nut:
After loosely putting it all together, it was time to estimate some measurements to cut the steer tube. I put a seat on there so I could get a feel for sitting and riding a bit. What I ultimately did was compare my favorite setup with what I had on this to get as close as possible to what I thought would work.
Set up for determining steer tube length:
As you can see prior to this I also installed the chain and basic pedals.
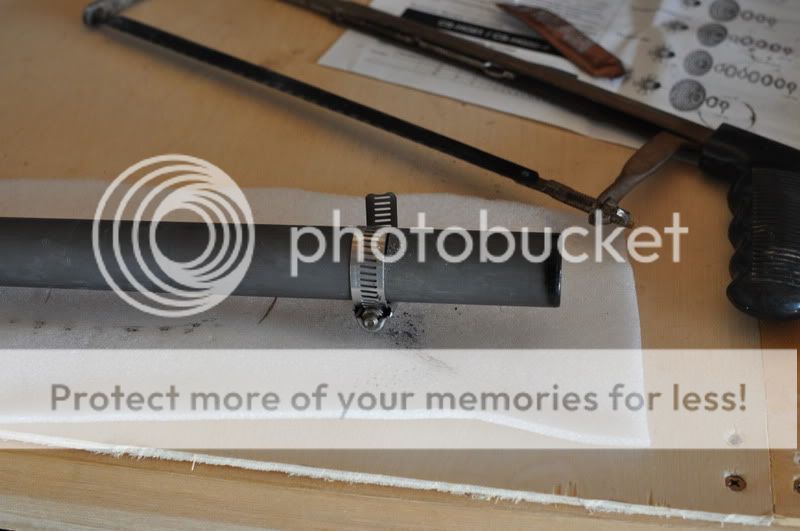
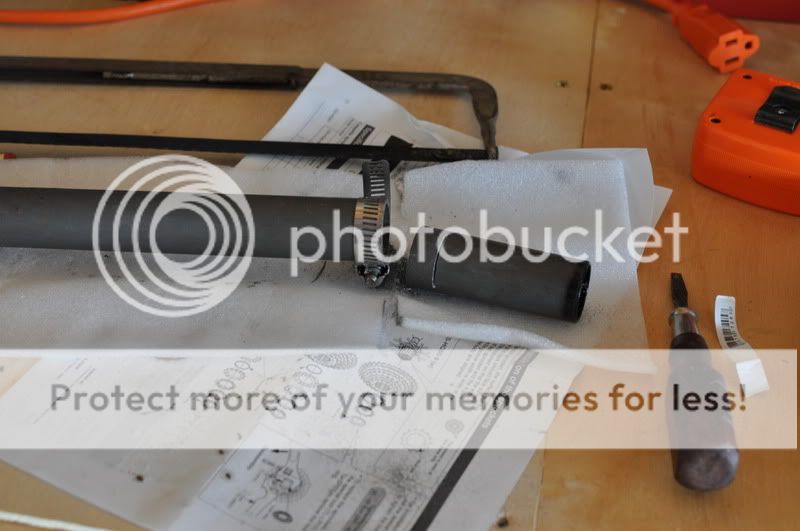
Some of the best advice I have read on cutting the steer tube was "measure twice, take a break..then come back and measure twice again." So that's what I did. In fact I went to the hardware store to buy a hose clamp for the cutting guide.
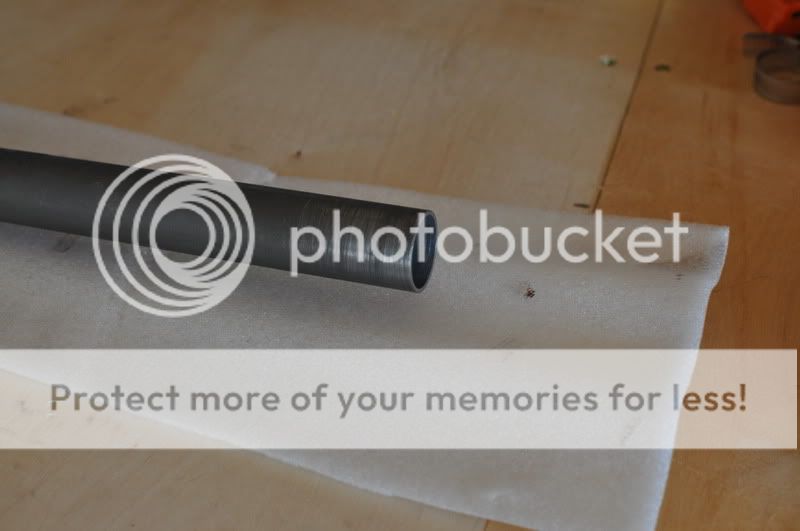
Before cutting the tube in the right place, I did a test cut about 1/2" above my real measurement just to get a feel for how it would cut:
With a new blade on the hacksaw I went to work. After 4 or 5 minutes it was in two pieces:
After a bit of sandpaper to smooth the edges it was time to remount the fork on the bike:
I had about 1 1/2" of stem spacers to give me a little wiggle room on the handlebar height adjustment.
As you can see in the next picture, I read it is best to leave the steer tube cut lower than the top of the stem. I'll explain the reason for this in the next part...
As I mentioned in my last post, a closer inspection of the crown race did not reveal any deformation from the earlier attempt at installation. Armed with some YouTube knowledge, a hammer, screwdriver and determination I was able to press the thing on with 6 or 7 hits.
Crown race installed on fork:
Once past this step I knew things would progress pretty quickly. The next step was to get an idea of how it all fit together and try to determine measurements for cutting the steer tube.
For anybody doing this, I suggest keeping all the headset parts together as much as possible. There's a diagram in the user manual but i think it would be difficult to determine which parts are which if it were to all fall apart.
Here's the head set top & bottom bearings, cap & star nut:
After loosely putting it all together, it was time to estimate some measurements to cut the steer tube. I put a seat on there so I could get a feel for sitting and riding a bit. What I ultimately did was compare my favorite setup with what I had on this to get as close as possible to what I thought would work.
Set up for determining steer tube length:
As you can see prior to this I also installed the chain and basic pedals.
Some of the best advice I have read on cutting the steer tube was "measure twice, take a break..then come back and measure twice again." So that's what I did. In fact I went to the hardware store to buy a hose clamp for the cutting guide.
Before cutting the tube in the right place, I did a test cut about 1/2" above my real measurement just to get a feel for how it would cut:
With a new blade on the hacksaw I went to work. After 4 or 5 minutes it was in two pieces:
After a bit of sandpaper to smooth the edges it was time to remount the fork on the bike:
I had about 1 1/2" of stem spacers to give me a little wiggle room on the handlebar height adjustment.
As you can see in the next picture, I read it is best to leave the steer tube cut lower than the top of the stem. I'll explain the reason for this in the next part...
11-23-11, 10:02 PM
#23
Senior Member
Thread Starter
Join Date: Jun 2009
Location: North County San Diego
Posts: 1,664
Mentioned: 1 Post(s)
Tagged: 0 Thread(s)
Quoted: 0 Post(s)
Likes: 0
Liked 0 Times
in
0 Posts
In the picture below, the thing on the right is the star nut:
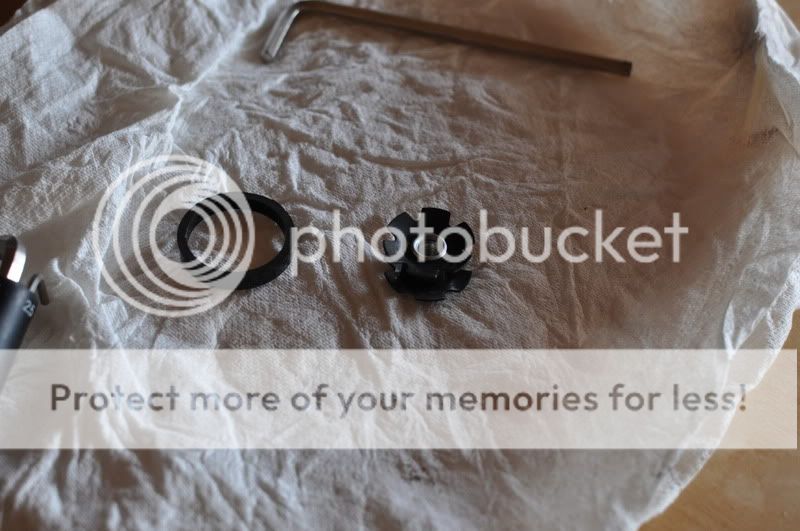
The way it works is it gets pushed into the steer tube an inch or so past the top. The cap and screw then get mounted on top of the stem and the screw is tightened just enough to compress the bearings so there's no play in the headset and the bars are able to turn freely. After this the stem is tightened onto the steer tube.
Here is the star nut down in the tube (I used a small ball peen hammer to tap it into there):
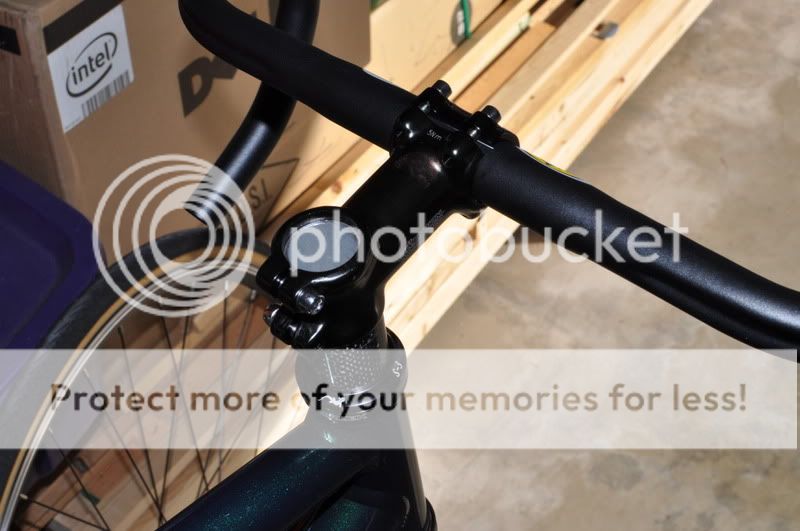
The cap & screw are mounted & tightened and the stem is tightened after that:
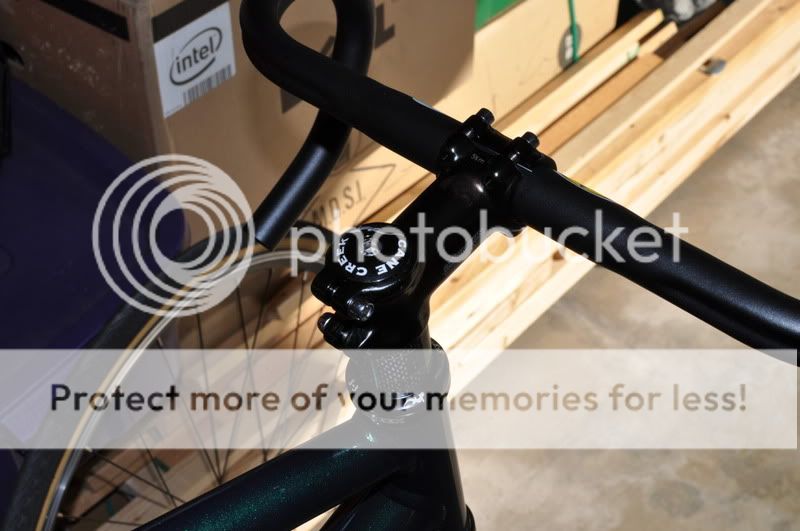
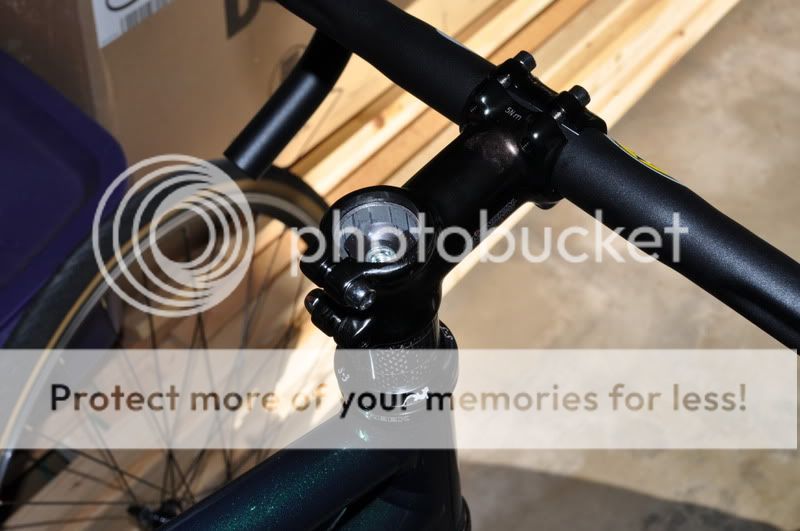
Here it is all put together....
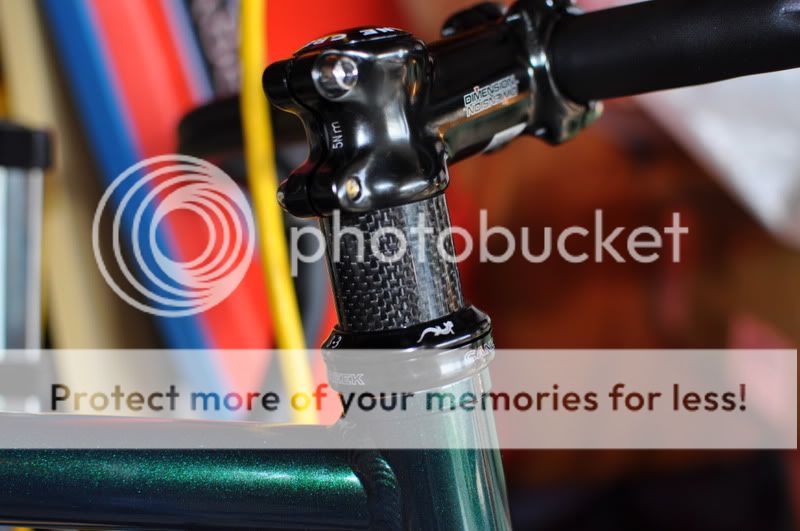
I used carbon spacers because I'm really worried about weight...lol not really it's just all I had. Anyway, one of those spacers will eventually be replaced with a brake cable hanger.
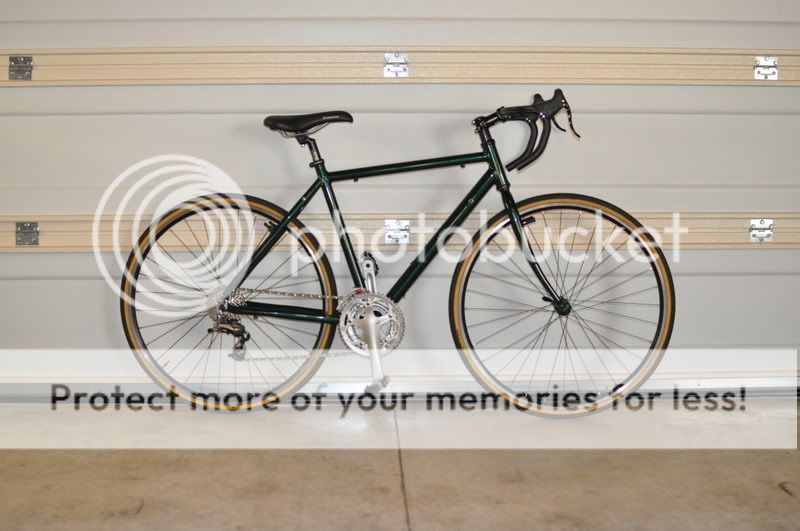
And of course the garage door shot of the current progress:
I had also installed my Cane Creek brake levers. I will be using the Nashbar cantilever brakes for stopping.
All in all a good day - I was able to saddle up and ride a bit and it really felt nice. A bit more upright than my other rides and really smooth.
Time to regroup and plan what happens next.
Have a great Thanksgiving!
The way it works is it gets pushed into the steer tube an inch or so past the top. The cap and screw then get mounted on top of the stem and the screw is tightened just enough to compress the bearings so there's no play in the headset and the bars are able to turn freely. After this the stem is tightened onto the steer tube.
Here is the star nut down in the tube (I used a small ball peen hammer to tap it into there):
The cap & screw are mounted & tightened and the stem is tightened after that:
Here it is all put together....
I used carbon spacers because I'm really worried about weight...lol not really it's just all I had. Anyway, one of those spacers will eventually be replaced with a brake cable hanger.
And of course the garage door shot of the current progress:
I had also installed my Cane Creek brake levers. I will be using the Nashbar cantilever brakes for stopping.
All in all a good day - I was able to saddle up and ride a bit and it really felt nice. A bit more upright than my other rides and really smooth.
Time to regroup and plan what happens next.
Have a great Thanksgiving!
Last edited by megalowmatt; 11-23-11 at 10:14 PM.
11-23-11, 11:40 PM
#24
Senior Member
Nice job on the headset and cutting down the steerer tube. Looks like you just need brakes, cables, and bar tape before you get your first test ride.
11-24-11, 12:33 AM
#25
working on my sandal tan

Join Date: Aug 2011
Location: CID
Posts: 22,629
Bikes: 1991 Bianchi Eros, 1964 Armstrong, 1988 Diamondback Ascent, 1988 Bianchi Premio, 1987 Bianchi Sport SX, 1980s Raleigh mixte (hers), All-City Space Horse (hers)
Mentioned: 98 Post(s)
Tagged: 0 Thread(s)
Quoted: 3871 Post(s)
Liked 2,568 Times
in
1,579 Posts
