


[Dahon/Tern] Brompton-like baggage block?
 09-07-17, 06:06 AM
#151
Full Member
Ok, thank you for explaining. Could threadlock (or sprung washers) be used to hold screws in place or is there so much room you really need the tape? Just being curious.
The three holes: I think Dahon started off with two holes and then for some reason decided to change the standard to three- and then went back to the old standard.
I bought some Clickfix stuff some years ago for my two hole Dahon curve and it came with an adaptor to atatch it to a three hole bike (if needed).
Best solution instead of adaptors would be if a proper Brompton block to fit on a Dahon and Proper Klickfix block to fit on a Brompton was available.
I would really like to know if my reshaped B block on my Curve is a better (stronger, stiffer) solution than this adapter.
I imagine your block has less lateral stress, but only time will tell if the weight will make a difference. 12 miles yesterday without issue, but still early.
Confident enough now to spend the bucks on my own bag...way better than my backpack.
 09-07-17, 08:17 AM
#152
**thusi*st
Very interesting post and set of design input. After all this I am inclined to say that I like the idea of a front rack and bridging the headpost to a second attachment at the lower end of the handlebar.
I want to do some comparative testing. Lets see if there is time.
The first issue are cable routings, of course. Second issue is foldability. Third is quick release but all can be handled. Bike control testing will also be important to compare.
Super impressed with all the work folks have put in on this.
09-07-17, 09:25 AM
#153
Full Member
The cables have to be pushed behind the bag, but I am going to experiment with a fastening system to hold them closer to the front stem, yet still allow for the handlebar folding.
Handling is different, best described as more solid and not as nimble. I do not see that as a negative. It does not seem practical to leave the bag on while folded, at least not when loaded, but the quick release works great and I just keep the bag with me on the train (including snacks and coffee).
Hope that helps.
09-11-17, 06:28 PM
#154
**thusi*st
This was this morning's rackification on my Visc D18. Started with the front. Then added the back.
I have no idea why the back rack shows a 18kg weight rating when it is twice as beefy as other Dahon racks. I did use hd Steel bolts rather than Stainless ones and guessing a 6mm upgrade from 5mm would help.
The bike also tows a Burley Travois trailer. Next is to fit it all in a suitcase but it may take two with this rack. The smaller racks and bike sill fit in one suitcase.
09-12-17, 08:43 AM
#155
Senior Member
Join Date: Feb 2011
Posts: 50
Mentioned: 2 Post(s)
Tagged: 0 Thread(s)
Quoted: 27 Post(s)
Likes: 0
Liked 1 Time
in
1 Post
Follow this link: https://www.shapeways.com/product/QL...ionId=61648886
The info you need is at the bottom left of the page.
Anybody know is Titanium bolts can take the same weight as steel for this kind of use?
The info you need is at the bottom left of the page.
Anybody know is Titanium bolts can take the same weight as steel for this kind of use?
As for the stainless vs titanium, stainless has a higher tensile strength than titanium so I'd stick with stainless. Unless you're deadset on ti

So I picked up the screws and bolts on the list and settled in for a nice rainy day project.
It was all good until adding the second screw to the Vybe frame. So great news that the Vybe has the three hole pattern. The bad news is the third hole has no thread!
So I can only use one screw for the adapter at the moment as holes one and two are too close to each other.
Any suggestions on how to overcome this?
This was this morning's rackification on my Visc D18. Started with the front. Then added the back.
I have no idea why the back rack shows a 18kg weight rating when it is twice as beefy as other Dahon racks. I did use hd Steel bolts rather than Stainless ones and guessing a 6mm upgrade from 5mm would help.
The bike also tows a Burley Travois trailer. Next is to fit it all in a suitcase but it may take two with this rack. The smaller racks and bike sill fit in one suitcase.
09-12-17, 11:34 AM
#156
Full Member
Wait I'm confused. So the adapter fits your bike? I designed the adapter for the two-hole bolt pattern (for now, I'm thinking of doing a three-bolt as they're way more popular than I thought), so I don't see how yours fits if it's a three-bolt pattern.
The screw thread is not perfectly square (I would say about 90%), so one part of the screw top is not snug into the base.
So far everything is working great. I have taken it through 4 rides and it remains snug- though the plumbers tape made a difference. Yesterday I went over several cobble stone streets, pot holes, and crappy roads- no issues.
If that bottom screw causes any issues my plan is to fill in the slight gap between the screw top and adapter with liquid nails. The photo shows the gap on one side, the other side is flush.
Last edited by kayakindude; 09-12-17 at 11:47 AM.
09-12-17, 12:29 PM
#157
**thusi*st
Dropbox - not sure it is showing:
I'm new to the forum and trying to use Dropbox links for the images as I can't drop a full picture in otherwise.
I saw the picture I posted yesterday in your post but seems you did not so.. who's to say. This one is a Link this time.
https://www.dropbox.com/s/d62srxnk48...18.20.jpg?dl=0
I saw the picture I posted yesterday in your post but seems you did not so.. who's to say. This one is a Link this time.
https://www.dropbox.com/s/d62srxnk48...18.20.jpg?dl=0
09-14-17, 11:18 AM
#158
Senior Member
Join Date: Feb 2011
Posts: 50
Mentioned: 2 Post(s)
Tagged: 0 Thread(s)
Quoted: 27 Post(s)
Likes: 0
Liked 1 Time
in
1 Post
The middle hole on the Vybe came with a screw to hold a cover plate on it. Your 2 hole adapter works as designed for the Dahon 2 hole pattern, which are my outlying holes. My issue began when the bottom outlying hole was missing thread. I resolved by buying a tap and thread set and threading the hole.
The screw thread is not perfectly square (I would say about 90%), so one part of the screw top is not snug into the base.
So far everything is working great. I have taken it through 4 rides and it remains snug- though the plumbers tape made a difference. Yesterday I went over several cobble stone streets, pot holes, and crappy roads- no issues.
If that bottom screw causes any issues my plan is to fill in the slight gap between the screw top and adapter with liquid nails. The photo shows the gap on one side, the other side is flush.
Although not ideal, I'd say maybe the best thing to do in your situation (now that you've tapped as far as it will go, hopefully with a "bottoming" tap to get useful thread all the way to the bottom) is to either buy a shorter screw, or cut off length from the screw you've got. You're not getting any more thread engagement by having the screw head stick out like that, and plumber's tape (while a good short-term solution!) isn't going to hold up for years. You really want the countersink of the screw to make good contact with the adapter for full strength and stability. If you can get the screw a couple mm shorter, I'd give that a whirl! Hope that helps, glad you're enjoying it despite the issue

I'm new to the forum and trying to use Dropbox links for the images as I can't drop a full picture in otherwise.
I saw the picture I posted yesterday in your post but seems you did not so.. who's to say. This one is a Link this time.
https://www.dropbox.com/s/d62srxnk48...18.20.jpg?dl=0
I saw the picture I posted yesterday in your post but seems you did not so.. who's to say. This one is a Link this time.
https://www.dropbox.com/s/d62srxnk48...18.20.jpg?dl=0
09-14-17, 12:26 PM
#159
**thusi*st
In the solo picture have the handlebar twisted as I had just folded it to see how it fits on the Burley Travois trailer (does fit). Second pic added now so you can see the trailer, rack clearance and the nice Kenda K-Rad tires I like on this bike. They just barely clear the fenders at 1.95". Without fenders I can run 2.25" K-rad or Holy Roller which I do for sure on Jetstreams.
The rear Dahon "Ultimate" rack is nice in that it has a slide in pouch that is more convenient to access than on the Dahon "Traveller" rack, both of which are high enough at the rack to easily take side panniers. It is a little "heavy" but it is also strong so if you really want to carry a load it is nice. The "Stash Bag" space would also accommodate a full on battery if one is to electrify the bike (not this one but I've done a Mu D8).
The front rack is a standard front rack. Not really high capacity and it would do well to have some sidewalls for panniers that might fit. Still, I am partial to the front load being attached and respondent to the wheel and handlebar twist rather than being fixed to the fork. It would be interesting to have a standoff from the handlebar post as well so that some real goods could be attached and semidetached easily and without worry about the cable and tube runs.
I have removed the cable runs from the frame as I can remove the handlebar, keeping the chain-line cables and cable sets sets intact while actually fit this bike onto my standard size suitcase (Samsonite). I can do this with all Visc, Mariner and Vitesse frames so pretty flexible.
The big rear rack will challenge the Suitcase so likely coming off of this bike and going on another. I do have these and other Dahon racks available and in stock if folks are interested.
Last edited by L Arnold; 09-14-17 at 12:55 PM.
12-01-17, 08:50 AM
#160
Full Member
So had a bit of a setback this week-
Pedaling home at night I misjudged a break in a speed bump and struck it full on. Heard a snap and my water bottle popped out of the rear pocket on the bag so I thought it was the plastic hitting the pavement. Swung back to grab it and noticed a wobble in the bag. Ugh...not a huge deal been here before when I had screws loosen up after going through a cobblestone street.
Went to pull the block apart today and that is exactly what happened...it pulled apart
The bag was not to heavy at the time, maybe 12-15 pounds (maybe as the lunch bag was empty). But my best guess is the crappy connection in my bottom screw gave out quickly, allowing the force from the bag frame to twist the plastic adapter upwards. The top screw did its job so so great that the adapter cracked around it.
I don't think that this is the fault of the adapter and I will reorder, but that bottom screw connection has to somehow get fixed. That being said it was a bit of a freak accident and the bag stayed on for the remaining few miles home. The adapter gave me months of easy commuting without the pack on my back so I still highly recommend it.
12-01-17, 03:07 PM
#161
Senior Member
Thread Starter
Join Date: Aug 2011
Location: Paris, France
Posts: 2,497
Mentioned: 9 Post(s)
Tagged: 0 Thread(s)
Quoted: 573 Post(s)
Liked 118 Times
in
99 Posts
For the benefit of science, before ordering a new 3D adapter, you could try dremeling the Brompton carrier block and see how it performs.
https://www.cyclechat.net/attachment..._n-jpg.135552/
https://www.cyclechat.net/attachment..._n-jpg.135552/
12-04-17, 08:38 PM
#162
Senior Member
Join Date: Feb 2011
Posts: 50
Mentioned: 2 Post(s)
Tagged: 0 Thread(s)
Quoted: 27 Post(s)
Likes: 0
Liked 1 Time
in
1 Post
Wow, sorry to see this dude. My guess agrees with yours: the bottom screw being loose puts ALL of the load thru that area around the one screw, and also allows the adapter to flex which easily could result in a crack in exactly that location. PM me
If it helps, I just upgraded the hardware of the outgoing units, my adapters now ship with NICE high quality stainless steel hardware. It's not made in the USA like I wanted (Taiwan), but it's very nice stuff. Also, the M6 bolt is an allen head since most people have that in their cycling multi-tool. It probably wouldn't have stopped this from happening given how it wasn't being used as designed, but it would be one less thing to worry about!
If it helps, I just upgraded the hardware of the outgoing units, my adapters now ship with NICE high quality stainless steel hardware. It's not made in the USA like I wanted (Taiwan), but it's very nice stuff. Also, the M6 bolt is an allen head since most people have that in their cycling multi-tool. It probably wouldn't have stopped this from happening given how it wasn't being used as designed, but it would be one less thing to worry about!
12-05-17, 09:17 AM
#163
Full Member
Thanks for the suggestion Winfried- it will be my fall back plan if this does not work out but I want to try and get it right.
I am about to order this- an M6 bottom thread to try and fix that hole. I used a regular tap thread so I am hoping the bottom thread will gain me clean threads to the bottom of the hole (I am new at this but it makes sense).
https://www.amazon.com/Kodiak-Cuttin...=m6+thread+tap
The adapter was shipped today (nice turn around). Slick I saw those steel and aluminum options thought they are expensive and wanted to give this one more go-around.
12-06-17, 01:34 PM
#164
Senior Member
Join Date: Feb 2011
Posts: 50
Mentioned: 2 Post(s)
Tagged: 0 Thread(s)
Quoted: 27 Post(s)
Likes: 0
Liked 1 Time
in
1 Post
Thanks for the suggestion Winfried- it will be my fall back plan if this does not work out but I want to try and get it right.
I am about to order this- an M6 bottom thread to try and fix that hole. I used a regular tap thread so I am hoping the bottom thread will gain me clean threads to the bottom of the hole (I am new at this but it makes sense).
https://www.amazon.com/Kodiak-Cuttin...=m6+thread+tap
The adapter was shipped today (nice turn around). Slick I saw those steel and aluminum options thought they are expensive and wanted to give this one more go-around.
I am about to order this- an M6 bottom thread to try and fix that hole. I used a regular tap thread so I am hoping the bottom thread will gain me clean threads to the bottom of the hole (I am new at this but it makes sense).
https://www.amazon.com/Kodiak-Cuttin...=m6+thread+tap
The adapter was shipped today (nice turn around). Slick I saw those steel and aluminum options thought they are expensive and wanted to give this one more go-around.
I'd love to offer the aluminum and steel stuff for cheaper, but it's either a long machining process or figuring out how to make a cast... both are very expensive for the sales volume at this point. Hopefully we can get your stuff sorted out, my test unit has been working great.
12-06-17, 02:29 PM
#165
Full Member
Oh thank god that was the wrong link- here is what I ordered so it should be good-
https://www.amazon.com/gp/product/B0...?ie=UTF8&psc=1
Kodiak Cutting Tools KCT210989 USA Made Bottom Tap, D5 Limit, Metric 4 Flute, Ground Threads, High Speed Steel, M6 x 1.0 Size
https://www.amazon.com/gp/product/B0...?ie=UTF8&psc=1
Kodiak Cutting Tools KCT210989 USA Made Bottom Tap, D5 Limit, Metric 4 Flute, Ground Threads, High Speed Steel, M6 x 1.0 Size
12-06-17, 08:29 PM
#166
**thusi*st
Taps and Dies are great. I have a sweet Czechoslovak set (circa 1988) that has served many many years of kayaks and bike modification. Tapping out braze-ons is a pretty frequent need.
One thing you can do on racks is ream the 5mm out a bit, tap with 6mm and usually have a much stronger rack. It is the bearing bolt at the bottom that is the weakest link in the chain. Also an argument for not using Stainless bolts there but rather changing out stronger steel ones (grease em up a bit first).
One thing you can do on racks is ream the 5mm out a bit, tap with 6mm and usually have a much stronger rack. It is the bearing bolt at the bottom that is the weakest link in the chain. Also an argument for not using Stainless bolts there but rather changing out stronger steel ones (grease em up a bit first).
Last edited by L Arnold; 12-06-17 at 08:52 PM.
12-08-17, 02:19 PM
#167
Full Member
Both the bottom tap and adapter arrived this morning, that was quick! Used the bottom tap and definitely carved out more threads. The bottom screw went in with a nice grip. Unfortunately the bottom screw spun around when I reassembled- there seemed to be a gap between the damaged beginning threads and the bottom of the hole threads caused by the adapter spacing.
Undeterred, I bought both 16mm and 20mm length M6 screws and went back at it. The 16mm was perfect, got me to the rear threads in the hole. It is a bit of an optical illusion but the bottom screw sits flush in the adapter and the top seems to sit more into the top hole. At first I thought I was in trouble but a test fitting on the old adapter showed the bottom screw flush. I lubed the screws up with loctite and once everything sets I should be good to go
So it appears the Dahon head assembly can handle M6x16mm, factoring in the adapter. I imagine this will make the assembly stronger since more threads are engaged?
04-04-18, 03:06 AM
#168
Stardust

Hey,
Inspired by idead of this thead we took a new aproach to put brompton front carrier block on dahons.


The dahon eco c7 and the dahon curve d3

Inspired by idead of this thead we took a new aproach to put brompton front carrier block on dahons.
The dahon eco c7 and the dahon curve d3
04-16-18, 12:47 AM
#169
Senior Member

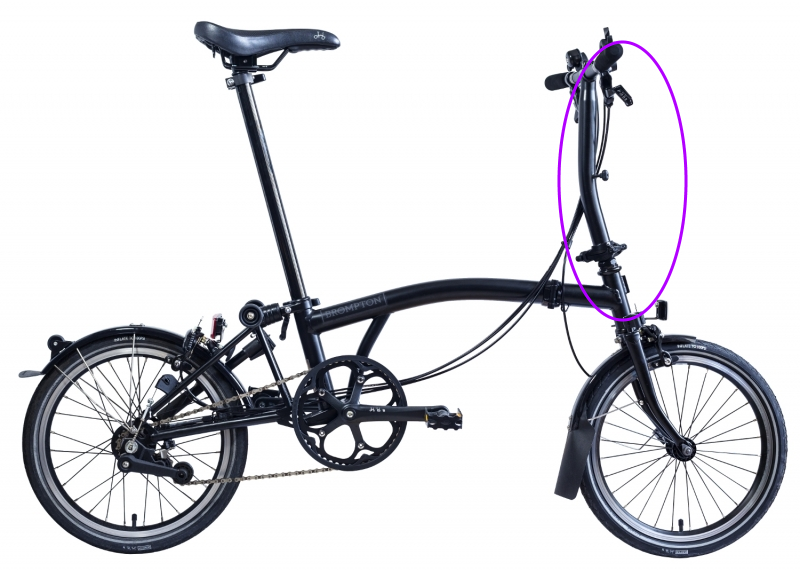
Adapter with an angle ... but still interferes with long arm brake cable.
04-16-18, 01:38 AM
#170
Senior Member
04-16-18, 02:56 PM
#171
Senior Member
 04-16-18, 06:23 PM
#172
Senior Member
06-13-18, 07:14 AM
#173
Stardust
06-13-18, 09:20 AM
#174
Banned
Brompton's brake cables come up from below to a double pivot side pull .. so no interference..
changing to a shorter pull brake lever and a mini V brake should work.
TRP's is 84mm long..
changing to a shorter pull brake lever and a mini V brake should work.
TRP's is 84mm long..
06-14-18, 01:45 AM
#175
Senior Member
Thread Starter
Join Date: Aug 2011
Location: Paris, France
Posts: 2,497
Mentioned: 9 Post(s)
Tagged: 0 Thread(s)
Quoted: 573 Post(s)
Liked 118 Times
in
99 Posts
As to why Dahon/Tern still use a long truss instead of keeping the cables close to the frame…