


Old Ti Serotta refinish and build
 08-10-15, 08:17 AM
#1
Senior Member
Thread Starter
Join Date: Jul 2008
Location: Indianapolis
Posts: 288
Bikes: 2011 Guru Praemio Ti (Rival), 03 Gary Fisher Franken-hardtail
Mentioned: 0 Post(s)
Tagged: 0 Thread(s)
Quoted: 0 Post(s)
Likes: 0
Liked 0 Times
in
0 Posts
Ti Serotta refinish and build
There has been a lot of discussion on bike forums about refinishing Ti frames so I thought I would document my build......
My wife's is a Triathlete and has been wanting a nice comfortable road bike so when we ride together she doesn't have to ride her tri-bike. I ride a Ti Guru and the thought of a comfortable Ti frame matching mine had some appeal, so she bought a 15 year old Serotta Classique Ti from ebay last month for me to build into a bike for her. The old Classique Ti Serotta has a 1" stearer tube with a nice Nitto quill stem and decent carbon fork. I believe these were made between 1999 and 2001. The headset bearing didn't sound good, but I cleaned them and re-greased and now they are working fine.........


The frame was in good clean conditioned, but has a stock bead blasted finish with some scratches, so the first step was to strip it of most decals and give it a brushed finish. I started with a purple 3M paint stripper pad on a power drill to initially remove the bead blasted texture. This took several hours as I was careful to go perpendicular with the frame. I then cut 1" strips of 400 grit sand paper and went over the entire frame again with a steady back and forth movement - again perp. to the frame tubing. Finally I finished with green scotch brite pads, which give it a nice fine factory brushed look. There was still a light bead blasted texture under the brushing, which isn't such a bad thing. In order to completely remove, I would need to start with a more aggressive sandpaper.

She asked me if I could put her name on the bike, so I thought it would be fun to experiment with my media blaster. I masked the bike and left a band unmasked, placing her name in vinyl letters on this area. I blasted it first with medium grit Aluminum Oxide and then with medium-fine glass beads. It gave a nice finished product, but she is looking for something with more subtle lettering, so I will re-brush over this area and try again later with smaller letters - maybe something matching the "Classique Ti" original font.

Next time I will be more careful to center the letters in the blasted band.


I will update the build with more photos as I start assembling the bike and take another shot at blasting the letters, and apply the new Serotta decals. She upgraded to carbon clinchers on her Tri bike so we are putting her old Soul wheels on this build. She also found a lightly used Red groupset, so we are splitting that set between this build and her Tri bike.
My wife's is a Triathlete and has been wanting a nice comfortable road bike so when we ride together she doesn't have to ride her tri-bike. I ride a Ti Guru and the thought of a comfortable Ti frame matching mine had some appeal, so she bought a 15 year old Serotta Classique Ti from ebay last month for me to build into a bike for her. The old Classique Ti Serotta has a 1" stearer tube with a nice Nitto quill stem and decent carbon fork. I believe these were made between 1999 and 2001. The headset bearing didn't sound good, but I cleaned them and re-greased and now they are working fine.........
The frame was in good clean conditioned, but has a stock bead blasted finish with some scratches, so the first step was to strip it of most decals and give it a brushed finish. I started with a purple 3M paint stripper pad on a power drill to initially remove the bead blasted texture. This took several hours as I was careful to go perpendicular with the frame. I then cut 1" strips of 400 grit sand paper and went over the entire frame again with a steady back and forth movement - again perp. to the frame tubing. Finally I finished with green scotch brite pads, which give it a nice fine factory brushed look. There was still a light bead blasted texture under the brushing, which isn't such a bad thing. In order to completely remove, I would need to start with a more aggressive sandpaper.
She asked me if I could put her name on the bike, so I thought it would be fun to experiment with my media blaster. I masked the bike and left a band unmasked, placing her name in vinyl letters on this area. I blasted it first with medium grit Aluminum Oxide and then with medium-fine glass beads. It gave a nice finished product, but she is looking for something with more subtle lettering, so I will re-brush over this area and try again later with smaller letters - maybe something matching the "Classique Ti" original font.
Next time I will be more careful to center the letters in the blasted band.
I will update the build with more photos as I start assembling the bike and take another shot at blasting the letters, and apply the new Serotta decals. She upgraded to carbon clinchers on her Tri bike so we are putting her old Soul wheels on this build. She also found a lightly used Red groupset, so we are splitting that set between this build and her Tri bike.
 08-10-15, 09:11 AM
#2
Senior Member
Join Date: Mar 2015
Posts: 270
Mentioned: 0 Post(s)
Tagged: 0 Thread(s)
Quoted: 48 Post(s)
Likes: 0
Liked 0 Times
in
0 Posts
that looks awesome, nicely done.
There has been a lot of discussion on bike forums about refinishing Ti frames so I thought I would document my build......
My wife's is a Triathlete and has been wanting a nice comfortable road bike so when we ride together she doesn't have to ride her tri-bike. I ride a Ti Guru and the thought of a comfortable Ti frame matching mine had some appeal, so she bought a 15 year old Serotta Classique Ti from ebay last month for me to build into a bike for her. The old Classique Ti Serotta has a 1" stearer tube with a nice Nitto quill stem and decent carbon fork. I believe these were made between 1999 and 2001. The headset bearing didn't sound good, but I cleaned them and re-greased and now they are working fine.........
The frame was in good clean conditioned, but has a stock bead blasted finish with some scratches, so the first step was to strip it of most decals and give it a brushed finish. I started with a purple 3M paint stripper pad on a power drill to initially remove the bead blasted texture. This took several hours as I was careful to go perpendicular with the frame. I then cut 1" strips of 400 grit sand paper and went over the entire frame again with a steady back and forth movement - again perp. to the frame tubing. Finally I finished with green scotch brite pads, which give it a nice fine factory brushed look. There was still a light bead blasted texture under the brushing, which isn't such a bad thing. In order to completely remove, I would need to start with a more aggressive sandpaper.
She asked me if I could put her name on the bike, so I thought it would be fun to experiment with my media blaster. I masked the bike and left a band unmasked, placing her name in vinyl letters on this area. I blasted it first with medium grit Aluminum Oxide and then with medium-fine glass beads. It gave a nice finished product, but she is looking for something with more subtle lettering, so I will re-brush over this area and try again later with smaller letters - maybe something matching the "Classique Ti" original font.
Next time I will be more careful to center the letters in the blasted band.
I will update the build with more photos as I start assembling the bike and take another shot at blasting the letters, and apply the new Serotta decals. She upgraded to carbon clinchers on her Tri bike so we are putting her old Soul wheels on this build. She also found a lightly used Red groupset, so we are splitting that set between this build and her Tri bike.
08-10-15, 12:45 PM
#3

Former Hoarder

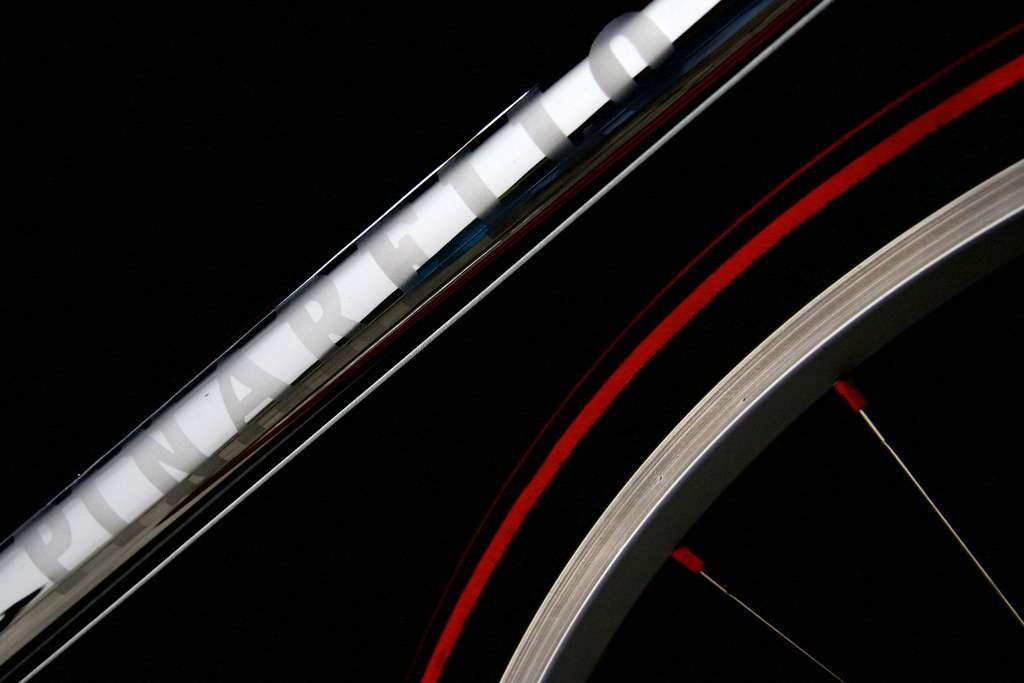
Nice! I'm a big fan of media blasting on frames and love the look. Will you be doing the same with the Serotta decals? I once did this with a reverse template on a chrome Pinarello frame to fantastic results.
__________________

08-10-15, 06:26 PM
#4
Senior Member
Thread Starter
Join Date: Jul 2008
Location: Indianapolis
Posts: 288
Bikes: 2011 Guru Praemio Ti (Rival), 03 Gary Fisher Franken-hardtail
Mentioned: 0 Post(s)
Tagged: 0 Thread(s)
Quoted: 0 Post(s)
Likes: 0
Liked 0 Times
in
0 Posts
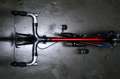
here is an update on the Serotta build. Still need to mount a brake and a d�railleur and add bar tape. My wife will swap out tires. I think she is going with a green motif as the new Serotta decals will have green outlines.
 08-10-15, 06:45 PM
#5

Should Be More Popular

Join Date: Dec 2007
Location: Malvern, PA (20 miles West of Philly)
Posts: 43,027
Bikes: 1986 Alpine (steel road bike), 2009 Ti Habenero, 2013 Specialized Roubaix
Mentioned: 560 Post(s)
Tagged: 2 Thread(s)
Quoted: 22571 Post(s)
Liked 8,918 Times
in
4,152 Posts
08-11-15, 07:19 AM
#6
Senior Member
Thread Starter
Join Date: Jul 2008
Location: Indianapolis
Posts: 288
Bikes: 2011 Guru Praemio Ti (Rival), 03 Gary Fisher Franken-hardtail
Mentioned: 0 Post(s)
Tagged: 0 Thread(s)
Quoted: 0 Post(s)
Likes: 0
Liked 0 Times
in
0 Posts
08-11-15, 07:21 AM
#7
Senior Member
Thread Starter
Join Date: Jul 2008
Location: Indianapolis
Posts: 288
Bikes: 2011 Guru Praemio Ti (Rival), 03 Gary Fisher Franken-hardtail
Mentioned: 0 Post(s)
Tagged: 0 Thread(s)
Quoted: 0 Post(s)
Likes: 0
Liked 0 Times
in
0 Posts

 08-11-15, 08:19 AM
#8
Senior Member

Join Date: Dec 2009
Location: Houston, TX
Posts: 28,682
Bikes: 1990 Romic Reynolds 531 custom build, Merlin Works CR Ti custom build, super light Workswell 066 custom build
Mentioned: 109 Post(s)
Tagged: 1 Thread(s)
Quoted: 6556 Post(s)
Likes: 0
Liked 58 Times
in
36 Posts
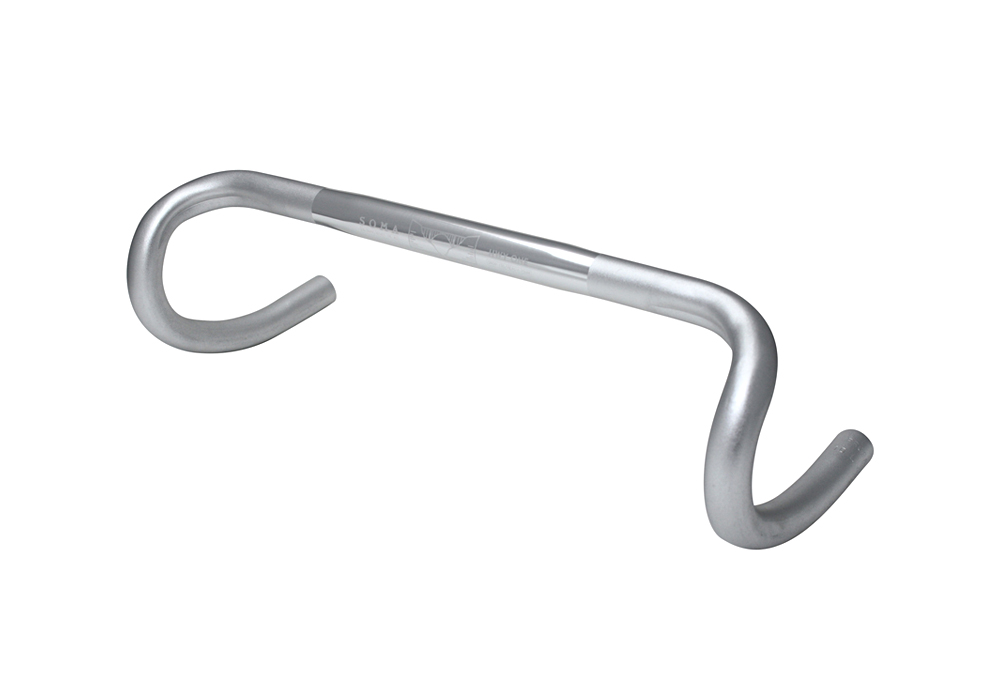
The problem with those old bars is that modern levers "require" them to be rotated up to get a flat run from the tops to the hoods that OP is showing in the photo. If I were OP, I would switch out the quill stem with a threadless stem adapter and buy a new stem and modern bars. Hand positions are an area where newer bikes are much improved over the old. For not too much money they can have the best bar setup that is now available.
08-11-15, 02:19 PM
#9
Expired Member

Join Date: Jun 2007
Location: TN
Posts: 11,499
Mentioned: 37 Post(s)
Tagged: 0 Thread(s)
Quoted: 3649 Post(s)
Liked 5,382 Times
in
2,732 Posts
Love the bead blast, very classy. If she's going green, there is the Vittoria Pave Vittoria Open Pave CG Tyre, TYRES ROAD/TRI/TRACK FOLDING .
08-11-15, 02:44 PM
#10
Senior Member
Join Date: Apr 2015
Location: S Oregon
Posts: 801
Bikes: Berthoud Randoneusse, Curt Goodrich steel road, Zanconato Minimax road, Jeff Lyon steel all road,
Mentioned: 4 Post(s)
Tagged: 0 Thread(s)
Quoted: 15 Post(s)
Likes: 0
Liked 3 Times
in
3 Posts
very cool build, nice wheels
08-12-15, 06:37 AM
#11
Senior Member
Thread Starter
Join Date: Jul 2008
Location: Indianapolis
Posts: 288
Bikes: 2011 Guru Praemio Ti (Rival), 03 Gary Fisher Franken-hardtail
Mentioned: 0 Post(s)
Tagged: 0 Thread(s)
Quoted: 0 Post(s)
Likes: 0
Liked 0 Times
in
0 Posts
The problem with those old bars is that modern levers "require" them to be rotated up to get a flat run from the tops to the hoods that OP is showing in the photo. If I were OP, I would switch out the quill stem with a threadless stem adapter and buy a new stem and modern bars. Hand positions are an area where newer bikes are much improved over the old. For not too much money they can have the best bar setup that is now available.
In the mean time I rotated the old bars down a bit as they were meant to be and it is not bad, although she may still want a more modern setup.

Last edited by dnslater; 08-12-15 at 06:42 AM.
08-12-15, 06:49 AM
#12
Expired Member
Join Date: Jun 2007
Location: TN
Posts: 11,499
Mentioned: 37 Post(s)
Tagged: 0 Thread(s)
Quoted: 3649 Post(s)
Liked 5,382 Times
in
2,732 Posts
The Nitto Noodle bar is comfortable and would look good on that bike. Agree with you about the quill as opposed to adapters.
08-12-15, 07:28 AM
#13
Senior Member
Join Date: Dec 2009
Location: Houston, TX
Posts: 28,682
Bikes: 1990 Romic Reynolds 531 custom build, Merlin Works CR Ti custom build, super light Workswell 066 custom build
Mentioned: 109 Post(s)
Tagged: 1 Thread(s)
Quoted: 6556 Post(s)
Likes: 0
Liked 58 Times
in
36 Posts
Well, DSFDF for sure. If you can get a modern shaped bar that fits the quill stem and together match your sensibilities, by all means go for. It is just that I never liked quill stems when they were all there was. I have always considered them gangly and ugly no matter what tube diameters the bike used. When the threadless stem was introduced, my first thought was, "It's about time!" I especially like the removable face plate on threadless stems for convenience.
08-15-15, 07:42 AM
#14
Senior Member
Thread Starter
Join Date: Jul 2008
Location: Indianapolis
Posts: 288
Bikes: 2011 Guru Praemio Ti (Rival), 03 Gary Fisher Franken-hardtail
Mentioned: 0 Post(s)
Tagged: 0 Thread(s)
Quoted: 0 Post(s)
Likes: 0
Liked 0 Times
in
0 Posts
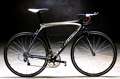
Update:
I had decals made with my wife's name and a black surround. I cut out her name and masked off the bike and blasted it with Al oxide and then glass beads.


Serottaa stickers are still incoming from Velocals in Europe.
She found a good deal on a 3T ergo road bar in polished aluminum that fits her 26mm quill. Hope to have it soon so we can complete the build.
I had decals made with my wife's name and a black surround. I cut out her name and masked off the bike and blasted it with Al oxide and then glass beads.
Serottaa stickers are still incoming from Velocals in Europe.
She found a good deal on a 3T ergo road bar in polished aluminum that fits her 26mm quill. Hope to have it soon so we can complete the build.
08-15-15, 10:18 AM
#15
The Freewheeler

Join Date: Sep 2011
Location: ATL/CHI
Posts: 225
Bikes: '37 Iver Johnson Racer, '44 BSA Airborne, '45 Swiss Militarvelo, '92 Fat City Slim Chance, '97 Pinarello Monviso, '03 Giant TCR Composite, '12 Bianchi Super Pista, '15 Humble CX
Mentioned: 0 Post(s)
Tagged: 0 Thread(s)
Quoted: 8 Post(s)
Likes: 0
Liked 1 Time
in
1 Post
your second take on the blasting looks fantastic
08-19-15, 06:39 PM
#16
Senior Member
Thread Starter
Join Date: Jul 2008
Location: Indianapolis
Posts: 288
Bikes: 2011 Guru Praemio Ti (Rival), 03 Gary Fisher Franken-hardtail
Mentioned: 0 Post(s)
Tagged: 0 Thread(s)
Quoted: 0 Post(s)
Likes: 0
Liked 0 Times
in
0 Posts
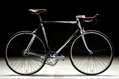
Mostly finished the build. Green scheme was all her idea. Still need a permanent polished seatpost and a different seat. TT seat on there for now.

 08-19-15, 11:15 PM
#19
Senior Member

Join Date: Jun 2013
Location: Los Angeles
Posts: 794
Bikes: '11 Merlin Extralight, '98 Dean Castanza, '89 Schwinn Prologue
Mentioned: 0 Post(s)
Tagged: 0 Thread(s)
Quoted: 19 Post(s)
Likes: 0
Liked 0 Times
in
0 Posts
Great restoration and lovely bike. But please change out the ugly handlebars.
08-20-15, 05:22 AM
#20
Expired Member
Join Date: Jun 2007
Location: TN
Posts: 11,499
Mentioned: 37 Post(s)
Tagged: 0 Thread(s)
Quoted: 3649 Post(s)
Liked 5,382 Times
in
2,732 Posts
Very nice. Happy wife....
08-20-15, 05:30 AM
#21
Senior Member
Thread Starter
Join Date: Jul 2008
Location: Indianapolis
Posts: 288
Bikes: 2011 Guru Praemio Ti (Rival), 03 Gary Fisher Franken-hardtail
Mentioned: 0 Post(s)
Tagged: 0 Thread(s)
Quoted: 0 Post(s)
Likes: 0
Liked 0 Times
in
0 Posts

My wife bought them on ebay. 38mm wide older 3T Forma ergobars. I think she thought they would be more modern. She will try them for a bit and see how she likes them. I think they look good on the bike in person.
08-20-15, 05:40 AM
#22
Senior Member
Join Date: Dec 2009
Location: Houston, TX
Posts: 28,682
Bikes: 1990 Romic Reynolds 531 custom build, Merlin Works CR Ti custom build, super light Workswell 066 custom build
Mentioned: 109 Post(s)
Tagged: 1 Thread(s)
Quoted: 6556 Post(s)
Likes: 0
Liked 58 Times
in
36 Posts
I like 'em. Nice look and I bet very comfy.
08-20-15, 05:49 AM
#23

Administrator

Join Date: Apr 2005
Location: Hudson Valley, NY
Posts: 32,978
Bikes: Merlin Cyrene '04; Bridgestone RB-1 '92
Mentioned: 325 Post(s)
Tagged: 2 Thread(s)
Quoted: 11952 Post(s)
Liked 6,599 Times
in
3,465 Posts
Great job! 
__________________
See, this is why we can't have nice things. - - smarkinson
Where else but the internet can a bunch of cyclists go and be the tough guy? - - jdon
08-20-15, 06:02 AM
#24
Emondafied

Join Date: May 2005
Location: Maryland
Posts: 4,939
Bikes: See sig
Mentioned: 0 Post(s)
Tagged: 0 Thread(s)
Quoted: 63 Post(s)
Likes: 0
Liked 0 Times
in
0 Posts
Looking great!
__________________

my bike page - my journal
Current Stable: Trek Emonda SL - Trek Top Fuel 8 - Scattante XRL - Jamis Dakar Expert - Trek 9700 -AlpineStars Al Mega
my bike page - my journal
Current Stable: Trek Emonda SL - Trek Top Fuel 8 - Scattante XRL - Jamis Dakar Expert - Trek 9700 -

Thread
Thread Starter
Forum
Replies
Last Post
Chombi
Classic & Vintage
71
05-09-18 08:39 AM


