


My future build - and a few questions
 05-19-17, 08:48 AM
#126
Senior Member
Thread Starter
Join Date: Apr 2017
Location: Orlando, FL
Posts: 286
Mentioned: 0 Post(s)
Tagged: 0 Thread(s)
Quoted: 108 Post(s)
Liked 0 Times
in
0 Posts
Shift cable housings should arrive today. That means that I should be able to install those, adjust shifting, and test it. Spacers are in tomorrow.
Also ordered a Goniometer to setup the seat height. I have a plump at home to measure and adjust seat position.
Got a bike stand for storage

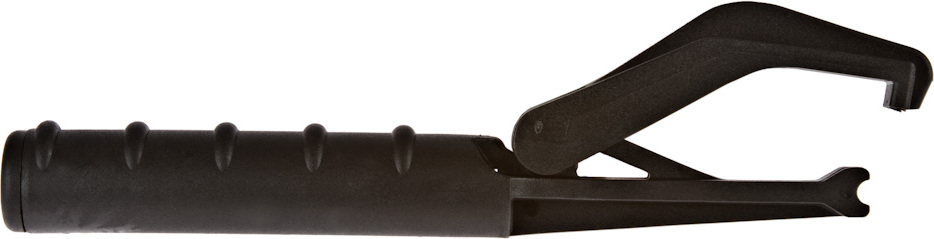
Read in a thread somewhere in the forum a recommendation of using Kool Stop Tire Bead Jack to make it easier to change tires... got one as well.
And since I did not have one... Got an inexpensive hanging hook scale to see what the end weight comes in at... not that I care much about the weight of the bike... I have a lot of work to do to get my weight down

If all goes well, I should be able to do a test ride over the weekend. Only thing missing are the bottle cages. Still waiting on those.
Also ordered a Goniometer to setup the seat height. I have a plump at home to measure and adjust seat position.
Got a bike stand for storage
Read in a thread somewhere in the forum a recommendation of using Kool Stop Tire Bead Jack to make it easier to change tires... got one as well.
And since I did not have one... Got an inexpensive hanging hook scale to see what the end weight comes in at... not that I care much about the weight of the bike... I have a lot of work to do to get my weight down
If all goes well, I should be able to do a test ride over the weekend. Only thing missing are the bottle cages. Still waiting on those.
 05-19-17, 09:39 AM
#127

Senior Member

Join Date: Sep 2015
Location: Madison, WI
Posts: 2,701
Mentioned: 52 Post(s)
Tagged: 0 Thread(s)
Quoted: 1136 Post(s)
Liked 650 Times
in
336 Posts
Yep, you should shorten that rear brake housing. Getting rid of the kink will improve the braking performance.
What cables are you using? Shimano has a variety now. Stainless, steel with polymer coating, steel with ano-type coating. If you are using the polymer-coated ones, make sure you are installing the finned/tongued housing ferrules in the correct spots. These are meant to avoid a situation where the polymer rubs off and causes a lot of friction on the cables, which has caused them to break, especially in the exit point from the levers.
Another thing to pay attention to is the installation of the front derailleur cable. Those FDs with the long pivot arm require a special tool to install the cable in the correct orientation. It is a flat plastic piece that should come with the derailleur (TL-FD68). It tells you what angle to route the cable when attaching it based on the angle that it is approaching the derailleur, which differs from frame to frame. Make sure to use it if you want good FD shifting.
I would also get a fourth hand tool to help with FD installation. You need quite a bit of tension on the cable to set the proper initial tension. The tool also makes brake cable installation and adjustment very easy.
Last edited by TenGrainBread; 05-19-17 at 09:44 AM.
05-19-17, 09:54 AM
#128
Senior Member
Thread Starter
Join Date: Apr 2017
Location: Orlando, FL
Posts: 286
Mentioned: 0 Post(s)
Tagged: 0 Thread(s)
Quoted: 108 Post(s)
Liked 0 Times
in
0 Posts
Yep, you should shorten that rear brake housing. Getting rid of the kink will improve the braking performance.
What cables are you using? Shimano has a variety now. Stainless, steel with polymer coating, steel with ano-type coating. If you are using the polymer-coated ones, make sure you are installing the finned/tongued housing ferrules in the correct spots. These are meant to avoid a situation where the polymer rubs off and causes a lot of friction on the cables, which has caused them to break, especially in the exit point from the levers.
Another thing to pay attention to is the installation of the front derailleur cable. Those FDs with the long pivot arm require a special tool to install the cable in the correct orientation. It is a flat plastic piece that should come with the derailleur (TL-FD68). It tells you what angle to route the cable when attaching it based on the angle that it is approaching the derailleur, which differs from frame to frame. Make sure to use it if you want good FD shifting.
I would also get a fourth hand tool to help with FD installation. You need quite a bit of tension on the cable to set the proper initial tension. The tool also makes brake cable installation and adjustment very easy.
What cables are you using? Shimano has a variety now. Stainless, steel with polymer coating, steel with ano-type coating. If you are using the polymer-coated ones, make sure you are installing the finned/tongued housing ferrules in the correct spots. These are meant to avoid a situation where the polymer rubs off and causes a lot of friction on the cables, which has caused them to break, especially in the exit point from the levers.
Another thing to pay attention to is the installation of the front derailleur cable. Those FDs with the long pivot arm require a special tool to install the cable in the correct orientation. It is a flat plastic piece that should come with the derailleur (TL-FD68). It tells you what angle to route the cable when attaching it based on the angle that it is approaching the derailleur, which differs from frame to frame. Make sure to use it if you want good FD shifting.
I would also get a fourth hand tool to help with FD installation. You need quite a bit of tension on the cable to set the proper initial tension. The tool also makes brake cable installation and adjustment very easy.
I did order a fourth hand tool. No I am wondering if it ever arrived... need to check.
Thank you for all those suggestions!!
 05-20-17, 02:34 PM
#129
Senior Member
Thread Starter
Join Date: Apr 2017
Location: Orlando, FL
Posts: 286
Mentioned: 0 Post(s)
Tagged: 0 Thread(s)
Quoted: 108 Post(s)
Liked 0 Times
in
0 Posts
Baby steps... had to sand down the fork post 1mm. Spacers are in and all is well. That task is done!

05-21-17, 07:55 AM
#130
Senior Member
Thread Starter
Join Date: Apr 2017
Location: Orlando, FL
Posts: 286
Mentioned: 0 Post(s)
Tagged: 0 Thread(s)
Quoted: 108 Post(s)
Liked 0 Times
in
0 Posts
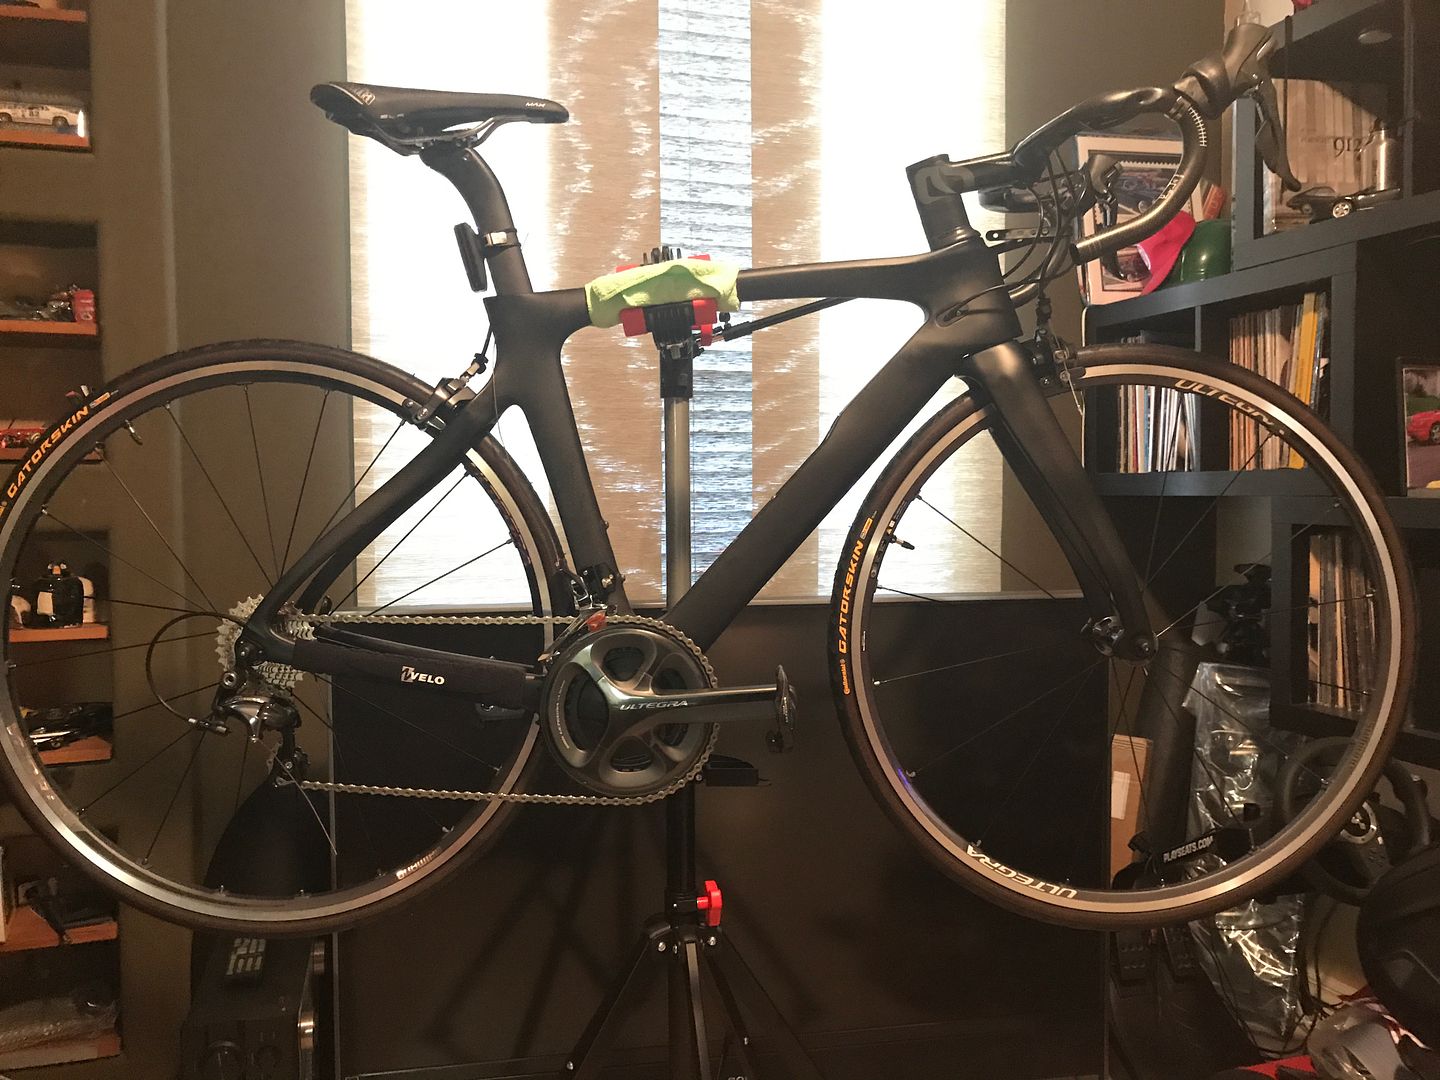
Chain installed. That was easier than I thought. The tool makes removing a link and installing the pin so easy!
Shifter cables also install. Now to adjust the front and rear derailleur
Shifter cables also install. Now to adjust the front and rear derailleur
05-21-17, 09:40 AM
#131
Senior Member

Join Date: Oct 2015
Posts: 15,489
Bikes: 2015 Workswell 066, 2017 Workswell 093, 2014 Dawes Sheila, 1983 Cannondale 500, 1984 Raleigh Olympian, 2007 Cannondale Rize 4, 2017 Fuji Sportif 1 LE
Mentioned: 144 Post(s)
Tagged: 0 Thread(s)
Quoted: 7652 Post(s)
Liked 3,473 Times
in
1,834 Posts
What's with the Velo sticker?
05-21-17, 10:52 AM
#132
Senior Member
Thread Starter
Join Date: Apr 2017
Location: Orlando, FL
Posts: 286
Mentioned: 0 Post(s)
Tagged: 0 Thread(s)
Quoted: 108 Post(s)
Liked 0 Times
in
0 Posts
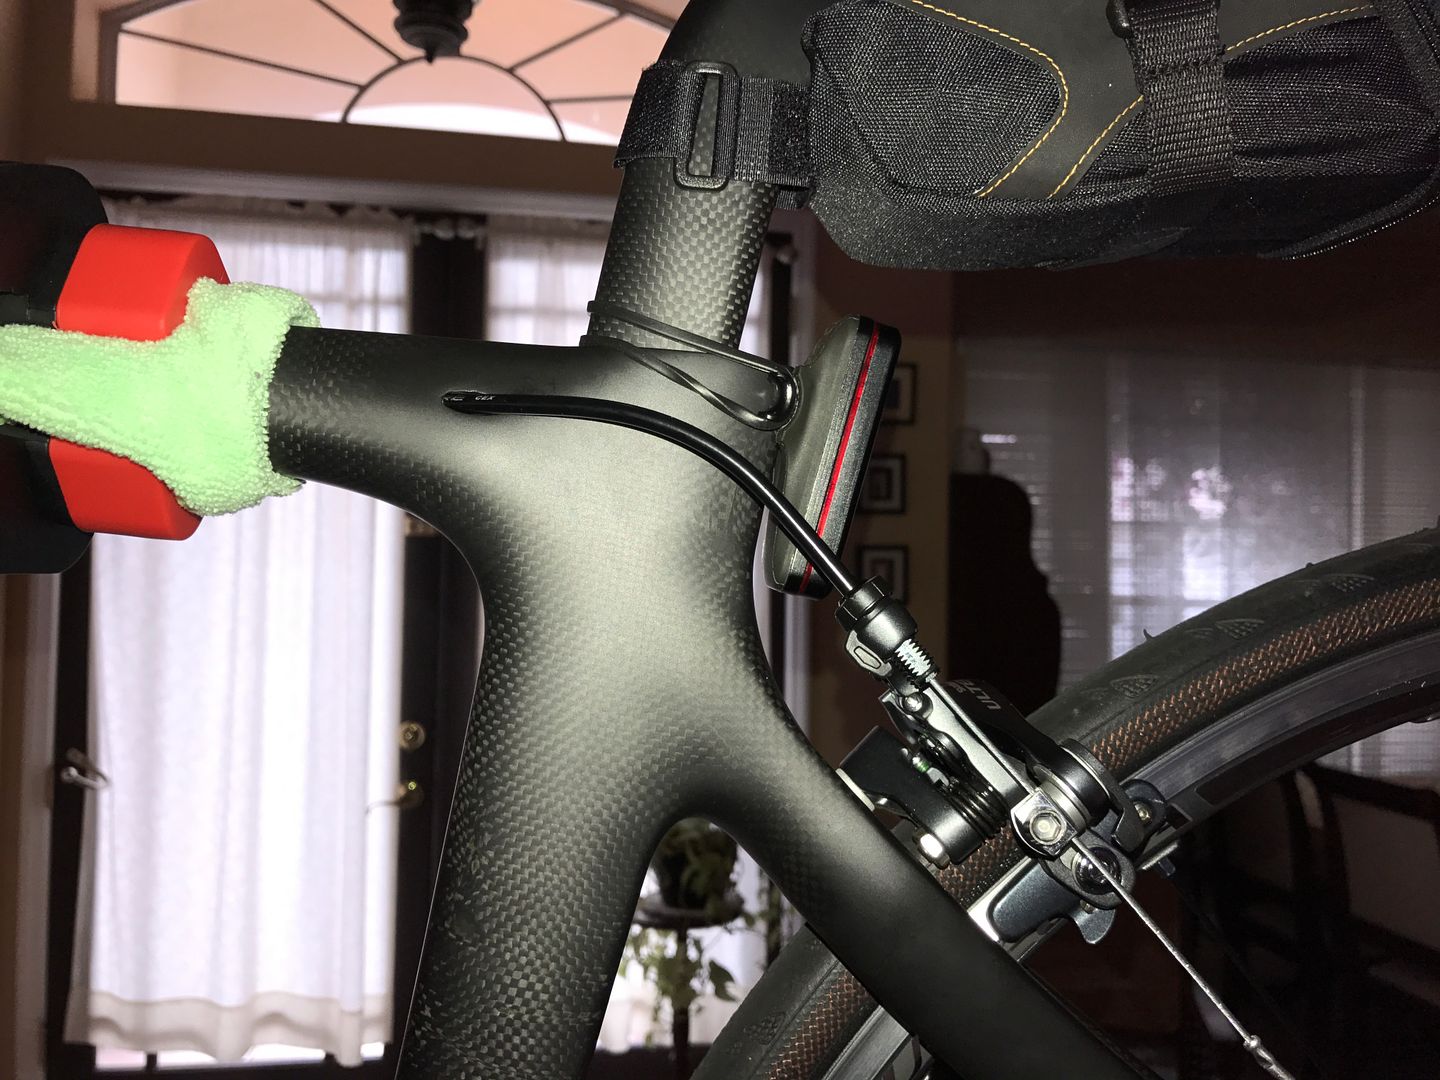
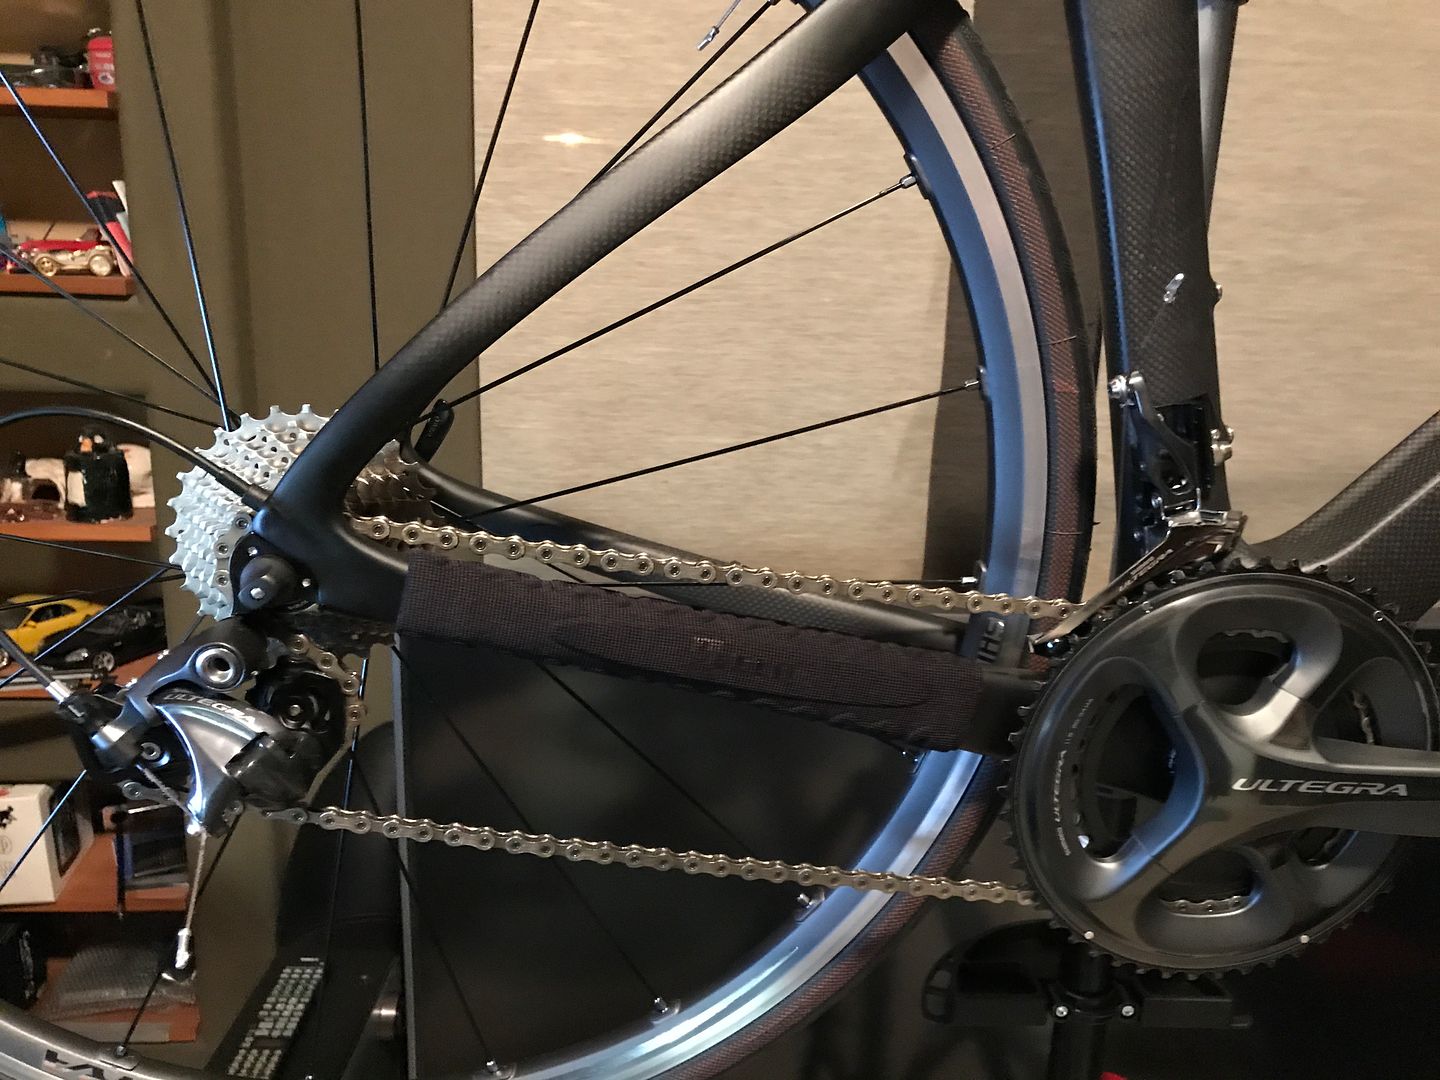
Not a sticker... a chainstay protector I got for that area... I hate logos... I will see if I can remove the logo. Last minute item in the cart to get the free shipping minimum amount 
Here is a closer look:
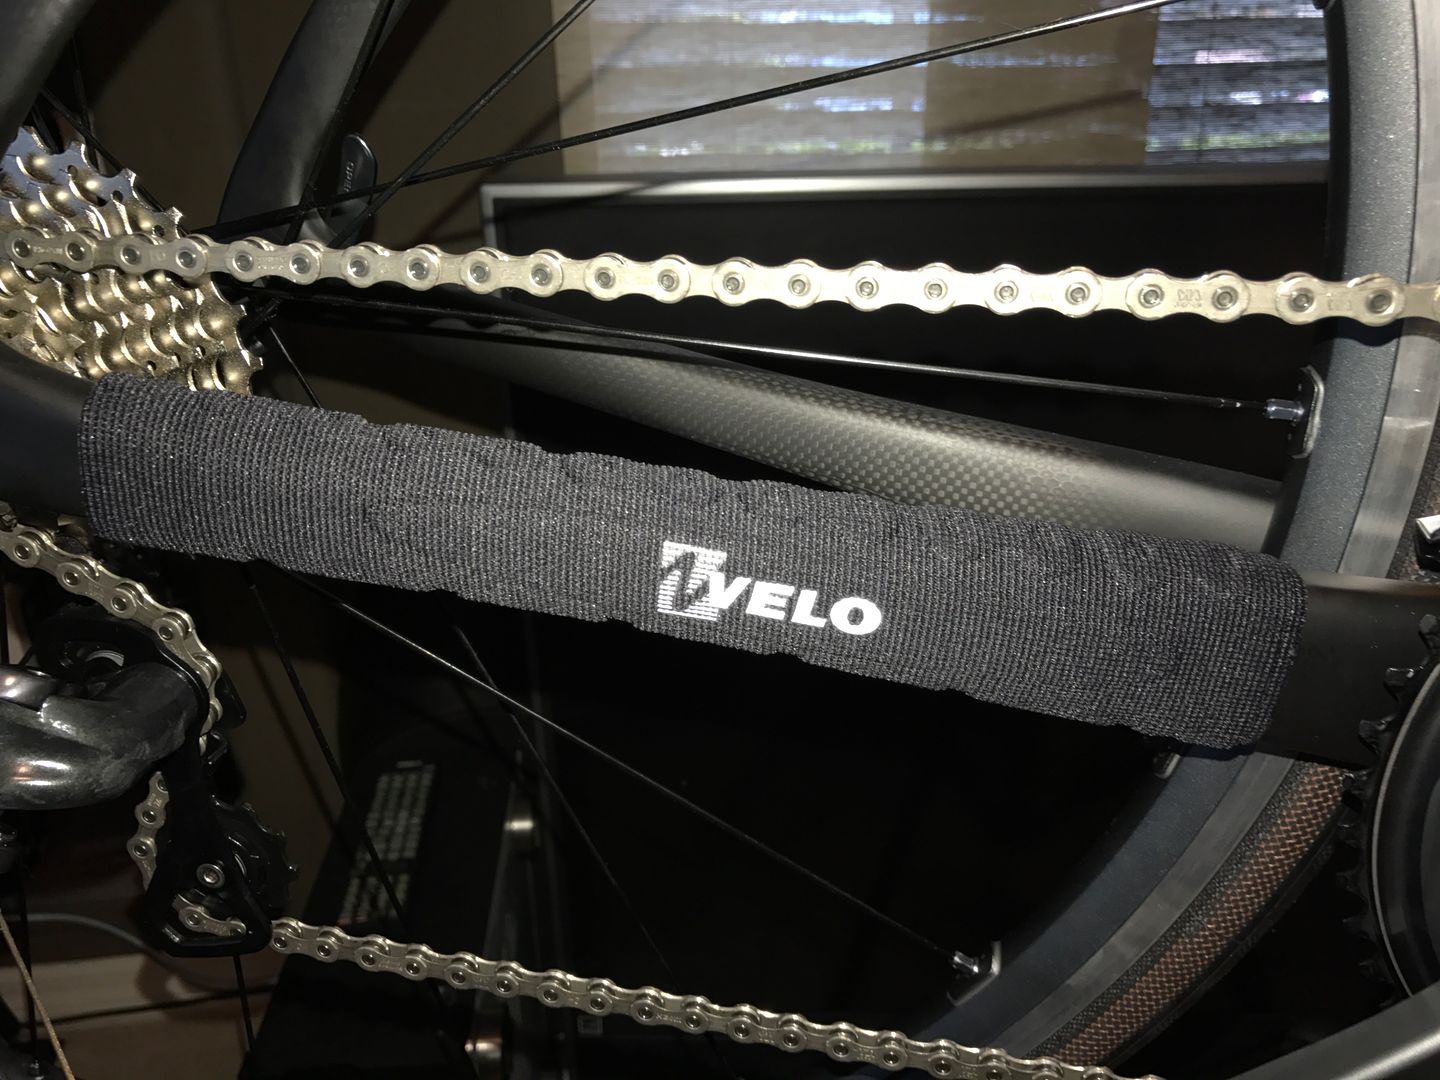
Here is a closer look:
Last edited by wachuko; 05-23-17 at 09:54 AM.
05-21-17, 11:19 AM
#133
Senior Member
Join Date: Oct 2015
Posts: 15,489
Bikes: 2015 Workswell 066, 2017 Workswell 093, 2014 Dawes Sheila, 1983 Cannondale 500, 1984 Raleigh Olympian, 2007 Cannondale Rize 4, 2017 Fuji Sportif 1 LE
Mentioned: 144 Post(s)
Tagged: 0 Thread(s)
Quoted: 7652 Post(s)
Liked 3,473 Times
in
1,834 Posts
Actually not a bad idea ... a little Sharpie ink?
My bike is silver and white ... the guard might look worse than the grease ... but of course, better than the chain gouge should the worst happen.
My bike is silver and white ... the guard might look worse than the grease ... but of course, better than the chain gouge should the worst happen.
05-21-17, 02:43 PM
#134
Senior Member
Thread Starter
Join Date: Apr 2017
Location: Orlando, FL
Posts: 286
Mentioned: 0 Post(s)
Tagged: 0 Thread(s)
Quoted: 108 Post(s)
Liked 0 Times
in
0 Posts
Black paint, sharpie, something like that, yeah
They come in many colors, shapes, and materials... you are sure to find one you like. I did it for the protection after seeing several threads/posts of damage by chains... being a CF frame, I want to protect it from common issues.
05-21-17, 02:55 PM
#135
Senior Member
Thread Starter
Join Date: Apr 2017
Location: Orlando, FL
Posts: 286
Mentioned: 0 Post(s)
Tagged: 0 Thread(s)
Quoted: 108 Post(s)
Liked 0 Times
in
0 Posts
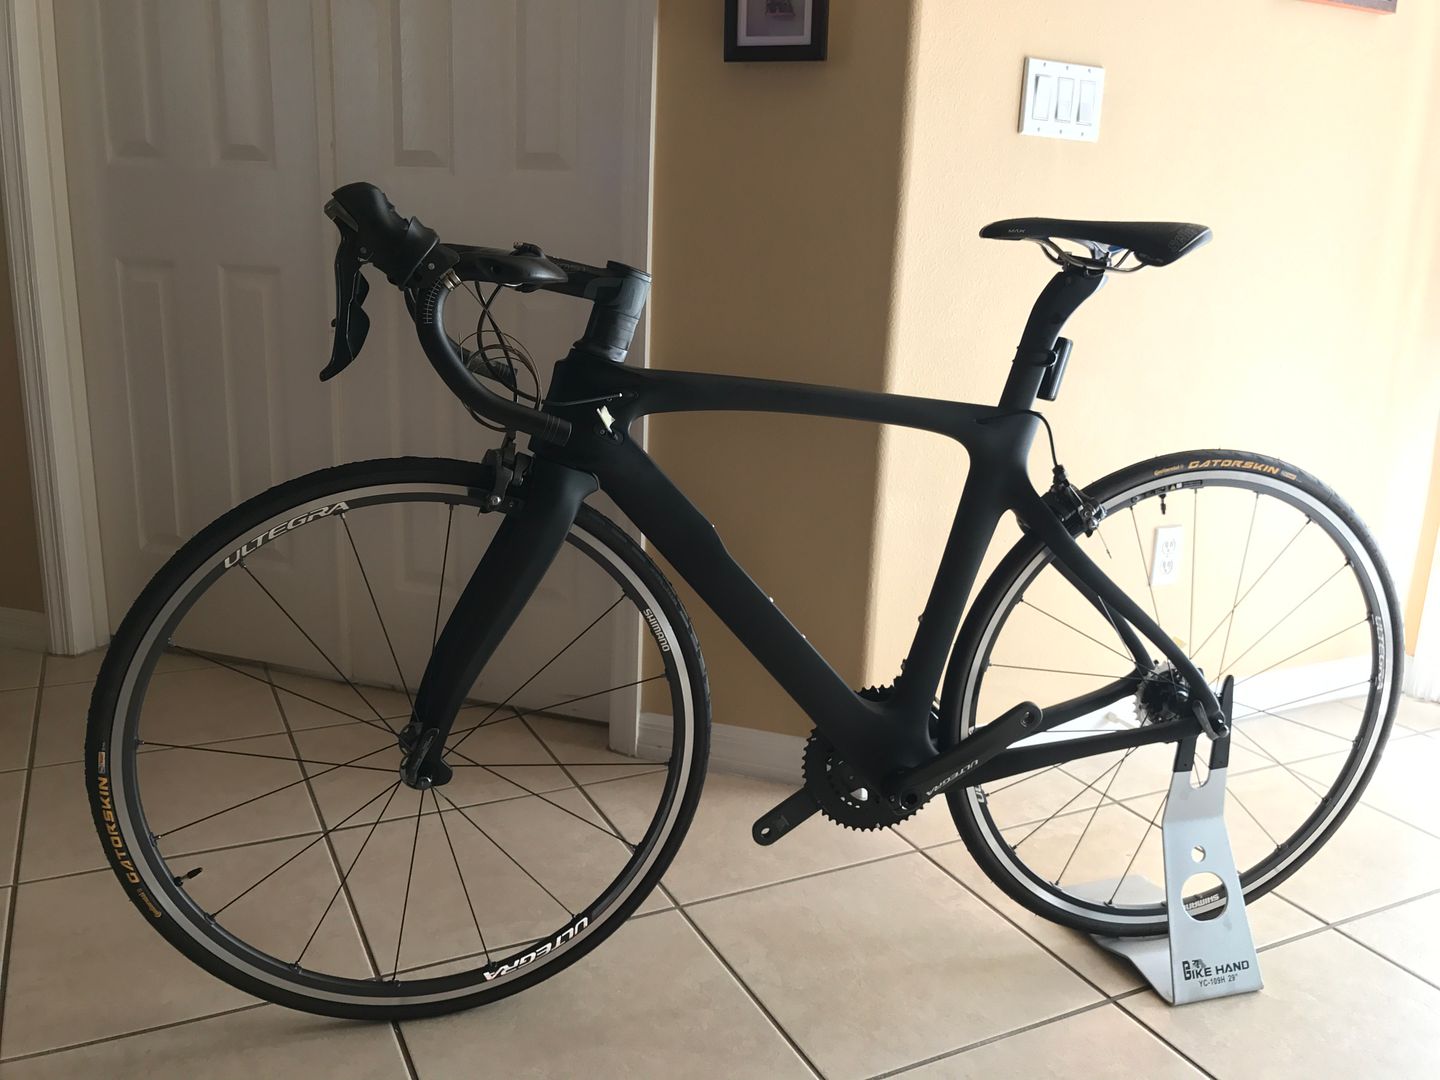
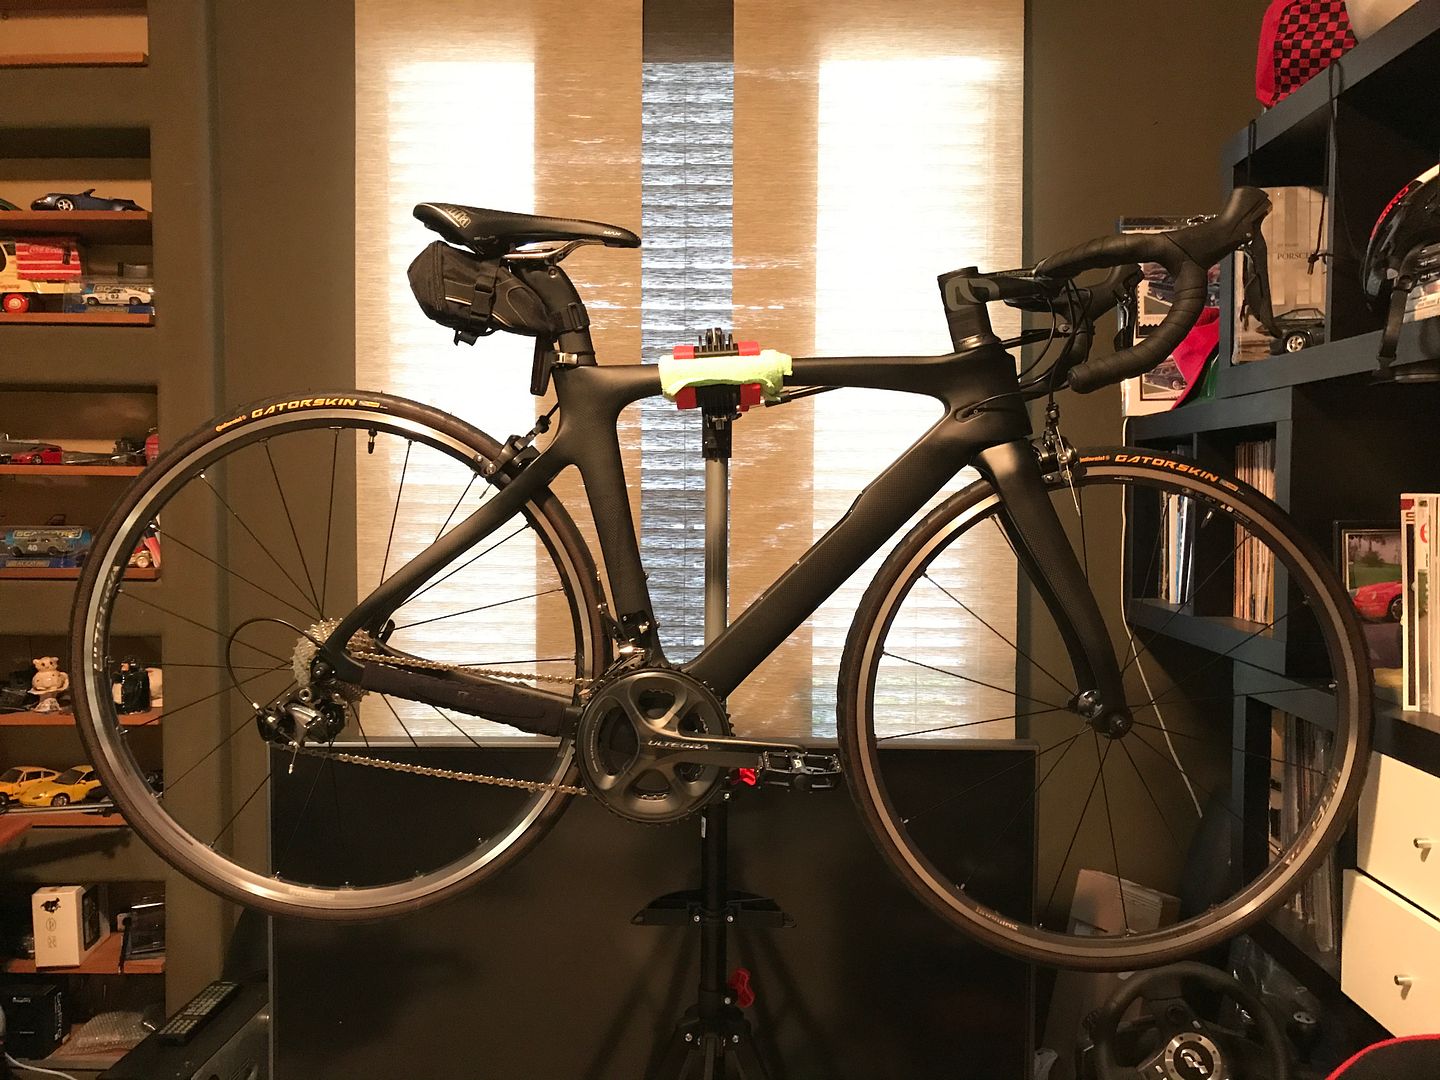
Well... looks like the major areas/issues are done. Maybe some fine tuning... Still waiting for the bottle cage to arrive. And using normal pedals for now while I get use to it.
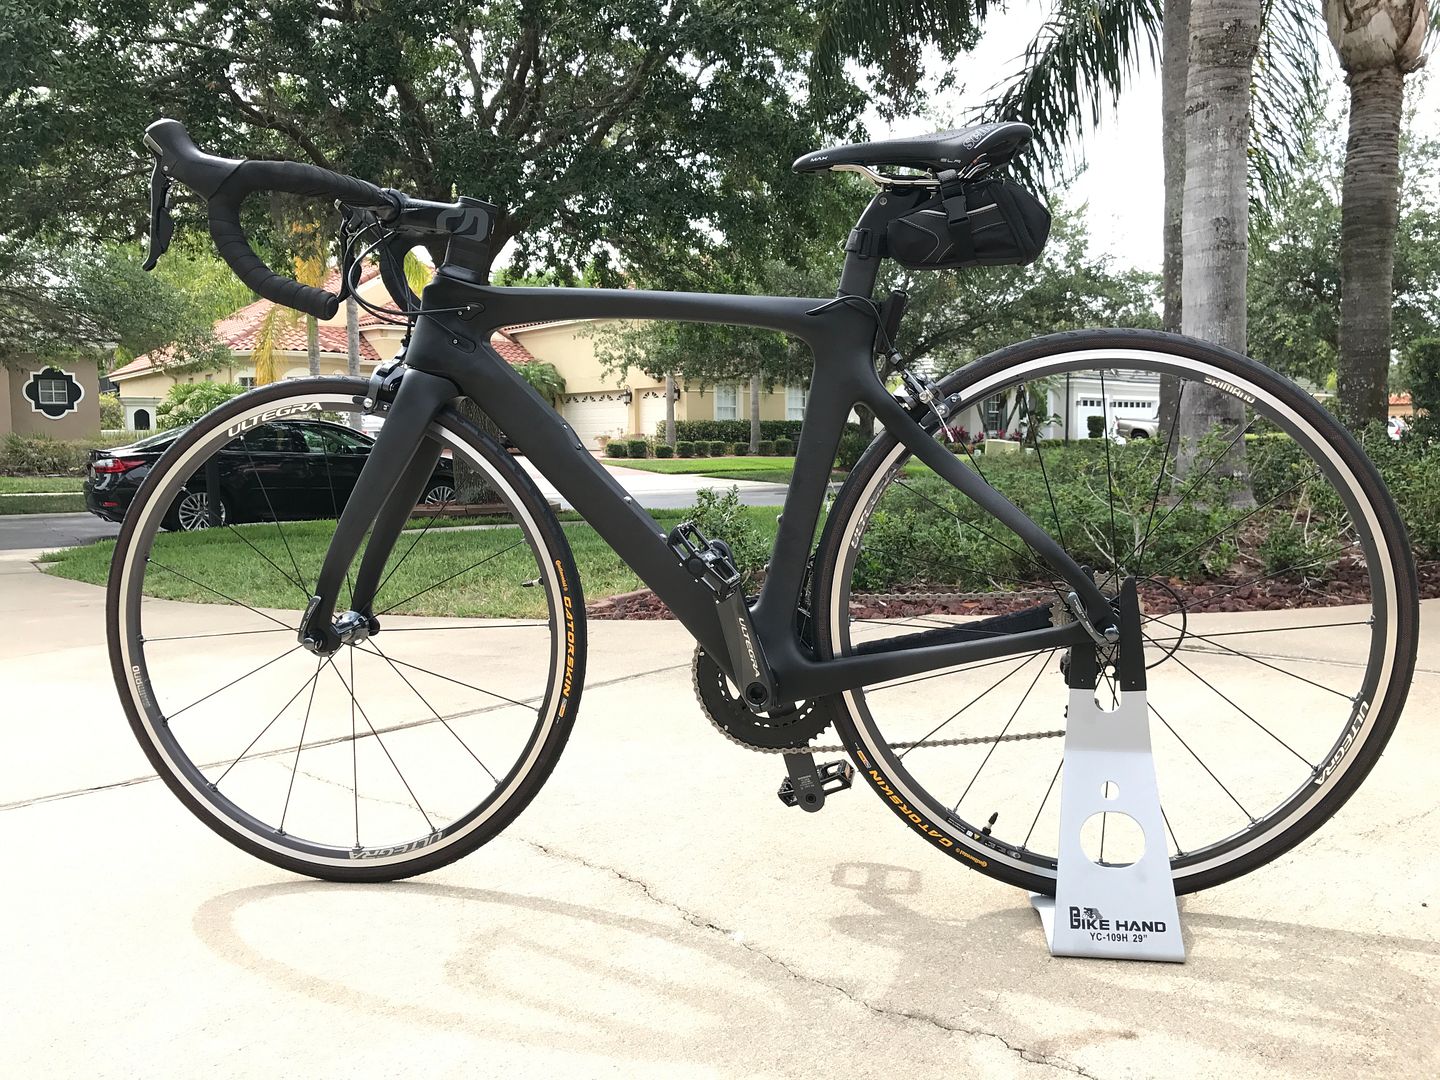
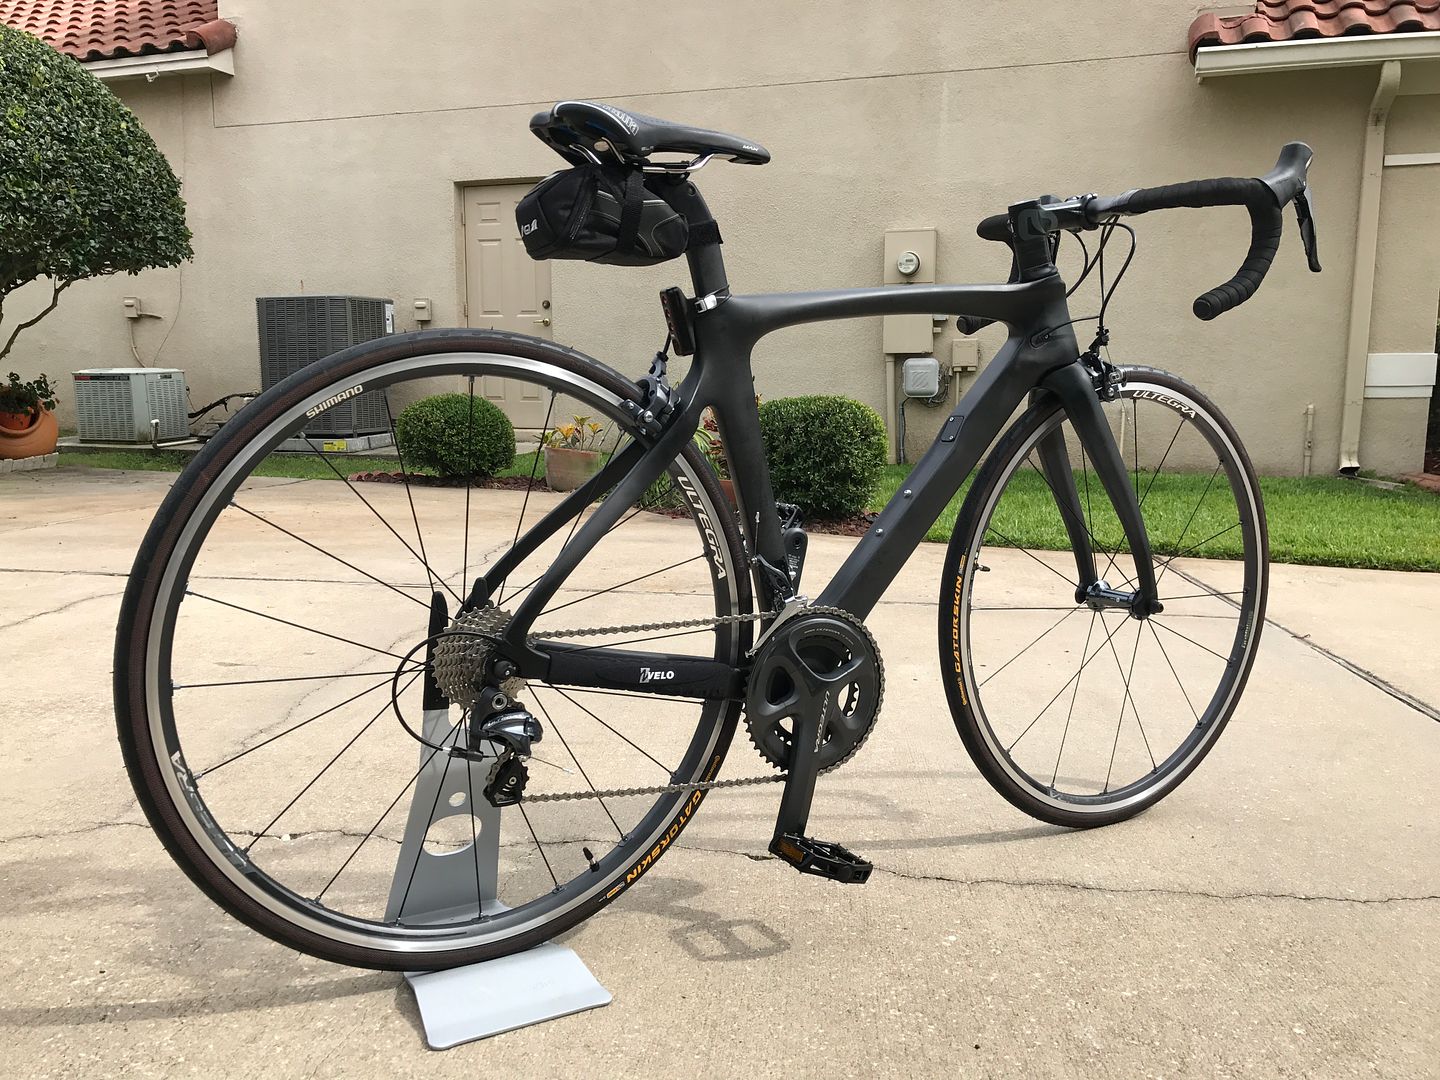
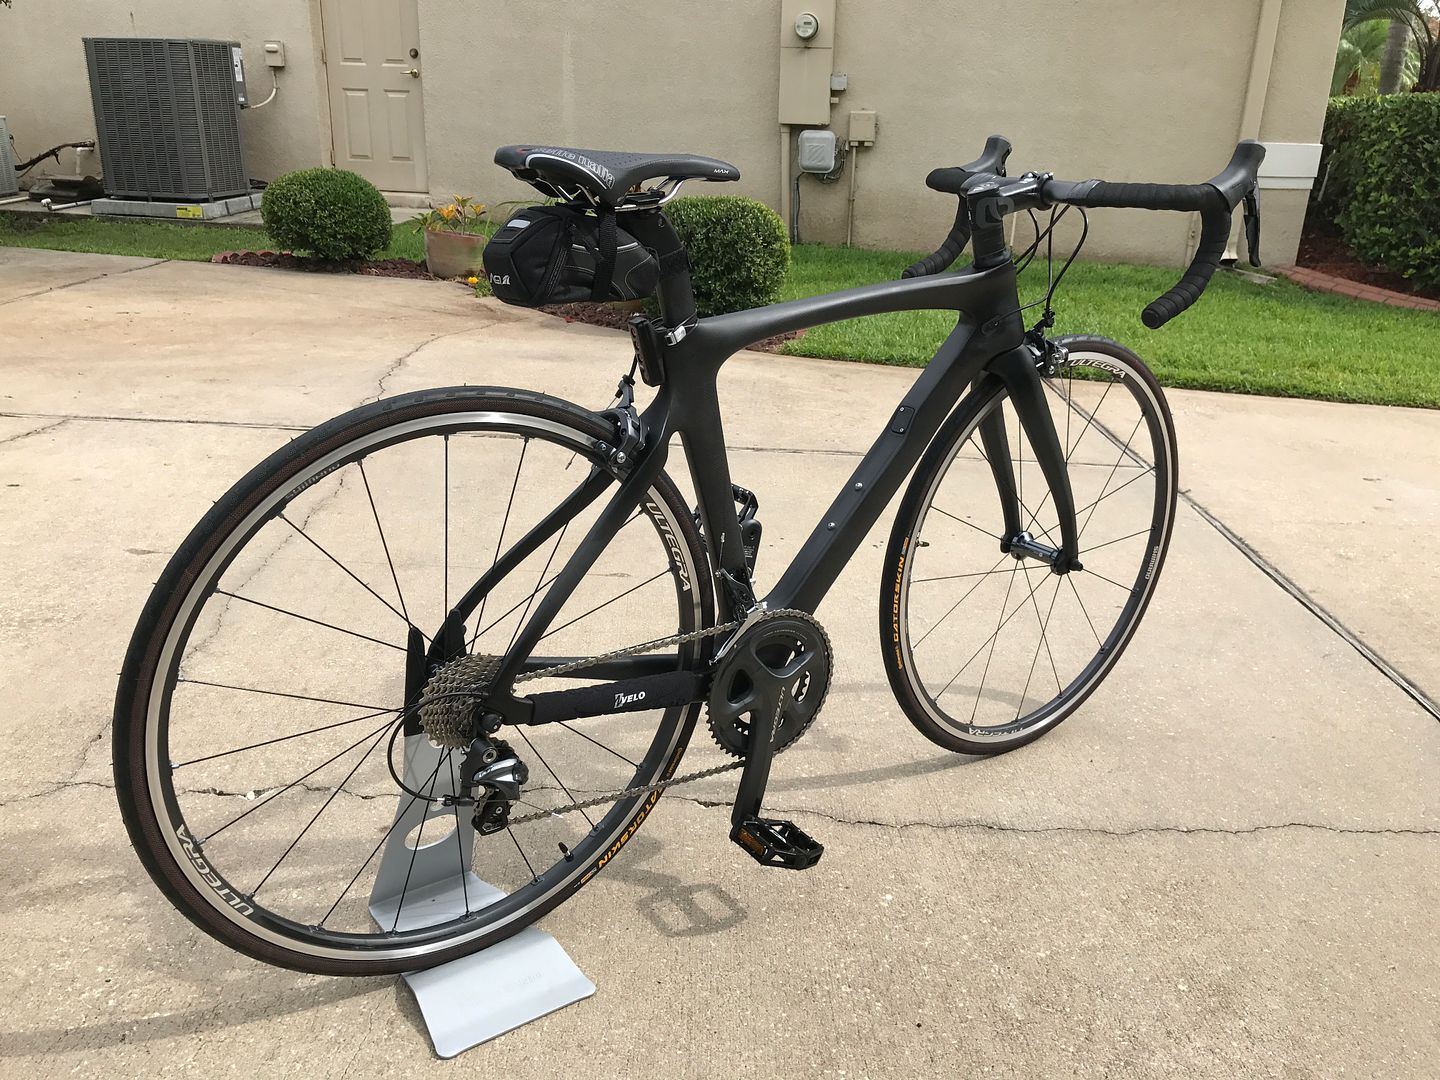

Looking at the photos I remember that I was going to cut a bit more the rear brake housing Will do so next...
Anyway... my first road bike. Took it out just around the neighborhood... oh goodness... this thing is hard as a rock! My a*s*s still hurts! No wonder everyone uses the padded underware (or padded shorts)
Total weight of the bike as you see it in the photos is 19.18 lbs Keep in mind that tool bag alone (tools inside) is 1.89lbs. Plus the pedals are heavier than the Ultegra clipless units. So with lighter tires, Ultegra pedals, taking off the toolbag... this could be a 17lbs bike. I was not going after any specific weight... just sharing in case anyone cares.
I will need to get used to how harsh this bike rides. Proper gear will certainly help. I will have to build up to be able to go with my friend on his 50+ miles rides... no way in heck I can do that right away... (yes, I am quickly realizing what it will take to make such a long ride )
)
Alright... let me ride this thing again... back in a few.
Looking at the photos I remember that I was going to cut a bit more the rear brake housing
Will do so next...Anyway... my first road bike. Took it out just around the neighborhood... oh goodness... this thing is hard as a rock! My a*s*s still hurts! No wonder everyone uses the padded underware (or padded shorts)
Total weight of the bike as you see it in the photos is 19.18 lbs Keep in mind that tool bag alone (tools inside) is 1.89lbs. Plus the pedals are heavier than the Ultegra clipless units. So with lighter tires, Ultegra pedals, taking off the toolbag... this could be a 17lbs bike. I was not going after any specific weight... just sharing in case anyone cares.
I will need to get used to how harsh this bike rides. Proper gear will certainly help. I will have to build up to be able to go with my friend on his 50+ miles rides... no way in heck I can do that right away... (yes, I am quickly realizing what it will take to make such a long ride
)Alright... let me ride this thing again... back in a few.
Last edited by wachuko; 05-21-17 at 03:00 PM.
05-21-17, 04:40 PM
#136
Senior Member
Thread Starter
Join Date: Apr 2017
Location: Orlando, FL
Posts: 286
Mentioned: 0 Post(s)
Tagged: 0 Thread(s)
Quoted: 108 Post(s)
Liked 0 Times
in
0 Posts
Took it out for 10 miles. Made additional adjustments to the brakes (fixed the housing on the rear section of the rear brake line) and front/rear derailleur... it is done! Well... at least for now, lol. Shifting and braking is smooth. Getting use to the seat. I know my Old Navy shorts are not right for this ride, will get some decent riding gear soon.
Ohh... and I fixed the toolbag... I had installed it upside down
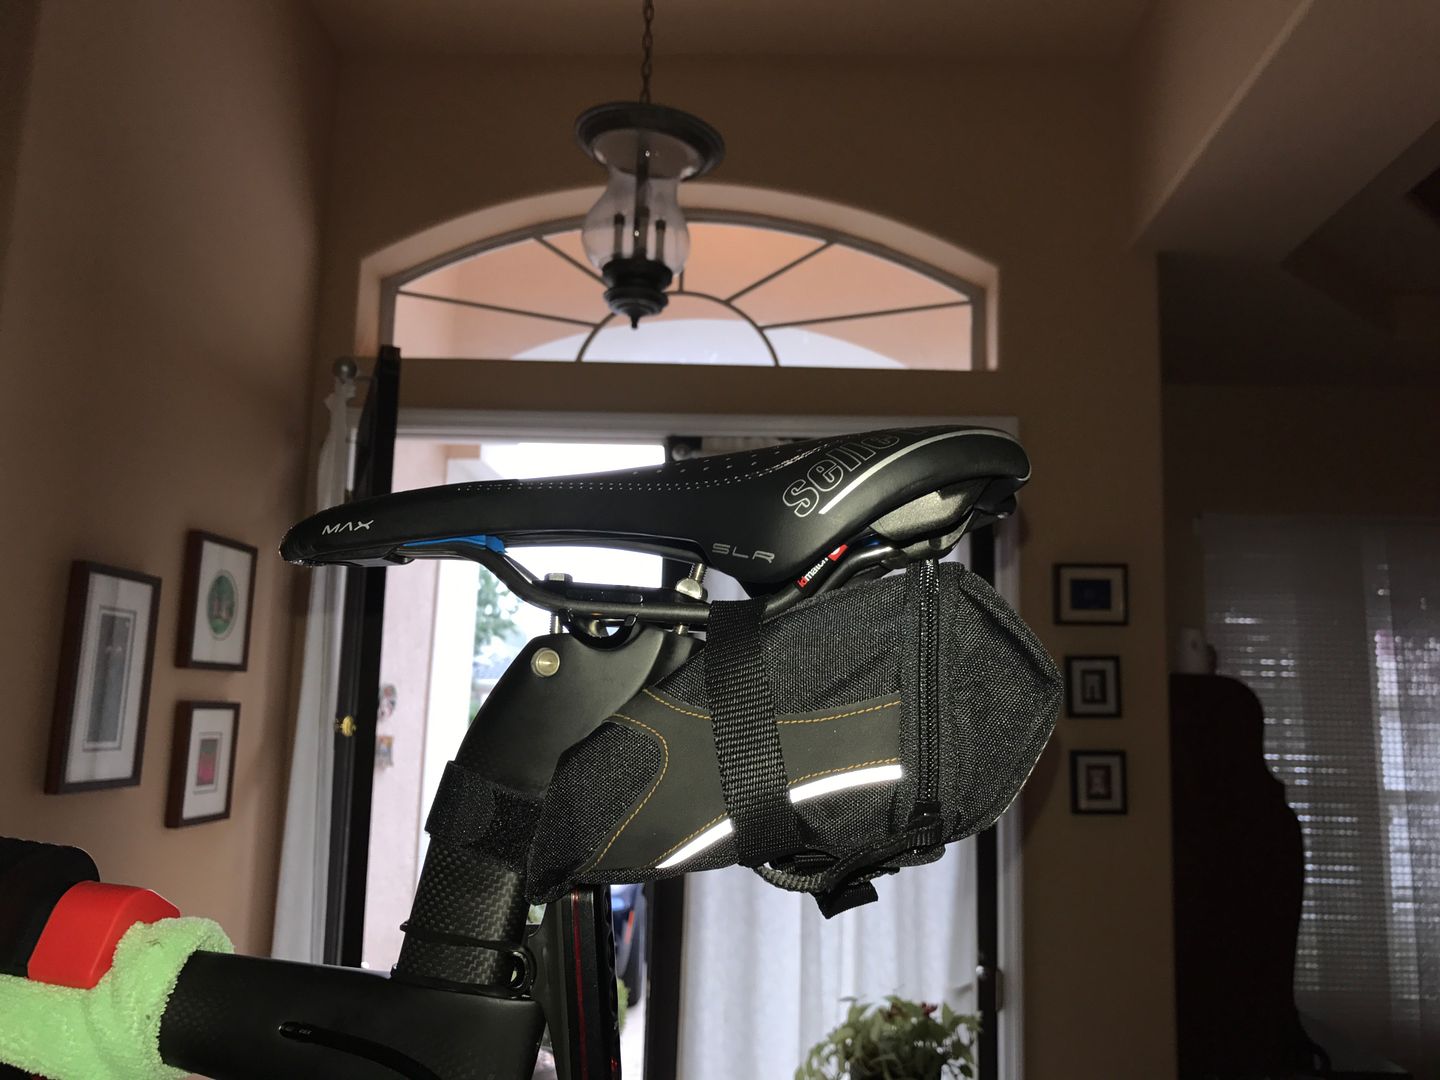
Ohh... and I fixed the toolbag... I had installed it upside down
Last edited by wachuko; 05-21-17 at 05:23 PM.
05-21-17, 04:53 PM
#137
Senior Member
Join Date: Oct 2015
Posts: 15,489
Bikes: 2015 Workswell 066, 2017 Workswell 093, 2014 Dawes Sheila, 1983 Cannondale 500, 1984 Raleigh Olympian, 2007 Cannondale Rize 4, 2017 Fuji Sportif 1 LE
Mentioned: 144 Post(s)
Tagged: 0 Thread(s)
Quoted: 7652 Post(s)
Liked 3,473 Times
in
1,834 Posts
I found the same thing with my Workswell, as to stiffness. it takes the chatter out, but the knocks are definitely Knocks. I cannot stay planted on the saddle when I hit big bumps.
The plus side is that the bike responds to each pedal stroke (or so I imagine.) I think I try a little harder because it feels more rewarding.
Okay .... now I am all worked up and have to go ride.
The plus side is that the bike responds to each pedal stroke (or so I imagine.) I think I try a little harder because it feels more rewarding.
Okay .... now I am all worked up and have to go ride.
05-21-17, 07:22 PM
#138
Senior Member
Thread Starter
Join Date: Apr 2017
Location: Orlando, FL
Posts: 286
Mentioned: 0 Post(s)
Tagged: 0 Thread(s)
Quoted: 108 Post(s)
Liked 0 Times
in
0 Posts
Logo almost gone... will do a second coat tomorrow...
Very happy with the build. Pretty sure a shop would have done a better job but a lot of the fun for me is doing the build myself.
Thank you all for the suggestions made. Also the YouTube videos on some tips and tricks for setting up that evil front derailleur (what a royal PITA that was!! )
Very happy with the build. Pretty sure a shop would have done a better job but a lot of the fun for me is doing the build myself.
Thank you all for the suggestions made. Also the YouTube videos on some tips and tricks for setting up that evil front derailleur
(what a royal PITA that was!! )
Last edited by wachuko; 05-22-17 at 11:18 AM.
05-21-17, 08:32 PM
#139
Senior Member
Join Date: Sep 2015
Location: Madison, WI
Posts: 2,701
Mentioned: 52 Post(s)
Tagged: 0 Thread(s)
Quoted: 1136 Post(s)
Liked 650 Times
in
336 Posts
Nice job. Rear brake housing looks perfect.
Yeah, the long arm FDs are a pain. Our Shimano rep says Shimano will be moving away from that design in coming years.
Get a few pairs of chamois shorts, a few jerseys, and ride it. If you can commute to work on it, that's a good way to get in a lot of miles.
Yeah, the long arm FDs are a pain. Our Shimano rep says Shimano will be moving away from that design in coming years.
Get a few pairs of chamois shorts, a few jerseys, and ride it. If you can commute to work on it, that's a good way to get in a lot of miles.
05-23-17, 09:51 AM
#140
Senior Member
Thread Starter
Join Date: Apr 2017
Location: Orlando, FL
Posts: 286
Mentioned: 0 Post(s)
Tagged: 0 Thread(s)
Quoted: 108 Post(s)
Liked 0 Times
in
0 Posts
Nice job. Rear brake housing looks perfect.
Yeah, the long arm FDs are a pain. Our Shimano rep says Shimano will be moving away from that design in coming years.
Get a few pairs of chamois shorts, a few jerseys, and ride it. If you can commute to work on it, that's a good way to get in a lot of miles.
Yeah, the long arm FDs are a pain. Our Shimano rep says Shimano will be moving away from that design in coming years.
Get a few pairs of chamois shorts, a few jerseys, and ride it. If you can commute to work on it, that's a good way to get in a lot of miles.
I also ordered some mirrors. Went with these. Did not feel good riding without being able to see behind me.
Sprintech Roadbike Review Mirrors (Pair)
I will not be able to commute to work this year... I take my son to school in the morning and it becomes a complicated process to go back home... will look to do that when he gets his driver's permit.
05-23-17, 10:14 AM
#141

pan y agua

Join Date: Aug 2005
Location: Jacksonville
Posts: 31,303
Bikes: Willier Zero 7; Merlin Extralight; Calfee Dragonfly tandem, Calfee Adventure tandem; Cervelo P2; Motebecane Ti Fly 29er; Motebecanne Phantom Cross; Schwinn Paramount Track bike
Mentioned: 17 Post(s)
Tagged: 0 Thread(s)
Quoted: 1447 Post(s)
Liked 727 Times
in
372 Posts
If we're talking assembling a bike from a frame that already has the head set installed, and wheels already built, it takes a few allen wrenches, a cable cutter, and the ability to use YouTube.
__________________
You could fall off a cliff and die.
You could get lost and die.
You could hit a tree and die.
OR YOU COULD STAY HOME AND FALL OFF THE COUCH AND DIE.
You could fall off a cliff and die.
You could get lost and die.
You could hit a tree and die.
OR YOU COULD STAY HOME AND FALL OFF THE COUCH AND DIE.
05-23-17, 10:42 AM
#142
Senior Member
Thread Starter
Join Date: Apr 2017
Location: Orlando, FL
Posts: 286
Mentioned: 0 Post(s)
Tagged: 0 Thread(s)
Quoted: 108 Post(s)
Liked 0 Times
in
0 Posts
If you include building the frame, and to a lesser degree lacing your own wheels.
If we're talking assembling a bike from a frame that already has the head set installed, and wheels already built, it takes a few allen wrenches, a cable cutter, and the ability to use YouTube.
If we're talking assembling a bike from a frame that already has the head set installed, and wheels already built, it takes a few allen wrenches, a cable cutter, and the ability to use YouTube.
 I had to measure the fork tube, cut, file some, etc. To do the fitment and then mount the headset. That did not take too much time. Just making sure the cut was straight and measured many times before cutting.
 Wheels came ready to go... only had to install the tubes and tires... They were true, so no adjustments were needed. I do want to learn how to lace a wheel. I might follow a fellow member approach and buy the parts to build a set. Just to learn (or get frustrated trying
 ) and see if I can have something lighter.
 Everything was torqued to specifications. I am always one to use a torque wrench when possible.
Greased all parts that called for it.
The cable guides that the frame had in place, were godsend. I can't imagine trying to route the cables without those guides. This is only an issue if you have cables that go inside the frame. Here I made a mistake and had to buy an additional brake cable... but my fault for not paying attention on how the length of the cable was impacted when you applied the brake... you have to measure based on movement from side to side, to have enough cable slack... but on the front one, you have to measure after applying the brake and taking into account the movement of the cable... minor stuff, but it got me.
But that evil front derailleur! Goodness!! SOB!!! I went back and forth adjusting, testing, adjusting... starting from scratch... rinse and repeat. I still do not think that I got it right. I want to go over my friend's F8 to see how his bike is working just to make sure I got it finally right.
05-23-17, 11:30 AM
#143
Senior Member
Not sure if you have this already, but I highly recommend using a cable tensioner for front derailleur, 6800 Fr Derailleur is tricky to get cable tension correct. Like these from Jagwire - makes it MUCH easier to cable tension correct, if that's what you're having trouble with.
But that evil front derailleur! Goodness!! SOB!!! I went back and forth adjusting, testing, adjusting... starting from scratch... rinse and repeat. I still do not think that I got it right. I want to go over my friend's F8 to see how his bike is working just to make sure I got it finally right.
05-23-17, 11:50 AM
#144
Senior Member
Join Date: Oct 2015
Posts: 15,489
Bikes: 2015 Workswell 066, 2017 Workswell 093, 2014 Dawes Sheila, 1983 Cannondale 500, 1984 Raleigh Olympian, 2007 Cannondale Rize 4, 2017 Fuji Sportif 1 LE
Mentioned: 144 Post(s)
Tagged: 0 Thread(s)
Quoted: 7652 Post(s)
Liked 3,473 Times
in
1,834 Posts
But that evil front derailleur! Goodness!! SOB!!! I went back and forth adjusting, testing, adjusting... starting from scratch... rinse and repeat. I still do not think that I got it right. I want to go over my friend's F8 to see how his bike is working just to make sure I got it finally right.
05-23-17, 12:07 PM
#145
Senior Member
Thread Starter
Join Date: Apr 2017
Location: Orlando, FL
Posts: 286
Mentioned: 0 Post(s)
Tagged: 0 Thread(s)
Quoted: 108 Post(s)
Liked 0 Times
in
0 Posts
6800 F. Der truly does suck. Not only is it hard to set up just right (in-line tensioner included) it seems to me that it is incredibly narrow and sensitive to angle ... and because mine (and yours, I'd guess) are bolt-on, there is so little angle adjustment possibly ... I might have to keep mounting mine a millimeter higher after every ride until I hit the sweet spot.
05-23-17, 12:15 PM
#146
Senior Member
Thread Starter
Join Date: Apr 2017
Location: Orlando, FL
Posts: 286
Mentioned: 0 Post(s)
Tagged: 0 Thread(s)
Quoted: 108 Post(s)
Liked 0 Times
in
0 Posts
Not sure if you have this already, but I highly recommend using a cable tensioner for front derailleur, 6800 Fr Derailleur is tricky to get cable tension correct. Like these from Jagwire - makes it MUCH easier to cable tension correct, if that's what you're having trouble with.
The other thing that I found interesting (almost funny)... you have all these grommets for this and that... and then you see the front derailleur cable go completely uncovered and without a guide inside the little hole behind the center post...
") I would have thought that a guide of some sort would be used there.
I would have thought that a guide of some sort would be used there. Photo is not my bike... just to show the routing that I am talking about...
 05-23-17, 08:26 PM
#147
Senior Member
Join Date: Dec 2015
Location: West Palm Beach FL
Posts: 176
Bikes: Giant TCR SL 1, Niner Air 9, Motobecane Fantom Cross Pro
Mentioned: 3 Post(s)
Tagged: 0 Thread(s)
Quoted: 57 Post(s)
Likes: 0
Liked 2 Times
in
1 Post
It took me a while adjusting my ultegra front derailleur. I also did not know that there was a trim function in the levers that makes thing nice and quiet after shifting to the big ring. Another tap on the lever backs it out.
Last edited by deex; 05-24-17 at 05:31 AM.
05-24-17, 04:10 AM
#149
Senior Member
Thread Starter
Join Date: Apr 2017
Location: Orlando, FL
Posts: 286
Mentioned: 0 Post(s)
Tagged: 0 Thread(s)
Quoted: 108 Post(s)
Liked 0 Times
in
0 Posts
05-24-17, 04:55 AM
#150
pluralis majestatis
Join Date: Feb 2004
Location: you rope
Posts: 4,206
Bikes: a DuhRosa
Mentioned: 8 Post(s)
Tagged: 0 Thread(s)
Quoted: 537 Post(s)
Likes: 0
Liked 2 Times
in
2 Posts
should probably clamp bike to seatpost instead of top tube
fd setup is tough ive youve never done it before. having inline cable is a huge help. as well as keeping the rotation correct.
fd setup is tough ive youve never done it before. having inline cable is a huge help. as well as keeping the rotation correct.