


KHatfull's Aluminum Polishing Thread
 11-25-10, 02:47 PM
#1
FBoD Member at Large
Thread Starter

Join Date: Aug 2008
Location: Woodbury, MN
Posts: 6,094
Mentioned: 3 Post(s)
Tagged: 0 Thread(s)
Quoted: 30 Post(s)
Likes: 0
Liked 7 Times
in
7 Posts
KHatfull's Aluminum Polishing Thread
UPDATE POST: 6/21/11
I updated my method and materials somewhat. The initial post below is still a worthwhile read as it leads into the updates I posted here.
INITIAL POST: 11/25/2010
While I don't think my polishing efforts are any better than a lot of what I see here in C&V I get lots of questions via the forum and via PMs about my techniques. I've bounced this idea around for a while and given I'm stuck basting a 20 1/2 pound turkey for the next 5-ish hours I thought I'd start a thread that I could 1) give a description of what I do and 2) keep updated as I find different techniques and ideas.
I certainly hope this doesn't seem presumptious on my part but with the number of questions I get, heck, I figured this would make it easier on me to respond (paste a link baby!) and to give a little more detail than I normally might.
Please keep in mind, what I'm talking about here is how to work on aluminum. For chrome I'm still working things out, there are much better people than I at chrome. I defer.
All the techniques I'll describe here are hand techniques, with the possible exception of the abrasive balls below...but they are used in a hand drill (and most everyone has one) so... You don't need buffing wheels and the like to polish a quality part. Those tools can take time off the process but not necessarily get you a higher quality result. I view my polishing activities as relaxing. Wet sanding is done at the laundry tub but once I get to polishing I have a huge beach towel that I spread out over myself, sit down in the easy chair, and polish while I watch TV and drink a Coke Zero or herbal tea (not a beer fan, sorry ). It's a lovely way to spend an evening.
Some of the different "tools of the trade" that I use:
There are three categories of parts that I look at:
One obvious question is "How do I determine if my part is coated?" There are tests one can do with a multimeter by measuring resistance on the part's surface and other techniques. Googling may help too. What I do is to find an inconspicuous spot, get a rag with a tiny dab of Mother's, and wipe. If the Mother's turns black nearly immediately the part is surely uncoated. Try in a few more spots, especially where the finish might appear different than other places. You may have clear anodizing that has worn off in places in which case the best thing would be to remove it and polish. Of course, if the parts are of "historical" significance or particularly valuable you should take that into account before doing anything to change them significantly. I like shiny parts (although I read with interest about folks using techniques to get to a satin finish) but I'm sure there are parts that should stay as they are and retain their patina to match a particular bike or build. Painted parts should be fairly obvious.
The very first thing I do is clean all parts throughly 1) because I like clean parts and 2) if the parts are clean its easier to see where they need work. I'll use a combination of things, Dawn dish soap, Simple Green, citrus-based, "Amazing" from the dollar store. All have their place and use. Cleaning could be another post all in itself but be careful with cleaners like Simple Green, citrus and the like. If used too strong or in a hot solution (or both) they can really change the look of a part. Don't ask me how I know. I'll just say I had to polish three chainrings I hadn't counted on...
Part of through cleaning is disassembly. I take apart brake calipers, noting things like order of washers and nuts, rear derailleurs (as much as reasonably possible), and other moving parts that don't require punching out rivets or anything. I don't disassemble an RDs parallelogram. Stems and seatposts get bolts removed. Anything that is steel/chrome gets an oxalic acid bath, even if I can't see any rust. When parts are reassembled they get lubricated in all the right spots. It's amazing how much better a 30 year old RD works after just a little care, even if it's been sitting in a co-op parts bin.
Now we know if our part is coated or not, it's clean and disassembled, and the aluminum pieces are ready to be worked. Here we go, forgive me if I ramble.
Bare Aluminum
Aluminum that is anodized/painted and I want to remove it.
Aluminum that is anodized/painted and I want to retain it.
Well folks, that's about it for the bulk of what I do. I do have two more tips I'd like to pass on though:
PLEASE, feel free to add to the thread. One of the things I want to experiment with is the various techniques to impart a satin finish. As I do and get some results I'll be sure to update my post here at the start of the thread. Unfortunately, taking pictures of different surface finishes is nearly impossible. If I get to that point I'll try some nice cloudy day pics to see if one can discern differences.
So many people have different good polishing ideas and techniques. Let's get them all into the same place! Now, that I've started this thread about aluminum polishing I'd like to ask that someone good with chrome, someone good with OA, and someone good with frames and paint restoration do the same.
If you've read this far I commend you! Please ask questions and post your thoughts and ideas. I always like to hear how other people do things.
Cheers and Happy Thanksgiving!
I updated my method and materials somewhat. The initial post below is still a worthwhile read as it leads into the updates I posted here.
INITIAL POST: 11/25/2010
While I don't think my polishing efforts are any better than a lot of what I see here in C&V I get lots of questions via the forum and via PMs about my techniques. I've bounced this idea around for a while and given I'm stuck basting a 20 1/2 pound turkey for the next 5-ish hours I thought I'd start a thread that I could 1) give a description of what I do and 2) keep updated as I find different techniques and ideas.
I certainly hope this doesn't seem presumptious on my part but with the number of questions I get, heck, I figured this would make it easier on me to respond (paste a link baby!) and to give a little more detail than I normally might.
Please keep in mind, what I'm talking about here is how to work on aluminum. For chrome I'm still working things out, there are much better people than I at chrome. I defer.
All the techniques I'll describe here are hand techniques, with the possible exception of the abrasive balls below...but they are used in a hand drill (and most everyone has one) so... You don't need buffing wheels and the like to polish a quality part. Those tools can take time off the process but not necessarily get you a higher quality result. I view my polishing activities as relaxing. Wet sanding is done at the laundry tub but once I get to polishing I have a huge beach towel that I spread out over myself, sit down in the easy chair, and polish while I watch TV and drink a Coke Zero or herbal tea (not a beer fan, sorry
). It's a lovely way to spend an evening.Some of the different "tools of the trade" that I use:
- Wet/dry sandpaper. I like going to auto parts stores and/or dedicated auto paint stores as they have a wider selection and much finer grits than a hardware store usually does. I've used grits from 220 to 3000. Buy good sandpaper, 3M, Norton...it makes a difference.
- Sanding sponges. Good for long parts like crank arms and such with rounded edges that the sponge can conform to. Used wet. I don't use them all the time but I keep the on hand.
- Abrasive balls (link) in the power drill. I like these for doing an initial "clearing" of the part, more below. I'm also looking for smaller versions.
- Mother's Mag and Aluminum Polish (link). The workhorse of the process.
- Blue Magic Metal Polish Cream (link). Slower working than Mother's but can get a last bit of shine that Mother's doesn't. I'f I'm going for mirror, it's the last thing I use before NuFinish.
- NuFinish Car Polish (link). While I have no empirical evidence for this yet I think a quick wiping with NuFinish protects the bare aluminum somewhat from the elements. I include it here because I'd love some other people to try it and see what their experiences are. I do know that it works well as a quick prep before bike pr0n pics I like it on frames too. I use the liquid.
- Turtle Wax Polishing Compund (link). Used for anodized and painted parts.
There are three categories of parts that I look at:
- Bare aluminum.
- Aluminum that is anodized/painted and I want to remove it.
- Aluminum that is anodized/painted and I want to retain it.
One obvious question is "How do I determine if my part is coated?" There are tests one can do with a multimeter by measuring resistance on the part's surface and other techniques. Googling may help too. What I do is to find an inconspicuous spot, get a rag with a tiny dab of Mother's, and wipe. If the Mother's turns black nearly immediately the part is surely uncoated. Try in a few more spots, especially where the finish might appear different than other places. You may have clear anodizing that has worn off in places in which case the best thing would be to remove it and polish. Of course, if the parts are of "historical" significance or particularly valuable you should take that into account before doing anything to change them significantly. I like shiny parts (although I read with interest about folks using techniques to get to a satin finish) but I'm sure there are parts that should stay as they are and retain their patina to match a particular bike or build. Painted parts should be fairly obvious.
The very first thing I do is clean all parts throughly 1) because I like clean parts and 2) if the parts are clean its easier to see where they need work. I'll use a combination of things, Dawn dish soap, Simple Green, citrus-based, "Amazing" from the dollar store. All have their place and use. Cleaning could be another post all in itself but be careful with cleaners like Simple Green, citrus and the like. If used too strong or in a hot solution (or both) they can really change the look of a part. Don't ask me how I know. I'll just say I had to polish three chainrings I hadn't counted on...
Part of through cleaning is disassembly. I take apart brake calipers, noting things like order of washers and nuts, rear derailleurs (as much as reasonably possible), and other moving parts that don't require punching out rivets or anything. I don't disassemble an RDs parallelogram
. Stems and seatposts get bolts removed. Anything that is steel/chrome gets an oxalic acid bath, even if I can't see any rust. When parts are reassembled they get lubricated in all the right spots. It's amazing how much better a 30 year old RD works after just a little care, even if it's been sitting in a co-op parts bin.Now we know if our part is coated or not, it's clean and disassembled, and the aluminum pieces are ready to be worked. Here we go, forgive me if I ramble.
Bare Aluminum
- The first thing I do now is a pass with one of the abrasive balls. The reason for this is twofold: 1) to remove shopwear and cut surface oxidation and 2) to even the surface to make finding nicks, scratches, and other flaws easier. Depending on the condition of the part I may start with either of the grades of abrasive ball above. I chuck it up in the cordless drill, hold the drill with my right hand, and manipulate the part against the ball with my left. I always finish with the fine ball and I do use them in order, coarse to fine.
- Once I've identified the nicks and other flaws I want to remove it's on to wet sanding. Depending on the depth of the flaws I want to remove I may start with either of 220/320/400. If the part is pretty much flawless you can even start at 600. Sanding the flaws can be tricky. To remove the flaw you need to remove material but you can't concentrate your sanding locally in one place. If you do you run the risk of "scalloping" the part...having visible depressions in the part once it's highly polished. I alternate between short local strokes and long strokes over a bigger section of the part, centered on the flaw. This is one reason I'm against using Dremel-type tools for this work. It's just way too easy to remove way too much material quickly, and locally. Hand work takes longer but is "safer" IMHO.
- I continue wet sanding using increasingly fine grades of sandpaper, all in order: 800/1000/1200/1500/2000. I'll sand lengthwise with the part, then at 90 degrees. This allows you to work the part faster....sanding creates fine scratches in the direction of your stroke. By switching directions you cut across those scratches which are removed more quickly. If you try you can feel the pull of the paper change, or I can by now. This is also a way to determine when you're ready to go to the next finer grade. The paper will feel different. I use a lot of paper and switch as soon as I feel the grit is becoming worn. Another thing that helps, especially when you get to the finer grits and you're more polishing than sanding, is to presoak the paper in water so the paper gets more flexible. The finer grades then can act more like a rag than stiff paper. It helps get into inside curves better.
- I'll usually stop at 2000 grit anymore. I think it's a good balance between smoothing the part well in prep for polishing and not standing over the laundry tub any more than needed. My tub needs to be 6 inches higher! Stop at 1500 and you'll polish longer, go to 3000 and you'll spend more time sanding. It's a trade off but I've found that 2000 works well and is readily available, finer grits can be hard to find sometmes. I have gone on to 3000 grit as an experiment. If you work it right it can create a nice satin finish but it's hard to do evenly on parts with lots of curves. I suspect the Scotchbrite techniques I've been reading about for a satin finish may work better. On a flat part though, 3000 grit gives you a finish much like that of Nitto Pearl parts.
- Once all the wet sanding is done: flaws removed (or diminished as much as possible), surface left nice and even by the 2000 grit paper, it's on to polishing. I start with Mother's. Dab on a rag and just start rubbing. ASIDE: On the subject of rags, I bought like 200 of the red shop rags at Harbor Freight. This differentiates them from anything of my wife's. I save them up until they're just about all dirty then run them by themsevles in our HE washer on the "sterilize" cycle. Dry them and they're ready to use and my wife and I don't argue about rags anymore I keep one rag specifically for applying the Mother's. I then have several for buffing off the Mother's and I keep one or two handy for buffing once the Mother's is removed. I keep track of them and use them only for those purposes for the duration of the current polishing session. Eventually one of the ones used for buffing off the Mother's gets slightly impregnated. This is a magic rag. Once you get one of these it's the one I use to see where I am once I think I'm about done with Mother's. There's something about that light level of impregnation that works.
- If I'm going for a real high shine I'll use the Blue Magic after I'm all done with Mother's. It works slower but I think it imparts just a tad higher mirror shine to a part. I don't like the smell so I use it sparingly. I love the smell of Mother's it reminds me of working on bikes
- At this point I'll wipe the part down with some liquid NuFinish and it's done. Lube, reassemble, stop and admire your work.
Aluminum that is anodized/painted and I want to remove it.
- Removing anodizing or paint can be done physically (by sanding, lots of work) or chemically (with some lye-based cleaner). The lye-based product I use is Easy-Off oven cleaner, or generic equivalent. It's convenient, easy to spray into nooks and crannies, and you can use only what you need...no containers of lye hanging around. Please, Please, PLEASE, read all the cautions, look up an MSDS, whatever. Use the stuff responsibly. Protect your workspace! To use it just spray the part evenly, wait a minute then rinse off. See what it looks like. Different coatings will require more treatments, longer treatments, or both. You'll have to figure that out via experience.
- Having clean parts is paramount here as if you have grease, oil, or dirt on your part the lye won't work there, or work to a lesser degree, and you'll have a mess of a surface.
- Once you have your coating removed you may have a black mottled surface. No worries, don't have a heart attack! See above and follow all those steps now that you have a bare part.
Aluminum that is anodized/painted and I want to retain it.
- If you've decided you want to keep your anodized or painted parts the best you can do is to clean them well. There's really not an "anodizing" polish I've been able to find. If someone knows of one, by all means, please post it!
- In the case of anodized parts I'll clean them well and just wipe them down lightly with the Turtle Wax Polishing Compound. I think the compound is just abrasive enough (EXTREMELY FINE) to remove and pesky oxidation that will come off, yet isn't aggressive enough to visibly scratch the anodizing. For instance, the Dia-Compe 500G calipers on my Fuji America...they are clear anodized and the anodizing was slightly dull from age. I went at them with the polishing compund and the surface evened out and took a tad of a shine to it. I'm sure they're not what they looked like from the factory but they looked very good without going through the trouble of removing the anodizing and starting from scratch.
- For painted parts treat them like you would any other paint you want to restore...polishing compound, ScratchX, etc. The white painted stem on my Fuji Tiara looked pretty bad when it came off the donor bike. Scuffed, black streaks here and there, not ugly but not pretty. 2-3 minutes with the polishing compound and then NuFinish and it looked (and looks ) like new.
Well folks, that's about it for the bulk of what I do. I do have two more tips I'd like to pass on though:
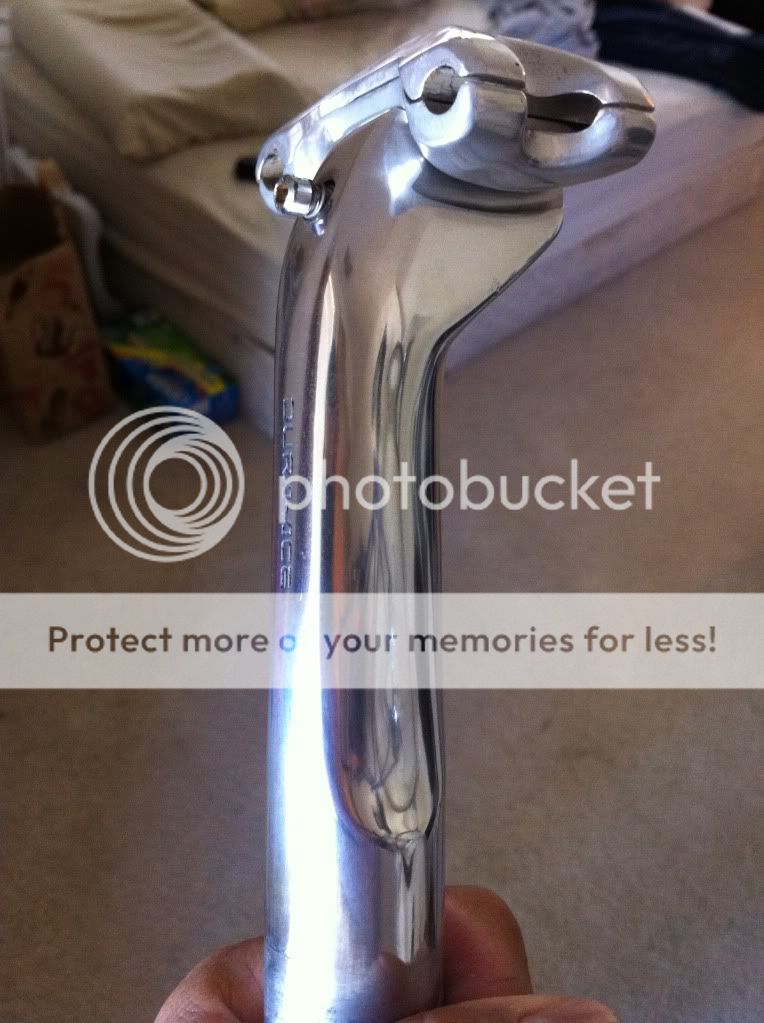
- The abrasive balls REALLY excel at one thing, refreshing seatposts. It always drives me nuts to have zig zags...plain posts are easy, just sand and polish. But, if the post has the machined ridges in it (are they called something?!) around the circumfrence of the post you're talking about a LOT of sanding to get that kind of post smooth and shiny. The abrasive ball, worked parallel to those ridges works WONDERS in reducing the appearance of the zig zags without significantly harming the ridges. You just have to try it sometime. And, at the end, no polishing tends to be necessary.

- Change sandpaper often. I mentioned it once before but I will again. There's no sense in trying to work a part with worn sandpaper. It's not expensive and fresh paper is so much more able to remove material. I dislike spinning wheels!
PLEASE, feel free to add to the thread. One of the things I want to experiment with is the various techniques to impart a satin finish. As I do and get some results I'll be sure to update my post here at the start of the thread. Unfortunately, taking pictures of different surface finishes is nearly impossible. If I get to that point I'll try some nice cloudy day pics to see if one can discern differences.
So many people have different good polishing ideas and techniques. Let's get them all into the same place! Now, that I've started this thread about aluminum polishing I'd like to ask that someone good with chrome, someone good with OA, and someone good with frames and paint restoration do the same.
If you've read this far I commend you! Please ask questions and post your thoughts and ideas. I always like to hear how other people do things.
Cheers and Happy Thanksgiving!
Last edited by khatfull; 01-13-12 at 11:05 PM.
 11-25-10, 02:53 PM
#2

Senior Member

Not presumptuous at all Keith, and nice to have lots of polishing/cleaning tips and tricks collected in one thread.
For polishing, I particularly like Simichrome, but haven't really compared it side by side with Mothers.
For polishing, I particularly like Simichrome, but haven't really compared it side by side with Mothers.
11-25-10, 02:54 PM
#3
grad stud.

Join Date: Apr 2010
Location: Houston, TX
Posts: 674
Bikes: 1987 Schwinn Voyageur
Mentioned: 1 Post(s)
Tagged: 0 Thread(s)
Quoted: 0 Post(s)
Likes: 0
Liked 1 Time
in
1 Post
ah, thanks for putting this together, Khatful! This looks awesome.
EDIT :: interesting - no steel wool?
EDIT :: interesting - no steel wool?
Last edited by dashuaigeh; 11-25-10 at 03:07 PM.

 11-25-10, 03:29 PM
#7
Senior Member
Join Date: Jul 2010
Location: Ontario, Canada (1.5 hours drive North of Toronto)
Posts: 205
Mentioned: 0 Post(s)
Tagged: 0 Thread(s)
Quoted: 0 Post(s)
Likes: 0
Liked 0 Times
in
0 Posts
yes I have done a lot of work on a buffing wheel, with the right compound it can almost look chrome. wear safety glasses and a work apron because you will be covered in compound by the time you finish a part. LOL if you are doing a lot of polishing it is worth the investment, if you are just doing small amounts then you can do it by hand.
 11-25-10, 08:37 PM
#10
Senior Member
Join Date: Mar 2010
Posts: 205
Mentioned: 0 Post(s)
Tagged: 0 Thread(s)
Quoted: 0 Post(s)
Likes: 0
Liked 1 Time
in
1 Post
A buffing wheel and the proper compound it a great labor saver. If I'm polishing a part, it ends up on the wheel. More info here:
https://www.caswellplating.com/buffs/buffman.htm
https://www.caswellplating.com/buffs/buffman.htm
11-25-10, 09:47 PM
#12
Senior Member
Join Date: Nov 2006
Location: TORONTO , ONT , CA
Posts: 813
Bikes: '86 AMBROSI / C RECORD. PINARELLO MONTELLO / FRAME, FORK.
Mentioned: 0 Post(s)
Tagged: 0 Thread(s)
Quoted: 0 Post(s)
Likes: 0
Liked 0 Times
in
0 Posts
"Perhaps. But polishing correctly on a buffing wheel takes a lot of practice. I have one, but I won't do some of my more valuable parts on it." QUOTE rootboy
+1
Regards,
J T
+1
Regards,
J T
11-25-10, 09:55 PM
#13
Senior Member

Send me a PM next time you cook a turkey. Basting a turkey is like using metal polish on an anodized part. . . pointless.
11-25-10, 10:41 PM
#15
grad stud.
Join Date: Apr 2010
Location: Houston, TX
Posts: 674
Bikes: 1987 Schwinn Voyageur
Mentioned: 1 Post(s)
Tagged: 0 Thread(s)
Quoted: 0 Post(s)
Likes: 0
Liked 1 Time
in
1 Post
 11-25-10, 10:47 PM
#17
FBoD Member at Large
Thread Starter
Join Date: Aug 2008
Location: Woodbury, MN
Posts: 6,094
Mentioned: 3 Post(s)
Tagged: 0 Thread(s)
Quoted: 30 Post(s)
Likes: 0
Liked 7 Times
in
7 Posts
A buffing wheel and the proper compound it a great labor saver. If I'm polishing a part, it ends up on the wheel. More info here:
https://www.caswellplating.com/buffs/buffman.htm
https://www.caswellplating.com/buffs/buffman.htm
yes I have done a lot of work on a buffing wheel, with the right compound it can almost look chrome. wear safety glasses and a work apron because you will be covered in compound by the time you finish a part. LOL if you are doing a lot of polishing it is worth the investment, if you are just doing small amounts then you can do it by hand.
So I concentrate on what I and others can do with some sandpaper, rags, and a $6 tub of Mothers. Really, that and time is all you need and you can get just as good results. Besides, makes me feel more connected to the bike to have caressed the parts so intimately. Did I just say that?
11-25-10, 11:28 PM
#18
Senior Member

Join Date: Apr 2009
Location: Detroit
Posts: 10,303
Mentioned: 6 Post(s)
Tagged: 0 Thread(s)
Quoted: 17 Post(s)
Likes: 0
Liked 42 Times
in
33 Posts
It saves time, but it's pretty easy to mess up a part with a polishing wheel. (I know this from doing chrome many years ago -The wheel can leave serious buffing marks.)
- I am confident in Khatfull's more conservative methods, and definitely uncomfortable with the Dremel /Black and Decker sander etc. recommended on that BMX site.
- If anyone has not read Khatfull's post carefully, and in its entirety, you owe it to yourself to do so now.
Excellent treatise Khatfull! Thanks!
__________________
- Auchen
- Auchen
11-26-10, 12:06 AM
#19
FBoD Member at Large
Thread Starter
Join Date: Aug 2008
Location: Woodbury, MN
Posts: 6,094
Mentioned: 3 Post(s)
Tagged: 0 Thread(s)
Quoted: 30 Post(s)
Likes: 0
Liked 7 Times
in
7 Posts
You know, I knew I'd end up having to defend myself to either OFG or Grand Bois or both. Typical. Makes me wonder why I bothered.
Sure, buy a Dremel if you don't have one, buy a mouse sander if you don't have one, blah, blah, blah. For $20 in supplies anyone can produce a quite fine part. That's my point, here. I've read this guys article,many times over in fact. I've read the referenced material at Caswell Plating. Nothing at all wrong with any of it. These are the techniques I use. Use them, don't use them, just like the other referenced materials.
Additionally, in no way did I suggest I was writing a polishing bible. That's why specifically I hoped I wasn't being too presumptuous.
Thanks Auchen...apparently someone understands what I'm getting at here.
With all due respect to the OP, there is only one bible about polishing, and it comes from a BMX guy, Ted Carl. I have no idea who he is, but he knows his stuff:
https://www.vintagebmx.com/community/...wtopic=4005471
Be prepared for a long read with awkward links, but if you want to polish, this article is a must. Tools are what makes us human, use them, that's the bottom line. Know how to use them, that's the next to last line.
Read the article, try the methods, and get back in a few days. It's a holiday weekend, good time to get dirty. Choose your parts wisely.
Additionally, in no way did I suggest I was writing a polishing bible. That's why specifically I hoped I wasn't being too presumptuous.
It saves time, but it's pretty easy to mess up a part with a polishing wheel. (I know this from doing chrome many years ago -The wheel can leave serious buffing marks.)
- I am confident in Khatfull's more conservative methods, and definitely uncomfortable with the Dremel /Black and Decker sander etc. recommended on that BMX site.
- If anyone has not read Khatfull's post carefully, and in its entirety, you owe it to yourself to do so now.
Excellent treatise Khatfull! Thanks!
- I am confident in Khatfull's more conservative methods, and definitely uncomfortable with the Dremel /Black and Decker sander etc. recommended on that BMX site.
- If anyone has not read Khatfull's post carefully, and in its entirety, you owe it to yourself to do so now.
Excellent treatise Khatfull! Thanks!
11-26-10, 12:17 AM
#20
grad stud.
Join Date: Apr 2010
Location: Houston, TX
Posts: 674
Bikes: 1987 Schwinn Voyageur
Mentioned: 1 Post(s)
Tagged: 0 Thread(s)
Quoted: 0 Post(s)
Likes: 0
Liked 1 Time
in
1 Post
Sure, buy a Dremel if you don't have one, buy a mouse sander if you don't have one, blah, blah, blah. For $20 in supplies anyone can produce a quite fine part. That's my point, here. I've read this guys article,many times over in fact. I've read the referenced material at Caswell Plating. Nothing at all wrong with any of it. These are the techniques I use. Use them, don't use them, just like the other referenced materials.
Additionally, in no way did I suggest I was writing a polishing bible. That's why specifically I hoped I wasn't being too presumptuous.
Thanks Auchen...apparently someone understands what I'm getting at here.
Additionally, in no way did I suggest I was writing a polishing bible. That's why specifically I hoped I wasn't being too presumptuous.
Thanks Auchen...apparently someone understands what I'm getting at here.
And there definitely is something nice about sitting down and seeing a shine get brought out with your hands. You could even get a few friends together and have a parts polishing party. Most people I talk to only want to polish parts for themselves or a close friend, so it's not like we have a ton of parts to polish thru either.
In any case, I'm immensely grateful to Khatful for putting in the time and effort to write this at all. It's a very clear and thorough thread, and I think a lot of people will benefit from this type of tutorial.
11-26-10, 12:32 AM
#21
Senior Member
Thanks Khatfull! This is exactly the kind of thing I was going to go searching for now that I'm gathering some parts for my bike build. You've just given me a nice rundown right here. It's perfect.
And sure, if I had a shop, parts to practice on, money for tools, etc... maybe I could polish the hell out of parts at light speed, but sometimes it's nice and more realistic to take it slow and use what you've got. And I agree, there is something satisfying about doing this sort of thing by hand. It's not like it's going to take you a year, and it's not like I spend every waking moment doing monumental things. Why not take some time with a hobby I enjoy and work with some basic sand paper and polishing compound? Then sit back and admire my hard work when I'm done.
Thanks again for the write-up!
11-26-10, 02:30 AM
#22
Senior Member
Join Date: Oct 2010
Location: NY
Posts: 81
Bikes: Colnago VIP, Specialized Langster Comp, Specialized Epic, Don Walker track, John Cherry
Mentioned: 0 Post(s)
Tagged: 0 Thread(s)
Quoted: 0 Post(s)
Likes: 0
Liked 0 Times
in
0 Posts
11-26-10, 07:39 AM
#23
Senior Member

Join Date: Apr 2005
Location: Wherever
Posts: 16,748
Mentioned: 92 Post(s)
Tagged: 0 Thread(s)
Quoted: 556 Post(s)
Likes: 0
Liked 132 Times
in
78 Posts
You know what they say about opinions; they're like bumholes, everybody's got one and they all stink. Lots of good info on the original post. Is it a lot of time consuming hand work? Yes, but sometimes that's what it takes. I have a 3/4 horse Baldor with one inch spindle, a very nice, pro quality buffing machine, but I didn't buy it for and rarely use it for bike parts. And, I know how to use it. Aluminum, however, is a very soft metal. The softest I ever work on. My only concern with many of the methods suggested on this forum is that they essentially change the part so much. Rounding over edges, diminishing the definition of the lines of the part, blurring the edges of any engraving, etc. If that's Ok with you, or you can use a buffer and get the results you're after, more power to you. But many of the techniques I see recommended on the forum remove a lot of metal. It seems it's the difference between restoring a part, and re-finishing a part. One of the most valuable aspects of the original post is the technique of going up through the grits, step by step, removing scratch marks with the next higher grit before moving on to the next. The proper approach to polishing any metal. Is it easy to put aluminum on a buffing wheel and bring up to a mirror shine. Yep. It's soft stuff. Can you save a lot of time and steps by buffing? Of course. But there's a place for hand polishing too.
11-26-10, 08:34 AM
#24
Senior Member

Join Date: Mar 2005
Location: Pinole, CA, USA
Posts: 17,392
Mentioned: 24 Post(s)
Tagged: 0 Thread(s)
Quoted: 443 Post(s)
Likes: 0
Liked 27 Times
in
25 Posts
It saves time, but it's pretty easy to mess up a part with a polishing wheel. (I know this from doing chrome many years ago -The wheel can leave serious buffing marks.)
- I am confident in Khatfull's more conservative methods, and definitely uncomfortable with the Dremel /Black and Decker sander etc. recommended on that BMX site.
- If anyone has not read Khatfull's post carefully, and in its entirety, you owe it to yourself to do so now.
Excellent treatise Khatfull! Thanks!
- I am confident in Khatfull's more conservative methods, and definitely uncomfortable with the Dremel /Black and Decker sander etc. recommended on that BMX site.
- If anyone has not read Khatfull's post carefully, and in its entirety, you owe it to yourself to do so now.
Excellent treatise Khatfull! Thanks!
Comparing it to polishing steel in preparation for plating is just ridiculous.
11-26-10, 08:39 AM
#25
Senior Member
Join Date: Apr 2005
Location: Wherever
Posts: 16,748
Mentioned: 92 Post(s)
Tagged: 0 Thread(s)
Quoted: 556 Post(s)
Likes: 0
Liked 132 Times
in
78 Posts
Yeah, maybe you're right. Aluminum doesn't really require the same methods as harder materials, moving up through the various grits to 2000 or beyond. It's soft enough you can go right from 400 to the buffer, if you want.