Bringing back a crankset aka elbow grease
 03-12-13, 07:49 PM
#1
Senior Member
Thread Starter
Bringing back a crankset aka elbow grease
Hi All, I thought this might be some decent general info. My Cannondale's crankset and brake calipers were very oxidized so I went about trying to remedy their appearance. This is the first time I'd tried this task.
Basically the crankarms were washed, sanded with 100, then 220 and finally 600 wet sand paper. Then buffed with 00 steel wool and finally a treatment with some Never Dull polish.
Brad


PS The calipers were just cleaned to the point where the decals weren't effected and I doubt I'll use them, but they looked as bad as the crankarm in the first photo..
Basically the crankarms were washed, sanded with 100, then 220 and finally 600 wet sand paper. Then buffed with 00 steel wool and finally a treatment with some Never Dull polish.
Brad
PS The calipers were just cleaned to the point where the decals weren't effected and I doubt I'll use them, but they looked as bad as the crankarm in the first photo..
 03-12-13, 07:58 PM
#2
Senior Member
Join Date: Nov 2009
Posts: 7,075
Mentioned: 2 Post(s)
Tagged: 0 Thread(s)
Quoted: 2 Post(s)
Likes: 0
Liked 4 Times
in
4 Posts
That is a big improvement.
i would keep going to 2500 and then hit it with mothers.
edit: bars are stock. I polished a milky silver stem.

i would keep going to 2500 and then hit it with mothers.
edit: bars are stock. I polished a milky silver stem.
Last edited by thirdgenbird; 03-12-13 at 08:01 PM.
03-12-13, 08:02 PM
#3
Senior Member

Join Date: Jan 2010
Location: San Diego
Posts: 1,046
Bikes: 1989 Schwinn World Sport. 1994 Diamond Back Response Elite MTB. 1964 Schwinn Typhoon. 1974 Bridgestone Sprinter, 2015 Scott Sub 10 Citybike.
Mentioned: 17 Post(s)
Tagged: 0 Thread(s)
Quoted: 1688 Post(s)
Liked 84 Times
in
37 Posts
I've found that Mother's Mag and Aluminum polish will create a mirror-like finish on aluminum.

03-12-13, 08:43 PM
#4
Senior Member

Join Date: Apr 2009
Location: Detroit
Posts: 10,303
Mentioned: 6 Post(s)
Tagged: 0 Thread(s)
Quoted: 17 Post(s)
Likes: 0
Liked 42 Times
in
33 Posts
Brad -
Are you sure they weren't clear-anodized to start with? (Hardest substance known to cycledom, I'd wager).
- Best to start by stripping, not sanding alloy cranks - but in any case, your after shot looks great.
Are you sure they weren't clear-anodized to start with?
(Hardest substance known to cycledom, I'd wager). - Best to start by stripping, not sanding alloy cranks - but in any case, your after shot looks great.
__________________
- Auchen
- Auchen
 03-12-13, 09:49 PM
#6
Hopelessly addicted...

Join Date: Aug 2009
Location: Central Maryland
Posts: 4,955
Bikes: 1949 Hercules Kestrel, 1950 Norman Rapide, 1970 Schwinn Collegiate, 1972 Peugeot UE-8, 1976 Raleigh Sports, 1977 Raleigh Sports, 1977 Jack Taylor Tandem, 1984 Davidson Tandem, 2010 Bilenky "BQ" 650B Constructeur Tandem, 2011 Linus Mixte
Mentioned: 13 Post(s)
Tagged: 0 Thread(s)
Quoted: 3 Post(s)
Likes: 0
Liked 10 Times
in
9 Posts
^ For that matter a little Mother's polish and a diaper resulted in this for me a few months back. I've not even messed with a buffing wheel since polishing by hand has given such good results.
Before:
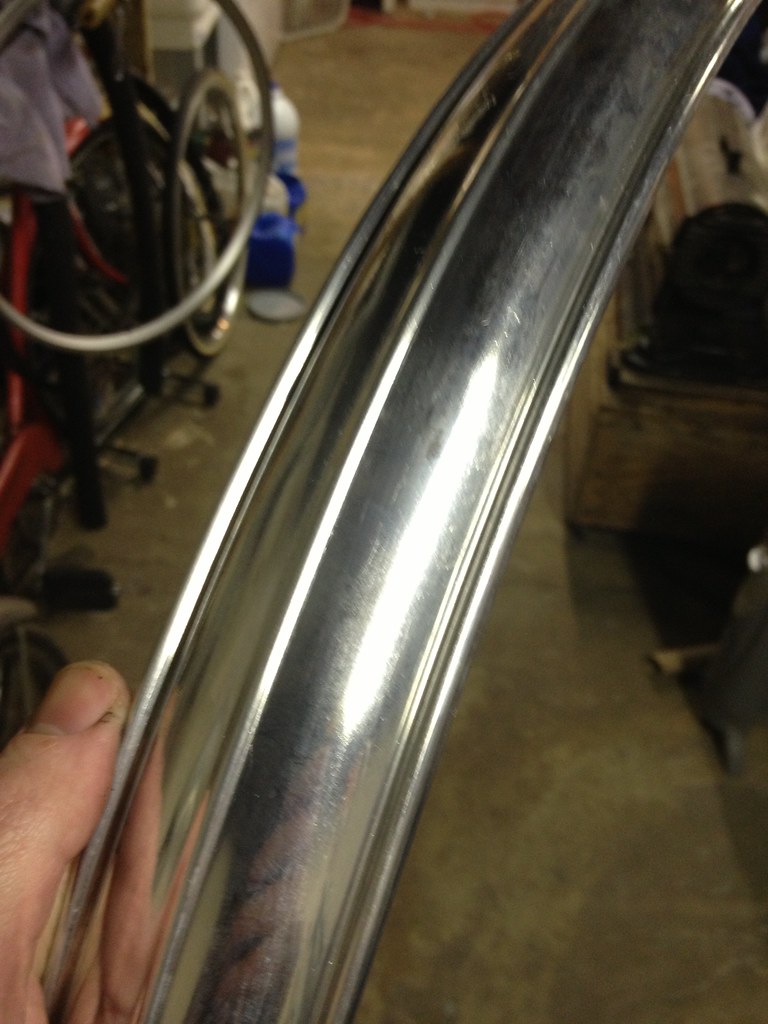
Bluemels Airweight - Pre-Polished by Sallad Rialb, on Flickr
After:
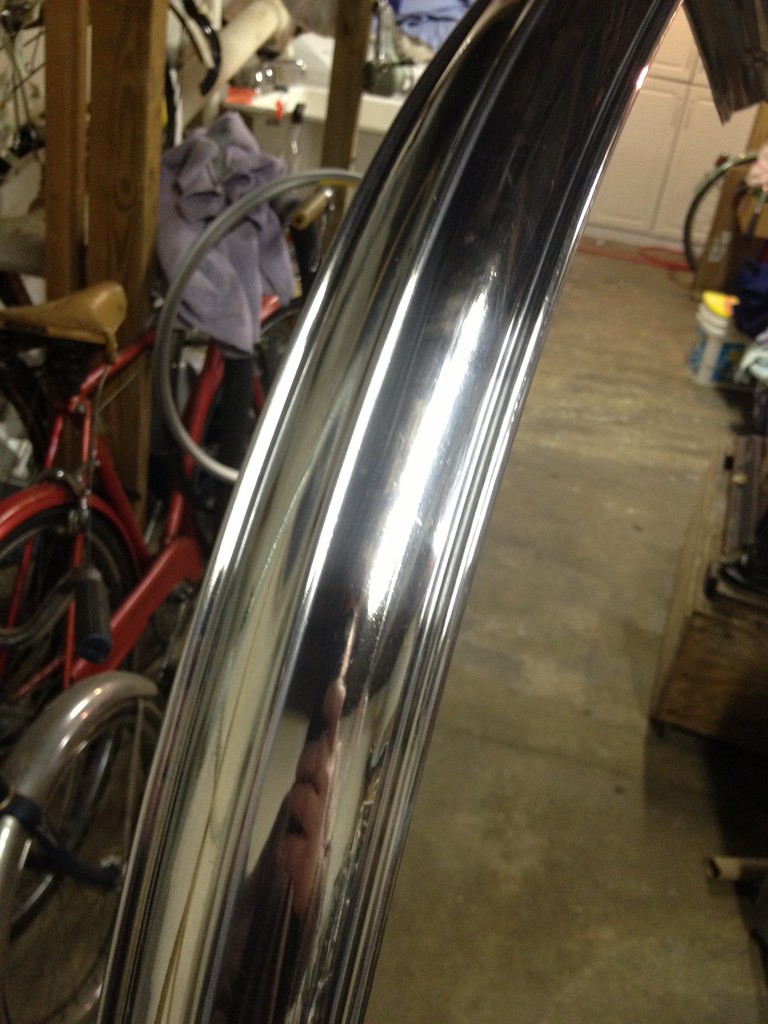
Bluemels Airweight - Post-Polished 1 by Sallad Rialb, on Flickr
Before:
Bluemels Airweight - Pre-Polished by Sallad Rialb, on Flickr
After:
Bluemels Airweight - Post-Polished 1 by Sallad Rialb, on Flickr
03-13-13, 06:29 AM
#7
Senior Member
Thread Starter
Wonderful advice from y'all, thank you!
These crankarms have some gouges that don't show in the photos so I won't take them any further. I do have another couple of sets that I can work on using what I'm learning and with your help so far. This is a little addictive, eh? I'll use what I'm learning on a too short for me Nitto quill stem 'till I can work on the cranksets as they're on bikes that see alot of use.
A couple of hours into the drive side crank arm had me thinking about a buffing wheel, but then it was a bit Zen like doing this by hand. The crankarms didn't have any type of coating, fortunately, but could a paint stripper be used to remove the coating if it had? Also, any tip if trying to save decals>
Brad
These crankarms have some gouges that don't show in the photos so I won't take them any further. I do have another couple of sets that I can work on using what I'm learning and with your help so far.
This is a little addictive, eh? I'll use what I'm learning on a too short for me Nitto quill stem 'till I can work on the cranksets as they're on bikes that see alot of use.A couple of hours into the drive side crank arm had me thinking about a buffing wheel, but then it was a bit Zen like doing this by hand. The crankarms didn't have any type of coating, fortunately, but could a paint stripper be used to remove the coating if it had? Also, any tip if trying to save decals>
Brad
03-13-13, 06:45 AM
#8

Senior Member

Join Date: Apr 2005
Location: Wherever
Posts: 16,748
Mentioned: 92 Post(s)
Tagged: 0 Thread(s)
Quoted: 556 Post(s)
Likes: 0
Liked 132 Times
in
78 Posts
Paint stripper won't remove anodizing. Clear coat, yes. Best to use something like Easy Off oven cleaner for anodizing, or Jesco anodizing remover.
By the way, you can go further with the grits if you like a high polished finish. But grey, or white Scotchbrite pads leave a nice, satin scratch pattern if you're careful going in one direction only.
By the way, you can go further with the grits if you like a high polished finish. But grey, or white Scotchbrite pads leave a nice, satin scratch pattern if you're careful going in one direction only.
03-13-13, 07:07 AM
#9
Hopelessly addicted...
Join Date: Aug 2009
Location: Central Maryland
Posts: 4,955
Bikes: 1949 Hercules Kestrel, 1950 Norman Rapide, 1970 Schwinn Collegiate, 1972 Peugeot UE-8, 1976 Raleigh Sports, 1977 Raleigh Sports, 1977 Jack Taylor Tandem, 1984 Davidson Tandem, 2010 Bilenky "BQ" 650B Constructeur Tandem, 2011 Linus Mixte
Mentioned: 13 Post(s)
Tagged: 0 Thread(s)
Quoted: 3 Post(s)
Likes: 0
Liked 10 Times
in
9 Posts
Paint stripper won't remove anodizing. Clear coat, yes. Best to use something like Easy Off oven cleaner for anodizing, or Jesco anodizing remover.
By the way, you can go further with the grits if you like a high polished finish. But grey, or white Scotchbrite pads leave a nice, satin scratch pattern if you're careful going in one direction only.
By the way, you can go further with the grits if you like a high polished finish. But grey, or white Scotchbrite pads leave a nice, satin scratch pattern if you're careful going in one direction only.
03-13-13, 07:11 AM
#10
Senior Member
Join Date: Nov 2008
Location: South Jersey
Posts: 1,959
Bikes: Too many Bicycles to list
Mentioned: 10 Post(s)
Tagged: 0 Thread(s)
Quoted: 90 Post(s)
Liked 137 Times
in
45 Posts
I just did my 600 EX cranks the other day, I had done them once with just polish ( someone else striped the anodizing off ) but this time I went with 400, 600, 800, 1000, 1500, 2000 and then Mothers Mag wheel polish & now they look like a piece of jewelry with the bronze colored chain rings & chain ring bolts mounted. Pictures to follow once I get my PC rebuilt and my Centurion finished.
Glenn
Glenn


 03-13-13, 09:21 AM
#13
Senior Member
Thread Starter
03-13-13, 09:26 AM
#14
Senior Member
Thread Starter
I just did my 600 EX cranks the other day, I had done them once with just polish ( someone else striped the anodizing off ) but this time I went with 400, 600, 800, 1000, 1500, 2000 and then Mothers Mag wheel polish & now they look like a piece of jewelry with the bronze colored chain rings & chain ring bolts mounted. Pictures to follow once I get my PC rebuilt and my Centurion finished.
Glenn
Glenn
Brad
 03-13-13, 09:55 AM
#16
Senior Member
Join Date: Apr 2005
Location: Wherever
Posts: 16,748
Mentioned: 92 Post(s)
Tagged: 0 Thread(s)
Quoted: 556 Post(s)
Likes: 0
Liked 132 Times
in
78 Posts
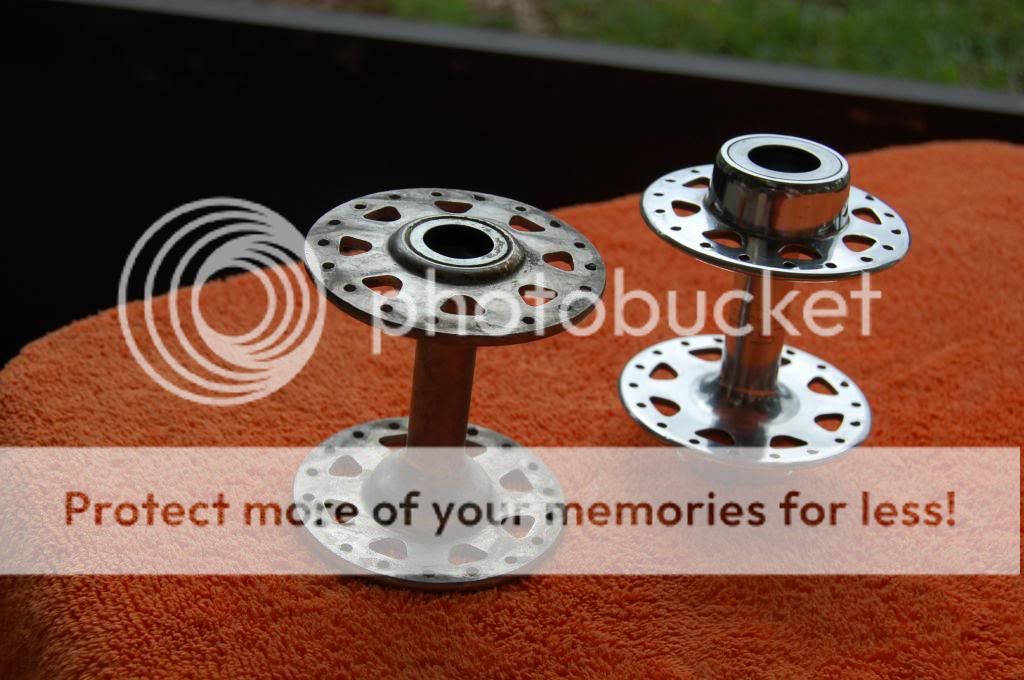
In general, I don't care too much for the high buff look, but it is pretty on some things. And sometimes it is necessary. Like it was on your crank, OP. And these;

03-13-13, 09:57 AM
#17
Senior Member
Join Date: Apr 2005
Location: Wherever
Posts: 16,748
Mentioned: 92 Post(s)
Tagged: 0 Thread(s)
Quoted: 556 Post(s)
Likes: 0
Liked 132 Times
in
78 Posts
By the way, do you guys who do high polish on your aluminum put anything on it afterwords to discourage oxidation? Wax? etc...
03-13-13, 11:11 AM
#18
Senior Member
Join Date: Apr 2009
Location: Detroit
Posts: 10,303
Mentioned: 6 Post(s)
Tagged: 0 Thread(s)
Quoted: 17 Post(s)
Likes: 0
Liked 42 Times
in
33 Posts
And by avoiding anything more permanent, I always have the option of buffing it all up with Mother's again.
__________________
- Auchen
- Auchen
03-13-13, 02:51 PM
#20
Senior Member

Join Date: Aug 2009
Location: Berkeley, CA
Posts: 7,238
Bikes: '72 Cilo Pacer, '72 Gitane Gran Tourisme, '72 Peugeot PX10, '73 Speedwell Ti, '74 Peugeot UE-8, '75 Peugeot PR-10L, '80 Colnago Super, '85 De Rosa Pro, '86 Look Equipe 753, '86 Look KG86, '89 Parkpre Team, '90 Parkpre Team MTB, '90 Merlin
Mentioned: 87 Post(s)
Tagged: 0 Thread(s)
Quoted: 830 Post(s)
Liked 2,123 Times
in
554 Posts
I've recently started wearing a pair of rubber kitchen gloves while sanding/polishing. I'll never have George Castanza hands, but at least they remain presentable for my day job.
__________________
-Randy
'72 Cilo Pacer � '72 Peugeot PX10 � '73 Speedwell Ti � '74 Nishiki Competition � '74 Peugeot UE-8 � '86 Look Equipe 753 � '86 Look KG86 � '89 Parkpre Team Road � '90 Parkpre Team MTB � '90 Merlin Ti
Avatar photo courtesy of jeffveloart.com, contact: contact: jeffnil8 (at) gmail.com.
-Randy
'72 Cilo Pacer � '72 Peugeot PX10 � '73 Speedwell Ti � '74 Nishiki Competition � '74 Peugeot UE-8 � '86 Look Equipe 753 � '86 Look KG86 � '89 Parkpre Team Road � '90 Parkpre Team MTB � '90 Merlin Ti
Avatar photo courtesy of jeffveloart.com, contact: contact: jeffnil8 (at) gmail.com.
03-13-13, 03:22 PM
#21
Senior Member
Thread Starter
 03-13-13, 03:40 PM
#22
Senior Member

Join Date: Aug 2003
Location: Tampa, Florida
Posts: 13,954
Mentioned: 40 Post(s)
Tagged: 0 Thread(s)
Quoted: 413 Post(s)
Likes: 0
Liked 109 Times
in
78 Posts
It was actually easy.
Step 1: Remove anodizing. I think I used some type of lye drain cleaner from home depot and diluted it.. Easy Off oven cleaner works well. It may take several dips into the solution. If all of the anodizing isn't removed you'll be sanding for weeks.
Step 2: Tap off engravings. I used blue painters tape. Just enough to cover the logos and marking on the back
Step 3: Sand. Start with the least abrasive grit needed. My cranks had deep road rash on the ends near the pedas so I used 80 grit on those scratches.
Step 4: Polish. Like everyone else says Mothers is the go to polish.
Tips n tricks:
Anodozing: It may take several dips into the solution. Anodizing turns black when exposed to the solution. Rinse with water and a green scrubby. If the green scrubby doesn't remove all of the black the part needs another dip. When there's no black after using the green scrubby all of the anodizing is removed!!
Sand paper: Use high quality wet/dry and wet sand with a water soap mixture. Just a little soap...too much and you'll get no sanding.
Grit progression: A general rule of thumb is to double your grit as best possible. 80, 160, 320, 600, 1200, 2000...you get the idea. Anything more than double may not remove the previous grits scratches. 220 will not easily remove 80 grit scratches just like 600 will not easily remove 220 grit scratches.
Directional sanding: Sand in one direction. For cranks I sand lengthwise.
Time: Be patient. Sometimes I'll have to go back a grit. For instance if 600's not removing the scratches left by the 320 it means the 320 didn't remove the 220 scratches so I'll go back a step.


 03-13-13, 03:53 PM
#24
Senior Member

FYI, it's Jetsco not Jesco. The difference is not trivial.

__________________
Bikes on Flickr
I prefer email to private messages. You can contact me at justinhughes@me.com
Bikes on Flickr
I prefer email to private messages. You can contact me at justinhughes@me.com
03-13-13, 04:37 PM
#25
Senior Member
Join Date: Dec 2010
Location: Central Florida
Posts: 277
Bikes: 1985 Eddy Merckx Corsa Extra, 1978 Schwinn Super Letour 12.2, Schwinn Paramount PDG 50, 1992 Schwinn Paramount PDG 3, Sears ToteCycle in the works
Mentioned: 0 Post(s)
Tagged: 0 Thread(s)
Quoted: 0 Post(s)
Likes: 0
Liked 0 Times
in
0 Posts
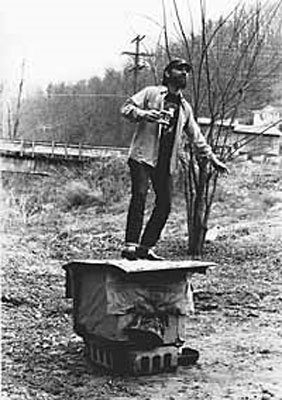
Buffing wheel FTW: