


The New New Post Your SS/FG Photos (2011/2012)
 07-08-12, 07:09 PM
#8901
Senior Member

Wow, we have to hear more about the seat post removal! 
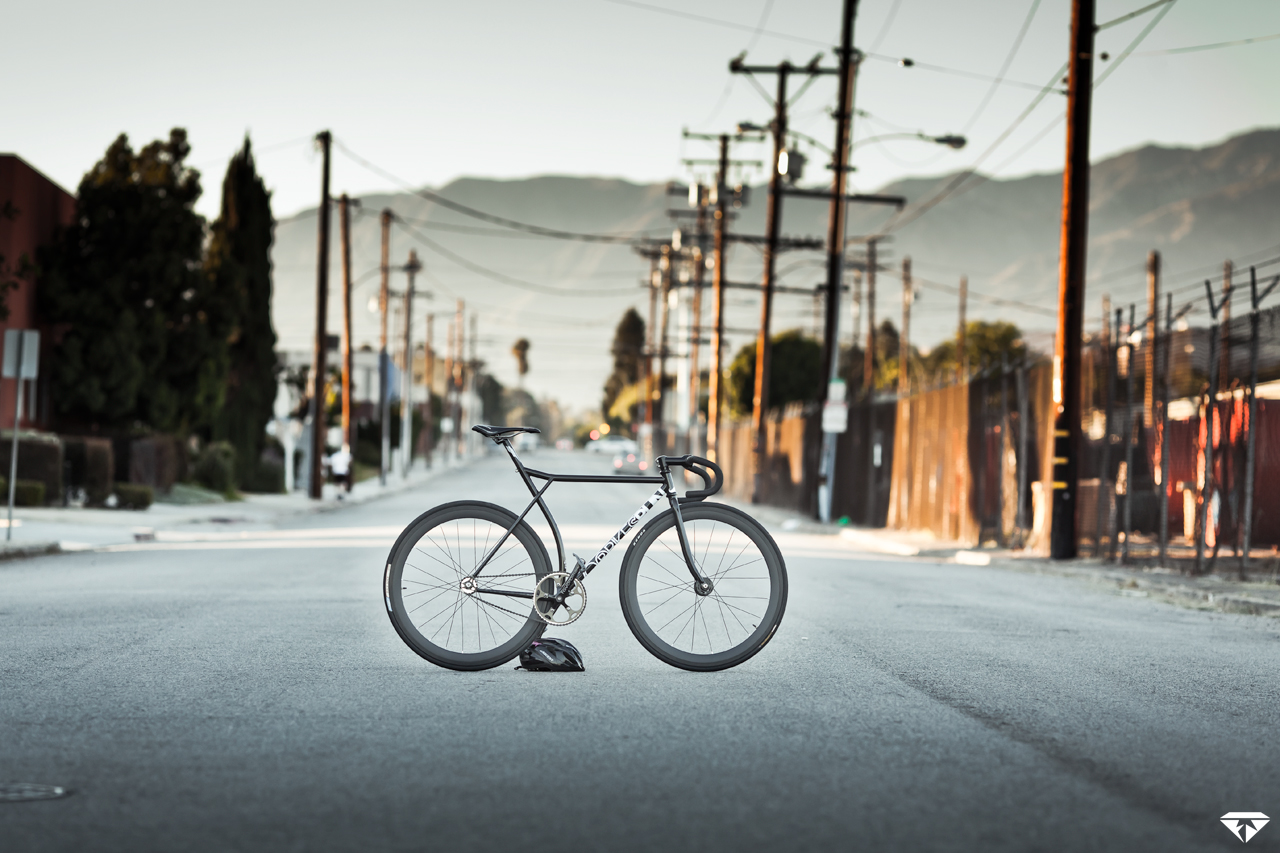
New garage [sourced parts] queen. Bought the frame for $20 with a stuck seatpost:
Conquered.

For this build, I bought a freewheel for $15 and a 4 prong remover as mine has gone missing. When I get around to it, I'm going to swap some parts around and wind up with black calipers, crankarms and a chain that isn't white. Some bar tape that isn't just stretched and faded take off would be nice as well and maybe a front wheel that isn't QR while I'm at it. For $35 and a lot of elbow grease, I'm more than happy.
Off to ride this mofo and get some glamour shots.
Conquered.
For this build, I bought a freewheel for $15 and a 4 prong remover as mine has gone missing. When I get around to it, I'm going to swap some parts around and wind up with black calipers, crankarms and a chain that isn't white. Some bar tape that isn't just stretched and faded take off would be nice as well and maybe a front wheel that isn't QR while I'm at it. For $35 and a lot of elbow grease, I'm more than happy.
Off to ride this mofo and get some glamour shots.
 07-08-12, 08:14 PM
#8902
New SS rider!
Join Date: Jun 2012
Location: Bethany Beach, DE
Posts: 11
Bikes: 2013 Dawes SST-AL
Mentioned: 0 Post(s)
Tagged: 0 Thread(s)
Quoted: 0 Post(s)
Likes: 0
Liked 0 Times
in
0 Posts
Here is my new SS that I got from Bikes Direct. It is a Dawes SST AL. Its my first SS and my first road bike in general. I'm stoked to get into this hobby!

07-08-12, 08:20 PM
#8903
We win all charity rides
Join Date: Apr 2008
Location: Central Michigan University/ GR, MI
Posts: 3,369
Bikes: BMX, fixed gear
Mentioned: 0 Post(s)
Tagged: 0 Thread(s)
Quoted: 1 Post(s)
Likes: 0
Liked 0 Times
in
0 Posts
Congrats and welcome!
07-08-12, 08:27 PM
#8904
Senior Member
Join Date: Oct 2011
Posts: 1,022
Mentioned: 0 Post(s)
Tagged: 0 Thread(s)
Quoted: 0 Post(s)
Likes: 0
Liked 0 Times
in
0 Posts

With the flipped and chopped bars.
07-08-12, 08:28 PM
#8905

Senior Member

Join Date: Jan 2012
Location: Ithaca, NY
Posts: 4,852
Bikes: Click on the #YOLO
Mentioned: 1 Post(s)
Tagged: 0 Thread(s)
Quoted: 26 Post(s)
Likes: 0
Liked 12 Times
in
12 Posts
Followed the advice on Sheldon Brown's site and fed ammonia into the seattube through a hole in the [empty, with no BB] BB shell, swapped it daily for a week only to find it didn't do anything but cause the bond on the head of the seatpost to separate from the post itself. Imagine my surprise when I came home to a throwaway seat (used to wedge a 2x4 between it and the stand to try to use the front triangle for leverage- no dice), still attached to the clamp sitting in a pool of ammonia on the garage floor under the stand holding the frame upside-down. Having the head come off was kind of nice actually, I got the clamp out of the way, and let me stick a tape measure in there to see how long the post actually was and how much of it was in the frame.
I didn't really mind the being patient part, normally it would have killed me, because I had a crazy hectic week and didn't have time anyway. Then came yesterday, when I decided it was time to really get this done. Grabbed the biggest pipe wrench I have and went to town on the post only to get nowhere at all. The post was a full foot long, but thankfully a lot of it was showing (The cut piece is about 6.5"), so the piece on the left I lopped off, leaving about 1" of post proud of the top of the seattube, with a hacksaw to lessen the amount I'd have to cut. A while back, I'd picked up one of these:

So I just went at it, two cuts, going slow to get through the post and not the frame. I also made a mark on the blade where the length of the post was, and kept cutting right around there- any longer and I wouldn't get through the end of the post, trigonometry wouldn't allow it. Thankfully alloy and steel feel different enough that it's not really a big deal to tell when you're through (when I knew I was close, I was just holding a bare blade), so when the time came, I gave the post a bump with a hammer INTO the frame to get it moving then out came the f*uckoff pipe wrench again, and I twisted and pulled the post pieces out. I hadn't cut all the way through on both cuts, but I had on one, which was enough movement to break the oxidization. I finished the second cut to show off on the interwebs.
Took me about 3 hours and 5 hacksaw blades of varying coarseness (18, 24, 36TPI) all told, but it served as a nice proof of concept and will be a nice skill to have to rescue frames that otherwise would be useless. I can't say which TPI or which orientation worked best, as one clogged, I'd grab another and try to feel if it was cutting or polishing. One of the toughest parts is setting the cut off the bat as the blade wants to dance around on the end of the post inside the frame, but I got it, crooked cut and all.
/WALL OF TEXT
I didn't really mind the being patient part, normally it would have killed me, because I had a crazy hectic week and didn't have time anyway. Then came yesterday, when I decided it was time to really get this done. Grabbed the biggest pipe wrench I have and went to town on the post only to get nowhere at all. The post was a full foot long, but thankfully a lot of it was showing (The cut piece is about 6.5"), so the piece on the left I lopped off, leaving about 1" of post proud of the top of the seattube, with a hacksaw to lessen the amount I'd have to cut. A while back, I'd picked up one of these:
So I just went at it, two cuts, going slow to get through the post and not the frame. I also made a mark on the blade where the length of the post was, and kept cutting right around there- any longer and I wouldn't get through the end of the post, trigonometry wouldn't allow it. Thankfully alloy and steel feel different enough that it's not really a big deal to tell when you're through (when I knew I was close, I was just holding a bare blade), so when the time came, I gave the post a bump with a hammer INTO the frame to get it moving then out came the f*uckoff pipe wrench again, and I twisted and pulled the post pieces out. I hadn't cut all the way through on both cuts, but I had on one, which was enough movement to break the oxidization. I finished the second cut to show off on the interwebs.
Took me about 3 hours and 5 hacksaw blades of varying coarseness (18, 24, 36TPI) all told, but it served as a nice proof of concept and will be a nice skill to have to rescue frames that otherwise would be useless. I can't say which TPI or which orientation worked best, as one clogged, I'd grab another and try to feel if it was cutting or polishing. One of the toughest parts is setting the cut off the bat as the blade wants to dance around on the end of the post inside the frame, but I got it, crooked cut and all.
/WALL OF TEXT
__________________

Shimano : Click :: Campy : Snap :: SRAM : Bang
Shimano : Click :: Campy : Snap :: SRAM : Bang
07-09-12, 02:43 AM
#8906
モㄥ工匕モ 爪モ爪乃モ尺
Join Date: Feb 2010
Location: LA San Gabriel, California
Posts: 2,135
Bikes: Custom frame
Mentioned: 0 Post(s)
Tagged: 0 Thread(s)
Quoted: 0 Post(s)
Likes: 0
Liked 0 Times
in
0 Posts


 07-09-12, 06:44 AM
#8911
Senior Member

Join Date: Jun 2012
Location: Chicago
Posts: 750
Bikes: https://www.pedalroom.com/bike/2008-se-lager-brown-6612
Mentioned: 0 Post(s)
Tagged: 0 Thread(s)
Quoted: 0 Post(s)
Likes: 0
Liked 0 Times
in
0 Posts
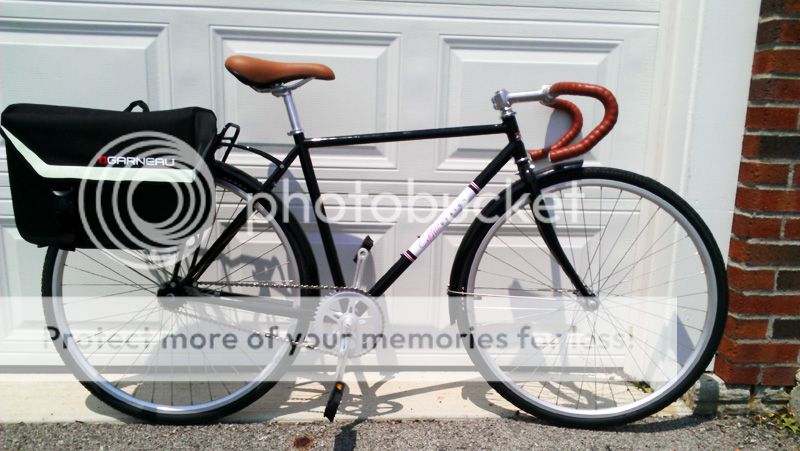
Here's my wife's bike. 1982 Schwinn Varsity converted to SS. Has Brooks sprung saddle, Tektro brakes, Velocity rims, 700x28 Vittoria Randonneurs, MKS Sylvan touring pedals, Origin8 crank, 39/16 gearing (SS), KMC 410 chain (yellow)... basically it's the most overpriced Schwinn Varsity I've ever seen lol. But she likes it a lot. People actually offer to buy it off her often. Just strangers on the street.

07-09-12, 07:37 AM
#8912
Senior Member

Join Date: Oct 2011
Location: Columbus, Oh
Posts: 209
Mentioned: 0 Post(s)
Tagged: 0 Thread(s)
Quoted: 0 Post(s)
Likes: 0
Liked 1 Time
in
1 Post
Took the wife's townie to the grocery store on Sunday. Really need to find a nice leather pannier set... that doesnt cost $400. This LG bag can hold a *****load tho.
07-09-12, 10:36 AM
#8913
Senior Member

Join Date: Oct 2009
Location: TX/HI
Posts: 291
Mentioned: 0 Post(s)
Tagged: 0 Thread(s)
Quoted: 0 Post(s)
Likes: 0
Liked 0 Times
in
0 Posts
07-09-12, 10:51 AM
#8914
Cat Enthusiast

Join Date: Aug 2011
Location: Plymouth, MI
Posts: 2,227
Bikes: All City Nature Boy
Mentioned: 0 Post(s)
Tagged: 0 Thread(s)
Quoted: 2 Post(s)
Likes: 0
Liked 0 Times
in
0 Posts
 07-09-12, 05:05 PM
#8915
Magnets, how do they work

Join Date: Jun 2010
Location: Buffalo
Posts: 1,299
Mentioned: 0 Post(s)
Tagged: 0 Thread(s)
Quoted: 0 Post(s)
Likes: 0
Liked 0 Times
in
0 Posts
07-09-12, 05:51 PM
#8916
Senior Member
Join Date: Jun 2012
Location: Chicago
Posts: 750
Bikes: https://www.pedalroom.com/bike/2008-se-lager-brown-6612
Mentioned: 0 Post(s)
Tagged: 0 Thread(s)
Quoted: 0 Post(s)
Likes: 0
Liked 0 Times
in
0 Posts
Latest edition...


 07-09-12, 06:24 PM
#8918
Senior Member
Join Date: Nov 2010
Location: Jersey City/NYC
Posts: 300
Mentioned: 0 Post(s)
Tagged: 0 Thread(s)
Quoted: 0 Post(s)
Likes: 0
Liked 0 Times
in
0 Posts
ballin' ice cream paint job
07-09-12, 06:30 PM
#8919
Senior Member
Join Date: Jun 2012
Location: Chicago
Posts: 750
Bikes: https://www.pedalroom.com/bike/2008-se-lager-brown-6612
Mentioned: 0 Post(s)
Tagged: 0 Thread(s)
Quoted: 0 Post(s)
Likes: 0
Liked 0 Times
in
0 Posts
Damnit scrod, stealing my thunder with your pepto bizmo sex machine
07-09-12, 06:47 PM
#8921
Senior Member

Join Date: Nov 2010
Posts: 1,869
Bikes: '14 Kona Rove, '06 Bob Jackson
Mentioned: 0 Post(s)
Tagged: 0 Thread(s)
Quoted: 1 Post(s)
Likes: 0
Liked 0 Times
in
0 Posts
Future head tube badge?
 07-09-12, 07:17 PM
#8923
We win all charity rides
Join Date: Apr 2008
Location: Central Michigan University/ GR, MI
Posts: 3,369
Bikes: BMX, fixed gear
Mentioned: 0 Post(s)
Tagged: 0 Thread(s)
Quoted: 1 Post(s)
Likes: 0
Liked 0 Times
in
0 Posts
Because whats better than seeing a dude with huge long dreads riding a sparkly pink bike?
07-09-12, 07:20 PM
#8924
モㄥ工匕モ 爪モ爪乃モ尺
Join Date: Feb 2010
Location: LA San Gabriel, California
Posts: 2,135
Bikes: Custom frame
Mentioned: 0 Post(s)
Tagged: 0 Thread(s)
Quoted: 0 Post(s)
Likes: 0
Liked 0 Times
in
0 Posts
the saddle nose to bars is only 54 cm O_O I dont get why everyones freaking out, the saddle is only like 13mm from the back end of the BB shell, The wheel base is really short making the frame look contorted
