


$15 Homemade CETMA-style Rack
 01-13-08, 02:15 PM
#1
Pants are for suckaz
Thread Starter

Join Date: Mar 2007
Location: Mt. Airy, MD
Posts: 2,578
Bikes: Hardtail MTB, Fixed gear, and Commuter bike
Mentioned: 0 Post(s)
Tagged: 0 Thread(s)
Quoted: 0 Post(s)
Likes: 0
Liked 1 Time
in
1 Post
$15 Homemade CETMA-style Rack
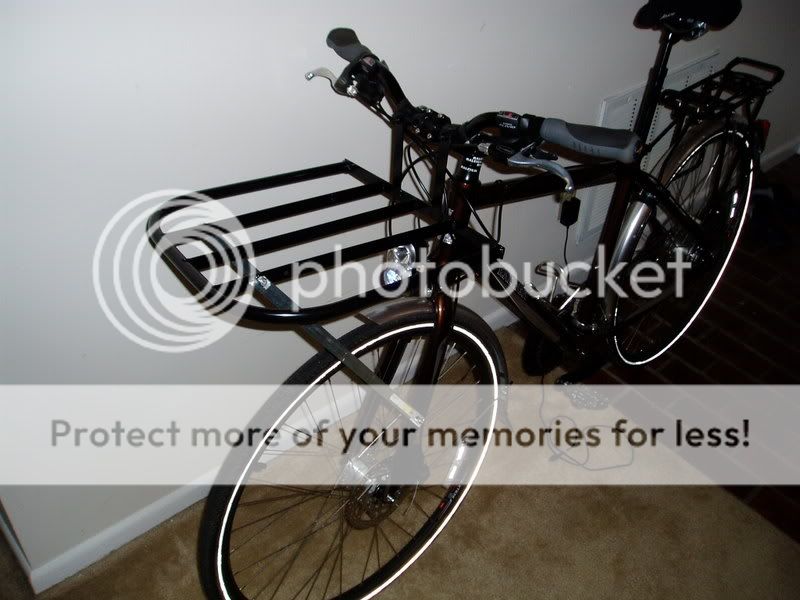
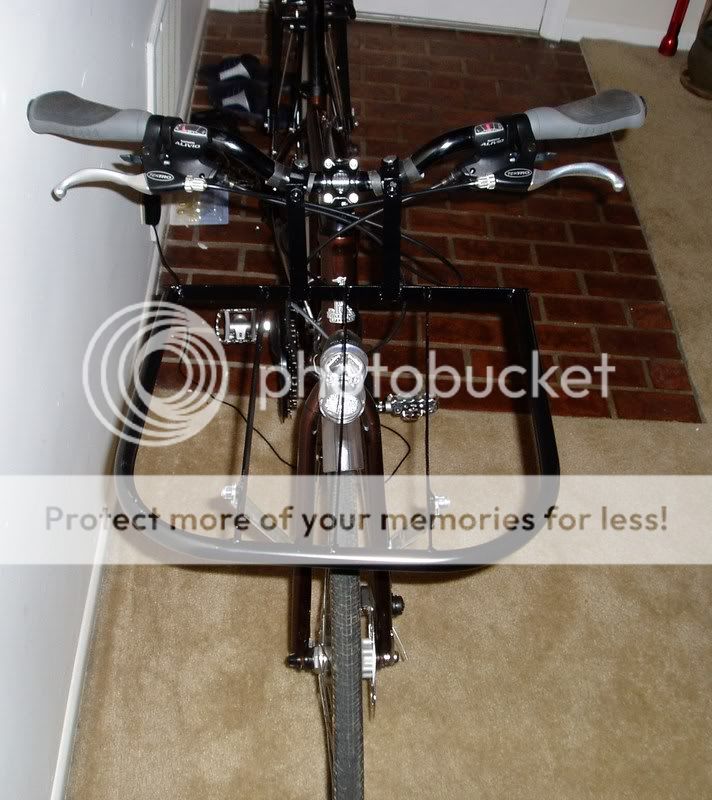
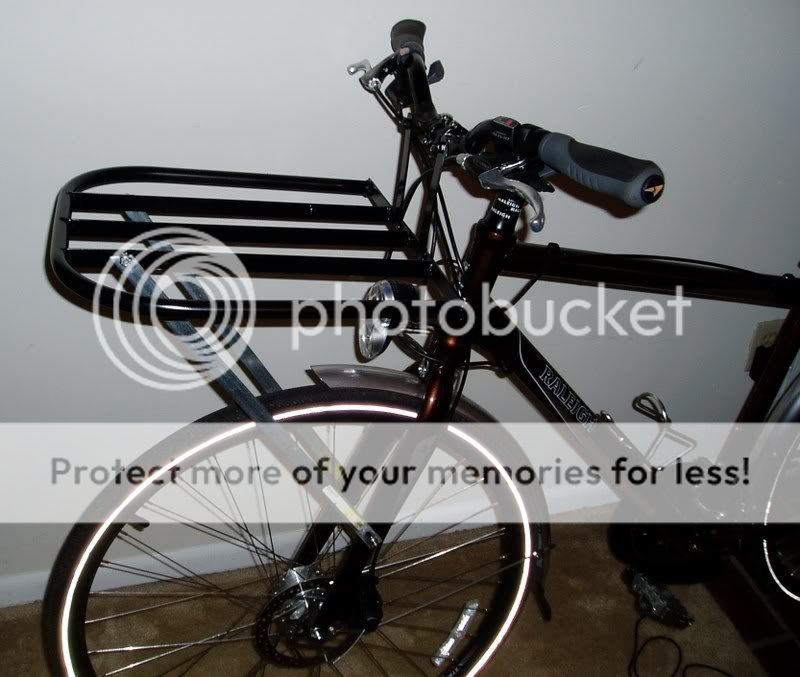
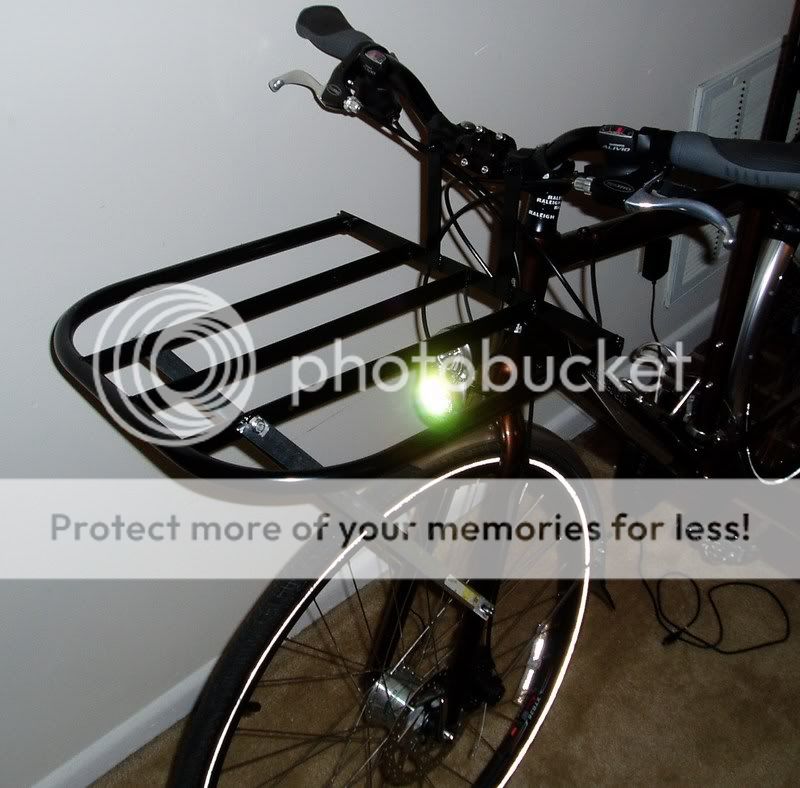
I just completed a front rack based on the CETMA design. The platform is welded from 1/2" conduit and 3/4" bar stock. It sits pretty high because I did not want to mess with relocating the dynamo powered headlight. I know putting the weight higher will make it harder to steer with heavy loads but I did not want to mess with the light. If you don't have a light in the way, i highly recommend moving the rack down to be just above the front wheel. when it comes to weight on a bike, lower is always better.
Total cost was about $15, it could be considerably less (about $3) if I used scrap steel rather than brand new.
The platform is roughly 16"x16".
What's that you say? You want to make one but don't own a conduit bender, drill press, several angle grinders, and a welder?!
A bolt together version could be made pretty easily based on this design but using only basic hand tools, let me know if you want me to post more about my ideas for a non-welded version.
Below are some pictures, feel free to ask questions or post comments/criticisms below.
 01-14-08, 12:29 PM
#3
Pants are for suckaz
Thread Starter
Join Date: Mar 2007
Location: Mt. Airy, MD
Posts: 2,578
Bikes: Hardtail MTB, Fixed gear, and Commuter bike
Mentioned: 0 Post(s)
Tagged: 0 Thread(s)
Quoted: 0 Post(s)
Likes: 0
Liked 1 Time
in
1 Post
For a bolt together rack I'd probably use aluminium as it is easier to cut, easier to drill, and lighter in weight. Honestly, I'd have used Al on my rack but I do not have the equipment required to weld it.
The tools needed would be:
Hacksaw
Drill & bits
Screwdriver/wrench for putting in the screws
Parts: (Depending on size of rack, these are rough estimates)
(2) 1/2" Conduit Hangers. These are the "clamps" that hold the rack to the handlebars. Available in the electrical section of Home Depot, Lowes, or your local hardware store.
(36") 1"x1" angle aluminum
(48") 3/4" square aluminum tubing
(48"+) 3/4" flat aluminium bar stock
(various) screws and lock nuts (i prefer nylon lock nuts to standard nuts w/locktite)
I made a crude paintbrush drawing of how I would bolt it together.

I hope this helps.
The tools needed would be:
Hacksaw
Drill & bits
Screwdriver/wrench for putting in the screws
Parts: (Depending on size of rack, these are rough estimates)
(2) 1/2" Conduit Hangers. These are the "clamps" that hold the rack to the handlebars. Available in the electrical section of Home Depot, Lowes, or your local hardware store.
(36") 1"x1" angle aluminum
(48") 3/4" square aluminum tubing
(48"+) 3/4" flat aluminium bar stock
(various) screws and lock nuts (i prefer nylon lock nuts to standard nuts w/locktite)
I made a crude paintbrush drawing of how I would bolt it together.
I hope this helps.
01-15-08, 04:16 AM
#4
Senior Member
Join Date: May 2005
Location: IL-USA
Posts: 1,859
Mentioned: 0 Post(s)
Tagged: 0 Thread(s)
Quoted: 111 Post(s)
Likes: 0
Liked 5 Times
in
5 Posts
Aluminum brazing rod can be difficult to use in some circumstances because aluminum spreads heat out so much. This is especially true when using a disposable propane torch, because the flame it gives is not real hot and is very broad. Any spot that you want more than two pieces to join will need to all be clamped and brazed at once. You will not be able to braze one piece, and then braze another on right next to it--the first join will melt from the heat of the second join.
Also those propane torches will get hot to melt thinner aluminum, and aluminum doesn't give much warning it's about to liquify so practice on scrap pieces first.
~
01-15-08, 05:40 AM
#5
Pants are for suckaz
Thread Starter
Join Date: Mar 2007
Location: Mt. Airy, MD
Posts: 2,578
Bikes: Hardtail MTB, Fixed gear, and Commuter bike
Mentioned: 0 Post(s)
Tagged: 0 Thread(s)
Quoted: 0 Post(s)
Likes: 0
Liked 1 Time
in
1 Post
Aluminum is cheap to braze: you need "aluminum repair rod" (any decent hardware stores sell it, $15 a lb or whatever), one brand is named Durafix or just ask them for aluminum brazing rod. It will melt with just a $15 hand-held propane torch (the kind with a disposable tank, and a screw-on valve/nozzle).
Aluminum brazing rod can be difficult to use in some circumstances because aluminum spreads heat out so much. This is especially true when using a disposable propane torch, because the flame it gives is not real hot and is very broad. Any spot that you want more than two pieces to join will need to all be clamped and brazed at once. You will not be able to braze one piece, and then braze another on right next to it--the first join will melt from the heat of the second join.
Also those propane torches will get hot to melt thinner aluminum, and aluminum doesn't give much warning it's about to liquify so practice on scrap pieces first.
~
