


Making Your Own Studded Tyres
 01-31-12, 04:08 PM
#151
Senior Member
Join Date: Apr 2006
Location: Gloucester MA
Posts: 216
Mentioned: 0 Post(s)
Tagged: 0 Thread(s)
Quoted: 0 Post(s)
Likes: 0
Liked 1 Time
in
1 Post
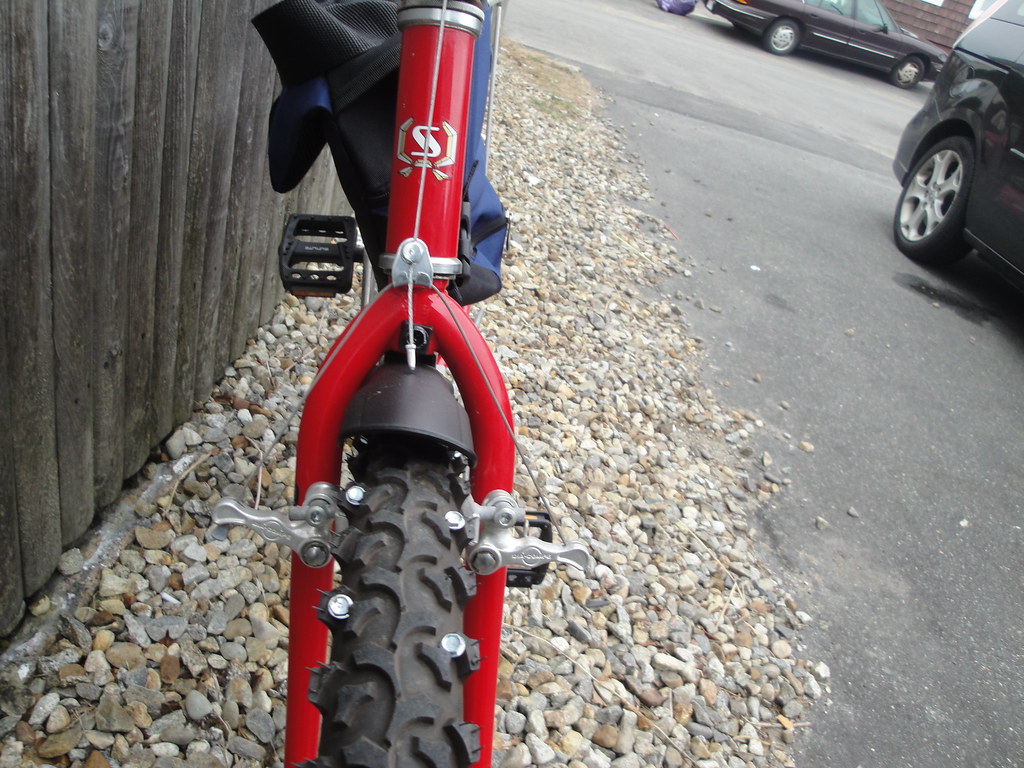
Well I did like others have done and simply screwed self-tapping screws into every other lug from the outside of the tire, angling them away from the tube. Seems to have held up fine for the first few miles anyway. Once I get a puncture I'll take the tire off and rock the duct tape tire liner. Heres one shot :
Too bad we've gotten basically NO snow here in New England
Too bad we've gotten basically NO snow here in New England
 02-01-12, 08:58 PM
#152
Mrs. Hop-along

Join Date: Oct 2009
Location: Seville, FL
Posts: 338
Bikes: Ladies Schwinn Super Sport and Gateway
Mentioned: 0 Post(s)
Tagged: 0 Thread(s)
Quoted: 1 Post(s)
Likes: 0
Liked 0 Times
in
0 Posts
If you have installed screws from the inside of a tire, points out, what did you use to protect your tube from the screw heads?
One layer of duct tape over them failed miserably.
We then tried squares of the destroyed inner tube surrounded by seat tape (cloth tape that rips like duct tape for patching the vinyl school bus seats) like little tire band-aids.
I thought for sure that would work, but I stepped outside to go to work this afternoon and the tire was flat again, after taking me to work and back again fine this morning. This time it seems like maybe the culprit was a fold of the original duct tape- there was a point which may have been sharp enough to wear a hole in the tube? Seemed like friction there was the cause, rather than a neat puncture.
Am I always going to have to worry about when I might get a flat? I can't commute like that, with an unreliable tire. Also, I'm already sick of taking my wheels apart to fix flats.
Last edited by redeyedtreefr0g; 02-01-12 at 09:01 PM.
02-01-12, 09:10 PM
#153
Full Member
Join Date: Jun 2008
Location: Canada
Posts: 358
Bikes: Devinci Millenium, Gary Fisher Joshua
Mentioned: 1 Post(s)
Tagged: 0 Thread(s)
Quoted: 73 Post(s)
Liked 29 Times
in
13 Posts
Use countersunk screws (flat head) so there is a flat surface on the inside.
Also use some baby powder on the tube and inside of the tire, so the tube can slide a bit to reduce any stress on it.
Some people use a thin strip of a rigid plastic between the tire and tube where the screws are. I believe one trade name for this is snakebite (something or other?) because it prevents the snakebite flats from spokes coming through the rim into the tire. These types of flats are two holes that look like a snake bite.
I am sure you could find some reasonably rigid, (but not too rigid,) plastic that would work
02-01-12, 11:07 PM
#154


Bicycle Repair Man !!!
Thread Starter

If you have installed screws from the inside of a tire, points out, what did you use to protect your tube from the screw heads?
One layer of duct tape over them failed miserably.
We then tried squares of the destroyed inner tube surrounded by seat tape (cloth tape that rips like duct tape for patching the vinyl school bus seats) like little tire band-aids.
I thought for sure that would work, but I stepped outside to go to work this afternoon and the tire was flat again, after taking me to work and back again fine this morning. This time it seems like maybe the culprit was a fold of the original duct tape- there was a point which may have been sharp enough to wear a hole in the tube? Seemed like friction there was the cause, rather than a neat puncture.
Am I always going to have to worry about when I might get a flat? I can't commute like that, with an unreliable tire. Also, I'm already sick of taking my wheels apart to fix flats.
One layer of duct tape over them failed miserably.
We then tried squares of the destroyed inner tube surrounded by seat tape (cloth tape that rips like duct tape for patching the vinyl school bus seats) like little tire band-aids.
I thought for sure that would work, but I stepped outside to go to work this afternoon and the tire was flat again, after taking me to work and back again fine this morning. This time it seems like maybe the culprit was a fold of the original duct tape- there was a point which may have been sharp enough to wear a hole in the tube? Seemed like friction there was the cause, rather than a neat puncture.
Am I always going to have to worry about when I might get a flat? I can't commute like that, with an unreliable tire. Also, I'm already sick of taking my wheels apart to fix flats.
The sheet metal screw is important due to the rounded head design that is less likely to work through the liner like a pan head screw will... this is a sheet metal screw.

A pan head screw is designed to be countersunk and the raised edge of the screw can shift and work it's way through a liner in rather short order.
Pan head... do not use these.

Have found that with the proper screws and an old tyre tube as a liner (no duct tape) flats have not ever been an issue. Some people like to double over the old tube to provide a doubly thick liner but I have never found this to be needed.
02-02-12, 07:58 AM
#155
Mrs. Hop-along
Join Date: Oct 2009
Location: Seville, FL
Posts: 338
Bikes: Ladies Schwinn Super Sport and Gateway
Mentioned: 0 Post(s)
Tagged: 0 Thread(s)
Quoted: 1 Post(s)
Likes: 0
Liked 0 Times
in
0 Posts

I used Lath screws, I thought they would be flatter to poke into the tube less, but still rounded to do the same thing as the sheet metal screw. Also I thought the flatness would help because I have slick tires, not a knobby one.
When using an old tube as a liner, how do you make sure its in the right place when installing it?
02-02-12, 12:09 PM
#156
Bicycle Repair Man !!!
Thread Starter
I used Lath screws, I thought they would be flatter to poke into the tube less, but still rounded to do the same thing as the sheet metal screw. Also I thought the flatness would help because I have slick tires, not a knobby one.
When using an old tube as a liner, how do you make sure its in the right place when installing it?
Place the tube inside the liner which you make from the used tube that has had the valve removed and has been slit along it's inside to allow for the tube to be inserted.
Having a little air in the tube when you are putting it in the liner and laying this in the tyre helps to maintain shape... this is also helpful when you mount tubes in tyres on a general basis.
The liner should wrap around the tube fairly evenly.
Make sure you use talc or baby powder between the tuber, liner, and tyre as it helps things slide and aids with mounting the tyre.
Mount the tyre on the rim carefully to make sure the liner does not interfere with the tyre bead and inflate the tyre, paying attention to make sure it seats correctly.
I think my next update will have to be to do a short instructional video on how to do this or add more photos of each step.
02-02-12, 03:31 PM
#157
Senior Member

Join Date: Nov 2007
Posts: 3,720
Mentioned: 3 Post(s)
Tagged: 0 Thread(s)
Quoted: 317 Post(s)
Likes: 0
Liked 1 Time
in
1 Post
Could you describe where the holes were? That is a lot in a short time.
We had some punctures but I found out It was becouse I used a angle grinder to file down the screws. Was lazy and used the wrong disc (for cutting stone ) and did it after installing the tyre and tube on the wheel. The screws got heated from this (red on the end) and therefor made the rubber in the tube brittle. I could see small round spots of a different black shade for ewery screw. When I realised this I just ditched the tubes (used it to line studded tyres instead) and all has been fine since that.
You have narrow tyres, I newer did this narrow tyres myself so I do not know. I feel bad for you since you really can not afford this to fail!
We had some punctures but I found out It was becouse I used a angle grinder to file down the screws. Was lazy and used the wrong disc (for cutting stone
) and did it after installing the tyre and tube on the wheel. The screws got heated from this (red on the end) and therefor made the rubber in the tube brittle. I could see small round spots of a different black shade for ewery screw. When I realised this I just ditched the tubes (used it to line studded tyres instead) and all has been fine since that.You have narrow tyres, I newer did this narrow tyres myself so I do not know. I feel bad for you since you really can not afford this to fail!
02-02-12, 07:40 PM
#158
Mrs. Hop-along
Join Date: Oct 2009
Location: Seville, FL
Posts: 338
Bikes: Ladies Schwinn Super Sport and Gateway
Mentioned: 0 Post(s)
Tagged: 0 Thread(s)
Quoted: 1 Post(s)
Likes: 0
Liked 0 Times
in
0 Posts
I've decided to take a break from Zoomie for a day or two. I was outside switching my lights over to the mountain bike this morning and adjusting the seat, and I'll ride it tomorrow too instead of fiddling with Zoomie's wheel again, which was flat (to be honest I'm not sure my patch glue is reliable at this point, it might have been a bad patch, especially since I didn't ride on it this time, it just sat there and deflated overnight).
I'm willing to give it one more shot with a proper tube as liner. I'll probably leave the current tape+tube bandaids in place, unless you think it would cause harm, in which case I'll remove them. I can take pictures when I take it apart again if you'd like to see what I've got in there.
(Wow those mountain bike tires look fat!)
02-09-12, 11:40 AM
#159
Mrs. Hop-along
Join Date: Oct 2009
Location: Seville, FL
Posts: 338
Bikes: Ladies Schwinn Super Sport and Gateway
Mentioned: 0 Post(s)
Tagged: 0 Thread(s)
Quoted: 1 Post(s)
Likes: 0
Liked 0 Times
in
0 Posts
Well, I've given up on studs, for now. I got another spare mountain bike (wow, now we have 4 bikes!). This new green one (my favorite color) has tall treads and a step-through frame, which I've discovered is an important feature for me. Not only is it difficult to mount and dismount from Foreman with his nearly-horizontal top tube, but it is also really freaking cold against my leg when pausing at stop signs!
I discovered while taking apart the wheels this last time why the front tire was the one to cause so much trouble. I made the front tire first. The rear tire, being done second, not only had screws in better places as my aim got better, but it had smoother and smaller patches of duct tape over each pair of studs, and then the seat-tape band-aids completely covered each duct tape patch.
I highly discourage the use of duct tape!!
I found it extremely difficult to remove, even after it warmed up (while cold the stuff just shreds) and most of the sticky goo remained stuck to the inside wall of the tire. Also, each tiny fold became a irritation point that could wear a hole in a tube just as easily as sticking a pin in there. Instead, use a spare junk tube as liner. If you don't have 2 full junk spares, I believe the seat tape with patches over the studs would have worked extremely well. Seat tape is a soft cloth version like duct tape- the brand I had was Shurtape.
I think my other problem was a faulty patch kit- where I believe most of my frustration stemmed from. I think the glue was no longer working, so every patch I put on just made an incredibly slow leak that would show itself after many many hours, and be discovered right when I needed to go somewhere. I've learned to bath-test tubes before re-installing them (submerge the tube section fully underwater and look for bubbles- even just using soap didn't detect the last patch leak, water did).
So now I officially own more than one bike, and Zoomie is a not-slick-road kind of girl. (She also officially became a she, when I decided Foreman was male. The green freebie is as yet unnamed, but its a girl.)
If I need studs later on I'll use the angled knobby version that doesn't put a tube in danger.
Also, for those wishing to know, installing studs in slick tires and removing them does leave tiny holes, but it doesn't seem to have any ill effects on the tire, so far.
02-09-12, 12:26 PM
#160
Senior Member
Join Date: Feb 2001
Location: England
Posts: 12,948
Mentioned: 0 Post(s)
Tagged: 0 Thread(s)
Quoted: 19 Post(s)
Likes: 0
Liked 7 Times
in
7 Posts
I though that panhead was flattened and a bit rounded off at the edge, ie the best style of head. Thats is what I got when I asked for panhead.
I protect the inner tube from the head using a 1" patch of inner tube glued in place with copydex rubber adhesive.
I protect the inner tube from the head using a 1" patch of inner tube glued in place with copydex rubber adhesive.
02-09-12, 12:49 PM
#161
Full Member
Join Date: Jun 2008
Location: Canada
Posts: 358
Bikes: Devinci Millenium, Gary Fisher Joshua
Mentioned: 1 Post(s)
Tagged: 0 Thread(s)
Quoted: 73 Post(s)
Liked 29 Times
in
13 Posts
I have discovered and have been told by mechanics that putting a patch on a bike tire is not only useless, it is worse than useless, as it will come undone at the wrong time. Even carrying a patch kit in my tool kit is a fool's paradise.
I spent hours and hours one night messing around trying to fix my daughter's tire tube in a hotel in the middle of nowhere on a 150 mile road trip we did once. Probably did about three or five tries before I got a temporary fix. Never again.
If you are considering a tube repair kit, picture yourself carrying a bike (yours) all the way home from the furthest point on your ride. That'll 'splain it all
"Buy a new tube" is my mantra.
02-09-12, 06:32 PM
#162
Bicycle Repair Man !!!
Thread Starter
alan, your mechanic does not know what he / she is talking about and your difficulty in patching may stem from user error or the fact that in very few rare cases. the surface of the tyre has been compromised so that the patch cannot vulcanize properly.
If you know how to properly patch a tube with cement, and not some pre-glued type, the cement vulcanizes the patch to the tube and the patched area will be stronger than the tube.
When patching a tube with vulcanizing cement the glue need to be allowed to dry before applying the patch, if you do it wet the patch will not stick.
I have serviced tyres that have had multiple patches on the tube and these may have been in place for decades and they have stayed put and not developed leaks.
Pre-glued "quick"patches are not as good as they do not vulcanize themselves to the tyre... vulcanization is a chemical process whereby the patch bonds to the tube at a molecular level and if done right, you will not be able to separate the patch from the tube after a repair as they will be as one.
02-09-12, 07:04 PM
#163
Full Member
Join Date: Jun 2008
Location: Canada
Posts: 358
Bikes: Devinci Millenium, Gary Fisher Joshua
Mentioned: 1 Post(s)
Tagged: 0 Thread(s)
Quoted: 73 Post(s)
Liked 29 Times
in
13 Posts
The patches I have used are the ones that have a sticky surface with a plastic film on them, however the tube itself is scratched with a sandpaper or whatever is included with the kit.
This is to give the contact cement (the name used in North America) something to hold onto.
Then the CC is applied and allowed to dry completely and most recommend putting a second coat of glue on and allowing it to dry. On our aircraft this is the method used to adhere the leading edge deicing boots.
Then the patch is pressed on and held for a bit.
When you say vulcanizing glue what do you mean?
02-09-12, 07:30 PM
#164
Bicycle Repair Man !!!
Thread Starter
alan - This is what the contact cement should be... a vulcanizing compound that really does more to chemically bond the two pieces of rubber rather than stick two pieces of rubber together. The patch should be tacky to the touch like raw rubber but not sticky so wonder if you had the wrong type of patch.
You can cut patches from old tubes if need be... no other treatment is needed.
The finished patch should be un-separable from the tyre and sometimes you can feel the patch get warmer as the chemical reaction occurs.
A bad experience on your part does not validate the bad advice you got from your mechanic... I have patched thousands of tyres in my lifetime and actually have a few tubes in the rotation that I am trying to see how many patches they can take but the only problem is I get very few flats.
What kind of flat kit do you have ?
Not all cements are created equally and I prefer Zefal kits as they provide a good quality cement.
02-09-12, 07:42 PM
#165
Full Member
Join Date: Jun 2008
Location: Canada
Posts: 358
Bikes: Devinci Millenium, Gary Fisher Joshua
Mentioned: 1 Post(s)
Tagged: 0 Thread(s)
Quoted: 73 Post(s)
Liked 29 Times
in
13 Posts
I used kits from a bike store. Not sure brand names. I will take your advice although I very rarely get flats anyways. The last one I had was with my daughter. That trip was a trip of a lifetime and the flat was just part of the story.
I sometimes question why I have a pump on my bike, but there it is, slowing down the flow of air by my bike.
I sometimes question why I have a pump on my bike, but there it is, slowing down the flow of air by my bike.
02-09-12, 07:55 PM
#166
weirdo
Join Date: Jan 2008
Location: Reno, NV
Posts: 1,962
Mentioned: 0 Post(s)
Tagged: 0 Thread(s)
Quoted: 0 Post(s)
Likes: 0
Liked 3 Times
in
3 Posts
What 65er said.
I patch my tubes until either I get a blowout, get a puncture right on the edge of a previous patch, or damage the valve stem. They look much cooler when they get decorated with plenty of colorful little patches.
02-24-12, 08:44 PM
#167
Senior Member
Join Date: Nov 2007
Posts: 3,720
Mentioned: 3 Post(s)
Tagged: 0 Thread(s)
Quoted: 317 Post(s)
Likes: 0
Liked 1 Time
in
1 Post
Found this film on the tube: https://www.youtube.com/watch?v=GI-fR...eature=related
02-29-12, 02:47 PM
#168
Mrs. Hop-along
Join Date: Oct 2009
Location: Seville, FL
Posts: 338
Bikes: Ladies Schwinn Super Sport and Gateway
Mentioned: 0 Post(s)
Tagged: 0 Thread(s)
Quoted: 1 Post(s)
Likes: 0
Liked 0 Times
in
0 Posts
I found that video rather painful to watch due to how slow it was, but he showed the do-it-yourself studding rather well.
I just got my new-to-me free mountain bike hooked up with a new chain (now named Chainless due to the rusty chain snapping in half on my way home the first morning I took it to work- like Toothless from the movie How To Train Your Dragon). Turns out I didn't need the chain tool the package said I did, yay!
Do you think I need to stud these tires? Now that I know how to do it properly (I bought a new tube already for a liner) it will be easy. I may even be able to use the lath screws I have, but not sure if they are long enough for the knobs.
But I haven't ridden Chainless in the snow yet. How much difference does just having knobby tires make? Chainless is meant to be purely my winter bike for now, when the roads are too slick to risk falling off Zoomie.
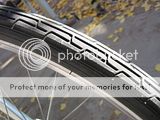
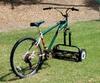
Zoomie's tire

Chainless' tire
I just got my new-to-me free mountain bike hooked up with a new chain (now named Chainless due to the rusty chain snapping in half on my way home the first morning I took it to work- like Toothless from the movie How To Train Your Dragon). Turns out I didn't need the chain tool the package said I did, yay!
Do you think I need to stud these tires? Now that I know how to do it properly (I bought a new tube already for a liner) it will be easy. I may even be able to use the lath screws I have, but not sure if they are long enough for the knobs.
But I haven't ridden Chainless in the snow yet. How much difference does just having knobby tires make? Chainless is meant to be purely my winter bike for now, when the roads are too slick to risk falling off Zoomie.

Zoomie's tire

Chainless' tire
Last edited by redeyedtreefr0g; 09-21-12 at 08:56 PM.
03-01-12, 12:34 PM
#169
Senior Member
Join Date: Nov 2007
Posts: 3,720
Mentioned: 3 Post(s)
Tagged: 0 Thread(s)
Quoted: 317 Post(s)
Likes: 0
Liked 1 Time
in
1 Post
I think if you commute in proper winter conditions you need studs. Ice is a bigger problem than snow but you`ll get both and you do not want broken bones. Try to make it so the studs just barely touch the ground when riding straight forwards. If they are too far down on the side (can happen on really fat knobbyes) it is almost as if you do not have them at all. We had seriousely wet ice here last week so ypo could hardly stand upright on two feet. Riding was also a challenge for a few days. Now it is melting.
03-01-12, 04:23 PM
#170
Bicycle Repair Man !!!
Thread Starter
A patch kit might cost the shop $1.00 - $1.50 and sell for $2.49 - $3.00
09-21-12, 09:18 PM
#171
Mrs. Hop-along
Join Date: Oct 2009
Location: Seville, FL
Posts: 338
Bikes: Ladies Schwinn Super Sport and Gateway
Mentioned: 0 Post(s)
Tagged: 0 Thread(s)
Quoted: 1 Post(s)
Likes: 0
Liked 0 Times
in
0 Posts
I'd like to update with my experiences so far during summertime riding.
Make sure you have GOOD quality tubes. And by that I mean NOT the Walmart Bell brand ones. They may work for a little while, but they fail alarmingly often without having been punctured first. I'd much rather earn my own flat tires from a sharp object! Since moving to Colorado and having two tubes fail in the same day, my husband bought me "thorn-resistant" tubes from our bike shop- these have thicker rubber on the outer surface to theoretically make it more difficult for a thorn or other sharp to penetrate far enough to actually put a hole in the tube.
I am adding on to my original opinion against duct tape. The sticky residue from last winter is STILL on the inside of my tire. It makes changing flat tubes a sincere pain in the butt as you have to yank very hard to remove that flat tube from inside the tire. It did not take long for me to get two ruined tubes to split longways to leave in there as tire liners (now the stickiness is helpful to keep the liner in place during a flat repair). I'm thinking that between the liners and the extra-thick tubes, I should be pretty well set to try re-studding Zoomie's smooth tires this coming winter.
(My husband is very much against me getting flat tires, its a bit funny actually since you'd think I would be the one upset more. Anyway, he may spring for "real" studded tires this year. I think I'd like to try the DIY thing still )
)
Studding your tires this way MAY damage your tube by causing a wire forming your tire to stick out of the empty hole eventually. In the fiasco of two-flats-in-one-day, I very thoroughly inspected both tires and rims for the cause of my flats and found nothing. I DID discover that under my old-inner-tube tire liners that one teeny wire was starting to poke. The liner was doing its job and the wire was easy to fix. (My tubes failed along the inner seam in different locations, no cause found along the rims. I can only conclude that the tubes were defective.)
Anyway, the temperatures are dropping slowly and trees are turning colors! I'm very excited for winter.
Make sure you have GOOD quality tubes. And by that I mean NOT the Walmart Bell brand ones. They may work for a little while, but they fail alarmingly often without having been punctured first. I'd much rather earn my own flat tires from a sharp object! Since moving to Colorado and having two tubes fail in the same day, my husband bought me "thorn-resistant" tubes from our bike shop- these have thicker rubber on the outer surface to theoretically make it more difficult for a thorn or other sharp to penetrate far enough to actually put a hole in the tube.
I am adding on to my original opinion against duct tape. The sticky residue from last winter is STILL on the inside of my tire. It makes changing flat tubes a sincere pain in the butt as you have to yank very hard to remove that flat tube from inside the tire. It did not take long for me to get two ruined tubes to split longways to leave in there as tire liners (now the stickiness is helpful to keep the liner in place during a flat repair). I'm thinking that between the liners and the extra-thick tubes, I should be pretty well set to try re-studding Zoomie's smooth tires this coming winter.
(My husband is very much against me getting flat tires, its a bit funny actually since you'd think I would be the one upset more. Anyway, he may spring for "real" studded tires this year. I think I'd like to try the DIY thing still
)Studding your tires this way MAY damage your tube by causing a wire forming your tire to stick out of the empty hole eventually. In the fiasco of two-flats-in-one-day, I very thoroughly inspected both tires and rims for the cause of my flats and found nothing. I DID discover that under my old-inner-tube tire liners that one teeny wire was starting to poke. The liner was doing its job and the wire was easy to fix. (My tubes failed along the inner seam in different locations, no cause found along the rims. I can only conclude that the tubes were defective.)
Anyway, the temperatures are dropping slowly and trees are turning colors! I'm very excited for winter.
10-18-12, 11:19 AM
#172
ouate de phoque
Join Date: Mar 2012
Location: La Prairie, Qc, Canada
Posts: 1,781
Bikes: Bianchi, Nakamura,Opus
Mentioned: 6 Post(s)
Tagged: 0 Thread(s)
Quoted: 6 Post(s)
Liked 0 Times
in
0 Posts
I followed the instruction and the tire look great, only I forgot to put baby powder in the tire when I put it on the wheel. Is it a big deal?
10-18-12, 01:50 PM
#173
Bicycle Repair Man !!!
Thread Starter
I guess the season is upon us and my winter bike is ready and that set of DIY studs will be going into their third season... the rear was double studded to give better centre line traction and is showing a little wear but should be fine for another season and then I will re-stud where it has worn.
I ride 5000-6000 km every winter so guess these tyres have 10,000 km on them now... previous sets of DIY studs I have built are still in use as I have given them away and keep a spare 26 wheel for my other bikes should I just want added front stability in the winter.
Received some 20- inch Marathon winter tyres as a gift so will set up one of my 20's for ice riding too and see how those roll.
10-18-12, 02:42 PM
#174
Bicycle Repair Man !!!
Thread Starter
Found this film on the tube: https://www.youtube.com/watch?v=GI-fR...eature=related
I use a cordless drill to establish the stud pattern and drive in the screws with the cordless driver that has a torque setting to prevent people from driving the screw in too far and causing casing damage.
Will also grind down the screw points to make them dul enough that they do not tear your clothes off and still give great traction.
10-18-12, 03:36 PM
#175
ouate de phoque
Join Date: Mar 2012
Location: La Prairie, Qc, Canada
Posts: 1,781
Bikes: Bianchi, Nakamura,Opus
Mentioned: 6 Post(s)
Tagged: 0 Thread(s)
Quoted: 6 Post(s)
Liked 0 Times
in
0 Posts
I have another question for you: This morning I had to take my winter bike for the first time ( broke two spokes on the rear wheel of my summer commuter last night) But I didn't dare try my studded tires just yet because I was afraid of wearing them down or tearing the rubber when cornering. After reading your reply I'm guessing that I'm wrong ???