A few photos included below, and more on photobucket:
http://s850.photobucket.com/albums/a...eynolds%20753/
First, please forgive the lengthy, indulgent narrative to follow. This is the story of my first attempt at bike restoration. This project is also how I came to find this wonderful forum. Sometime during this painting process, I stumbled on BikeForums. Lots of great tips on this site, so I'd like to thank everyone who has contributed their advice and experience--especially helpful were the various tips on painting from Dr. Deltron, and painting and general frame prep from
Randy Jawa's fantastic "My Ten Speeds" site. I wish I had discovered BikeForums.net before I began the project, but...“C’est La Vie (Claire)!”
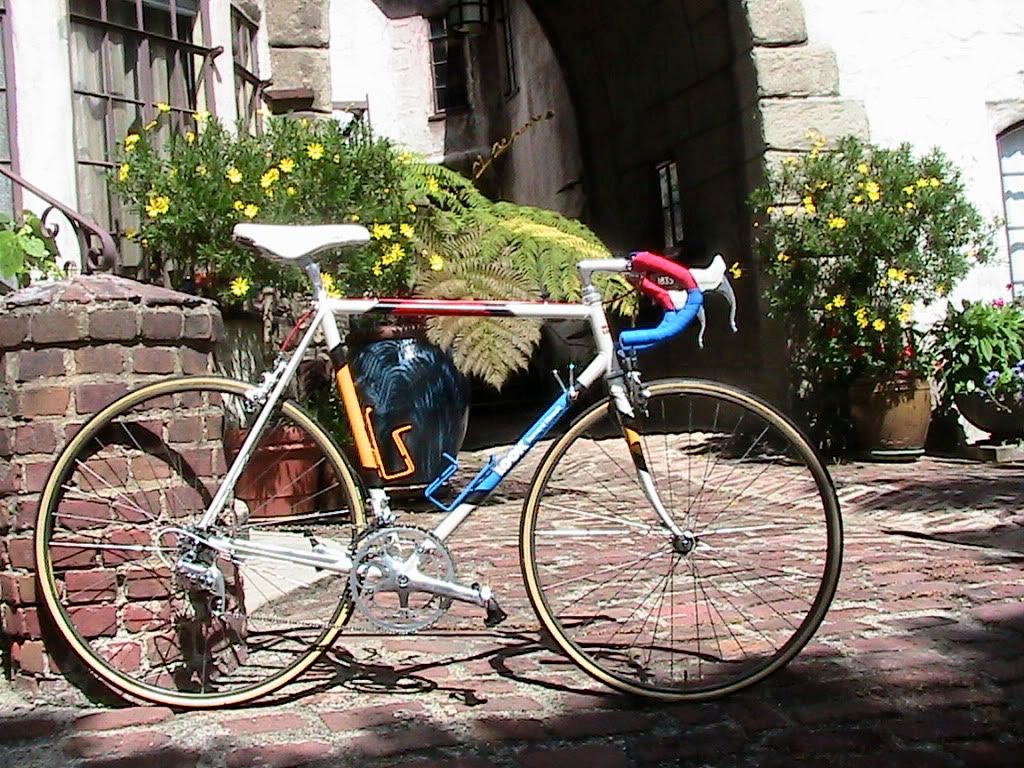
The 1986 LOOK “Bernard Hinault” Equipe Reynolds 753 (or whatever it’s proper name is), was my first race bike, which I purchased new as a teenager. (My first 10-speed bike was a Vitus 979, which was wrecked when a careless and oblivious driver sideswiped me with her van. I then used the very small insurance payment toward purchase of the LOOK frame—but that’s another story...) After riding/racing the LOOK almost daily for a couple years, tragedy struck: A solo ride on a brisk fall morning started pleasantly enough, until I crashed the LOOK into the back of a parked car two blocks from my home while programming my Avocet 30 computer (pictured). I know, careless and oblivious, right? With braces lodged in my upper lip, I returned home to lick my wounds. The worst was realized the next day, when I noticed the fork was bent and there was a small buckle on the bottom of the down tube where it meets the head tube.

I can’t recall who did the repairs, but I brought the frame back to the licensed LOOK dealer in southern CA where I purchased the frame. A certified Reynolds framebuilder replaced the fork and down tube (if I remember correctly, the replacement fork came directly from LOOK). I also had the framebuilder install waterbottle cage bosses on the seat tube, and repair a damaged braze-on brake cable guide above the top tube. Serendipitously, around this time, my junior race team received free bikes around this time from our new team sponsor (Park Pre). The early Park Pre road bike was actually pretty nice, and I didn’t have the money or the need to restore the LOOK, and so began its long dormancy—repaired but quite haggard-looking. This was around 1989.
Regretfully, all my “before” pictures were lost on a corrupted computer, so you will have to imagine a well-used frame with an exposed metal down tube, and welding marks/scorched paint at the bottom bracket, bottom head tube lug, around the new waterbottle bosses, and center brake cable guide. So, this frame was clearly beyond any discussion of preserving the patina, though I still had enough of the paint job to take adequate measurements. The down tube and forks took a bit of guesswork, but I was able to find a few photos online from which to base the respray. The frame was kept wrapped and in dry places. There was some mild rust on the exposed down tube, but not as bad as one my suspect.
Sometime last year, I decided it was finally time to restore the frame to its original glory, or as close to it as I could get. The final version is far from perfect. But every time I had a little setback…err, learning experience…I just kept reminding myself to stop obsessing and remember where I started. In hindsight, I realize I probably took on an overly ambitious paint scheme for my first frame respray attempt and would have been better off sending it out to a professional, but (a) I didn’t know what I was getting into, (b) it’s been immensely gratifying, and (c) I’m still ultimately satisfied with the results.
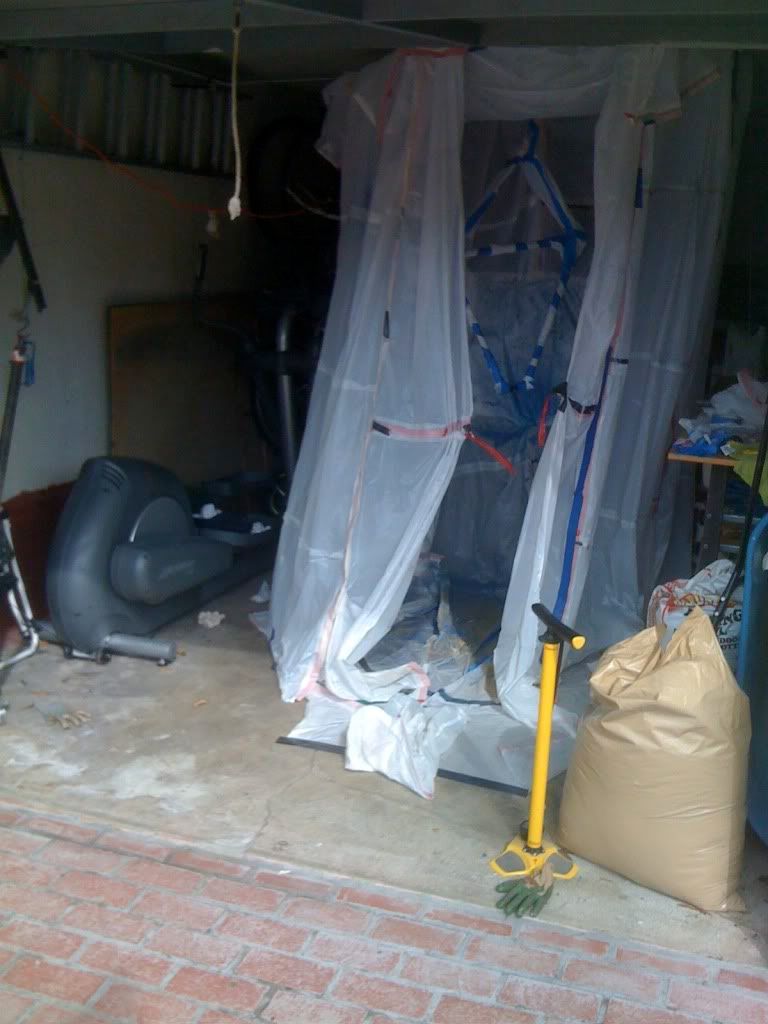
I found some brief tips elsewhere online, and began the frame prep with steel wool, then tried some naval jelly. The naval jelly worked okay, but not really. So I went back to steel wool, 600 grit sandpaper, and a brass-bristle brush around the lugs until the frame was completely stripped. It was a long, tedious process. Perhaps I could have gotten away with more aggressive sanding grits, but I figured it was better to go slow than too fast. The chromed dropouts I cleaned with wet brillo pads. The dropouts cleaned up fairly well, though some pitting remains. Cleaned the frame with automotive degreaser. Now I was almost ready to paint, but first I had to create an improvised spray booth.
Fortunately, before I started, I read that I should use auto paint. I was not able to move immediately from coats of primer to coats of paint to coats of clear. Because of the various color patterns, I painted in a series of stages allowing sufficient time for the paint to completely dry before taping for the next color. After giving the entire bike several coats of primer, my strategy was to start with the base color, then move on to the colors—yellow, red, blue. I left the black bands for last since they wouldn’t show so much if the black overlapped slightly onto one of the other colors.
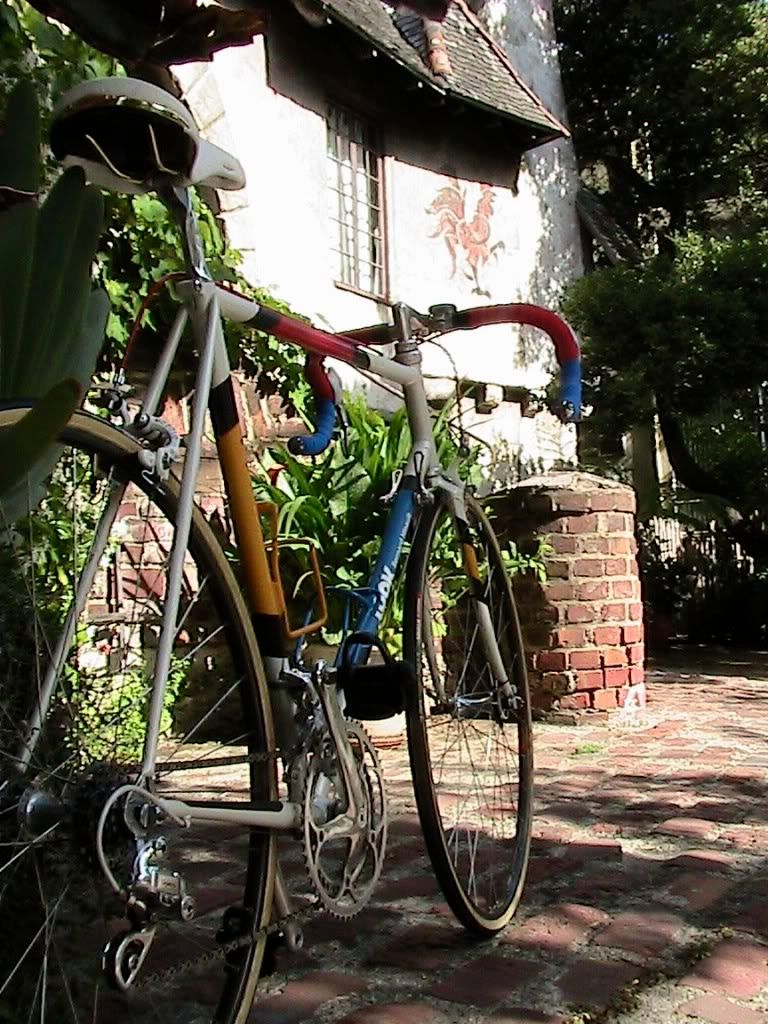
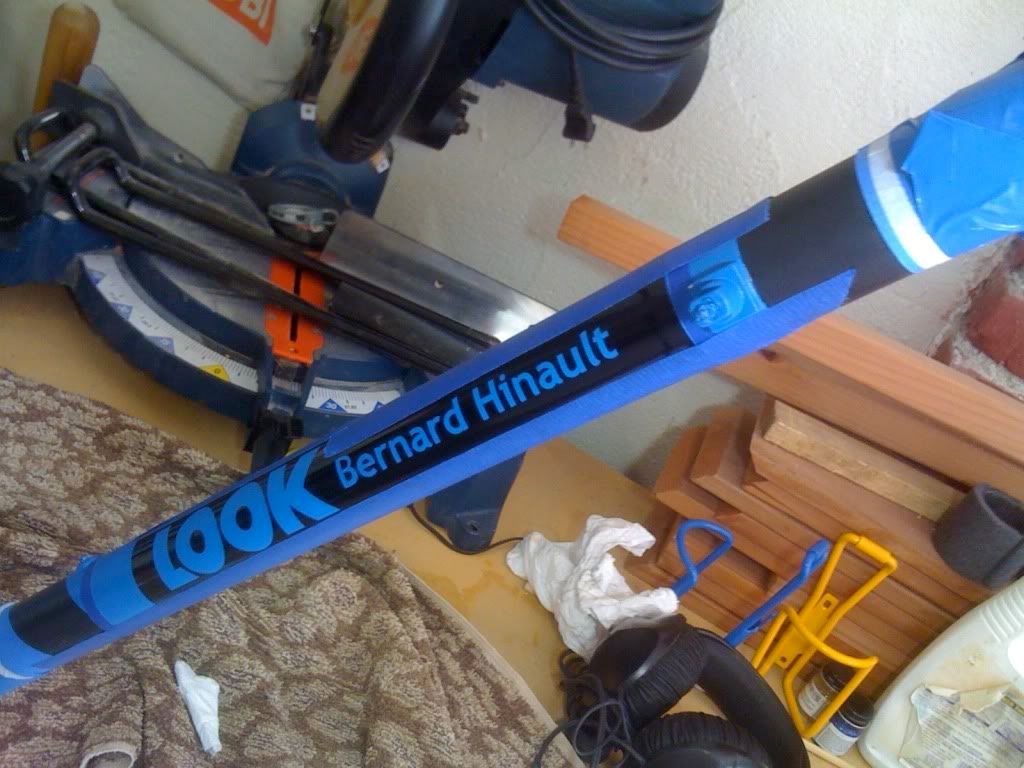
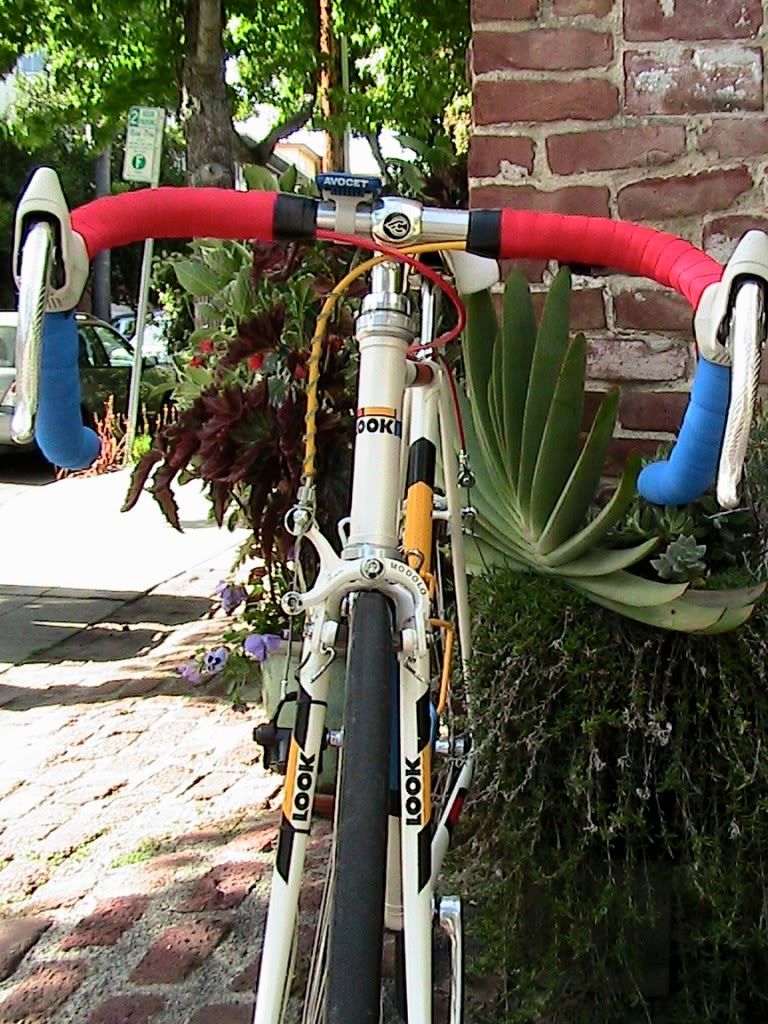
The logos were the tricky part. The white “LOOK Bernard Hinault” text on the down tube and the logo on the head tube were originally painted on, not decals. I tried several failed methods for creating stencils to use for these details, before ultimately finding a local sign shop that could manufacture cut-out vinyl stickers from Adobe Illustrator files I was able to create, and which served as the templates ($40). Btw, the font used for “Bernard Hinault” was the appropriately French Trebuchet font. Meanwhile, I had been moving ahead with the painting of the frame and so I had to go back at toward the end and spray each little square in the logo on the head tube, followed black lines. The last step was the white paint on the down tube.
I hit a stumbling block when I got to the white lettering on the down tube. Since that is the only place requiring white paint, I tried to save a few bucks and use model paint, which turned out to be a mistake. I put the text “stencil” sticker over the blue, applied a thin layer of clear over the edges and then sprayed. (Someone on this forum suggested applying a thin layer of clear at the edges of tape to prevent bleed through. It seemed like a good idea, and it may work for others, but it did not work for me.) I spent a couple days trying to fix the edges of the lettering, but it was clear that I was never going to be satisfied with the results. I decided I may have to compromise my standards and go with a decal instead of paint, and I called CycleArt to see if they could make a decal. They don’t provide one-off decals on order, but they did give some useful advice and hung up feeling assured that my painting methods were correct and that another attempt was in order. So, with renewed confidence, I convinced the local sign shop to run another vinyl stencil sticker, and attempted the lettering a second time---now with white automotive paint, and with patience to wait for a perfectly a warm, dry day. The results were dramatically improved.
I gave everything a light sanding/caressing with 2000 grit wet sandpaper and then a thorough cleaning, before applying 3 or 4 coats of clear. To my dismay, the clear coats dried into a frosty haze, not the very shiny polish you see on a newly powdercoated frame. I’m still not sure what I did wrong here. I let the clear coat dry thoroughly, sanded it down with 2000 grit paper, and re-applied three more coats of clear hoping for better results. Again, it turned out slightly frosty. After another round of wet sanding with 200 grit paper, I had a nice smooth finish. A little quality auto polish and the frame came out as you see it—acceptable, though still with that showroom shine I was expecting.
The components are a mix of things I had owned (seatpost, pedals, hubs, freewheel, chain, RD, brake calipers, shifters, stem & bars) and things I purchased or traded for (cranks, BB, FD, headset, brake levers, saddle, front rim). A 1st generation Chorus BB and C-Record Crankset where intended for this bike, but remain stuck on another frame (again, another story, a tragic one at that). I don’t know what ever happened to the matching Wolber front rim—perhaps damaged in the original crash. I bought the pair in 1984 in France, and haven’t been able to find a replacement, but I think the Mavic GL 330 is a pretty close match. Sheldon says, “If you have the same number of spokes front and rear, either the front wheel is heavier than it needs to be, or the rear wheel is weaker than it should be.” But since I had the matching 32-hole front hub on hand, I built up the front wheel with 2-cross pattern to compensate (instead of 3 cross as in back) using Wheelsmith aero spokes.
The Mavic 310 headset I found on ebay and replaced the same one I originally used on the frame before it became too pitted. It’s one of my favorite pieces on this frame. However, it took me months to find a shop (thank you Cupertino Bike Shop!) with
the right tool. You should have seen some of the funny looks I got from most other local bike shops. (If anyone has the tool and aren’t using it, PM me if you’d consider selling.) [EDIT: One of the two required wrenches just popped up on Ebay. I'll keep my fingers crossed.]
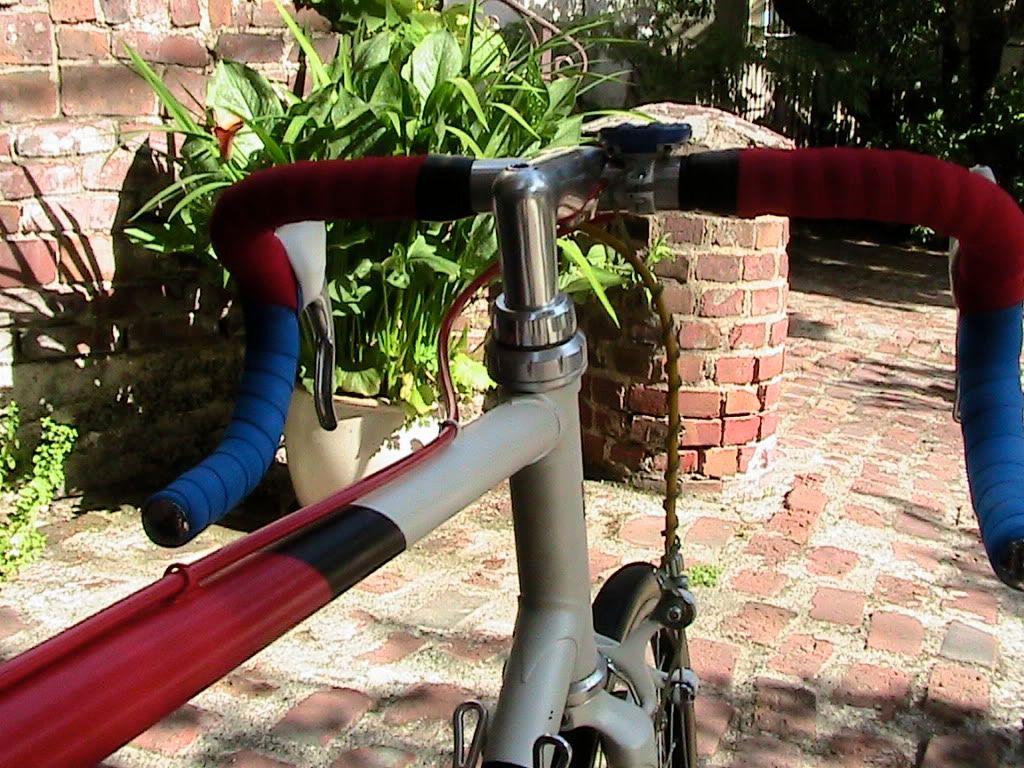
The Modolo brakes are kind of a place holder for now. I’m really not happy with their performance. Very flexy. I’ve been looking for a set of Chorus monoplanar brakes, but the ones on ebay tend to go for more than I’m willing to pay. I left an extra inch or two of extra rear brake cable housing with this replacement in mind. (PM me if you have a pair of Chorus monoplanar calipers you’d be willing to sell.) EDIT: I now have monoplanar brakes.
Oh, I almost forgot to say: The bike rides like a dream. It's quick and responsive and handles wonderfully. Haven't taken it for any long rides since the restoration, but I know it's built for long days in the saddle.

Thanks for reading!
A few odds & ends:
1. Serial number for reference: B57S194 (“J6” on non-drive side, not sure what that means).
2. The Avocet computer was not reading the magnet, so I improvised a make-shift spacer using plastic irrigation tubing to get the magnet on the hub closer to the sensor on the fork. Not sure how long this will last. Anyone else have this issue and found a more permanent solution?
3. The original derailleur cable guide came with a little plastic peg that popped into the frame. The nylon derailleur cable guide now attached came with a screw to fit into the bottom of the BB. However, the hole in this frame is not threaded and won’t hold the screw. Again, I improvised here using the green bottom piece of an indoor Christmas light bulb, which is superglued onto the cable guide--a perfect fit, although still a temporary solution. Anyone know where I can get an old school derailleur guide with a peg and not a screw mount?
4. A couple paint touch-ups are still in order (i.e., where the front brake arm accidentally hit the down tube).
5. Nose of the saddle will come down a just a smidge.
Some random tips & things I learned:
1. When painting bands or other lines, be careful not to leave too much of a ridge at the edge of the first color. In some places where I overlapped slightly and later gave a light sanding, I exposed a slight line of color under the black bands, which I had to go back and re-touch.
2. Don’t paint on humid days, and don’t count on good weather. If possible, don’t start a project like this at the beginning of the rainy season.
3. I lined the inside of the head tube, portion of the seat tube, and bottom bracket with painters tape and then trimmed the edges with a razor blade. I also filled in all holes (watterbottle bosses, down tube shifter bosses) with small wads of paper towels, which could either be pulled out or pushed in and then gathered in the BB after painting was complete.
4. When pulling off tape, pull at an angle (not perpendicular to the line of paint). This helps to avoid pulling up the paint at the edges.
5. (Courtesy of CycleArt) White aerosol paint does not mix as well as other colors, and should be shaken much longer. If the can says shake for 2 minutes, shake for 5 minutes.
6. Don’t be cheap when it comes to masks. I began using a cheap dust mask when I started the project. One day I blew my nose after a round of painting and found a thick film of blue in the tissue paper. I promptly purchased a more expensive mask specifically designed for paint fumes. At one point I began to ponder how many additional miles on the bike would be required to counterbalance the health risks incurred from sanding, chemical, and paint inhalation…
7. When creating the shim for the anatomical Modolo bars for the Cinelli stem, I inserted a rolled piece of aluminum can and traced the shim at the edge of the stem with a pencil. I then pulled out the aluminum and was able to create a perfectly shaped shim using a razor blade directly on the aluminum to match the curves of the stem.
8. Love your bike, but make sure your wife still realizes you still love her more.

 http://i850.photobucket.com/albums/a...ndriveside.jpg
http://i850.photobucket.com/albums/a...atCluster1.jpg
http://i850.photobucket.com/albums/a...ndriveside.jpg
http://i850.photobucket.com/albums/a...atCluster1.jpg