


Mounting a rack, amongst other things to an old bike with no bosses
 12-04-20, 05:11 PM
#1
Senior Member
Thread Starter

Mounting a rack, amongst other things to an old bike with no bosses
This is a documentary thread. At the moment I am satisfied with how my rack is mounted, although I may well become dissatisfied so I welcome any opinions that may be had.
I'll cover a bit of background as to why I went to all this effort before getting into the details of my modification. I bought this bike (a 1980 BSA prima) in March of this year. My plan was to go touring around Scotland with some of my friends, and I decided it would be a good opportunity to get myself a steel framed road bike. The bike would also be used to commute 24 miles per day to University, on dry days during term time. Cursory browsing of various marketplaces turned up the problem that, where I live there is not a vast supply of steel framed bikes available on the used market. Even finding a 90s 'mountain' bike requires a certain degree of patience. I would I imagine this has something to do with the not so ideal weather in Scotland killing off a lot of steel bikes with corrosion. I did find one eventually, at a reasonable price that is, but I had to drive about 140 miles to pick it up. The whole ordeal took forever because the old man I bought it from wouldn't stop telling me stories from his past and trying to sell me his old Mercedes on the side. I got the bike home, pleased with fact that I had got a Reynolds 531 frame with the rest of the bits attached for a reasonable price. Once home I then had to decide what was needing done and what I was happy to live with. Other than mounting a rack, the bike also needed a set of new tyres, a spoke on the rear wheel and a set of brake pads. I'll list the original spec bellow so that folk can get an Idea of what I was dealing with.
Frame : BSA Prima Reynolds 531, Raleigh built, but with standard BB threading
Fork: Chrome BSA, no sticker so I'm assuming it's not Reynolds
Wheels: Atom QR hubs, on Raleigh single wall aluminium rims, galvanised spokes
Tyres: Ancient Michelin clinchers (can't remember which model but they were perished)
Group set: Suntour VX, with band clamp friction shifters
Crankset: Raleigh branded stronglight square taper job (44/52 IRC)
Bars and stem : Raleigh
Brake levers: Dia-compe
Brake callipers: Raleigh branded Weinmann single pivot.
The spec was somewhat peculiar to me, since other Primas I've seen online are slightly different to mine. The first thing I changed was the tyres. This allowed me to ride the bike and get a feeling of what I wanted to change. Frome riding I soon realised that I was not going to be getting up hills with the installed crankset. I also noticed how woefully poor the brakes were compared to other properly adjusted bikes I had ridden in the past, rim or disc brake. I purchased replacement cables and a compact double crank. I didn't by a touring triple since I was trying to keep costs low and I thought the double I found looked quite nice. The replacement cables and pads made my bike a safe, but I would still prefer I bit more power, so I may change the callipers in the future.
The rack is an Axiom Journey Uni fit. I bought this rack after doing some research online and deciding that P'clips would not be ideal for heavy loads. For those unfamiliar, this rack mounts through the quick release skewer instead of an eyelet, so in theory it was ideal for my bike. In practice however this rack has become a bit of a farce. The main problem is the fact that this rack will natively only fit 135mm drop out and nothing else. I had to use washers in between the rack mount and drop out which was sketchy to say the least. The other big gripe I have with this rack is they do not include the hardware required to get the rack mounted. For the pennies it would have cost them I don't understand why they can't include them.
The rack was installed about the end of April and although my tour got cancelled due to COVID I had been riding my bike with no problems (with the rack anyway) until about a month ago. The gears had been presenting a problem during this time, but it was something I could live with. The derailleur was squeeky and even with my new 34/48 crankset, steep hills were a grind. The wheels were also showing their age with how much flex they had, even without panniers. This all came to a head when I started using my bike to commute to University. One day a spoke snapped and it all spiralled into a big wheel and gears conversion. To replace the spoke I had to take the wheel off, which meant faffing around with the rack and its washers; hardly quick release. Then to take the spoke off I had to take the freewheel off, normally no problem, except this freewheel is French and I wasn't forking out 10 quid for the tool. So with the freewheel dismantled I replaced the spoke and what d'ya know another breaks. Simultaneously my willingness to keep these wheels going breaks. I already had some early 90s shimano 7 speed mtb hubs kicking about and although the frame would be stretched to fit them I decide that the added strength and gears is worth the slightly awkward frame stretching.
I built two new wheels (front and rear obviously) with Shimano Exage hubs, Ryde Sputnik rims and Sapim PG stainless spokes. Since the rear hub is a cassette I decided 7 speed would be the limit of what I could easily add without having to change the DT shifters. I'm using a shimano 12-32 which should hopefully get me up most hills. This high range cassette does have the draw back of having large gaps between speeds, but I don't really mind If my cadence changes a little. I have also added a 1990 shimano Deore dx derailleur to fit the new cassette range. The derailleur is incorporated into my revised rack mounting. The revised rack-mount bolts in between the drop out itself. Since my bike has fairly long dropouts this is doable. The connection is made in similar fashion to the derailleur hanger and is actually using the same bolt as the hanger on the drive side. This makes taking the wheel off a lot easier. Since I've not cold set the frame it would be very tricky to stretch the frame out whilst also trying the line the axle up with the rack. I do need to change the qr to one with a smaller nut so I can move the wheel a bit further back.
The only other mod is the Oxford mudguards I've added, which are mounted in a bodged manner on the rear. I cannot recommend these either since they came with no mounting screws and are not even round! I had to bend them, which caused the plastic to wrinkle. The updated parts I will list bellow.
Tyres: Panaracer Pasela 28c
Wheels: Shimano Exage on Ryde Sputnik
Crankset: On-one Compact double on a 113mm BB
Derailleur: Shimano Deore DX M650
Cassette: Shimano HG-200
Chain: KMC Z8.3
Pads: Fibrax Holders with Ritchie Blue pad (open to suggestions on good pads)
There may be other upgrades in the future, such as a 531 touring fork and maybe some compact drops, but not until winter is over at least. I am also going to get the frame powder coated next year and when it's stripped down I may see If I can get a fabricator friend to weld some bosses on for me.
I've added some pictures bellow to say what I can't.

Rack spaced with washers and fastened using existing derailleur hanger hardware

A plate was cut a drilled for the non-drive side

Bracket holding the top of the rack and cable ties holding the mudguard

Hose clamps for bottle cages and improvised mudguard bracket
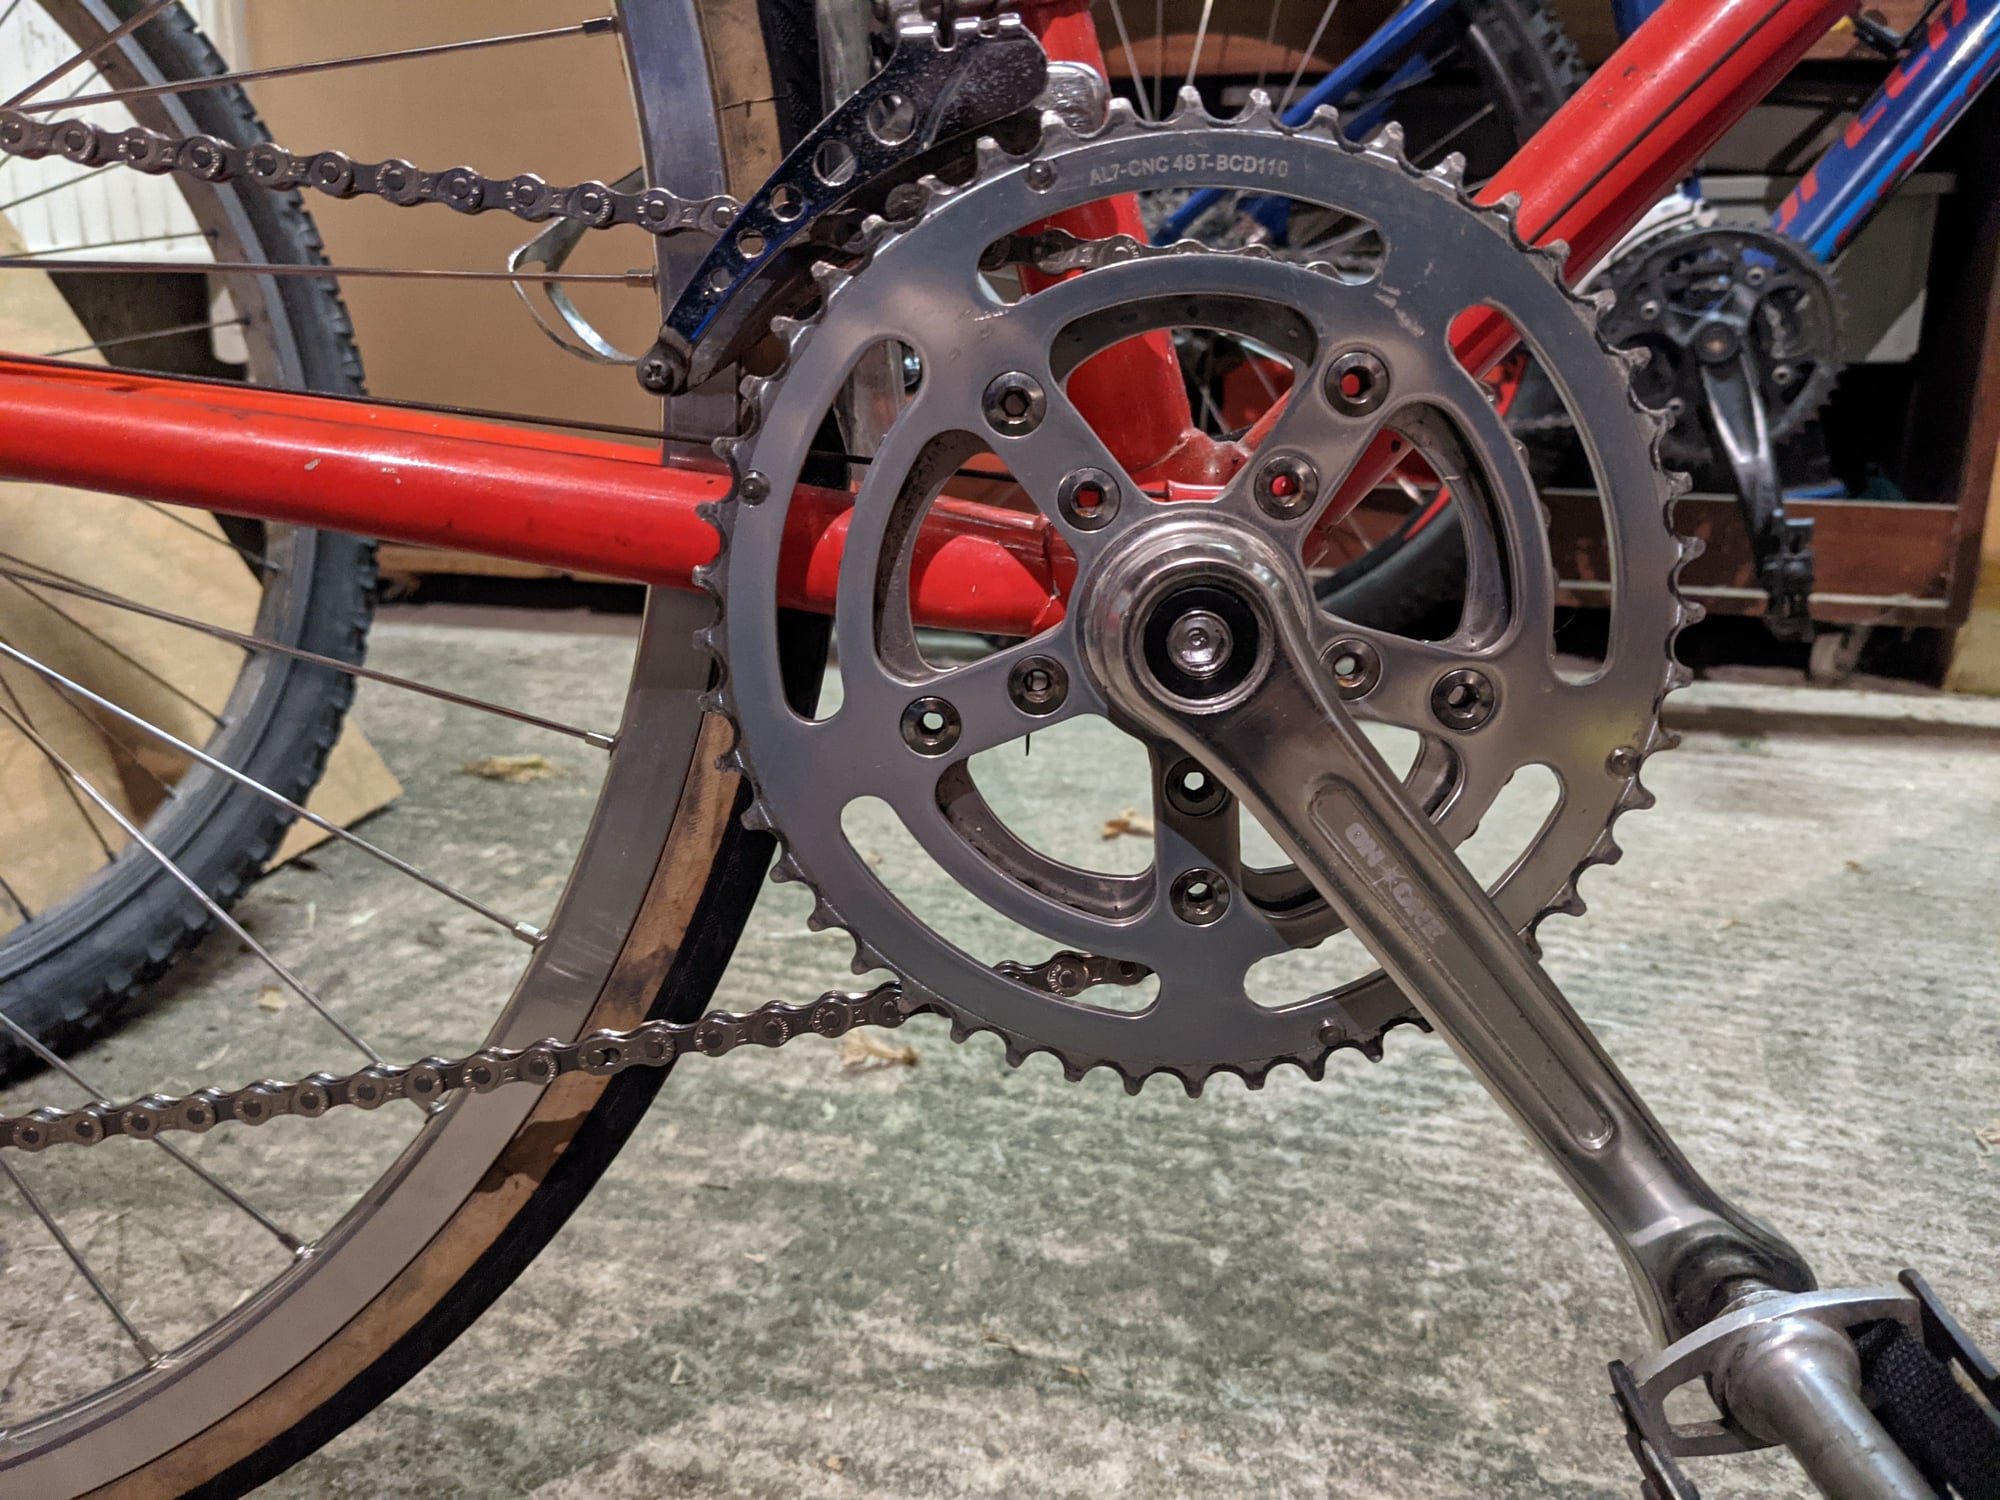
Replacement compact crankset

wrinkle in bent mudguard

I'll cover a bit of background as to why I went to all this effort before getting into the details of my modification. I bought this bike (a 1980 BSA prima) in March of this year. My plan was to go touring around Scotland with some of my friends, and I decided it would be a good opportunity to get myself a steel framed road bike. The bike would also be used to commute 24 miles per day to University, on dry days during term time. Cursory browsing of various marketplaces turned up the problem that, where I live there is not a vast supply of steel framed bikes available on the used market. Even finding a 90s 'mountain' bike requires a certain degree of patience. I would I imagine this has something to do with the not so ideal weather in Scotland killing off a lot of steel bikes with corrosion. I did find one eventually, at a reasonable price that is, but I had to drive about 140 miles to pick it up. The whole ordeal took forever because the old man I bought it from wouldn't stop telling me stories from his past and trying to sell me his old Mercedes on the side. I got the bike home, pleased with fact that I had got a Reynolds 531 frame with the rest of the bits attached for a reasonable price. Once home I then had to decide what was needing done and what I was happy to live with. Other than mounting a rack, the bike also needed a set of new tyres, a spoke on the rear wheel and a set of brake pads. I'll list the original spec bellow so that folk can get an Idea of what I was dealing with.
Frame : BSA Prima Reynolds 531, Raleigh built, but with standard BB threading
Fork: Chrome BSA, no sticker so I'm assuming it's not Reynolds
Wheels: Atom QR hubs, on Raleigh single wall aluminium rims, galvanised spokes
Tyres: Ancient Michelin clinchers (can't remember which model but they were perished)
Group set: Suntour VX, with band clamp friction shifters
Crankset: Raleigh branded stronglight square taper job (44/52 IRC)
Bars and stem : Raleigh
Brake levers: Dia-compe
Brake callipers: Raleigh branded Weinmann single pivot.
The spec was somewhat peculiar to me, since other Primas I've seen online are slightly different to mine. The first thing I changed was the tyres. This allowed me to ride the bike and get a feeling of what I wanted to change. Frome riding I soon realised that I was not going to be getting up hills with the installed crankset. I also noticed how woefully poor the brakes were compared to other properly adjusted bikes I had ridden in the past, rim or disc brake. I purchased replacement cables and a compact double crank. I didn't by a touring triple since I was trying to keep costs low and I thought the double I found looked quite nice. The replacement cables and pads made my bike a safe, but I would still prefer I bit more power, so I may change the callipers in the future.
The rack is an Axiom Journey Uni fit. I bought this rack after doing some research online and deciding that P'clips would not be ideal for heavy loads. For those unfamiliar, this rack mounts through the quick release skewer instead of an eyelet, so in theory it was ideal for my bike. In practice however this rack has become a bit of a farce. The main problem is the fact that this rack will natively only fit 135mm drop out and nothing else. I had to use washers in between the rack mount and drop out which was sketchy to say the least. The other big gripe I have with this rack is they do not include the hardware required to get the rack mounted. For the pennies it would have cost them I don't understand why they can't include them.
The rack was installed about the end of April and although my tour got cancelled due to COVID I had been riding my bike with no problems (with the rack anyway) until about a month ago. The gears had been presenting a problem during this time, but it was something I could live with. The derailleur was squeeky and even with my new 34/48 crankset, steep hills were a grind. The wheels were also showing their age with how much flex they had, even without panniers. This all came to a head when I started using my bike to commute to University. One day a spoke snapped and it all spiralled into a big wheel and gears conversion. To replace the spoke I had to take the wheel off, which meant faffing around with the rack and its washers; hardly quick release. Then to take the spoke off I had to take the freewheel off, normally no problem, except this freewheel is French and I wasn't forking out 10 quid for the tool. So with the freewheel dismantled I replaced the spoke and what d'ya know another breaks. Simultaneously my willingness to keep these wheels going breaks. I already had some early 90s shimano 7 speed mtb hubs kicking about and although the frame would be stretched to fit them I decide that the added strength and gears is worth the slightly awkward frame stretching.
I built two new wheels (front and rear obviously) with Shimano Exage hubs, Ryde Sputnik rims and Sapim PG stainless spokes. Since the rear hub is a cassette I decided 7 speed would be the limit of what I could easily add without having to change the DT shifters. I'm using a shimano 12-32 which should hopefully get me up most hills. This high range cassette does have the draw back of having large gaps between speeds, but I don't really mind If my cadence changes a little. I have also added a 1990 shimano Deore dx derailleur to fit the new cassette range. The derailleur is incorporated into my revised rack mounting. The revised rack-mount bolts in between the drop out itself. Since my bike has fairly long dropouts this is doable. The connection is made in similar fashion to the derailleur hanger and is actually using the same bolt as the hanger on the drive side. This makes taking the wheel off a lot easier. Since I've not cold set the frame it would be very tricky to stretch the frame out whilst also trying the line the axle up with the rack. I do need to change the qr to one with a smaller nut so I can move the wheel a bit further back.
The only other mod is the Oxford mudguards I've added, which are mounted in a bodged manner on the rear. I cannot recommend these either since they came with no mounting screws and are not even round! I had to bend them, which caused the plastic to wrinkle. The updated parts I will list bellow.
Tyres: Panaracer Pasela 28c
Wheels: Shimano Exage on Ryde Sputnik
Crankset: On-one Compact double on a 113mm BB
Derailleur: Shimano Deore DX M650
Cassette: Shimano HG-200
Chain: KMC Z8.3
Pads: Fibrax Holders with Ritchie Blue pad (open to suggestions on good pads)
There may be other upgrades in the future, such as a 531 touring fork and maybe some compact drops, but not until winter is over at least. I am also going to get the frame powder coated next year and when it's stripped down I may see If I can get a fabricator friend to weld some bosses on for me.
I've added some pictures bellow to say what I can't.
Rack spaced with washers and fastened using existing derailleur hanger hardware
A plate was cut a drilled for the non-drive side
Bracket holding the top of the rack and cable ties holding the mudguard
Hose clamps for bottle cages and improvised mudguard bracket
Replacement compact crankset
wrinkle in bent mudguard
 12-04-20, 05:21 PM
#2
Senior Member
P clips can be a real problem solver with mounting racks, lights, reflectors, fenders....etc. etc. etc.
https://www.amazon.com/s?k=p+clips&g...l_19rkjm6mfx_b
https://www.amazon.com/s?k=p+clips&g...l_19rkjm6mfx_b
12-04-20, 05:25 PM
#3
Senior Member
Thread Starter
Didn't fancy them, to me they looked like they would introduce a lot of flex to the system.
 12-05-20, 01:46 AM
#5
Senior Member

Join Date: Sep 2020
Location: Eastern Poland
Posts: 743
Bikes: Romet Jubilat x 4, Wigry x 1, Turing x 1
Mentioned: 3 Post(s)
Tagged: 0 Thread(s)
Quoted: 194 Post(s)
Liked 204 Times
in
151 Posts
Finding mudguards for calliper brake era bikes can be tricky, because they had to squeeze under the brake. Yours look like they are not in the right place, and there may never be the right place on your frame.
12-05-20, 01:47 AM
#6
Senior Member
Join Date: Sep 2020
Location: Eastern Poland
Posts: 743
Bikes: Romet Jubilat x 4, Wigry x 1, Turing x 1
Mentioned: 3 Post(s)
Tagged: 0 Thread(s)
Quoted: 194 Post(s)
Liked 204 Times
in
151 Posts
Finding mudguards for calliper brake era bikes can be tricky, because they had to squeeze under the brake. Yours look like they are not in the right place, and there may never be the right place on your frame.
12-05-20, 06:13 AM
#7
Senior Member
Thread Starter
On a side note, I had actually wanted to make mudguards out of recycled drinks bottles, but I could never work out how to create the arc required.
12-05-20, 07:45 AM
#8
Senior Member
Join Date: Jun 2020
Location: Maryland
Posts: 1,379
Bikes: 1982 Bianchi Sport SX, Rayleigh Tamland 1, Rans V-Rex recumbent, Fuji MTB, 80's Cannondale MTB with BBSHD ebike motor
Mentioned: 1 Post(s)
Tagged: 0 Thread(s)
Quoted: 667 Post(s)
Liked 529 Times
in
355 Posts
These water bottle cage mounts work really well
https://www.amazon.com/gp/product/B0...?ie=UTF8&psc=1
Consider switching to hex nuts with nylon lock washers built in. Zip tie an extra to the bottom of the rack.

https://www.amazon.com/gp/product/B0...?ie=UTF8&psc=1
Consider switching to hex nuts with nylon lock washers built in. Zip tie an extra to the bottom of the rack.
12-05-20, 08:07 AM
#9
Senior Member
Thread Starter
These water bottle cage mounts work really well
https://www.amazon.com/gp/product/B0...?ie=UTF8&psc=1
Consider switching to hex nuts with nylon lock washers built in. Zip tie an extra to the bottom of the rack.
https://www.amazon.com/gp/product/B0...?ie=UTF8&psc=1
Consider switching to hex nuts with nylon lock washers built in. Zip tie an extra to the bottom of the rack.
The non nylock nuts are a only there since my local hardware store has a very poor selection of fasteners: They only sell bolts with flat blade screwdriver heads. If the bolts show any signs of loosening off I'll be changing them, but for now I'll continue to avoid unnecessary shipping of low value things.
12-05-20, 09:42 AM
#10

Senior Member
Join Date: Mar 2016
Location: North of Boston
Posts: 898
Bikes: 1973 Schwinn Sports Tourer plus a " few" more :)
Mentioned: 4 Post(s)
Tagged: 0 Thread(s)
Quoted: 211 Post(s)
Liked 199 Times
in
147 Posts
I would also use pieces of old inner tube to put under the water bottles cages to prevent scratches, and any other attachments that are similar
Been doing this for years.
Very Nice !!!
GREAT BIKE you have !!
LOVE the Orange !!
Been doing this for years.
Very Nice !!!
GREAT BIKE you have !!
LOVE the Orange !!
12-05-20, 10:33 AM
#11
Senior Member
Thread Starter
Good shout, I'll see if I have some old inner tubes lying about to tide me over until I sort out a more 'proper' solution.

 12-06-20, 04:54 AM
#13
Senior Member
Thread Starter
That's my dads bike and I've been eyeing it up for a while. It needs a fair bit of work before I would trust it for touring. He's actually very proud of the fact it still has its original tyres. He's also really keen on grip shift and I'm not, so it could be a while before I can take it touring.
12-06-20, 11:39 PM
#14
Friendship is Magic

Join Date: Nov 2010
Location: Sacramento, CA
Posts: 22,984
Bikes: old ones
Mentioned: 304 Post(s)
Tagged: 0 Thread(s)
Quoted: 26394 Post(s)
Liked 10,367 Times
in
7,198 Posts
.
...the last time I had a set of downtube bottle bosses added to a frame here, it cost like 40 bucks.
Well worth it to me, if I'm going to repaint a frame anyway, for some other reason.
Properly fitted P clips work fine to mount a rear rack, and don't introduce any additional flex I've noticed, because you have two of them, one per stay.
With two attachment points on the stays, and another two on the dropouts, a decently welded rack like a Blackburn type works fine.
You do need to match the diameter of the P clip to the size of the stay. They can't be loose. The rubber or plastic coating on them prevents paint damage.
Bottle cages mounted on the bar work fine, but they do interfere if you want to mount a bar bag. Which I usually don't with a rear rack available anyway.
12-07-20, 01:05 AM
#15
Senior Member
Join Date: Sep 2020
Location: Eastern Poland
Posts: 743
Bikes: Romet Jubilat x 4, Wigry x 1, Turing x 1
Mentioned: 3 Post(s)
Tagged: 0 Thread(s)
Quoted: 194 Post(s)
Liked 204 Times
in
151 Posts
Ah ha, a rivet nut, or rivnut, I just found a thread on the subject, three threads down

Last edited by Geepig; 12-07-20 at 01:09 AM. Reason: found an answer
Likes For Geepig:
12-07-20, 09:42 AM
#16
Friendship is Magic
Join Date: Nov 2010
Location: Sacramento, CA
Posts: 22,984
Bikes: old ones
Mentioned: 304 Post(s)
Tagged: 0 Thread(s)
Quoted: 26394 Post(s)
Liked 10,367 Times
in
7,198 Posts
Generally speaking, it's a bad idea to drill holes in a steel frame. The rivnuts do not provide the same support to the surrounding metal.
But people do it and get away with it. If the frame is made of some straight gauge tubing, with a little more thickness, you stand a better chance of that solution working for a longer time.
I don't know exactly why they seem to be used in some aluminum framed bicycles. Might be something about the positioning of them in areas of compression, rather than tension.
