


Hints and tricks thread
 02-24-19, 06:36 PM
#651
Full Member

Join Date: Sep 2015
Location: Denver Colorado
Posts: 339
Bikes: 2020 Pivot Vault, 1983 Rossin Record, Garneau R1, Mesamods home built gravel/rain commuter bike, 1995 Barracuda A2V modified with Surley single speed dropouts, 1969 Bottecchia junkyard special fixed gear, Cervelo P4, Mesamods 650b klunker
Mentioned: 3 Post(s)
Tagged: 0 Thread(s)
Quoted: 96 Post(s)
Liked 72 Times
in
50 Posts
Great easy upgrade if you're hard on brakes!
 03-04-19, 03:57 PM
#652
Junior Member
Join Date: Feb 2010
Posts: 11
Mentioned: 0 Post(s)
Tagged: 0 Thread(s)
Quoted: 0 Post(s)
Likes: 0
Liked 0 Times
in
0 Posts
I buy / repair / sell bikes. I found an older TREK 730 that was in fairly nice shape. One problem it had was the grip shifters rubber had degraded somewhat where they felt "sticky". Not bad, but not comfortable to use, and I did not really want to replace the shifters. I knew that wrapping them in tape or some such would not last for long. I found a good easy solution. I found some large shrink tube on Amazon that slipped over the shifter, and used a heat gun to shrink it to the shifter surface. Trimmed the edge with a razor blade, re-installed the handlebar grips, and have an easy and relatively cheap repair.
03-09-19, 08:54 AM
#653
Newbie

Join Date: Feb 2019
Location: Gulf Coast, FL
Posts: 4
Bikes: Greenspeed, Canon, Bike-E, Dahon Mu D10 Tour
Mentioned: 1 Post(s)
Tagged: 0 Thread(s)
Quoted: 1 Post(s)
Likes: 0
Liked 1 Time
in
1 Post
Chain cleaning
I posted this many years ago, seems like it was on this forum. A MUCH younger forum.
You need:
1. Orbital hand held sander
2. Coffee can. Metal if your cleaner is mineral based, plastic if "green".
3. Wire clothes hanger, cut and straightened with a hook on it (to hang the wet chain)
Take off your chain, into the coffee can it goes.
Add cleaner of choice. PUT THE LID ON THE CAN, it will splatter.
Flip the sander on to it's back and HOLD the can on the pad.
Turn on the sander for however long you want.
Repeat as necessary.
Remove the chain and use the clothes hanger to suspend the chain to dry.
Likes For 76r:
04-06-19, 12:46 AM
#654

Junior Member
Join Date: Nov 2018
Posts: 8
Mentioned: 0 Post(s)
Tagged: 0 Thread(s)
Quoted: 2 Post(s)
Likes: 0
Liked 0 Times
in
0 Posts
Cutting multi-strand cables
I have found this method keeps the cable strands from splaying when cutting, similar to soldering without the hassle.
Wrap the area you are going to cut with a little more than one layer of green masking tape.
I do it so the cut is in the middle of the tape.
Make sure the tape is really tightly wound around the cable.
Mark the cut line with a pen.
Make a firm quick cut with your cable cutters.
Remove the tape.
04-06-19, 12:55 AM
#655
Junior Member
Join Date: Nov 2018
Posts: 8
Mentioned: 0 Post(s)
Tagged: 0 Thread(s)
Quoted: 2 Post(s)
Likes: 0
Liked 0 Times
in
0 Posts
ArmorAll your SPD-SL cleats
Sometimes I find after changing my cleats that shoe/pedal engagement can be stiff.
I spray a small amount of ArmorAll on my finger and then spread it around the cleat and
in the areas of the pedal that contact the cleat and this eases engagement for weeks.
Warning - this will make your shoe and pedal engagement action very slippery, so try a
very small amount at first. If you don't like it, wash it off thoroughly with dish detergent and
water.
04-08-19, 09:04 AM
#656
Keepin it Wheel

Join Date: Aug 2011
Location: San Diego
Posts: 10,245
Bikes: Surly CrossCheck, Krampus
Mentioned: 0 Post(s)
Tagged: 0 Thread(s)
Quoted: 26 Post(s)
Liked 3,427 Times
in
2,534 Posts
Cutting multi-strand cables
I have found this method keeps the cable strands from splaying when cutting, similar to soldering without the hassle.
Wrap the area you are going to cut with a little more than one layer of green masking tape.
I do it so the cut is in the middle of the tape.
Make sure the tape is really tightly wound around the cable.
Mark the cut line with a pen.
Make a firm quick cut with your cable cutters.
Remove the tape.
I have found this method keeps the cable strands from splaying when cutting, similar to soldering without the hassle.
Wrap the area you are going to cut with a little more than one layer of green masking tape.
I do it so the cut is in the middle of the tape.
Make sure the tape is really tightly wound around the cable.
Mark the cut line with a pen.
Make a firm quick cut with your cable cutters.
Remove the tape.
 04-09-19, 09:17 AM
#658
Senior Member
Join Date: Nov 2014
Location: Saratoga calif.
Posts: 1,049
Bikes: Miyata 610(66cm), GT Vantara Hybrid (64cm), Nishiki International (64cm), Peugeot rat rod (62 cm), Trek 800 Burning Man helicopter bike, Bob Jackson frame (to be restored?) plus a never ending stream of neglected waifs from the Bike exchange.
Mentioned: 28 Post(s)
Tagged: 0 Thread(s)
Quoted: 339 Post(s)
Likes: 0
Liked 632 Times
in
229 Posts
destroying crank spider
I was stripping a bike that I was working on for the Bike Exchange and when it came to the cranks I realized thea the drive side threads were stripped. The thing was really on there and I couldn't shift it with the use of 2 Automotive pickle forks . It had to come off or I would have to saw through the bottom bracket spindle . I thought maybe I could saw through it on one side which might allow me to pull it off. Then I thought maybe it would be easier to drill through the aluminum .
I clamped the frame to the table of my drill press and filed a flat spot on the crank spider then drilled a hole as close to the edge of the square taper spindle as I could . Then I drilled another hole next to it . By then I had drilled almost completely from the spindle to the outside of the spider. a small wood chisel was used to cut through the remaining sliver of aluminum . At this point a tap on the pickle fork wedged between the spider and the bottom bracket popped the spider off. It was at that point that I saw the tin wedge that had been inserted between the spider and the square tapered spindle.
I had taken this bike home because it was a Bianchi and they have some name recognition and thus a bit more value as a sale bike. After all was said and done though I realized that this bike was nothing special. It was a franken bike whan I found it and will be one when I am finished. It will be rebuilt with low value components and probably donated out to one of our client organizations.
04-11-19, 08:58 PM
#659
Senior Member
Join Date: Feb 2012
Location: Rochester, NY
Posts: 18,073
Bikes: Stewart S&S coupled sport tourer, Stewart Sunday light, Stewart Commuting, Stewart Touring, Co Motion Tandem, Stewart 3-Spd, Stewart Track, Fuji Finest, Mongoose Tomac ATB, GT Bravado ATB, JCP Folder, Stewart 650B ATB
Mentioned: 0 Post(s)
Tagged: 0 Thread(s)
Quoted: 4201 Post(s)
Liked 3,857 Times
in
2,305 Posts
I have done a similar stuck crank arm on tapered square BB axle removal a few times. But I use a hack saw to slot a diagonal cut across the axle end of the crank arm. The angle of the cut is determined by things like frame avoidance. You want the cut to be as parallel to the axle as possible yet avoid the shell and don't whack into the stay or tubes with the hack saw. Once the cut is close the axle I hammer in a chisel or flat bladed screw driver to fracture the remaining un cut arm end and thus expand the arm end away from the axle. Andy
__________________
AndrewRStewart
AndrewRStewart
06-20-19, 01:43 PM
#660
Junior Member

Woot! I made it all the way to the end of this thread. So many helpful tips!! I'm especially interested in looking into my local Public Library's 3-D Printing offerings.
06-20-19, 02:16 PM
#661
Keepin it Wheel
Join Date: Aug 2011
Location: San Diego
Posts: 10,245
Bikes: Surly CrossCheck, Krampus
Mentioned: 0 Post(s)
Tagged: 0 Thread(s)
Quoted: 26 Post(s)
Liked 3,427 Times
in
2,534 Posts
07-18-19, 04:39 PM
#662
BF's Resident Dumbass

Join Date: Apr 2016
Location: Jeddah, Saudi Arabia
Posts: 1,566
Bikes: 1990 Raleigh Flyer (size 21"); 2014 Trek 7.6 FX (size 15"); 2014 Trek 7.6 FX (size 17.5"); 2019 Dahon Mu D9; 2020 Dahon Hemingway D9
Mentioned: 6 Post(s)
Tagged: 0 Thread(s)
Quoted: 792 Post(s)
Liked 1,494 Times
in
496 Posts
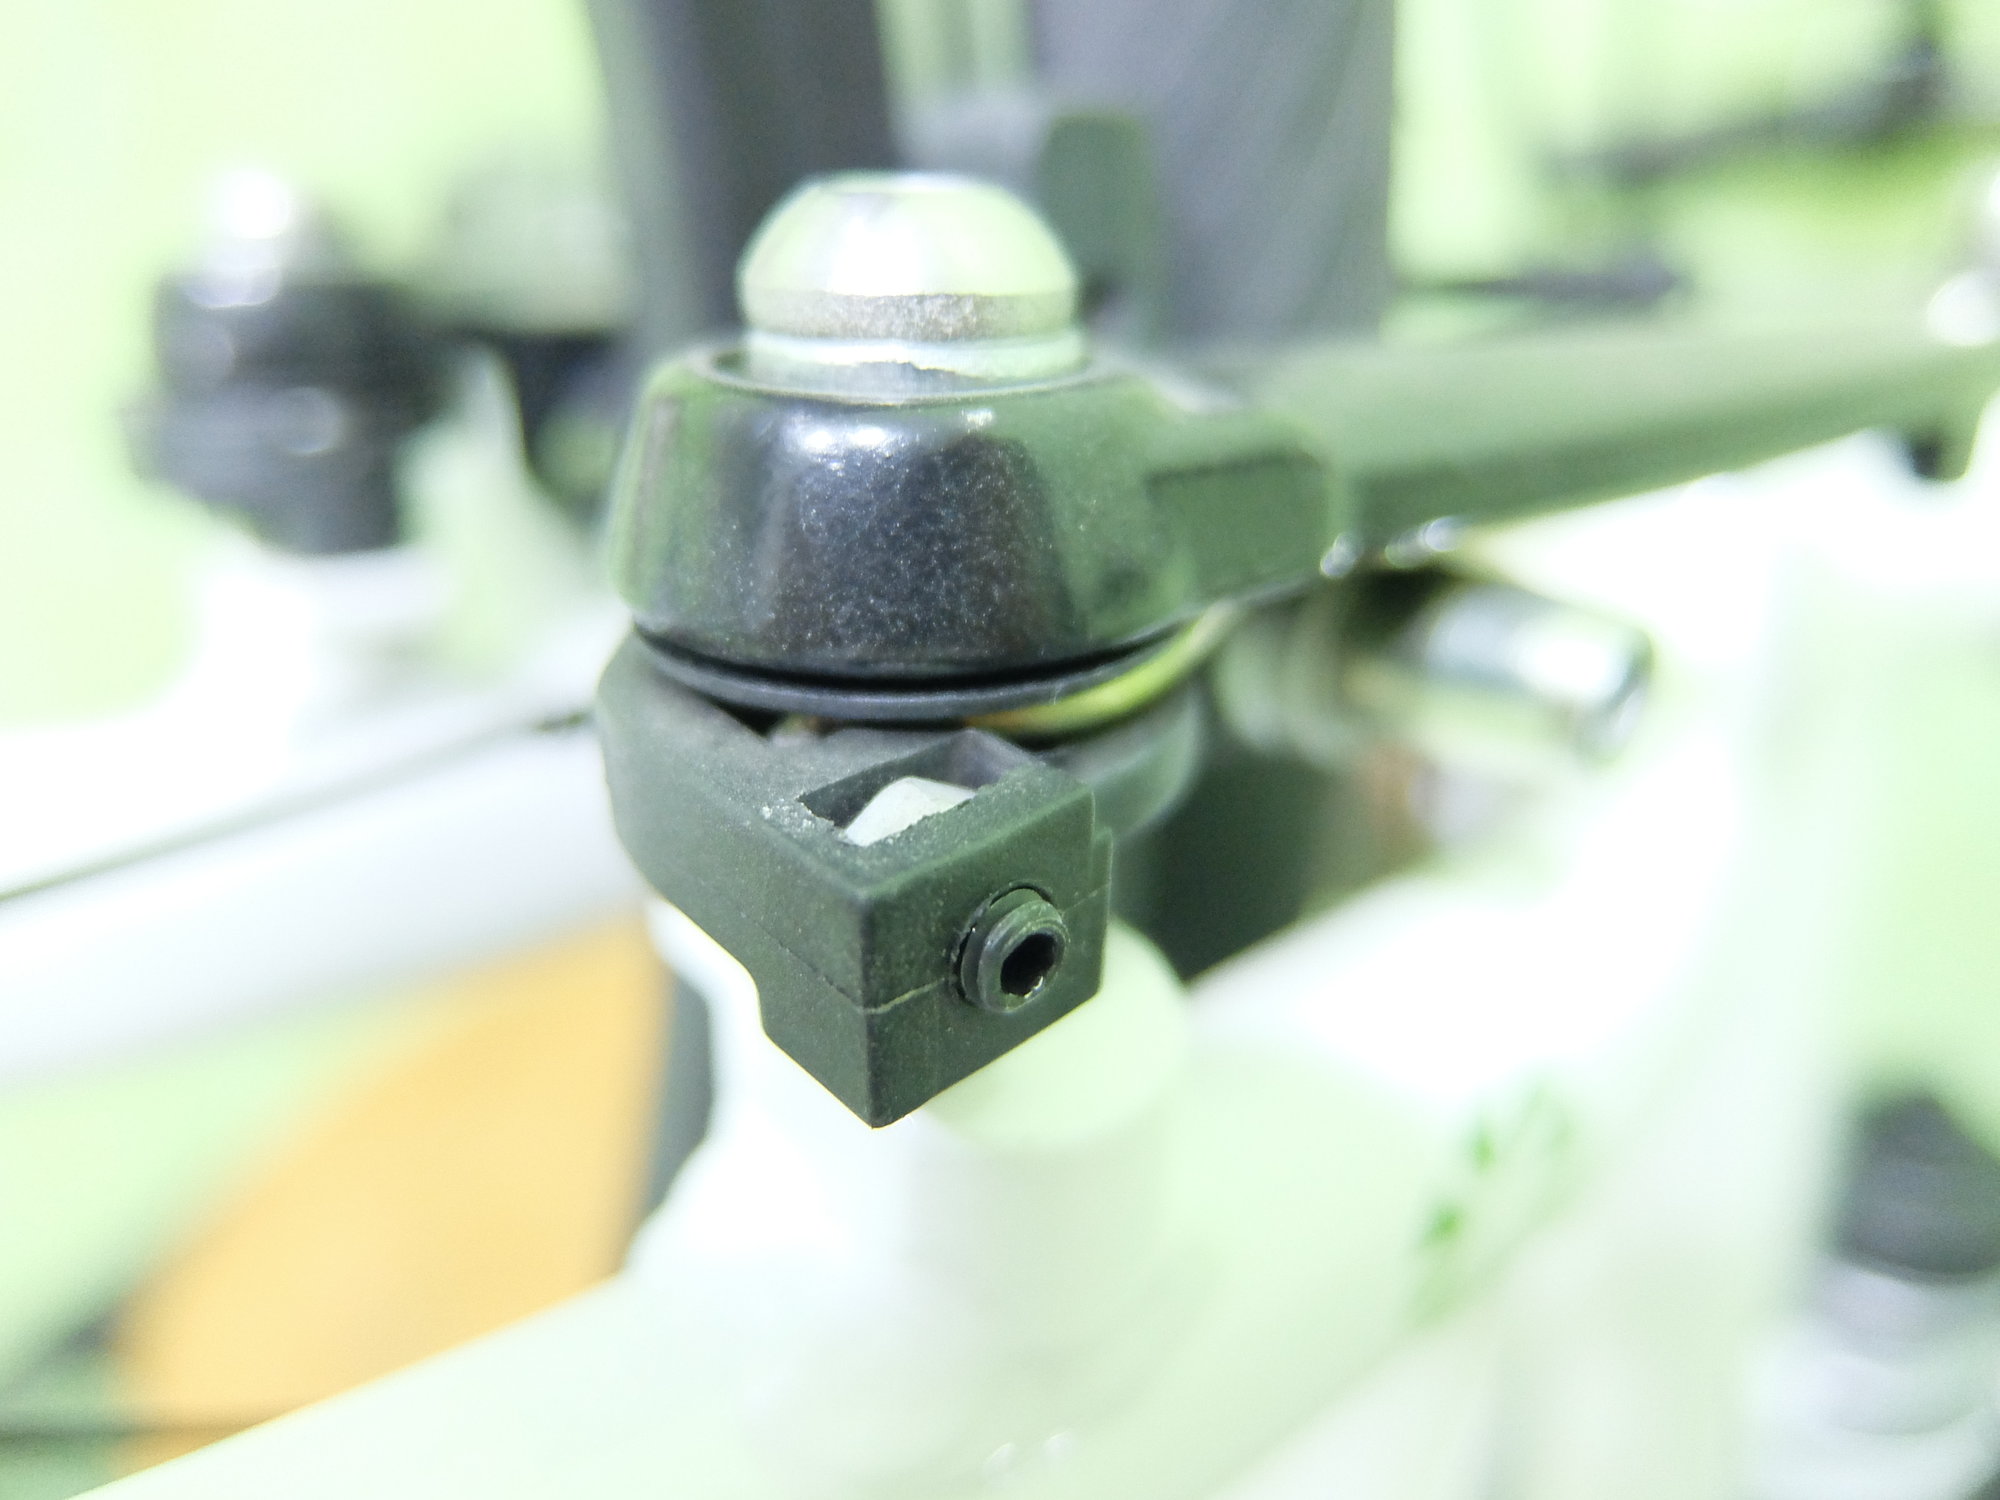
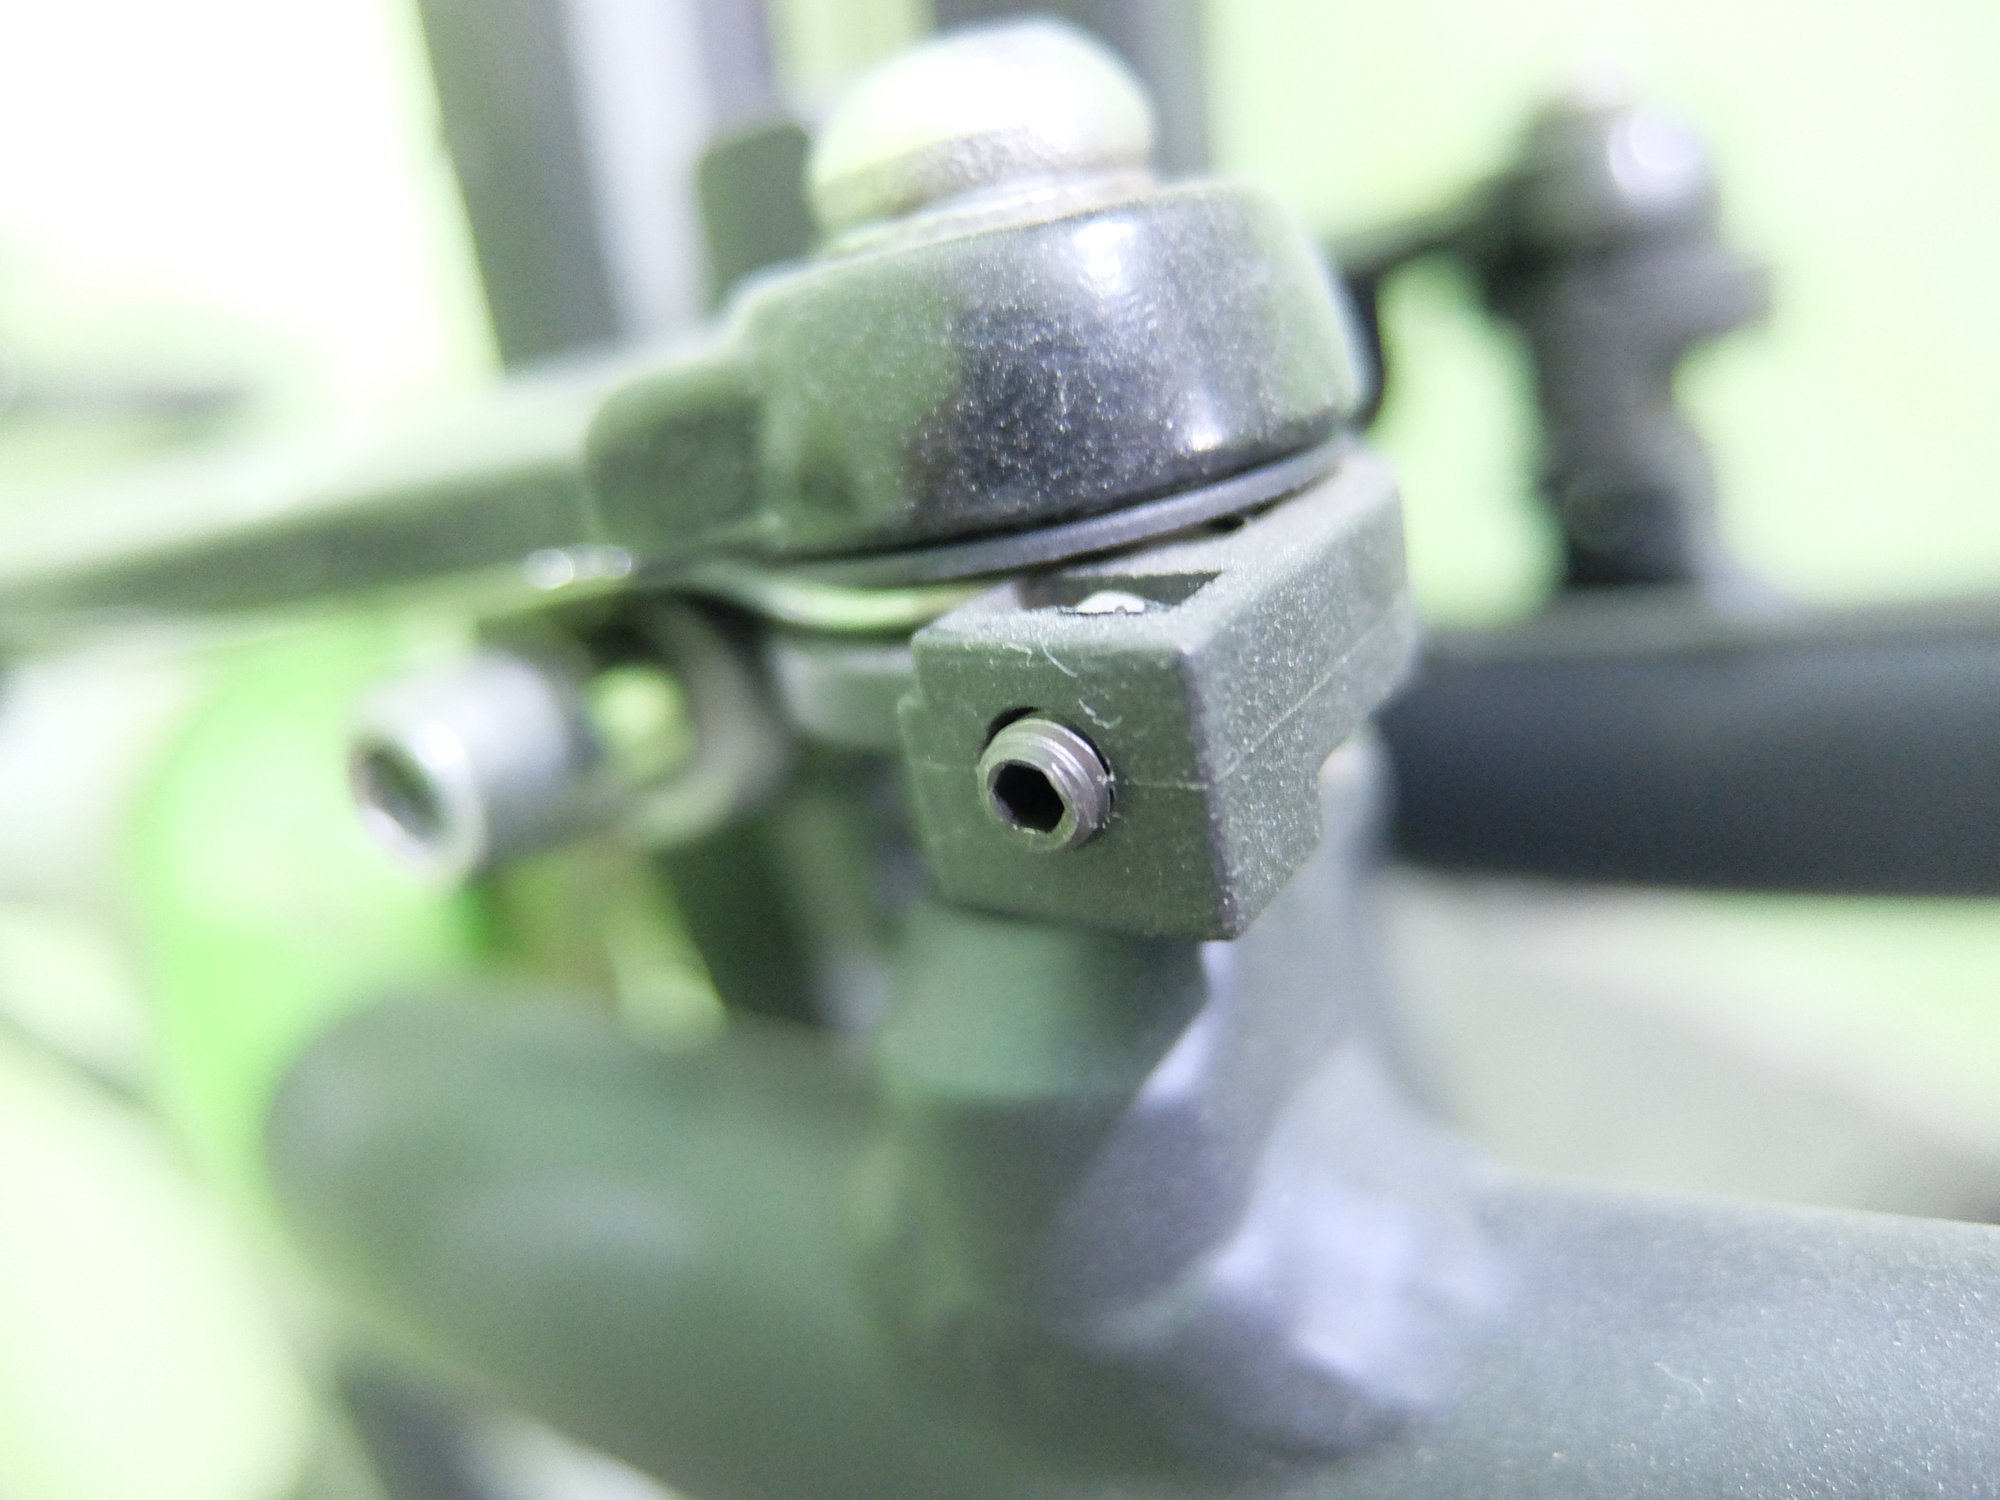
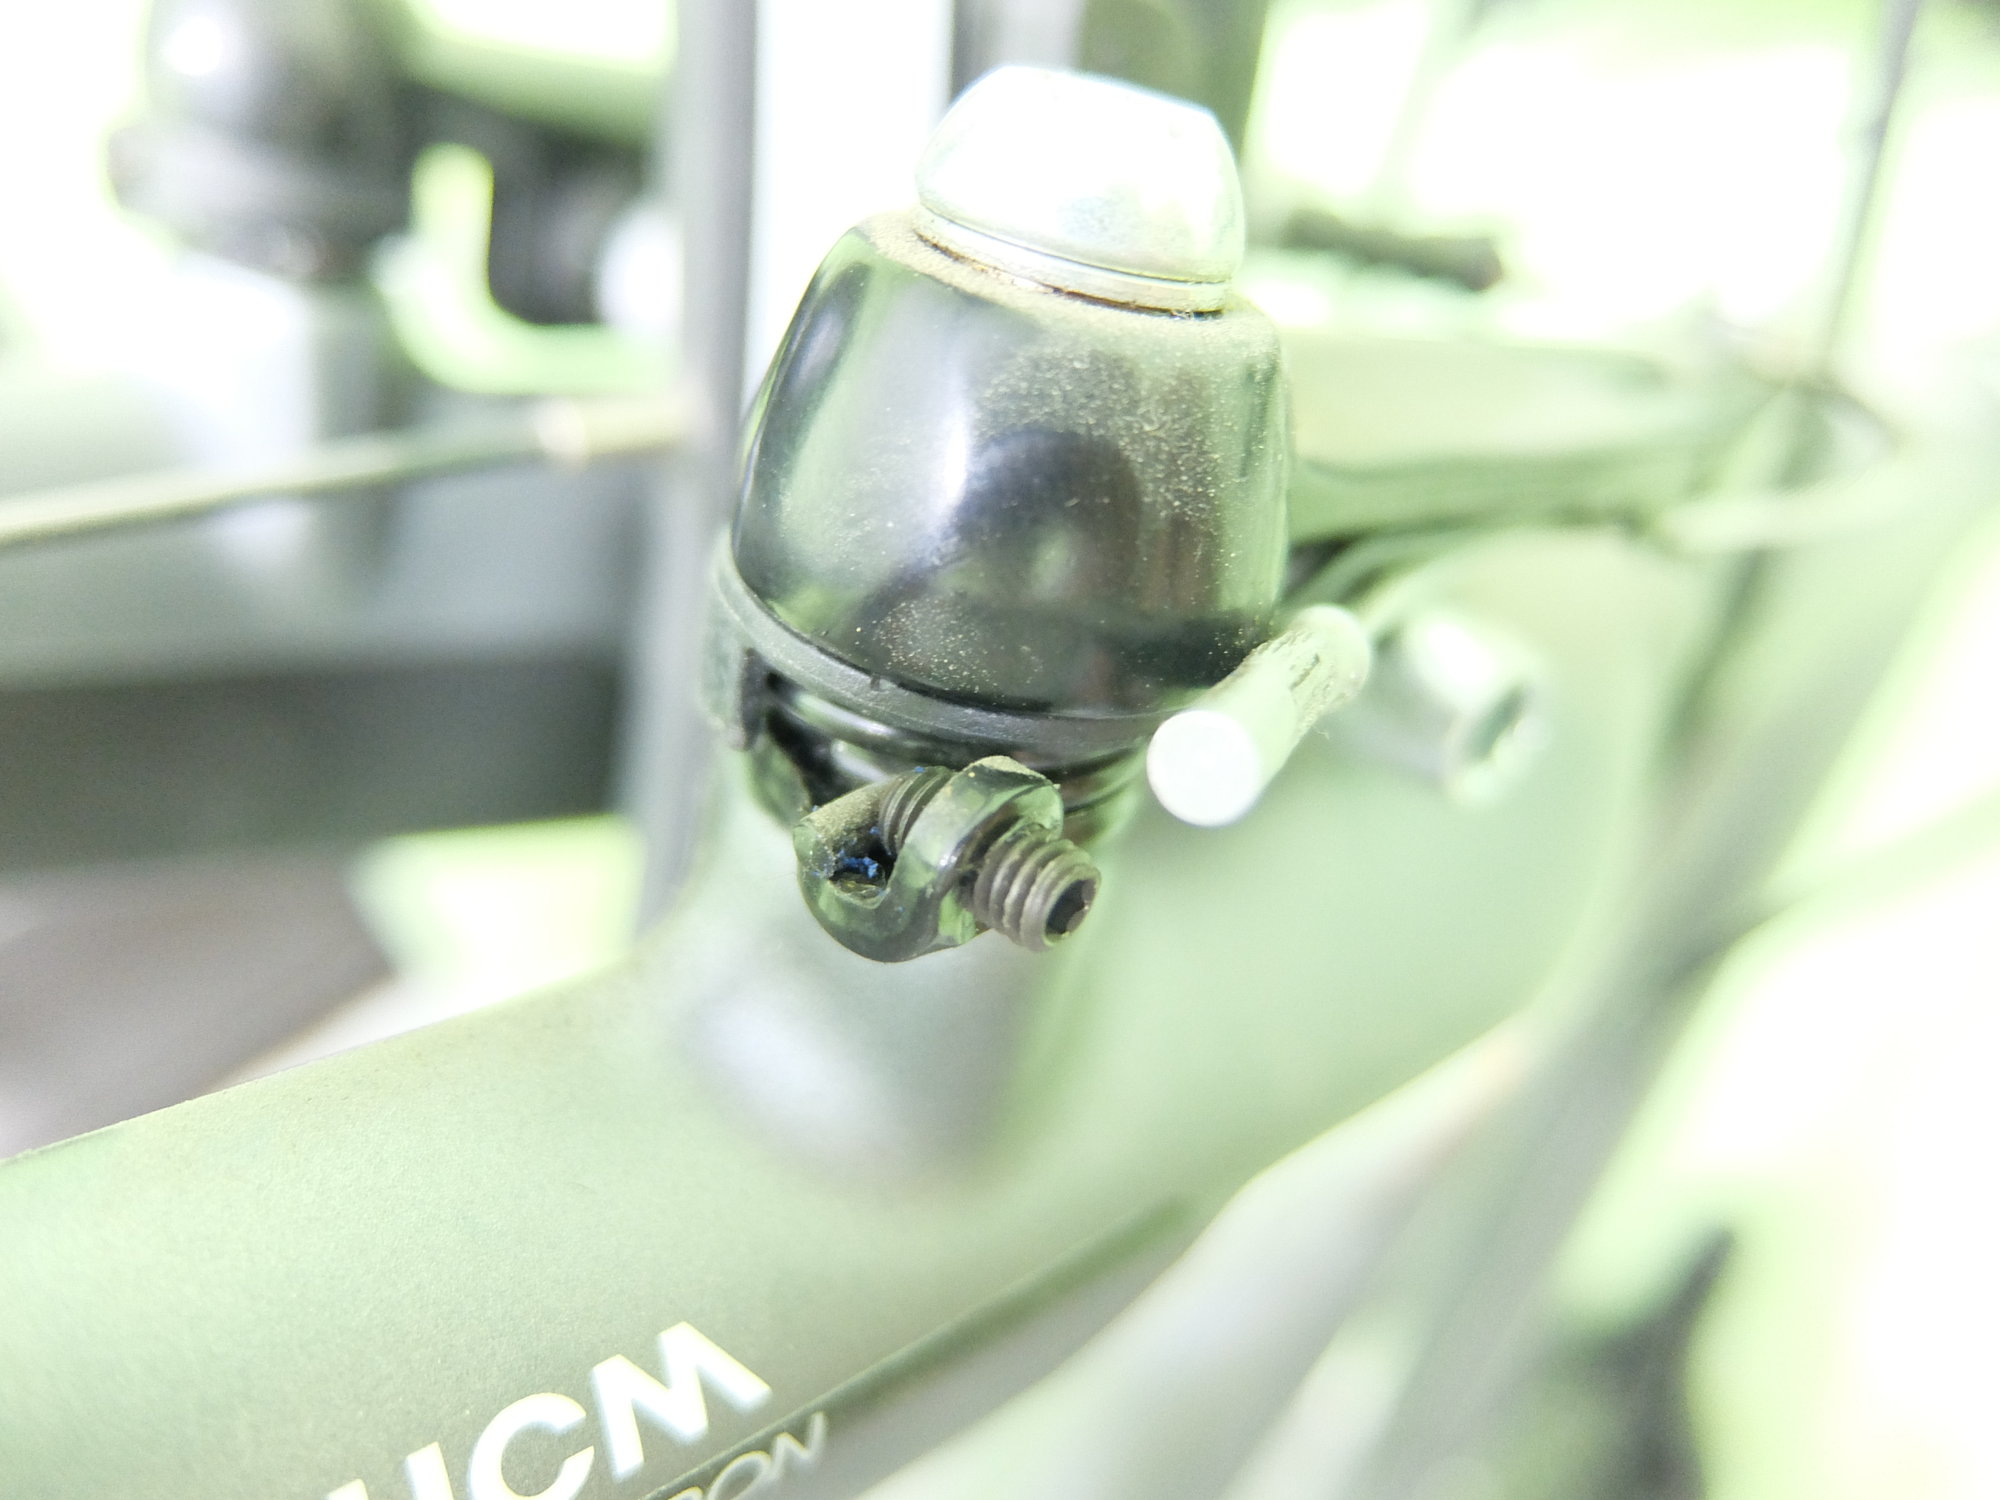
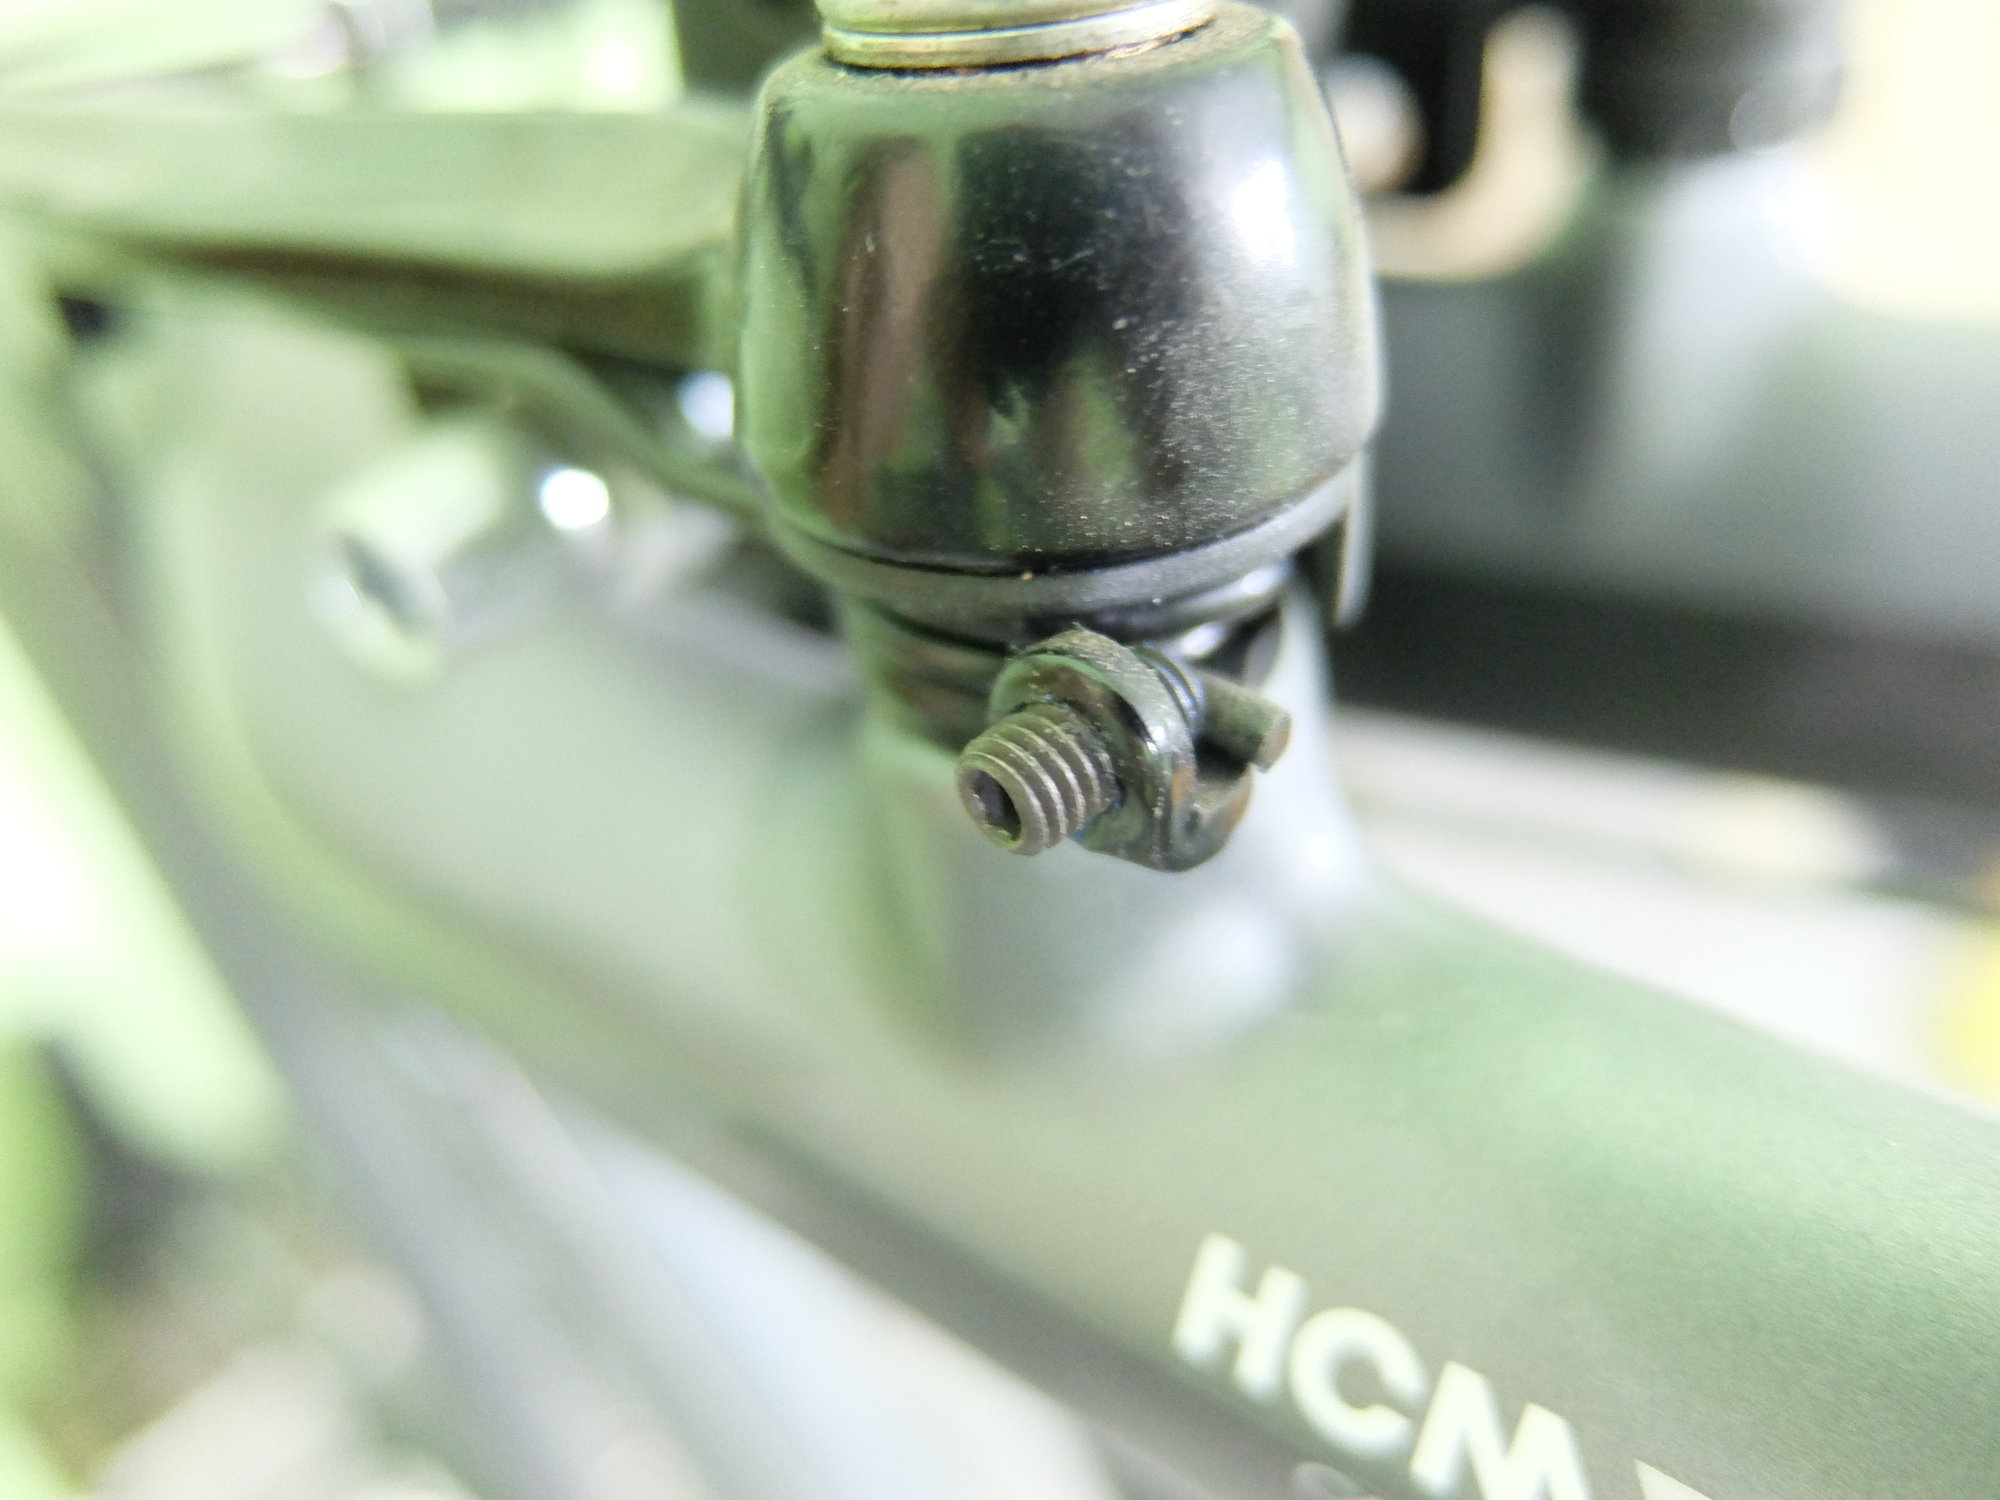
Replaced all the adjustment screws of the V-brakes on all my bikes with set screws. They're just easier to handle with a 2mm Allen key or hex bit. Dealing with the factory slot-Phillips combo head screws using any screwdriver was fiddly, imprecise, and generally annoying.
Last edited by sjanzeir; 09-23-19 at 10:42 PM.
Likes For sjanzeir:
07-18-19, 05:48 PM
#663
Keepin it Wheel
Join Date: Aug 2011
Location: San Diego
Posts: 10,245
Bikes: Surly CrossCheck, Krampus
Mentioned: 0 Post(s)
Tagged: 0 Thread(s)
Quoted: 26 Post(s)
Liked 3,427 Times
in
2,534 Posts
Nice, I like that one!
07-19-19, 07:16 PM
#664
Newbie
Also look AT the tool or part when you set it down. Only takes a second or two but you have just taken a snapshot that is easier for your mind to recall.
Last edited by flatrockmobile; 07-19-19 at 10:26 PM.
08-14-19, 10:56 PM
#666
BF's Resident Dumbass
Join Date: Apr 2016
Location: Jeddah, Saudi Arabia
Posts: 1,566
Bikes: 1990 Raleigh Flyer (size 21"); 2014 Trek 7.6 FX (size 15"); 2014 Trek 7.6 FX (size 17.5"); 2019 Dahon Mu D9; 2020 Dahon Hemingway D9
Mentioned: 6 Post(s)
Tagged: 0 Thread(s)
Quoted: 792 Post(s)
Liked 1,494 Times
in
496 Posts
08-15-19, 06:03 PM
#667
Newbie
08-30-19, 03:43 AM
#668
Junior Member
Join Date: Apr 2018
Posts: 99
Mentioned: 2 Post(s)
Tagged: 0 Thread(s)
Quoted: 35 Post(s)
Liked 54 Times
in
26 Posts
Two little tips I have alreday experimented
- Have always with you a pair of small plastic collars (you know, the cheap one you just have to pull on to tighten)
They will let you go back home in case you have a problem or even lose one of your rear back derailleur roller
- If you have a flat in the middle of a forest and no rubber tube to repair, you can always put grass into the tyre.
It will allow to go back home. (of course you basically need the small tools to remove the tyre from the wheel at least partially to put the grass in )
)
I hope you will understand what I am trying to explain in english !
- Have always with you a pair of small plastic collars (you know, the cheap one you just have to pull on to tighten)
They will let you go back home in case you have a problem or even lose one of your rear back derailleur roller
- If you have a flat in the middle of a forest and no rubber tube to repair, you can always put grass into the tyre.
It will allow to go back home. (of course you basically need the small tools to remove the tyre from the wheel at least partially to put the grass in
)I hope you will understand what I am trying to explain in english !
09-02-19, 09:44 AM
#669
Quidam Bike Super Hero
Join Date: Jan 2019
Location: Stone Mountain, GA (Metro Atlanta, East)
Posts: 1,135
Bikes: 1995 Trek 800 Sport, aka, "CamelTrek"
Mentioned: 2 Post(s)
Tagged: 0 Thread(s)
Quoted: 331 Post(s)
Liked 415 Times
in
282 Posts
As others have said, envision and plan the repair/maintainence:
Used the pop stick to clean cassette and cogs AFTER clean and lube chain...DOH!
Had to reclean chain from falling gunk....
*sigh*
Used the pop stick to clean cassette and cogs AFTER clean and lube chain...DOH!
Had to reclean chain from falling gunk....
*sigh*
09-02-19, 08:29 PM
#670
Senior Member
Join Date: Jul 2017
Location: Pacific Northwest
Posts: 1,993
Bikes: Argon 18 Gallium, BH G7, Rocky Mountain Instinct C70
Mentioned: 11 Post(s)
Tagged: 0 Thread(s)
Quoted: 800 Post(s)
Liked 512 Times
in
306 Posts
Not sure if this is a hint, trick, or just common sense. But...when I take the cassette of my bike I slip a zip tie through the centre of all the rings. That way the cassette stays in the proper order and I don't have to worry about spacers getting lots of in the wrong order.
Plus if I leave enough slack in the zip tie I'm able to clean the cassette too.
Plus if I leave enough slack in the zip tie I'm able to clean the cassette too.
09-21-19, 08:57 AM
#671
Senior Member
Join Date: Mar 2007
Location: SF Bay Area, East bay
Posts: 7,658
Bikes: Miyata 618 GT, Marinoni, Kestral 200 2002 Trek 5200, KHS Flite, Koga Miyata, Schwinn Spitfire 5, Mondia Special, Univega Alpina, Miyata team Ti, Santa Cruz Highball
Mentioned: 53 Post(s)
Tagged: 0 Thread(s)
Quoted: 1609 Post(s)
Liked 2,589 Times
in
1,224 Posts
09-21-19, 10:38 AM
#672
Senior Member
 09-22-19, 08:07 PM
#673
Senior Member
Join Date: Nov 2014
Location: Saratoga calif.
Posts: 1,049
Bikes: Miyata 610(66cm), GT Vantara Hybrid (64cm), Nishiki International (64cm), Peugeot rat rod (62 cm), Trek 800 Burning Man helicopter bike, Bob Jackson frame (to be restored?) plus a never ending stream of neglected waifs from the Bike exchange.
Mentioned: 28 Post(s)
Tagged: 0 Thread(s)
Quoted: 339 Post(s)
Likes: 0
Liked 632 Times
in
229 Posts
I like to paint bikes and when I do one of the biggest headaches is runs. Recently I found that if you rotate the pice you are painting right after you spray the paint on you can avoid a lot of runs . When spraying a fork I hold it by the steer tube and spin it around and also swing my srm so that the fork rotates in 2 directions. Do this for about 2 minutes or so till the paint starts to set and you can eliminate a lot of runs. Then , respray after a couple of minutes while the paint is tacky for a second coat to assure full coverage. It always amazes me how often I thought I had a good solid coat only to find holidays where I missed a spot.
With the frame I just painted I clamped a stick just small enough to slide inside the seat tube to a work table and slid the frame onto it then continuously rotated the frame as I sprayed it in primer. There was a run where I painted the top of the tube too heavy so I flipped the frame over and most of the run blended back in. It was actually much easier to paint this way as it is easy to get into the nooks and cranies when they are on the up side. I am using Rustoleum spray Enamel. Another tip. Heat the can under hot water in the sink till it is about body temp, shaking the can frequently to warm the paint. This will increase the spray pressure and give better atomization. Don't heat it too much warmer than this as you don't want the can to explode.
With the frame I just painted I clamped a stick just small enough to slide inside the seat tube to a work table and slid the frame onto it then continuously rotated the frame as I sprayed it in primer. There was a run where I painted the top of the tube too heavy so I flipped the frame over and most of the run blended back in. It was actually much easier to paint this way as it is easy to get into the nooks and cranies when they are on the up side. I am using Rustoleum spray Enamel. Another tip. Heat the can under hot water in the sink till it is about body temp, shaking the can frequently to warm the paint. This will increase the spray pressure and give better atomization. Don't heat it too much warmer than this as you don't want the can to explode.
09-28-19, 02:43 AM
#674
Junior Member
Join Date: Sep 2019
Posts: 16
Mentioned: 0 Post(s)
Tagged: 0 Thread(s)
Quoted: 2 Post(s)
Likes: 0
Liked 1 Time
in
1 Post
thin layers and a good distance from your subject is the best way to avoid running paint! You need to be 25-40 cm away to get dusty enough to prevent running in my experience. Also did you try the Spray.Bike paint?
09-28-19, 12:14 PM
#675
Senior Member
In this episode of "what bad experiences did teach me", we will talk about chain whips 
I see a lot of youtube videos in which people use the "chain whip" incorrectly, even including the famous cycling channels in youtube. What most people do is they wrap the chain whip to one of the larger cogs which ensures very little engagement and in a worst case scenario, as you exert power to the wrench to loosen the cassette, the chain whip disengages from the cog and breaks (happened to me).
What you should do instead is you should choose a "smaller" cog to fully wrap the chain whip and secure the tip of the chain with the straight part of the chain whip tool. This way, no matter what kind of force you exert to the wrench, chain will stay in full engagement on the cog.