


any tips on making the free wheel easier to remove in the future?
 08-25-10, 04:08 PM
#1
Full Member
Thread Starter
Join Date: Jun 2010
Location: Orangeville, Ontario
Posts: 388
Mentioned: 0 Post(s)
Tagged: 0 Thread(s)
Quoted: 2 Post(s)
Likes: 0
Liked 0 Times
in
0 Posts
any tips on making the free wheel easier to remove in the future?
i was just wondering if there is any tip to make the free wheel easier to remove in the future because i am just about to install a new free wheel and don't want to have such a hard time removing it next time.
 08-25-10, 04:18 PM
#2

12mph+ commuter
Join Date: Aug 2008
Location: Oak Park, IL
Posts: 863
Mentioned: 0 Post(s)
Tagged: 0 Thread(s)
Quoted: 0 Post(s)
Likes: 0
Liked 0 Times
in
0 Posts
Grease the threads that the freewheel screws into on the rear hub.
08-25-10, 04:19 PM
#3
Junior Member
Join Date: Aug 2010
Location: Upstate NY
Posts: 82
Bikes: Raleigh One Way, Specialized Hard Rock, Schwinn Continental
Mentioned: 0 Post(s)
Tagged: 0 Thread(s)
Quoted: 3 Post(s)
Likes: 0
Liked 0 Times
in
0 Posts
Nature of the beast - they're always tough to get off. The only thing you can do is get a good coating of grease or anti-seize on the threads.
08-25-10, 04:38 PM
#6

Thrifty Bill

Join Date: Jan 2008
Location: Mountains of Western NC
Posts: 23,524
Bikes: 86 Katakura Silk, 87 Prologue X2, 88 Cimarron LE, 1975 Sekai 4000 Professional, 73 Paramount, plus more
Mentioned: 96 Post(s)
Tagged: 0 Thread(s)
Quoted: 1236 Post(s)
Liked 964 Times
in
628 Posts
+1 Anti seize.
08-25-10, 04:40 PM
#7
Senior Member
Join Date: Sep 2004
Location: boston, ma
Posts: 2,896
Mentioned: 0 Post(s)
Tagged: 0 Thread(s)
Quoted: 9 Post(s)
Likes: 0
Liked 1 Time
in
1 Post
seriously though next time brace the wheel on a wall or door jamb, secure freehweel tool with skewer or nut and grab your big breaker bar. should spin right off
08-25-10, 04:55 PM
#8
Senior Member

Join Date: Sep 2009
Location: Up
Posts: 4,695
Bikes: Masi, Giant TCR, Eisentraut (retired), Jamis Aurora Elite, Zullo, Cannondale, 84 & 93 Stumpjumpers, Waterford, Tern D8, Bianchi, Gunner Roadie, Serotta, Serotta Duette, was gifted a Diamond Back
Mentioned: 4 Post(s)
Tagged: 0 Thread(s)
Quoted: 305 Post(s)
Liked 2,038 Times
in
604 Posts
I don't know how much trouble that you had but I used to put the put the freewheel tool on the wheel, held in place with the skewer. I would then put the tool in a vice with the wheel horizontal. Turn the wheel counterclockwise. It should unscrew pretty easy. Greasing the threads or anti-seize will help in the future but since each pedal stroke tightens the freewheel it will always be tough to take off.
08-25-10, 04:59 PM
#9
Banned
not each pedal stroke the first few do the job , Freewheel butts up against a shoulder machined in the hubshell ..
08-25-10, 06:25 PM
#10
Senior Member

There's still a significant amount of torque on the freewheel if you're in the granny-ring/big-cog gear and hammering up a hill. I've broken bench-vices and granite counter-tops trying to muscle freewheels off. I find using longer moment-arm from a 18-24" breaker-bar results in less brute-force shenanginans.
Wrapping 2-layers of teflon plumbing-tape around the hub's threads before installing the freewheel really helps in removing it later. Be sure to wrap it clockwise in the direction of threading to prevent it from bunching up and getting scraped off when you install the freewheel.
Wrapping 2-layers of teflon plumbing-tape around the hub's threads before installing the freewheel really helps in removing it later. Be sure to wrap it clockwise in the direction of threading to prevent it from bunching up and getting scraped off when you install the freewheel.
08-25-10, 07:50 PM
#11
Full Member
Thread Starter
Join Date: Jun 2010
Location: Orangeville, Ontario
Posts: 388
Mentioned: 0 Post(s)
Tagged: 0 Thread(s)
Quoted: 2 Post(s)
Likes: 0
Liked 0 Times
in
0 Posts
thanks for the advise. i bought some anti-seize but i think i might try the Teflon tape because i still have some Teflon tape left over from 2 weeks ago when i hooked up my compressor, air lines and air tools .
.
.
08-25-10, 08:30 PM
#12
Senior Member

Join Date: Mar 2003
Location: Beaufort, South Carolina, USA and surrounding islands.
Posts: 8,521
Bikes: Cannondale R500, Motobecane Messenger
Mentioned: 0 Post(s)
Tagged: 0 Thread(s)
Quoted: 11 Post(s)
Likes: 0
Liked 1 Time
in
1 Post
If you have all of that, then get a bench vise. Clamp the tool in the vise, align the freewheel into the tool, then turn the wheel counter-clockwise to remove the freewheel. I know this is a shop method and will offend the anti-bike shop snobs on the board.
08-25-10, 08:51 PM
#13
Retired dabbler

Join Date: May 2010
Location: Acton, MA (20 miles west of Boston) - GORGEOUS cycling territory!
Posts: 788
Bikes: 2007 Specialized Roubaix Elite Triple - 1st ride = century 9/19/2010 , Ultegra
Mentioned: 1 Post(s)
Tagged: 0 Thread(s)
Quoted: 46 Post(s)
Likes: 0
Liked 0 Times
in
0 Posts
+1 (first time I've ever done that) - I saw the tech do it on my wheel at a grade A bike shop and it was really slick. If it's a big horizontal vise, the wheel will be completely horizontal if the tool is seated properly. You can also insert the tool and then clamp it - it's reassuring seeing the tool mesh into the receptacle but it makes tightening the vise more awkward.
08-25-10, 08:57 PM
#14
Guest
Join Date: Jul 2008
Location: Grid Reference, SK
Posts: 3,768
Bikes: I never learned to ride a bike. It is my deepest shame.
Mentioned: 0 Post(s)
Tagged: 0 Thread(s)
Quoted: 1 Post(s)
Likes: 0
Liked 6 Times
in
6 Posts
+1 (first time I've ever done that) - I saw the tech do it on my wheel at a grade A bike shop and it was really slick. If it's a big horizontal vise, the wheel will be completely horizontal if the tool is seated properly. You can also insert the tool and then clamp it - it's reassuring seeing the tool mesh into the receptacle but it makes tightening the vise more awkward.
 And it never fails with modern multi-spline freewheels. Removing older four-prong and two-prong freewheels can be a pain, though.
08-25-10, 09:22 PM
And it never fails with modern multi-spline freewheels. Removing older four-prong and two-prong freewheels can be a pain, though.
08-25-10, 09:22 PM
#15
Senior Member
Join Date: Apr 2009
Location: New Rochelle, NY
Posts: 38,706
Bikes: too many bikes from 1967 10s (5x2)Frejus to a Sumitomo Ti/Chorus aluminum 10s (10x2), plus one non-susp mtn bike I use as my commuter
Mentioned: 140 Post(s)
Tagged: 1 Thread(s)
Quoted: 5779 Post(s)
Liked 2,576 Times
in
1,427 Posts
There are a number of ways to make freewheels easier to remove. Unfortunately none are practical or desireable. The simple fact is that a freewheel will always take slightly more torque to remove than you applied when riding.
So the keys to easy removal.
1- no large sprockets, stick to straight block freewheels.
2- no granny gears, too much leverage, so higher chain tension and torque.
3- shorter cranks, though the difference between 165 and 175 is only about 6%
4- no hill climbing
5- no sprinting
6- no hard acceleration
7- no heavy riders
8- no standing on pedals
So in short use your bike only on level ground, making sure never to work hard. It helps if you only weight 125# or less.
If those conditions are unacceptable to you, buy a good quality remover, work on your arm strength and use the vise and left turn technique described above.
__________________
FB
Chain-L site
An ounce of diagnosis is worth a pound of cure.
Just because I'm tired of arguing, doesn't mean you're right.
�One accurate measurement is worth a thousand expert opinions� - Adm Grace Murray Hopper - USN
WARNING, I'm from New York. Thin skinned people should maintain safe distance.
FB
Chain-L site
An ounce of diagnosis is worth a pound of cure.
Just because I'm tired of arguing, doesn't mean you're right.
�One accurate measurement is worth a thousand expert opinions� - Adm Grace Murray Hopper - USN
WARNING, I'm from New York. Thin skinned people should maintain safe distance.
08-25-10, 09:31 PM
#16
Full Member
Thread Starter
Join Date: Jun 2010
Location: Orangeville, Ontario
Posts: 388
Mentioned: 0 Post(s)
Tagged: 0 Thread(s)
Quoted: 2 Post(s)
Likes: 0
Liked 0 Times
in
0 Posts
^thats pretty much impossible for me. i live in a hilly town and i weight 200#.
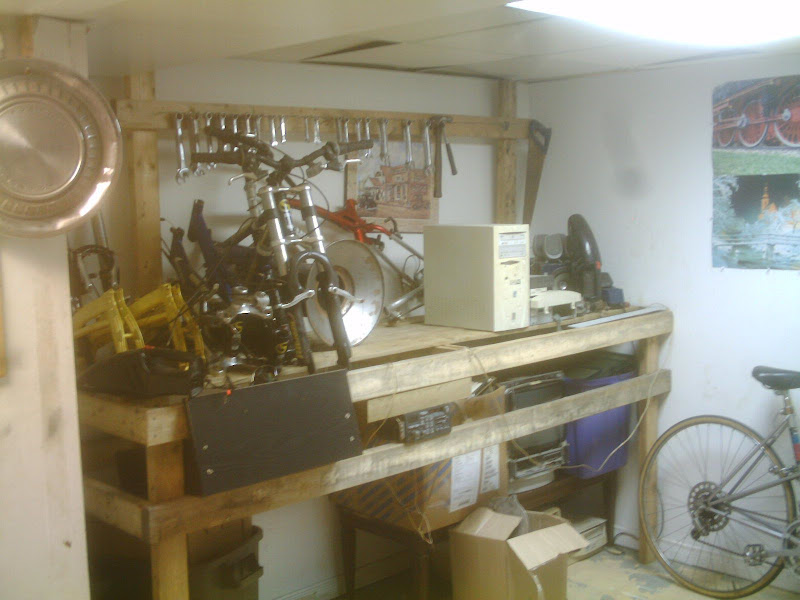
i would like to get a vise but i'm not quite sure where to get a good one or where to mount it if i can find one. the workbench that i had built in my basement was not strong enough or heavy enough to bolt a vise to plus i had to take my workbench out of the basement when the basement flooded almost 2 month ago . apparently the basement will start being returned to its original state in 2 weeks. heres an old picture of my workbench before the flood
. apparently the basement will start being returned to its original state in 2 weeks. heres an old picture of my workbench before the flood
08-25-10, 11:20 PM
#17
Senior Member

Join Date: Aug 2008
Location: Tucson, Arizona
Posts: 704
Bikes: '02 Lemond Buenos Aires, '98 Fuji Touring w/ Shimano Nexus premium, '06 Jamis Nova 853 cross frame set up as commuter, '03 Fuji Roubaix Pro 853 back up training bike
Mentioned: 0 Post(s)
Tagged: 0 Thread(s)
Quoted: 0 Post(s)
Likes: 0
Liked 1 Time
in
1 Post
^thats pretty much impossible for me. i live in a hilly town and i weight 200#.
i would like to get a vise but i'm not quite sure where to get a good one or where to mount it if i can find one. the workbench that i had built in my basement was not strong enough or heavy enough to bolt a vise to plus i had to take my workbench out of the basement when the basement flooded almost 2 month ago. apparently the basement will start being returned to its original state in 2 weeks. heres an old picture of my workbench before the flood
i would like to get a vise but i'm not quite sure where to get a good one or where to mount it if i can find one. the workbench that i had built in my basement was not strong enough or heavy enough to bolt a vise to plus i had to take my workbench out of the basement when the basement flooded almost 2 month ago
. apparently the basement will start being returned to its original state in 2 weeks. heres an old picture of my workbench before the flood
08-25-10, 11:35 PM
#18

Bicycle Repair Man !!!

A bench vise is the best tool to use, and is the shop preferred method, and there should be no issue with multi splined freewheels and 2 , 3, and 4 pronged models should have the tool secured with a nut / washer so they don't slip and frag the freewheel detentes.
Barring a bench vise... I have also use a long box end wrench on the tool .
When you put the freewheel back on make sure the threads on the freewheel and hub are clean and greased.
08-26-10, 12:14 AM
#19
Senior Member
Join Date: Jan 2010
Posts: 111
Mentioned: 0 Post(s)
Tagged: 0 Thread(s)
Quoted: 1 Post(s)
Likes: 0
Liked 0 Times
in
0 Posts
I've often wondered where or what freewheels tighten down onto. Do they hit the outward end of the threaded hub, or a shoulder inward? I hope they don't sometimes just run out of thread on the hub and tighten up that way. Grease everything, teflon tapes sounds good too.
08-26-10, 07:00 AM
#20
Senior Member
Join Date: Apr 2009
Location: New Rochelle, NY
Posts: 38,706
Bikes: too many bikes from 1967 10s (5x2)Frejus to a Sumitomo Ti/Chorus aluminum 10s (10x2), plus one non-susp mtn bike I use as my commuter
Mentioned: 140 Post(s)
Tagged: 1 Thread(s)
Quoted: 5779 Post(s)
Liked 2,576 Times
in
1,427 Posts
They get to the last thread and butt up against the shoulder. After that they're like any other nut in that you loosen with the same torque you tightened it with. The only problem is that they're torqued down by all the strength you can muster in your legs. If you stood on the pedals climbing up some wall, than that's the kind of torque you'll need to remove them.
__________________
FB
Chain-L site
An ounce of diagnosis is worth a pound of cure.
Just because I'm tired of arguing, doesn't mean you're right.
�One accurate measurement is worth a thousand expert opinions� - Adm Grace Murray Hopper - USN
WARNING, I'm from New York. Thin skinned people should maintain safe distance.
FB
Chain-L site
An ounce of diagnosis is worth a pound of cure.
Just because I'm tired of arguing, doesn't mean you're right.
�One accurate measurement is worth a thousand expert opinions� - Adm Grace Murray Hopper - USN
WARNING, I'm from New York. Thin skinned people should maintain safe distance.

