


Road Bike Stem Swap
 07-05-14, 09:23 PM
#1
Senior Member
Thread Starter
Join Date: Feb 2013
Location: Kearneysville, WV
Posts: 739
Bikes: 2012 Cannondale Flash Alloy 2 (mountain bike), 2010 Schwinn Paramount Series 7 (road bike)
Mentioned: 0 Post(s)
Tagged: 0 Thread(s)
Quoted: 0 Post(s)
Likes: 0
Liked 0 Times
in
0 Posts
Road Bike Stem Swap
My wife needed to swap to a larger stem due to poor fitment, so I swapped the stem. In the process, I removed one of the spacers. The reason I did this was because the part of the stem that wraps around the fork was higher on the replacement than on the original. When I had the new stem on the bike, plus all the spacers, I was worried I wouldn't be able to get the screw in the stem-cap tightened all the way down into the top of the fork because of the difference between the two stems.
The stem-cap is very tight, and so are the two "side bolts" on the stem. I've made sure everything is pressed down on to the fork as much as possible. I noticed today the spacers will "spin," or they are "loose," despite the stem being as tight as I can possibly get it. Is this something I should be worried about?
I rode the bike, made sure it turns, etc. and does not have any "play" in it. I've slammed on the brakes, then accelerated numerous times, and everything is tight; no knocking sounds or anything that feels loose.
Is this okay, or do I need to re-add that spacer?
 07-05-14, 09:33 PM
#2

don't try this at home.

Join Date: Jan 2006
Location: N. KY
Posts: 5,939
Mentioned: 10 Post(s)
Tagged: 0 Thread(s)
Quoted: 973 Post(s)
Liked 511 Times
in
351 Posts
You want the fork's steerer tube to be recessed a little. On this Park Tool headset page, go down to the section titled "Headset Adjustment - Threadless Type"

The top cap pushes down on the stem while pulling up on the steerer tube. This adjusts the play in the headset bearings. On my bike, I barely have to use any force at all when tightening the top cap to take out the bearing play. Then the two bolts on the stem hold the whole assembly together--the cap must be set first.
You don't want the side bolt on the stem to be above the top of the steerer, so the recess amount can't be "too" much.
To replace a 10 mm spacer that's a little too big, you can get 5 mm half height spacers, or even narrower ones. And the narrow spacer can even go on top of the stem, if the steer tube is sticking out a little above the stem.
Last edited by rm -rf; 07-05-14 at 09:41 PM.
07-05-14, 09:37 PM
#3
Senior Member
Thread Starter
Join Date: Feb 2013
Location: Kearneysville, WV
Posts: 739
Bikes: 2012 Cannondale Flash Alloy 2 (mountain bike), 2010 Schwinn Paramount Series 7 (road bike)
Mentioned: 0 Post(s)
Tagged: 0 Thread(s)
Quoted: 0 Post(s)
Likes: 0
Liked 0 Times
in
0 Posts
You want the fork's steerer tube to be recessed a little. On this Park Tool headset page, go down to the section titled "Headset Adjustment - Threadless Type"
The top cap pushes down on the stem while pulling up on the steerer tube. This adjusts the play in the headset bearings. On my bike, I barely have to use any force at all when tightening the top cap to take out the bearing play. Then the two bolts on the stem hold the whole assembly together--the cap must be set first.
To replace a 10 mm spacer that's a little too big, you can get 5 mm half height spacers, or even narrower ones.
07-05-14, 09:47 PM
#4
Senior Member
Join Date: Dec 2010
Location: Above ground, Walnut Creek, Ca
Posts: 6,681
Bikes: 8 ss bikes, 1 5-speed touring bike
Mentioned: 0 Post(s)
Tagged: 0 Thread(s)
Quoted: 86 Post(s)
Likes: 0
Liked 4 Times
in
4 Posts
it's unlikely, depending on the size of the spacer, that after removing one that is more than a couple of millimeters in depth, that the headset can be properly adjusted. you'll probably have to cut off more steerer.
a pic without the cap would help.
BTW, some caps are recessed, why, i don't know, and can highcenter themselves on a steerer plug designed for carbon forks. maybe they assume the steerer will have a metal steerer and a starnut, IDK. i've had to go to the trouble of stuffing the plug down in the steerer far enough to clear the cap's recess.
Last edited by hueyhoolihan; 07-05-14 at 09:53 PM.
07-05-14, 09:49 PM
#5
Senior Member
Join Date: May 2011
Location: Upstate NY
Posts: 3,783
Bikes: Bianchi San Mateo and a few others
Mentioned: 18 Post(s)
Tagged: 0 Thread(s)
Quoted: 634 Post(s)
Likes: 0
Liked 13 Times
in
9 Posts
Did you tension the top cap to remove play in the headset before tightening the bolts on the stem?
07-05-14, 10:52 PM
#6
Senior Member
Thread Starter
Join Date: Feb 2013
Location: Kearneysville, WV
Posts: 739
Bikes: 2012 Cannondale Flash Alloy 2 (mountain bike), 2010 Schwinn Paramount Series 7 (road bike)
Mentioned: 0 Post(s)
Tagged: 0 Thread(s)
Quoted: 0 Post(s)
Likes: 0
Liked 0 Times
in
0 Posts
it's unlikely, depending on the size of the spacer, that after removing one that is more than a couple of millimeters in depth, that the headset can be properly adjusted. you'll probably have to cut off more steerer.
a pic without the cap would help.
BTW, some caps are recessed, why, i don't know, and can highcenter themselves on a steerer plug designed for carbon forks. maybe they assume the steerer will have a metal steerer and a starnut, IDK. i've had to go to the trouble of stuffing the plug down in the steerer far enough to clear the cap's recess.
a pic without the cap would help.
BTW, some caps are recessed, why, i don't know, and can highcenter themselves on a steerer plug designed for carbon forks. maybe they assume the steerer will have a metal steerer and a starnut, IDK. i've had to go to the trouble of stuffing the plug down in the steerer far enough to clear the cap's recess.
Yes, I made sure the step was flush with the spacers, then tightened the stem first, followed by the two screws on the side of the stem.
07-05-14, 11:00 PM
#7
Senior Member
Join Date: Dec 2010
Location: Above ground, Walnut Creek, Ca
Posts: 6,681
Bikes: 8 ss bikes, 1 5-speed touring bike
Mentioned: 0 Post(s)
Tagged: 0 Thread(s)
Quoted: 86 Post(s)
Likes: 0
Liked 4 Times
in
4 Posts
you know, i't possible to have the problem you describe and still have a headset that is properly installed. which is why i prefaced my post with "it's unlikely".
here's how.
1) install the headset properly with cap and at least one spacer ABOVE the stem.
2) remove the cap and the spacer and replace the spacer with a narrower spacer.
3) reattach the cap
the spacer may or may not end up being loose. but it really doesn't matter because that spacer is serving no purpose.
07-06-14, 07:44 AM
#8
Senior Member
Thread Starter
Join Date: Feb 2013
Location: Kearneysville, WV
Posts: 739
Bikes: 2012 Cannondale Flash Alloy 2 (mountain bike), 2010 Schwinn Paramount Series 7 (road bike)
Mentioned: 0 Post(s)
Tagged: 0 Thread(s)
Quoted: 0 Post(s)
Likes: 0
Liked 0 Times
in
0 Posts
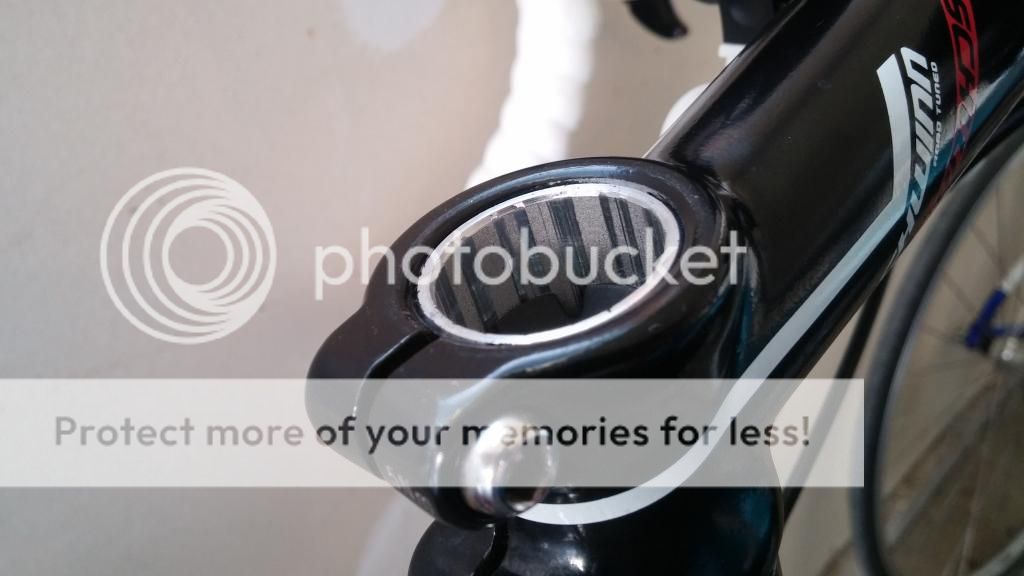
Okay, here are some photos of the parts, as requested.
Here is the stem and top of the fork...
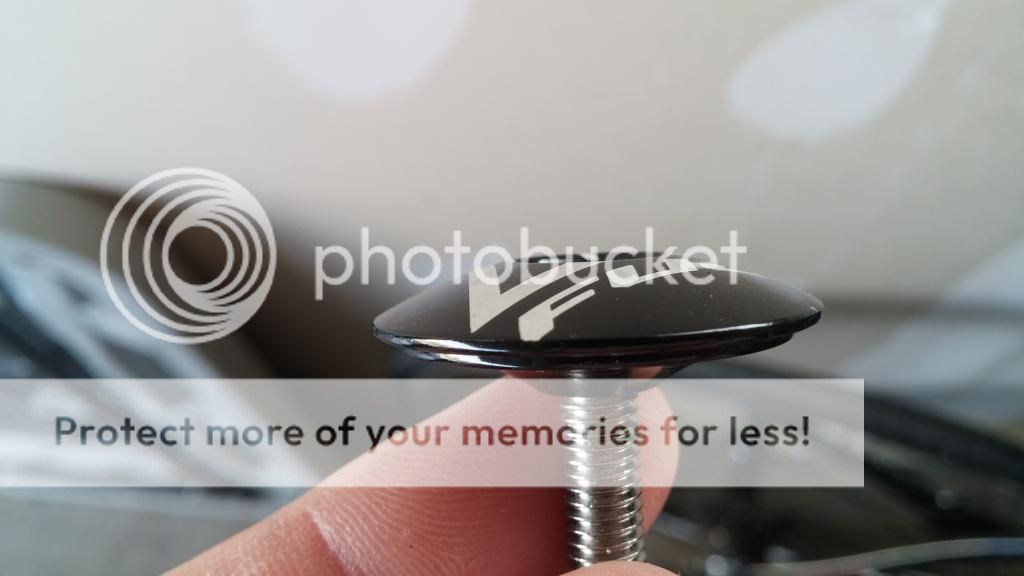
Here is the stem cap with the "bottom washer" on it...
Here is the stem and top of the fork...

Here is the stem cap with the "bottom washer" on it...
 07-06-14, 09:20 AM
#9
Senior Member
Join Date: May 2011
Location: Upstate NY
Posts: 3,783
Bikes: Bianchi San Mateo and a few others
Mentioned: 18 Post(s)
Tagged: 0 Thread(s)
Quoted: 634 Post(s)
Likes: 0
Liked 13 Times
in
9 Posts
Your fork's steerer tube isn't recessed enough in the stem. When you tighten the top cap, it's bottoming out on the steerer tube. You need another spacer (even a 2.5 mm "half spacer") under the stem or you need to trim the fork's steerer tube.
To verify, you could put a spacer on top of the stem, get everything adjusted and tightened up, then remove the cap and topside spacer to inspect.
To verify, you could put a spacer on top of the stem, get everything adjusted and tightened up, then remove the cap and topside spacer to inspect.
Last edited by SkyDog75; 07-06-14 at 09:32 AM.
07-06-14, 09:51 AM
#10
Senior Member
Thread Starter
Join Date: Feb 2013
Location: Kearneysville, WV
Posts: 739
Bikes: 2012 Cannondale Flash Alloy 2 (mountain bike), 2010 Schwinn Paramount Series 7 (road bike)
Mentioned: 0 Post(s)
Tagged: 0 Thread(s)
Quoted: 0 Post(s)
Likes: 0
Liked 0 Times
in
0 Posts
Your fork's steerer tube isn't recessed enough in the stem. When you tighten the top cap, it's bottoming out on the steerer tube. You need another spacer (even a 2.5 mm "half spacer") under the stem or you need to trim the fork's steerer tube.
To verify, you could put a spacer on top of the stem, get everything adjusted and tightened up, then remove the cap and topside spacer to inspect.
To verify, you could put a spacer on top of the stem, get everything adjusted and tightened up, then remove the cap and topside spacer to inspect.
The reason I removed the original 2.5mm spacer in the first place was because of the difference in the height of the part of the stem that wraps around the fork. I figured because of this, I would remove the spacer to ensure the stem cap would drive the full length down into the fork.
Last edited by Wooden Tiger; 07-06-14 at 11:22 AM.
07-06-14, 11:27 AM
#11
Senior Member
Join Date: Dec 2010
Location: Above ground, Walnut Creek, Ca
Posts: 6,681
Bikes: 8 ss bikes, 1 5-speed touring bike
Mentioned: 0 Post(s)
Tagged: 0 Thread(s)
Quoted: 86 Post(s)
Likes: 0
Liked 4 Times
in
4 Posts
the cap bolt and cap are only used for initial adjustment. it's not even needed once the headset is installed and adjusted correctly. you can leave it on for cosmetic reasons if you want to, but it serves no purpose, so it's not important how far it threads into the compression plug or starnut.
07-06-14, 11:56 AM
#12
Full Member
I advise you to stick the 2.5mm spacer back under the top cap, loosen the stem pinch bolts and see if the headset can be adjusted correctly. Personally I like to run a 2.5mm spacer above the stem regardless, since it ensures adequate clearance to tighten the headset and gives more even clamping.
Last edited by SlowJoeCrow; 07-06-14 at 11:58 AM. Reason: spelling
07-06-14, 01:12 PM
#13
Senior Member
Thread Starter
Join Date: Feb 2013
Location: Kearneysville, WV
Posts: 739
Bikes: 2012 Cannondale Flash Alloy 2 (mountain bike), 2010 Schwinn Paramount Series 7 (road bike)
Mentioned: 0 Post(s)
Tagged: 0 Thread(s)
Quoted: 0 Post(s)
Likes: 0
Liked 0 Times
in
0 Posts
the cap bolt and cap are only used for initial adjustment. it's not even needed once the headset is installed and adjusted correctly. you can leave it on for cosmetic reasons if you want to, but it serves no purpose, so it's not important how far it threads into the compression plug or starnut.
I advise you to stick the 2.5mm spacer back under the top cap, loosen the stem pinch bolts and see if the headset can be adjusted correctly. Personally I like to run a 2.5mm spacer above the stem regardless, since it ensures adequate clearance to tighten the headset and gives more even clamping.
When I replaced stems, I never adjusted anything, what would I need to adjust?
07-06-14, 03:43 PM
#14
Senior Member
Join Date: Dec 2010
Location: Above ground, Walnut Creek, Ca
Posts: 6,681
Bikes: 8 ss bikes, 1 5-speed touring bike
Mentioned: 0 Post(s)
Tagged: 0 Thread(s)
Quoted: 86 Post(s)
Likes: 0
Liked 4 Times
in
4 Posts
i don't think anybody advised "adjusting the stem". all references that i can find that include the word "adjust" are referring to the headset in this thread.
Last edited by hueyhoolihan; 07-06-14 at 03:48 PM.
07-06-14, 04:01 PM
#15
Senior Member
Thread Starter
Join Date: Feb 2013
Location: Kearneysville, WV
Posts: 739
Bikes: 2012 Cannondale Flash Alloy 2 (mountain bike), 2010 Schwinn Paramount Series 7 (road bike)
Mentioned: 0 Post(s)
Tagged: 0 Thread(s)
Quoted: 0 Post(s)
Likes: 0
Liked 0 Times
in
0 Posts
 07-06-14, 06:22 PM
#17
Senior Member
Thread Starter
Join Date: Feb 2013
Location: Kearneysville, WV
Posts: 739
Bikes: 2012 Cannondale Flash Alloy 2 (mountain bike), 2010 Schwinn Paramount Series 7 (road bike)
Mentioned: 0 Post(s)
Tagged: 0 Thread(s)
Quoted: 0 Post(s)
Likes: 0
Liked 0 Times
in
0 Posts
") 07-06-14, 06:22 PM
07-06-14, 06:22 PM
#18
Senior Member
Join Date: May 2011
Location: Upstate NY
Posts: 3,783
Bikes: Bianchi San Mateo and a few others
Mentioned: 18 Post(s)
Tagged: 0 Thread(s)
Quoted: 634 Post(s)
Likes: 0
Liked 13 Times
in
9 Posts
It doesn't matter how far the cap's bolt extends down into the fork, so long as it can thread into the star nut enough to set the stem and get your headset adjustment just right. The cap is only there to aid in assembly and adjustment. Once you tighten the stem bolts, the stem's doing all the work. The cap's job is done. You could even remove the cap if you wanted to.
Last edited by SkyDog75; 07-06-14 at 06:33 PM.
07-06-14, 06:31 PM
#19
Senior Member
Headset...stem...whatever. Nothing was adjusted, I just removed the stem, then replaced it with another one. I put the spacer back on, and everything seems to be okay. It's on straight, there's no "play" in the steering, and the spacers under the stem aren't spinning anymore. I guess it's fixed.
07-06-14, 06:46 PM
#20
Senior Member
Thread Starter
Join Date: Feb 2013
Location: Kearneysville, WV
Posts: 739
Bikes: 2012 Cannondale Flash Alloy 2 (mountain bike), 2010 Schwinn Paramount Series 7 (road bike)
Mentioned: 0 Post(s)
Tagged: 0 Thread(s)
Quoted: 0 Post(s)
Likes: 0
Liked 0 Times
in
0 Posts
Regardless of how the original stem fit, this stem is just about flush with the top of your steerer tube as pictured. You may need another millimeter and quite possibly more to be able to adjust your headset preload properly. A 2.5 mm spacer will give you that and still be well within the stem clamp's design parameters. It's not even close to pushing the margin of safety, but if you want to be absolutely certain, you can put that spacer on top of the stem instead of below it. It'll still keep the cap from bottoming out on the steerer tube.
It doesn't matter how far the cap's bolt extends down into the fork, so long as it can thread into the star nut enough to set the stem and get your headset adjustment just right. The cap is only there to aid in assembly and adjustment. Once you tighten the stem bolts, the stem's doing all the work. The cap's job is done. You could even remove the cap if you wanted to.
It doesn't matter how far the cap's bolt extends down into the fork, so long as it can thread into the star nut enough to set the stem and get your headset adjustment just right. The cap is only there to aid in assembly and adjustment. Once you tighten the stem bolts, the stem's doing all the work. The cap's job is done. You could even remove the cap if you wanted to.
Except, of course, that the headset bearing preload was adjusted. When you undo the stem, the preload on the bearing goes away. When you tighten the top cap, you set the preload. There needs to be enough to keep the bearing engaged, but not enough to bind. Put the front brake on, and push the handle bars back and foward, if you feel it clunk, see (or really, use your finger to feel) if the headset cups are moving relative to each other.), if they are, you need to loosen the stem and tighten the cap a smidge, then retighten the stem and retest. (A little bit of movement is normal, when you put the brake on and push and pull the bars. There's play in the front wheel bearing, there may be compression of the tire, and a little bit of play in the headset is usual. That's why you figure out what part is moving.)
Last week when I got fitted to my bike, the guy at the LBS swapped stems and didn't test anything as you're describing. Everything also works okay. I figured since all he really did was unscrew three bolts, swap parts, and screw three bolts again, it couldn't be too difficult. My bike works fine. I figured it would't be any different on her bike.
07-06-14, 06:51 PM
#21
Senior Member
Join Date: May 2011
Location: Upstate NY
Posts: 3,783
Bikes: Bianchi San Mateo and a few others
Mentioned: 18 Post(s)
Tagged: 0 Thread(s)
Quoted: 634 Post(s)
Likes: 0
Liked 13 Times
in
9 Posts
For future reference as much as anything else... When setting/adjusting bearing preload -- headsets or elsewhere -- you shouldn't tighten "about as tight as you could". Just enough to remove play. Anything more is simply putting extra unnecessary load on the bearings and can shorten the life of the bearings and cups/cones/races.
07-06-14, 07:02 PM
#22
Senior Member
Thread Starter
Join Date: Feb 2013
Location: Kearneysville, WV
Posts: 739
Bikes: 2012 Cannondale Flash Alloy 2 (mountain bike), 2010 Schwinn Paramount Series 7 (road bike)
Mentioned: 0 Post(s)
Tagged: 0 Thread(s)
Quoted: 0 Post(s)
Likes: 0
Liked 0 Times
in
0 Posts
For future reference as much as anything else... When setting/adjusting bearing preload -- headsets or elsewhere -- you shouldn't tighten "about as tight as you could". Just enough to remove play. Anything more is simply putting extra unnecessary load on the bearings and can shorten the life of the bearings and cups/cones/races.
07-06-14, 07:19 PM
#23

Senior Member

Join Date: Feb 2004
Location: St Peters, Missouri
Posts: 30,225
Bikes: Catrike 559 I own some others but they don't get ridden very much.
Mentioned: 16 Post(s)
Tagged: 0 Thread(s)
Quoted: 1572 Post(s)
Liked 643 Times
in
364 Posts
If your spacers spin freely, that's bad. It means that there's nothing holding your headset preload adjustment.
__________________
My greatest fear is all of my kids standing around my coffin and talking about "how sensible" dad was.
My greatest fear is all of my kids standing around my coffin and talking about "how sensible" dad was.
07-06-14, 07:42 PM
#24
Senior Member
Join Date: May 2011
Location: Upstate NY
Posts: 3,783
Bikes: Bianchi San Mateo and a few others
Mentioned: 18 Post(s)
Tagged: 0 Thread(s)
Quoted: 634 Post(s)
Likes: 0
Liked 13 Times
in
9 Posts
What I'll probably do is go out and loosen everything up a tad. Approximately how tight should everything be? What I did was tighten the stem cap about as tight as I could get it, then tighten the pinch bolts on the stem. Should I just go back and loosen the stem bolt until it's just enough to be snugged down, then retighten the pinch bolts?
For more detail, check out Park Tool's tutorial on threadless headset installation & adjustment.
07-07-14, 06:26 AM
#25
don't try this at home.
Join Date: Jan 2006
Location: N. KY
Posts: 5,939
Mentioned: 10 Post(s)
Tagged: 0 Thread(s)
Quoted: 973 Post(s)
Liked 511 Times
in
351 Posts
You don't want excessively tightened bolts.
Like the other posters said:
Keep the two side bolts on the stem completely loose.
Step 1:
Barely tighten the top cap, just until it makes contact with the stem, then very light pressure with two fingers.
Straddle the bike, pull hard on the front brake to lock the wheel from turning, and rock the bike. Do you hear or feel the play in the fork? (try this with the cap very loose, to see what the bearing play feels like)
If it still has play, tighten the cap a little more, not even a 1/8 turn, and repeat the brake test.
If no play, you are done:
Step 2:
Tighten the stem's side bolts. Don't overdo it! Tighten the two bolts "medium tight". Hold the front wheel between your legs, facing backwards, and see if you can twist the handlebars off center. If they move, loosen the two bolts, recenter the stem, and try a little more tension on the two bolts.
~~~~
You want as little force as possible on the top cap that still takes up the play in the bearings.
My old bike needed very little force at all. The new one needs to be tightened somewhat more.
Last edited by rm -rf; 07-07-14 at 06:42 AM.