


Merckx with partially crushed seat tube
 01-12-16, 06:10 PM
#1
Junior Member
Thread Starter
Join Date: Nov 2015
Location: WA
Posts: 14
Mentioned: 0 Post(s)
Tagged: 0 Thread(s)
Quoted: 0 Post(s)
Likes: 0
Liked 0 Times
in
0 Posts
Merckx with partially crushed seat tube
I recently took possession of this 1990 Corsa Extra and was disappointed to find that a too-small seat post had obviously been installed prior. The opening measures right a 26.8 currently, and I know this bike should take a 27.2.
I imagine this can be re-expended to it's original dimension, but I'm not sure of the best method to do that (I'm not going to pry it with a screwdriver). I'm concerned it may not re-expand evenly on each side, causing it to always bind/scrape on one side when intalling/removing a post. I'm also concerned that the seat binder tabs may actually be bent, realiazing that it would take considerable torque on the binder bolt to get this frame to secure a too-small seat post. Opinions?

I imagine this can be re-expended to it's original dimension, but I'm not sure of the best method to do that (I'm not going to pry it with a screwdriver). I'm concerned it may not re-expand evenly on each side, causing it to always bind/scrape on one side when intalling/removing a post. I'm also concerned that the seat binder tabs may actually be bent, realiazing that it would take considerable torque on the binder bolt to get this frame to secure a too-small seat post. Opinions?
 01-12-16, 06:16 PM
#2
Senior Member
If you are not comfortable doing this yourself, do you have a qualified LBS close by.
01-12-16, 06:19 PM
#3

Decrepit Member

Find a local bike shop with an adjustable reamer.
 01-12-16, 06:30 PM
#4

Senior Member
Join Date: Aug 2007
Location: Evanston, IL
Posts: 5,084
Bikes: many
Mentioned: 63 Post(s)
Tagged: 0 Thread(s)
Quoted: 1441 Post(s)
Liked 1,386 Times
in
758 Posts
Reaming will just remove metal. You need to open it back up and preserve the metal you have. A split one-inch oak dowel wedge tool should do the trick. Start with a one-inch piece of oak dowel, about 12 inches long. Cut it lengthwise, but at an angle. You wind up with two wedges. Lubricate them, put in a seatpost bolt loosely, slide in one wedge, fat end down, maybe halfway in (hang onto the thin end!), then follow with the other wedge, fat side up. Slide it down until the two meet and are snug in the tube. Tap with a hammer to open things up a bit. Lather, rinse, repeat. Rotate the wedges to open up in different directions.
01-12-16, 06:34 PM
#5
All Campy All The Time
Join Date: Nov 2013
Location: Richmond, Virginia
Posts: 1,417
Bikes: Listed in my signature.
Mentioned: 2 Post(s)
Tagged: 0 Thread(s)
Quoted: 177 Post(s)
Liked 114 Times
in
63 Posts
You don't want to ream it, you want to expand it. Trouble with exhaust pipe expanders is that they are too big - starting at 1-1/8". If it were mine I'd go to the lathe and make up a tapered metal plug that starts at what size the hole is now and tapers to what size I want it to be, plus a fuzz more. I'd also drill and thread a hole in the end of the plug so I could yank it out again with a slap-hammer once I bump it in. With some good anti-seize or grease, of course.
__________________
My C&V Bikes:
1972 Bottecchia Professional, 1972 Legnano Olympiade Record,
1982 Colnago Super, 1987 Bottecchia Team C-Record,
1988 Pinarello Montello, 1990 Masi Nuova Strada Super Record,
1995 Bianchi Campione d'Italia, 1995 DeBernardi Thron
My C&V Bikes:
1972 Bottecchia Professional, 1972 Legnano Olympiade Record,
1982 Colnago Super, 1987 Bottecchia Team C-Record,
1988 Pinarello Montello, 1990 Masi Nuova Strada Super Record,
1995 Bianchi Campione d'Italia, 1995 DeBernardi Thron
 01-12-16, 06:38 PM
#6
Junior Member
Thread Starter
Join Date: Nov 2015
Location: WA
Posts: 14
Mentioned: 0 Post(s)
Tagged: 0 Thread(s)
Quoted: 0 Post(s)
Likes: 0
Liked 0 Times
in
0 Posts
Find a local bike shop with an adjustable reamer.
As for having a LBS do the work, I had the most well-known shop in Portland botch a headtube facing job on a new frame due to a facing tool that was too dull (requiring over-tightening it to get it to cut, resulting in a rough/uneven cut). So I'm really leary about having shops touch my bikes anymore. I worked in a shop years ago, and we would just pry this open with a screwdriver wrapped in something to try to prevent gouges. There has to be a better, more controlled method.
Last edited by plainview; 01-12-16 at 07:10 PM. Reason: spelling
01-12-16, 06:43 PM
#7
Junior Member
Thread Starter
Join Date: Nov 2015
Location: WA
Posts: 14
Mentioned: 0 Post(s)
Tagged: 0 Thread(s)
Quoted: 0 Post(s)
Likes: 0
Liked 0 Times
in
0 Posts
You don't want to ream it, you want to expand it. Trouble with exhaust pipe expanders is that they are too big - starting at 1-1/8". If it were mine I'd go to the lathe and make up a tapered metal plug that starts at what size the hole is now and tapers to what size I want it to be, plus a fuzz more. I'd also drill and thread a hole in the end of the plug so I could yank it out again with a slap-hammer once I bump it in. With some good anti-seize or grease, of course.
01-12-16, 06:50 PM
#8
Senior Member

Join Date: Oct 2013
Location: D'uh... I am a Cutter
Posts: 6,139
Bikes: '17 Access Old Turnpike Gravel bike, '14 Trek 1.1, '13 Cannondale CAAD 10, '98 CAD 2, R300
Mentioned: 62 Post(s)
Tagged: 0 Thread(s)
Quoted: 1571 Post(s)
Likes: 0
Liked 12 Times
in
9 Posts
Interesting. I would have just removed the bolt and used an extra large screwdriver to re-expand the crushed expansion slot. I wonder what a LBS would do.
01-12-16, 07:02 PM
#9
Senior Member
Join Date: Apr 2005
Posts: 912
Mentioned: 0 Post(s)
Tagged: 0 Thread(s)
Quoted: 34 Post(s)
Likes: 0
Liked 8 Times
in
7 Posts
This is what I would do as well, use a large screwdriver, then check for roundness using a disposable seatpost. May need to follow up with a reamer.
01-12-16, 07:16 PM
#10
It's MY mountain

Join Date: Sep 2006
Location: Mt.Diablo
Posts: 10,001
Bikes: Klein, Merckx, Trek
Mentioned: 70 Post(s)
Tagged: 0 Thread(s)
Quoted: 4335 Post(s)
Liked 2,977 Times
in
1,614 Posts
Yeah - screwdriver in the slot --- a sturdy one. but I like @Smonatanaro's idea too.
01-12-16, 07:18 PM
#11
Senior Member

Join Date: May 2015
Location: Richmond VA area
Posts: 2,618
Bikes: '00 Koga Miyata Full Pro Oval Road bike.
Mentioned: 17 Post(s)
Tagged: 0 Thread(s)
Quoted: 475 Post(s)
Likes: 0
Liked 8 Times
in
7 Posts
It never ceases to amaze me how someone will take a high-end frame like that and force a wrong size seatpost into it instead fo paying just a few dollars to buy something that will fit..
01-12-16, 07:25 PM
#12
Member
Join Date: Sep 2010
Location: Jacksonville, N.C.
Posts: 31
Bikes: Peugeot, Felt, Gary Fisher, Specialized, Scattante
Mentioned: 0 Post(s)
Tagged: 0 Thread(s)
Quoted: 0 Post(s)
Likes: 0
Liked 0 Times
in
0 Posts
I'd have a go at it with smontanaro's method. Sounds like a good plan to me.
01-12-16, 07:34 PM
#13
Super Course fan

Join Date: Sep 2006
Location: Lost on the windswept plains of the Great Black Swamp
Posts: 2,720
Mentioned: 0 Post(s)
Tagged: 0 Thread(s)
Quoted: 6 Post(s)
Likes: 0
Liked 8 Times
in
8 Posts
If this was a gas-pipe Raleigh or Peugeot I would carefully work it open with a wood dowel and a large screwdriver.
This being quite a bit higher end than my usual victim I'll defer to more experienced opinions.
This being quite a bit higher end than my usual victim I'll defer to more experienced opinions.
__________________
I have a white PX-10, a Green Dawes Galaxy and an Orange Falcon, now I'm done.
I have a white PX-10, a Green Dawes Galaxy and an Orange Falcon, now I'm done.
01-12-16, 07:39 PM
#14
Junior Member
Thread Starter
Join Date: Nov 2015
Location: WA
Posts: 14
Mentioned: 0 Post(s)
Tagged: 0 Thread(s)
Quoted: 0 Post(s)
Likes: 0
Liked 0 Times
in
0 Posts
Reaming will just remove metal. You need to open it back up and preserve the metal you have. A split one-inch oak dowel wedge tool should do the trick. Start with a one-inch piece of oak dowel, about 12 inches long. Cut it lengthwise, but at an angle. You wind up with two wedges. Lubricate them, put in a seatpost bolt loosely, slide in one wedge, fat end down, maybe halfway in (hang onto the thin end!), then follow with the other wedge, fat side up. Slide it down until the two meet and are snug in the tube. Tap with a hammer to open things up a bit. Lather, rinse, repeat. Rotate the wedges to open up in different directions.
This is similar to the idea of using a quill stem as an expander (two inclined planes). I'd feel more comfortable with the stem idea if the diameter matched the seat tube better.
01-12-16, 07:58 PM
#15
I'm a Classic Man.
Join Date: May 2014
Location: Central Valley California
Posts: 555
Bikes: Anything with a full record group.
Mentioned: 0 Post(s)
Tagged: 0 Thread(s)
Quoted: 3 Post(s)
Likes: 0
Liked 1 Time
in
1 Post
I would take a triangular wedge put it at the top of the slot and gently hammer down until square maybe one tap beyond.
01-12-16, 08:02 PM
#16
Senior Member

Join Date: Mar 2014
Location: City of Angels
Posts: 4,870
Bikes: A few too many
Mentioned: 42 Post(s)
Tagged: 1 Thread(s)
Quoted: 1363 Post(s)
Liked 2,177 Times
in
1,182 Posts
Good points about screwdrivers, I always use 2 screw drivers slipped both into the slot and use one to pry against the other.....using only one can deform the opposite side when prying against it.
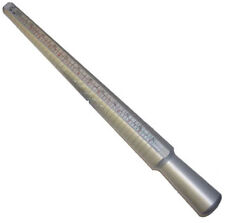
There is also a tool used to check the dia. of a seat tube for sizing that is similar to ones used by a jeweler to check ring sizes (tapered)....you might see if your LBS has one and use it to open the tube that way.
Just don't jam it in all at once to open up the tube because you may run the risk of the "stuck" seat post syndrome.....it also has markings on it that indicated dia. 26.2 etc. etc.
JM2C's Ben
__________________
"EVERY PERSON IS GUILTY OF ALL THE GOOD THEY DID NOT DO"
Voltaire
Voice recognition may sometimes create odd spelling and grammatical errors
"EVERY PERSON IS GUILTY OF ALL THE GOOD THEY DID NOT DO"
Voltaire
Voice recognition may sometimes create odd spelling and grammatical errors
01-12-16, 08:06 PM
#17
Senior Member
Join Date: Aug 2015
Location: AZ/WA
Posts: 2,403
Bikes: Yes
Mentioned: 36 Post(s)
Tagged: 0 Thread(s)
Quoted: 460 Post(s)
Liked 54 Times
in
30 Posts
I might try something wood like a broom handle and move up to something like a shovel or other yard handle. Grease it, put a rag on it or something so as not to rub or scratch the paint. If you are in cold weather I would put a hair dryer on it, seems like that might make it a little more malleable. Just my .02, don't blame me if you break it though. 

If you do the screwdriver thing, wrap the tip with something rubber or at least cloth.
If you feel it is being forced too much and not happening, then take it elsewhere but these are made to expand and close to a point.
If you do the screwdriver thing, wrap the tip with something rubber or at least cloth.
If you feel it is being forced too much and not happening, then take it elsewhere but these are made to expand and close to a point.
01-12-16, 08:19 PM
#18
Senior Member

Join Date: Sep 2011
Location: Baltimore MD
Posts: 3,331
Bikes: '72 Motobecane Grand Record, '72 Gitane tandem, '72 Raleigh Super Course, '73 Raleigh Gran Sport, '73 Colnago Super, '76 Fiorelli Coppi, '78 Raleigh SBDU Team Pro, '78 Trek 930, '81 Holdsworth Special 650B, '86 Masi GC, ’94 Bridgestone RB-T
Mentioned: 67 Post(s)
Tagged: 0 Thread(s)
Quoted: 786 Post(s)
Liked 517 Times
in
280 Posts
I like the oak idea, but I would start with a one inch dowel (25.4 mm), split exactly in half. Then drive a wedge of some sort into the slot in the wood. A large flat head screwdriver might be a good wedge. Using a screwdriver in the seat tube slot would mar the paint, if it's not already marred. Please report back once you proceed with something.
__________________
The man who dies with the most toys�is dead. - Rootboy
The man who dies with the most toys�is dead. - Rootboy
01-12-16, 08:21 PM
#19
weapons-grade bolognium

Join Date: Dec 2008
Location: Across the street from Chicago
Posts: 6,344
Bikes: Battaglin Cromor, Ciocc Designer 84, Schwinn Superior 1981
Mentioned: 44 Post(s)
Tagged: 0 Thread(s)
Quoted: 985 Post(s)
Liked 2,376 Times
in
891 Posts
Maybe a ring sizing mandrel would do the trick? Can be had for less than $10.
01-12-16, 08:22 PM
#20
Senior Member
For best results, wedge it open using one of the methods described, and ream it out.
The reamer is just to fix the slight distortion that will be there if the seat tube has been squished in and opened up again. You are just chasing it, only a tiny amount of metal should be removed. If you don't do this, you won't get a nice round tight fit, and the seatpost won't clamp properly, and it will get scratched up too.
So yeah, take it to the LBS or buy the tool. Unfortunately, this is a PITA repair, one I always dreaded.
01-12-16, 08:23 PM
#21
Senior Member
Join Date: Aug 2007
Location: Evanston, IL
Posts: 5,084
Bikes: many
Mentioned: 63 Post(s)
Tagged: 0 Thread(s)
Quoted: 1441 Post(s)
Liked 1,386 Times
in
758 Posts
From John Hurley, over on CR:
https://www.flickr.com/photos/7665899@N05/880185603/
I was describing John's scheme from memory, because I couldn't find it at first. He said he also posted it to the old CR in 2007, which I've yet to find in the search.bikelist.org archives. If you are a current member of Classic Rendezvous, his message from last February us in Google Groups:
https://groups.google.com/forum/m/#!searchin/classic-rendezvous-lightweight-vintage-bicycles/Seat$20tube$20clamp$20area/classic-rendezvous-lightweight-vintage-bicycles/_Ra4rXtbOP8
His message is #6 in the thread.
01-12-16, 08:25 PM
#22
Decrepit Member
I guess I need to clarify my suggestion to use a variable reamer.
If the seat tube is supposed to accommodate a 27.2mm seatpost, it is likely to have 0.6mm walls (28.6mm - 2 x 0.6 = 27.4mm). The 0.2mm difference between the I.D. of the seat tube and the O.D. of the seatpost is to allow for differences in manufacturing tolerances and distortion of the seat tube from torch heat while brazing the seat cluster. Seat tube reaming is usually done after a frame is brazed in order to mitigate the distortion and ensure the inside of the seat tube is round and provides clearance for the seatpost.
Since some hamfisted clown tightened the binder bolt to snugly fit a 26.8mm seatpost, a variable reamer beginning with reaming the seat tube to 26.8mm and gradually expanding to 27.2mm in the non-cutting counter-clockwise direction would restore the seat tube to its original I.D. and roundness without removing much - if any - material.
It should be possible, since you're restoring the I.D. to its original size, to do this twisting the reamer counter-clockwise (IOW, not rotating the reamer blades in the cutting direction, but in the blunt direction to essentially cold set the seat tube back to its original diameter).
01-12-16, 10:56 PM
#23
Senior Member
Join Date: Dec 2011
Posts: 82
Mentioned: 0 Post(s)
Tagged: 0 Thread(s)
Quoted: 0 Post(s)
Likes: 0
Liked 1 Time
in
1 Post
I had that issue on a frame once. Went to the co-op we have and used a seatpost sizing rod and a rubber mallet. Just put a piece of tape at the point you need to stop and grease up the rod and hammer it to size.
[h=1][/h]
[h=1][/h]
01-12-16, 11:02 PM
#24
Ride, Wrench, Swap, Race

Join Date: Jan 2010
Location: Northern California
Posts: 9,181
Bikes: Cheltenham-Pedersen racer, Boulder F/S Paris-Roubaix, Varsity racer, '52 Christophe, '62 Continental, '92 Merckx, '75 Limongi, '76 Presto, '72 Gitane SC, '71 Schwinn SS, etc.
Mentioned: 132 Post(s)
Tagged: 0 Thread(s)
Quoted: 1562 Post(s)
Liked 1,285 Times
in
856 Posts
Definitely it is a matter of cold-setting the clamp to a wider opening.
I normally do this by pushing in a near proper-sized, thickwalled seatpost, using one that has enough of a taper or radius at the end if needed to center up and slide in without damaging paint.
I put the post in about 1" deep only, then simply tilt the post rearward just forcefully enough to spread the ears back to where they need to be.
The bolt gets removed first of course, and within a few tries the post is sliding through normally.
If the clamp has any tendency to bind or dig into the post after the bolt has subsequently been tightened and then removed, only then will I use a half-round file to remove the burred edges inside of the lug, to either side of the slot.
Some of the chromed steel seatposts slide into a damaged clamp opening most easily, and it isn't really necessary for the post used for restoring the opening to be an exact size match.
A longer post makes the job easier and more controllable!
01-13-16, 08:37 PM
#25
Junior Member
Thread Starter
Join Date: Nov 2015
Location: WA
Posts: 14
Mentioned: 0 Post(s)
Tagged: 0 Thread(s)
Quoted: 0 Post(s)
Likes: 0
Liked 0 Times
in
0 Posts
You guys have armed me with some excellent ideas. dazevedo's and dddd's ideas appeal to me the most in terms of practicality and controllability. It might take a combination of both. I'm also intrigued by Scooper's reverse reamer idea, but I'm not inclined to invest in a reamer, and I wouldn't trust a shop to execute that move (Perhaps a co-op will have one. Havn't tried the co-op thing).
Salamandrine's point of needing a final reamer touch-up to restore factory insertion smoothness is also well taken.
The seller has given me a window of a few weeks to explore the repair and decide. I'm going to sit on this a bit and see if I get super-lucky and find another early 90's Merckx that isn't damaged (my dream bike is actually a Century, but they seem more rare and I know I'm late to the party). If this one were otherwise pristine it would be an easy decision, but it has a number of paint touch-ups that are kind of sloppy (at least it's rust and dent-free). I wouldn't try to return it after attempting the repair, regardless of outcome ("you tweak it, you keep it").
If I decide to keep it and attempt the repair, I'll first check with the seller to see if he'll do a partial refund. It only seems fair, as this damage was not disclosed in the ebay ad (and the seller said he owned the frame for seven years).
Thanks again for all the help - what a great forum!

