


1984 Diamondback Rebuild (Pic Heavy).
 09-18-17, 04:10 PM
#26
Senior Member
Thread Starter
Join Date: Sep 2015
Location: Left Coast, Canada
Posts: 5,126
Mentioned: 24 Post(s)
Tagged: 0 Thread(s)
Quoted: 2236 Post(s)
Liked 1,314 Times
in
707 Posts
After a little hiatus...
I bought a new bike and did some touring etc... so the rebuild took a back seat for a bit. One reason was that I felt thwarted by a frozen fixed cup on the BB. This meant I had to reuse the axle which was scarred and I put it on hold hoping I would come across one in my travels.
Today was a rainy day and I was off work so I decided to give removal one more try. It's been sitting for a while with WD40 sprayed into the threads so I ran a bolt through the stuck cup and using some large washers secured a pipe wrench to it and wailed away with the hammer. Finally.. success! With that out I inserted a Shimano UN55 sealed cartridge BB and set to work on my crankset.
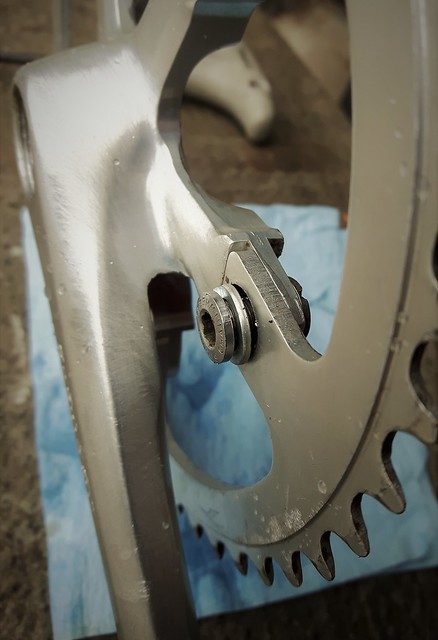
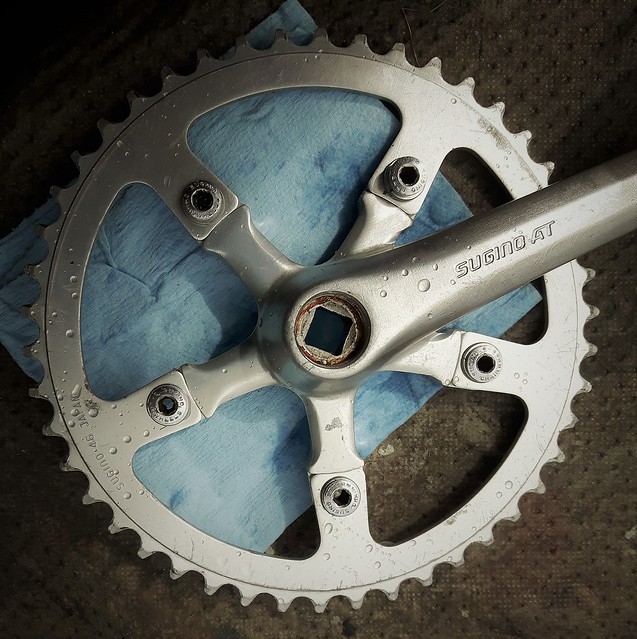
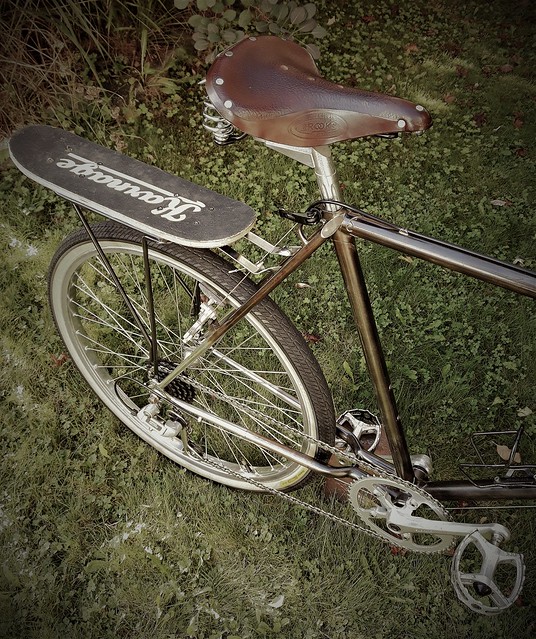
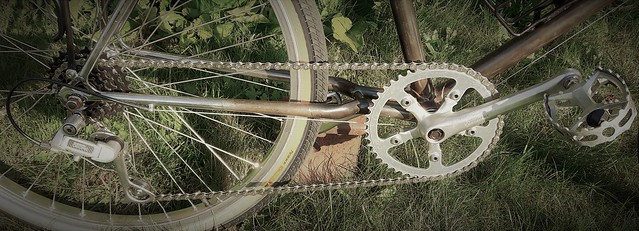
The problem there was that, in making it a 1X I had to remove the middle and small chain rings. This left a gap for the bolts holding the large chain ring as the middle chain ring was also secured by it and in its absence there was play. This I resolved by adding lock washers to the bolt seen here:
Now that those drive train issues are resolved the way is clear to do the rest of the build for which I have all the parts.
I bought a new bike and did some touring etc... so the rebuild took a back seat for a bit. One reason was that I felt thwarted by a frozen fixed cup on the BB. This meant I had to reuse the axle which was scarred and I put it on hold hoping I would come across one in my travels.
Today was a rainy day and I was off work so I decided to give removal one more try. It's been sitting for a while with WD40 sprayed into the threads so I ran a bolt through the stuck cup and using some large washers secured a pipe wrench to it and wailed away with the hammer. Finally.. success! With that out I inserted a Shimano UN55 sealed cartridge BB and set to work on my crankset.
The problem there was that, in making it a 1X I had to remove the middle and small chain rings. This left a gap for the bolts holding the large chain ring as the middle chain ring was also secured by it and in its absence there was play. This I resolved by adding lock washers to the bolt seen here:
Now that those drive train issues are resolved the way is clear to do the rest of the build for which I have all the parts.
Last edited by Happy Feet; 09-18-17 at 04:14 PM.
 09-18-17, 04:38 PM
#27

Senior Member

Join Date: Sep 2015
Location: Madison, WI
Posts: 2,701
Mentioned: 52 Post(s)
Tagged: 0 Thread(s)
Quoted: 1136 Post(s)
Liked 650 Times
in
336 Posts
Nice job.
For future reference you can go to an LBS and get chainring bolt spacers for applications like this. They're basically just washers of the right size so if you found normal washers that work you should be good to go.
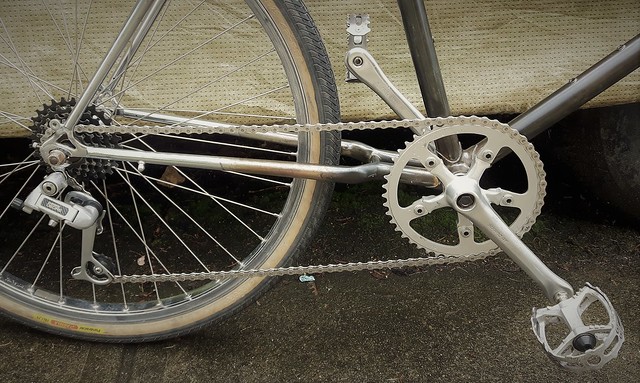
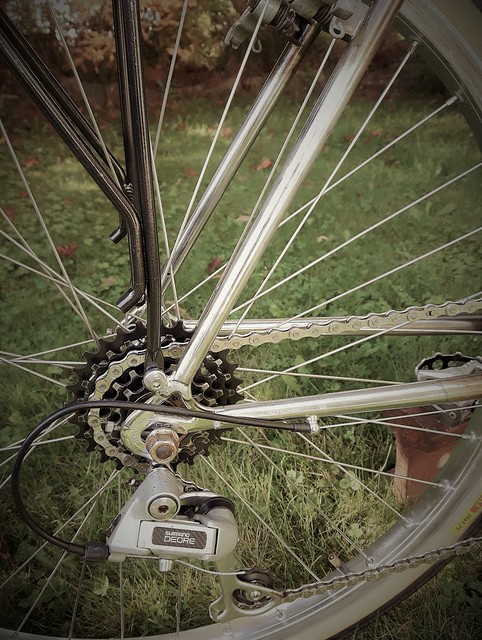
I would look into a chainkeeper (Paul Components?) as a 1x setup with a vintage derailleur doesn't really hold the chain very tight and you end up dropping your chain a lot in the lowest and highest gears. Either that or a derailleur with a clutch and a new narrow-wide chainring, which are standard equipment on new 1x bikes. The chainkeeper will be the least expensive route.
For future reference you can go to an LBS and get chainring bolt spacers for applications like this. They're basically just washers of the right size so if you found normal washers that work you should be good to go.
I would look into a chainkeeper (Paul Components?) as a 1x setup with a vintage derailleur doesn't really hold the chain very tight and you end up dropping your chain a lot in the lowest and highest gears. Either that or a derailleur with a clutch and a new narrow-wide chainring, which are standard equipment on new 1x bikes. The chainkeeper will be the least expensive route.
09-18-17, 08:14 PM
#28
Senior Member
Thread Starter
Join Date: Sep 2015
Location: Left Coast, Canada
Posts: 5,126
Mentioned: 24 Post(s)
Tagged: 0 Thread(s)
Quoted: 2236 Post(s)
Liked 1,314 Times
in
707 Posts
Thanks for the tips. I'm going to google the derailer info 
The one bike store around here that I source older parts from is closing and the other ones would probably have no idea what spacer washers were or why someone would need them (0 vintage vibe) but I will keep it in mind. As far as the wheel goes I'm just going to finish the bike up as it is for now and, if I keep it, will probably rebuild a wheel with a SA 3speed hub I have. It's a 40h and I'm keeping my eye open for a matching rim. That's why I'm not worrying too much about the bent rear axle.
Hah. back already! Thanks for that. I just read about narrow wide rings and clutch derailers. Feel like I learned something new tonight.
Last edited by Happy Feet; 09-18-17 at 08:24 PM.
09-18-17, 09:33 PM
#29
Senior Member
Join Date: Jan 2010
Location: mass
Posts: 242
Bikes: '74 Fuji The Ace, '07 S-Works Epic, 88? Hardrock.... A whole bunch more
Mentioned: 4 Post(s)
Tagged: 0 Thread(s)
Quoted: 40 Post(s)
Likes: 0
Liked 0 Times
in
0 Posts
They make single ring chainring bolts where the nut side is shorter. I've used them on two different builds. fairly cheap too
10-08-17, 06:28 PM
#30
Senior Member
Thread Starter
Join Date: Sep 2015
Location: Left Coast, Canada
Posts: 5,126
Mentioned: 24 Post(s)
Tagged: 0 Thread(s)
Quoted: 2236 Post(s)
Liked 1,314 Times
in
707 Posts
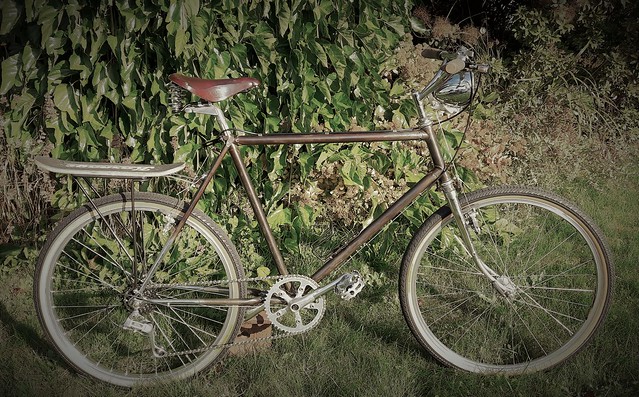
Today I finished off the project (for now) though I may still add some vintage wire bottle cages from VO and new brake pads.
Total cost for the project was a little high but that's because I wanted to add a few expensive parts like the seat, grips and tires for a certain aesthetic. Without those I could have knocked $240 off the rebuild price easily.
Tires: $90 (2 Panaracer Paselas 26x1.75 + tubes)
Chain: $10
Fluids: $20 (Blue acid and shop fluids)
Seat: $180 (Brooks B67)
Brakes: $20 (Tektro)
Grips: $40 (Specialized)
Cables: $5
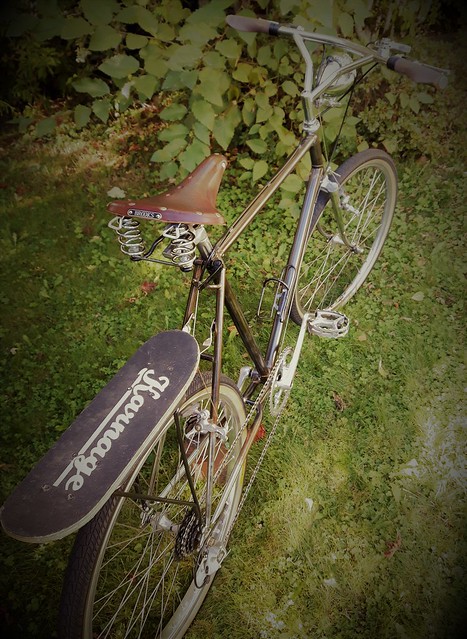
Skateboard rack and light: $10
Other stuff I had lying around
Total: $375
I picked up a few parts from the flea market for $10 and got to work on a sunny Thanksgiving afternoon.
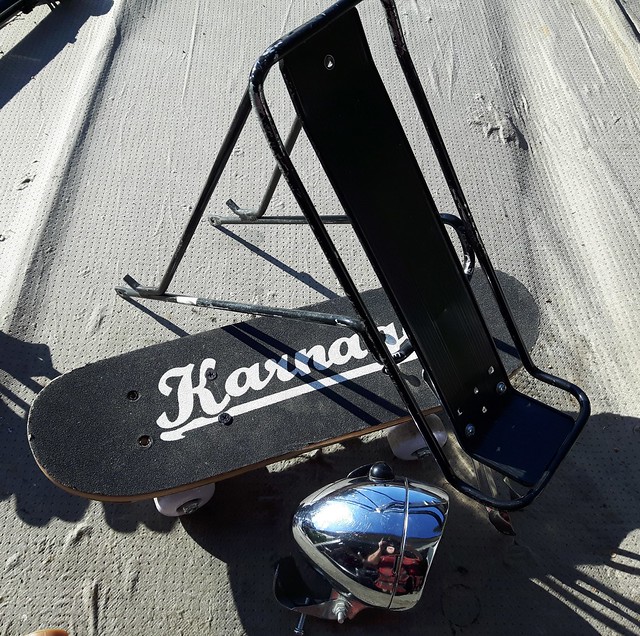
After some mods I bolted them on and took some pics.
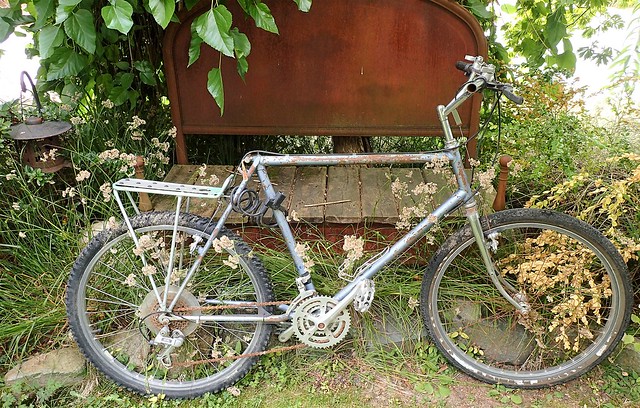
Before:
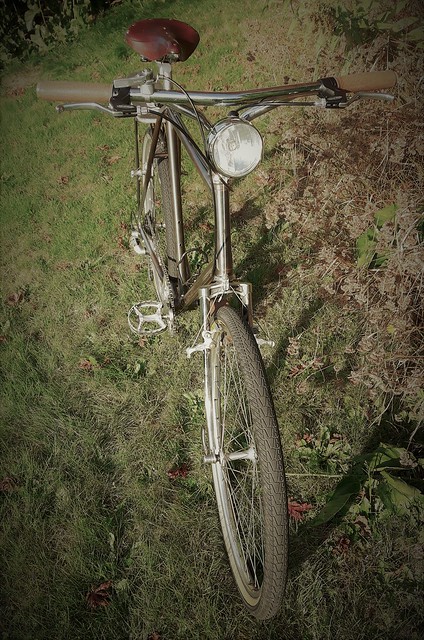
After:

Total cost for the project was a little high but that's because I wanted to add a few expensive parts like the seat, grips and tires for a certain aesthetic. Without those I could have knocked $240 off the rebuild price easily.
Tires: $90 (2 Panaracer Paselas 26x1.75 + tubes)
Chain: $10
Fluids: $20 (Blue acid and shop fluids)
Seat: $180 (Brooks B67)
Brakes: $20 (Tektro)
Grips: $40 (Specialized)
Cables: $5
Skateboard rack and light: $10
Other stuff I had lying around
Total: $375
I picked up a few parts from the flea market for $10 and got to work on a sunny Thanksgiving afternoon.
After some mods I bolted them on and took some pics.
Before:
After:
10-09-17, 03:45 AM
#31
Senior Member

Join Date: Dec 2016
Location: Bush, Louisiana
Posts: 568
Bikes: 1984 Centurion Elite GT 15, 1985 Centurion Ironman Dave Scott, 1983 Diamond Back Ridge Runner, 1985 Mongoose ATB, 1987 Ross Centaur, 1986 Raleigh Marathon
Mentioned: 26 Post(s)
Tagged: 0 Thread(s)
Quoted: 190 Post(s)
Liked 76 Times
in
39 Posts
Wow man, that turned out beautifully!!! Very nice work! I've been keeping an eye on your build as I'm interested in building up something very similar, but with a drop bar conversion. Luckily I ran across the perfect candidate just a couple of weeks ago too!
'83/'84 Diamond Back Ridge Runner

'83/'84 Diamond Back Ridge Runner
10-09-17, 07:39 AM
#32
Extraordinary Magnitude

Join Date: Aug 2009
Location: Waukesha WI
Posts: 13,646
Bikes: 1978 Trek TX700; 1978/79 Trek 736; 1984 Specialized Stumpjumper Sport; 1984 Schwinn Voyageur SP; 1985 Trek 620; 1985 Trek 720; 1986 Trek 400 Elance; 1987 Schwinn High Sierra; 1990 Miyata 1000LT
Mentioned: 84 Post(s)
Tagged: 0 Thread(s)
Quoted: 2608 Post(s)
Liked 1,699 Times
in
935 Posts
Wow man, that turned out beautifully!!! Very nice work! I've been keeping an eye on your build as I'm interested in building up something very similar, but with a drop bar conversion. Luckily I ran across the perfect candidate just a couple of weeks ago too!
'83/'84 Diamond Back Ridge Runner
'83/'84 Diamond Back Ridge Runner
__________________
*Recipient of the 2006 Time Magazine "Person Of The Year" Award*
Commence to jigglin� huh?!?!
"But hey, always love to hear from opinionated amateurs." -says some guy to Mr. Marshall.
Commence to jigglin� huh?!?!
"But hey, always love to hear from opinionated amateurs." -says some guy to Mr. Marshall.
10-09-17, 08:28 AM
#33
Senior Member
Join Date: Jan 2017
Location: Berea, KY
Posts: 1,135
Mentioned: 19 Post(s)
Tagged: 0 Thread(s)
Quoted: 360 Post(s)
Liked 323 Times
in
186 Posts
It looks great. I am still a fan of that bluing. I plan to do that to a welded frame when I finally decide it is time to strip the paint off of it.
__________________
Andy
Andy
10-09-17, 10:20 AM
#34
Senior Member
Thread Starter
Join Date: Sep 2015
Location: Left Coast, Canada
Posts: 5,126
Mentioned: 24 Post(s)
Tagged: 0 Thread(s)
Quoted: 2236 Post(s)
Liked 1,314 Times
in
707 Posts
Thanks Beicster
Austin, that RR looks in good shape for a conversion. I was considering that too but the bullhorns won out. If you go that way there are a couple of guys on the board who are looking for them (those high rise bullhorns). For an old mtb the lugs on these DB's look so nice that they make spending time on the frame worth it IMO.
I'm going to take off the add on's and take another pic for a more stripped down look.
 10-10-17, 04:19 PM
#36
Senior Member
It was the bull moose bars that made my early 80's mtb have that distinctive ride characteristic.
10-11-17, 08:51 AM
#37
Senior Member
Join Date: Oct 2006
Location: Dallas / Ft Worth
Posts: 1,162
Mentioned: 19 Post(s)
Tagged: 0 Thread(s)
Quoted: 213 Post(s)
Liked 1,508 Times
in
409 Posts
I really like how your Diamondback turned out Happy Feet.
Nice work.
What a contrast in the b4 and after!
Thanks for documenting your project.
Nice work.
What a contrast in the b4 and after!
Thanks for documenting your project.
10-11-17, 01:19 PM
#38
Senior Member
Join Date: Oct 2015
Location: PDX
Posts: 13,038
Bikes: Merz x 5 + Specialized Merz Allez x 2, Strawberry/Newlands/DiNucci/Ti x3, Gordon, Fuso/Moulton x2, Bornstein, Paisley,1958-74 Paramounts x3, 3rensho, 74 Moto TC, 73-78 Raleigh Pro's x5, Marinoni x2, 1960 Cinelli SC, 1980 Bianchi SC, PX-10 X 2
Mentioned: 267 Post(s)
Tagged: 0 Thread(s)
Quoted: 4511 Post(s)
Liked 6,378 Times
in
3,667 Posts
Add me to the copycat list, going to do it on an 83 Stumpy that the bad paint looks kind of like this only really bad.
Have no doubt it will be stunning after the blue.
Have no doubt it will be stunning after the blue.
12-22-17, 06:48 AM
#39
Senior Member
Join Date: Jan 2017
Location: Berea, KY
Posts: 1,135
Mentioned: 19 Post(s)
Tagged: 0 Thread(s)
Quoted: 360 Post(s)
Liked 323 Times
in
186 Posts
I started my bluing process yesterday. I stripped the paint off the fork of my 1994 Diamondback Apex and rubbed on the bluing. I love the way it looks and it is way easier than repainting. I'll post pics when it is done. Thanks for posting about this.
__________________
Andy
Andy

