


Peugeot Path Racer (PPR) - My French Racer Build
 11-29-18, 07:22 AM
#26
On Holiday

Join Date: Apr 2017
Posts: 1,014
Bikes: A bunch of old steel bikes
Mentioned: 14 Post(s)
Tagged: 0 Thread(s)
Quoted: 394 Post(s)
Likes: 0
Liked 14 Times
in
12 Posts
Good luck on your build.
 11-29-18, 02:46 PM
#27

Full Member
Thread Starter
Hi Hoopdriver,
Thank you for the advice on the S2 back-shifting. I will definitely keep this in mind. The build is turning out nice, I think. More pics to come. =)
aceves
Thank you for the advice on the S2 back-shifting. I will definitely keep this in mind. The build is turning out nice, I think. More pics to come. =)
aceves
11-30-18, 01:43 PM
#28
Full Member
Thread Starter
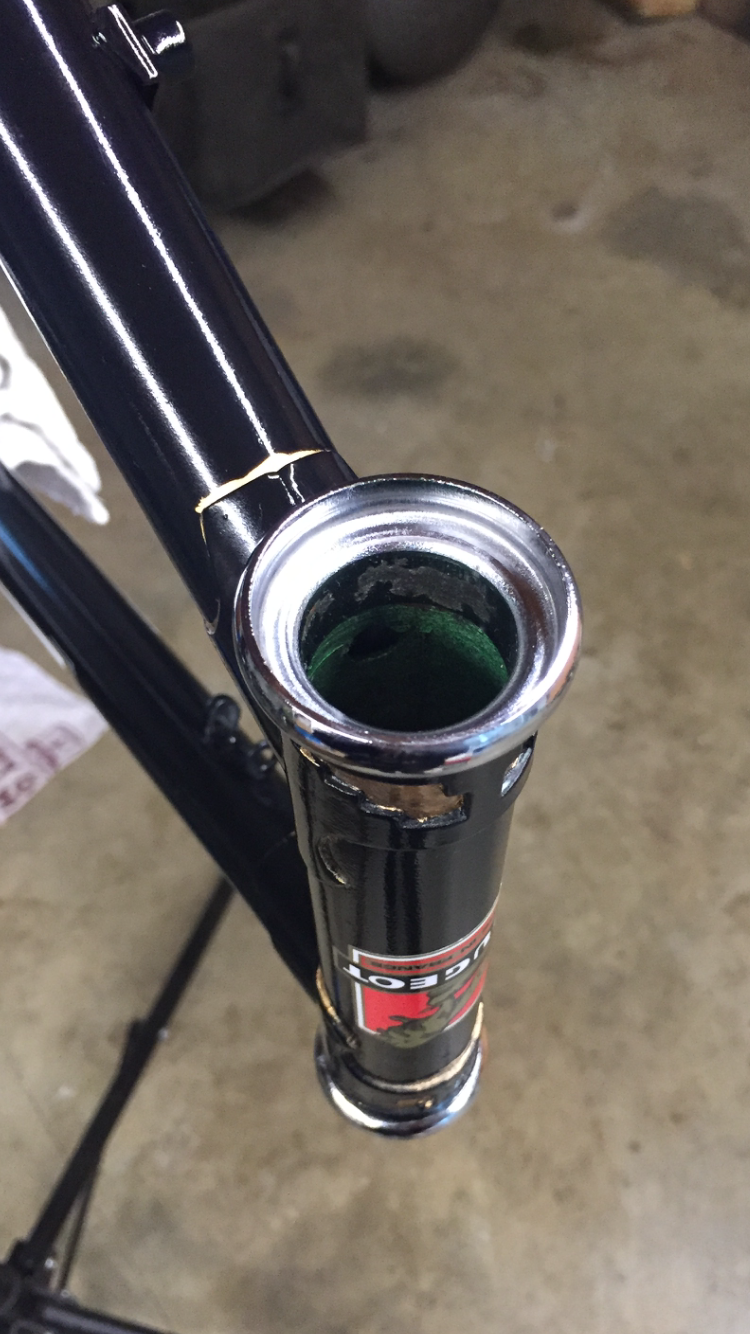
Moving along... New ball bearings and fresh grease in the headset. I did the same with the bottom bracket.
aceves

aceves

 11-30-18, 03:15 PM
#30
Full Member
Thread Starter
12-02-18, 12:36 PM
#31
Member

Nice project!! Cant wait to see the final result! Thx for sharing 
12-03-18, 03:09 PM
#32
Full Member
Thread Starter
12-03-18, 03:14 PM
#33
Full Member
Thread Starter
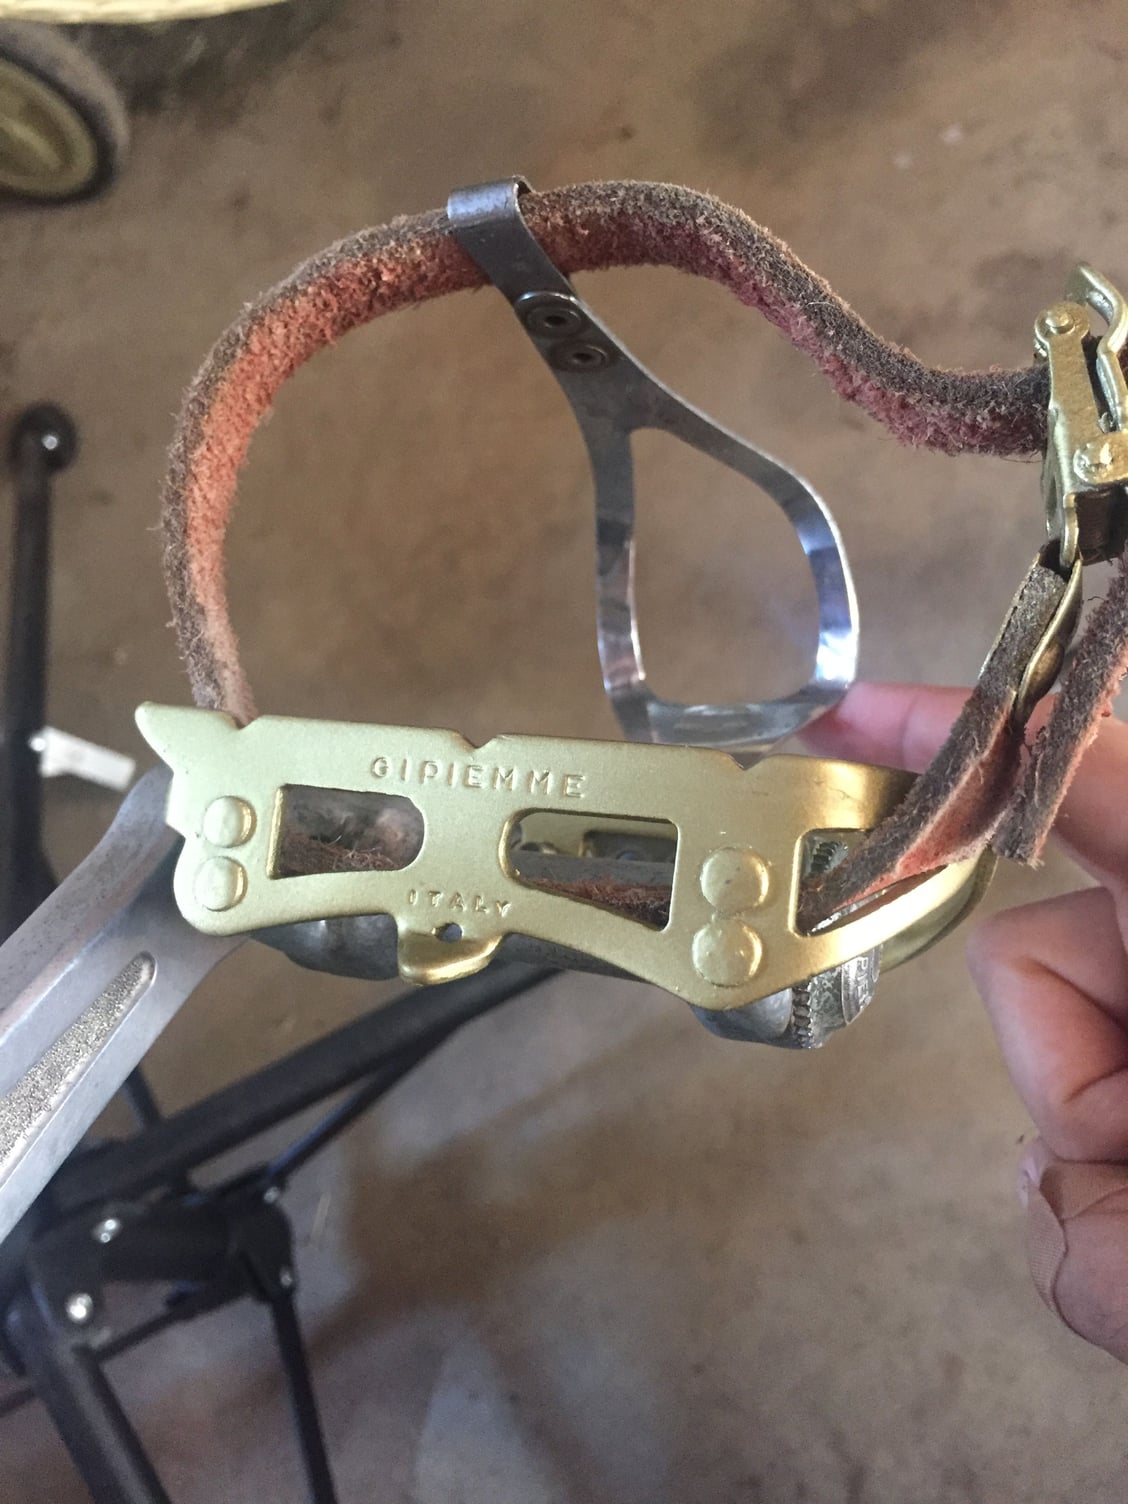
Here is an update on my Gipiemme pedals with Christophe toe clips. They cleaned up nice, and they kept a nice weathered look to them thanks to the leather straps. Should work out great for this rider build.
aceves

aceves
Last edited by aceves; 12-03-18 at 03:18 PM.
12-04-18, 12:49 PM
#34
Full Member
Thread Starter
For brake levers, I went with Tektro FL750 levers. Very clean, simple design, and they go well with a vintage build. I found these used, so cost was minimal. 
aceves

aceves
12-04-18, 01:34 PM
#35
Full Member
Thread Starter
Although I've been posting all the highlights of my build, I also want to share my lows in hopes of helping someone else not make the same mistakes.
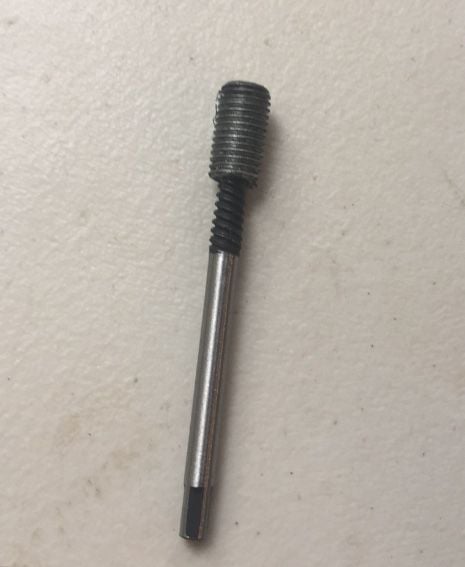
When I was mounting the Nervar crank to the square-taper Gipiemme spindle, I over-tightened the spindle bolt and... you guessed it, it broke!! Noooo! I was so upset at myself for making this rookie mistake. What do I do now??
So I took a day off to consider my options. I started researching the best way to remove a broken bolt without stripping the spindle threads. Then I came upon the solution: use a screw/bolt extractor!! I went to the local hardware store with the broken bolt head and purchased a bolt extractor in a smaller diameter than the bolt. The way to do this is to drill a hole in the broken bolt inside the spindle, tap the bolt extractor in place, and SLOWLY turn the bolt extractor counter-clockwise with a wrench to un-screw the broken bolt. As I had just threaded the bolt into the spindle the day before, there were no issues with the bolt being too stuck. I slowly started turning and out came the broken bolt. The spindle threads remained intact. SUCCESS!!!!
Once the broken bit came out, I immediately mounted my crank once again with another bolt I had from another project, and I was careful not to over-tighten this time. Very happy to have the crankset mounted on PPR!!
Just wanted to let you all know that there is hope to remove a broken bolt if you happen to over-tighten it with your super-human strength and snap it. I definitely learned from this experience.
aceves

When I was mounting the Nervar crank to the square-taper Gipiemme spindle, I over-tightened the spindle bolt and... you guessed it, it broke!!
Noooo! I was so upset at myself for making this rookie mistake. What do I do now??So I took a day off to consider my options. I started researching the best way to remove a broken bolt without stripping the spindle threads. Then I came upon the solution: use a screw/bolt extractor!! I went to the local hardware store with the broken bolt head and purchased a bolt extractor in a smaller diameter than the bolt. The way to do this is to drill a hole in the broken bolt inside the spindle, tap the bolt extractor in place, and SLOWLY turn the bolt extractor counter-clockwise with a wrench to un-screw the broken bolt. As I had just threaded the bolt into the spindle the day before, there were no issues with the bolt being too stuck. I slowly started turning and out came the broken bolt. The spindle threads remained intact. SUCCESS!!!!
Once the broken bit came out, I immediately mounted my crank once again with another bolt I had from another project, and I was careful not to over-tighten this time. Very happy to have the crankset mounted on PPR!!
Just wanted to let you all know that there is hope to remove a broken bolt if you happen to over-tighten it with your super-human strength and snap it. I definitely learned from this experience.
aceves
Last edited by aceves; 12-04-18 at 01:39 PM.
12-07-18, 04:39 PM
#36
Full Member
Thread Starter
A little update: I went with a gold KMC chain. Should be done with the build in the next few days. Stay tuned.
aceves

aceves
Last edited by aceves; 12-07-18 at 04:43 PM.
12-07-18, 04:59 PM
#37
Shifting is fun!

Join Date: Aug 2009
Location: South Holland, NL
Posts: 11,006
Bikes: Yes, please.
Mentioned: 280 Post(s)
Tagged: 0 Thread(s)
Quoted: 2198 Post(s)
Liked 4,600 Times
in
1,764 Posts
Coming along nicely!
12-10-18, 02:48 AM
#38
Senior Member
Join Date: Jun 2016
Location: Saigon - South Vietnam
Posts: 139
Bikes: Saronni Colnago 1982; Battaglin 1982, Centurion Lemans RS 1978, 3Rensho Katana 1978, C. Borghi Olympia 1980, 3Rensho Athlete 1980's, Holdsworth 1980's and more...
Mentioned: 2 Post(s)
Tagged: 0 Thread(s)
Quoted: 33 Post(s)
Liked 9 Times
in
5 Posts
Can't wait to see the final result!
12-10-18, 02:48 PM
#39
Full Member
Thread Starter
Hi non-fixie and Nguyen Dang!! Thanks for your comments! Here come the photos!!
aceves
aceves
12-10-18, 03:02 PM
#40
Full Member
Thread Starter
Hi BF Members!
So Project PPR is done!!! Here is the glamour shot! VERY excited how the bike turned out! And she rides super smooth! I've taking it out a couple of times and I'm still making adjustments to the handlebars, brake levers, saddle position, and seat post height; but other than that, it is DONE!
I like the look - vintage yet modern. For a budget build, it actually turned out great. Lots of re-used, upcycled parts, and of course a few brand new ones.
This will be a rider, not a wall-hanger. And the ride position is actually comfortable, a little aggressive, but definitely comfortable. I will post more pics below, but this will be the stand-alone beauty shot.
aceves
Last edited by aceves; 12-10-18 at 03:06 PM.
12-10-18, 04:08 PM
#41
Full Member
Thread Starter
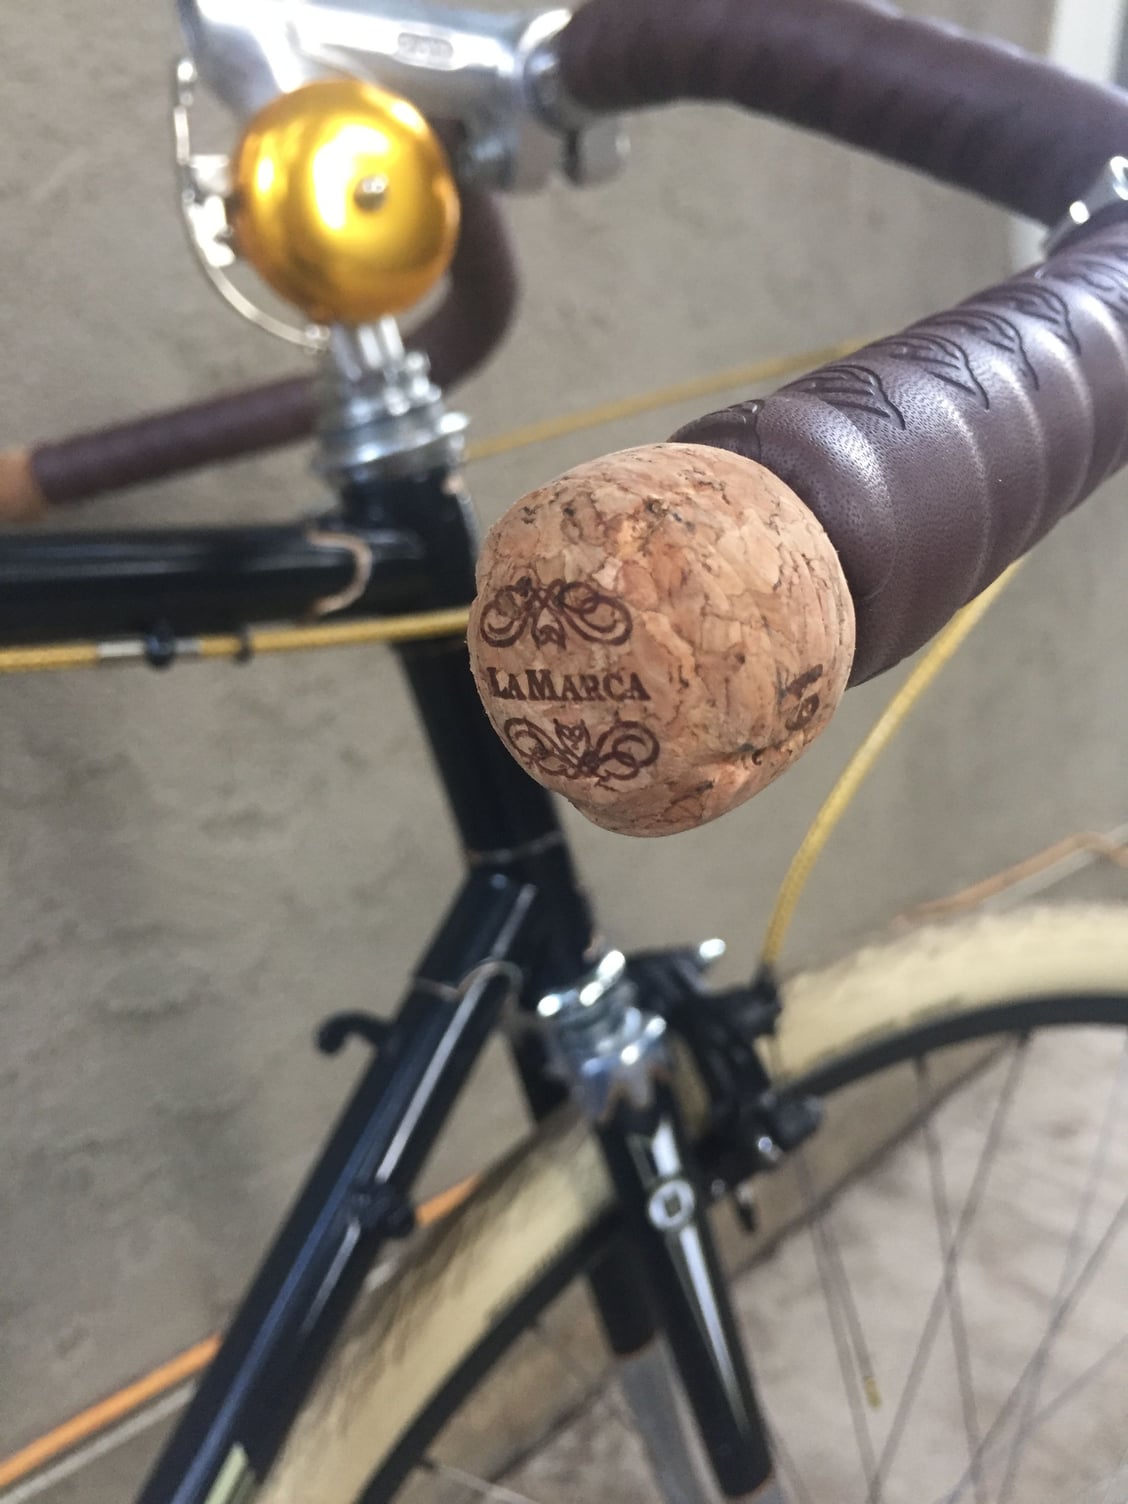
Here is the Pivo quill stem with the up-side down North Roads and gold bell. You can also see the gold lug lining - not perfect, but it complements the black frame just right. I went with gold-braided cable housings. The bar tape is Cinelli faux leather which I had on hand - could not justify going full leather when I had this spare tape ready to go. And I added champagne corks as bar plugs - French theme after all.
aceves


aceves
Last edited by aceves; 12-10-18 at 04:14 PM.
12-10-18, 04:31 PM
#42
Full Member
Thread Starter
Here is the Nervar Star single crank with KMC gold chain, along with the gold Gipiemme pedals with Christophe toe clips and real vintage leather straps.
aceves


aceves
Last edited by aceves; 12-10-18 at 04:37 PM.
12-10-18, 04:32 PM
#43
Full Member
Thread Starter
The Sturmey Archer S2 rear hub - super smooth. Gold lug lining at dropouts.
aceves

aceves
Last edited by aceves; 12-10-18 at 04:40 PM.
12-10-18, 04:34 PM
#44
Full Member
Thread Starter
The matte black Universal brakes.
aceves

aceves
Last edited by aceves; 12-10-18 at 04:39 PM.
12-10-18, 04:45 PM
#45
Junior Member
Join Date: Jul 2017
Location: Los Angeles
Posts: 91
Bikes: '75 UO-8 Metallic Blue, '80 PY10S Pearl White, '83 PSV-10 Pearl White, '83 PRO-10 Shell-Michelin Team Pearl White, '84 PY10LS Metallic Black, '85 PX10SH Pro-600 Burgundy, '88 PY10P Metallic Black
Mentioned: 1 Post(s)
Tagged: 0 Thread(s)
Quoted: 24 Post(s)
Liked 15 Times
in
8 Posts
Very nice!
12-10-18, 04:48 PM
#46
Shifting is fun!
Join Date: Aug 2009
Location: South Holland, NL
Posts: 11,006
Bikes: Yes, please.
Mentioned: 280 Post(s)
Tagged: 0 Thread(s)
Quoted: 2198 Post(s)
Liked 4,600 Times
in
1,764 Posts
That came out well! Nice to see what you can do with an old frame and a little imagination.
12-10-18, 04:49 PM
#47
Full Member
Thread Starter
I went with a Pure Cycles leather saddle. I know it does not match the bar tape, but it looks good and feels even better.
aceves

aceves
Last edited by aceves; 12-10-18 at 05:00 PM.
12-10-18, 04:51 PM
#49
Full Member
Thread Starter
12-10-18, 04:53 PM
#50
Full Member
Thread Starter
Peugeot head badge with gold details. I ordered a full set of new Peugeot U-08 decals, put them on after the paint, and then clear-coated over them.
aceves

aceves
Last edited by aceves; 12-10-18 at 05:37 PM.