


8-speed wide ratio rear derailleur
 04-10-19, 12:08 PM
#26

Bike Butcher of Portland

Join Date: Jul 2014
Location: Portland, OR
Posts: 11,635
Bikes: It's complicated.
Mentioned: 1299 Post(s)
Tagged: 0 Thread(s)
Quoted: 4679 Post(s)
Liked 5,797 Times
in
2,282 Posts
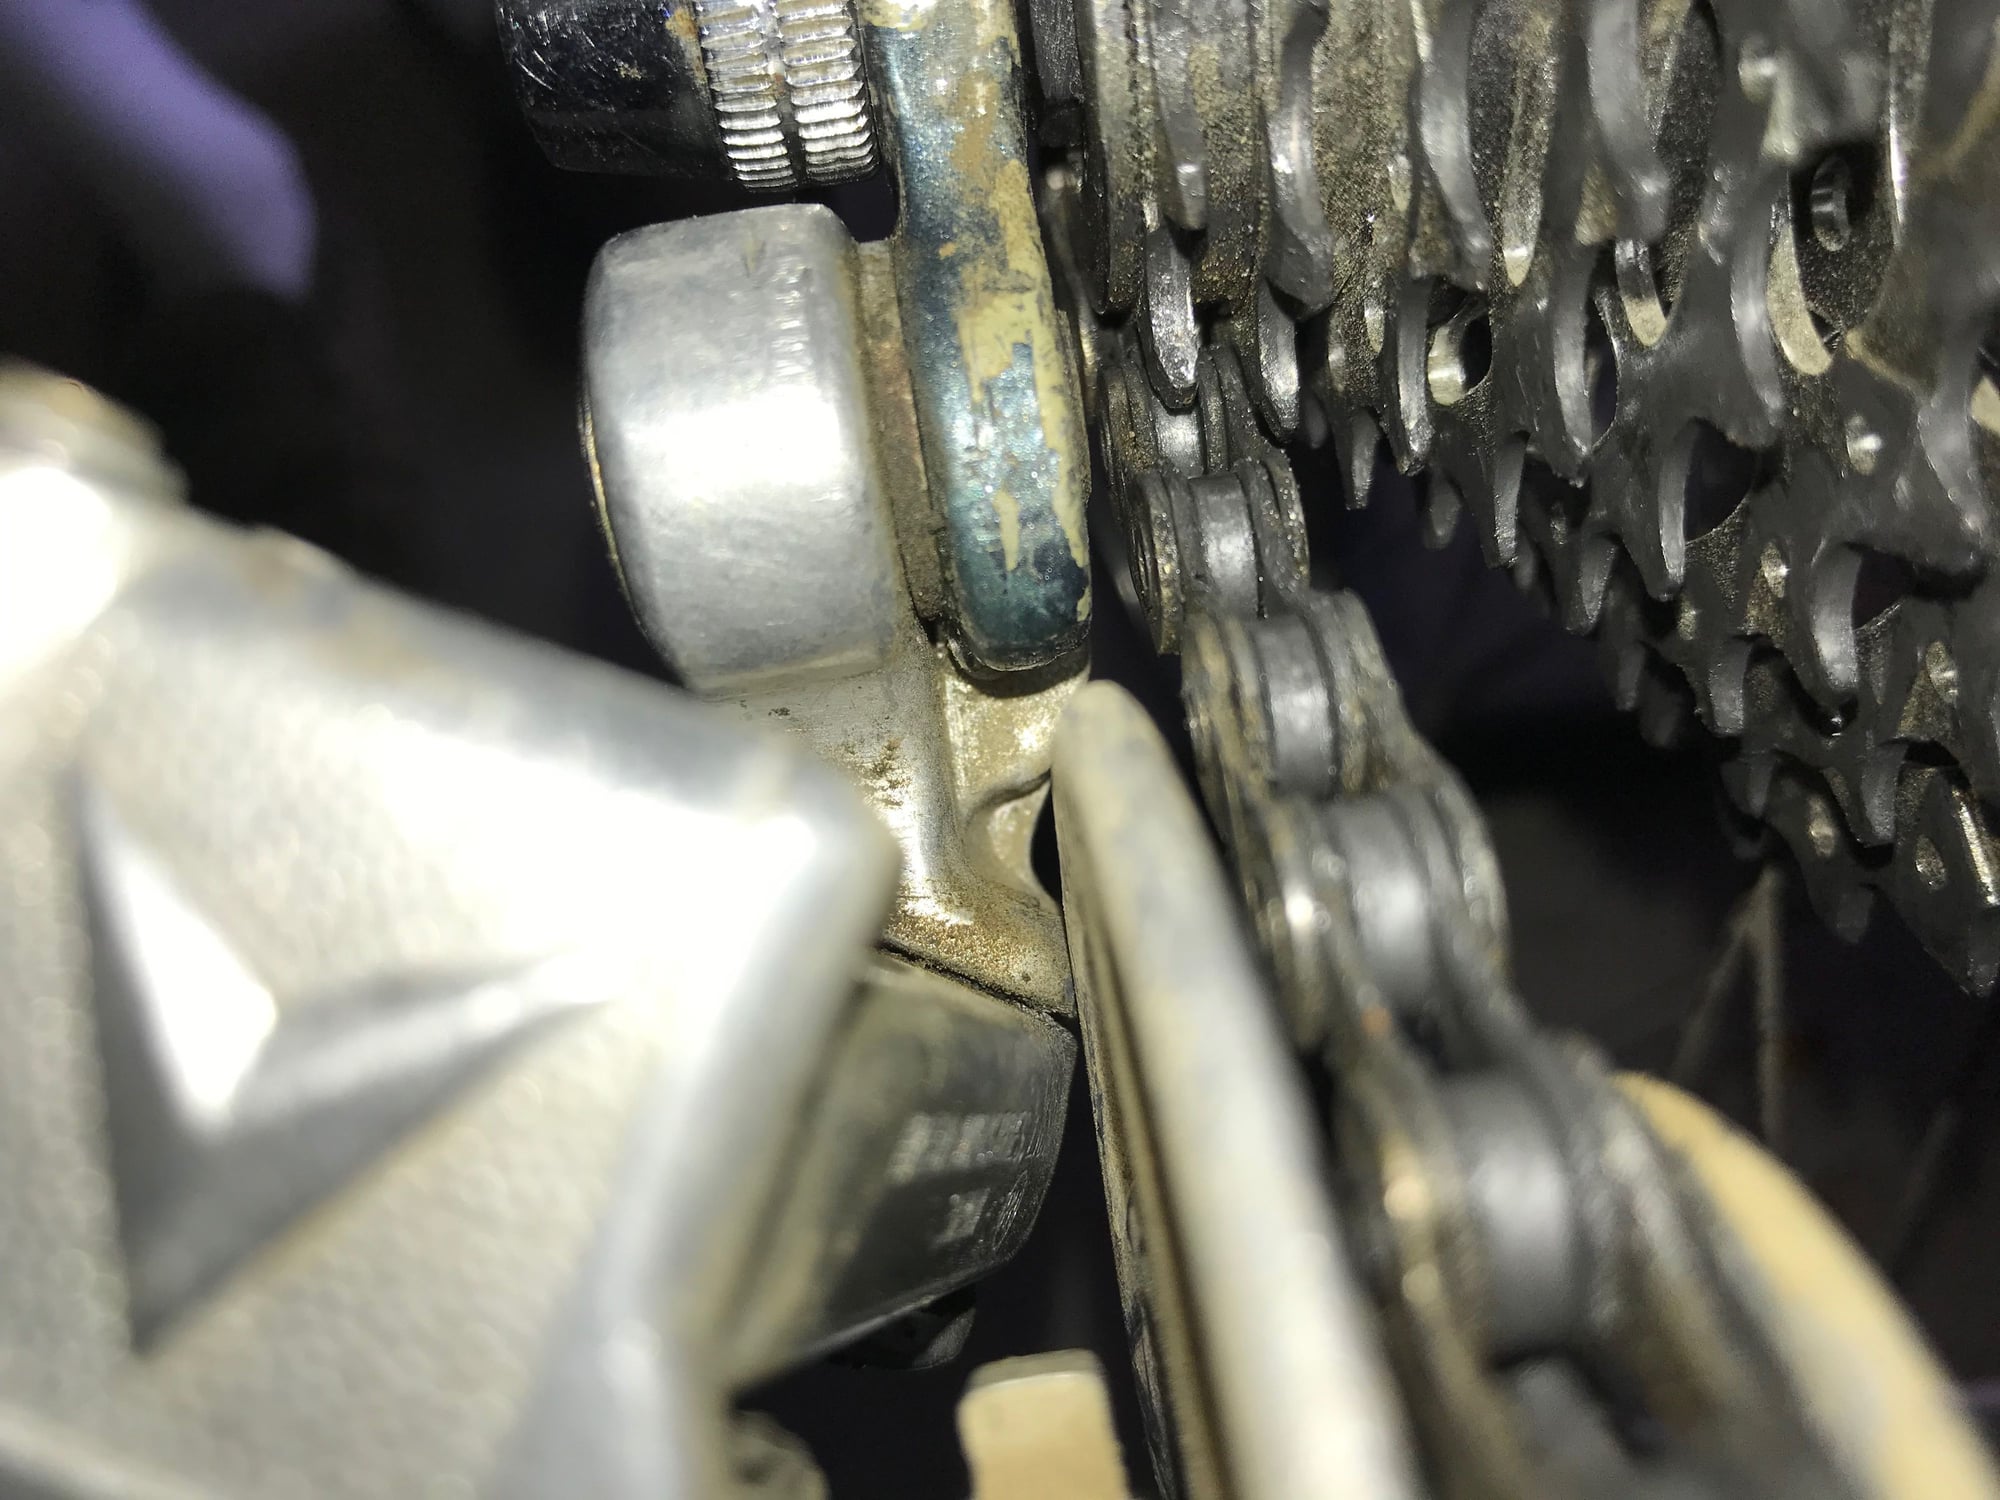
Just to be clear, I was with @SquireBlack when we pulled into a rest stop that had a mechanic. The B screw did not hit the Campagnolo 1010 derailleur stop - it's a bit too low. A picture would help illlustrate this. I thought that quite odd, since the SunTour VGT derailleurs were very common back in the day, as were the ubiquitous 1010 dropout. But I saw it with my own two eyes.
My first thought, and the mechanics first stop was to adjust the B screw. I've never been a real gear head, but I did work in an LBS and don't recall this ever being an issue.
I did offer to braze up an extension, but the Lygie paint job was too nice to fiddle with. ;-)
My first thought, and the mechanics first stop was to adjust the B screw. I've never been a real gear head, but I did work in an LBS and don't recall this ever being an issue.
I did offer to braze up an extension, but the Lygie paint job was too nice to fiddle with. ;-)
__________________
If someone tells you that you have enough bicycles and you don't need any more, stop talking to them. You don't need that kind of negativity in your life.
If someone tells you that you have enough bicycles and you don't need any more, stop talking to them. You don't need that kind of negativity in your life.
 04-10-19, 01:21 PM
#27
Ride, Wrench, Swap, Race

Join Date: Jan 2010
Location: Northern California
Posts: 9,193
Bikes: Cheltenham-Pedersen racer, Boulder F/S Paris-Roubaix, Varsity racer, '52 Christophe, '62 Continental, '92 Merckx, '75 Limongi, '76 Presto, '72 Gitane SC, '71 Schwinn SS, etc.
Mentioned: 132 Post(s)
Tagged: 0 Thread(s)
Quoted: 1565 Post(s)
Liked 1,295 Times
in
865 Posts
I can only imagine that the bolt tip missed the stop because it was bent, or because it was screwed in so far as to move away from the radius at which the stop is located.
These stop radius dimensions have seemed to be standardized over all of the ~fifty years that I have been tinkering with derailer bikes.
In cases where a longer bolt missed the stop, it has traditionally been corrected by adding a locknut to the tip or reversing the screw so as to present a bigger "target" at the end of the screw with which to achieve "purchase" on the stop.
The Suntour screw infortunately has odd, fine threading, making this more difficult than simply adding a nut.
Very unlikely, but possibly the threaded screw hole got stripped and re-drilled at an odd angle at some point. A standard screw threading would be the clue to this possibility.
And yes, also possible that there was a version of this derailer knuckle made exclusively for use with a Suntour hanger claw having a longer stop radius, I'll check my parts box here for a look...
04-10-19, 02:57 PM
#28
Ride, Wrench, Swap, Race
Join Date: Jan 2010
Location: Northern California
Posts: 9,193
Bikes: Cheltenham-Pedersen racer, Boulder F/S Paris-Roubaix, Varsity racer, '52 Christophe, '62 Continental, '92 Merckx, '75 Limongi, '76 Presto, '72 Gitane SC, '71 Schwinn SS, etc.
Mentioned: 132 Post(s)
Tagged: 0 Thread(s)
Quoted: 1565 Post(s)
Liked 1,295 Times
in
865 Posts
I measured a few derailers for the radius of the screw tip location, and both the standard and claw-equipped VGT derailers had a relatively short 7.5mm from the mounting bolt center.
Campag, Shimano and Sram had slightly larger contact radius dimensions than the VGT, more like 9-11mm.
So how that particular Suntour stop screw tip ended up missing the stop entirely becomes a key question.
Campag, Shimano and Sram had slightly larger contact radius dimensions than the VGT, more like 9-11mm.
So how that particular Suntour stop screw tip ended up missing the stop entirely becomes a key question.
04-10-19, 03:33 PM
#29
ambulatory senior
Join Date: Dec 2016
Location: Peoria Il
Posts: 5,998
Bikes: Austro Daimler modified by Gugie! Raleigh Professional and lots of other bikes.
Mentioned: 76 Post(s)
Tagged: 0 Thread(s)
Quoted: 1955 Post(s)
Liked 3,661 Times
in
1,679 Posts
I can only imagine that the bolt tip missed the stop because it was bent, or because it was screwed in so far as to move away from the radius at which the stop is located.
These stop radius dimensions have seemed to be standardized over all of the ~fifty years that I have been tinkering with derailer bikes.
In cases where a longer bolt missed the stop, it has traditionally been corrected by adding a locknut to the tip or reversing the screw so as to present a bigger "target" at the end of the screw with which to achieve "purchase" on the stop.
The Suntour screw infortunately has odd, fine threading, making this more difficult than simply adding a nut.
Very unlikely, but possibly the threaded screw hole got stripped and re-drilled at an odd angle at some point. A standard screw threading would be the clue to this possibility.
And yes, also possible that there was a version of this derailer knuckle made exclusively for use with a Suntour hanger claw having a longer stop radius, I'll check my parts box here for a look...
These stop radius dimensions have seemed to be standardized over all of the ~fifty years that I have been tinkering with derailer bikes.
In cases where a longer bolt missed the stop, it has traditionally been corrected by adding a locknut to the tip or reversing the screw so as to present a bigger "target" at the end of the screw with which to achieve "purchase" on the stop.
The Suntour screw infortunately has odd, fine threading, making this more difficult than simply adding a nut.
Very unlikely, but possibly the threaded screw hole got stripped and re-drilled at an odd angle at some point. A standard screw threading would be the clue to this possibility.
And yes, also possible that there was a version of this derailer knuckle made exclusively for use with a Suntour hanger claw having a longer stop radius, I'll check my parts box here for a look...
04-10-19, 10:21 PM
#30
Junior Member
Thread Starter

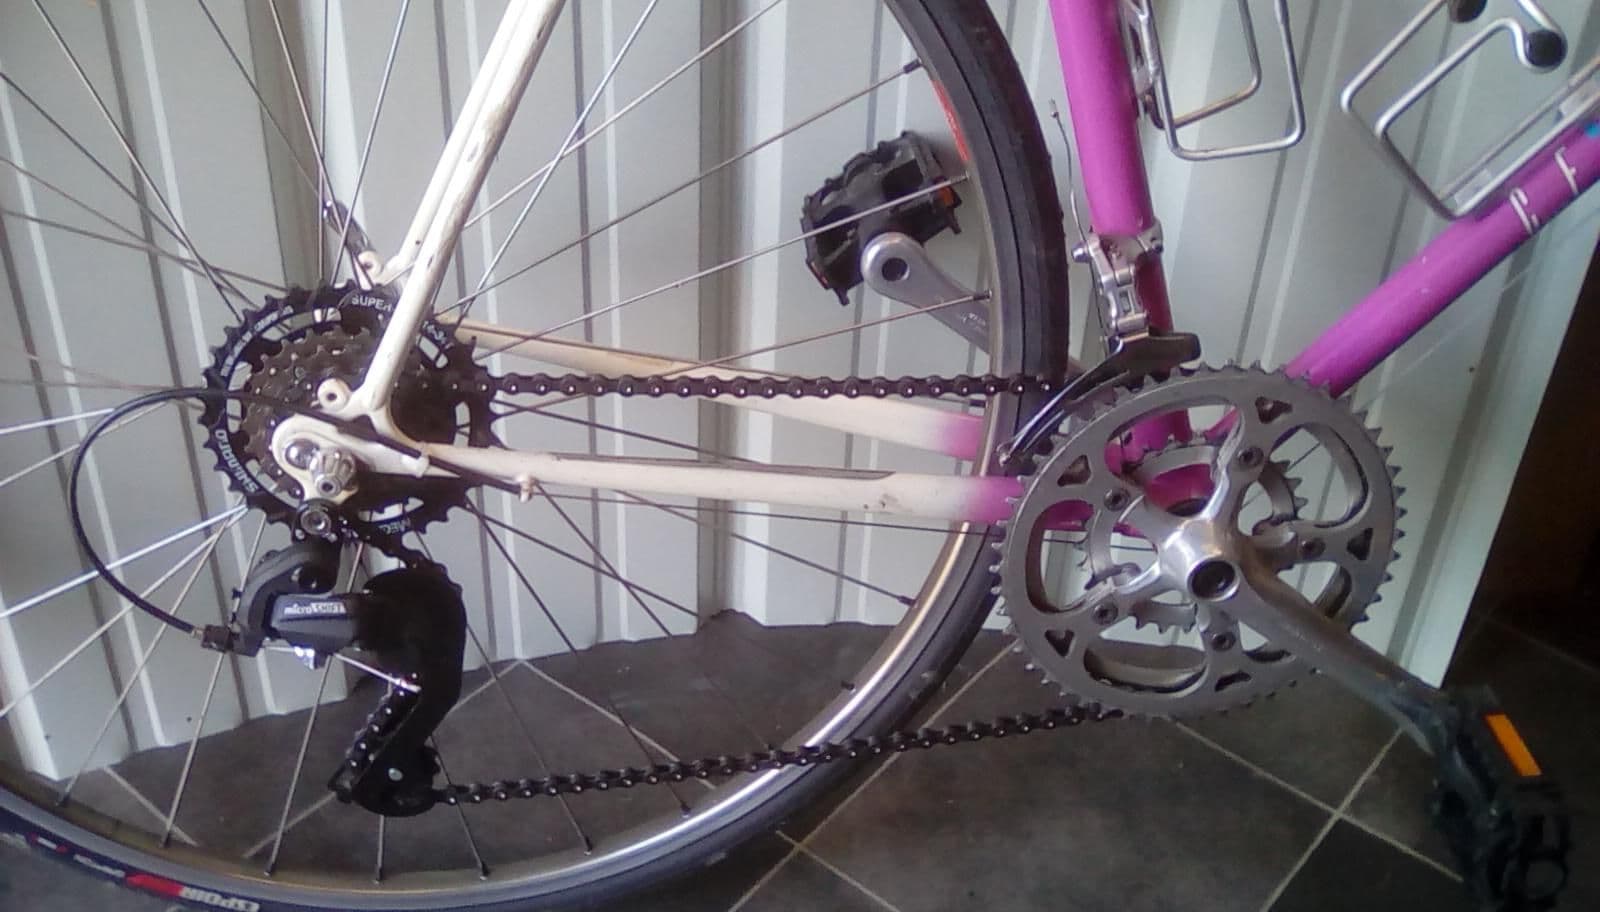
I got the bike back last night, ask was able to send a few minutes looking closely at the derailleur failing to change this evening. (Not too long, because I am leaving for a [non-biking] trip tomorrow).
I think that @dddd hit the nail on the head with their suggestion that the chain was being pressed against the side of the inner sprocket by the cage, rather than being moved under it.
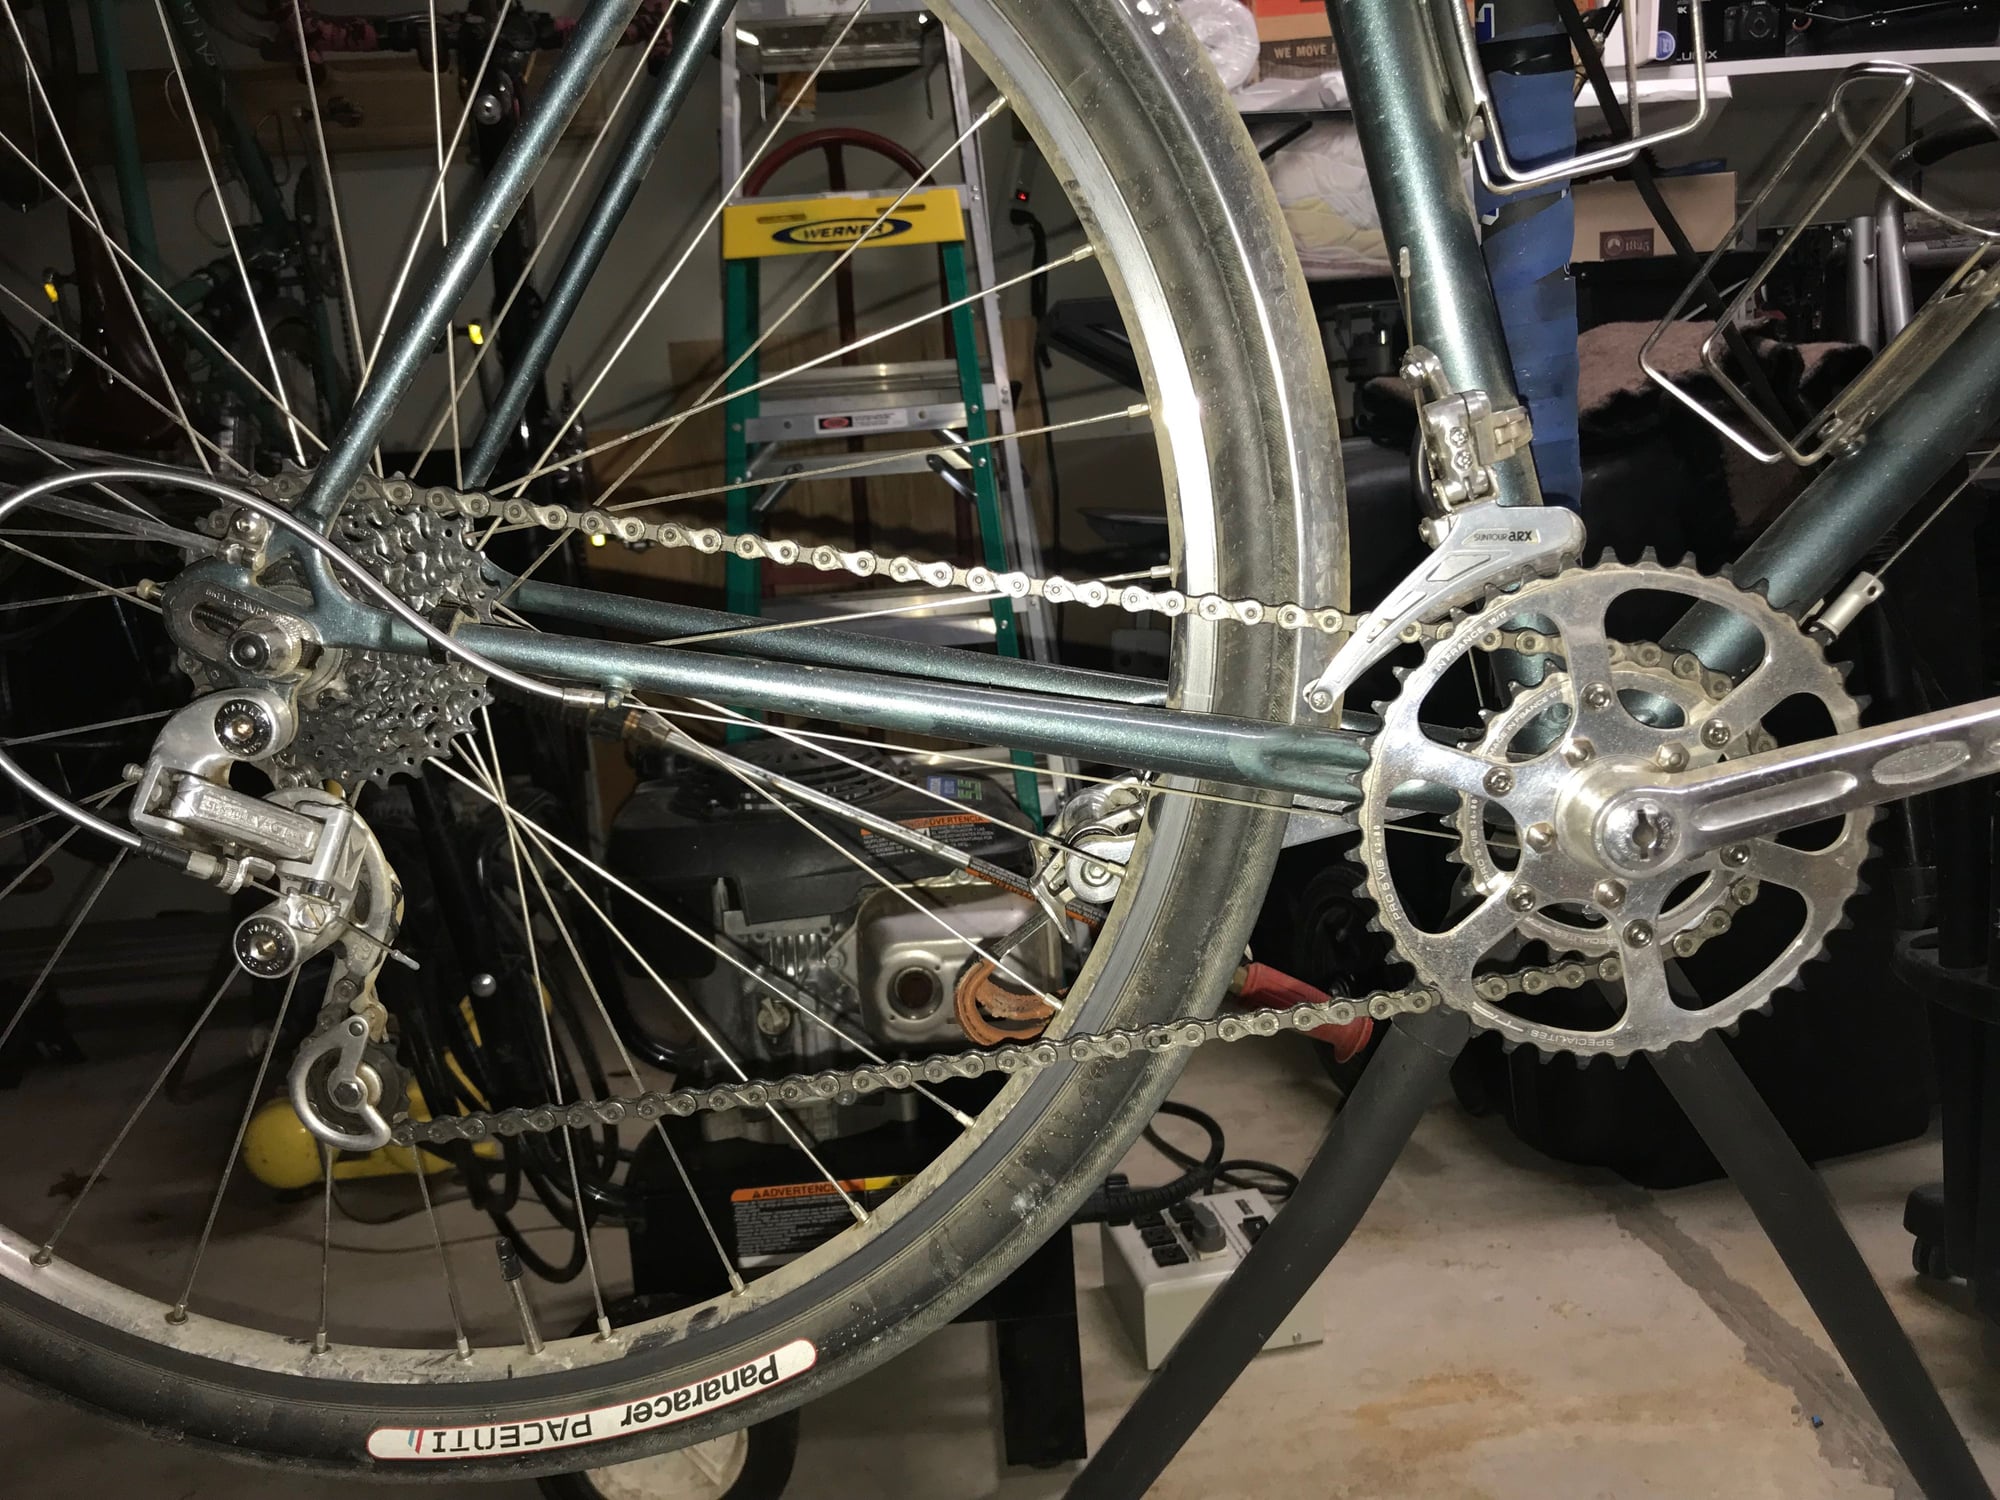
Here are some pictures that may help to clarify what is going on.

Large–large combination. Notice how top of derailleur cage is pulled below the bottom go the large sprocket.

Close-up of top of cage and bottom of sprocket (in large-large combination)
Small-large combination. Notice how top of cage is much closer to the large sprocket.
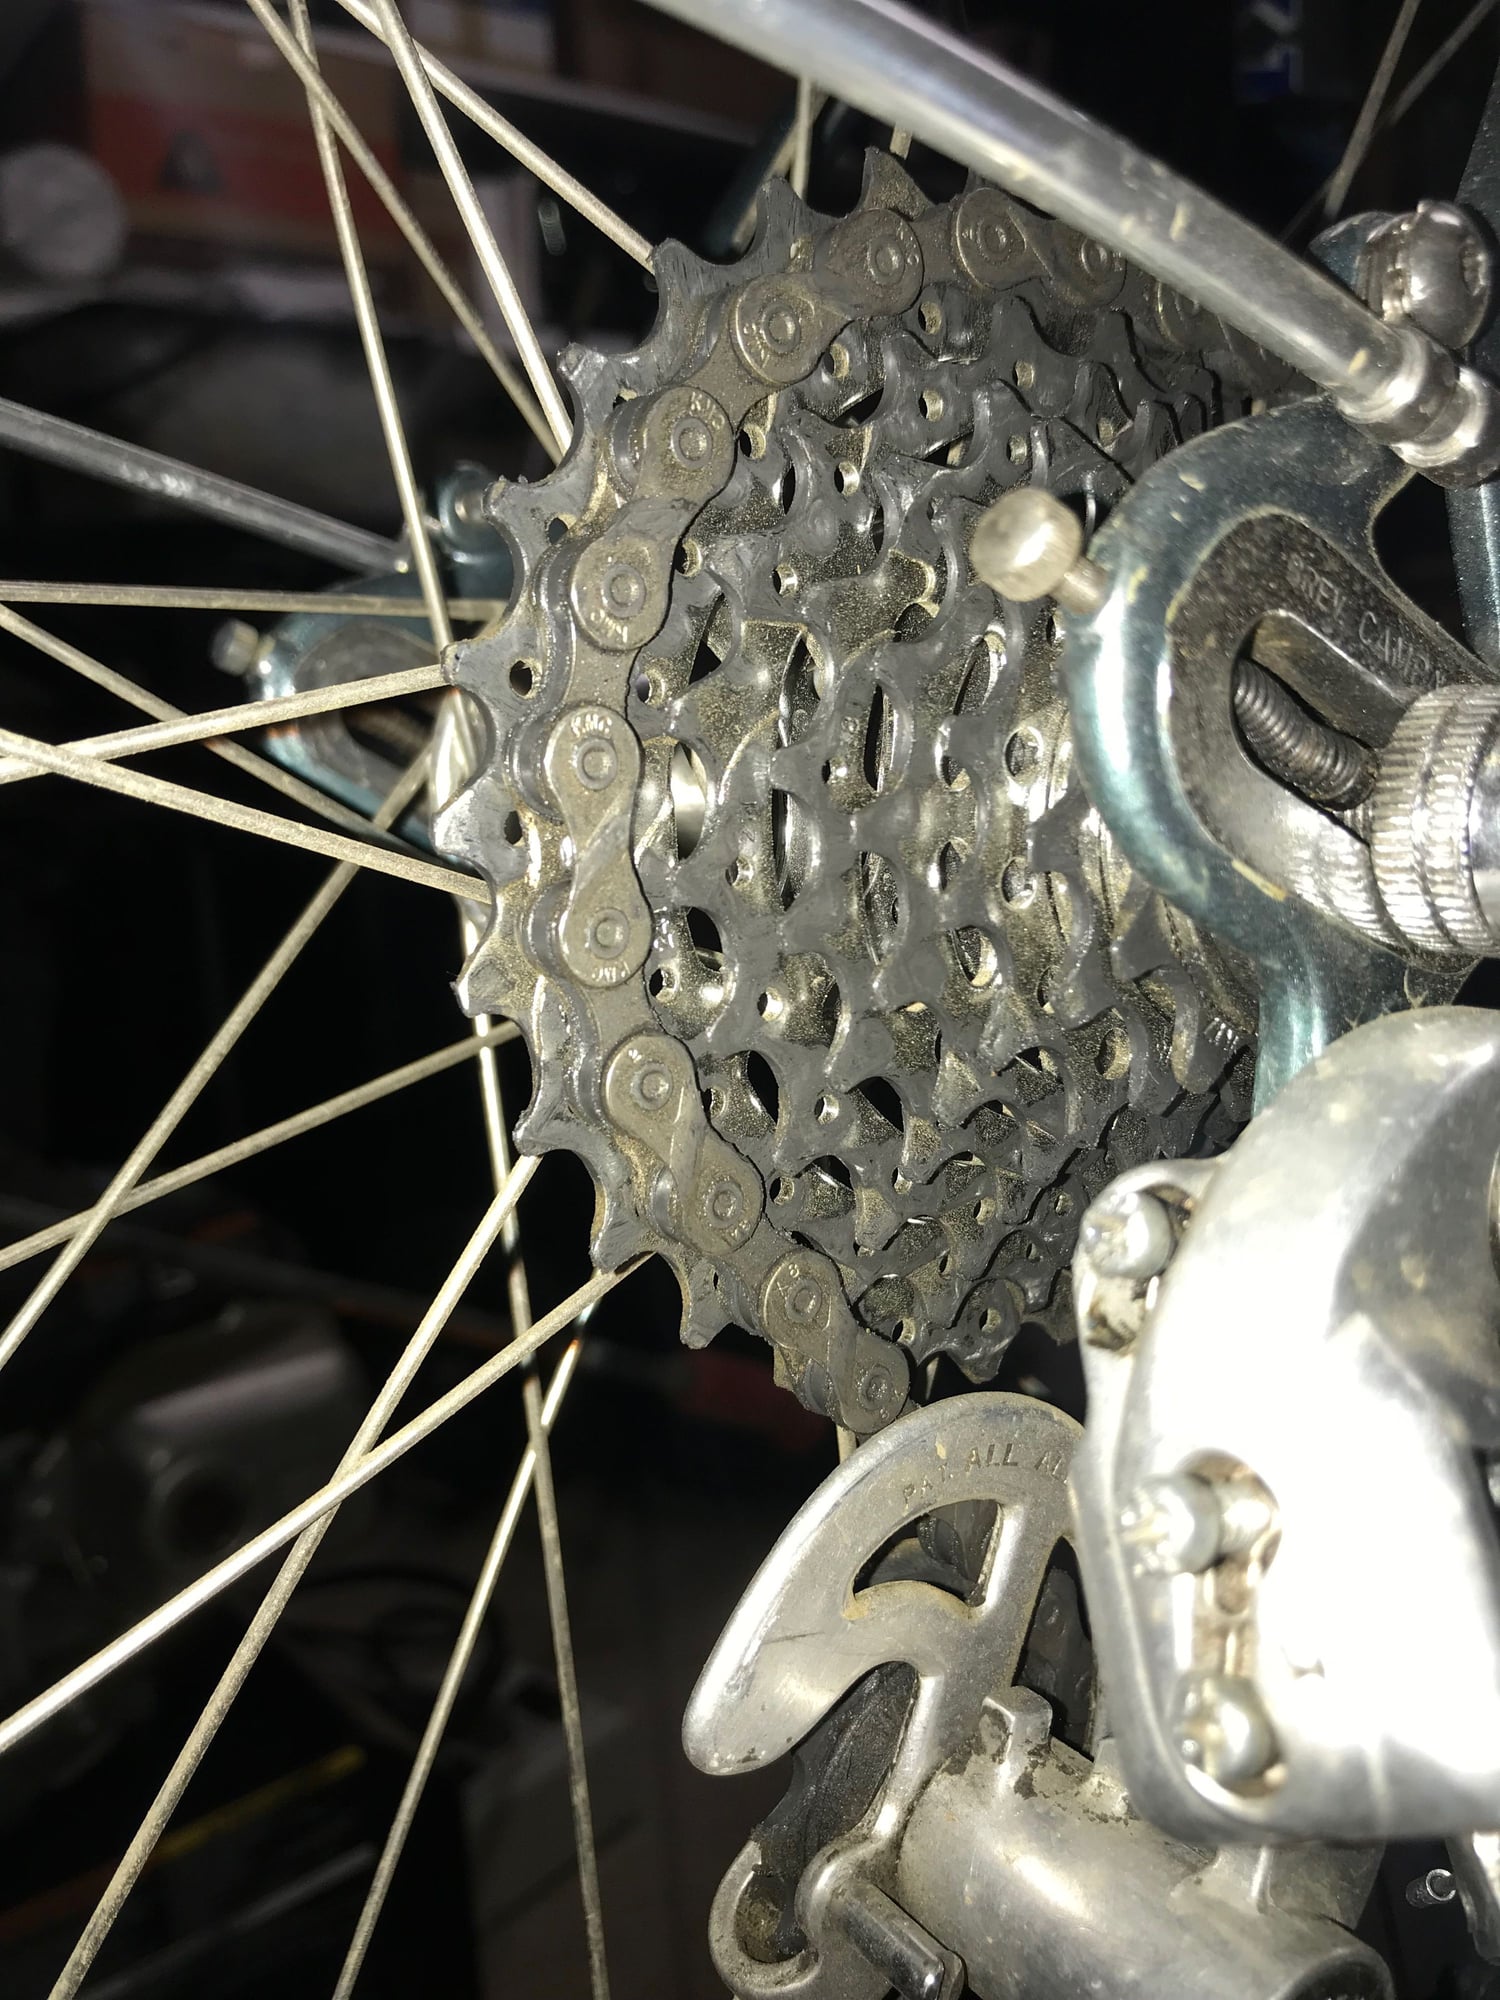
Close-up of top of cage and bottom of sprocket (in small-large combination)
Rear view of the chain failing to move onto the large sprocket (using small front chainring).
Apologies for the California dust on the components! Think of it as "honest bike sweat".
The Erica Rules don't say anything about cassettes versus freewheels. The rules do explicitly allow gears to be selected appropriate to the difficulty of the event; I would never have finished if that were not the case! Obviously, as a 1966 frame, this bike would originally have been equipped with a block, and probably two chainrings of almost-equal size. Such is progress!
I think that @dddd hit the nail on the head with their suggestion that the chain was being pressed against the side of the inner sprocket by the cage, rather than being moved under it.
Here are some pictures that may help to clarify what is going on.
Large–large combination. Notice how top of derailleur cage is pulled below the bottom go the large sprocket.
Close-up of top of cage and bottom of sprocket (in large-large combination)
Small-large combination. Notice how top of cage is much closer to the large sprocket.
Close-up of top of cage and bottom of sprocket (in small-large combination)
Rear view of the chain failing to move onto the large sprocket (using small front chainring).
Apologies for the California dust on the components! Think of it as "honest bike sweat".
The Erica Rules don't say anything about cassettes versus freewheels. The rules do explicitly allow gears to be selected appropriate to the difficulty of the event; I would never have finished if that were not the case! Obviously, as a 1966 frame, this bike would originally have been equipped with a block, and probably two chainrings of almost-equal size. Such is progress!
Last edited by SquireBlack; 04-25-19 at 11:25 PM.
04-10-19, 11:26 PM
#31
working on my sandal tan

Join Date: Aug 2011
Location: CID
Posts: 22,629
Bikes: 1991 Bianchi Eros, 1964 Armstrong, 1988 Diamondback Ascent, 1988 Bianchi Premio, 1987 Bianchi Sport SX, 1980s Raleigh mixte (hers), All-City Space Horse (hers)
Mentioned: 98 Post(s)
Tagged: 0 Thread(s)
Quoted: 3871 Post(s)
Liked 2,568 Times
in
1,579 Posts
Could be the angle of that last picture, but it's looking like the hanger or RD is bent inward. That could be why it has trouble shifting to the smallest cog.
04-11-19, 02:35 PM
#32
Bike Butcher of Portland
Join Date: Jul 2014
Location: Portland, OR
Posts: 11,635
Bikes: It's complicated.
Mentioned: 1299 Post(s)
Tagged: 0 Thread(s)
Quoted: 4679 Post(s)
Liked 5,797 Times
in
2,282 Posts
We didn't notice the screw being bent when working on it.
I like @dddd's idea of adding a nylok nut to the back side of the B screw for increased purchase.
__________________
If someone tells you that you have enough bicycles and you don't need any more, stop talking to them. You don't need that kind of negativity in your life.
If someone tells you that you have enough bicycles and you don't need any more, stop talking to them. You don't need that kind of negativity in your life.
04-11-19, 03:00 PM
#33
working on my sandal tan
Join Date: Aug 2011
Location: CID
Posts: 22,629
Bikes: 1991 Bianchi Eros, 1964 Armstrong, 1988 Diamondback Ascent, 1988 Bianchi Premio, 1987 Bianchi Sport SX, 1980s Raleigh mixte (hers), All-City Space Horse (hers)
Mentioned: 98 Post(s)
Tagged: 0 Thread(s)
Quoted: 3871 Post(s)
Liked 2,568 Times
in
1,579 Posts
Oh, I think I misread the OP anyway. Shifting into the small cog isn't the problem, oops.
__________________
RUSA #7498
Originally Posted by noglider
People in this forum are not typical.
Last edited by ThermionicScott; 04-11-19 at 03:07 PM.
04-26-19, 12:13 AM
#34
Junior Member
Thread Starter
I believe that there are two issues here that are combining to cause my shifting problem.
These derailleurs originally came with a mounting bracket, intended to be attached to the rear of a horizontal dropout. The derailleur pivoted smoothly around the mounting bracket on the mounting bolt, which was equipped with several washers and a locknut to stop it from unscrewing. I bought a second one so that I could examine the parts:

Mounting hardware for SunTour VGT luxe
The two very thin washers next to the bolt were under the head of the mounting bolt where it is recessed into the the top knuckle of the derailleur body. The thicker washer (shown out of place in the picture) was between the deraillure body and the hanger, and the locknut (top-left) was on the back of the hanger.
The problem is that the hanger integrated into a Campy dropout is about 4mm thicker than the original SunTour hanger plate, and the locknut is only 3.8mm thick. So, when using a Campy dropout, there is no thread left for the locknut — and even if there were enough thread, there is not enough clearance between the hanger and the chain (on my 8-speed setup).
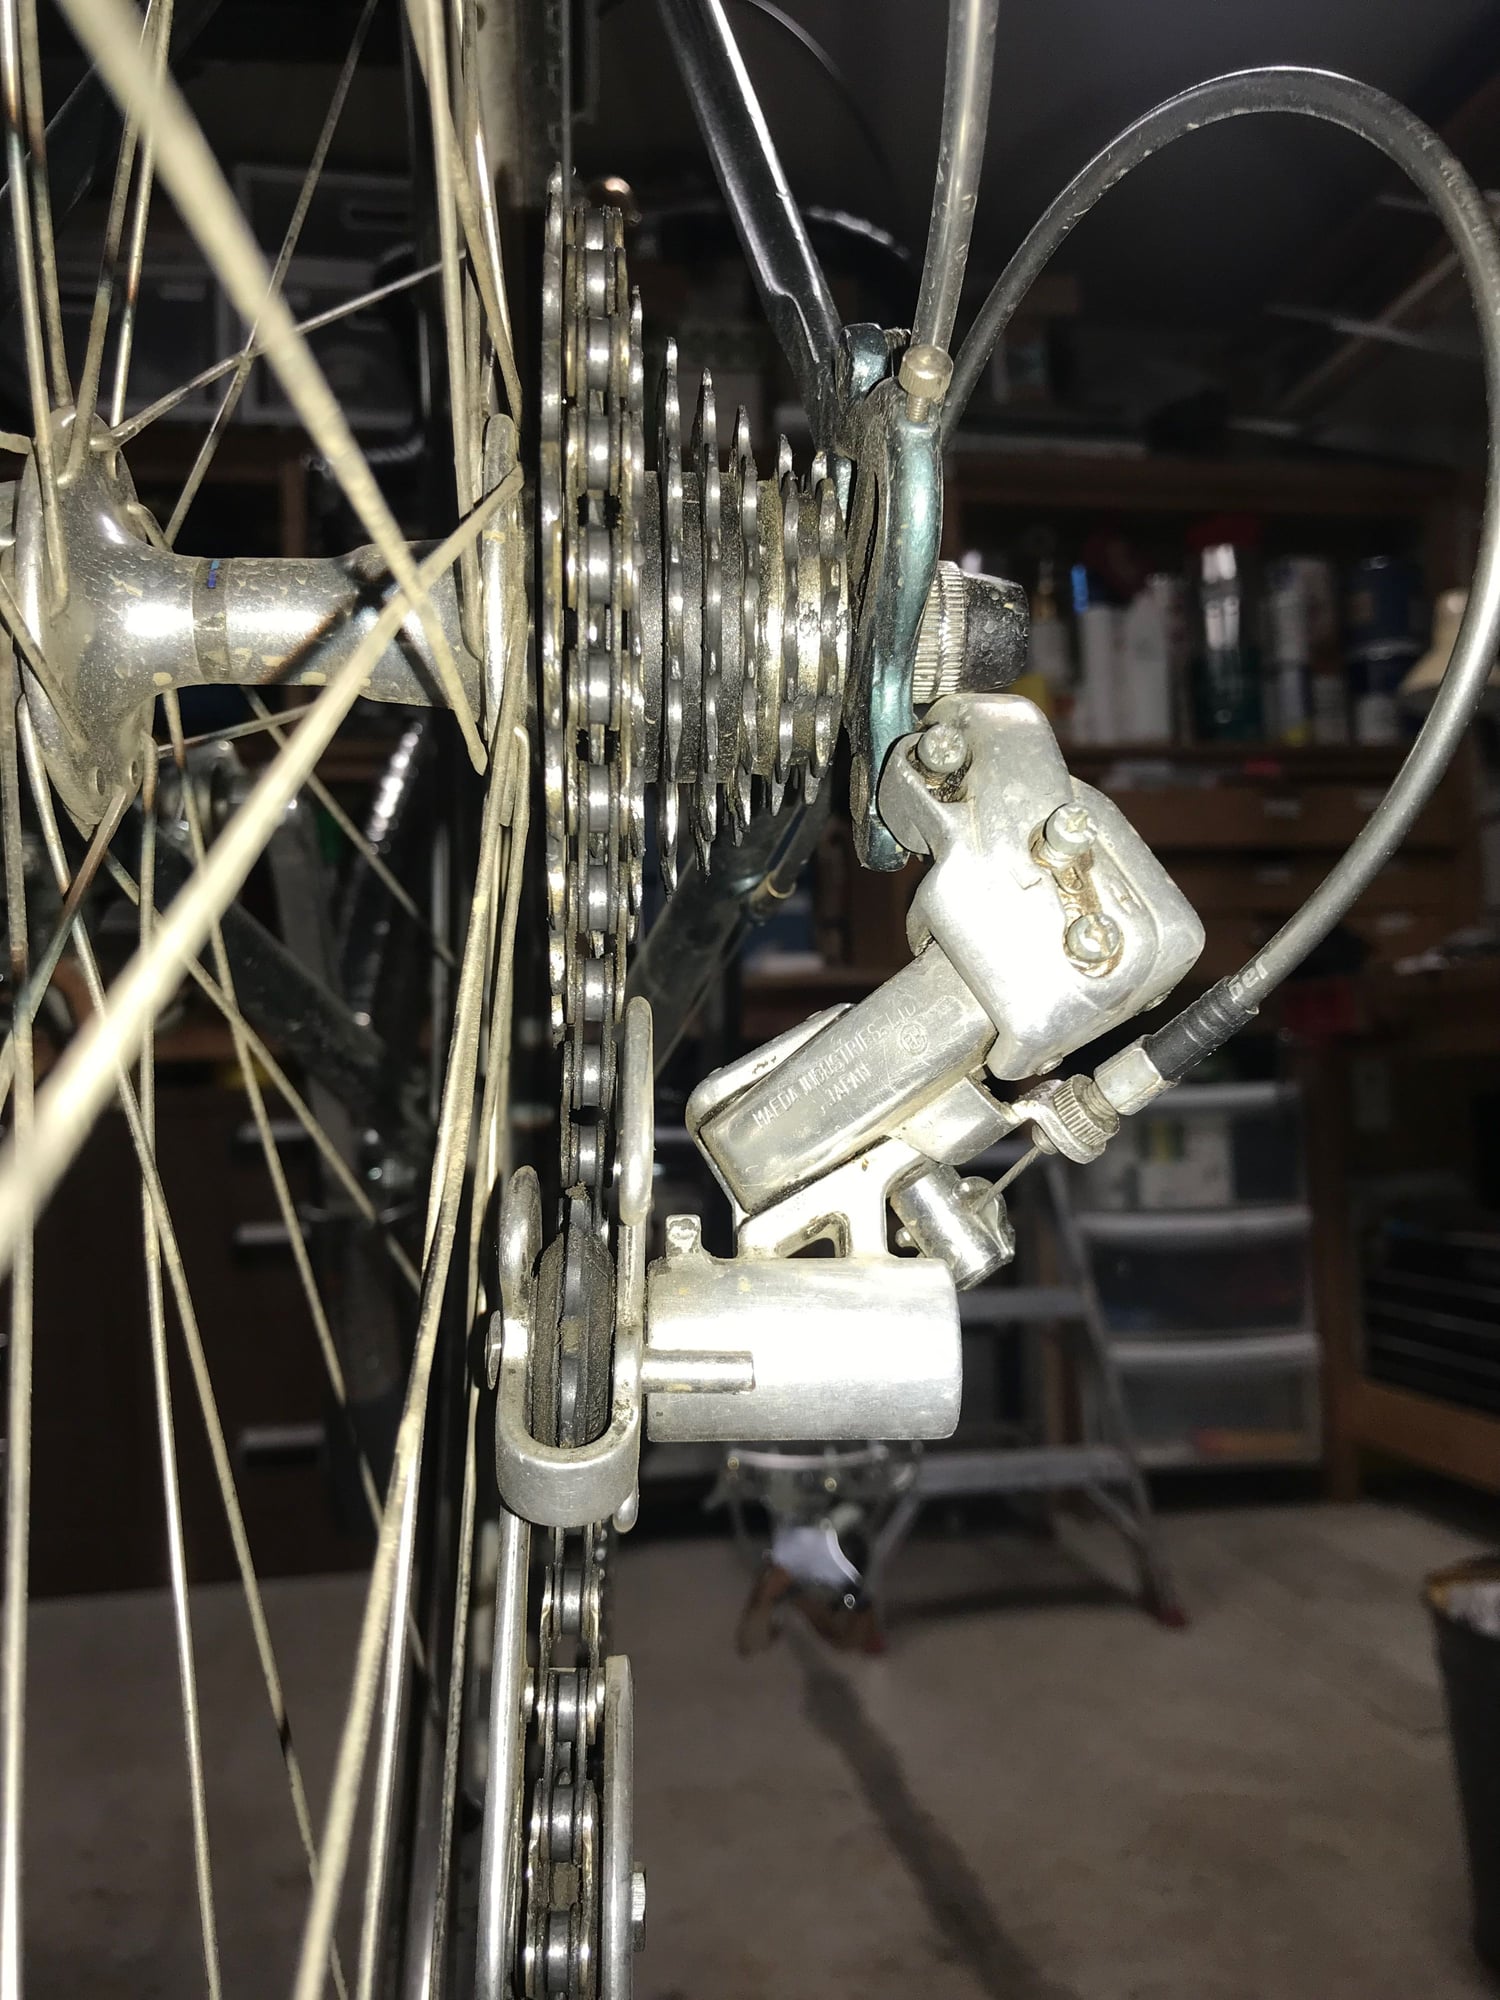
Very limited clearance between derailleur hanger and chain when in the small cog.
Without a locknut, it's hard for me to see how I can leave the mounting bolt loose enough to permit the derailleur to pivot, without risking the whole deraillur falling off when the mounting bolt vibrates loose (which I've seen happen on Eroica). Will a dab of blue locktite be enough?
- The derailleur guide pulls is too high, and thus too close to the large sprocket. This is in spite of the fact that a 32T sprocket is within the original spec (according to a SunTour catalog on disraeligears the max cog was 34T). As shown in the photo above, the outer cage plate, which I believe is designed to push the chain inwards until it is under the appropriate cog, is instead squeezing the chain against the side of the cog.
- My derailleur is not pivoting around the mounting bolt. This is because I have screwed it down tight against the hanger that is integrated into the Campagnolo dropout. This lack of pivoting may be the cause of (1) above, because it stops the cage from rotating and thus moving the guide pulley away from the cassette.
These derailleurs originally came with a mounting bracket, intended to be attached to the rear of a horizontal dropout. The derailleur pivoted smoothly around the mounting bracket on the mounting bolt, which was equipped with several washers and a locknut to stop it from unscrewing. I bought a second one so that I could examine the parts:
Mounting hardware for SunTour VGT luxe
The two very thin washers next to the bolt were under the head of the mounting bolt where it is recessed into the the top knuckle of the derailleur body. The thicker washer (shown out of place in the picture) was between the deraillure body and the hanger, and the locknut (top-left) was on the back of the hanger.
The problem is that the hanger integrated into a Campy dropout is about 4mm thicker than the original SunTour hanger plate, and the locknut is only 3.8mm thick. So, when using a Campy dropout, there is no thread left for the locknut — and even if there were enough thread, there is not enough clearance between the hanger and the chain (on my 8-speed setup).
Very limited clearance between derailleur hanger and chain when in the small cog.
Without a locknut, it's hard for me to see how I can leave the mounting bolt loose enough to permit the derailleur to pivot, without risking the whole deraillur falling off when the mounting bolt vibrates loose (which I've seen happen on Eroica). Will a dab of blue locktite be enough?
Last edited by SquireBlack; 04-26-19 at 12:18 AM. Reason: Typographical errors
04-26-19, 11:56 AM
#35
Full Member
try this first
Here is a cheap fix for most of the tight fit and reach problems I run into on "extreme gearing". Roadlink D/R extender or a cheap copy for $2 on Ebay.
04-26-19, 12:05 PM
#36
Ride, Wrench, Swap, Race
Join Date: Jan 2010
Location: Northern California
Posts: 9,193
Bikes: Cheltenham-Pedersen racer, Boulder F/S Paris-Roubaix, Varsity racer, '52 Christophe, '62 Continental, '92 Merckx, '75 Limongi, '76 Presto, '72 Gitane SC, '71 Schwinn SS, etc.
Mentioned: 132 Post(s)
Tagged: 0 Thread(s)
Quoted: 1565 Post(s)
Liked 1,295 Times
in
865 Posts
Hmmm, a "dab" of blue LocTite does not sound really sufficient where the bolt isn't being torqued along it's threads.
Blue Loctite will work reliably, but you'll want to get the threads wiped reasonably clean and apply enough to both mating parts so as to see a bit of blue on every thread. Then carefully adjust the bolt tension snug before allowing the threadlocker to set.
The bolt won't loosen in use, but you can still remove it with a regular hex key.
Pro tip, you can set the thread-locker in minutes by heating the parts to 130F (moderately hot to the touch) using a normal hair drier.
04-26-19, 01:58 PM
#37
Junior Member
Thread Starter
@grayEZrider: my derailleur hanger extender arrived in the mail last night; trying that will be my first attempt at a fix. I figured that it's cheap and reversible, whereas cutting the lobe off the derailleur cage will be more work and irreversible.
@dddd: Thanks for the locktite advice.
@dddd: Thanks for the locktite advice.
04-29-19, 11:07 PM
#38
Junior Member
Thread Starter
Resolution
I spent a bunch of time on this over the weekend.
First, I tried thederailleur hanger extender. Installing this removed the problem of squeezing the chain between the derailleur cage and the largest sprocket, bit it still would not change into the large sprocket. In fact, it made things worse, because the extender moved the derailleur mounting point outboard a tad. I applied the washers and locknut from my spare derailleur, and set it up to pivot around the mounting bolt, but that didn't help either. I decided that the problem was what I had originally guessed: that there was not quite enough left to right throw on the Suntour VGT (which was designed for a 5-speed cassette, or maybe a 6?) to move the chain to where it needed to go. I took the derailleur apart, and filed down some strategic bits to try to increase the throw a tad. Still no go.
Then I left it for a day, and went for a ride (on another bike). While riding, I had an idea: if I want 8 gears and a smaller throw, why not try 8 of 9 � that is, the top 8 gears of a 9-speed cassette? When I arrived home and could do the research (thank you Sheldon Brown, from beyond the grave) I found that 8 and 9 speed Shimano sprockets are the same thickness: 1.8mm. The difference is in the spacers: 3mm on the 8-speed, vs 2.54mm on the 9-speed.
I found an old 9-speed cassette, disassembled both, and reassembled a combo cassette with the 9-speed spacers, except for the two smallest sprockets (11T and 12T) which came from my 8-speed cassette, and which have built-in spacers. The reduction in width of the other 5 spacers (0.46 mm each, for a total of 2.3mm) made room for a 2mm metal spacer between the largest cog and the freehub body. The other 0.3mm is taken up by screwing down the lockring. So now I'm back to 8-speeds, but with less overall width, and a little throw to spare on my derailleur.
I replaced the 8-speed chain with a 9-speed, and everything works great. No problem at all shifting anywhere in the range. Because I'm running this on friction (SunTour powershift barcons), the fact that the spacing between the small sprockets is different from the spacing between the large sprockets is of no import.
The only tricky thing about this substitution is that you have to start off with a cheap cassette that has individual sprockets throughout the range. Some of the more expensive ones have the larger sprockets mounted on a spider, so there are no spacers to harvest. Fortunately, I found a used 9-speed cassette with individual sprockets in a drawer � I've no recollection of what bike I had removed it. It seemed to be in reasonably good shape � the larger sprockets don't wear much, in any case, and taking it apart allowed me to thoroughly clean it. I was surprised to find that the 8-speed that I had on the Lygie was actually a SRAM 11�28: I would have sworn blind that it was 11�32, and that is what it said on the box (now long gone). Well, thanks to the cannibalized 9-speed, it's now 11�30.
04-30-19, 01:04 AM
#39
Ride, Wrench, Swap, Race
Join Date: Jan 2010
Location: Northern California
Posts: 9,193
Bikes: Cheltenham-Pedersen racer, Boulder F/S Paris-Roubaix, Varsity racer, '52 Christophe, '62 Continental, '92 Merckx, '75 Limongi, '76 Presto, '72 Gitane SC, '71 Schwinn SS, etc.
Mentioned: 132 Post(s)
Tagged: 0 Thread(s)
Quoted: 1565 Post(s)
Liked 1,295 Times
in
865 Posts
I spent a bunch of time on this over the weekend.
First, I tried thederailleur hanger extender. Installing this removed the problem of squeezing the chain between the derailleur cage and the largest sprocket, bit it still would not change into the large sprocket. In fact, it made things worse, because the extender moved the derailleur mounting point outboard a tad. I applied the washers and locknut from my spare derailleur, and set it up to pivot around the mounting bolt, but that didn't help either. I decided that the problem was what I had originally guessed: that there was not quite enough left to right throw on the Suntour VGT (which was designed for a 5-speed cassette, or maybe a 6?) to move the chain to where it needed to go. I took the derailleur apart, and filed down some strategic bits to try to increase the throw a tad. Still no go.
Then I left it for a day, and went for a ride (on another bike). While riding, I had an idea: if I want 8 gears and a smaller throw, why not try 8 of 9 � that is, the top 8 gears of a 9-speed cassette? When I arrived home and could do the research (thank you Sheldon Brown, from beyond the grave) I found that 8 and 9 speed Shimano sprockets are the same thickness: 1.8mm. The difference is in the spacers: 3mm on the 8-speed, vs 2.54mm on the 9-speed.
I found an old 9-speed cassette, disassembled both, and reassembled a combo cassette with the 9-speed spacers, except for the two smallest sprockets (11T and 12T) which came from my 8-speed cassette, and which have built-in spacers. The reduction in width of the other 5 spacers (0.46 mm each, for a total of 2.3mm) made room for a 2mm metal spacer between the largest cog and the freehub body. The other 0.3mm is taken up by screwing down the lockring. So now I'm back to 8-speeds, but with less overall width, and a little throw to spare on my derailleur.
I replaced the 8-speed chain with a 9-speed, and everything works great. No problem at all shifting anywhere in the range. Because I'm running this on friction (SunTour powershift barcons), the fact that the spacing between the small sprockets is different from the spacing between the large sprockets is of no import.
The only tricky thing about this substitution is that you have to start off with a cheap cassette that has individual sprockets throughout the range. Some of the more expensive ones have the larger sprockets mounted on a spider, so there are no spacers to harvest. Fortunately, I found a used 9-speed cassette with individual sprockets in a drawer � I've no recollection of what bike I had removed it. It seemed to be in reasonably good shape � the larger sprockets don't wear much, in any case, and taking it apart allowed me to thoroughly clean it. I was surprised to find that the 8-speed that I had on the Lygie was actually a SRAM 11�28: I would have sworn blind that it was 11�32, and that is what it said on the box (now long gone). Well, thanks to the cannibalized 9-speed, it's now 11�30.
First, I tried thederailleur hanger extender. Installing this removed the problem of squeezing the chain between the derailleur cage and the largest sprocket, bit it still would not change into the large sprocket. In fact, it made things worse, because the extender moved the derailleur mounting point outboard a tad. I applied the washers and locknut from my spare derailleur, and set it up to pivot around the mounting bolt, but that didn't help either. I decided that the problem was what I had originally guessed: that there was not quite enough left to right throw on the Suntour VGT (which was designed for a 5-speed cassette, or maybe a 6?) to move the chain to where it needed to go. I took the derailleur apart, and filed down some strategic bits to try to increase the throw a tad. Still no go.
Then I left it for a day, and went for a ride (on another bike). While riding, I had an idea: if I want 8 gears and a smaller throw, why not try 8 of 9 � that is, the top 8 gears of a 9-speed cassette? When I arrived home and could do the research (thank you Sheldon Brown, from beyond the grave) I found that 8 and 9 speed Shimano sprockets are the same thickness: 1.8mm. The difference is in the spacers: 3mm on the 8-speed, vs 2.54mm on the 9-speed.
I found an old 9-speed cassette, disassembled both, and reassembled a combo cassette with the 9-speed spacers, except for the two smallest sprockets (11T and 12T) which came from my 8-speed cassette, and which have built-in spacers. The reduction in width of the other 5 spacers (0.46 mm each, for a total of 2.3mm) made room for a 2mm metal spacer between the largest cog and the freehub body. The other 0.3mm is taken up by screwing down the lockring. So now I'm back to 8-speeds, but with less overall width, and a little throw to spare on my derailleur.
I replaced the 8-speed chain with a 9-speed, and everything works great. No problem at all shifting anywhere in the range. Because I'm running this on friction (SunTour powershift barcons), the fact that the spacing between the small sprockets is different from the spacing between the large sprockets is of no import.
The only tricky thing about this substitution is that you have to start off with a cheap cassette that has individual sprockets throughout the range. Some of the more expensive ones have the larger sprockets mounted on a spider, so there are no spacers to harvest. Fortunately, I found a used 9-speed cassette with individual sprockets in a drawer � I've no recollection of what bike I had removed it. It seemed to be in reasonably good shape � the larger sprockets don't wear much, in any case, and taking it apart allowed me to thoroughly clean it. I was surprised to find that the 8-speed that I had on the Lygie was actually a SRAM 11�28: I would have sworn blind that it was 11�32, and that is what it said on the box (now long gone). Well, thanks to the cannibalized 9-speed, it's now 11�30.
Lesson here is that it takes persistence to understand and solve some of these mechanical problems. Now you get to reap the reward of your effort.

Thread
Thread Starter
Forum
Replies
Last Post
Weebee
Tandem Cycling
5
09-28-10 11:16 AM
