


~1984 KHS 10 speed, where to start to get it ready to ride?
 06-13-11, 07:17 PM
#1
Holy crip he's a crapple
Thread Starter
Join Date: Jun 2011
Posts: 164
Mentioned: 0 Post(s)
Tagged: 0 Thread(s)
Quoted: 0 Post(s)
Likes: 0
Liked 0 Times
in
0 Posts
~1984 KHS 10 speed, where to start to get it ready to ride?
I searched for a few weeks to find a bike that fit me well to ride to work, I'm 6'5".
I found this 68cm KHS Competition 10 speed that was traded in at my LBS, and I jumped on it.
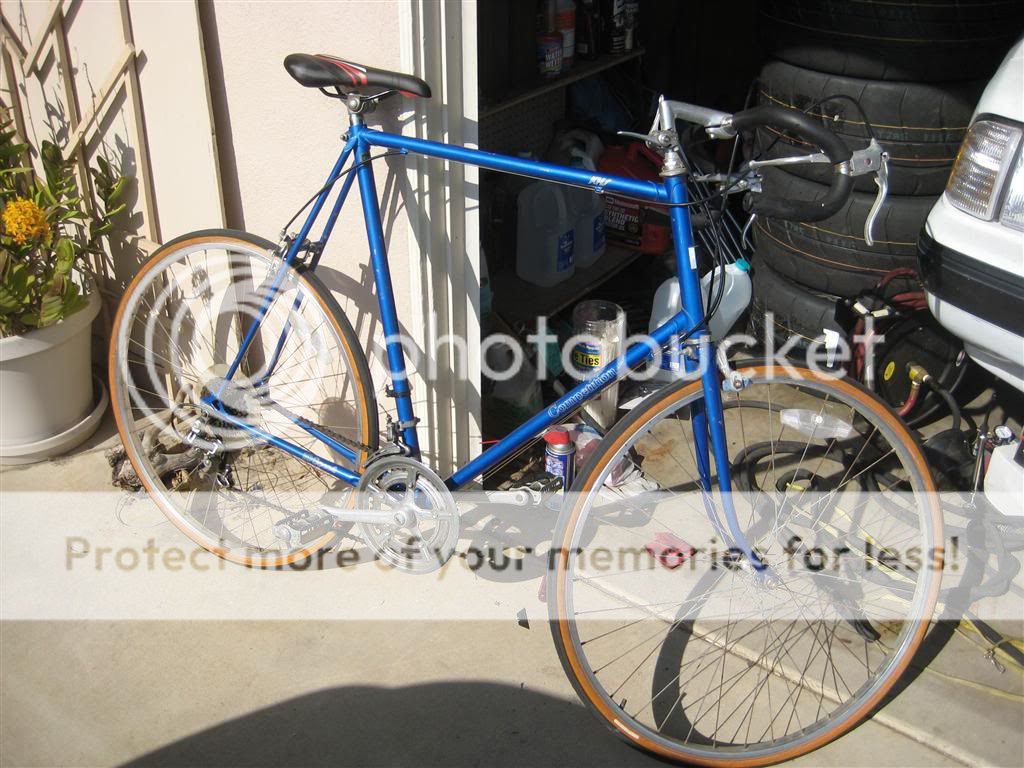
The brakes are horrible, the pads are dry rotted and the cables visibly stretch when I pull, especially the rear brake. The tires are a little dry but I think they'll be ok for awhile, my commute is only 2.5 miles each way.
Where to start? I'd like to replace the cables, but I'm unsure of how exactly to adjust the derailers and brakes when I do. I loosened the clamping bolts and pulled the cables as tight as I could with pliers while pushing against the clamps, but the brakes basically feel the same.
What else should I do right away? I washed the bike with a shop rag and a small amount of simple green, and sprayed some PB blaster dry lube on all the moving parts.
The bike rides very smoothly, pedals easily, the only real issue is the brakes barely work, and when in 5th gear the chain jumps if I pedal hard, if I shift the front into the larger gear I can pedal as hard as I want and the chain stays fine though, otherwise it shifts every gear easily and rolls very nicely. Much easier to go fast on than my ~40lb full suspension mountain bike!
I found this 68cm KHS Competition 10 speed that was traded in at my LBS, and I jumped on it.
The brakes are horrible, the pads are dry rotted and the cables visibly stretch when I pull, especially the rear brake. The tires are a little dry but I think they'll be ok for awhile, my commute is only 2.5 miles each way.
Where to start? I'd like to replace the cables, but I'm unsure of how exactly to adjust the derailers and brakes when I do. I loosened the clamping bolts and pulled the cables as tight as I could with pliers while pushing against the clamps, but the brakes basically feel the same.
What else should I do right away? I washed the bike with a shop rag and a small amount of simple green, and sprayed some PB blaster dry lube on all the moving parts.
The bike rides very smoothly, pedals easily, the only real issue is the brakes barely work, and when in 5th gear the chain jumps if I pedal hard, if I shift the front into the larger gear I can pedal as hard as I want and the chain stays fine though, otherwise it shifts every gear easily and rolls very nicely. Much easier to go fast on than my ~40lb full suspension mountain bike!
 06-13-11, 08:33 PM
#2
Senior Member

Join Date: Sep 2010
Location: Oregon City, OR
Posts: 1,597
Mentioned: 4 Post(s)
Tagged: 0 Thread(s)
Quoted: 95 Post(s)
Likes: 0
Liked 3 Times
in
3 Posts
The cables may be rusted inside the housing. New cables, and housing are in order. I buy my cables/housing at sports authority for ~5 bucks a pack. New pads will make a world of difference too. If the chain skips, it might be worn out, or the freewheel is worn out. It's fairly cheap to replace both of them (~40 bucks).
06-13-11, 09:43 PM
#3
Holy crip he's a crapple
Thread Starter
Join Date: Jun 2011
Posts: 164
Mentioned: 0 Post(s)
Tagged: 0 Thread(s)
Quoted: 0 Post(s)
Likes: 0
Liked 0 Times
in
0 Posts
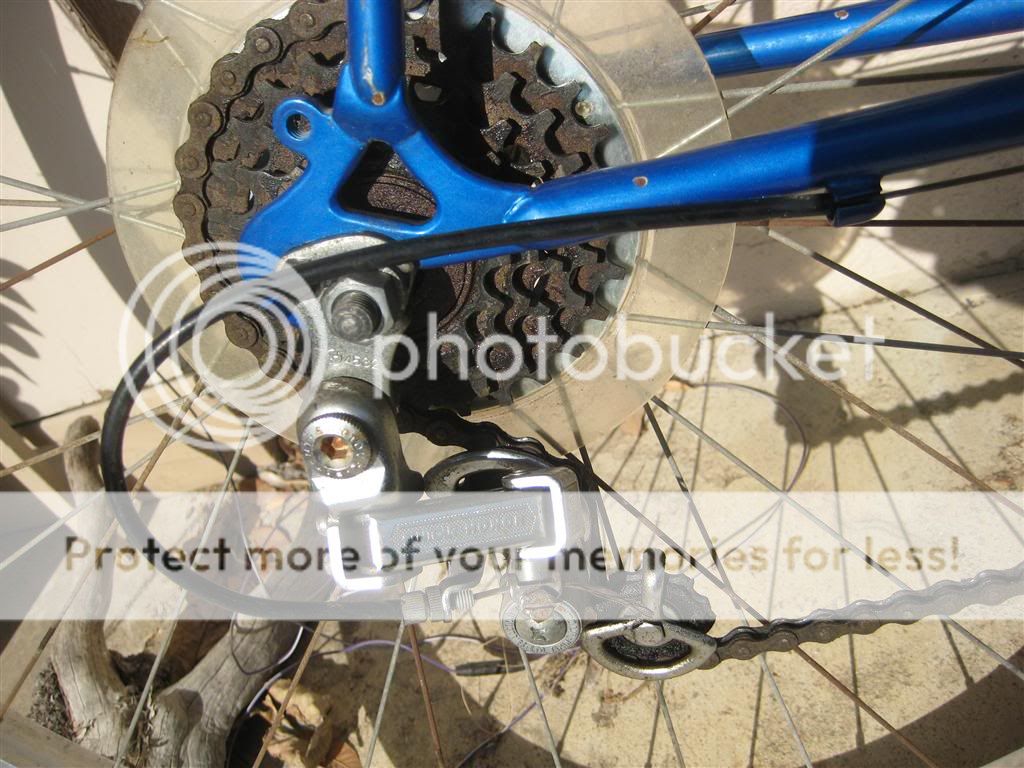
what part is the freewheel?
For new cables, I just basically need to measure the overall length of my old ones and roughly match up for the new ones, just like a chain, right?
For new cables, I just basically need to measure the overall length of my old ones and roughly match up for the new ones, just like a chain, right?
06-13-11, 11:08 PM
#4
No Money and No Sense

Join Date: Sep 2010
Location: Anderson, MO
Posts: 705
Mentioned: 0 Post(s)
Tagged: 0 Thread(s)
Quoted: 0 Post(s)
Likes: 0
Liked 0 Times
in
0 Posts
The freewheel is that cluster of gears on the back wheel. It's a single thread-on piece: the actual "freewheel" is the device that lets you roll forward without pedalling, which is attached to the cogs. Newer bikes use a freehub which separates the gears and the freewheel. 5 speed freewheel spacing is all the same, so you can pick up one from just about any maker. Removal will take a special tool.
You are correct on the cables. The derailleur should be shifted into 1st to release tension on the shifter and derailleur side, and then you can just tighten down the new shift cable.
You are correct on the cables. The derailleur should be shifted into 1st to release tension on the shifter and derailleur side, and then you can just tighten down the new shift cable.
06-14-11, 10:38 AM
#5
Holy crip he's a crapple
Thread Starter
Join Date: Jun 2011
Posts: 164
Mentioned: 0 Post(s)
Tagged: 0 Thread(s)
Quoted: 0 Post(s)
Likes: 0
Liked 0 Times
in
0 Posts
oh I thought that was called a cassette, sorry I'm used to working on my mountain bike, I googled the differences now 
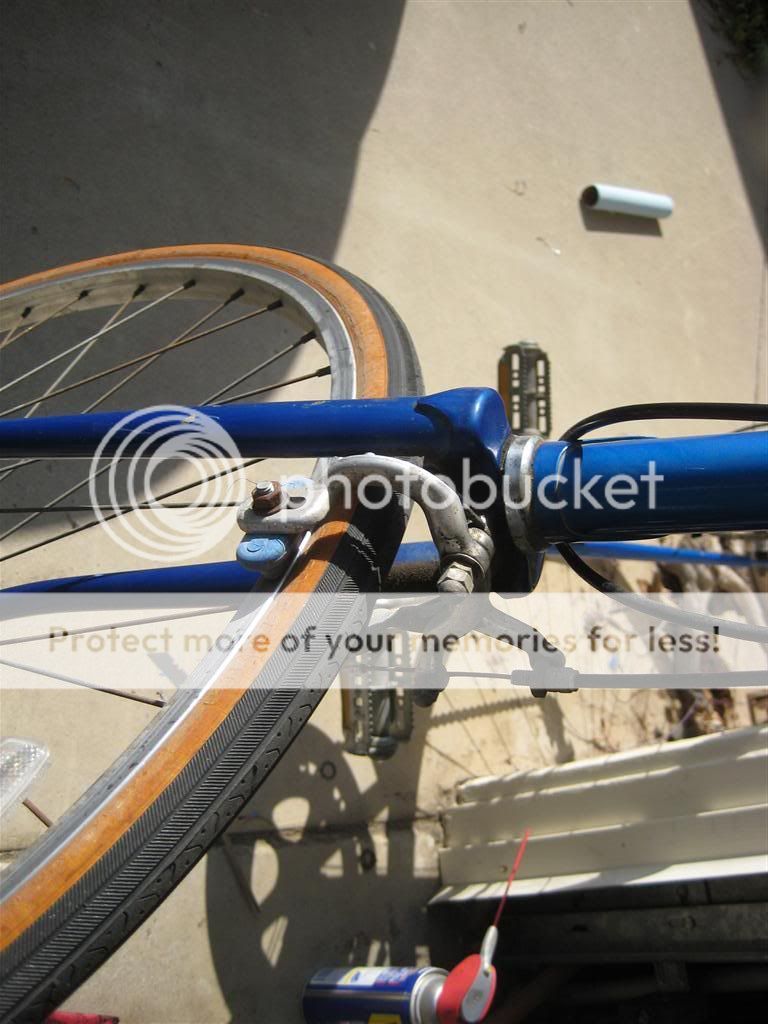
I rode it in to work today and it rides pretty nice, I feel like I want the handlebars further out ahead of me and higher up, but I think I'll give it a couple weeks before I start looking at different bars.
going to take getting used to these shifters too, quite a bit different than the modern shifters I'm used to!
06-14-11, 11:30 AM
#6
No Money and No Sense
Join Date: Sep 2010
Location: Anderson, MO
Posts: 705
Mentioned: 0 Post(s)
Tagged: 0 Thread(s)
Quoted: 0 Post(s)
Likes: 0
Liked 0 Times
in
0 Posts
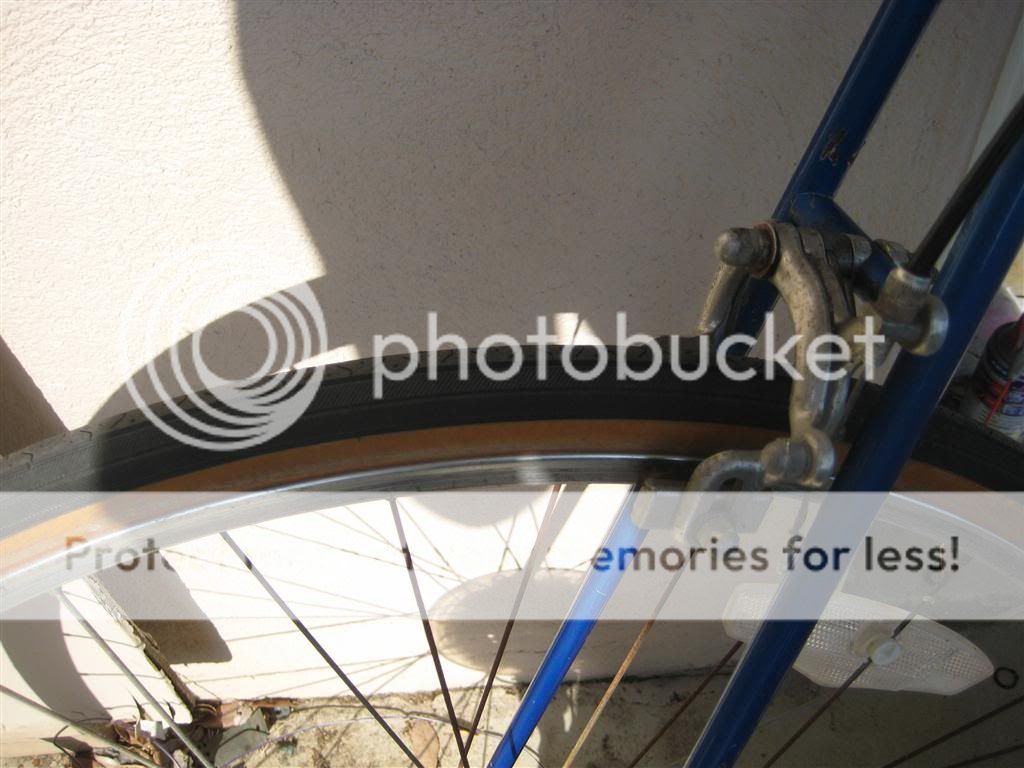
By now you should've rubbed off the top surface of the rims. If they're shiny, they're steel. They suck for braking in rain, but you can help remedy that by getting some salmon Kool Stop pads. If the rims have a matte finish, they're alloy and can use just about any pad - Most people here will still recommend Kool Stops, but you won't need the salmon compound.
06-19-11, 05:12 PM
#7
Holy crip he's a crapple
Thread Starter
Join Date: Jun 2011
Posts: 164
Mentioned: 0 Post(s)
Tagged: 0 Thread(s)
Quoted: 0 Post(s)
Likes: 0
Liked 0 Times
in
0 Posts
I'm fairly sure the wheels are steel, will these brake pads work for me?
https://www.amazon.com/Kool-Stop-Moun...8524790&sr=8-2
or these-
https://www.amazon.com/Kool-Stop-Bicy...8524790&sr=8-1
?
I replaced the brake and shifter cables and housing this morning, and spent some time with a brass bristle brush on the gears, pullies, and chain, followed up with some lithium lube and 'clean chain' wax based chain lube.
The bike is riding quite a bit faster/smoother now, and the brakes work better but the old, dry pads are still not doing much so I think I've got to replace them.
Does anyone have any tips for adjusting these brakes? They are stamped with 'diacompe' on the calipers and brake levers, I used the $5 Bell cables/housing kit from sports authority to replace everything on the bike, I loosened the nuts on the front of the calipers, then squeezed the calipers to the wheels and tightened the cable grab nut, then loosely installed the center nuts and cap/locking nuts to set them up. I'm not sure if this is the correct way or not, the front brakes work pretty good but make a lot of noise, the rear brakes hardly work at all but I think it's the pads mainly.
06-19-11, 06:11 PM
#8
Banned.
Join Date: Dec 2007
Posts: 27,199
Mentioned: 34 Post(s)
Tagged: 1 Thread(s)
Quoted: 378 Post(s)
Liked 1,409 Times
in
909 Posts
Go to Walmart.
Rust Remover (auto section) $6
Cheap paste wax $4
Cable set, complete, $5
Chain, $8
Can of WD40 $4
Black bar wrap $7
Brake pads $7
Chain Lube $4
Marine grease $5
0000 Steel wool $5
Chain tool $6
Side cutter/needle nose pliers $4
If the tires and/or tubes need replacing, try tubes first, also at Walmart.
Take it apart, de-rust the spots. Wash and wax the frame.
Steel wool and WD40 the shiny stuff.
Re-assemble, hang the cables and housing, and chain.
Re-wrap the bar.
Adjust it up, lube it up, and ride.
If you catch the fever, go ahead and repack the hubs and bottom bracket.
One day job if you've been there, done that. Longer if not, but every thing you do, you'll learn.
You'll know and appreciate the bike, and intuitively pick up on what needs to be done.
Have fun, and welcome to the forum.
On the calipers. Hold your hand over them to squeeze them up to the rim. Loosen the cable at the caliper, make sure all the housing is snug where it fits into the calipers and levers, then pull it fairly tight. Then tighten the cable clamp. When you release your hand, you'll be pretty close to where you want, adjustment-wise, as there's enough slack in your grip and the cable to give the pads some clearance when you let go. Adjust afterwards a bit if needed.
If the caliper is crooked, that's ajusted on the main bolt that runs through the frame. Loosen it slightly, move the caliper to a more centered position, and tighten it. Those old side pull calipers don't pull evenly on each side, so having the caliper slightly askew often works better.
Last edited by RobbieTunes; 06-19-11 at 06:17 PM.
07-01-11, 06:46 PM
#9
Holy crip he's a crapple
Thread Starter
Join Date: Jun 2011
Posts: 164
Mentioned: 0 Post(s)
Tagged: 0 Thread(s)
Quoted: 0 Post(s)
Likes: 0
Liked 0 Times
in
0 Posts
After a bit of clean up, and replacing the brake and shifter cables and housings, watched some youtube videos on derailer adjustment and got it shifting perfectly  I've put about 70 miles on this bike commuting to work, I haven't missed a day since I bought the bike
thanks a lot for the tips on setting up the brake calipers, I think I have them as well adjusted as I can get them, I haven't bought new pads yet and it still stops pretty horribly, but at least I have enough power to lock up the tires if I need to..from the drop handles at least, the top handles are freaking useless.
Yesterday I noticed a squeaking/creaking sound coming from the bottom bracket area, it stops if I'm not pedaling, and only happens under load.
I'm planning to take the crankset off and inspect the bottom bracket this weekend, if cleaning/repacking everything with grease doesn't fix this, what do I need to measure / look out for when scouring ebay for a replacement BB / crank set?
I'd love to throw on something lighter with less resistance / more modern, this caught my eye on ebay - https://cgi.ebay.com/Shimano-crankset...#ht_500wt_1413
Would something like that be compatible with my bike?
and I'm fairly sure the wheels are steel, they're quite shiny and look nothing like the wheels on my mtb.
I've put about 70 miles on this bike commuting to work, I haven't missed a day since I bought the bike thanks a lot for the tips on setting up the brake calipers, I think I have them as well adjusted as I can get them, I haven't bought new pads yet and it still stops pretty horribly, but at least I have enough power to lock up the tires if I need to..from the drop handles at least, the top handles are freaking useless.
Yesterday I noticed a squeaking/creaking sound coming from the bottom bracket area, it stops if I'm not pedaling, and only happens under load.
I'm planning to take the crankset off and inspect the bottom bracket this weekend, if cleaning/repacking everything with grease doesn't fix this, what do I need to measure / look out for when scouring ebay for a replacement BB / crank set?
I'd love to throw on something lighter with less resistance / more modern, this caught my eye on ebay - https://cgi.ebay.com/Shimano-crankset...#ht_500wt_1413
Would something like that be compatible with my bike?
and I'm fairly sure the wheels are steel, they're quite shiny and look nothing like the wheels on my mtb.
Last edited by Blind; 07-01-11 at 07:02 PM.
07-01-11, 10:48 PM
#10
No Money and No Sense
Join Date: Sep 2010
Location: Anderson, MO
Posts: 705
Mentioned: 0 Post(s)
Tagged: 0 Thread(s)
Quoted: 0 Post(s)
Likes: 0
Liked 0 Times
in
0 Posts
I think either brake pad will work: There should be plenty of space around the forks and chainstays for them.
As for the bottom bracket, you can get a new cartridge BB fairly cheap. The measurements need to match the width of the frame (probably 68mm), and the width and design (square taper, ISIS, etc.) specified for your crankset. From the picture, it looks like the eBay seller left the BB on the crank, so if it fits, you're good to go. If you decide against a crankset, you may want to try taking everything apart and regreasing it first.
As for the bottom bracket, you can get a new cartridge BB fairly cheap. The measurements need to match the width of the frame (probably 68mm), and the width and design (square taper, ISIS, etc.) specified for your crankset. From the picture, it looks like the eBay seller left the BB on the crank, so if it fits, you're good to go. If you decide against a crankset, you may want to try taking everything apart and regreasing it first.
07-04-11, 09:41 PM
#11
Holy crip he's a crapple
Thread Starter
Join Date: Jun 2011
Posts: 164
Mentioned: 0 Post(s)
Tagged: 0 Thread(s)
Quoted: 0 Post(s)
Likes: 0
Liked 0 Times
in
0 Posts
pulled the bottom bracket apart and found the bearings and cages they sit in all gummy and rusty colored with some grit on them, cleaned them all up and repacked the bearings with synthetic wheel bearing grease and threw it back together, they spin nice and smooth now.
Next I need to figure out how to take the front and rear hubs apart, they both are stamped suntour japan, can these be serviced without buying special tools? I got the cranks off without too much hassle with a dead blow hammer and pry bar, but I'm a ham fisted backyard mechanic that scca races cars as you may be able to tell by what's stacked in the garage behind my bike in the above pictures, haha.
Next I need to figure out how to take the front and rear hubs apart, they both are stamped suntour japan, can these be serviced without buying special tools? I got the cranks off without too much hassle with a dead blow hammer and pry bar, but I'm a ham fisted backyard mechanic that scca races cars as you may be able to tell by what's stacked in the garage behind my bike in the above pictures, haha.
07-04-11, 10:24 PM
#12
No Money and No Sense
Join Date: Sep 2010
Location: Anderson, MO
Posts: 705
Mentioned: 0 Post(s)
Tagged: 0 Thread(s)
Quoted: 0 Post(s)
Likes: 0
Liked 0 Times
in
0 Posts
The front wheel you can take off and unscrew the cones: As long as one of them loosens up, you can slide the axle back and forth to get some grease into the bearings. You'll need to remove the freewheel to reach the right-side cone on the rear. This requires a special Suntour-specific freewheel tool.
BTW - If you decide to get a new freewheel, any ISO-threaded (99.9% of all hubs) 5-speed will fit. Anything new will have a twist-tooth design that shifts easier.
You don't have to have a cone wrench, but it makes this a lot easier. This is a flat wrench that can be used on the cones while on the bike, so you can tweak the cone tightness. On -most- bikes like this you'll have 13mm cones on the front and 15mm on the rear. You can get a single wrench with both sizes.
 07-05-11, 12:37 PM
#14
Holy crip he's a crapple
Thread Starter
Join Date: Jun 2011
Posts: 164
Mentioned: 0 Post(s)
Tagged: 0 Thread(s)
Quoted: 0 Post(s)
Likes: 0
Liked 0 Times
in
0 Posts
07-05-11, 12:52 PM
#16

Senior Member

Join Date: Apr 2007
Location: Thunder Bay, Ontario, Canada - burrrrr!
Posts: 11,674
Bikes: 1958 Rabeneick 120D, 1968 Legnano Gran Premio, 196? Torpado Professional, 2000 Marinoni Piuma
Mentioned: 210 Post(s)
Tagged: 0 Thread(s)
Quoted: 1372 Post(s)
Likes: 0
Liked 1,751 Times
in
938 Posts
Restoring the Peugeot PX10 discusses many of the things one should or could do when restoring an old road bicycle. There are other articles in the website that also help one understand how to go about fixing up an old bike.
Hope it is a help.
Hope it is a help.
__________________
"98% of the bikes I buy are projects".
"98% of the bikes I buy are projects".
07-05-11, 01:00 PM
#17
Holy crip he's a crapple
Thread Starter
Join Date: Jun 2011
Posts: 164
Mentioned: 0 Post(s)
Tagged: 0 Thread(s)
Quoted: 0 Post(s)
Likes: 0
Liked 0 Times
in
0 Posts
yes, autox and road course, I usually get out to willow springs (socal) about once a month if time permits. 275 all around, it's basically a 500hp gokart
great link, thank you!
One annoying thing I wasn't able to resolve this weekend was the pullies on my rear derailer are making a squeeking noise, I hate noises like this and it's driving me nuts, I couldn't get the noise to go away, even with a temporary fix with a squirt of wd40 which usually helps me track down the source of noise on moving pullies like this.
Can I use a modern rear derailer with my stem mounted suntour friction shifters? I assume it would work fine?
I found an old trek 800 womens mountain bike on the side of the road a few years ago and have used parts off it to keep my wifes trek 880 mountain bike running well, it has a Shimano Altus rear derailer on it iirc, but the pullies gears on it are double the size of the ones on my bike. I noticed shimano 105 or ultegra rear derailers are running under $30, and the pullies look about the same size as mine. Would these be worth a shot for swapping on if I can't get these pullies to stop squeeking?
Restoring the Peugeot PX10 discusses many of the things one should or could do when restoring an old road bicycle. There are other articles in the website that also help one understand how to go about fixing up an old bike.
Hope it is a help.
Hope it is a help.
One annoying thing I wasn't able to resolve this weekend was the pullies on my rear derailer are making a squeeking noise, I hate noises like this and it's driving me nuts, I couldn't get the noise to go away, even with a temporary fix with a squirt of wd40 which usually helps me track down the source of noise on moving pullies like this.
Can I use a modern rear derailer with my stem mounted suntour friction shifters? I assume it would work fine?
I found an old trek 800 womens mountain bike on the side of the road a few years ago and have used parts off it to keep my wifes trek 880 mountain bike running well, it has a Shimano Altus rear derailer on it iirc, but the pullies gears on it are double the size of the ones on my bike. I noticed shimano 105 or ultegra rear derailers are running under $30, and the pullies look about the same size as mine. Would these be worth a shot for swapping on if I can't get these pullies to stop squeeking?

