


1960's Raleigh "Rough"storation (w/ Pics)


 05-01-12, 05:24 PM
#27
Hopelessly addicted...

Join Date: Aug 2009
Location: Central Maryland
Posts: 4,955
Bikes: 1949 Hercules Kestrel, 1950 Norman Rapide, 1970 Schwinn Collegiate, 1972 Peugeot UE-8, 1976 Raleigh Sports, 1977 Raleigh Sports, 1977 Jack Taylor Tandem, 1984 Davidson Tandem, 2010 Bilenky "BQ" 650B Constructeur Tandem, 2011 Linus Mixte
Mentioned: 13 Post(s)
Tagged: 0 Thread(s)
Quoted: 3 Post(s)
Likes: 0
Liked 10 Times
in
9 Posts
She's moving in a very encouraging direction. I'd have to say nice work! I know I've commented on this before, but you have THE BEST avatar on the forums. 
05-08-12, 07:38 PM
#28
Senior Member
Thread Starter
Join Date: Aug 2010
Posts: 263
Mentioned: 0 Post(s)
Tagged: 0 Thread(s)
Quoted: 0 Post(s)
Likes: 0
Liked 1 Time
in
1 Post
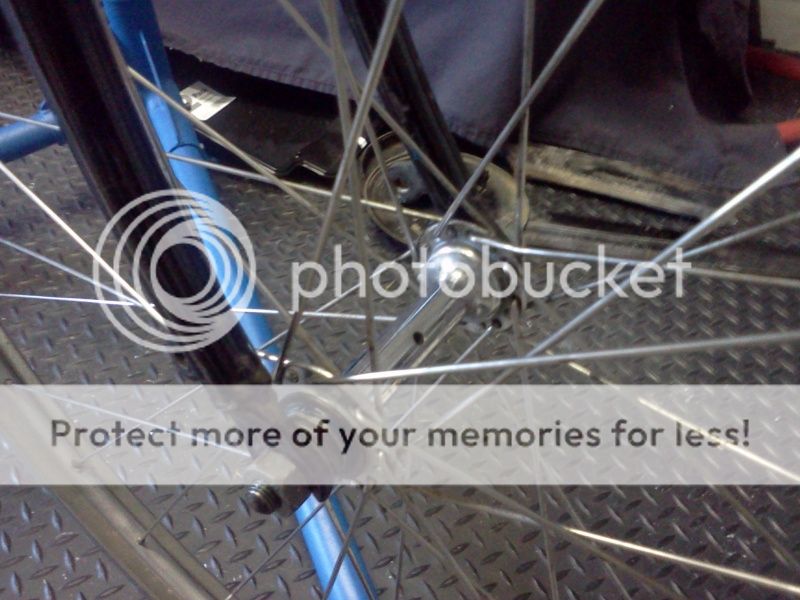
I've been screwing around in the garage this week. I'm cleaning up individual components with varying success. I was able to swing by my LBS and pick up some critical stem and BB bearings today.
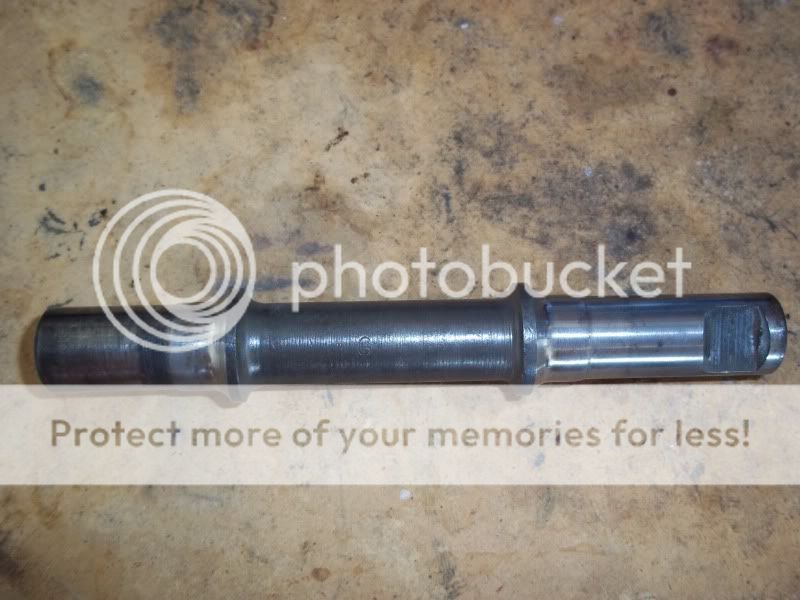
Here is the BB shaft ready for install.
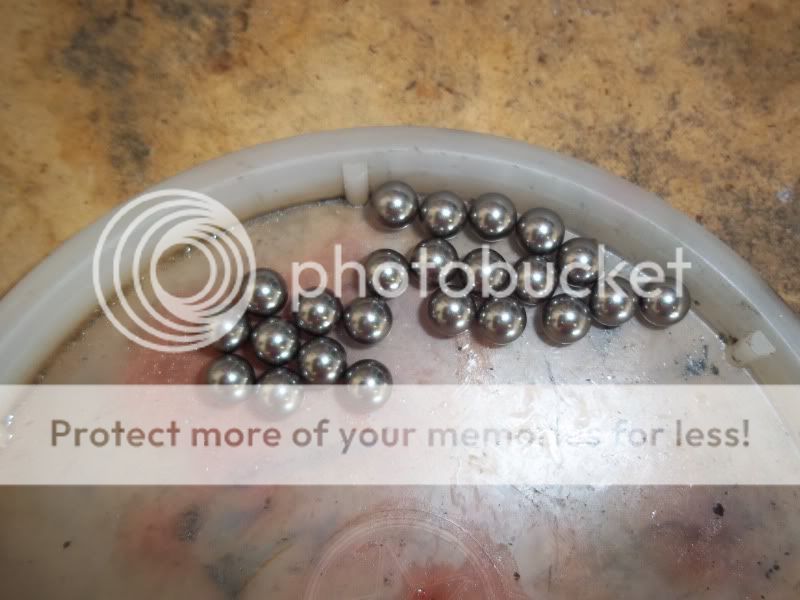
NEW BALLS!
Final assembly
She turns smooth as butter.
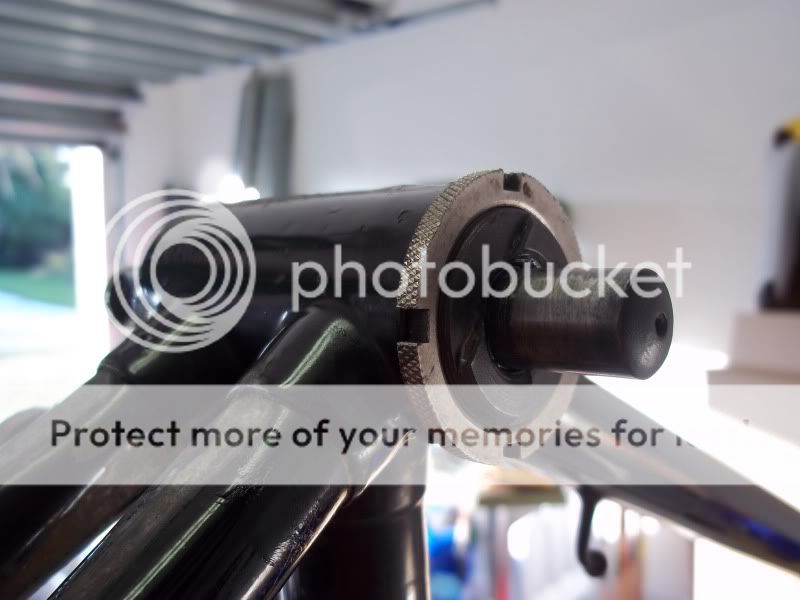
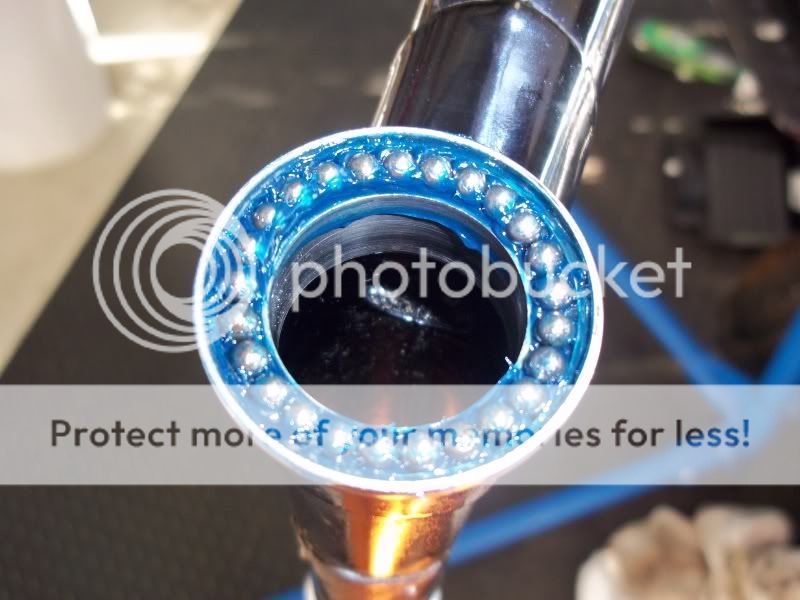
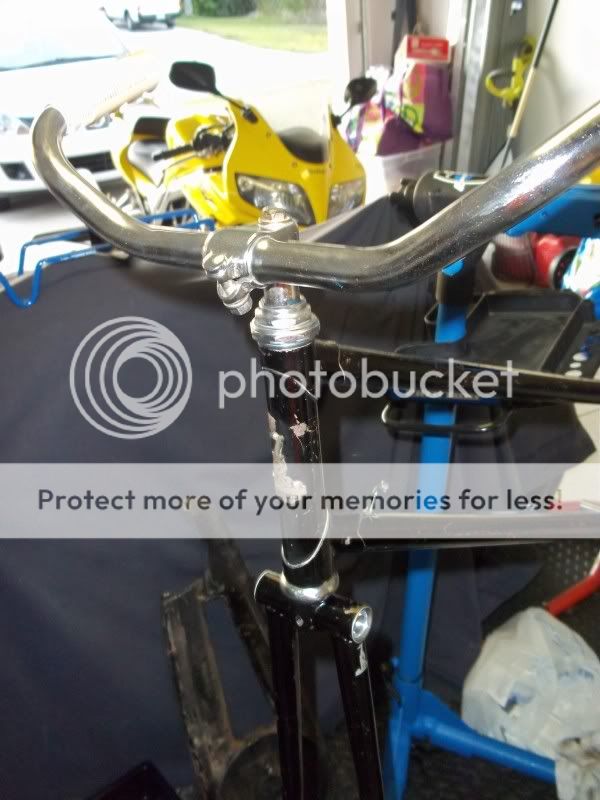
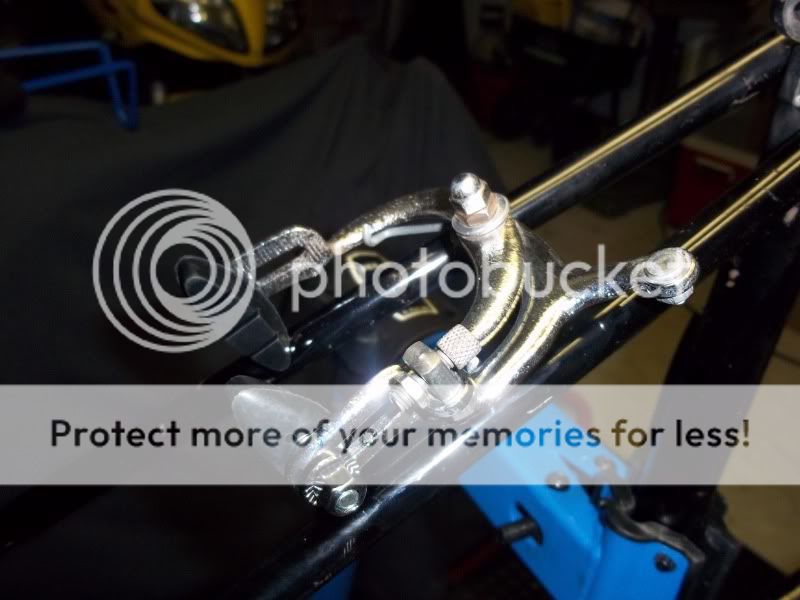
Next came the steering stem. I assembled it upside down. This is the lower cup with fresh bearings and grease.
My hands were to greasy for a "mid-stroke pic" but you get the idea.
I found some oxalic acid today at my local ACE hardware. I'll be learning the ropes this week.
Here is the BB shaft ready for install.
NEW BALLS!
Final assembly
She turns smooth as butter.
Next came the steering stem. I assembled it upside down. This is the lower cup with fresh bearings and grease.
My hands were to greasy for a "mid-stroke pic" but you get the idea.
I found some oxalic acid today at my local ACE hardware. I'll be learning the ropes this week.
Last edited by supafast213; 06-03-12 at 05:48 PM.
05-09-12, 04:01 AM
#29
Senior Member

Join Date: Apr 2010
Location: vermont
Posts: 3,081
Bikes: Many
Mentioned: 8 Post(s)
Tagged: 0 Thread(s)
Quoted: 5 Post(s)
Likes: 0
Liked 10 Times
in
10 Posts
It's pretty unusual to see that much of the human form on BF.
The project is coming along fantastic. I guess it's late to mention it but the seat tube is hollow all the way to the bottom bracket bearings and there is a removable shield inside the BB shell.
I overlooked cleaning out the seat tube on an older machine and went back to find an entire civilization living in the bottom of the seat tube.
05-09-12, 12:55 PM
#30
Elitest Murray Owner

Join Date: Apr 2006
Posts: 2,657
Bikes: 1972 Columbia Tourist Expert III, Columbia Roadster
Mentioned: 0 Post(s)
Tagged: 0 Thread(s)
Quoted: 1 Post(s)
Likes: 0
Liked 3 Times
in
2 Posts
Shouldn't there only be 24 balls in a raleigh headset? Or am I recalling wrong?
05-09-12, 01:39 PM
#31
Senior Member
Thread Starter
Join Date: Aug 2010
Posts: 263
Mentioned: 0 Post(s)
Tagged: 0 Thread(s)
Quoted: 0 Post(s)
Likes: 0
Liked 1 Time
in
1 Post
Good question Mos. I'm not really sure. Most of the original balls were desentegrated or ejected out of the stem during disassembly. (Now you see why I post these threads, so you guys can check my work). Lets ask the experts. 24 or 25 balls? At this point, it won't be to painfull to correct this mistake.
05-09-12, 02:37 PM
#32
Senior Member

Join Date: May 2008
Location: Southwest Michigan
Posts: 1,554
Bikes: Fuji Monterey, Schwinn Traveler, Fuji Special Road Racer, Gitane Interclub, Sun EZ-1, Schwinn Frontier, Puch Cavalier, Vista Cavalier, Armstrong, Raleigh Sports, Schwinn Stingray
Mentioned: 0 Post(s)
Tagged: 0 Thread(s)
Quoted: 1 Post(s)
Likes: 0
Liked 2 Times
in
2 Posts
Very nice work. Thanks for posting this beautiful bike. I like the other pic, but it's not the sort of thing I should be looking at during my break at work.
05-09-12, 03:47 PM
#33
Senior Member

Join Date: Oct 2011
Location: Normal, Illinois
Posts: 2,714
Bikes: Trek 600 ,1980Raleigh Competition G.S., 1986 Schwinn Passage, Facet Biotour 2000, Falcon San Remo 531,Schwinn Sierra, Sun Seeker tricycle recumbent,1985 Bianchi Squadra
Mentioned: 1 Post(s)
Tagged: 0 Thread(s)
Quoted: 33 Post(s)
Liked 12 Times
in
9 Posts
4 beers ? Looks like a 6 pack worth of work to me. Great job ! C Clamp works great for that , just did 2 on my Raleigh Grand Prix, same exact method .
05-09-12, 06:16 PM
#34
Senior Member
Thread Starter
Join Date: Aug 2010
Posts: 263
Mentioned: 0 Post(s)
Tagged: 0 Thread(s)
Quoted: 0 Post(s)
Likes: 0
Liked 1 Time
in
1 Post
Well I pulled the stem down to double check my work. The top had 24 balls so I pulled 1 ball out of the bottom and reassembled. My inner feeling is that 24 is the correct number. Thanks for calling me on it.
Gravity, I keep my local booze depot in business while I work on bikes. For better or worse, that's just the way I do it.
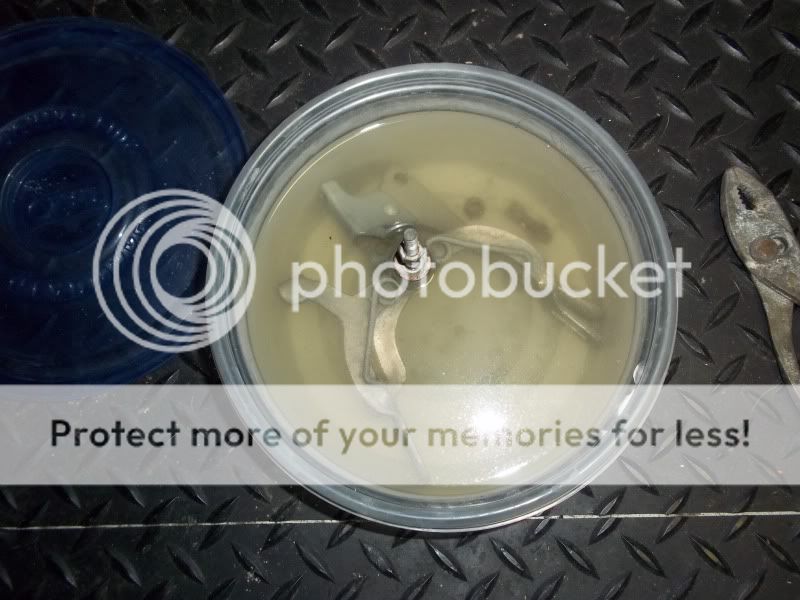
I found the perfect container to hold the Oxy while soaking the chain case. I think I'll throw a few other parts in the mix to soak while the chain case gets some love. In the mean time, I have to figure out how much water it will take to submerge the case and mix the acid accordingly. I guess I should clean the case as much as possible before turning it loose on the acid.
Gravity, I keep my local booze depot in business while I work on bikes. For better or worse, that's just the way I do it.
I found the perfect container to hold the Oxy while soaking the chain case. I think I'll throw a few other parts in the mix to soak while the chain case gets some love. In the mean time, I have to figure out how much water it will take to submerge the case and mix the acid accordingly. I guess I should clean the case as much as possible before turning it loose on the acid.
05-10-12, 04:11 AM
#35
Senior Member
Join Date: Oct 2011
Location: Normal, Illinois
Posts: 2,714
Bikes: Trek 600 ,1980Raleigh Competition G.S., 1986 Schwinn Passage, Facet Biotour 2000, Falcon San Remo 531,Schwinn Sierra, Sun Seeker tricycle recumbent,1985 Bianchi Squadra
Mentioned: 1 Post(s)
Tagged: 0 Thread(s)
Quoted: 33 Post(s)
Liked 12 Times
in
9 Posts
Might try vinegar first, to get the worst of it off .
05-12-12, 07:13 PM
#36
Senior Member
Thread Starter
Join Date: Aug 2010
Posts: 263
Mentioned: 0 Post(s)
Tagged: 0 Thread(s)
Quoted: 0 Post(s)
Likes: 0
Liked 1 Time
in
1 Post
The Raleigh has been patient while I screw around cleaning sub-assembly's and figure out this acid thing.
Rear brakes, I know, not the correct pads.
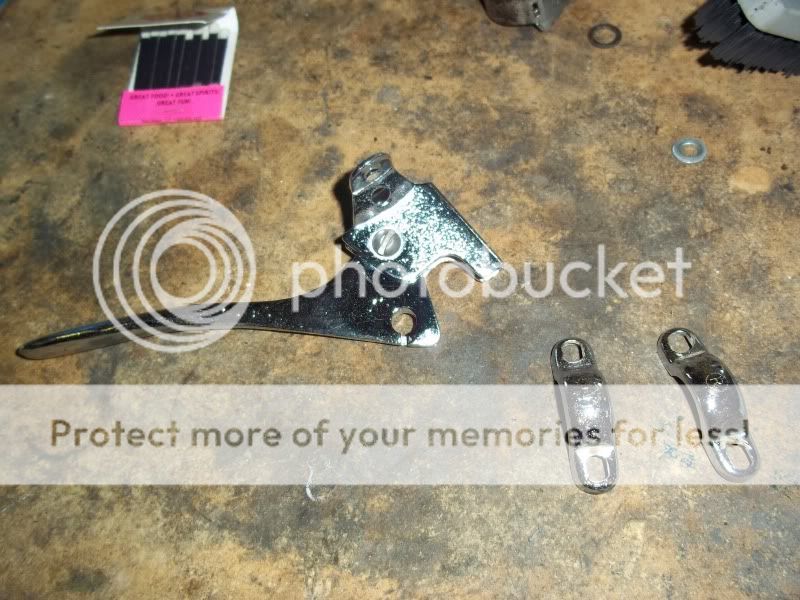
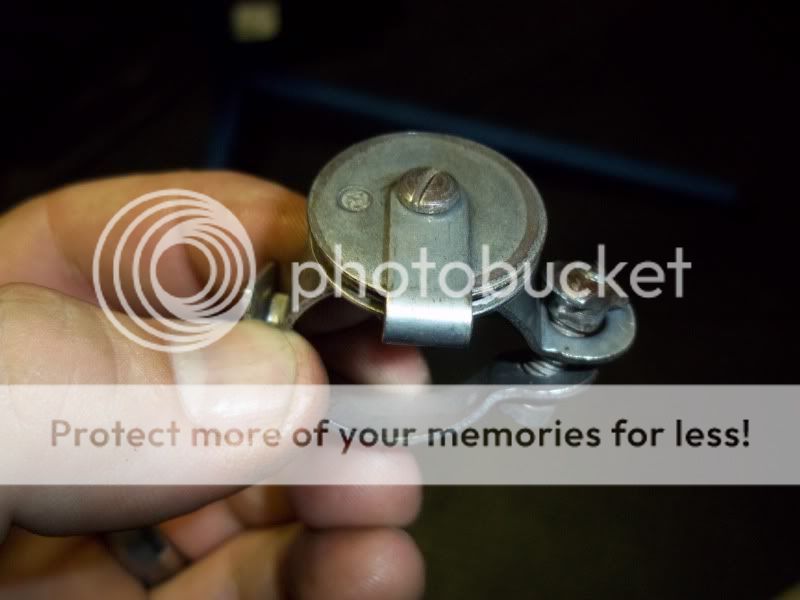
Front hub components (the best bearings in the bike so far) Also, a pic of the pedals. The left pedal is as clean as I can get it and the internals are clean and regreased. The right pedal is how they both looked. If anyone knows how to remove the rubber for cleaning, please speak up.

My current batch of crap in the oxy.
Some other parts and pieces.

Rear brakes, I know, not the correct pads.
Front hub components (the best bearings in the bike so far) Also, a pic of the pedals. The left pedal is as clean as I can get it and the internals are clean and regreased. The right pedal is how they both looked. If anyone knows how to remove the rubber for cleaning, please speak up.
My current batch of crap in the oxy.
Some other parts and pieces.
05-14-12, 06:07 AM
#37
Hopelessly addicted...
Join Date: Aug 2009
Location: Central Maryland
Posts: 4,955
Bikes: 1949 Hercules Kestrel, 1950 Norman Rapide, 1970 Schwinn Collegiate, 1972 Peugeot UE-8, 1976 Raleigh Sports, 1977 Raleigh Sports, 1977 Jack Taylor Tandem, 1984 Davidson Tandem, 2010 Bilenky "BQ" 650B Constructeur Tandem, 2011 Linus Mixte
Mentioned: 13 Post(s)
Tagged: 0 Thread(s)
Quoted: 3 Post(s)
Likes: 0
Liked 10 Times
in
9 Posts
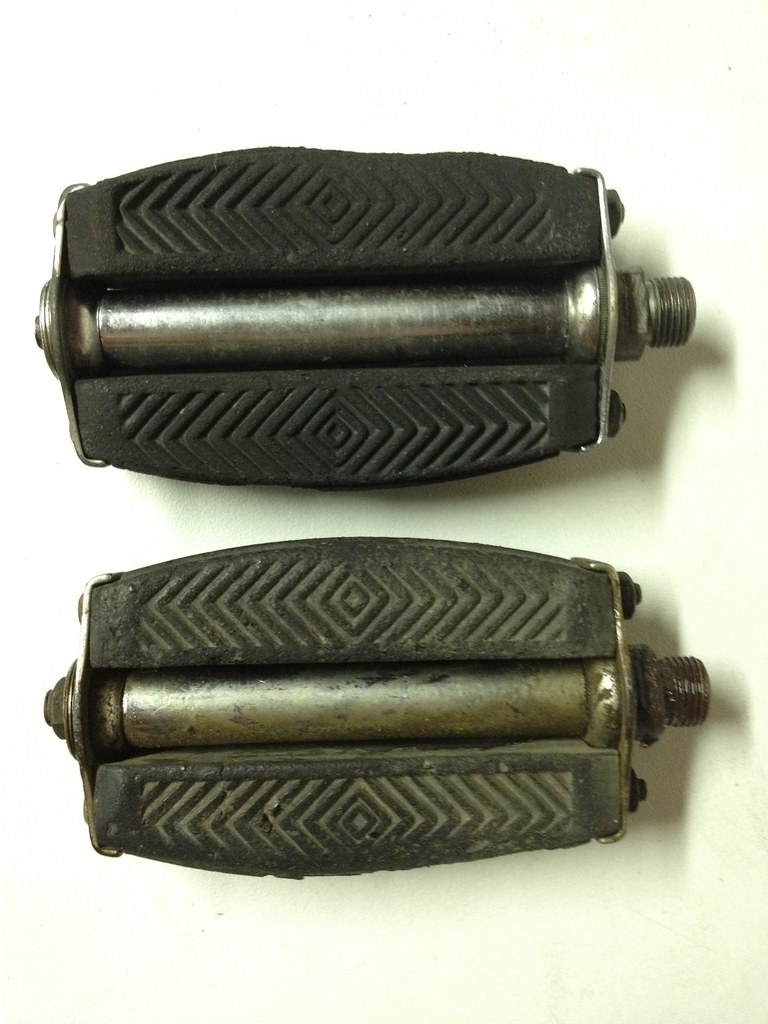
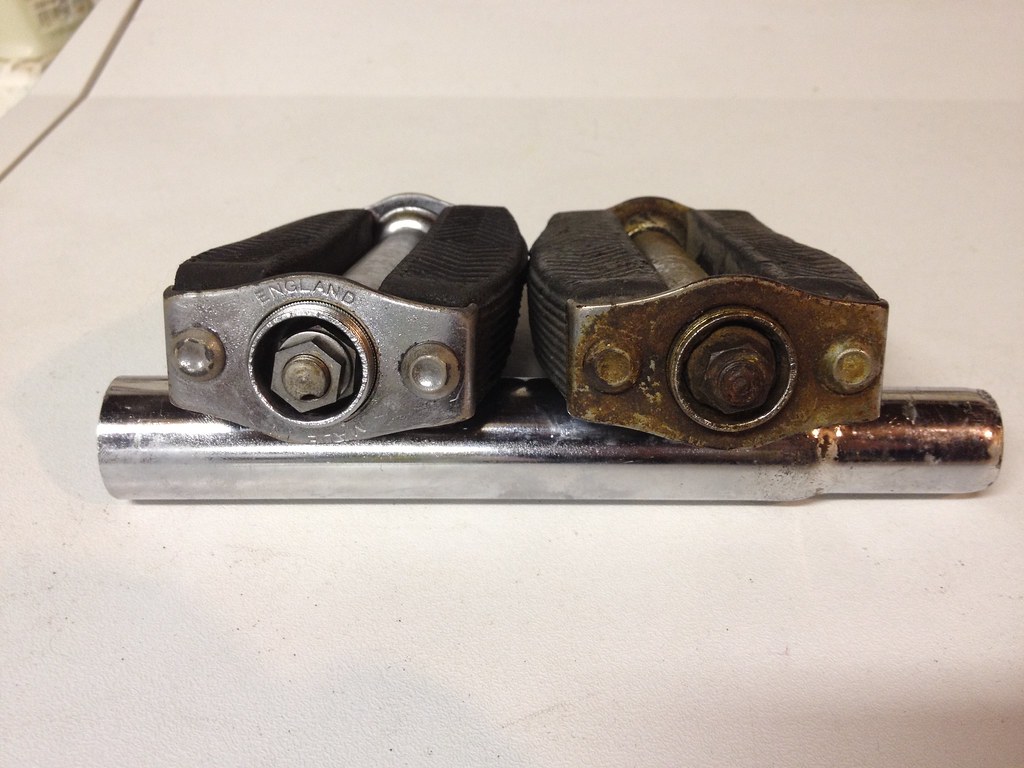
To clean the pedals you need to take the cap of the end, then you remove the nuts where they go through the rubber. You should be able to pull off the end caps at that point and disassemble the rest of the pedal and reassemble it. Below are what mine looked like before and after they have been disassembled and cleaned.
BTW, thanks for the pic!! I should have known that she was wearing French heel hose.
Pedals - Before and After - 1 by Sallad Rialb, on Flickr
Pedals - Before and After - 2 by Sallad Rialb, on Flickr

Pedals - Before and After - 3 by Sallad Rialb, on Flickr
BTW, thanks for the pic!! I should have known that she was wearing French heel hose.
Pedals - Before and After - 1 by Sallad Rialb, on Flickr
Pedals - Before and After - 2 by Sallad Rialb, on Flickr
Pedals - Before and After - 3 by Sallad Rialb, on Flickr
06-03-12, 05:21 PM
#39
Senior Member
Thread Starter
Join Date: Aug 2010
Posts: 263
Mentioned: 0 Post(s)
Tagged: 0 Thread(s)
Quoted: 0 Post(s)
Likes: 0
Liked 1 Time
in
1 Post
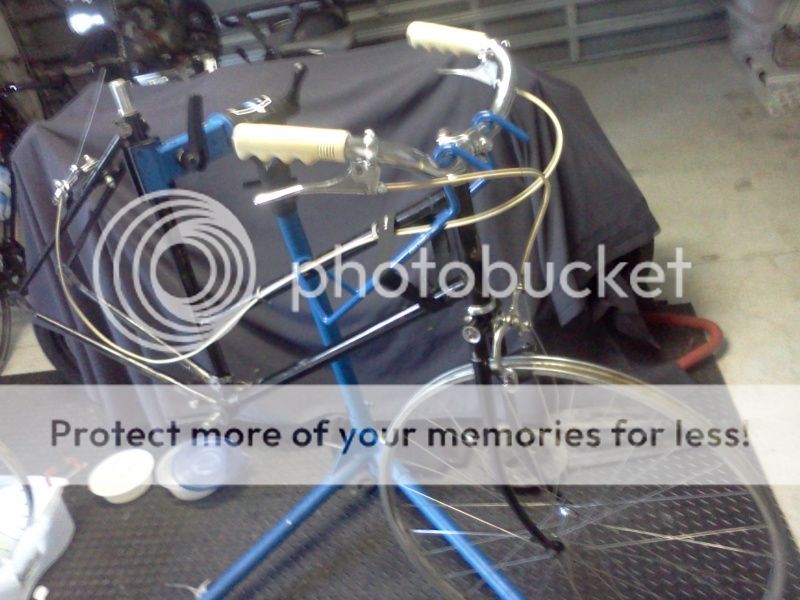
I snapped some pics today before going to visit Mr. Ted and Mrs. Girdy. These are the most up to date shots so far. Sorry for the cell phone pics.
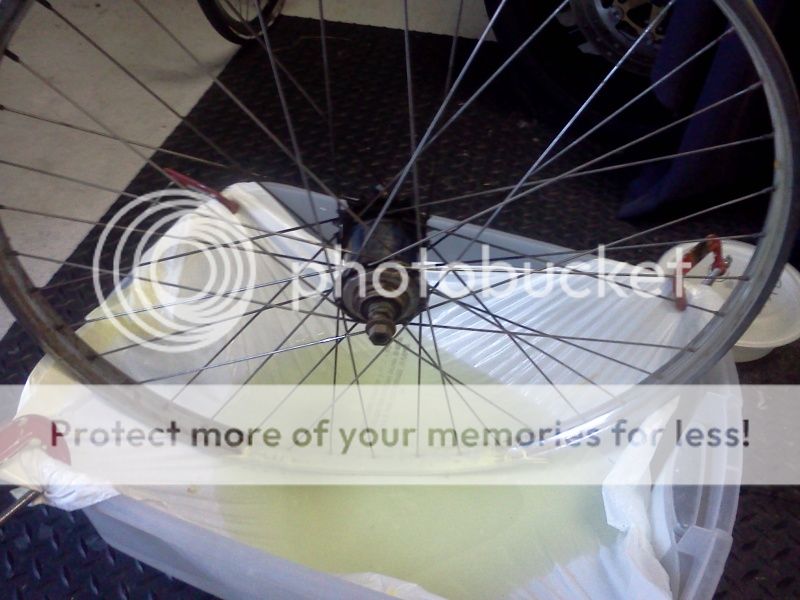
Here is my take on the OA bath. I can use about a gallon of solution with this setup, however, I have to rotate the rim once a day. You can see the difference from one side to the other.
The front wheel has been through this process and the hub had been cleaned and regreased.
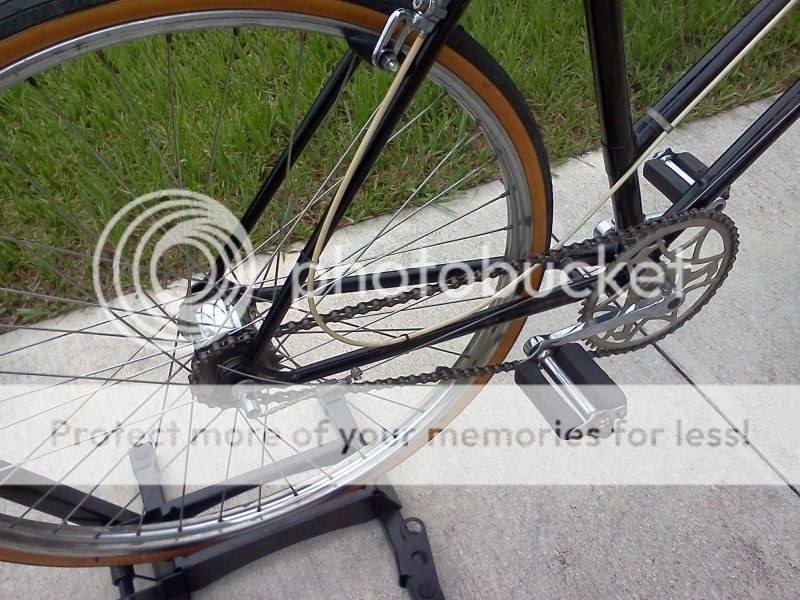
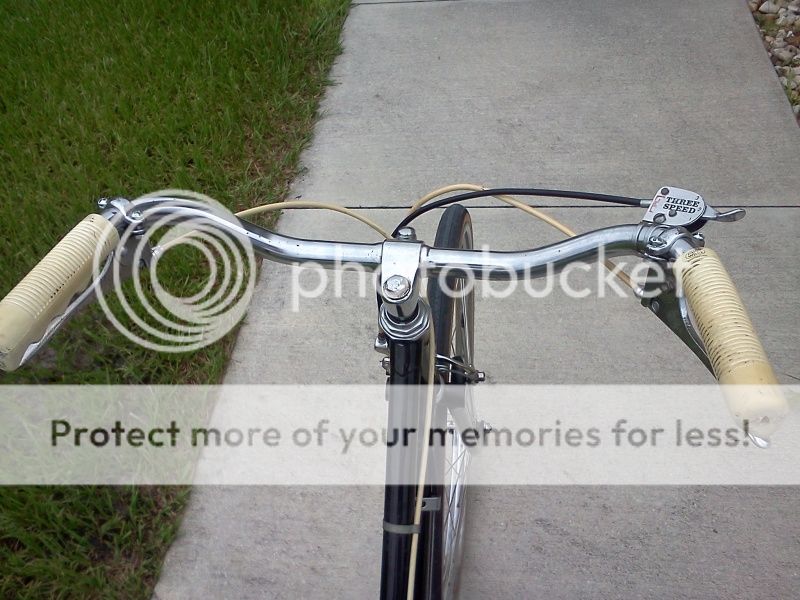
Here is a shot of the bike as it sits today.
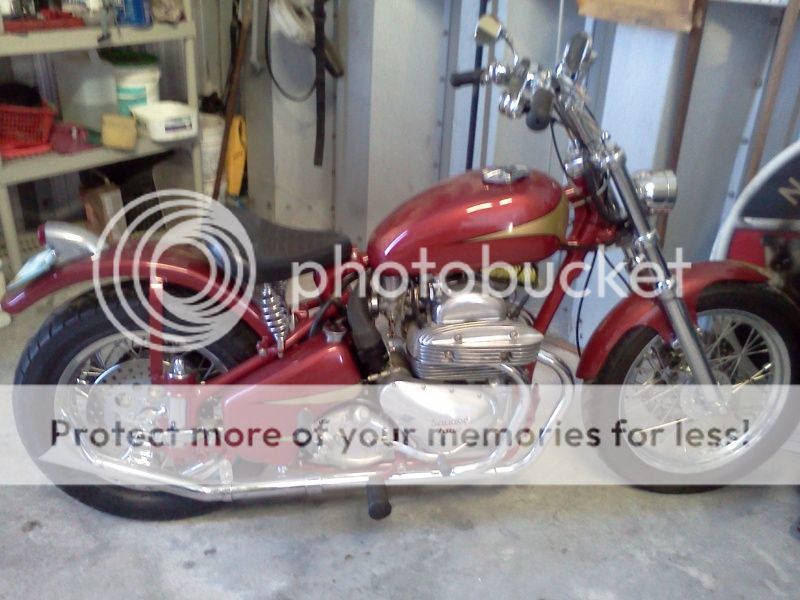
While visiting Mr. Ted, I helped him with a true C&V bike. He has a beautiful 1954 Ariel Square Four, the same year as the Raleigh.
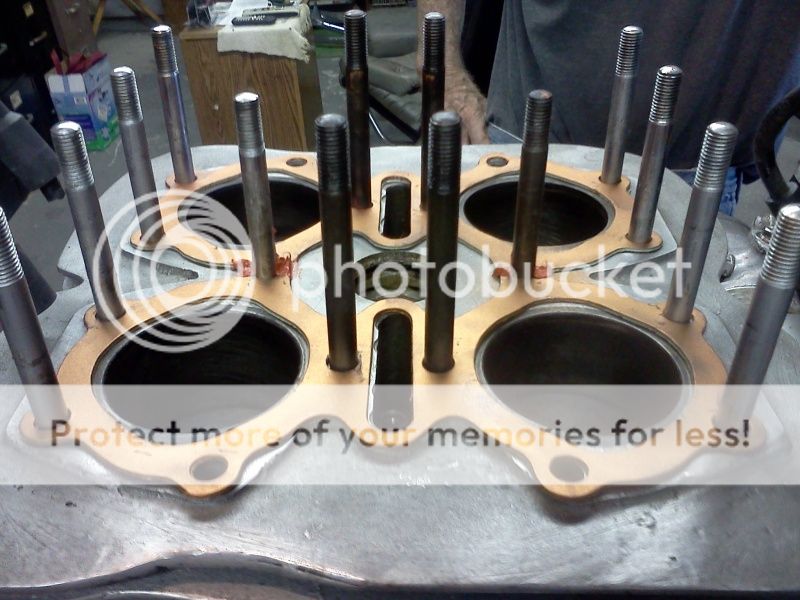
We changed the head gasket, so I snapped some shots of the inside of a motor you will never see.
Manifold and valve covers removed.
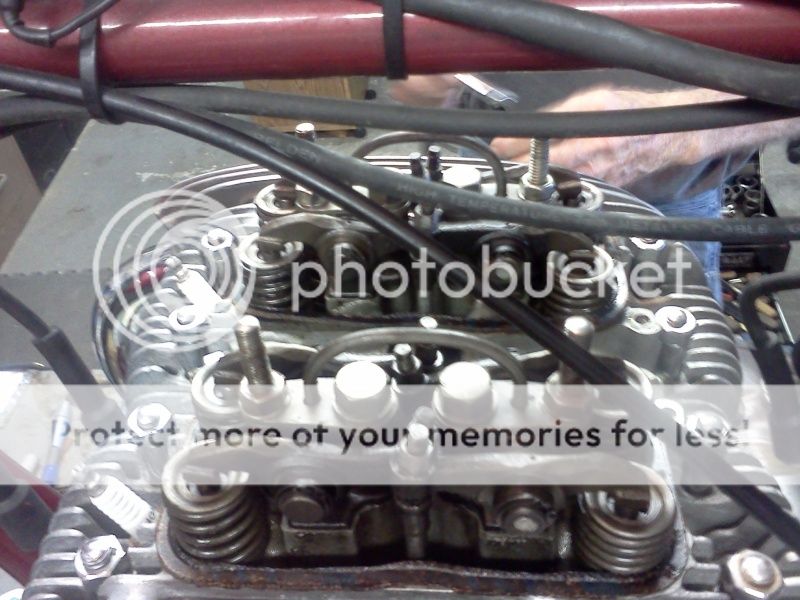
Head gasket surfaces prepped and ready.

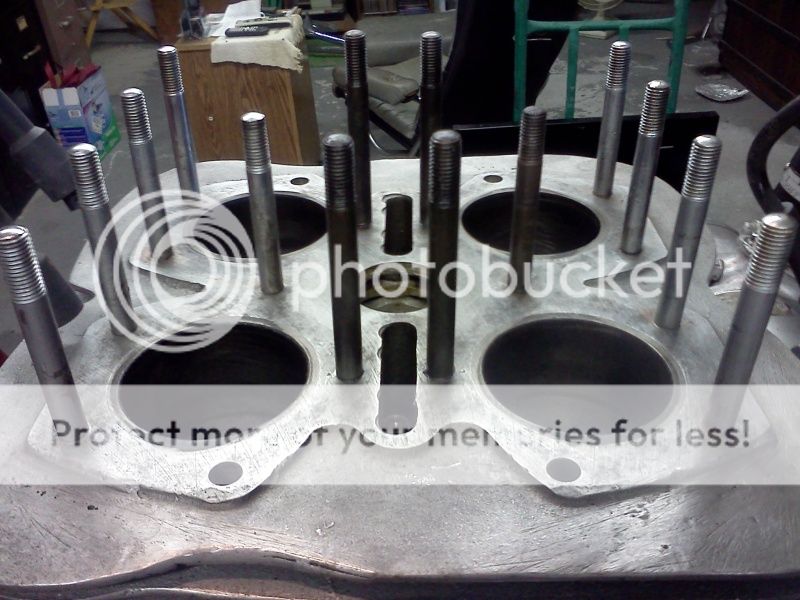
What we came to do...
 06-03-12, 06:10 PM
#40
Senior Member
Thread Starter
Join Date: Aug 2010
Posts: 263
Mentioned: 0 Post(s)
Tagged: 0 Thread(s)
Quoted: 0 Post(s)
Likes: 0
Liked 1 Time
in
1 Post
photogravity
She's moving in a very encouraging direction. I'd have to say nice work! I know I've commented on this before, but you have THE BEST avatar on the forums.
She's moving in a very encouraging direction. I'd have to say nice work! I know I've commented on this before, but you have THE BEST avatar on the forums.
My avatar got pulled guys. Sorry. Now it's just me looking back at YOU.
06-03-12, 07:31 PM
#41
Hopelessly addicted...
Join Date: Aug 2009
Location: Central Maryland
Posts: 4,955
Bikes: 1949 Hercules Kestrel, 1950 Norman Rapide, 1970 Schwinn Collegiate, 1972 Peugeot UE-8, 1976 Raleigh Sports, 1977 Raleigh Sports, 1977 Jack Taylor Tandem, 1984 Davidson Tandem, 2010 Bilenky "BQ" 650B Constructeur Tandem, 2011 Linus Mixte
Mentioned: 13 Post(s)
Tagged: 0 Thread(s)
Quoted: 3 Post(s)
Likes: 0
Liked 10 Times
in
9 Posts
 As you had the best avatar EVER, I'm slightly disappointed.
  07-17-12, 12:40 PM
#42
Senior Member
Thread Starter
Join Date: Aug 2010
Posts: 263
Mentioned: 0 Post(s)
Tagged: 0 Thread(s)
Quoted: 0 Post(s)
Likes: 0
Liked 1 Time
in
1 Post
Well it got hot here in Florida and my garage moral has been low. Despite the baking temps, I've been able to make slow progress on the Raleigh. The bike is now ride-able and nearly complete. I've been cruising around the block and tightening/adjusting stuff today.


To commemorate the speed of this build, I took this photo yesterday after a storm....

To commemorate the speed of this build, I took this photo yesterday after a storm....
08-31-12, 12:06 PM
#43
Full Member
Sorry if I'm bumping a dead thread here, but I have wheels that are surprisingly true but about as rusty as the ones that were on this bike. Now that I see there is hope for them I was wondering if you could give me a rundown on the process.
Thanks.
Thanks.
09-02-12, 02:12 PM
#44
Senior Member
Thread Starter
Join Date: Aug 2010
Posts: 263
Mentioned: 0 Post(s)
Tagged: 0 Thread(s)
Quoted: 0 Post(s)
Likes: 0
Liked 1 Time
in
1 Post
This pic pretty much sums up my wheel program. I clamped a trash bag in a plastic bin to minimize the amount of solution needed to soak a round wheel. This method was good for me because it was my first time using OA and the rear hub could not be submerged. I was able to soak 6-9 inches of rim per day, so the process was a bit drawn out. After soaking a section, I blasted it with water, blew it off with compressed air and wiped/polished the section.
Doing one section at a time let me refine my water/OA ratio and taught me to change the solution every 1-2 dips as the acid would lose it's effectiveness.
I encourage you to search this subject before trying it. My experience is minimal compared to the others in this forum.
Don't forget, if the rims are that bad, the bearings probably need attention.
Last edited by supafast213; 09-02-12 at 04:09 PM.
09-02-12, 04:03 PM
#45
Senior Member
Join Date: Oct 2010
Posts: 143
Mentioned: 0 Post(s)
Tagged: 0 Thread(s)
Quoted: 12 Post(s)
Likes: 0
Liked 7 Times
in
2 Posts
Great bike and thanks for the detailed thread! The pics make it look like you just soaked the brakes and rims (with spokes installed) in the oxalic acid bath without dis-assembling them. Is that what you did? Do you expect these moving/threaded parts to hold up without overhaul and grease/lubricant?
09-02-12, 04:12 PM
#46
Senior Member
Thread Starter
Join Date: Aug 2010
Posts: 263
Mentioned: 0 Post(s)
Tagged: 0 Thread(s)
Quoted: 0 Post(s)
Likes: 0
Liked 1 Time
in
1 Post
Good question RBG. The spoke nipples needed some lubrication before I could do the final truing of the wheel. The front brake calipers were soaked "mostly" assembled. I found the aluminum spacers to be brittle once reassembled. Luckily, I had some spares to correct my mistake. To answer your question, I do expect these parts to hold up, but they need some love after soaking them in OA.
09-02-12, 04:14 PM
#47
Senior Member
Join Date: Apr 2010
Location: vermont
Posts: 3,081
Bikes: Many
Mentioned: 8 Post(s)
Tagged: 0 Thread(s)
Quoted: 5 Post(s)
Likes: 0
Liked 10 Times
in
10 Posts
Hey, your friends bike is looking good. Just get a big fan and get some air moving in your shop space
Aren't those stainless steel rims? I had an older Rudge with those rims and I found they were 400 series stainless steel. I had no idea OA would work on SS.
Aren't those stainless steel rims? I had an older Rudge with those rims and I found they were 400 series stainless steel. I had no idea OA would work on SS.
Last edited by ftwelder; 09-02-12 at 04:18 PM.
09-02-12, 04:24 PM
#48
Senior Member
Thread Starter
Join Date: Aug 2010
Posts: 263
Mentioned: 0 Post(s)
Tagged: 0 Thread(s)
Quoted: 0 Post(s)
Likes: 0
Liked 1 Time
in
1 Post
I didn't see the second half of your post until I quoted it. I'm not sure if the rims are stainless or not. I can say that they were rusty as hell and the OA helped the situation.
I've been a little distracted. I "borrowed" this from my shop for the long weekend....
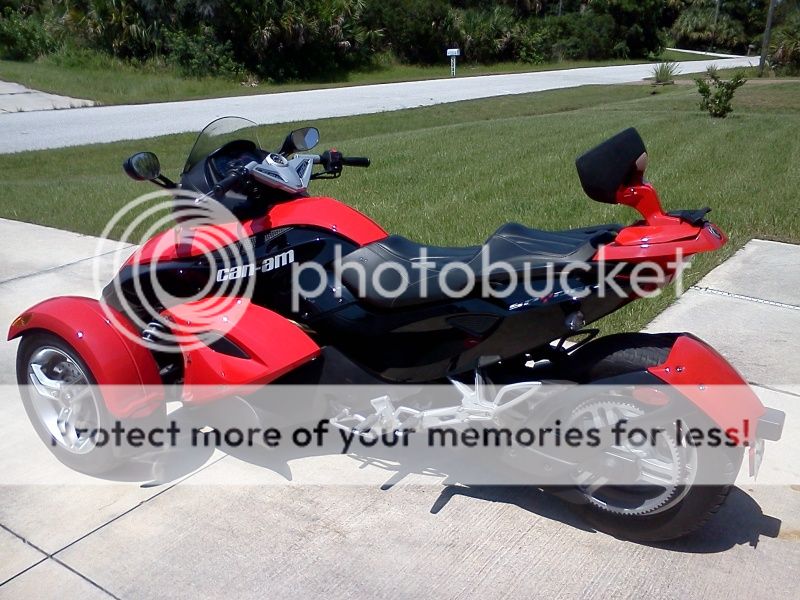
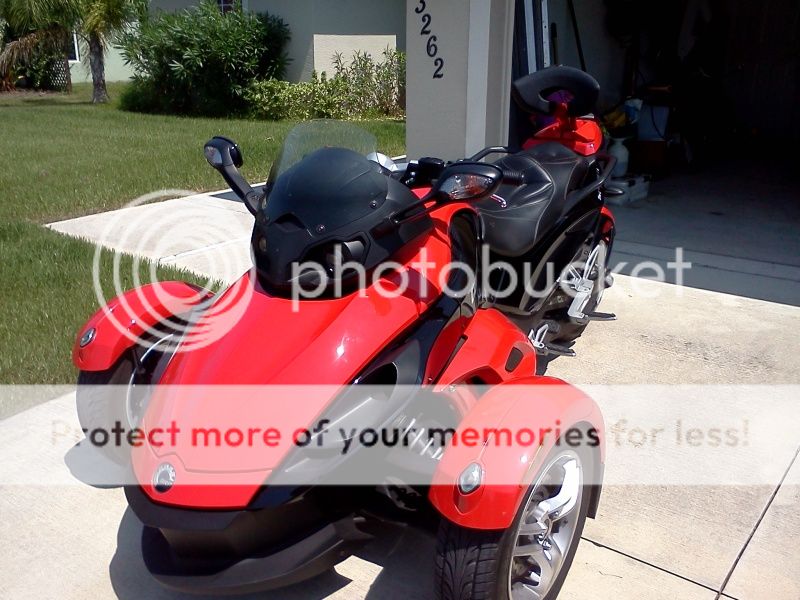
Last edited by supafast213; 09-02-12 at 04:29 PM.

Thread
Thread Starter
Forum
Replies
Last Post
lungimsam
Classic and Vintage Bicycles: Whats it Worth? Appraisals.
5
12-26-12 11:02 PM
