


Cold setting a '70s Peugeot 10 speed.
 08-27-14, 10:49 AM
#1

Senior Member
Thread Starter

Join Date: Aug 2014
Location: Bronx, NYC
Posts: 1,885
Bikes: '19 Fuji Gran Fondo 1.5, '72 Peugeot PX10, '71ish Gitane Super Corsa, '78 Fuji Newest, '89 Fuji Ace, '94 Cannondale R600, early '70s LeJeune Pro project
Mentioned: 87 Post(s)
Tagged: 0 Thread(s)
Quoted: 293 Post(s)
Liked 218 Times
in
101 Posts
Cold setting a '70s Peugeot 10 speed.
Hello all! I am new to the Forum and have already benefitted greatly from the knowledge of experienced members. My question is regarding cold setting a 10 speed Peugeot U08 frame to spread the dropouts for a larger freewheel. What is the preferred method of cold setting and what tools are necessary for this task? I realize this is a procedure that is not to be toyed with and I want to learn this correctly at the outset.
 08-27-14, 10:55 AM
#2
Rides Majestic
Join Date: Jan 2013
Location: Westfield, MA
Posts: 1,339
Bikes: 1983 Univega Gran Turismo, 1970 Schwinn Super Sport, 2001 Univega Modo Vincere, Self-Built Nashbar Touring, 1974 Peugeot U08, 1974 Atala Grand Prix, 1986 Ross Mt. Hood, 80's Maruishi MT-18
Mentioned: 0 Post(s)
Tagged: 0 Thread(s)
Quoted: 3 Post(s)
Likes: 0
Liked 7 Times
in
6 Posts
Don't bother with cold setting, get a 700C wheelset spaced for 126MM. It'll slide in there without much effort at all, the stays are long and flexible. You can then run any 6 speed freewheel without any clearance issues.
08-27-14, 11:37 AM
#3
Senior Member
Thread Starter
Join Date: Aug 2014
Location: Bronx, NYC
Posts: 1,885
Bikes: '19 Fuji Gran Fondo 1.5, '72 Peugeot PX10, '71ish Gitane Super Corsa, '78 Fuji Newest, '89 Fuji Ace, '94 Cannondale R600, early '70s LeJeune Pro project
Mentioned: 87 Post(s)
Tagged: 0 Thread(s)
Quoted: 293 Post(s)
Liked 218 Times
in
101 Posts
True but I do have the 27 1/4 aluminum alloys already which are in great condition and I was trying to be economical also. I have heard some say to keep the 27's and many others say to just change it up. It is a matter of laying out the cash for two new wheelsets...
08-27-14, 11:50 AM
#4

Senior Member

Join Date: Mar 2005
Location: Pinole, CA, USA
Posts: 17,392
Mentioned: 24 Post(s)
Tagged: 0 Thread(s)
Quoted: 443 Post(s)
Likes: 0
Liked 27 Times
in
25 Posts
Sheldon Brown's method works best for me because you are bending each side separatley and can correct any misalignment at the same time.
Bicycle Frame/Hub Spacing
I tried the "threaded rod" method once and ended up correcting the mess I made with Sheldon's method.
Bicycle Frame/Hub Spacing
I tried the "threaded rod" method once and ended up correcting the mess I made with Sheldon's method.
08-27-14, 01:12 PM
#5
Rides Majestic
Join Date: Jan 2013
Location: Westfield, MA
Posts: 1,339
Bikes: 1983 Univega Gran Turismo, 1970 Schwinn Super Sport, 2001 Univega Modo Vincere, Self-Built Nashbar Touring, 1974 Peugeot U08, 1974 Atala Grand Prix, 1986 Ross Mt. Hood, 80's Maruishi MT-18
Mentioned: 0 Post(s)
Tagged: 0 Thread(s)
Quoted: 3 Post(s)
Likes: 0
Liked 7 Times
in
6 Posts
Ok, if you have 27" wheels on hand use them. If those wheels are spaced 126mm, which is pretty likely, you shouldn't have to cold set. Have you tried to slide the wheel into the dropouts? I had very little problem doing it on mine. If you can avoid bending the frame, I would.
08-27-14, 02:21 PM
#6
Senior Member
There's a threaded rod technique out there that sounds like a total PITA. Sheldon Brown's method assures that you spread both sides equally. My technique is to take the back wheel off, lay the bike down sideways on a soft surface, put a foot on the bottom dropout and pull up on the other one. It's important to feel what the metal is doing and both sides will spread evenly unless there are issues like more corrosion in one side vs the other. The stays normally have equal strength.
08-27-14, 02:58 PM
#7
Ride, Wrench, Swap, Race

Join Date: Jan 2010
Location: Northern California
Posts: 9,193
Bikes: Cheltenham-Pedersen racer, Boulder F/S Paris-Roubaix, Varsity racer, '52 Christophe, '62 Continental, '92 Merckx, '75 Limongi, '76 Presto, '72 Gitane SC, '71 Schwinn SS, etc.
Mentioned: 132 Post(s)
Tagged: 0 Thread(s)
Quoted: 1565 Post(s)
Liked 1,295 Times
in
865 Posts
There's a threaded rod technique out there that sounds like a total PITA. Sheldon Brown's method assures that you spread both sides equally. My technique is to take the back wheel off, lay the bike down sideways on a soft surface, put a foot on the bottom dropout and pull up on the other one. It's important to feel what the metal is doing and both sides will spread evenly unless there are issues like more corrosion in one side vs the other. The stays normally have equal strength.
The range of elastic flexing is too great to detect the needed 3mm of yield in each chainstay, so one side must first be done to bring the presumed 120mm out to a measured 123mm, then the other side done to bring the inside-width to a measured 126mm.
This assumes that the frame is now at 120mm (likely not exact at this point) and that the new wheels are at 126mm (are they?).
I myself do this kind of work to fork blades and chainstays with the bike laying on a wooden deck, and do also pull up a bit on one chainstay while bending the other one downward, but I grasp the upper-side chainstay near to the bottom bracket so as not to reach the point of bending yield on the upper-side chainstay.
Once the 123mm spacing is reached, I flip the frame and do the other chainstay, again by pushing down with my foot.
The points of contact with the ground are important to keep the frame steady, so the cranks should be rotated to a position that best facilitates this, and the handlebar held with the free hand in a position that, again, keeps the bike steady on the ground.
Always use a progressive trial-and-error approach to achieving the needed bending, as the frame can be ruined by careless application of force.
Contrarily, repeated-but-futile attempts at bending with insufficient force are harmless (and are good exercise actually). This frame-bending without tools sometimes provides a decent workout actually! I've done hundreds, so I ought to know.
Also, bending the chainstay out 4mm and then back 1mm will produce a more stress-relieved state and a higher and more-symmetric yield-force limit in each chainstay, which is better at preserving the frame's alignment going forward.
The same advice applies to fork blades, where again the bike's contact points with the ground play a huge role in stabilizing the frame during the precise bending process.
Lastly, to check for dropout parallelism after doing such work, an axle with one cone and locknut jammed on one end only can be held with the locknut against the inside face of one dropout, with the other end pointing as it should to the exact same spot in the opposite dropout's slot. This makes the wheel's quick-release have a more positive action and can also make wheel installation easier, as well as reducing dropout joint stress and helping to prevent bent axles.
PS's;...
If one has little experience with bending metal tubing, the utmost in care should be exercised to prevent bending any tube too far. You have been warned.
I might recommend buying a 99-cent broom with thin metal tubing handle, to experience the effect! The broom can later be straightened and will likely still be fairly usable after you buckle it.
Some tubing bends with little force, while other grades of tubing can require comparatively huge amounts of force to cold-set.
Last edited by dddd; 08-27-14 at 03:10 PM.
08-27-14, 03:04 PM
#8
Senior Member
Join Date: Mar 2005
Location: Pinole, CA, USA
Posts: 17,392
Mentioned: 24 Post(s)
Tagged: 0 Thread(s)
Quoted: 443 Post(s)
Likes: 0
Liked 27 Times
in
25 Posts
It surprised me how much force I had to apply on a Mixte frame. The third pair of stays makes a big difference.
I agree with everything dddd said except that I have a piece of carpet that I lay on the garge floor insted of doing it on a wooden deck.
What busdriver1959 described is not Sheldon's method.
I agree with everything dddd said except that I have a piece of carpet that I lay on the garge floor insted of doing it on a wooden deck.
What busdriver1959 described is not Sheldon's method.
Last edited by Grand Bois; 08-27-14 at 03:10 PM.
08-27-14, 03:16 PM
#9
Senior Member
Join Date: May 2011
Location: Upstate NY
Posts: 3,783
Bikes: Bianchi San Mateo and a few others
Mentioned: 18 Post(s)
Tagged: 0 Thread(s)
Quoted: 634 Post(s)
Likes: 0
Liked 13 Times
in
9 Posts
Before assuming you need to cold set the frame, try to fit the wheels by hand. If you find that it's not too difficult, you may not need to bother. (I didn't have to cold set my own UO-8.)
08-27-14, 03:45 PM
#10
Senior Member

Join Date: Jul 2006
Location: San Jose (Willow Glen) Ca
Posts: 9,845
Bikes: Kirk Custom JK Special, '84 Team Miyata,(dura ace old school) 80?? SR Semi-Pro 600 Arabesque
Mentioned: 106 Post(s)
Tagged: 0 Thread(s)
Quoted: 2338 Post(s)
Liked 2,822 Times
in
1,541 Posts
Sheldon Brown's method works best for me because you are bending each side separatley and can correct any misalignment at the same time.
Bicycle Frame/Hub Spacing
I tried the "threaded rod" method once and ended up correcting the mess I made with Sheldon's method.
Bicycle Frame/Hub Spacing
I tried the "threaded rod" method once and ended up correcting the mess I made with Sheldon's method.
__________________
Life is too short not to ride the best bike you have, as much as you can
(looking for Torpado Super light frame/fork or for Raleigh International frame fork 58cm)
Life is too short not to ride the best bike you have, as much as you can
(looking for Torpado Super light frame/fork or for Raleigh International frame fork 58cm)
08-27-14, 03:48 PM
#11
Senior Member
It surprised me how much force I had to apply on a Mixte frame. The third pair of stays makes a big difference.
I agree with everything dddd said except that I have a piece of carpet that I lay on the garge floor insted of doing it on a wooden deck.
What busdriver1959 described is not Sheldon's method.
I agree with everything dddd said except that I have a piece of carpet that I lay on the garge floor insted of doing it on a wooden deck.
What busdriver1959 described is not Sheldon's method.
Spreading a rear triangle isn't rocket science if you pay attention to what the metal is telling you.
08-27-14, 04:54 PM
#12
Senior Member
Join Date: Apr 2014
Location: Minneapols, Minnesota
Posts: 538
Bikes: 89 Raleigh Technium PRE, 92 SP 1000 ti, '09 Team Pro, 72 International, 63 Hercules 3-spd, '81 Vitus 979, 2 Kabuki Submariners, 2 C. Itoh Submariners, Gary Fisher Big Sur, Skyway 3-spd, Robin Hood w/ S-A IGH 5 speed.
Mentioned: 0 Post(s)
Tagged: 0 Thread(s)
Quoted: 6 Post(s)
Likes: 0
Liked 0 Times
in
0 Posts
What dddd said! I also use the threaded rod with two nuts tightend at each end (4 nuts total) spaced at the exact spacing for each step (1/2 the spread and the full spread) I merely use the rod as a gauge for each step. I just get a fried to stand on the frame at a couple of spots with cardboard protecting the frame. I then use a long 2 X 4 on the seat tube to bend up on the stays and dropout. I have done 3 or 4 bikes this way to fit 8 speeds into old 5 and 6 speed bikes.
08-27-14, 05:32 PM
#13
Ride, Wrench, Swap, Race
Join Date: Jan 2010
Location: Northern California
Posts: 9,193
Bikes: Cheltenham-Pedersen racer, Boulder F/S Paris-Roubaix, Varsity racer, '52 Christophe, '62 Continental, '92 Merckx, '75 Limongi, '76 Presto, '72 Gitane SC, '71 Schwinn SS, etc.
Mentioned: 132 Post(s)
Tagged: 0 Thread(s)
Quoted: 1565 Post(s)
Liked 1,295 Times
in
865 Posts
The good thing about the OP's UO8 frame is that it's a fairly easy one to bend.
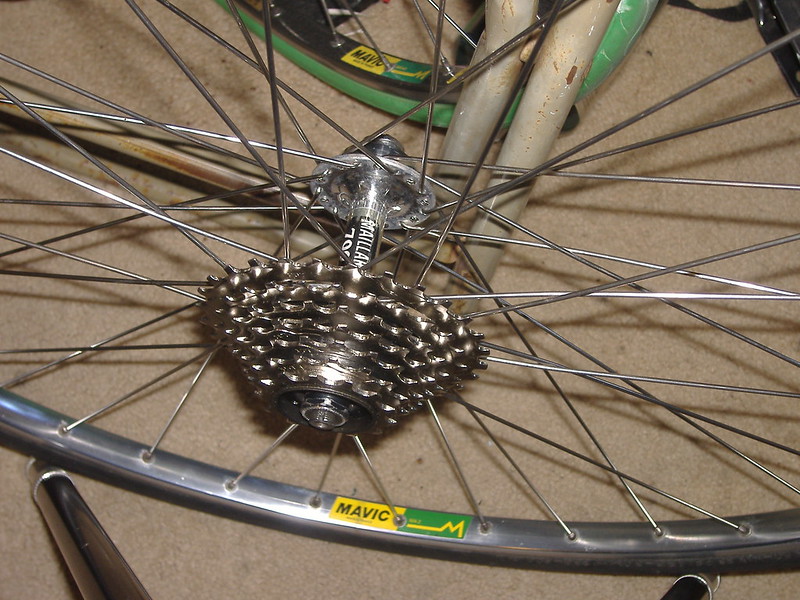
Also, most of the Peugeot frames I've had were more like 121mm already, and I have on one occasion built up a strong, 124mm wheel with 7-speed freewheel that easily slipped into a Peugeot's stock frame. But this was for a nice PX10 that I might want to return to it's all-original state in the future, so avoiding any cold-setting was a choice I made at the time.
This is the particular wheel btw:
...And the bike that it later went on:
08-27-14, 05:41 PM
#14
Senior Member

Join Date: Jun 2012
Location: Central California
Posts: 1,083
Bikes: 2001 LeMond Nevada City, �92 Merlin Titanium, '84 Torpado Super Strada, �84 Schwinn Tempo, '81 Bianchi Limites, '73 Raleigh Supercourse
Mentioned: 18 Post(s)
Tagged: 0 Thread(s)
Quoted: 161 Post(s)
Liked 69 Times
in
41 Posts
I recently used the scissor jack out if my wife's car. Worked perfectly.
08-27-14, 05:59 PM
#15
Senior Member
Join Date: Mar 2005
Location: Pinole, CA, USA
Posts: 17,392
Mentioned: 24 Post(s)
Tagged: 0 Thread(s)
Quoted: 443 Post(s)
Likes: 0
Liked 27 Times
in
25 Posts
I could force it in without cold setting as so many people advocate, but I get a lot of satisfaction from doing things right. I know I've got it right when I flip the QR and the wheel slides out effortlessly with no binding. That's how it's supposed to work.
08-27-14, 07:09 PM
#16
Ride, Wrench, Swap, Race
Join Date: Jan 2010
Location: Northern California
Posts: 9,193
Bikes: Cheltenham-Pedersen racer, Boulder F/S Paris-Roubaix, Varsity racer, '52 Christophe, '62 Continental, '92 Merckx, '75 Limongi, '76 Presto, '72 Gitane SC, '71 Schwinn SS, etc.
Mentioned: 132 Post(s)
Tagged: 0 Thread(s)
Quoted: 1565 Post(s)
Liked 1,295 Times
in
865 Posts
08-27-14, 07:24 PM
#17
Rides Majestic
Join Date: Jan 2013
Location: Westfield, MA
Posts: 1,339
Bikes: 1983 Univega Gran Turismo, 1970 Schwinn Super Sport, 2001 Univega Modo Vincere, Self-Built Nashbar Touring, 1974 Peugeot U08, 1974 Atala Grand Prix, 1986 Ross Mt. Hood, 80's Maruishi MT-18
Mentioned: 0 Post(s)
Tagged: 0 Thread(s)
Quoted: 3 Post(s)
Likes: 0
Liked 7 Times
in
6 Posts
So are you advocating that inexperienced people working on a bike for the first time should be cold setting frames? Here's a quote from this thread's poster, Greg3rd48, from his other thread about rebuilding a '71 Peugeot U08: "I just picked up a '71 U08 and I am in the beginning stages of my first rebuild. So this is where I defer to more experienced rebuilders. It is now stripped down and awaiting the rebuild process. Since this is my first rebuild and first post please be patient."
08-27-14, 07:49 PM
#18
What??? Only 2 wheels?

Join Date: Apr 2010
Location: Boston-ish, MA
Posts: 13,434
Bikes: 72 Peugeot UO-8, 82 Peugeot TH8, 87 Bianchi Brava, 76? Masi Grand Criterium, 74 Motobecane Champion Team, 86 & 77 Gazelle champion mondial, 81? Grandis, 82? Tommasini, 83 Peugeot PF10
Mentioned: 189 Post(s)
Tagged: 0 Thread(s)
Quoted: 1222 Post(s)
Liked 645 Times
in
232 Posts
The part I like is where it says "This is my first time working on a bike and the first thing I did was take it completely apart. Now I can't remember how everything goes back together." Yeah, I know, it doesn't really say that. I just find it curious that "completely stripping it down" so often precedes asking for advice. I would have advised repacking the wheel and maybe crank bearings, getting the brakes and derailleurs functional if they aren't, and then riding a bunch. That way you learn what is important and what isn't, whether you really need that 7-speed FW or whether you can deal with whatever shifters it happens to have.
We need a thread with a title:If you just bought your first bike and want to "rebuild" it, read this first.
We need a thread with a title:If you just bought your first bike and want to "rebuild" it, read this first.
__________________
Real cyclists use toe clips.
With great bikes comes great responsibility.
jimmuller
Real cyclists use toe clips.
With great bikes comes great responsibility.
jimmuller
08-27-14, 07:57 PM
#19
Get off my lawn!
Join Date: Nov 2010
Location: The Garden State
Posts: 6,031
Bikes: 1917 Loomis, 1923 Rudge, 1930 Hercules Renown, 1947 Mclean, 1948 JA Holland, 1955 Hetchins, 1957 Carlton Flyer, 1962 Raleigh Sport, 1978&81 Raleigh Gomp GS', 2010 Raliegh Clubman
Mentioned: 9 Post(s)
Tagged: 0 Thread(s)
Quoted: 93 Post(s)
Likes: 0
Liked 98 Times
in
48 Posts
Sheldon Brown's method works best for me because you are bending each side separatley and can correct any misalignment at the same time.
Bicycle Frame/Hub Spacing
Bicycle Frame/Hub Spacing
08-27-14, 08:10 PM
#20
Rides Majestic
Join Date: Jan 2013
Location: Westfield, MA
Posts: 1,339
Bikes: 1983 Univega Gran Turismo, 1970 Schwinn Super Sport, 2001 Univega Modo Vincere, Self-Built Nashbar Touring, 1974 Peugeot U08, 1974 Atala Grand Prix, 1986 Ross Mt. Hood, 80's Maruishi MT-18
Mentioned: 0 Post(s)
Tagged: 0 Thread(s)
Quoted: 3 Post(s)
Likes: 0
Liked 7 Times
in
6 Posts
The part I like is where it says "This is my first time working on a bike and the first thing I did was take it completely apart. Now I can't remember how everything goes back together." Yeah, I know, it doesn't really say that. I just find it curious that "completely stripping it down" so often precedes asking for advice. I would have advised repacking the wheel and maybe crank bearings, getting the brakes and derailleurs functional if they aren't, and then riding a bunch. That way you learn what is important and what isn't, whether you really need that 7-speed FW or whether you can deal with whatever shifters it happens to have.
We need a thread with a title:If you just bought your first bike and want to "rebuild" it, read this first.
We need a thread with a title:If you just bought your first bike and want to "rebuild" it, read this first.
I think you're pretty right about being conservative on a first build. I fixed copiers/printers for a while and trying to fix things that weren't broken usually came back to bite you in the ass.
08-27-14, 08:14 PM
#21
Senior Member
Join Date: Jun 2012
Location: Central California
Posts: 1,083
Bikes: 2001 LeMond Nevada City, �92 Merlin Titanium, '84 Torpado Super Strada, �84 Schwinn Tempo, '81 Bianchi Limites, '73 Raleigh Supercourse
Mentioned: 18 Post(s)
Tagged: 0 Thread(s)
Quoted: 161 Post(s)
Liked 69 Times
in
41 Posts
Now I am a rookie at most things and do tend to screw some things up (gotta learn somehow), however the wheel sits nice and straight in the frame. Dead center. And now it actually rides better (straighter) than it did...so regardless, I am happy. Maybe ignorance is bliss.
08-30-14, 01:05 AM
#22
Senior Member
Thread Starter
Join Date: Aug 2014
Location: Bronx, NYC
Posts: 1,885
Bikes: '19 Fuji Gran Fondo 1.5, '72 Peugeot PX10, '71ish Gitane Super Corsa, '78 Fuji Newest, '89 Fuji Ace, '94 Cannondale R600, early '70s LeJeune Pro project
Mentioned: 87 Post(s)
Tagged: 0 Thread(s)
Quoted: 293 Post(s)
Liked 218 Times
in
101 Posts
Well, jimmuller, initially I began on my own with books and some mechanical know how so the stripping down of the bike and recording where components go wasn't a hard job. Being meticulous helps me. Where did you glean the information that I do not know how to reassemble the bike? In addition I had no idea there was such a thing as this forum which I now find invaluable so I was learning on my own. As I said some parts were shot (derailleurs, shifters, chain), others I want to replace and once I found this forum I discovered that it is a great source of advice and help. And yes I did clean out and repack the wheel hubs and BB and I also cleaned the 6 speed Shimano freewheel I had sitting around and it fits without coldsetting. I will try Sheldon's method on another frame first that is of no use to practice on. Everyone has to start somewhere.
08-30-14, 05:02 AM
#23
Senior Member

Join Date: Apr 2007
Location: Thunder Bay, Ontario, Canada - burrrrr!
Posts: 11,674
Bikes: 1958 Rabeneick 120D, 1968 Legnano Gran Premio, 196? Torpado Professional, 2000 Marinoni Piuma
Mentioned: 210 Post(s)
Tagged: 0 Thread(s)
Quoted: 1372 Post(s)
Likes: 0
Liked 1,751 Times
in
938 Posts
I have been cold setting rear stays for a long time. Some string, a tape measure and a piece of wood does the job just fine...

__________________
"98% of the bikes I buy are projects".
"98% of the bikes I buy are projects".
08-30-14, 05:58 AM
#24
What??? Only 2 wheels?
Join Date: Apr 2010
Location: Boston-ish, MA
Posts: 13,434
Bikes: 72 Peugeot UO-8, 82 Peugeot TH8, 87 Bianchi Brava, 76? Masi Grand Criterium, 74 Motobecane Champion Team, 86 & 77 Gazelle champion mondial, 81? Grandis, 82? Tommasini, 83 Peugeot PF10
Mentioned: 189 Post(s)
Tagged: 0 Thread(s)
Quoted: 1222 Post(s)
Liked 645 Times
in
232 Posts
I wasn't thinking so much about the fixin' part as about the overall experience part. Knowing how a bike (in general or in particular) rides lets you choose what to do and what to skip, what is worth the expense and effort, what would actually be an improvement and what wouldn't and for what kind of riding, whether a bike is a keeper, better for errands or for sport riding or anything else, etc.
We see it often in C&V: Someone starts a new thread with "My friend gave me a bike that use to belong to his neighbor's uncle, and it's all original, even with the original tires!" Okay. The next paragraph will then contain "I intend to..." followed by some combination of the phrases "keep it all original", "restore her (it's always a her, not a him or an it) to her former glory", "upgrade to the best", "ride it everywhere", "the tires blew on my first ride", "repaint it, I've already stripped it, what color is best and where can I get decals?", "upgrade to a 10-speed, what do I need?", "don't tell me whether it is any good or not, just tell me about my bike", and "low budget". A few posts later after other C&V members have pressured him into posting pics we discover either that the bike is the equivalent to a 1974 Chevy Vega, that it had no "former glory" whatsoever even when new and there is a reason the friend's neighbor's uncle gave it away, or that it is the equivalent of an all-original '57 Chevy in almost new condition but he's already tossed the chrome trim because one piece showed a little rust and he's upgrading the engine so he can drive it the 240 miles between college and his parents' house every weekend.
The point here is that a sense of perspective is missing. A triple crank is pointless if you live in Vernon Hill, Illinois where the highest hill is the 1-ft rise where a road goes over some RR tracks. A 13T cog with 53T chainring is pointless without a downhill or good tailwind. New paint is expensive and hard to do well. "All-original" doesn't last long for consumable items, and wears thin when you're wishing for better shifts with 40 miles behind you and 30 miles still to go. Shiny touched-up and waxed paint looks great but doesn't prevent pitting of the bearings when grease is 30 years old. A few ounces saved with expensive components is pointless on a bike that weighs 27 pounds already unless you intend to upgrade everything, in which case you probably should have started with a different bike.
It's all obvious, of course, except when it isn't. It usually isn't to a someone thinking of "former glory".

__________________
Real cyclists use toe clips.
With great bikes comes great responsibility.
jimmuller
Real cyclists use toe clips.
With great bikes comes great responsibility.
jimmuller
Last edited by jimmuller; 08-30-14 at 06:05 AM.
08-30-14, 06:13 AM
#25

Senior Member

Join Date: Aug 2003
Location: Tampa, Florida
Posts: 13,954
Mentioned: 40 Post(s)
Tagged: 0 Thread(s)
Quoted: 413 Post(s)
Likes: 0
Liked 109 Times
in
78 Posts
Bend side A 3mm.
Bend side B 3mm.
Boom...done.