


Show us your DIY Gear
 04-11-12, 05:58 PM
#51
Junior Member
Here's another cheap cleaning/repair stand. Basically just two lengths of 2x4, cut and glued/nailed together, bolted down to the workbench with long 5/16" bolts. A hole of somewhat larger diameter than your fattest downtube is drilled in the hinged end as shown. Standard wood working clamp holds the bike snug in place.
The 2x4 on the right side has a bevel cut along the length that sits on the work bench, so you can mount it tilted on the work bench, or flat. First photo is just the stand, bolted in the flat position, second photo shows it in use in the tilted position. You can see a line on the end of the right side 2x4 that shows the bevel angle I cut it along the bottom, except for the last 6" or so. (Click photos to enlarge)


Pros:
Cheap
Rock solid
Takes most any size tube, depending on how much you want to pad around it
Cons:
Limited choice of tilt angles
No height adjustment
Obv., you need to already have a workbench
Next time I find myself with a scrap 2x4 in the right length, I'll probably build one that tilts the other way, so I can angle it both ways. Had I planned ahead, I could have made this one a double-ender, with just the addition of another hinge.
The 2x4 on the right side has a bevel cut along the length that sits on the work bench, so you can mount it tilted on the work bench, or flat. First photo is just the stand, bolted in the flat position, second photo shows it in use in the tilted position. You can see a line on the end of the right side 2x4 that shows the bevel angle I cut it along the bottom, except for the last 6" or so. (Click photos to enlarge)
Pros:
Cheap
Rock solid
Takes most any size tube, depending on how much you want to pad around it
Cons:
Limited choice of tilt angles
No height adjustment
Obv., you need to already have a workbench
Next time I find myself with a scrap 2x4 in the right length, I'll probably build one that tilts the other way, so I can angle it both ways. Had I planned ahead, I could have made this one a double-ender, with just the addition of another hinge.
I did something similar and it works OK. I was thinking of modifying it so that instead of a round hole, I would cut V shaped notches on each of the bike clamp's faces and glue some padding onto the V-notches.
 04-16-12, 09:30 AM
#52

Senior Member

Join Date: Nov 2011
Location: Port Angeles, WA
Posts: 7,922
Bikes: A green one, "Ragleigh," or something.
Mentioned: 194 Post(s)
Tagged: 0 Thread(s)
Quoted: 1627 Post(s)
Liked 630 Times
in
356 Posts
 06-04-12, 01:06 PM
#54
Senior Member
Join Date: Nov 2011
Location: Port Angeles, WA
Posts: 7,922
Bikes: A green one, "Ragleigh," or something.
Mentioned: 194 Post(s)
Tagged: 0 Thread(s)
Quoted: 1627 Post(s)
Liked 630 Times
in
356 Posts
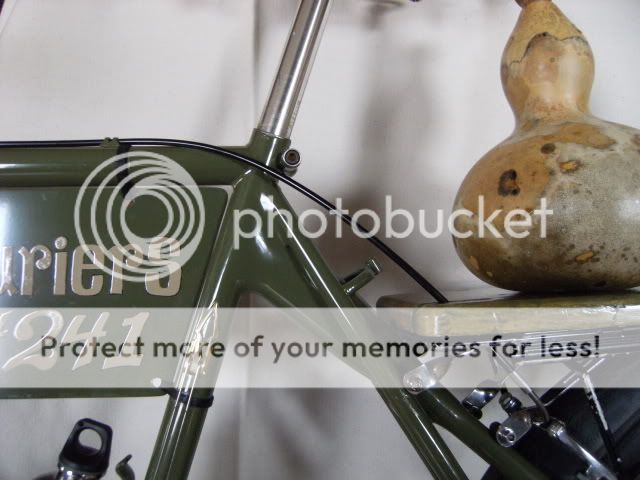
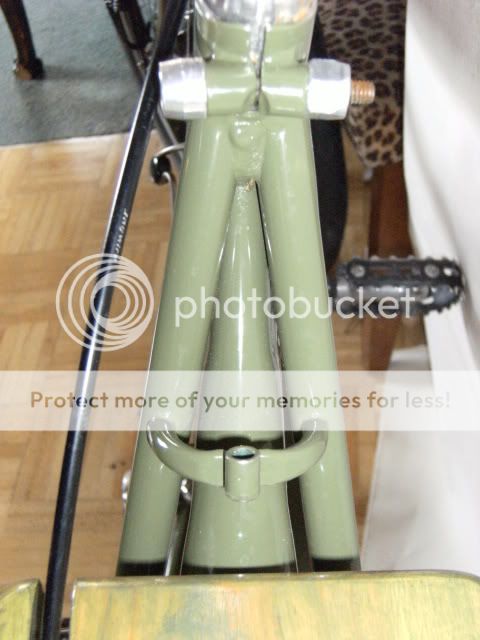
Another cheap front bag holder, or decaleur, if you will. Made from $3 worth of 1/4" aluminum rod stock, to fit my Schwinn Tempo on those odd days I'm stopping by the grocery store on my lunchtime ride or on the way home. The 1/4" rod stock was almost too easy to bend. I'll try this again with the next size up for a stiffer unit if I don't get a proper front rack for this bike. If you make one like this, be advised aluminum doesn't like to be bent more than once, so don't bend it too far; bending it back the other way makes it break off. I used a broom handle held in a vise as a form to make the initial bends, then the rest of them in situ, on the bike itself.
This is a bit bouncy on rough pavement and only good for 10 or 15 pounds. The bottom of the bag is reinforced with several layers of glued up cardboard as a base, for a little stiffness. A piece of plywood would work fine too. The straps of the bag, tied around the head tube, keep it more or less in place, in a similar fashion to way I mounted it on my previous post with the rack on the yellow mountain bike.


This is a bit bouncy on rough pavement and only good for 10 or 15 pounds. The bottom of the bag is reinforced with several layers of glued up cardboard as a base, for a little stiffness. A piece of plywood would work fine too. The straps of the bag, tied around the head tube, keep it more or less in place, in a similar fashion to way I mounted it on my previous post with the rack on the yellow mountain bike.
Last edited by Lascauxcaveman; 06-04-12 at 01:24 PM.
06-11-12, 05:12 AM
#55
Senior Member
Join Date: Jun 2008
Location: Central NJ
Posts: 576
Bikes: MGX MTB, Fuji Supreme, Miyata 90 and a Trek 700 in the works
Mentioned: 0 Post(s)
Tagged: 0 Thread(s)
Quoted: 16 Post(s)
Likes: 0
Liked 2 Times
in
2 Posts


Thanks
06-11-12, 07:13 AM
#56
Senior Member
Join Date: Aug 2008
Location: Downtown Detroit, Mi.
Posts: 781
Bikes: Surly LHT, 94 Cannondale track bike, 80's Cannondale track bike, 60's Raleigh 5 speed, 1888 Eldridge wood wheel track bike and my old 76 DG BMX from when I was a kid.
Mentioned: 0 Post(s)
Tagged: 0 Thread(s)
Quoted: 0 Post(s)
Likes: 0
Liked 0 Times
in
0 Posts
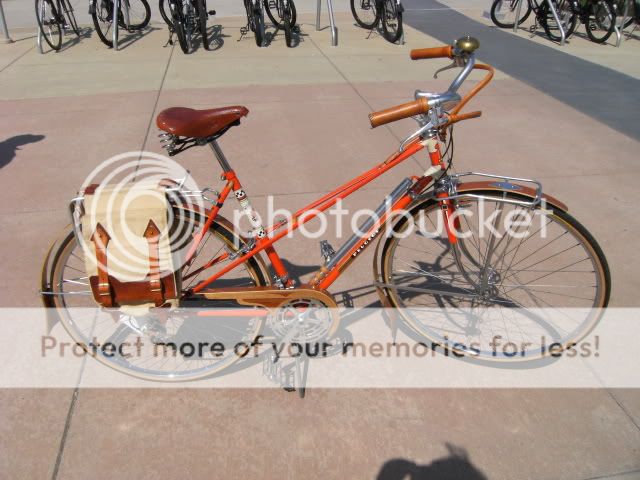
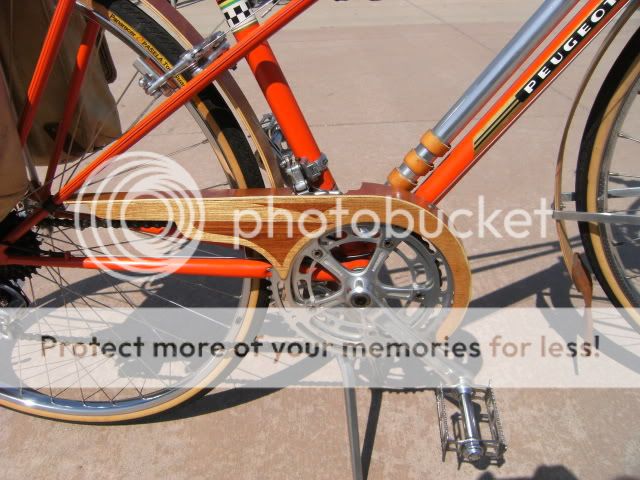
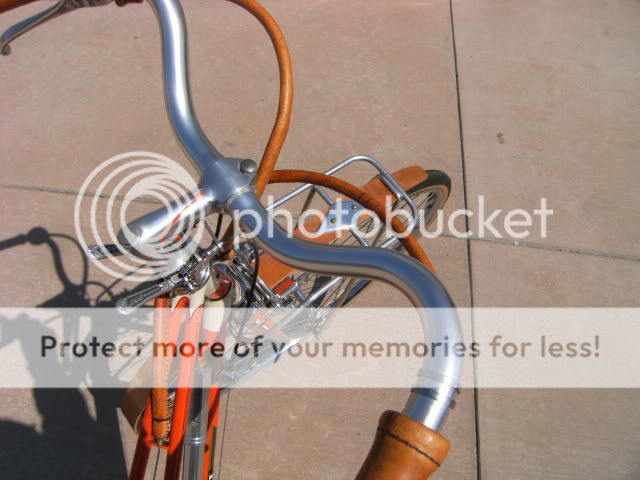 Bags, bent wood & leather brake cables.
06-11-12, 07:18 AM
Bags, bent wood & leather brake cables.
06-11-12, 07:18 AM
#57
Senior Member
Join Date: Aug 2008
Location: Downtown Detroit, Mi.
Posts: 781
Bikes: Surly LHT, 94 Cannondale track bike, 80's Cannondale track bike, 60's Raleigh 5 speed, 1888 Eldridge wood wheel track bike and my old 76 DG BMX from when I was a kid.
Mentioned: 0 Post(s)
Tagged: 0 Thread(s)
Quoted: 0 Post(s)
Likes: 0
Liked 0 Times
in
0 Posts
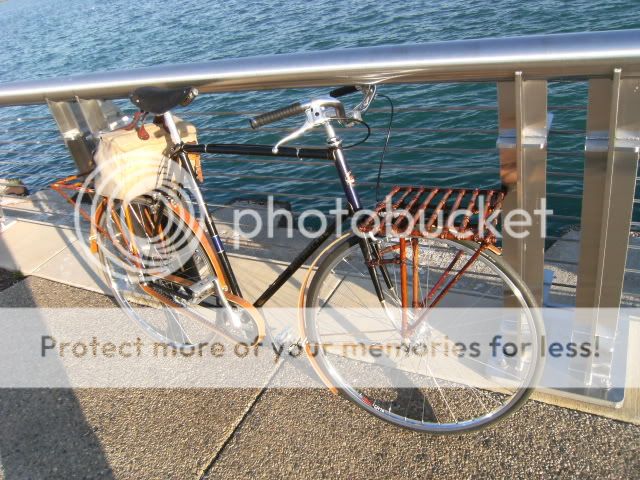
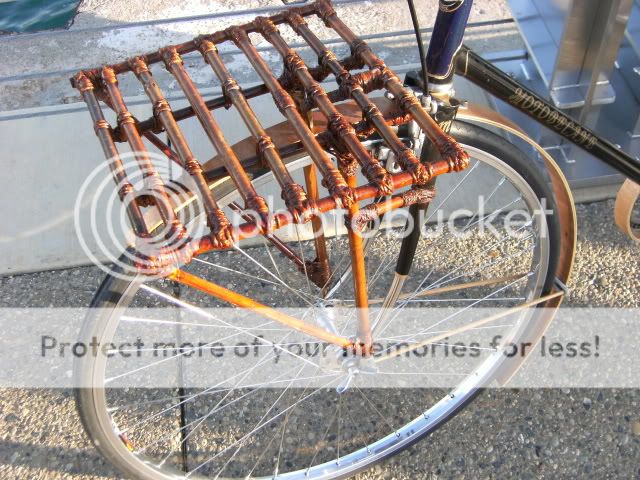 Bags, bent wood, bamboo & twine.
06-11-12, 07:25 AM
Bags, bent wood, bamboo & twine.
06-11-12, 07:25 AM
#58
Senior Member
Join Date: Jul 2011
Location: Erie Penna.
Posts: 1,141
Mentioned: 1 Post(s)
Tagged: 0 Thread(s)
Quoted: 37 Post(s)
Likes: 0
Liked 3 Times
in
2 Posts
I like them a lot. many make their own out of kitty liter buckets and such.
06-11-12, 07:34 AM
#59
Senior Member
Join Date: Aug 2008
Location: Downtown Detroit, Mi.
Posts: 781
Bikes: Surly LHT, 94 Cannondale track bike, 80's Cannondale track bike, 60's Raleigh 5 speed, 1888 Eldridge wood wheel track bike and my old 76 DG BMX from when I was a kid.
Mentioned: 0 Post(s)
Tagged: 0 Thread(s)
Quoted: 0 Post(s)
Likes: 0
Liked 0 Times
in
0 Posts
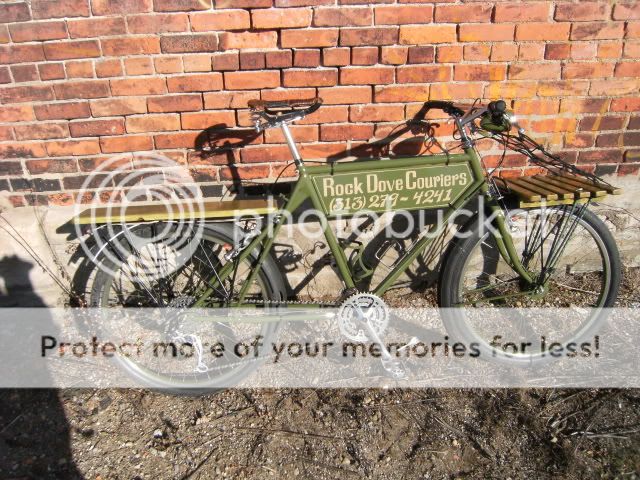
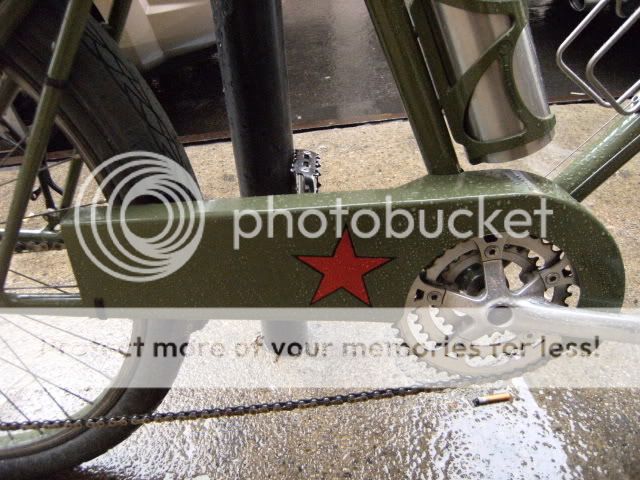
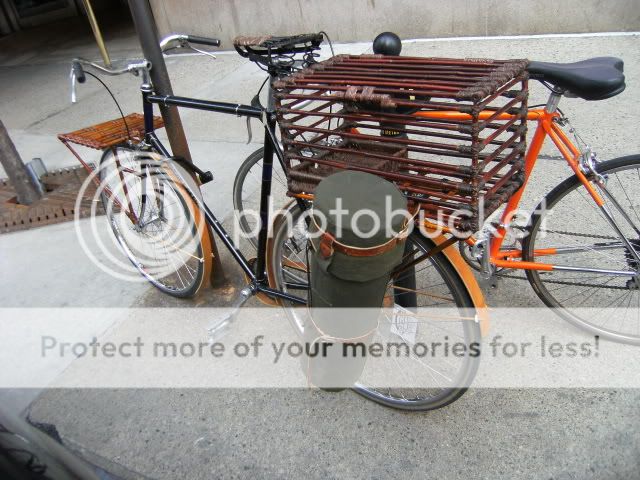
 Cargo bike. 1980s basket case Rock Hopper welded up to move case files for work. The fenders are old tires.
06-11-12, 11:45 AM
Cargo bike. 1980s basket case Rock Hopper welded up to move case files for work. The fenders are old tires.
06-11-12, 11:45 AM
#60
a.k.a., Point Five Dude
Join Date: Apr 2011
Location: Twin Cites, MN USA
Posts: 794
Bikes: 1987 Trek Elance 400 T
Mentioned: 0 Post(s)
Tagged: 0 Thread(s)
Quoted: 0 Post(s)
Likes: 0
Liked 0 Times
in
0 Posts
Since nobody else has posted one of these here is a home made fork mount for a light:

Here it is without the light attached to it:

Materials:
1/2" PVC Coupler
1/2" PVC Plug
Hose clamp
Some old inner tube
Dremel out PVC material so that the clamp mechanism fits inside it and only the band & the end of the adjustment screw protrude. The inner tube material is optional and serves both as protective padding on the fork as well as an aesthetic covering to conceal the white PVC.
Here it is without the light attached to it:
Materials:
1/2" PVC Coupler
1/2" PVC Plug
Hose clamp
Some old inner tube
Dremel out PVC material so that the clamp mechanism fits inside it and only the band & the end of the adjustment screw protrude. The inner tube material is optional and serves both as protective padding on the fork as well as an aesthetic covering to conceal the white PVC.
06-12-12, 05:42 AM
#61
Senior Member
Join Date: Aug 2008
Location: Downtown Detroit, Mi.
Posts: 781
Bikes: Surly LHT, 94 Cannondale track bike, 80's Cannondale track bike, 60's Raleigh 5 speed, 1888 Eldridge wood wheel track bike and my old 76 DG BMX from when I was a kid.
Mentioned: 0 Post(s)
Tagged: 0 Thread(s)
Quoted: 0 Post(s)
Likes: 0
Liked 0 Times
in
0 Posts
[QUOTE=Surrealdeal;14341344]Since nobody else has posted one of these here is a home made fork mount for a light:
That is a cool way to do that! I mounted my light in the same spot and like the light patern much more and it puts more light on the ground. I like YOUR mount though.
That is a cool way to do that! I mounted my light in the same spot and like the light patern much more and it puts more light on the ground. I like YOUR mount though.
06-12-12, 06:39 AM
#62
Kid A

Join Date: Aug 2009
Location: Alexandria, VA
Posts: 1,778
Mentioned: 0 Post(s)
Tagged: 0 Thread(s)
Quoted: 3 Post(s)
Likes: 0
Liked 5 Times
in
5 Posts
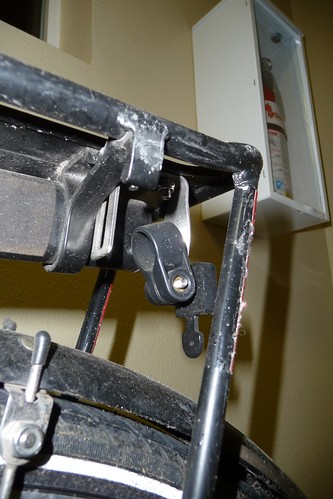
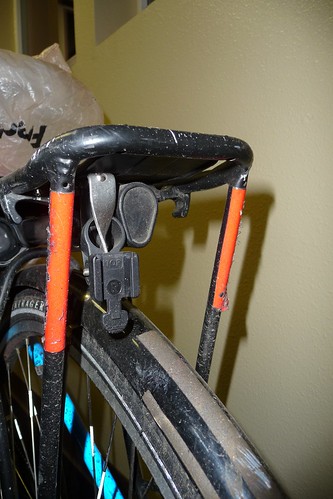
have a couple -- DIY fishing rod holder for rear rack, and a fix for mounting a rear taillight on a rear rack that has at least one hole in the back of it.


rod holder is just 1.5" pvc with a notch cut into them for the reels, and attached with hose clamps -- easy and secure.
The light mount is a p-clip with the rubber part removed so only the metal is there. It bends around almost perfectly for positioning the light rearward.
BTW - this is the best thread I've read in a LONG time on BF. Keep it up!
Last edited by TurbineBlade; 06-12-12 at 06:43 AM.
06-12-12, 08:45 AM
#63
Senior Member
Join Date: Jun 2010
Posts: 54
Mentioned: 0 Post(s)
Tagged: 0 Thread(s)
Quoted: 0 Post(s)
Likes: 0
Liked 0 Times
in
0 Posts
06-12-12, 11:02 AM
#64
Junior Member
Join Date: Jun 2012
Location: somewhere west of Toronto
Posts: 5
Bikes: 1998 hotrodded Specialized S-Works Hardtail mtn bike, 2005 Kona Jake the Snake, 2010 Kona Dew City (aka the Frankenbike), 1981 Marinoni road bike
Mentioned: 0 Post(s)
Tagged: 0 Thread(s)
Quoted: 0 Post(s)
Likes: 0
Liked 0 Times
in
0 Posts
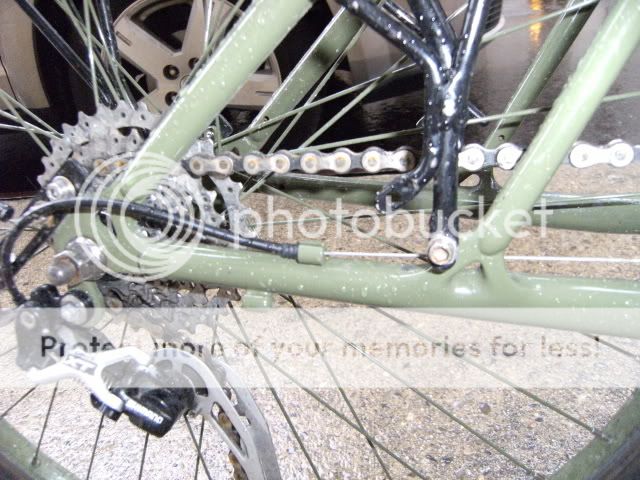
This is a picture of my bike light hack (it is a planet bike superflash - really bright) and my frankenfender on my Kona Dew that I use for commuting and general city riding. The fender is made up of two bits of cheap as dirt mtn bike fender, and a couple of bits of vinegar jug, and a mess of zipties. The idea is to somehow in the very limited space Kona gives you (bad Kona!) fit in 700x40c schwalbe winter marathon studded tires while still getting fender coverage. The fenders, except for a bit zip tied to the seat tube, are all attached to the rack. The coverage is good enough that I don't get wet at all no matter what I am riding through be it mud, snow, slush, or water. Also, there is enough clearance that even deep snow is not an issue in the winter. The wheel does not jam up although there is not as much clearance as I would like near the bottom bracket.
The front wheel though, come winter time, has no fender as there simply is not room enough with the stock fork and winter tires. This fall, I intend to install a Surly 29in mtn bike fork to the bike in the hopes that this will create more space and allow for a proper fender without messing up the geometry too much. A fit test will be done before a final decision is made, and should it happen, the commuter bomb will get a new sealed cartridge headset at the same time (may as well...). I have used a zipped tied on mtn bike dirt shield on the down tube which works quite well but I would rather be using a proper front fender.

The front wheel though, come winter time, has no fender as there simply is not room enough with the stock fork and winter tires. This fall, I intend to install a Surly 29in mtn bike fork to the bike in the hopes that this will create more space and allow for a proper fender without messing up the geometry too much. A fit test will be done before a final decision is made, and should it happen, the commuter bomb will get a new sealed cartridge headset at the same time (may as well...). I have used a zipped tied on mtn bike dirt shield on the down tube which works quite well but I would rather be using a proper front fender.
06-12-12, 12:03 PM
#65
Commander, UFO Bike

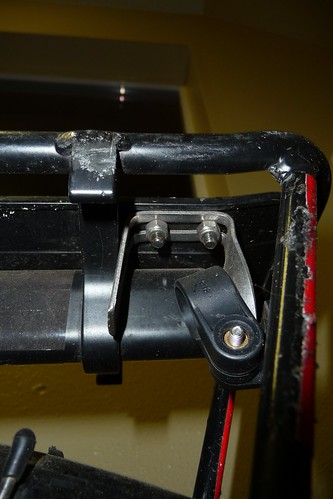
To create a mounting point for my PB SuperFlash (and it works for my PDW DangerZone too), I used an old rack strut. I bent it to a squared off "U" shape, cut off the extra metal (but kept enough to keep it closed on both ends), drilled a pair of holes in the deck of the rack, and bolted the mount on.
06-13-12, 08:35 AM
#66
a.k.a., Point Five Dude
Join Date: Apr 2011
Location: Twin Cites, MN USA
Posts: 794
Bikes: 1987 Trek Elance 400 T
Mentioned: 0 Post(s)
Tagged: 0 Thread(s)
Quoted: 0 Post(s)
Likes: 0
Liked 0 Times
in
0 Posts
Thanks - I really like the fork mount both for how it is one less thing on my handlebars plus I like the angle of the beam better too.
06-13-12, 10:42 AM
#67
Senior Member
Join Date: Feb 2011
Location: Patchogue, NY
Posts: 82
Bikes: Trek Madon 4.5, Fausto Coppi Masciaghi
Mentioned: 0 Post(s)
Tagged: 0 Thread(s)
Quoted: 3 Post(s)
Likes: 0
Liked 1 Time
in
1 Post
Some of these I intend to implement on my bike, better solutions than I have currently!
Had a tricky situation with a front light mount. I wanted a rigidly fixed bag for commuting and other stuff. Settled on a topeak bag with a plastic mount. Unfortunately, along with the interrupter levers that were on the bike, this bag ate up all the real estate on the handlebars.
I took the bag apart, bought some longer screws, bought, cut and bent some aluminium stock. Drilled some holes, and assembled. Along with some PVC pipe, black spray paint, zip-ties and some Shiner I ended up with the below!
06-14-12, 11:08 PM
#69
Senior Member
Join Date: Aug 2008
Location: Downtown Detroit, Mi.
Posts: 781
Bikes: Surly LHT, 94 Cannondale track bike, 80's Cannondale track bike, 60's Raleigh 5 speed, 1888 Eldridge wood wheel track bike and my old 76 DG BMX from when I was a kid.
Mentioned: 0 Post(s)
Tagged: 0 Thread(s)
Quoted: 0 Post(s)
Likes: 0
Liked 0 Times
in
0 Posts
06-16-12, 09:38 PM
#70
Senior Member
Join Date: Aug 2008
Location: Downtown Detroit, Mi.
Posts: 781
Bikes: Surly LHT, 94 Cannondale track bike, 80's Cannondale track bike, 60's Raleigh 5 speed, 1888 Eldridge wood wheel track bike and my old 76 DG BMX from when I was a kid.
Mentioned: 0 Post(s)
Tagged: 0 Thread(s)
Quoted: 0 Post(s)
Likes: 0
Liked 0 Times
in
0 Posts
06-18-12, 05:59 AM
#71
Senior Member
Join Date: Jun 2008
Location: Central NJ
Posts: 576
Bikes: MGX MTB, Fuji Supreme, Miyata 90 and a Trek 700 in the works
Mentioned: 0 Post(s)
Tagged: 0 Thread(s)
Quoted: 16 Post(s)
Likes: 0
Liked 2 Times
in
2 Posts
Also, Aluminum tubing may be a better material than aluminum rod for a stiffer decaleur with higher weight capacity. Bending the tubing will not be as easy as a bending a rod.
06-18-12, 06:01 AM
#72
Senior Member
Join Date: Jun 2008
Location: Central NJ
Posts: 576
Bikes: MGX MTB, Fuji Supreme, Miyata 90 and a Trek 700 in the works
Mentioned: 0 Post(s)
Tagged: 0 Thread(s)
Quoted: 16 Post(s)
Likes: 0
Liked 2 Times
in
2 Posts
Another cheap front bag holder, or decaleur, if you will. Made from $3 worth of 1/4" aluminum rod stock, to fit my Schwinn Tempo on those odd days I'm stopping by the grocery store on my lunchtime ride or on the way home. The 1/4" rod stock was almost too easy to bend. I'll try this again with the next size up for a stiffer unit if I don't get a proper front rack for this bike. If you make one like this, be advised aluminum doesn't like to be bent more than once, so don't bend it too far; bending it back the other way makes it break off. I used a broom handle held in a vise as a form to make the initial bends, then the rest of them in situ, on the bike itself.
This is a bit bouncy on rough pavement and only good for 10 or 15 pounds. The bottom of the bag is reinforced with several layers of glued up cardboard as a base, for a little stiffness. A piece of plywood would work fine too. The straps of the bag, tied around the head tube, keep it more or less in place, in a similar fashion to way I mounted it on my previous post with the rack on the yellow mountain bike.
This is a bit bouncy on rough pavement and only good for 10 or 15 pounds. The bottom of the bag is reinforced with several layers of glued up cardboard as a base, for a little stiffness. A piece of plywood would work fine too. The straps of the bag, tied around the head tube, keep it more or less in place, in a similar fashion to way I mounted it on my previous post with the rack on the yellow mountain bike.
Also, Aluminum tubing may be a better material than aluminum rod for a stiffer decaleur with higher weight capacity. Bending the tubing will not be as easy as a bending a rod.
06-18-12, 06:27 AM
#73
Senior Member
Join Date: Jun 2008
Location: Central NJ
Posts: 576
Bikes: MGX MTB, Fuji Supreme, Miyata 90 and a Trek 700 in the works
Mentioned: 0 Post(s)
Tagged: 0 Thread(s)
Quoted: 16 Post(s)
Likes: 0
Liked 2 Times
in
2 Posts
Since nobody else has posted one of these here is a home made fork mount for a light:
Here it is without the light attached to it:
Materials:
1/2" PVC Coupler
1/2" PVC Plug
Hose clamp
Some old inner tube
Dremel out PVC material so that the clamp mechanism fits inside it and only the band & the end of the adjustment screw protrude. The inner tube material is optional and serves both as protective padding on the fork as well as an aesthetic covering to conceal the white PVC.
06-18-12, 08:45 AM
#74
a.k.a., Point Five Dude
Join Date: Apr 2011
Location: Twin Cites, MN USA
Posts: 794
Bikes: 1987 Trek Elance 400 T
Mentioned: 0 Post(s)
Tagged: 0 Thread(s)
Quoted: 0 Post(s)
Likes: 0
Liked 0 Times
in
0 Posts
 06-18-12, 01:07 PM
#75
Member
Join Date: Sep 2010
Location: Halifax, NS
Posts: 44
Bikes: Kona JTS, Specialized Sirius Elite, Team Miyata
Mentioned: 0 Post(s)
Tagged: 0 Thread(s)
Quoted: 0 Post(s)
Likes: 0
Liked 0 Times
in
0 Posts
Wow, sexy! Nice work!
Also to the others that have posted, thanks! Great thread to read through for those of us who like to keep ourselves buried in "projects".
Good point, and to bend tubing just fill it with sand and go slow in order to avoid collapse.
Also to the others that have posted, thanks! Great thread to read through for those of us who like to keep ourselves buried in "projects".
Good point, and to bend tubing just fill it with sand and go slow in order to avoid collapse.
Last edited by n8b; 06-18-12 at 01:13 PM.

Thread
Thread Starter
Forum
Replies
Last Post
vintagerando
Classic & Vintage
37
01-17-20 08:34 AM
crank_addict
Classic & Vintage
16
03-30-15 04:45 PM
