


12 Volt LED Headlights
 02-19-12, 06:23 PM
#26
Certified Bike Brat
Join Date: Jan 2011
Location: Montreal, Quebec
Posts: 4,251
Mentioned: 0 Post(s)
Tagged: 0 Thread(s)
Quoted: 5 Post(s)
Likes: 0
Liked 6 Times
in
6 Posts
Could just do it properly..
https://www.peterwhitecycles.com/dymotec.asp
B&M Dymotec S12: Price: $ 315.00, Bottle dynamo ..
Lumotec Oval Plus 12 (12 volt) headlight and bracket Price: $ 82.00,
$ 17.00 spare bulb, is 5 watt (12 volt)
[ its halogen , so an LED substitute is also needing to be a 5W load.]
taillights: $ 68.00, a rack mount, or $ 52.00, rear of mudguard mount..
The road bikes I'll probably just run with a helmet light anyway so single 900 lumen light and battery for that would be less than $200, and in fact, I can just 'borrow' something temporarily from the mtb bike.
So my decision was based on redundency, availability and overall flexibility rather than cost. There were definately cheaper individual solutions - IMO this was the better overall solution for my own uses.
Someone else might take an entirely different approach depending on their own objectives and I'd have no problem with that.
Last edited by Burton; 02-19-12 at 06:53 PM.
 02-20-12, 09:49 AM
#27
Senior Member
Thread Starter

Could just do it properly..
https://www.peterwhitecycles.com/dymotec.asp
B&M Dymotec S12: Price: $ 315.00, Bottle dynamo ..
Lumotec Oval Plus 12 (12 volt) headlight and bracket Price: $ 82.00,
$ 17.00 spare bulb, is 5 watt (12 volt)
[ its halogen , so an LED substitute is also needing to be a 5W load.]
taillights: $ 68.00, a rack mount, or $ 52.00, rear of mudguard mount..
https://www.peterwhitecycles.com/dymotec.asp
B&M Dymotec S12: Price: $ 315.00, Bottle dynamo ..
Lumotec Oval Plus 12 (12 volt) headlight and bracket Price: $ 82.00,
$ 17.00 spare bulb, is 5 watt (12 volt)
[ its halogen , so an LED substitute is also needing to be a 5W load.]
taillights: $ 68.00, a rack mount, or $ 52.00, rear of mudguard mount..
I was not aware that there was any 12 volt sidewall dynamo in existence. Thank you for "enlightening" me, no pun intended.
The price is a bit steep though. I once had a setup with a six volt dynamo, with a rectifier, and connected to a six volt lead-acid SLA. But someone vandalized it by shoving a screwdriver under the rectifier bridge and prying up on it, which ruined the diodes, and shorted out the battery. The vandalism occurred while I was standing near the bike, and I felt threatened by this guy, who was like 6 foot two, but the Police would not do anything about it! Well anyway, that was more than twenty years ago. After that, I went to twelve volt.
But $315 is more than I paid for the Frame, so I wouldn't put one on this bike.
02-21-12, 12:49 PM
#28
Banned
B.S. like that, wanton ugly vandalism, reinforces why I moved here,
not violence free, given This is a nation that uses violence rather than wisdom,
Even to entertain the masses.
but Way out on the Wet coast, it is a bit less.
not violence free, given This is a nation that uses violence rather than wisdom,
Even to entertain the masses.
but Way out on the Wet coast, it is a bit less.
Last edited by fietsbob; 02-21-12 at 12:52 PM.
02-26-12, 01:24 PM
#29
Senior Member
Thread Starter
https://www.hobbypartz.com/ledlights....FYSK4AodhHxpPQ
This is something I saw today. These strings of LED's run on 12 volt, so the advert says. Are they cheap enough?
This is something I saw today. These strings of LED's run on 12 volt, so the advert says. Are they cheap enough?
02-26-12, 04:48 PM
#30
-

All the high-power LEDs used in bike headlights are designed around Lithium cells as a power source, consequently the LEDs require ~3.7 V for operation.
You should look into these for building lights. Better yet, just buy one ready to use and quit wasting your time with all these novelty 12 V automotive aftermarket LED devices.
You should look into these for building lights. Better yet, just buy one ready to use and quit wasting your time with all these novelty 12 V automotive aftermarket LED devices.
Last edited by seeker333; 02-26-12 at 06:17 PM.
03-01-12, 12:27 PM
#31
lowracer ninja master
Join Date: May 2003
Posts: 912
Mentioned: 0 Post(s)
Tagged: 0 Thread(s)
Quoted: 0 Post(s)
Likes: 0
Liked 0 Times
in
0 Posts
I have an inova 12 volt led on my quest carbon velomobile. All you need is a LI-PO 11.1 volt rc type
battery and the li-po charger. I get a few days of run time if you run the light 4 to 5 hours a night after dark. I'm also running a whelen vertex light head flasher on the rear.
here's a short clip of the rear 12v flasher. I don't have any pics of the headlight, but you can check it out at bluevelo.com
<object style="height: 390px; width: 640px"><param name="movie" value="https://www.youtube.com/v/81YDzBw055o?version=3&feature=player_detailpage"><param name="allowFullScreen" value="true"><param name="allowScriptAccess" value="always"><embed src="https://www.youtube.com/v/81YDzBw055o?version=3&feature=player_detailpage" type="application/x-shockwave-flash" allowfullscreen="true" allowScriptAccess="always" width="640" height="360"></object>
03-01-12, 08:11 PM
#32
Certified Bike Brat
Join Date: Jan 2011
Location: Montreal, Quebec
Posts: 4,251
Mentioned: 0 Post(s)
Tagged: 0 Thread(s)
Quoted: 5 Post(s)
Likes: 0
Liked 6 Times
in
6 Posts
All the high-power LEDs used in bike headlights are designed around Lithium cells as a power source, consequently the LEDs require ~3.7 V for operation.
You should look into these for building lights. Better yet, just buy one ready to use and quit wasting your time with all these novelty 12 V automotive aftermarket LED devices.
You should look into these for building lights. Better yet, just buy one ready to use and quit wasting your time with all these novelty 12 V automotive aftermarket LED devices.
Last edited by Burton; 03-01-12 at 08:17 PM.
05-07-12, 04:07 PM
#33
Senior Member
Thread Starter
Okay, I came up with something new, to update this post.
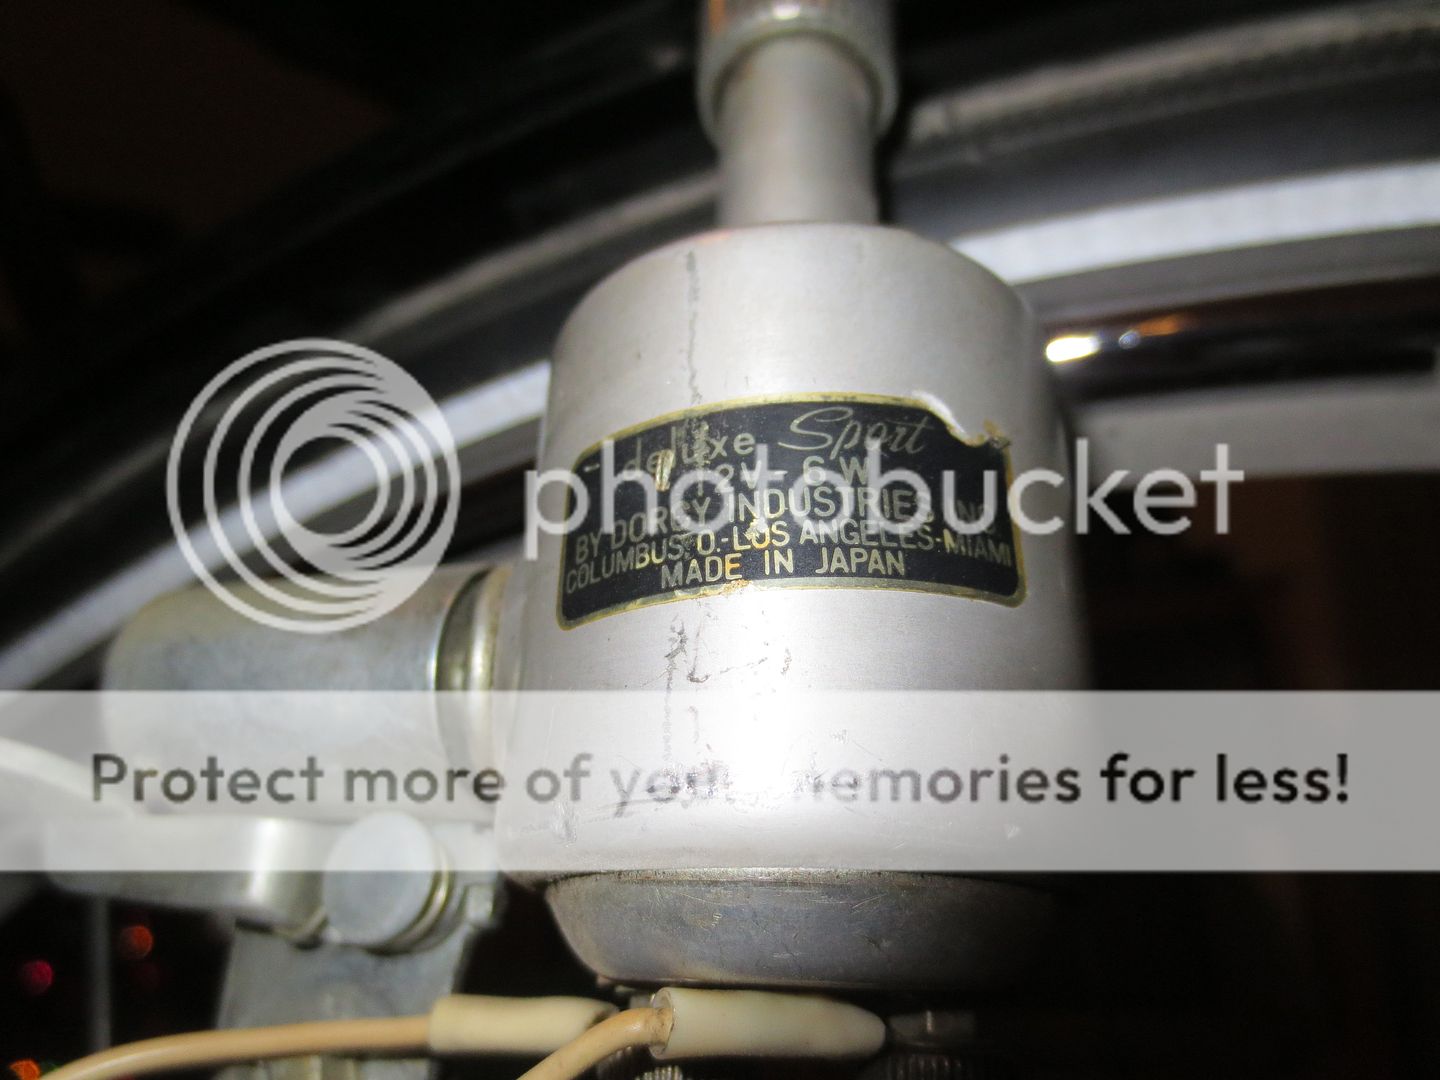
A photo of a 12 volt MR16 socket, fresh from the electrical supply house on the other side of town:
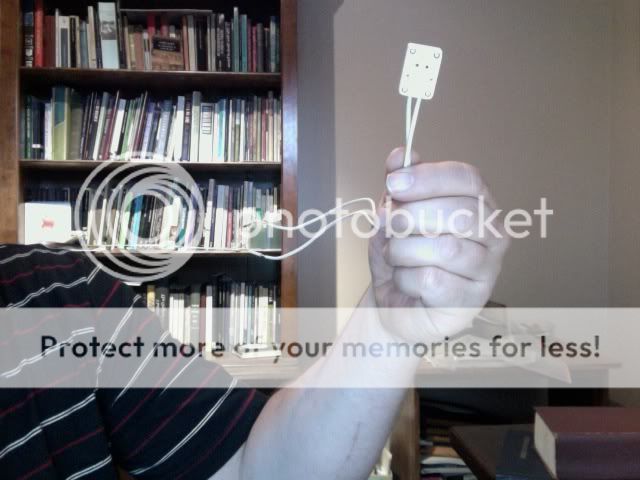
(This photo was shot using the computer's built in camera)
The socket is ceramic, with a mica faceplate, and asbestos insulated leads. It is obviously meant to take high temperature, Though the LED MR16 is only 6.7 watts. The ceramic block actually says 250 volt 75 watts.
I can make a fixture out of a coca-cola can now.
Second item, The supply house now has a lot more variety of LED lighting, including an 8 degree beam angle version of the LED MR16. (The one I currently use is a 35 degree beam angle).
So I will soon have both the wide and narrow beam lights.
A photo of a 12 volt MR16 socket, fresh from the electrical supply house on the other side of town:
(This photo was shot using the computer's built in camera)
The socket is ceramic, with a mica faceplate, and asbestos insulated leads. It is obviously meant to take high temperature, Though the LED MR16 is only 6.7 watts. The ceramic block actually says 250 volt 75 watts.
I can make a fixture out of a coca-cola can now.
Second item, The supply house now has a lot more variety of LED lighting, including an 8 degree beam angle version of the LED MR16. (The one I currently use is a 35 degree beam angle).
So I will soon have both the wide and narrow beam lights.
05-07-12, 07:54 PM
#34


Se�ior Member
Join Date: Sep 2005
Location: Michigan
Posts: 13,749
Bikes: Windsor Fens, Giant Seek 0 (2014, Alfine 8 + discs)
Mentioned: 13 Post(s)
Tagged: 0 Thread(s)
Quoted: 446 Post(s)
Likes: 0
Liked 8 Times
in
7 Posts
Used to be a lot of us, back before LEDs got cheap. It used to be common to run MR16 halogen spots.
The problem I see with that is that until proven otherwise I'd bet those were extremely inefficient. The current limiting might be really crude in those which would lead to a lot of power being spent as heat. When you're designing to go onto a car, you can afford to just dump power as heat, nobody cares if it draws an extra 5 watts, but on a bicycle or flashlight it's a big deal.
The problem I see with that is that until proven otherwise I'd bet those were extremely inefficient. The current limiting might be really crude in those which would lead to a lot of power being spent as heat. When you're designing to go onto a car, you can afford to just dump power as heat, nobody cares if it draws an extra 5 watts, but on a bicycle or flashlight it's a big deal.
__________________
Work: the 8 hours that separates bike rides.
Work: the 8 hours that separates bike rides.
05-07-12, 07:57 PM
#35
Se�ior Member
Join Date: Sep 2005
Location: Michigan
Posts: 13,749
Bikes: Windsor Fens, Giant Seek 0 (2014, Alfine 8 + discs)
Mentioned: 13 Post(s)
Tagged: 0 Thread(s)
Quoted: 446 Post(s)
Likes: 0
Liked 8 Times
in
7 Posts
If you look at REALLY OLD posts in the lighting forums here, you'll find dozens if not hundreds of DIY MR16 halogen setups.
This album from 2004 shows my solution, whipped up in about 20 minutes at a home improvement store. It ran great for 2 years until I upgraded.
https://www.hauntedfrog.com/gallery/m...g2_itemId=2636
This album from 2004 shows my solution, whipped up in about 20 minutes at a home improvement store. It ran great for 2 years until I upgraded.
https://www.hauntedfrog.com/gallery/m...g2_itemId=2636
__________________
Work: the 8 hours that separates bike rides.
Work: the 8 hours that separates bike rides.
05-08-12, 08:11 AM
#36
Senior Member
Thread Starter
If you look at REALLY OLD posts in the lighting forums here, you'll find dozens if not hundreds of DIY MR16 halogen setups.
This album from 2004 shows my solution, whipped up in about 20 minutes at a home improvement store. It ran great for 2 years until I upgraded.
https://www.hauntedfrog.com/gallery/m...g2_itemId=2636
This album from 2004 shows my solution, whipped up in about 20 minutes at a home improvement store. It ran great for 2 years until I upgraded.
https://www.hauntedfrog.com/gallery/m...g2_itemId=2636
So, yesterday, before I updated this post, I was riding a recumbent bike that I keep in a shed in my Mothers back yard, and I happened to swing around the Electrical Supply house, so I parked the bike in front and went in, to see what they've got. Let me tell you, this LED thing is growing, they have more LED bulbs and fixtures than the last time I went there. (Same is true for the auto parts store, where I bought the marker lights, 12 volt red and amber.
So I bought the two pin socket , and last night / this morning I built a fixture to house the new MR16 bulb...
05-08-12, 08:24 AM
#37
Senior Member
Thread Starter
I don't have any new pictures, but since I forgot to show you all the old pictures, let me show you them now:
TAIL LIGHTS-12 volt LED, with "Signal Stat" brand name on them, from the auto parts store:
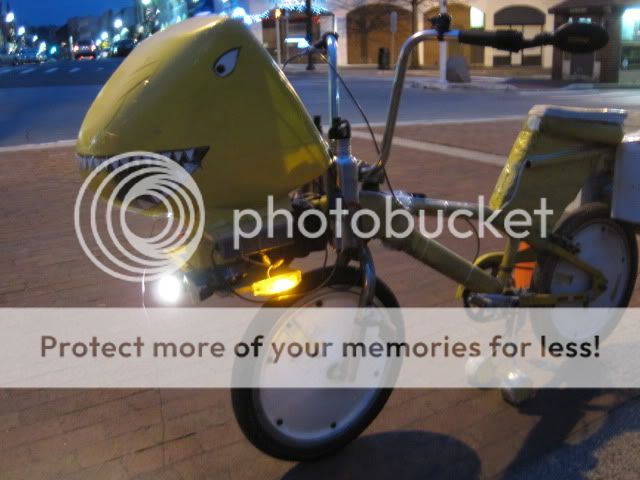
Amber Marker Lights on the front of this Utility Bike:
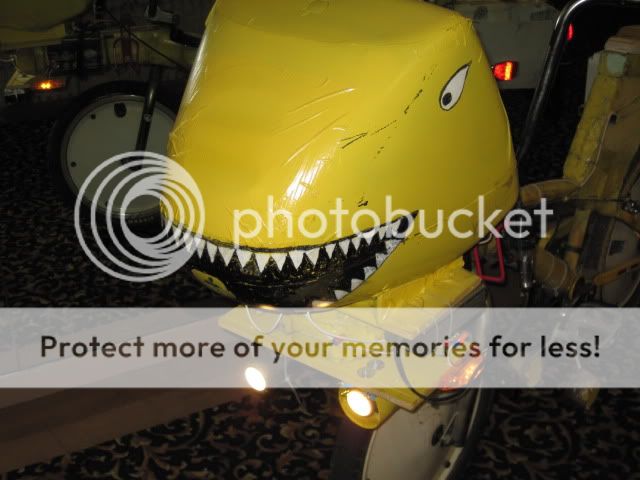
Let me say a few words about fairings: while fairings have been proven to reduce aerodynamic drag, they are primarily a Protective Shield. Also, I have discovered that fairings can house electrical and electronic gear.
Then I painted the shark teeth and eyeballs on it:
These Photographs are from 19 December, 2011.
In the photos , the LED headlight is the 6.7 watt with a 35 degree spread angle. I plan to add another 6.7 watt LED headlight, on the left side underneath (I mount my lights on the bottoms of my fairings so I don't get blinded by the glare) But with an EIGHT (8) degree spread angle, so I can see farther up the road.
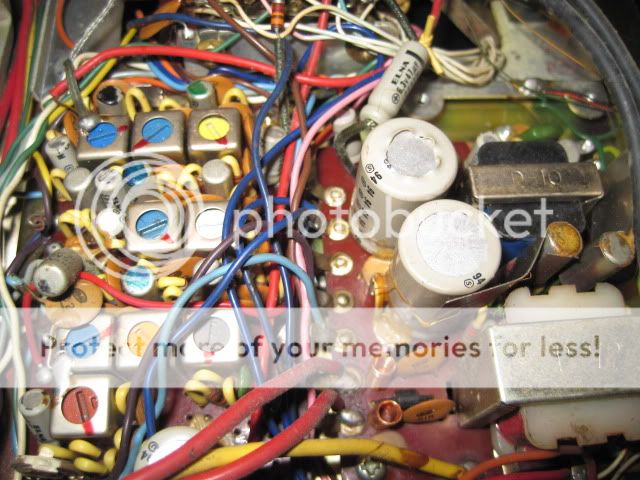
Some radio innards, the Shark Bike has a radio:
Sorry, I'm behind in shooting photographs, I will try to update this post later.
I have already installed two Toggle switches in the faceplate of the iMac. I used an Apple iMac computer case for the fairing, which saved me like 300 hours of work in the fiberglass booth. The Apple Computer plastic can be drilled without shattering , FYI.
Will post pictures later.
TAIL LIGHTS-12 volt LED, with "Signal Stat" brand name on them, from the auto parts store:
Amber Marker Lights on the front of this Utility Bike:
Let me say a few words about fairings: while fairings have been proven to reduce aerodynamic drag, they are primarily a Protective Shield. Also, I have discovered that fairings can house electrical and electronic gear.
Then I painted the shark teeth and eyeballs on it:
These Photographs are from 19 December, 2011.
In the photos , the LED headlight is the 6.7 watt with a 35 degree spread angle. I plan to add another 6.7 watt LED headlight, on the left side underneath (I mount my lights on the bottoms of my fairings so I don't get blinded by the glare) But with an EIGHT (8) degree spread angle, so I can see farther up the road.
Some radio innards, the Shark Bike has a radio:
Sorry, I'm behind in shooting photographs, I will try to update this post later.
I have already installed two Toggle switches in the faceplate of the iMac. I used an Apple iMac computer case for the fairing, which saved me like 300 hours of work in the fiberglass booth. The Apple Computer plastic can be drilled without shattering , FYI.
Will post pictures later.
Last edited by hotbike; 05-08-12 at 08:29 AM.
05-08-12, 01:15 PM
#38
Senior Member
Thread Starter
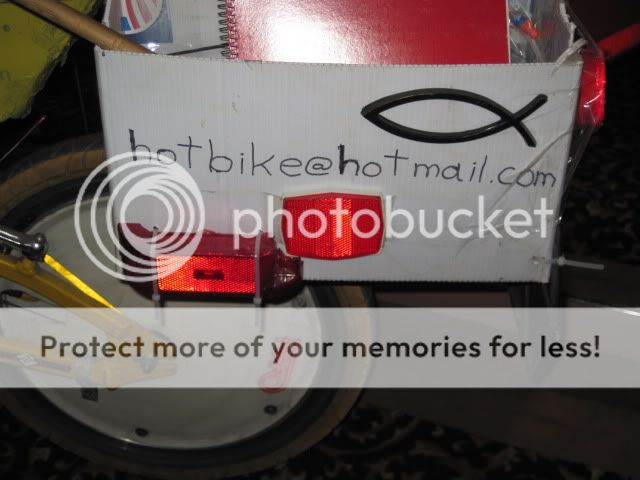
Photo above shows the new red marker light, on the left rear pannier. For some reason, all these pictures were flash photographs. The camera won't flash when I want it to, then it flashes when I don't want it to. Maybe I changed a setting on the camera.
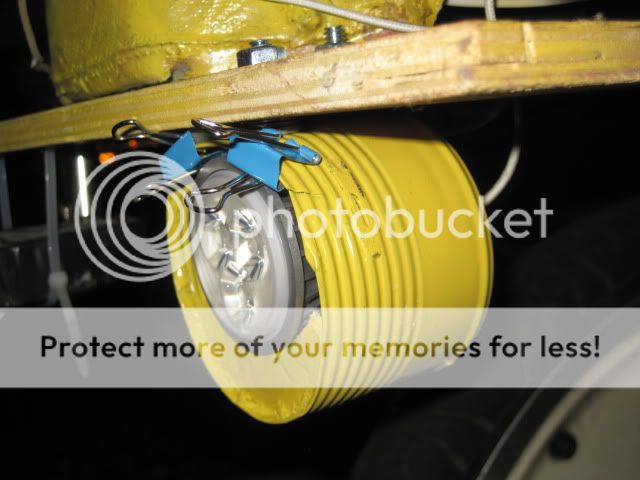
Photo above shows the new lighting fixture, which I made using the ceramic MR16 socket shown in an earlier photo, and a soup can.
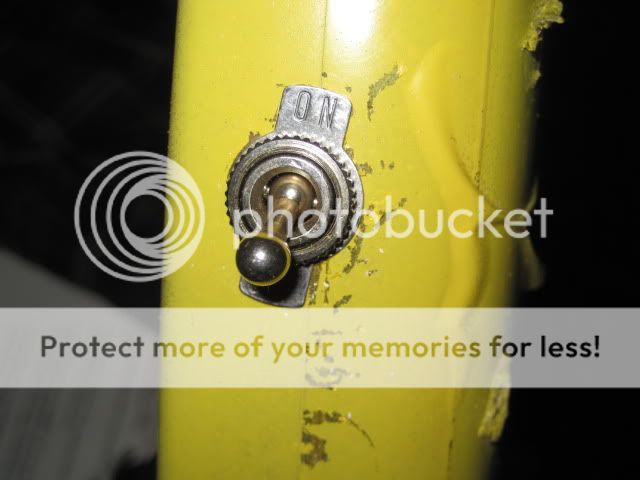
Detail of Toggle switch. Yes, I thoroughly marred the paint with the pliers while installing it. These switches are getting mighty expensive these days, so I salvaged two switches from the 1982 Suzuki Fairing. Price went up when the price of copper went up. they cost five or six dollars each now.
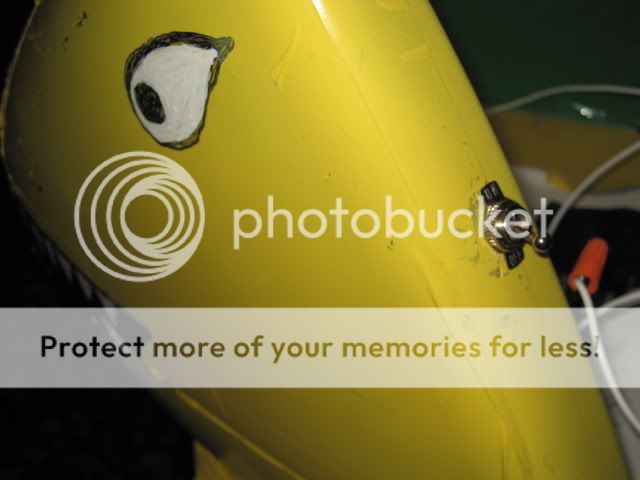
Photo above shows the position... excuse me, installed location of the left side toggle switch. The position is "OFF".
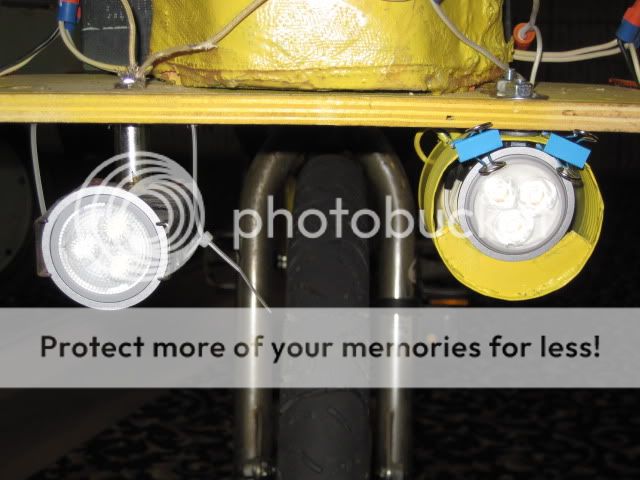
Photo above shows the front tire/tyre, chromed fork, the front edge of the battery rack, and the two LED Headlights. The right (my right, your left) is 6.7 watts with a 35 degree beam spread angle, and the fixture can be rotated in any direction, if I cut the white plastic zip-tie. The left Headlight has a 6.2 watt LED bulb, with an eight degree beam spread angle. It really casts a beam far ahead. This bulb is mounted in the fixture I made this morning, and it is held to the bottom of the battery rack with quarter-twenty hex bolts; I added three washers to the front bolt to keep the light aimed down, so it doesn't blind other drivers. There is some foam-board glued to the bottom, and the bulb is retained by two small blue binder clips at the top. Amazing what can be built just from the junk one finds on ones desk!
The inside of the shark's mouth was blacked with India Ink and a small paintbrush, last week. I always have a bike that is a "work-in-progress", and this is it.
05-23-12, 01:29 PM
#39
Senior Member
Thread Starter
A new Fiberglass Battery Box is planned for the Type Eleven. The LED Lights on the Type Ten are a complete success, and the bike received many thumbs up and compliments at the Car Show last Thursday night.
The location of the new battery box is shown in the embedded video (above). This should be an ideal location on account the center of gravity will be kept low.
Has anyone installed a battery box in this location before? It will be mounted on a fiberglass keel hanging from the downtube.
I will keep you all posted .
05-23-12, 04:46 PM
#40
Certified Bike Brat
Join Date: Jan 2011
Location: Montreal, Quebec
Posts: 4,251
Mentioned: 0 Post(s)
Tagged: 0 Thread(s)
Quoted: 5 Post(s)
Likes: 0
Liked 6 Times
in
6 Posts
A new Fiberglass Battery Box is planned for the Type Eleven. The LED Lights on the Type Ten are a complete success, and the bike received many thumbs up and compliments at the Car Show last Thursday night.
The location of the new battery box is shown in the embedded video (above). This should be an ideal location on account the center of gravity will be kept low.
Has anyone installed a battery box in this location before? It will be mounted on a fiberglass keel hanging from the downtube.
I will keep you all posted .
05-23-12, 05:42 PM
#41
Senior Member
Thread Starter
This is a Trek 720 Ladies frame, so there is only ONE set of bottle cage bosses. I think I will have to use longer screws to mount the Bottle Cage, to reach through the Fiberglass.
I really want to see how it works with the weight of the battery placed so low. Also, I think I can mount some kind of Chain-Guard to the side of the Battery Box.
Thanks for your suggestion, I assume you mean a Nickel Cadmium battery, like the Night-Sun system?
I have built a mock-up of the battery box using foam board, and I will wrap it in Epoxy Fiberglass soon.
05-23-12, 06:39 PM
#42
Certified Bike Brat
Join Date: Jan 2011
Location: Montreal, Quebec
Posts: 4,251
Mentioned: 0 Post(s)
Tagged: 0 Thread(s)
Quoted: 5 Post(s)
Likes: 0
Liked 6 Times
in
6 Posts
I guess you have a dial-up modem? Anyway, in the video, the 12v12a/h is placed exactly where I intend to install it, and I rotate the pedals to demonstrate that I have clearance.
This is a Trek 720 Ladies frame, so there is only ONE set of bottle cage bosses. I think I will have to use longer screws to mount the Bottle Cage, to reach through the Fiberglass.
I really want to see how it works with the weight of the battery placed so low. Also, I think I can mount some kind of Chain-Guard to the side of the Battery Box.
Thanks for your suggestion, I assume you mean a Nickel Cadmium battery, like the Night-Sun system?
I have built a mock-up of the battery box using foam board, and I will wrap it in Epoxy Fiberglass soon.
05-24-12, 11:28 AM
#43
Senior Member
Thread Starter
I'm afraid the situation is NOT as you have assumed. The fact is, I have THREE 12v12a/h batteries sitting around, and I don't really have enough money to buy Lithium Batteries.
I have made a mock-up of the battery box, but now I think I will mount it Inside the frame, using the bottle cage screws . In fact, it might be more like a cage to hold the Battery, as there is an issue with inserting and removing the Battery once the box is attached to the bike.
I wanted to keep the Center of Gravity low, but the box would be so low, I'm afraid it would strike, or get hung up on, the curb, if I was to go over a curb. And while test fitting, I realized the battery would get blocked by the Kickstand, unless I make the fiberglass keel longer by about two inches, which would make the box even lower.
05-26-12, 03:51 PM
#44
Senior Member
Thread Starter
This series of short embedded videos is intended to be a "How To Guide" for the Do It Yourself'er (DIY'er) .
Headlight Installation 31 seconds:
Battery Installation 14 seconds:
New Headlight Test 31 seconds:
Later on, red LED tail lights and marker lights will be installed, as well as amber LED marker lights. Perhaps a second headlight, with a wider beam pattern...
Headlight Installation 31 seconds:
Battery Installation 14 seconds:
New Headlight Test 31 seconds:
Later on, red LED tail lights and marker lights will be installed, as well as amber LED marker lights. Perhaps a second headlight, with a wider beam pattern...
06-01-12, 12:58 PM
#45
Senior Member
Thread Starter
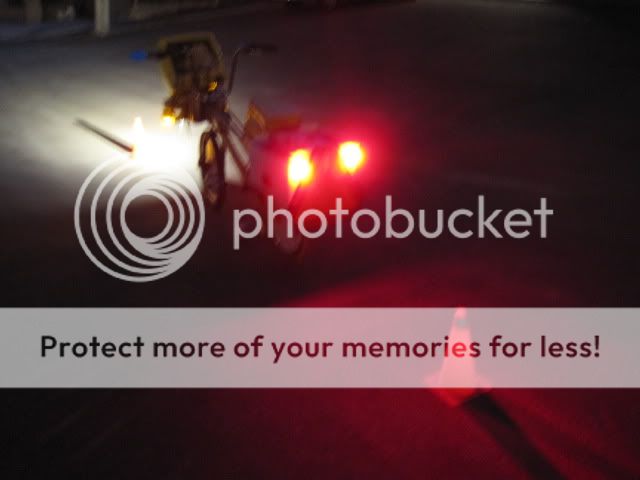
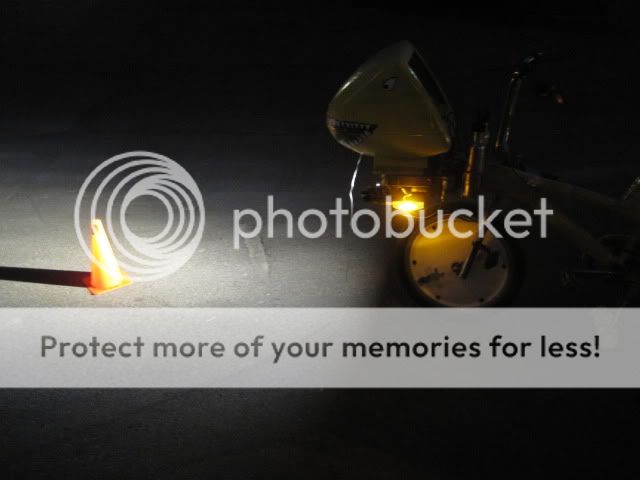
Night Ride:
Just got around to an actual road test of the 6.2 watt LED, with 8 deg beam pattern. This was shot at 00:30 this morning, 01 June, 2012.
Just got around to an actual road test of the 6.2 watt LED, with 8 deg beam pattern. This was shot at 00:30 this morning, 01 June, 2012.
08-12-12, 12:37 PM
#46
Senior Member
Thread Starter
UPDATE:
The bike now has two headlights, with different beam patterns, and different color temperatures.
Watch as I turn the switches, you can see which light is which, and then I turn them both off, so you can see how dark it is on this, Piping Rock Road, on Long Island.
The bike now has two headlights, with different beam patterns, and different color temperatures.
Watch as I turn the switches, you can see which light is which, and then I turn them both off, so you can see how dark it is on this, Piping Rock Road, on Long Island.
08-13-12, 06:19 PM
#47
Senior Member
Join Date: Jun 2010
Posts: 306
Mentioned: 0 Post(s)
Tagged: 0 Thread(s)
Quoted: 0 Post(s)
Likes: 0
Liked 0 Times
in
0 Posts
i use 8aa batteries, and put green LED lights on the dragon slayer, then did red on my huffy marathon. gonna add white ones to the front forks for visability
03-20-13, 10:16 AM
#48
Senior Member
Thread Starter
Here is something new, or at least new-ish:
https://www.amertac.com/details.php?t...binet%20Lights
[TABLE]
[TR]
[TD="class: photo_viewer"]
[/TD]
[/TR]
[/TABLE]
https://www.amertac.com/details.php?t...binet%20Lights
[TABLE]
[TR]
[TD="class: photo_viewer"]
[/TD]
[/TR]
[/TABLE]
03-20-13, 10:25 AM
#49
Senior Member
Thread Starter
I put one of these white LED strips on the bottom of my Fairing, on the Type Eleven, described earlier in this thread. It only draws 80 milliamps.
I copy and paste the picture direct from the manufacturers website.
https://www.amertac.com
I "winged-it" though, since the package or product gave no clue as to the correct polarity. I guessed that the BIG prong would be the negative ground, and I was correct.
Product was $14.99 at an ACE Hardware store, but I had a 20% off coupon.
This is good to have, since my other "beams" cast their light up ahead, but leave the area of my front wheel dark.
The strip was sold as an "Expansion" kit, which means it came without a "wall-wart" transformer.
I am happy with this purchase.
03-20-13, 12:25 PM
#50
You gonna eat that?

I have a 12V 6W generator. If I can find a headlight with that wattage, I would use it.
__________________
I stop for people / whose right of way I honor / but not for no one.
 Originally Posted by bragi
  "However, it's never a good idea to overgeneralize."
I stop for people / whose right of way I honor / but not for no one.
"However, it's never a good idea to overgeneralize."