


Frame design decisions - your opinions?
 02-27-19, 10:32 AM
#76


Randomhead
Join Date: Aug 2008
Location: Happy Valley, Pennsylvania
Posts: 24,386
Mentioned: 0 Post(s)
Tagged: 0 Thread(s)
Quoted: 4 Post(s)
Liked 3,686 Times
in
2,509 Posts
a little sandpaper should clean it right up and make it ready to braze again. Although if you use enough flux that will probably do the job
 02-27-19, 01:01 PM
#77

framebuilder
Thoughts on flux application. Almost all beginners make the same predictable mistakes in how there approach putting on and drying flux as well as how they try to braze. I�ll just touch on a couple of things. A full description is way beyond one post and why I teach frame building classes. There are a lot of interconnecting dots with application and drying and preheating and the pattern needed for brazing efficiently. If something starts to go wrong in one area it can lead to failure in others.
Flux is the rookie�s best friend. It keeps the metal clean and helps the silver to flow. And it lets one know when things are at the right temperature to start brazing. Once it gets used up during the braze, there is real trouble. For starters it needs to be understood that a beginner will take longer to braze a joint than a pro � sometimes a lot longer. For example it probably takes me 3 to 5 minutes to braze a lug while a typical student takes maybe 15 to 20 minutes (with me constantly suggesting refinements). That means they need more flux so they don�t run out.
Here are 3 suggestions. 1st, don�t pile it all up just around the lug because it won�t stay there. Spread it out up the tubes. Richard Sachs� amount is perfect for him but a rookie should put even more up the tubes where it can be accessed if necessary. 2nd, if you are using a small flux brush, roll the brush so the flux stays on in greater volume instead of brushing it on which only leaves a thin layer. And 3rd, if your drying flux technique is poor and it ends up on the floor instead of staying near the joint, stop and let it cool and add some more before continuing.
I might add that a beginner�s instinct on how to dry flux is usually flawed. One needs to stop and think how can I use my flame to keep as much of it in place as possible? It is enviable that some will not stay where it is useful but if the majority is not where it needs to be then the builder needs to think how they can improve their poor flame pattern.
The 2 kinds of flux I use in my class is Stainless Light by Cycle Design and Type G by Gasflux. I prefer these 2 because they have a higher temperature range over typical white flux so they forgive rookie mistakes better. They are also thicker than the watery stuff I buy at my local welding supply store. The methods used to dry each type of flux is very different from each other.
02-27-19, 01:12 PM
#78
Senior Member

Join Date: Mar 2012
Location: santa barbara CA
Posts: 1,087
Mentioned: 1 Post(s)
Tagged: 0 Thread(s)
Quoted: 96 Post(s)
Liked 30 Times
in
21 Posts
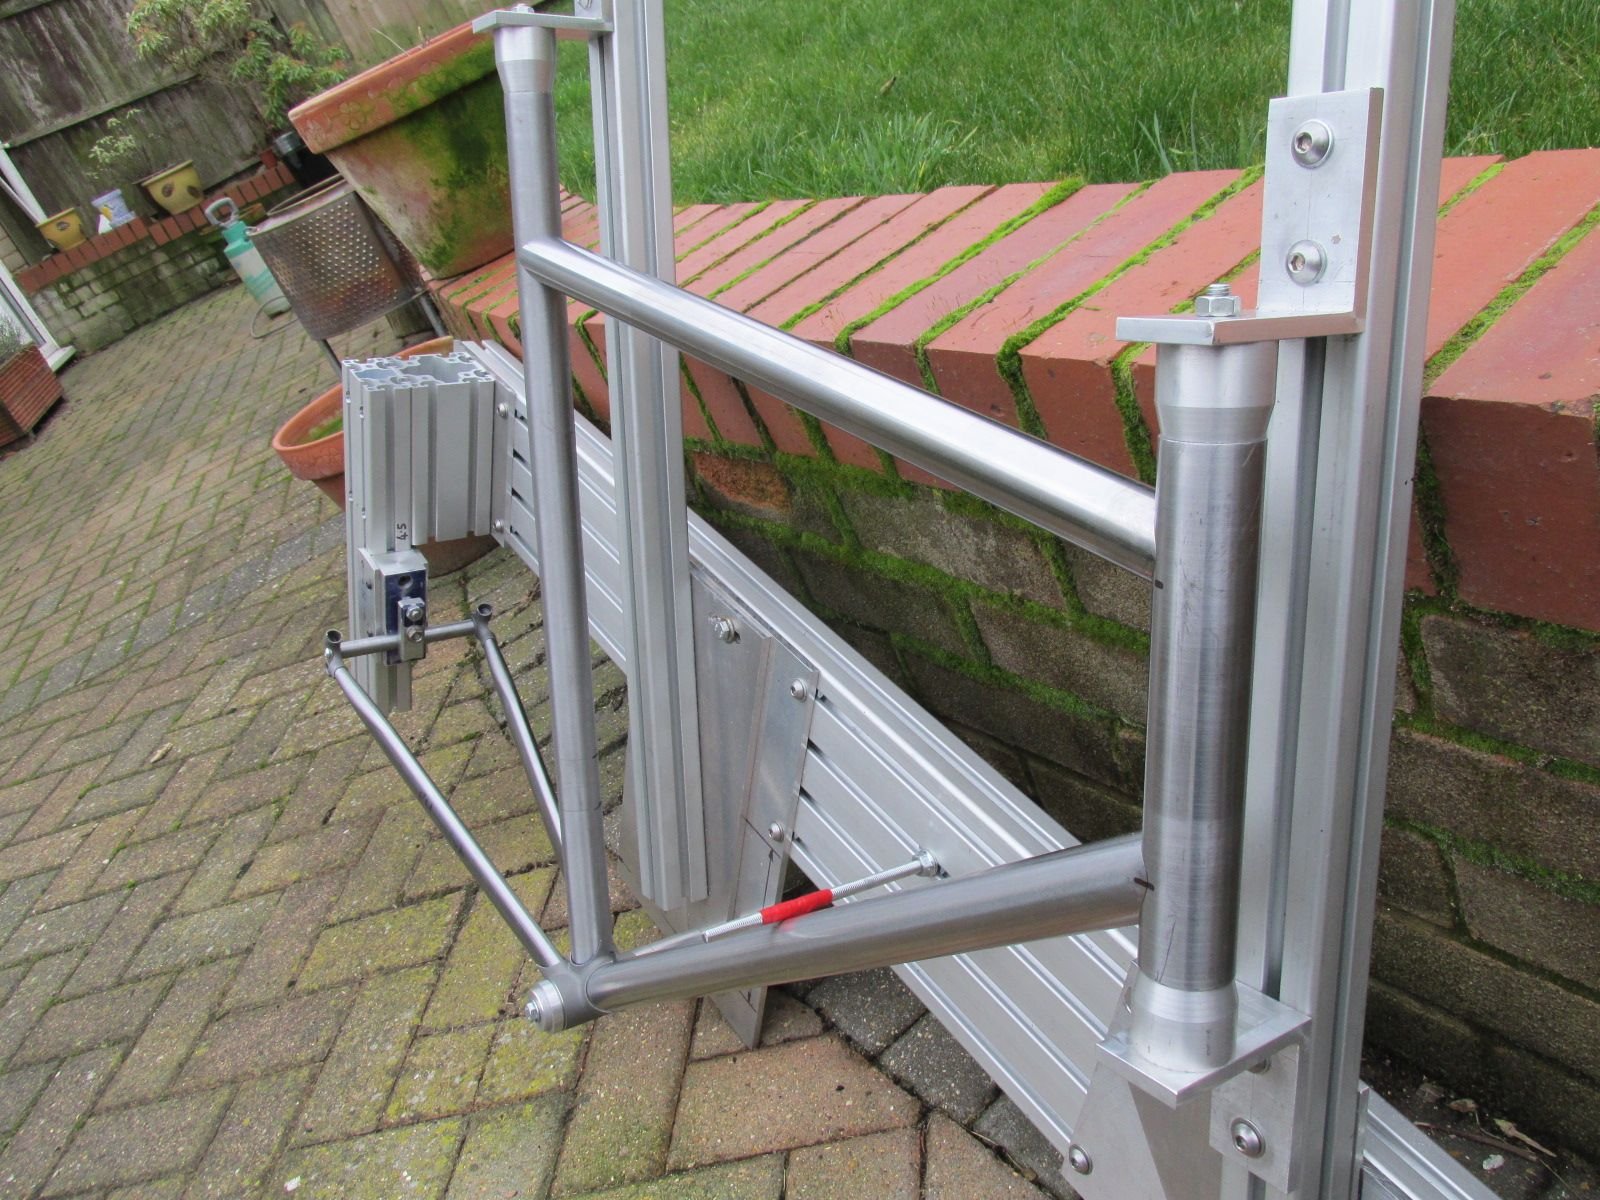
Progress so far:
The jig is a simplified Arctos type and was very easy to build, the tube clamps took longer !! I might improve the rear axle holder at some point and the brackets for the cones need to be guided better as there is some side to side play, but it is OK as is for the first frame.
The drum sanders were very effective and I dont think I could get the mitres any better. The sanders don't remove material very fast so I had to do some hacksaw cuts first. The second mitre on the top tube took some time as I had to go little at a time. I have a 3HP belt sander in my workshop which would cut mitres in seconds but building a jig to hold the tubes would have been a big job - one day.
I am all worked up now as my lugs are on back order.
regards, Brian
__________________
Brian
Brian
Last edited by calstar; 02-27-19 at 01:15 PM.
02-27-19, 01:58 PM
#79
Junior Member
Thread Starter
Join Date: Nov 2015
Posts: 185
Mentioned: 0 Post(s)
Tagged: 0 Thread(s)
Quoted: 45 Post(s)
Likes: 0
Liked 44 Times
in
23 Posts
Thanks Brian
I did the blocks on my lathe and it took a long time
When I made the sanding drums I first made them to the size of the tube and then turned them down, a little at a time (to allow for the thickness of the abrasive) testing each time until the mitre was perfect.
I did the blocks on my lathe and it took a long time
When I made the sanding drums I first made them to the size of the tube and then turned them down, a little at a time (to allow for the thickness of the abrasive) testing each time until the mitre was perfect.
02-27-19, 02:19 PM
#80
Junior Member
Thread Starter
Join Date: Nov 2015
Posts: 185
Mentioned: 0 Post(s)
Tagged: 0 Thread(s)
Quoted: 45 Post(s)
Likes: 0
Liked 44 Times
in
23 Posts
As suggested by Unterhausen I took this lug back to the bench to clean up the shorelines. I wouldnt say it was 100% successful but they were much improved and it was good practice. I have 4 more practice lugs so have to make the most of each one!
I have cut the lug up and penetration is good - everywhere there is metal contact there is filler. I didnt get a fillet inside the top tube - probably because it hardly touches the seat tube, the filler went to the end of the TT but no further. I will have to spend more time on the mitre next time. I didnt get a fillet inside the ears either, not sure why so I will give this more attention next time too.
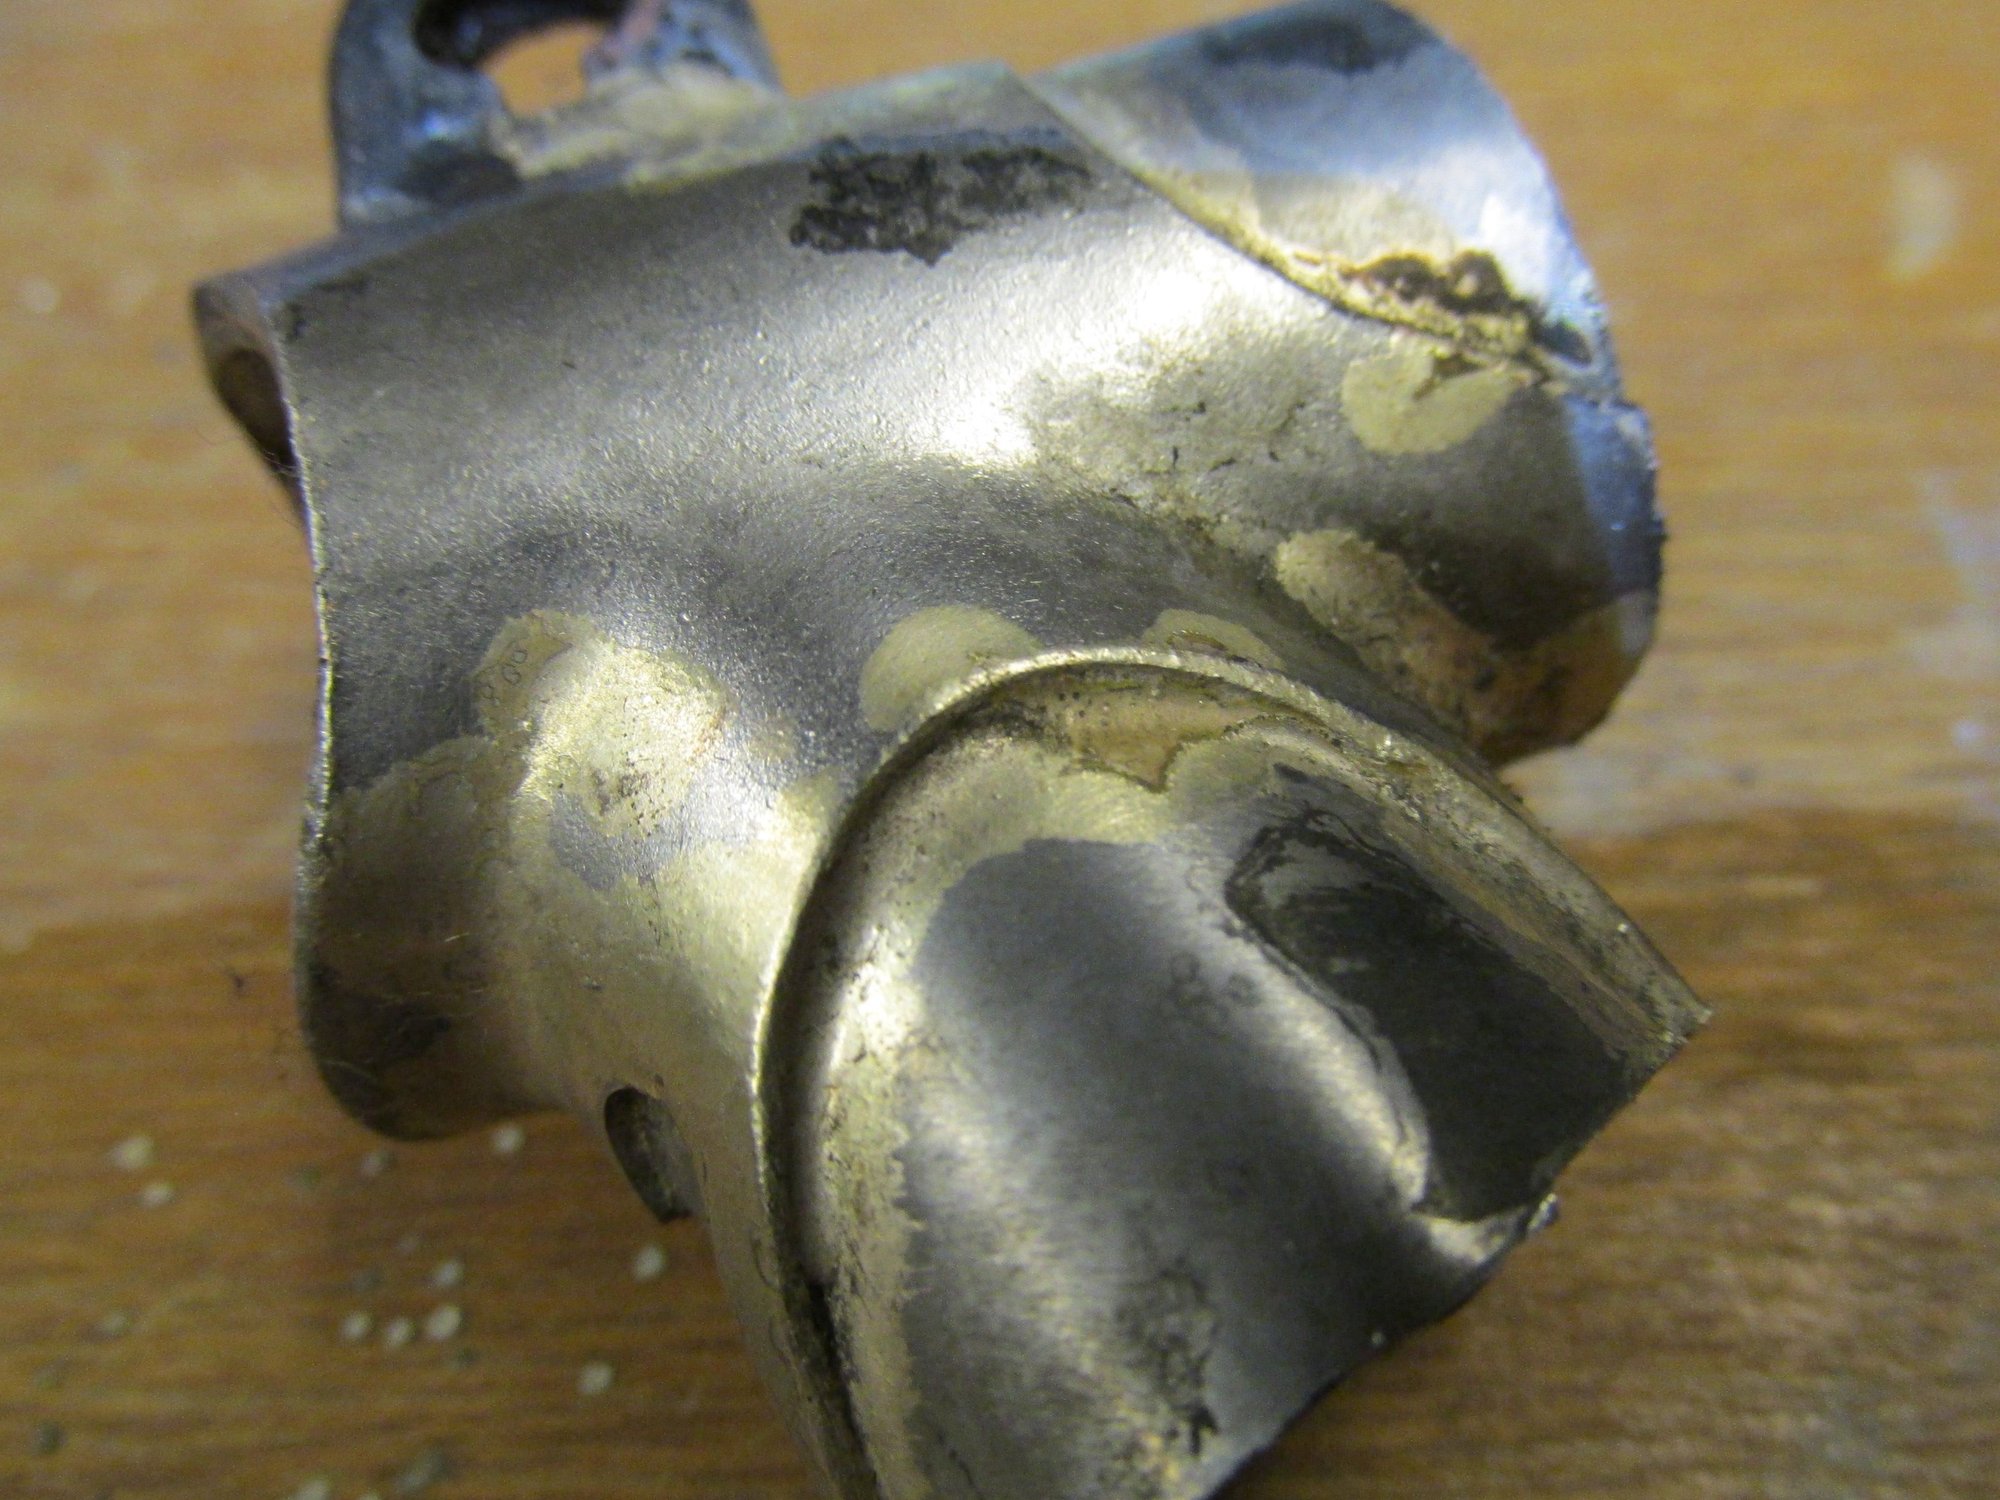
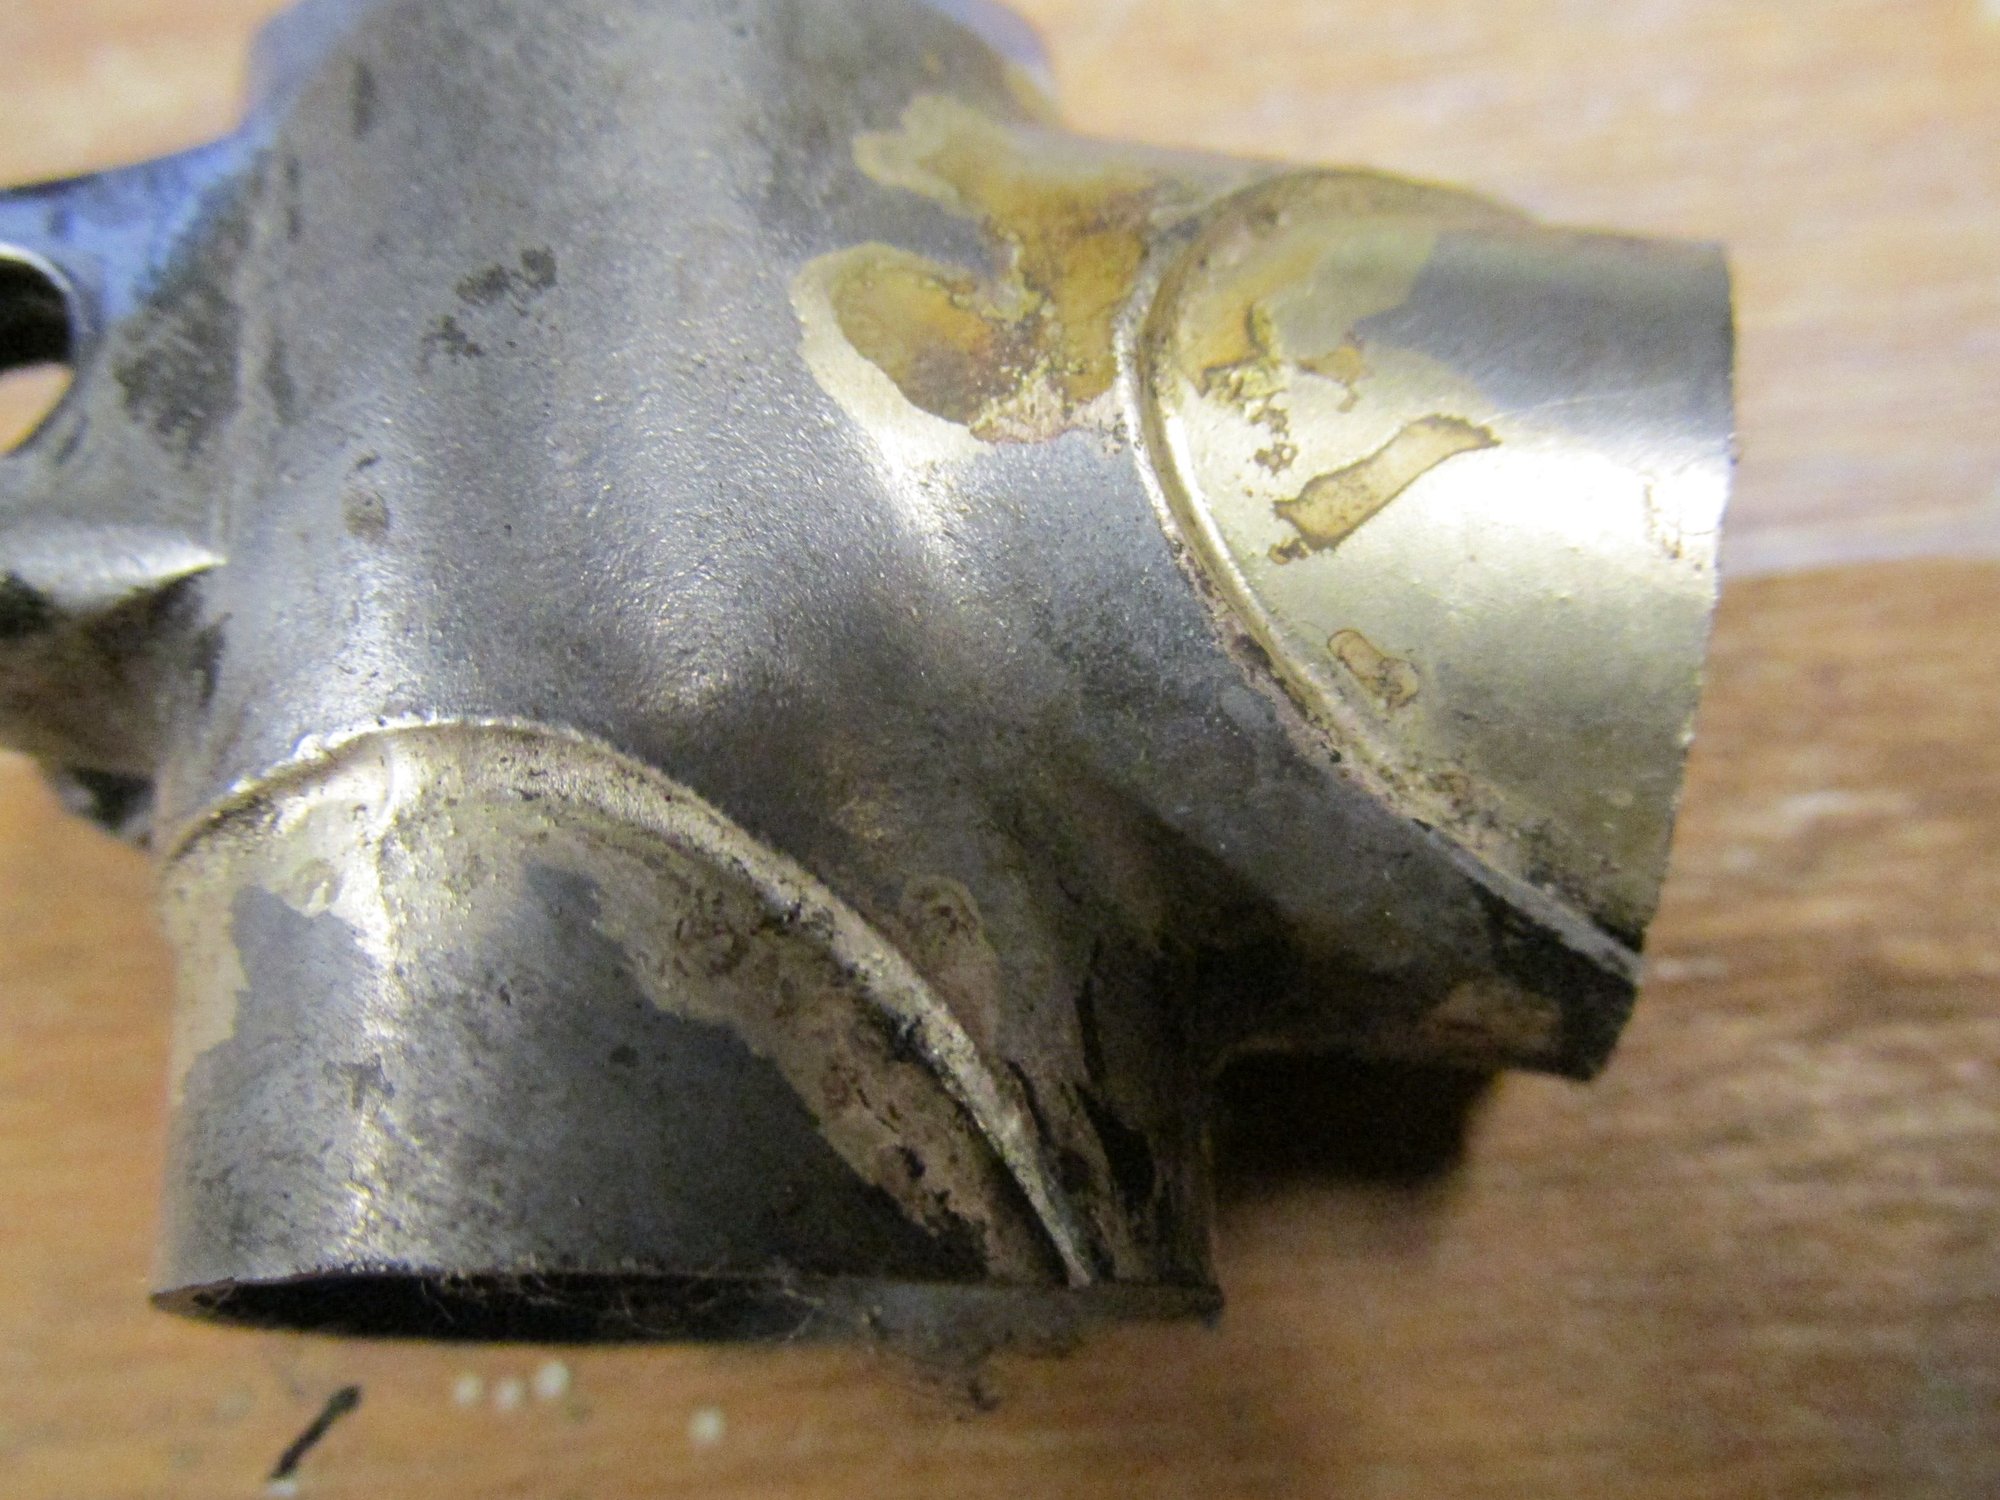


I have cut the lug up and penetration is good - everywhere there is metal contact there is filler. I didnt get a fillet inside the top tube - probably because it hardly touches the seat tube, the filler went to the end of the TT but no further. I will have to spend more time on the mitre next time. I didnt get a fillet inside the ears either, not sure why so I will give this more attention next time too.
02-27-19, 02:34 PM
#81
Junior Member
Thread Starter
Join Date: Nov 2015
Posts: 185
Mentioned: 0 Post(s)
Tagged: 0 Thread(s)
Quoted: 45 Post(s)
Likes: 0
Liked 44 Times
in
23 Posts
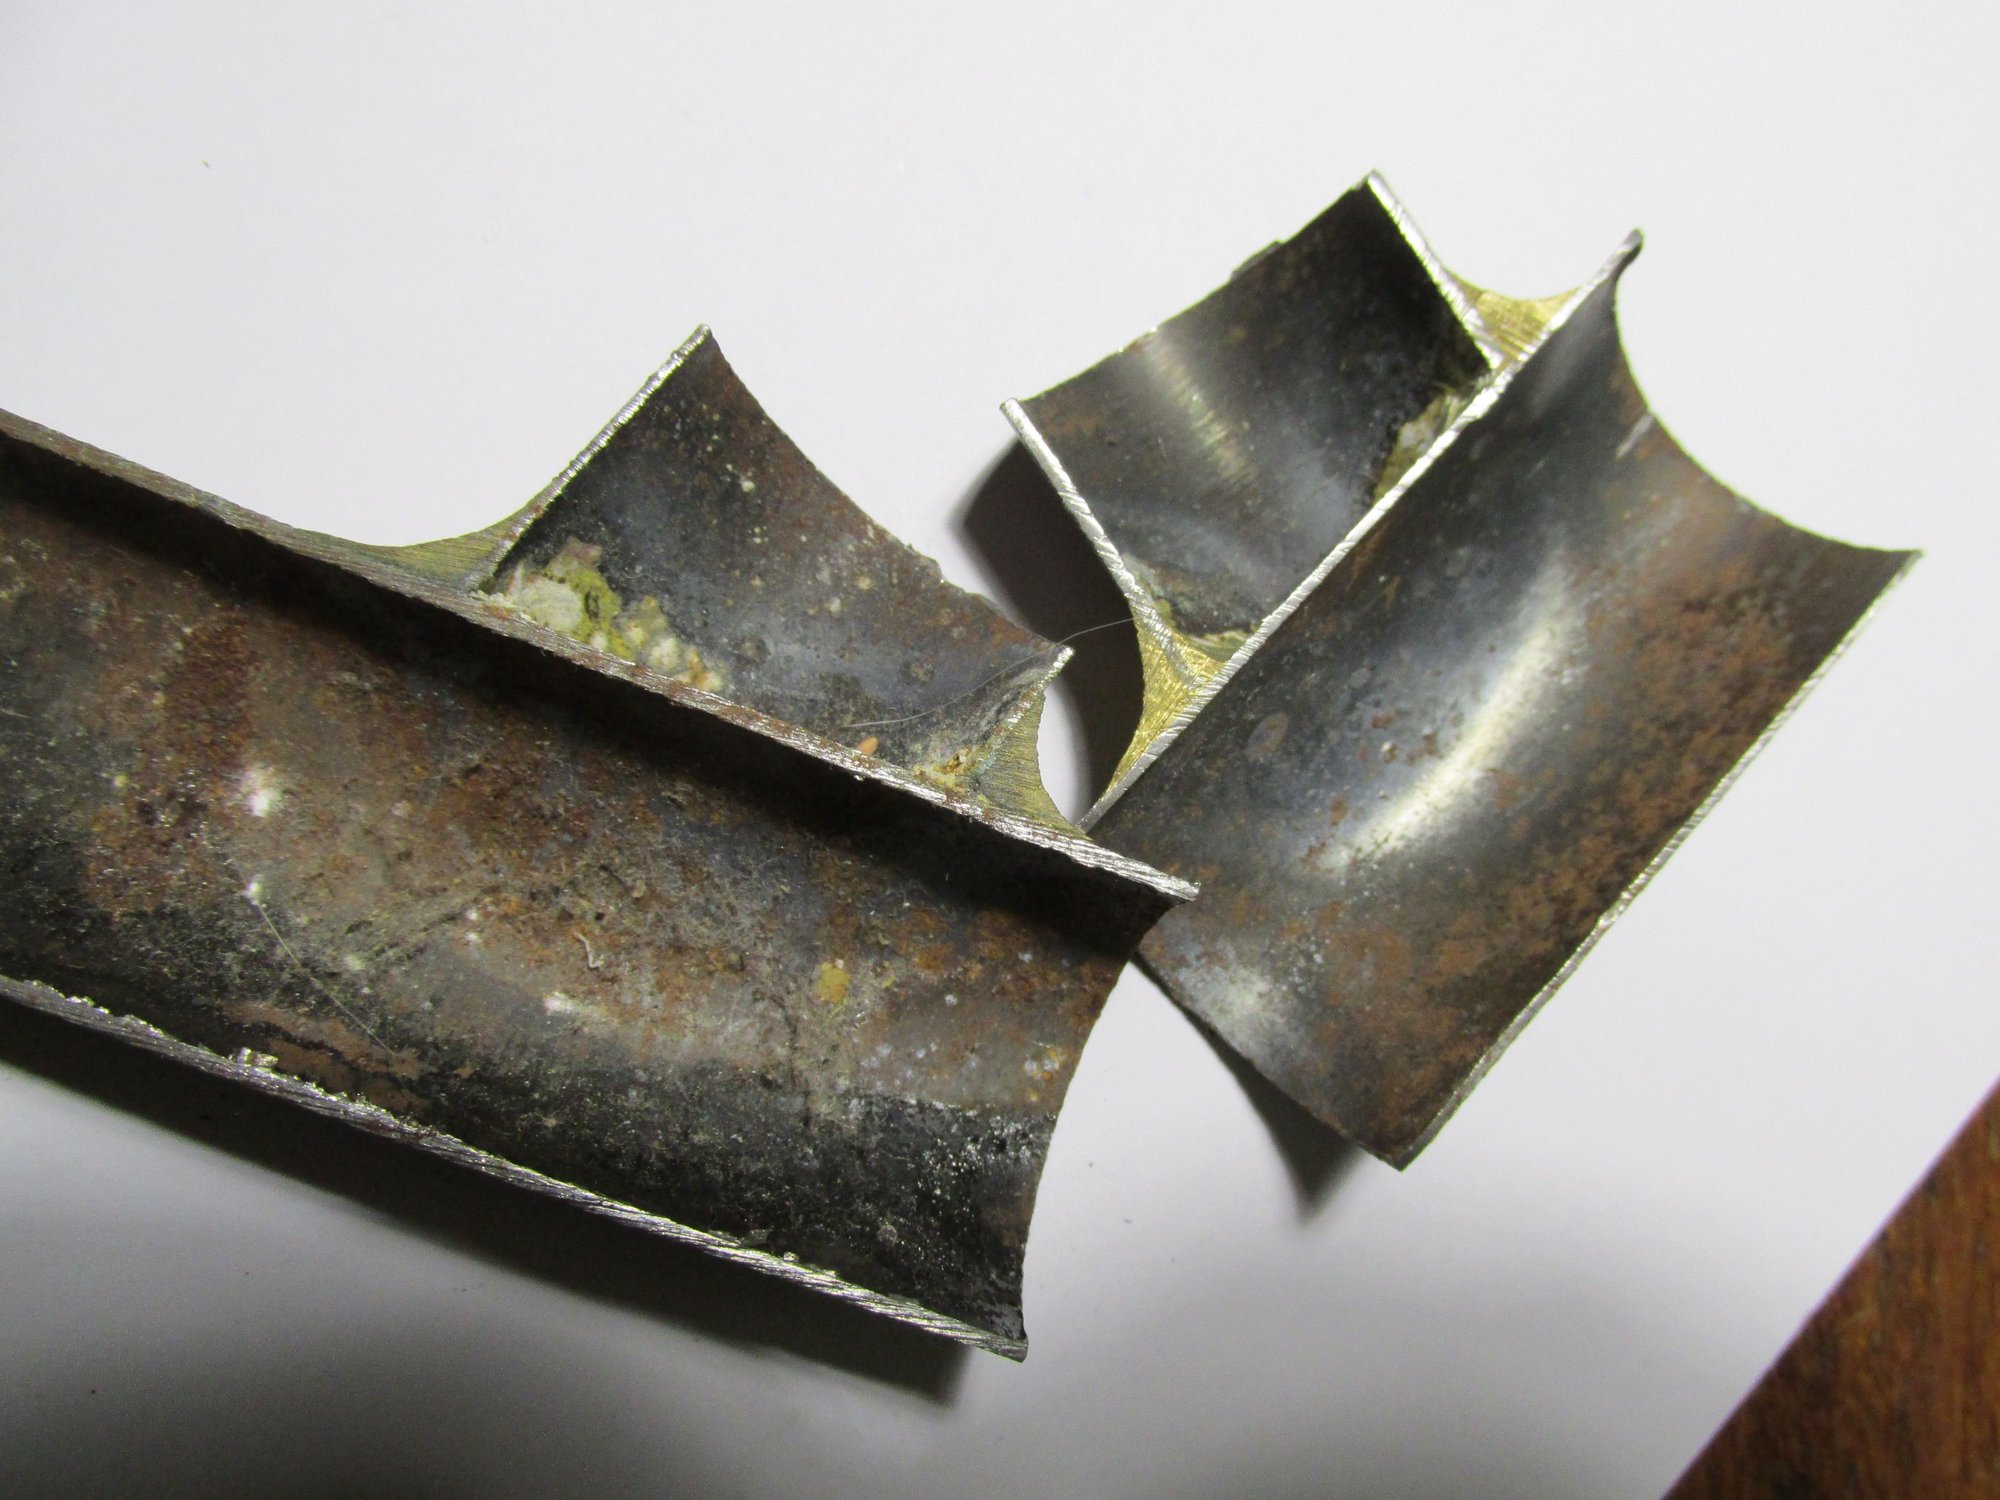
I dug these out this evening, my practice joints when I made my first frame 15 years ago. I did just the two then built the frame - I am not so gung-ho these days
02-27-19, 05:23 PM
#82
Randomhead
Join Date: Aug 2008
Location: Happy Valley, Pennsylvania
Posts: 24,386
Mentioned: 0 Post(s)
Tagged: 0 Thread(s)
Quoted: 4 Post(s)
Liked 3,686 Times
in
2,509 Posts
Mike,
Looks good for the most part. You probably just didn't heat the ears up enough to pull any filler back there. As far as jumping from one tube to another, you should generally try to fill on one tube and flow it to the other. If you can't get that to work you can always fill on the other tube too, but it almost always works. Just realize you have to heat the complete path enough that the filler stays molten.
Looks good for the most part. You probably just didn't heat the ears up enough to pull any filler back there. As far as jumping from one tube to another, you should generally try to fill on one tube and flow it to the other. If you can't get that to work you can always fill on the other tube too, but it almost always works. Just realize you have to heat the complete path enough that the filler stays molten.
02-28-19, 11:21 AM
#83
Junior Member
Thread Starter
Join Date: Nov 2015
Posts: 185
Mentioned: 0 Post(s)
Tagged: 0 Thread(s)
Quoted: 45 Post(s)
Likes: 0
Liked 44 Times
in
23 Posts
Thoughts on flux application. Almost all beginners make the same predictable mistakes in how there approach putting on and drying flux as well as how they try to braze. I�ll just touch on a couple of things. A full description is way beyond one post and why I teach frame building classes. There are a lot of interconnecting dots with application and drying and preheating and the pattern needed for brazing efficiently. If something starts to go wrong in one area it can lead to failure in others.
Flux is the rookie�s best friend. It keeps the metal clean and helps the silver to flow. And it lets one know when things are at the right temperature to start brazing. Once it gets used up during the braze, there is real trouble. For starters it needs to be understood that a beginner will take longer to braze a joint than a pro � sometimes a lot longer. For example it probably takes me 3 to 5 minutes to braze a lug while a typical student takes maybe 15 to 20 minutes (with me constantly suggesting refinements). That means they need more flux so they don�t run out.
Here are 3 suggestions. 1st, don�t pile it all up just around the lug because it won�t stay there. Spread it out up the tubes. Richard Sachs� amount is perfect for him but a rookie should put even more up the tubes where it can be accessed if necessary. 2nd, if you are using a small flux brush, roll the brush so the flux stays on in greater volume instead of brushing it on which only leaves a thin layer. And 3rd, if your drying flux technique is poor and it ends up on the floor instead of staying near the joint, stop and let it cool and add some more before continuing.
I might add that a beginner�s instinct on how to dry flux is usually flawed. One needs to stop and think how can I use my flame to keep as much of it in place as possible? It is enviable that some will not stay where it is useful but if the majority is not where it needs to be then the builder needs to think how they can improve their poor flame pattern.
The 2 kinds of flux I use in my class is Stainless Light by Cycle Design and Type G by Gasflux. I prefer these 2 because they have a higher temperature range over typical white flux so they forgive rookie mistakes better. They are also thicker than the watery stuff I buy at my local welding supply store. The methods used to dry each type of flux is very different from each other.
Flux is the rookie�s best friend. It keeps the metal clean and helps the silver to flow. And it lets one know when things are at the right temperature to start brazing. Once it gets used up during the braze, there is real trouble. For starters it needs to be understood that a beginner will take longer to braze a joint than a pro � sometimes a lot longer. For example it probably takes me 3 to 5 minutes to braze a lug while a typical student takes maybe 15 to 20 minutes (with me constantly suggesting refinements). That means they need more flux so they don�t run out.
Here are 3 suggestions. 1st, don�t pile it all up just around the lug because it won�t stay there. Spread it out up the tubes. Richard Sachs� amount is perfect for him but a rookie should put even more up the tubes where it can be accessed if necessary. 2nd, if you are using a small flux brush, roll the brush so the flux stays on in greater volume instead of brushing it on which only leaves a thin layer. And 3rd, if your drying flux technique is poor and it ends up on the floor instead of staying near the joint, stop and let it cool and add some more before continuing.
I might add that a beginner�s instinct on how to dry flux is usually flawed. One needs to stop and think how can I use my flame to keep as much of it in place as possible? It is enviable that some will not stay where it is useful but if the majority is not where it needs to be then the builder needs to think how they can improve their poor flame pattern.
The 2 kinds of flux I use in my class is Stainless Light by Cycle Design and Type G by Gasflux. I prefer these 2 because they have a higher temperature range over typical white flux so they forgive rookie mistakes better. They are also thicker than the watery stuff I buy at my local welding supply store. The methods used to dry each type of flux is very different from each other.
Thanks for that Doug - didnt spot your post yesterday. Lots of useful info as normal
04-06-19, 06:39 AM
#84
Junior Member
Thread Starter
Join Date: Nov 2015
Posts: 185
Mentioned: 0 Post(s)
Tagged: 0 Thread(s)
Quoted: 45 Post(s)
Likes: 0
Liked 44 Times
in
23 Posts
It has been a while but my frame is now finished and is soon off to be powder coated. It was certainly a learning experience, but it came out OK. I did have to do a fair bit of clean up around the lugs so the shore lines will not be as clean and crisp as all the photos you lot post up, this was a bit disappointing but I have most of the stuff ready to build another frame - but better :-)
Alignment came out pretty good, the head tube was 10 thou out over its length (relative to seat tube) which equates to the front wheel contact patch being 40 or 50 thou out. I am not going to worry about this. Frame angles are pretty much spot on and Bbkt is square. I started using Dougs tacking/aligning/brazing method but with the route from my workshop to my flat surface (kitchen worktop) going through 3 doors and driving rain I gave up and finished up all the remaining the tacked joints in one go. It worked out OK.
I found the rear triangle much harder to get right for reasons I will explain in a bit, however, by eye the rear wheel looks completely central to the chainstays, seat tube and seat stays. I made up some wedges to measure the gaps and the wheel is not perfectly central but should be plenty good enough. I have been looking at peoples wheel alignment out on club rides and have been quite shocked by how far out some frames are.
Things that I found out along the way and might be useful to other newbies are:
1 - Practicing on 1" lugs and tubes does not prepare you for brazing 2OS lugs and tubes - Next time I will get some 2OS lugs and tube to practice on and try using a bigger nozzle. Because of the larger size I was a bit worried about getting full penetration and ended up feeding in far move silver than necessary - hence the clean up needed.
2 - Using a seat lug with sockets for seat tubes is not a good idea unless you tack/braze the front and rear triangles in one go. I thought this type of lug would make things easier for a beginner but the fillet that you get in the sockets from brazing the front triangle cocks up your carefully mitered seat stays and rear triangle alignment. I had to braze the top end of the seat stays (before doing the chainstays) and then adjust the bottom ends to get correct vertical wheel alignment. As a result of this I possibly don't have the seat stays perfectly mitred to the seat tube. With the Llewellyn lugs there is so much joint area that I dont think this is likely to be a problem.
3 - I spent an hour or two perfectly mitering the brake bridge only to find that the brake pads (in the bottom of their slots) were going to be braking on the tyre - doh I haven't a clue how I managed this as I must have measured it 10 times and test fitted it a number of times too, it was way out! I ordered another brake bridge and started again. I was aiming to get the brake pad in the middle of the slot and worked out the position using the Shimano data sheet and double checking with the parts assembled in the frame. The second attempt looked spot on so I brazed it in place. This one was OK but the brake pads are closer to the top of the slot than I had planned, so I need to figure out a better way of doing this step next time.
I will take and post some pics later - have to take the kids to McDs now.
Thanks again for all the useful help and advice.


 04-06-19, 12:28 PM
#86
Banned.

Join Date: Jun 2004
Location: Torrance, CA
Posts: 3,061
Bikes: Homebuilt steel
Mentioned: 18 Post(s)
Tagged: 0 Thread(s)
Quoted: 2193 Post(s)
Liked 425 Times
in
337 Posts
Looks good Mike. You should be proud!
Cleaning lug shorelines isn't too hard it just takes time. If you used 56% silver you can remove the extra material by scraping more so than filing. I use a myriad of needle files with that were sharpened at the tip using a grinder. For that lower head tube lug I'd flux up the parts with the excess material and use a small torch tip and focus some heat right on the excess, and as soon as it hits it's liquid point take a stainless steel wire brush and swipe it off the frame. This is a ghetto fix but effective. I read where Brian Bayless used soldering wick to pull away excess filler sometimes too. At any rate, a few extra hours scraping those lug edges will pay off in the long run...if it matters enough to you that is.
Cleaning lug shorelines isn't too hard it just takes time. If you used 56% silver you can remove the extra material by scraping more so than filing. I use a myriad of needle files with that were sharpened at the tip using a grinder. For that lower head tube lug I'd flux up the parts with the excess material and use a small torch tip and focus some heat right on the excess, and as soon as it hits it's liquid point take a stainless steel wire brush and swipe it off the frame. This is a ghetto fix but effective. I read where Brian Bayless used soldering wick to pull away excess filler sometimes too. At any rate, a few extra hours scraping those lug edges will pay off in the long run...if it matters enough to you that is.
Last edited by Nessism; 04-06-19 at 02:17 PM.
04-07-19, 07:13 AM
#87
Randomhead
Join Date: Aug 2008
Location: Happy Valley, Pennsylvania
Posts: 24,386
Mentioned: 0 Post(s)
Tagged: 0 Thread(s)
Quoted: 4 Post(s)
Liked 3,686 Times
in
2,509 Posts
I agree that scraping is the way to go. But you can get rid of any filler that way. I managed to spill some nickle silver over the shoreline of the seat lug while brazing the seat stays on my current build  Spent an evening cleaning it out. I have a little flat file that works really well for that. Actually using it as a file often leaves the surface of the lug munged up a little. I had time to thing that there is probably a carbide graver that would work really well in that application.
Spent an evening cleaning it out. I have a little flat file that works really well for that. Actually using it as a file often leaves the surface of the lug munged up a little. I had time to thing that there is probably a carbide graver that would work really well in that application.
04-07-19, 02:49 PM
#88
Senior Member
Join Date: Aug 2012
Location: Seattle
Posts: 507
Mentioned: 0 Post(s)
Tagged: 0 Thread(s)
Quoted: 103 Post(s)
Liked 144 Times
in
88 Posts
Balancing the heat between the cable and the lug shore/excess filler is tricky. It's possible to pull filler away from the shoreline and need to top them up afterwards. Anyway, good tool to have in the toolbox.
__________________
https://www.flickr.com/photos/54319503@N05/
https://www.draper-cycles.com
https://www.flickr.com/photos/54319503@N05/
https://www.draper-cycles.com
04-07-19, 04:25 PM
#89
Randomhead
Join Date: Aug 2008
Location: Happy Valley, Pennsylvania
Posts: 24,386
Mentioned: 0 Post(s)
Tagged: 0 Thread(s)
Quoted: 4 Post(s)
Liked 3,686 Times
in
2,509 Posts
if the problem with the shoreline is on a bike I made with silver, I just crank up the torch and move it somewhere inconspicuous. Or on rare occasion, somewhere easy to file. But I don't think I would want to do that with lfb unless it was really causing a problem. Like on my first frame, where I flowed filler into the threads in the bb. I think I used welding rod and a wire brush to get rid of that
My motto is "no file" so if I have to file I consider it penance for my (brazing) sins.
My motto is "no file" so if I have to file I consider it penance for my (brazing) sins.
04-08-19, 03:42 AM
#90
Junior Member
Thread Starter
Join Date: Nov 2015
Posts: 185
Mentioned: 0 Post(s)
Tagged: 0 Thread(s)
Quoted: 45 Post(s)
Likes: 0
Liked 44 Times
in
23 Posts
Using a scraper sounds like a good idea, I will give that a go as I am not keen on heating things up again. I have some old lathe tools and blanks that should do the job nicely.
04-08-19, 06:04 AM
#91
Banned.
Join Date: Jun 2004
Location: Torrance, CA
Posts: 3,061
Bikes: Homebuilt steel
Mentioned: 18 Post(s)
Tagged: 0 Thread(s)
Quoted: 2193 Post(s)
Liked 425 Times
in
337 Posts
Needle files with a sharpened tip work great. A lathe tool would be hard to hold onto and maneuver.
Oh, and when scraping in the context being discussed it's a push motion, not a pull. You basically dig the sharp tip of the tool into the excess material and skim off the top layer.
Oh, and when scraping in the context being discussed it's a push motion, not a pull. You basically dig the sharp tip of the tool into the excess material and skim off the top layer.
Last edited by Nessism; 04-08-19 at 08:35 AM.
04-08-19, 09:57 AM
#92
Senior Member
Join Date: Feb 2012
Location: Rochester, NY
Posts: 18,056
Bikes: Stewart S&S coupled sport tourer, Stewart Sunday light, Stewart Commuting, Stewart Touring, Co Motion Tandem, Stewart 3-Spd, Stewart Track, Fuji Finest, Mongoose Tomac ATB, GT Bravado ATB, JCP Folder, Stewart 650B ATB
Mentioned: 0 Post(s)
Tagged: 0 Thread(s)
Quoted: 4195 Post(s)
Liked 3,837 Times
in
2,295 Posts
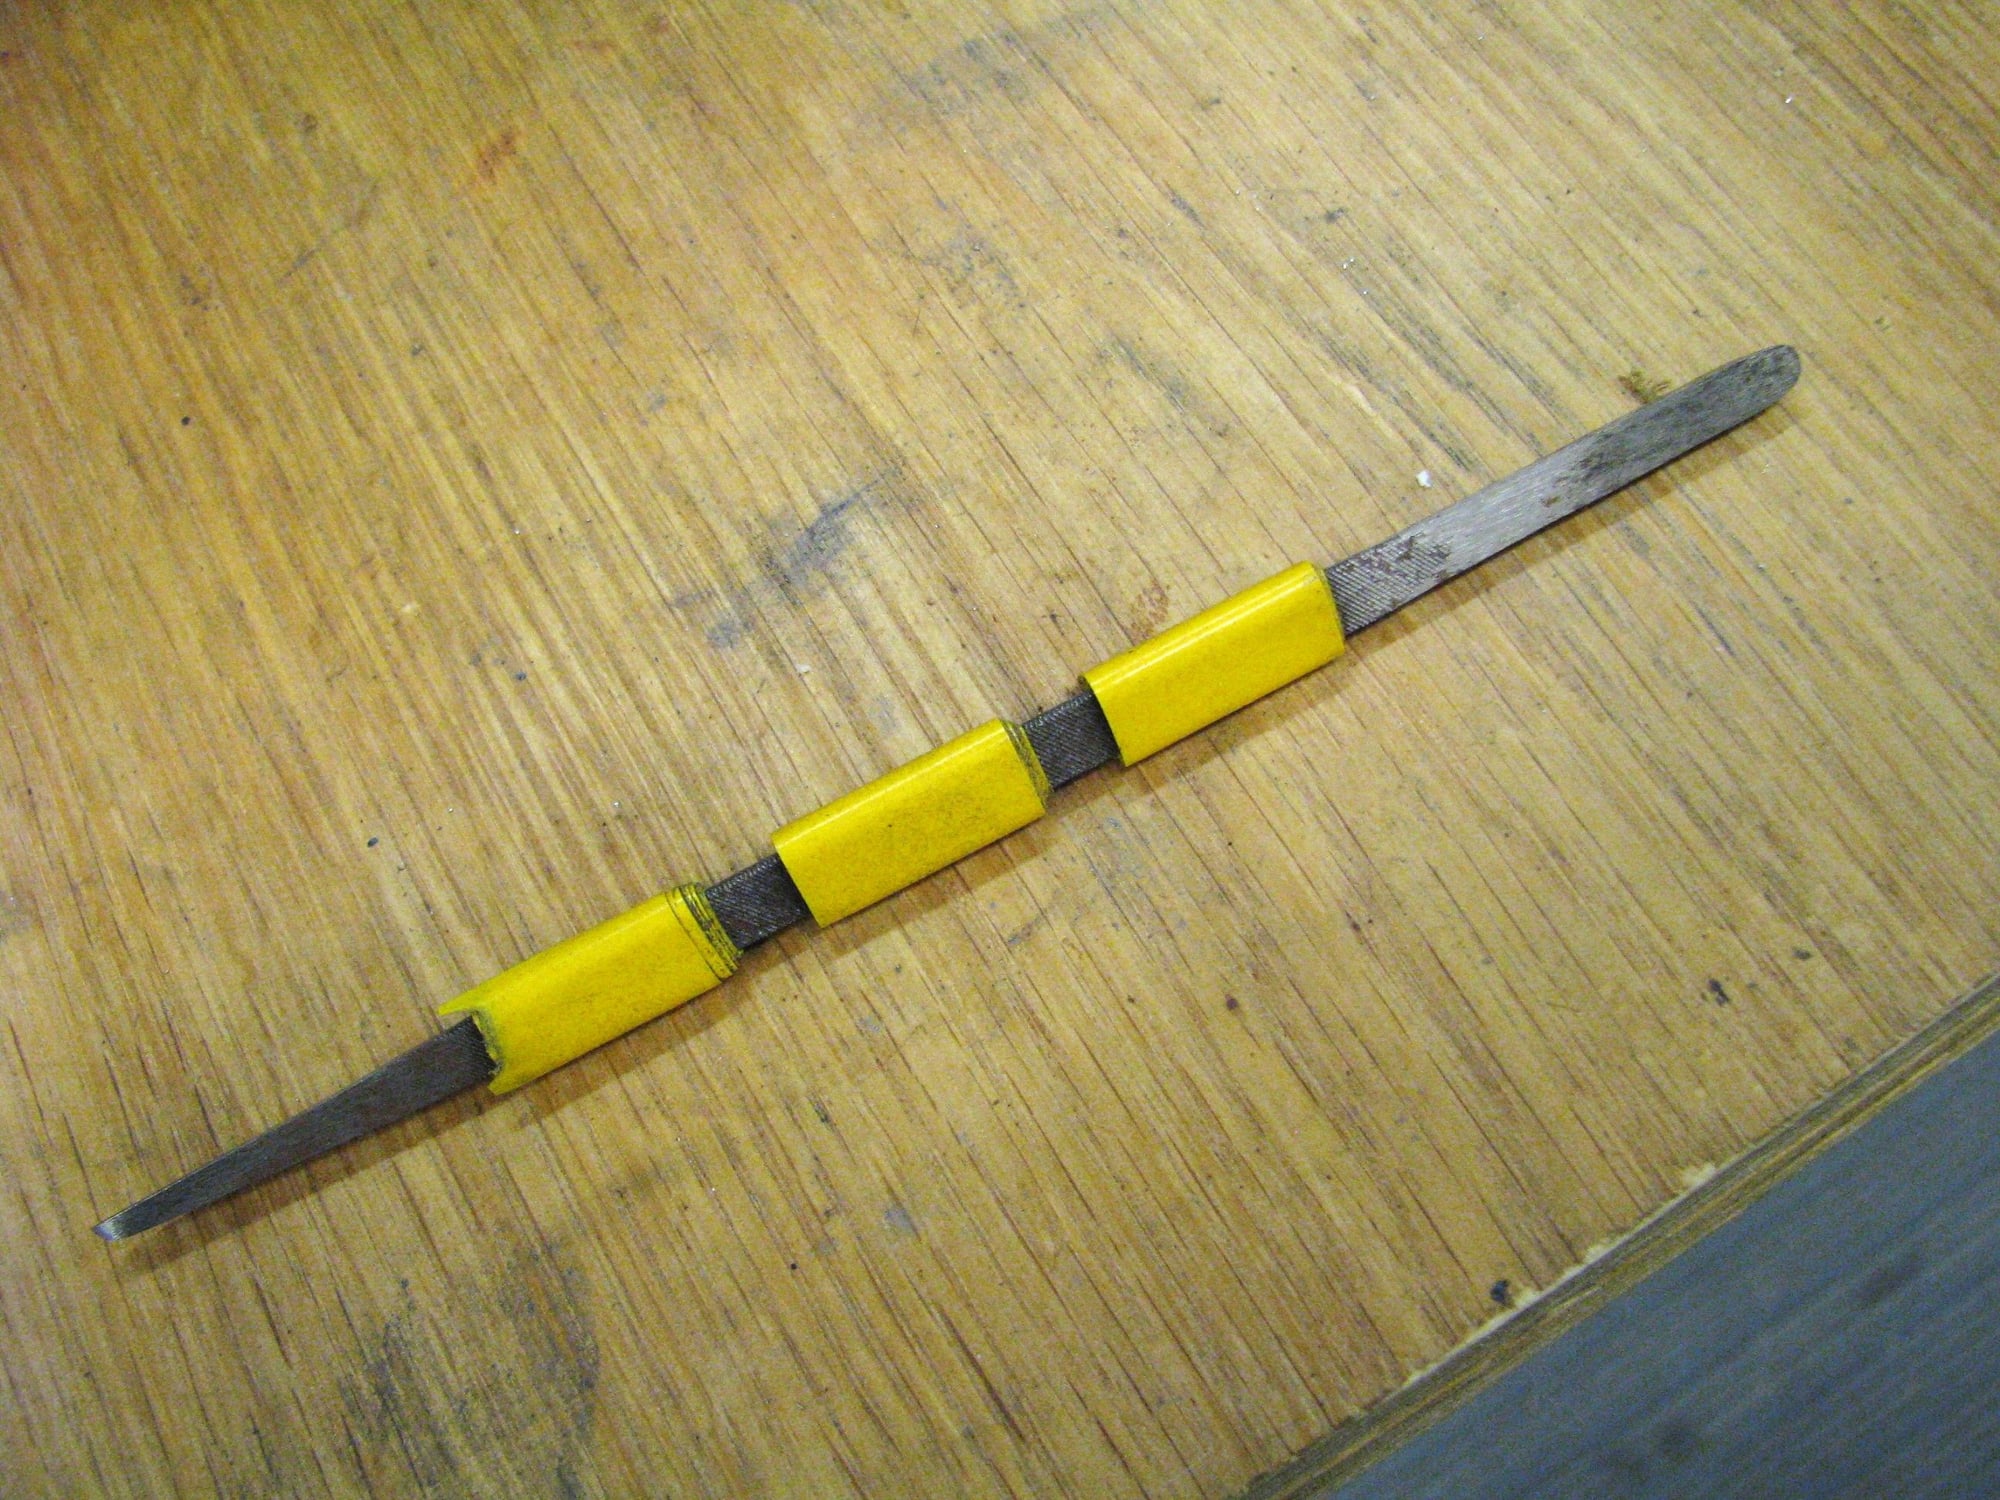
I've used this scraper for many years. Like any other tool it has it's place but since I have done far more fillet then lug work lately I am not going to this tool as frequently. It's a ground down triangular file. Both ends are shaped in what I call a boat prow/hull design. This gives me a few different curves and edges to shave with. What I found important is the ability to securely hold the tool. So a short, shinny or hard to grip scraper won't be easy to use IMO. Note that I have wrapped tape around the tool's body to soften the edges in my hands and to increase the grip. Generally it's a lug shoreline that sees this scraper and not much else. Andy
__________________
AndrewRStewart
AndrewRStewart
04-09-19, 12:14 AM
#93
Senior Member
Join Date: Aug 2012
Location: Seattle
Posts: 507
Mentioned: 0 Post(s)
Tagged: 0 Thread(s)
Quoted: 103 Post(s)
Liked 144 Times
in
88 Posts
if the problem with the shoreline is on a bike I made with silver, I just crank up the torch and move it somewhere inconspicuous. Or on rare occasion, somewhere easy to file. But I don't think I would want to do that with lfb unless it was really causing a problem. Like on my first frame, where I flowed filler into the threads in the bb. I think I used welding rod and a wire brush to get rid of that
My motto is "no file" so if I have to file I consider it penance for my (brazing) sins.
My motto is "no file" so if I have to file I consider it penance for my (brazing) sins.
__________________
https://www.flickr.com/photos/54319503@N05/
https://www.draper-cycles.com
https://www.flickr.com/photos/54319503@N05/
https://www.draper-cycles.com
04-09-19, 09:11 AM
#94
framebuilder
Brazing a lug with clean shore lines that doesn�t require after brazing clean up with riffler files or scrapers should be the objective of everyone that is serious about building frames. It can and should be done so the only reason a tool other than a torch needs to be used is for the rare occasional slip up. It can be very challenging to do (especially for the less talented) but that doesn�t mean it shouldn�t be the goal for everyone that wants to build good frames. In fact while most of my framebuilding class students don�t have trouble after proper instruction to get full silver or brass brazing penetration (within the proper temperature window), they find being able to clean shorelines with a flame the hardest part of learning to braze. It requires recognizing what is happening and controlling the outcome with good hand coordination.
Here are some tips. Clean shorelines start with a torch tip that produces a sharp pointed flame (I use either Paige or Meco multi-port tips designed specifically for propane). Next the lugs have to be blacksmithed so there is a tight fit between the lug edge and the tube. Being careless with fit almost guarantees sloppy after brazing shorelines. It is necessary to have someplace for extra melting silver to go like the seat or head tube sticking beyond the lug. This is the dumping ground for too much silver because it is almost impossible to feed in the exact amount.
It is beyond the scope of this post to describe the flame motions to get a clean result. In my framebuilding class manual I wrote a whole page on shoreline cleaning alone. The Cliff notes version is that you move the flame along the shoreline at the speed in which silver can melt on its journey to the dumping ground.
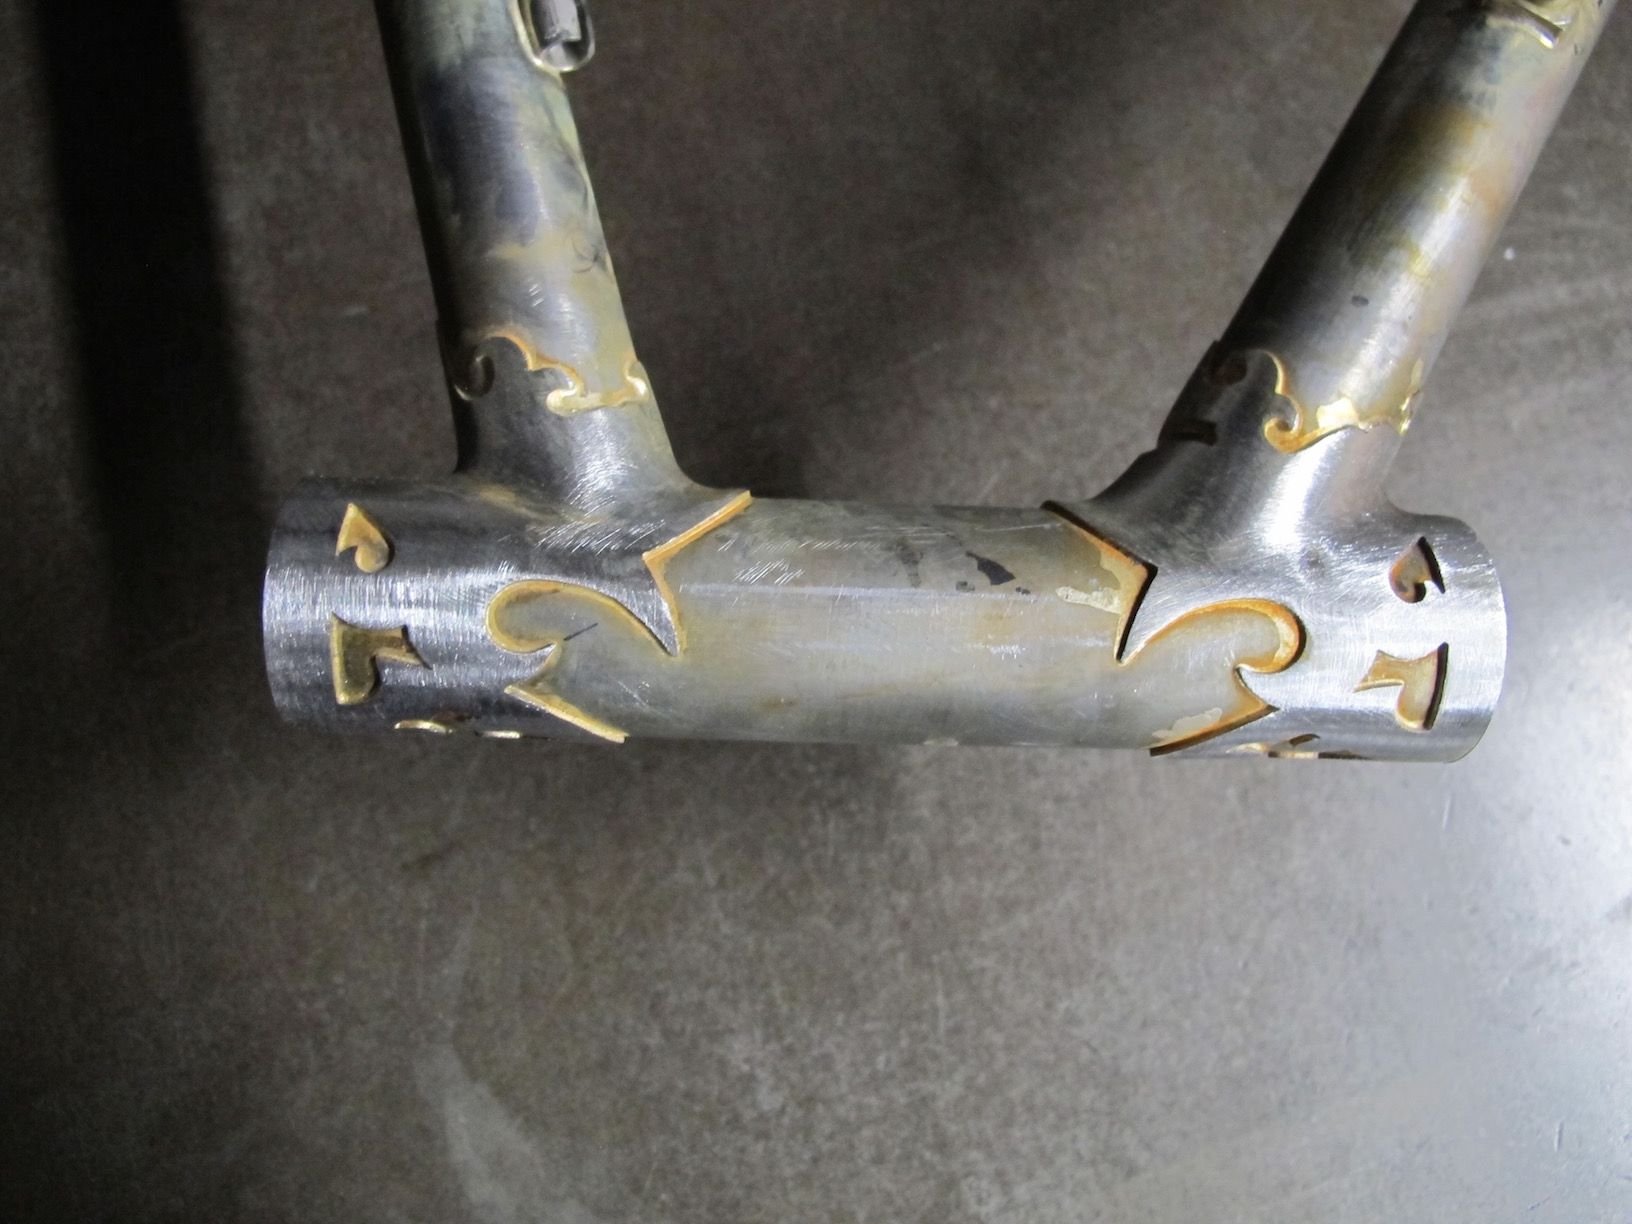
Here is a picture of a student frame with clean shorelines on his 1st build. The silver shadow that you see is just a thin film and has no volume. He created and cut the design out of blank lugs. It has his initials in the front. My goal for every student that takes one of my 3-week classes is to braze properly with clean shorelines and alignment to within at least 1mm. I see no reason to be satisfied with mediocre when with proper knowledge and some practice great results are possible.
04-09-19, 06:33 PM
#95
Randomhead
Join Date: Aug 2008
Location: Happy Valley, Pennsylvania
Posts: 24,386
Mentioned: 0 Post(s)
Tagged: 0 Thread(s)
Quoted: 4 Post(s)
Liked 3,686 Times
in
2,509 Posts
good thing he did such a nice job, that would have been a nightmare to clean up.
04-10-19, 02:57 AM
#96
Junior Member
Thread Starter
Join Date: Nov 2015
Posts: 185
Mentioned: 0 Post(s)
Tagged: 0 Thread(s)
Quoted: 45 Post(s)
Likes: 0
Liked 44 Times
in
23 Posts
I am so glad I used simple lugs.
I did a bit more clean up and then dropped the frame off for powder coating. I didnt want to spend too long polishing a turd :-) It is not that bad but I want to do better.
After riding this frame for a while, I will alter the design if I feel it necessary and start again.
Will post up pics when the bike is finished.
04-10-19, 08:08 AM
#97
Senior Member
Join Date: Feb 2012
Location: Rochester, NY
Posts: 18,056
Bikes: Stewart S&S coupled sport tourer, Stewart Sunday light, Stewart Commuting, Stewart Touring, Co Motion Tandem, Stewart 3-Spd, Stewart Track, Fuji Finest, Mongoose Tomac ATB, GT Bravado ATB, JCP Folder, Stewart 650B ATB
Mentioned: 0 Post(s)
Tagged: 0 Thread(s)
Quoted: 4195 Post(s)
Liked 3,837 Times
in
2,295 Posts
Mike- The bug has bitten you. Even before you've ridden this frame you are already thinking about the next one and what you might do different. I suffer from the same affliction Andy
Andy
__________________
AndrewRStewart
AndrewRStewart
04-17-19, 02:23 AM
#98
Senior Member
Join Date: Jul 2011
Posts: 2,441
Mentioned: 0 Post(s)
Tagged: 0 Thread(s)
Quoted: 33 Post(s)
Likes: 0
Liked 4 Times
in
3 Posts
Not sure exactly the point in the last bit, but you can certainly braze with oxy propane. You can actually weld 4130 with it, or aluminum. Hotter is better, but oxy propane is still very hot.
04-17-19, 06:57 AM
#99
Junior Member
Thread Starter
Join Date: Nov 2015
Posts: 185
Mentioned: 0 Post(s)
Tagged: 0 Thread(s)
Quoted: 45 Post(s)
Likes: 0
Liked 44 Times
in
23 Posts
I was under the impression that oxy/propane was not suitable for fillet brazing. I will be trying it at some point to find out for myself - I like the freedom it gives you.
04-17-19, 07:34 AM
#100
Randomhead
Join Date: Aug 2008
Location: Happy Valley, Pennsylvania
Posts: 24,386
Mentioned: 0 Post(s)
Tagged: 0 Thread(s)
Quoted: 4 Post(s)
Liked 3,686 Times
in
2,509 Posts
Cue Doug Fattic