


Bike Caravan/Camp Trailer for Touring? Build #5
 07-24-21, 07:12 PM
#26
Member
Thread Starter
This last weeks progress. I canvases the ceiling side of the roof.
Canvas drying.
Canvas trimmed after drying.
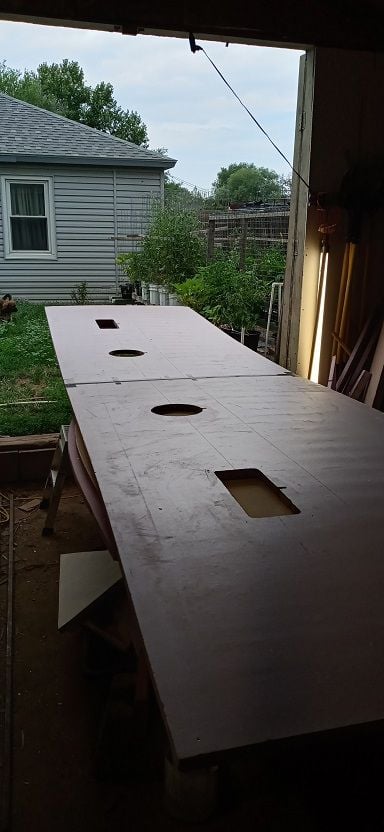
Then I cut out the forward shelf dado's on the left wall panel.
Canvas drying.
Canvas trimmed after drying.
Then I cut out the forward shelf dado's on the left wall panel.
 07-24-21, 07:40 PM
#27
Member
Thread Starter
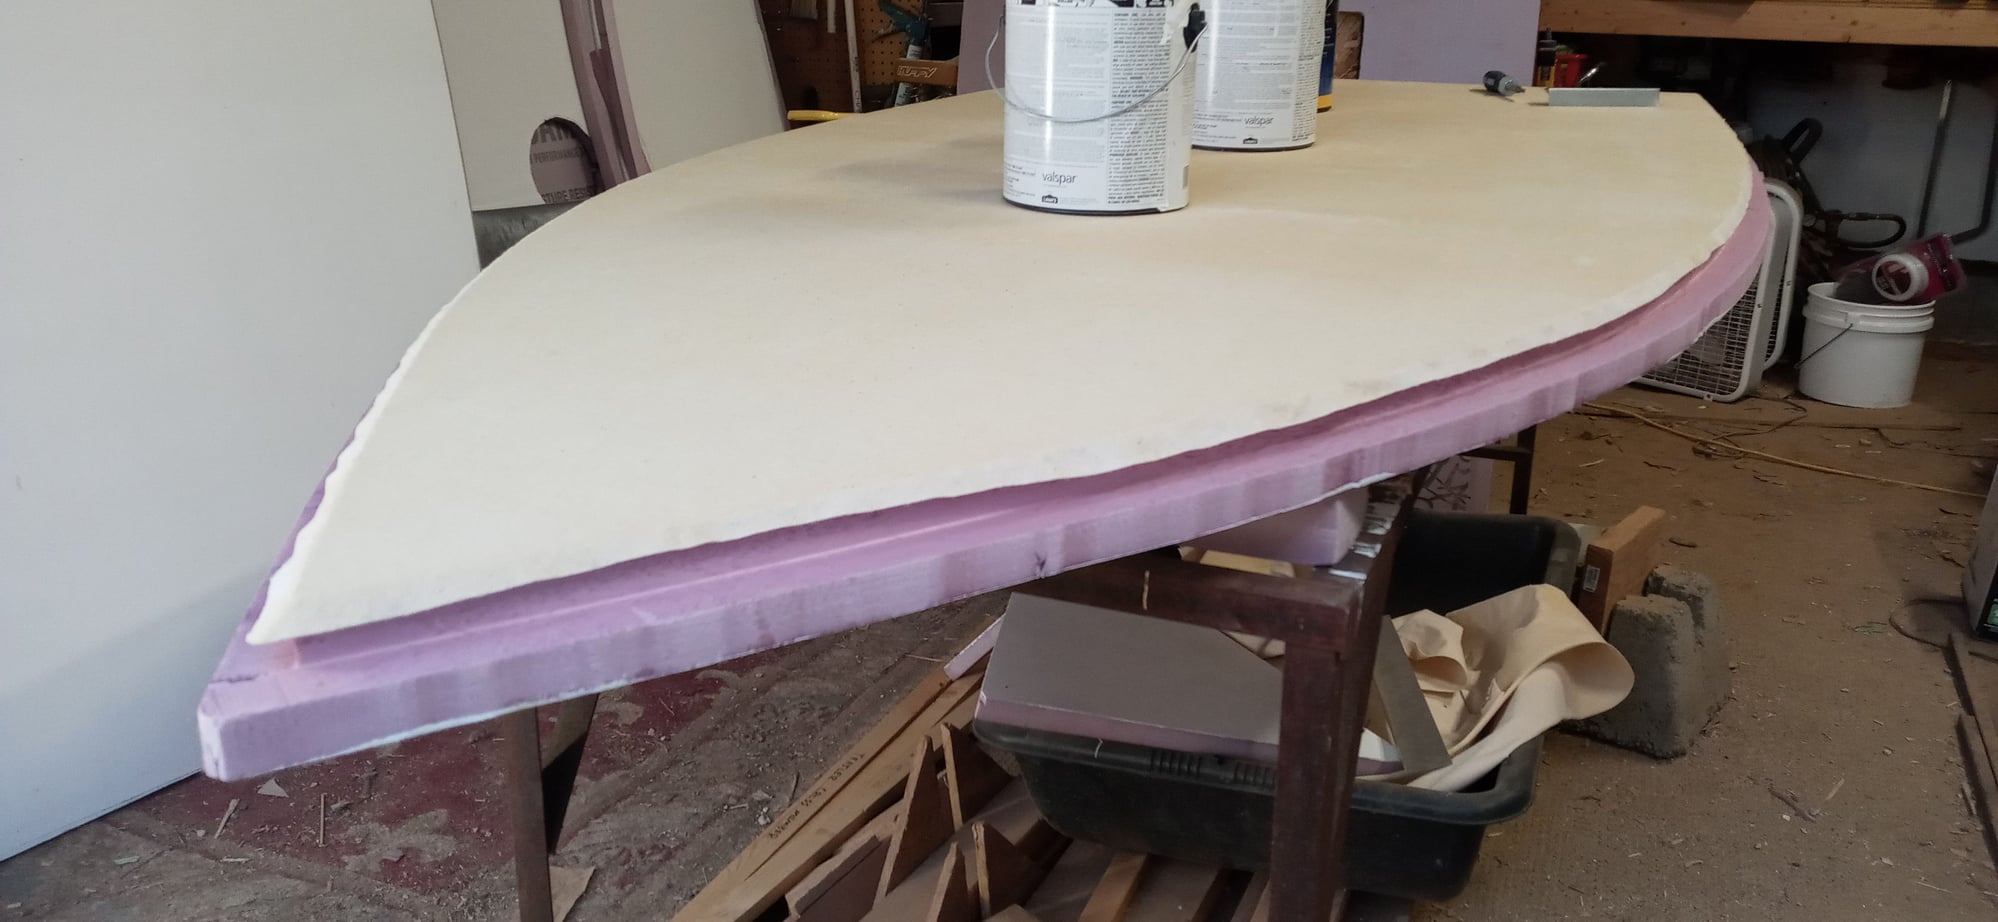
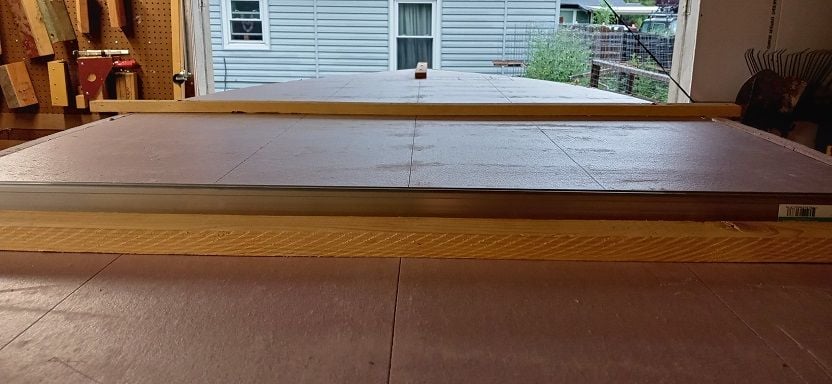
So now the fun part. With discussions here and other forums I have decided to try something different with this build. Instead of the OSB floor as originally planned I decided to try and do a foam floor.
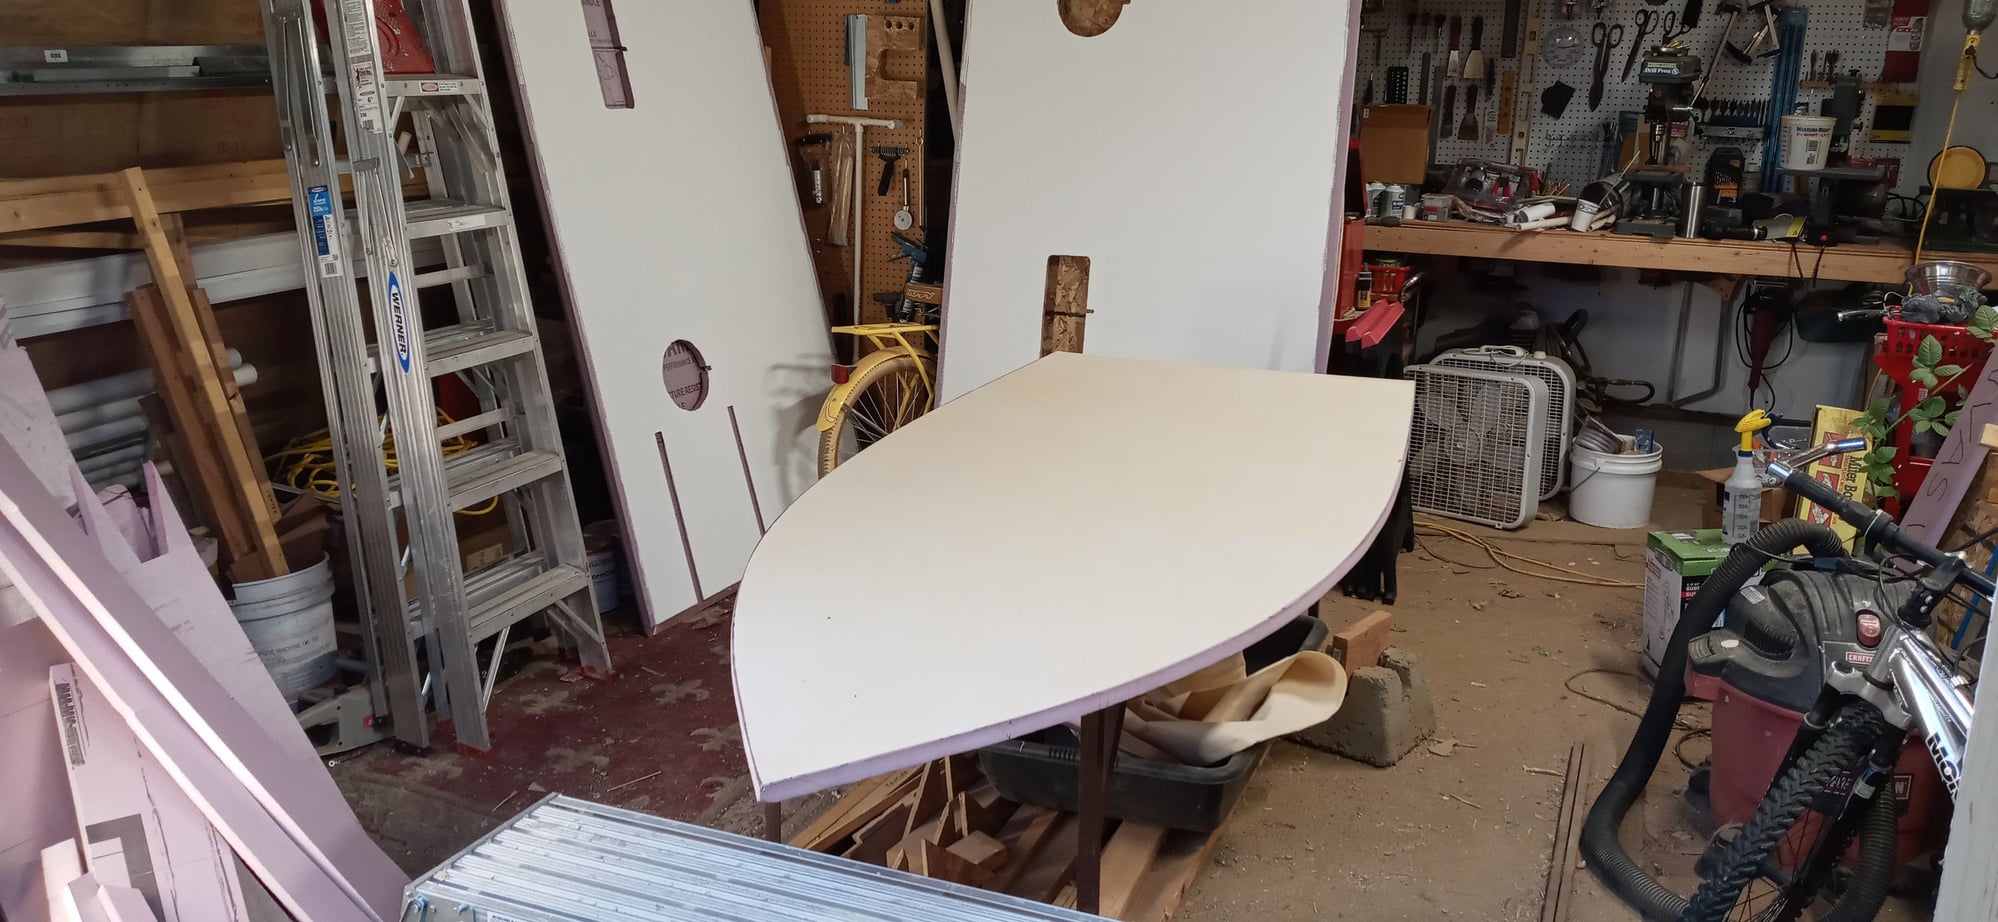
Here is the 2" foam floor just after cutting it out. The template is still on top of it.
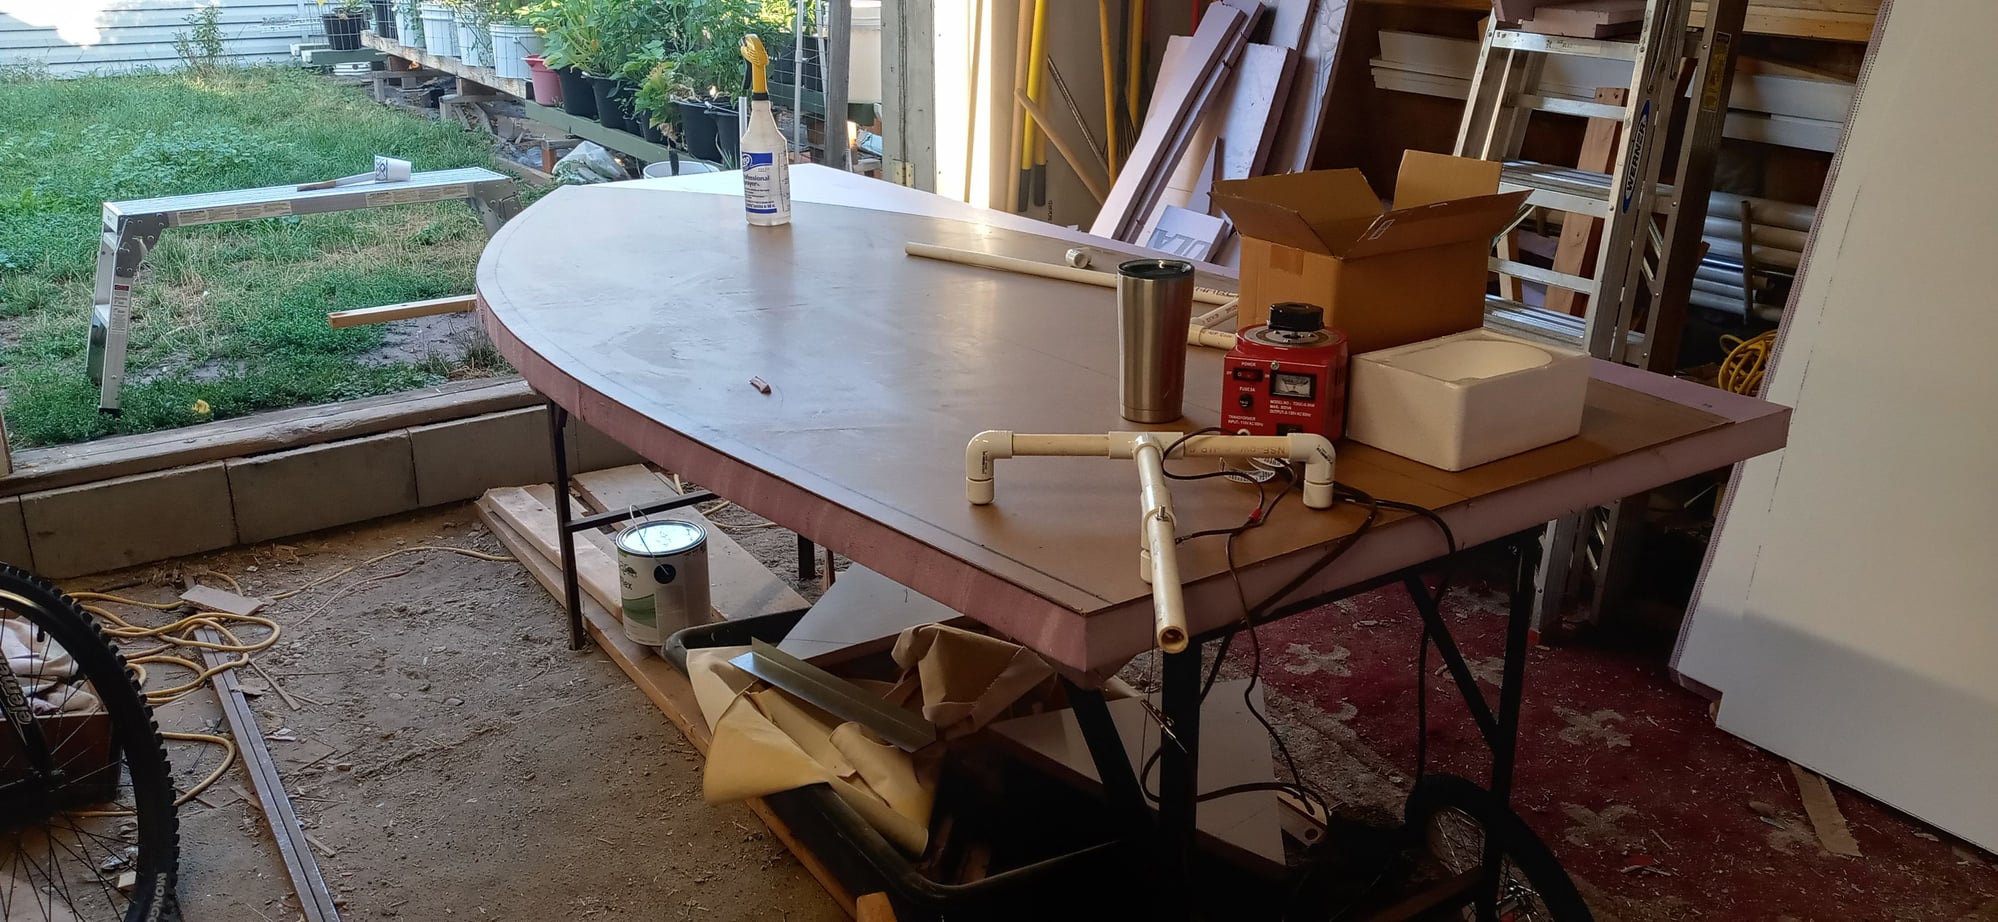
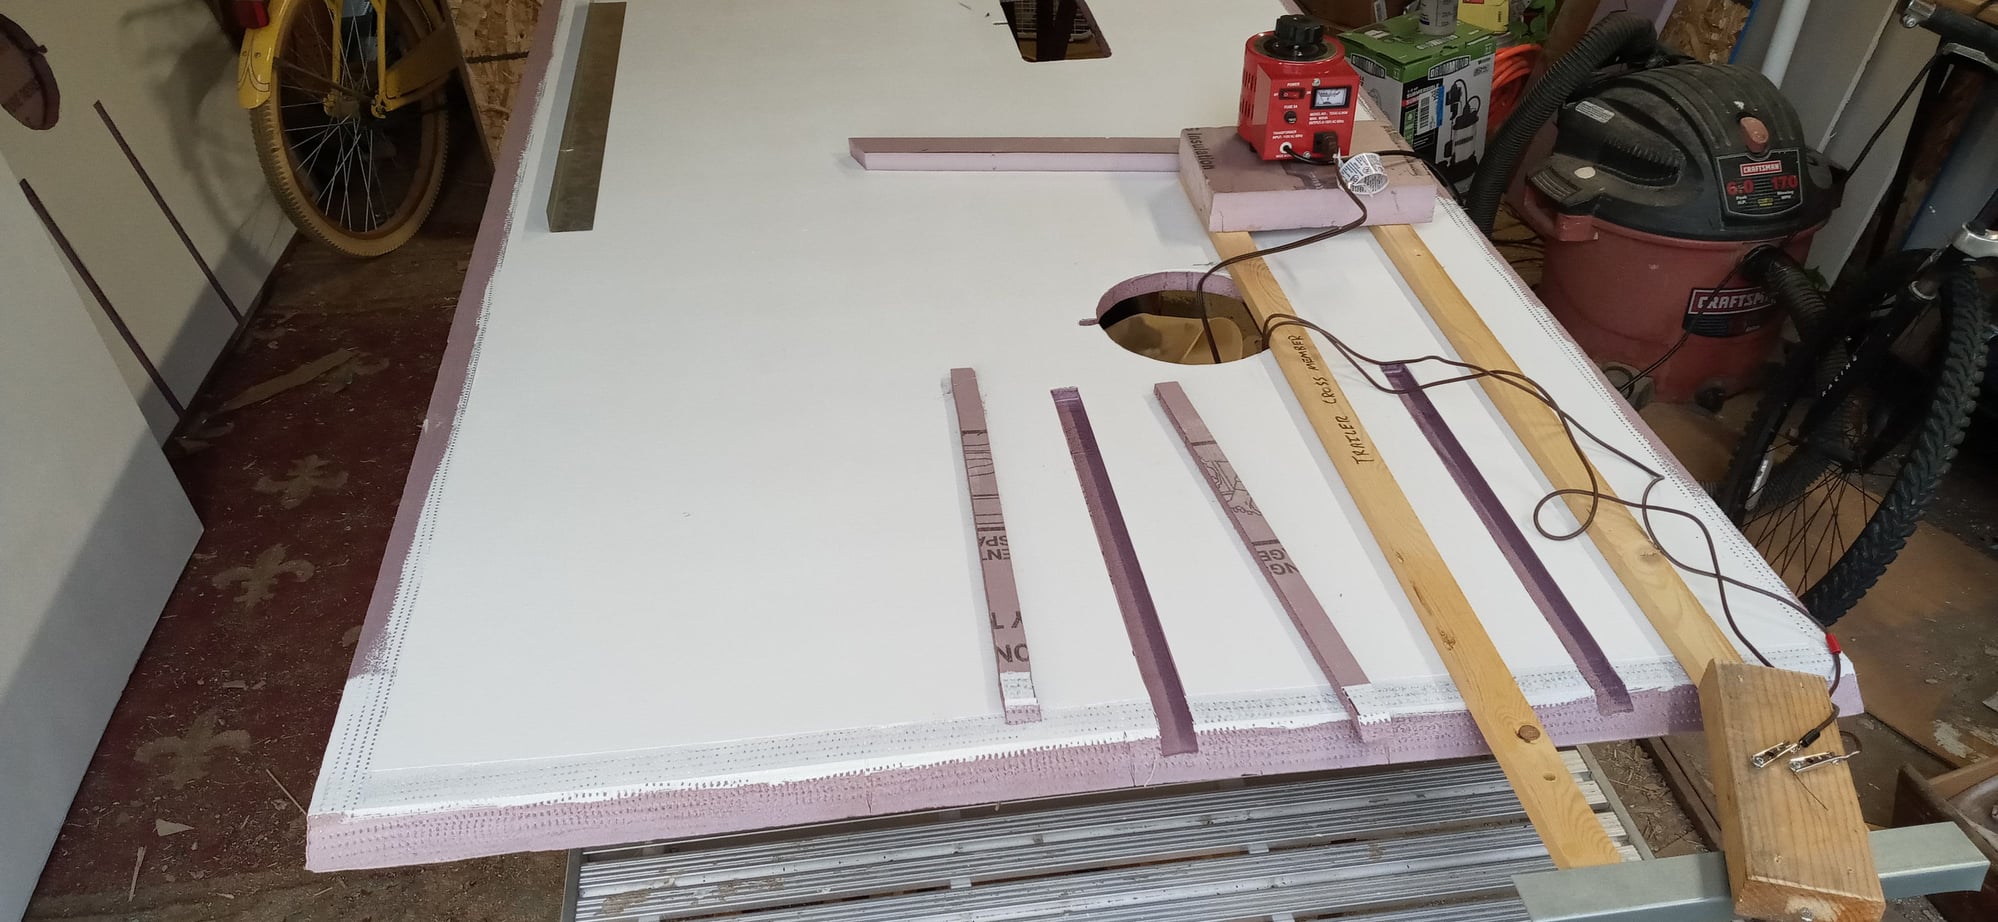
Then ran a dado along the edges. This is where the walls will sit.
I am applying bonding primer to the top and bottom. The bonding primer bonds better to the foam than the Tight Bond II and Tight Bond II bonds great to the primer.
So I weighed the OSB floor (below) and it came in at 33lbs. The foam floor (above) weighs 4lbs. Now this is before paint and canvas which may add a pound or two more. We shall see.
Floor with inner frame rails installed
Here is the 2" foam floor just after cutting it out. The template is still on top of it.
Then ran a dado along the edges. This is where the walls will sit.
I am applying bonding primer to the top and bottom. The bonding primer bonds better to the foam than the Tight Bond II and Tight Bond II bonds great to the primer.
So I weighed the OSB floor (below) and it came in at 33lbs. The foam floor (above) weighs 4lbs. Now this is before paint and canvas which may add a pound or two more. We shall see.
Floor with inner frame rails installed
Likes For ghcoe:
07-25-21, 09:49 AM
#28
Senior Member

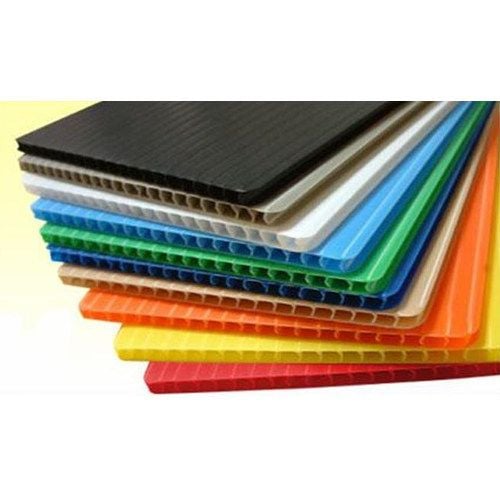
Have you given any thought to use corrugated plastic panels? Come in various thicknesses/strengths and colors or clear.. Home greenhouses frequently use it.
07-25-21, 04:29 PM
#29
Member
Thread Starter
Once I get this foamie built it will basically be a unibody. Quite rigid and durable compared to the coroplast. Not to mention a lot more insulation to keep you cool or warm in different climate conditions.
07-26-21, 08:18 AM
#30
Senior Member
Join Date: Sep 2015
Location: Left Coast, Canada
Posts: 5,126
Mentioned: 24 Post(s)
Tagged: 0 Thread(s)
Quoted: 2236 Post(s)
Liked 1,314 Times
in
707 Posts
Progress got slowed down a bit this week. Really all I managed to do was to cut off the excess canvas on the other wall, mark my shelf locations, and cut out the shelf dado's. Most of the time was making a new hot wire jig for the shelf cuts and a template for it too. Getting too hot here in the afternoons to be working out in the shop.
I hear you about the heat. Currently working on a new 4x4 overlander build but my garage is west facing and with the heat and direct sun I want to put in some time after work but often bail because it's too hot. I just erected a sun awning in my driveway to try to get some shade.
07-26-21, 03:04 PM
#31
Senior Member
I have used coroplast on some other projects. To me it is a bit flimsy for trailers, at least for a long term build. Also, I don't particularly like how you have to use zip ties, tape and other types of quirky fasteners to build with. You probably could build a lighter trailer, but would sacrifice quality to get it.
Once I get this foamie built it will basically be a unibody. Quite rigid and durable compared to the coroplast. Not to mention a lot more insulation to keep you cool or warm in different climate conditions.
Once I get this foamie built it will basically be a unibody. Quite rigid and durable compared to the coroplast. Not to mention a lot more insulation to keep you cool or warm in different climate conditions.
07-26-21, 05:00 PM
#32
Member
Thread Starter
Looking good! Very curious to see how it turns out as I've considered a similar idea as a fun project for a while myself.
I hear you about the heat. Currently working on a new 4x4 overlander build but my garage is west facing and with the heat and direct sun I want to put in some time after work but often bail because it's too hot. I just erected a sun awning in my driveway to try to get some shade.
I hear you about the heat. Currently working on a new 4x4 overlander build but my garage is west facing and with the heat and direct sun I want to put in some time after work but often bail because it's too hot. I just erected a sun awning in my driveway to try to get some shade.
07-26-21, 05:02 PM
#33
Member
Thread Starter
I wasn't thinking the cheap/soft/weak stuff used for political yard signs, USPS mail trays/tubs. I was thinking more of the much higher strength corrugated polycarbonates. Those panels are VERY strong and rigid. Like I said, they make commercial greenhouses and sunrooms out of the stuff - (think snow load here near the Great Lakes) BUT it isn't cheap.
07-26-21, 07:25 PM
#34
Senior Member
Join Date: Sep 2015
Location: Left Coast, Canada
Posts: 5,126
Mentioned: 24 Post(s)
Tagged: 0 Thread(s)
Quoted: 2236 Post(s)
Liked 1,314 Times
in
707 Posts
I have a Dodge Caravan I've been using for some years "as is" and am now committing to "vanlife" and just picked up a 2002 Chev S10 ZR2 I'm planning to use for more off road type travel.
Budget builds but I see them as a means to an end (getting me to biking, diving and SUP spots) than an end in themselves.
07-26-21, 07:34 PM
#35
Member
Thread Starter
Just joined exped portal. Left Coast Dale, though I haven't posted yet.
I have a Dodge Caravan I've been using for some years "as is" and am now committing to "vanlife" and just picked up a 2002 Chev S10 ZR2 I'm planning to use for more off road type travel.
Budget builds but I see them as a means to an end (getting me to biking, diving and SUP spots) than an end in themselves.
I am also on Expedition Portal and Overland Bound. Welcome!
Last edited by ghcoe; 07-26-21 at 07:37 PM.
Likes For ghcoe:
07-31-21, 04:50 PM
#36
Member
Thread Starter
Progress last week.
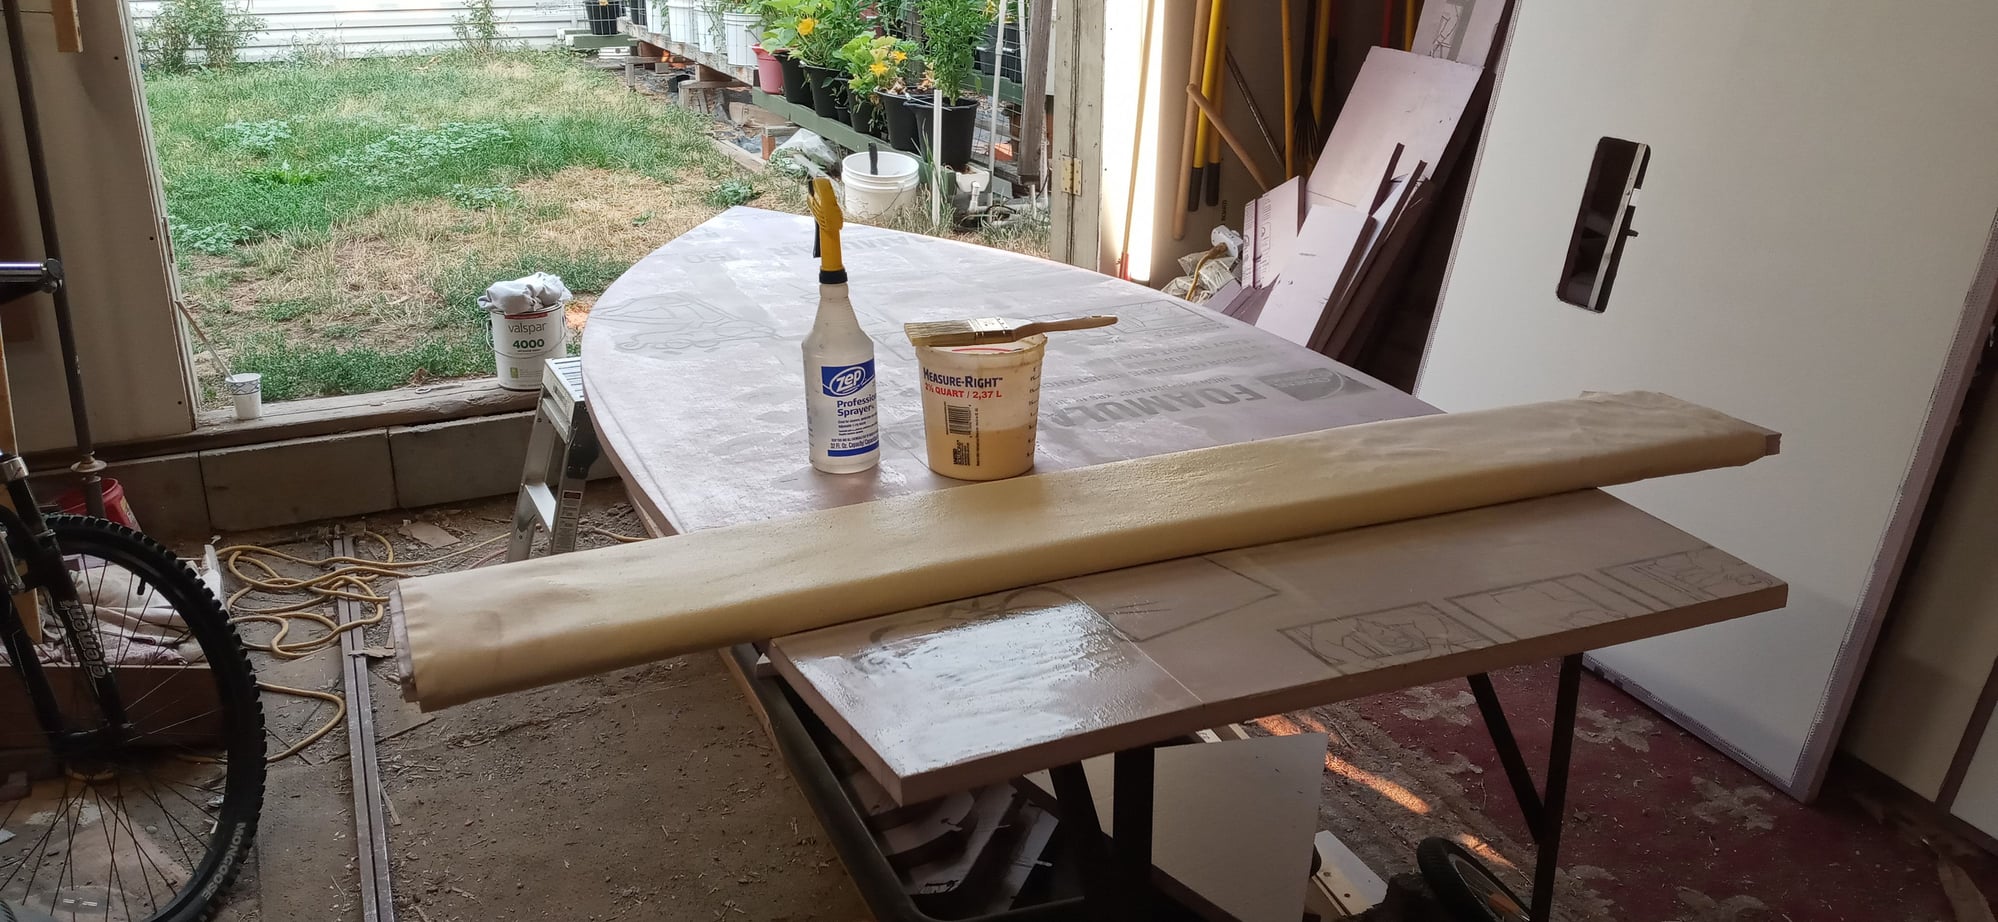
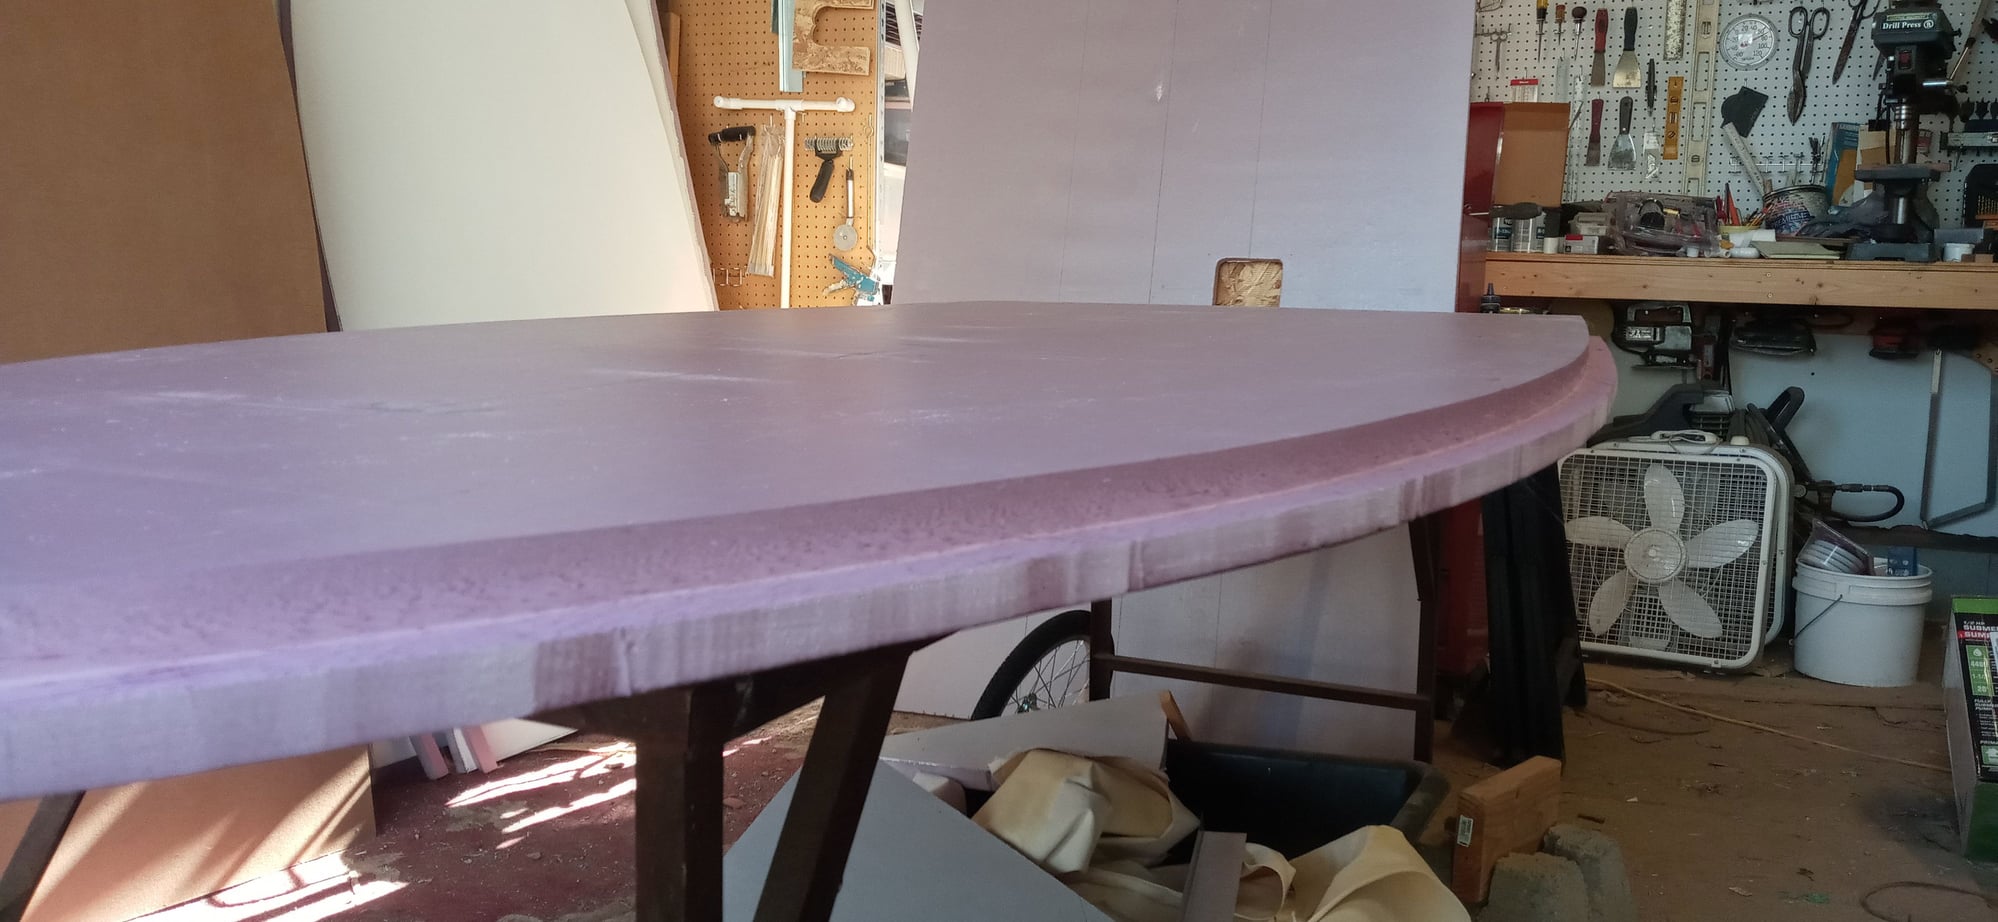
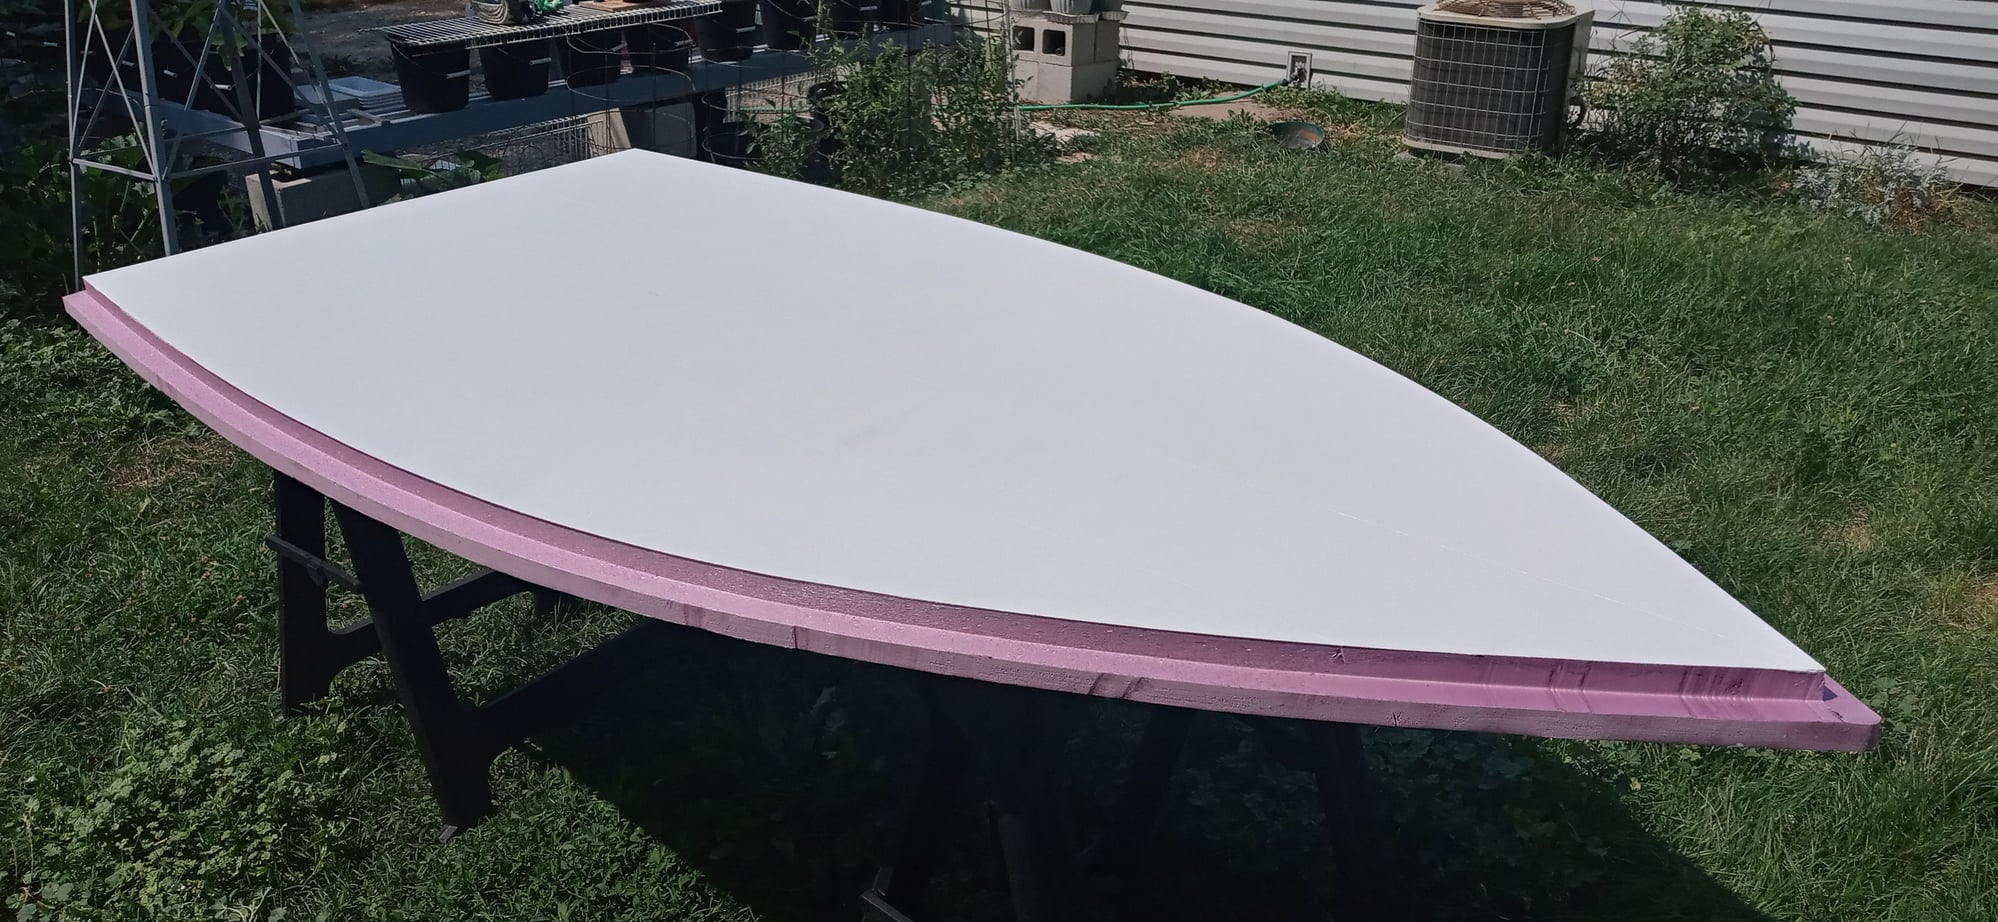
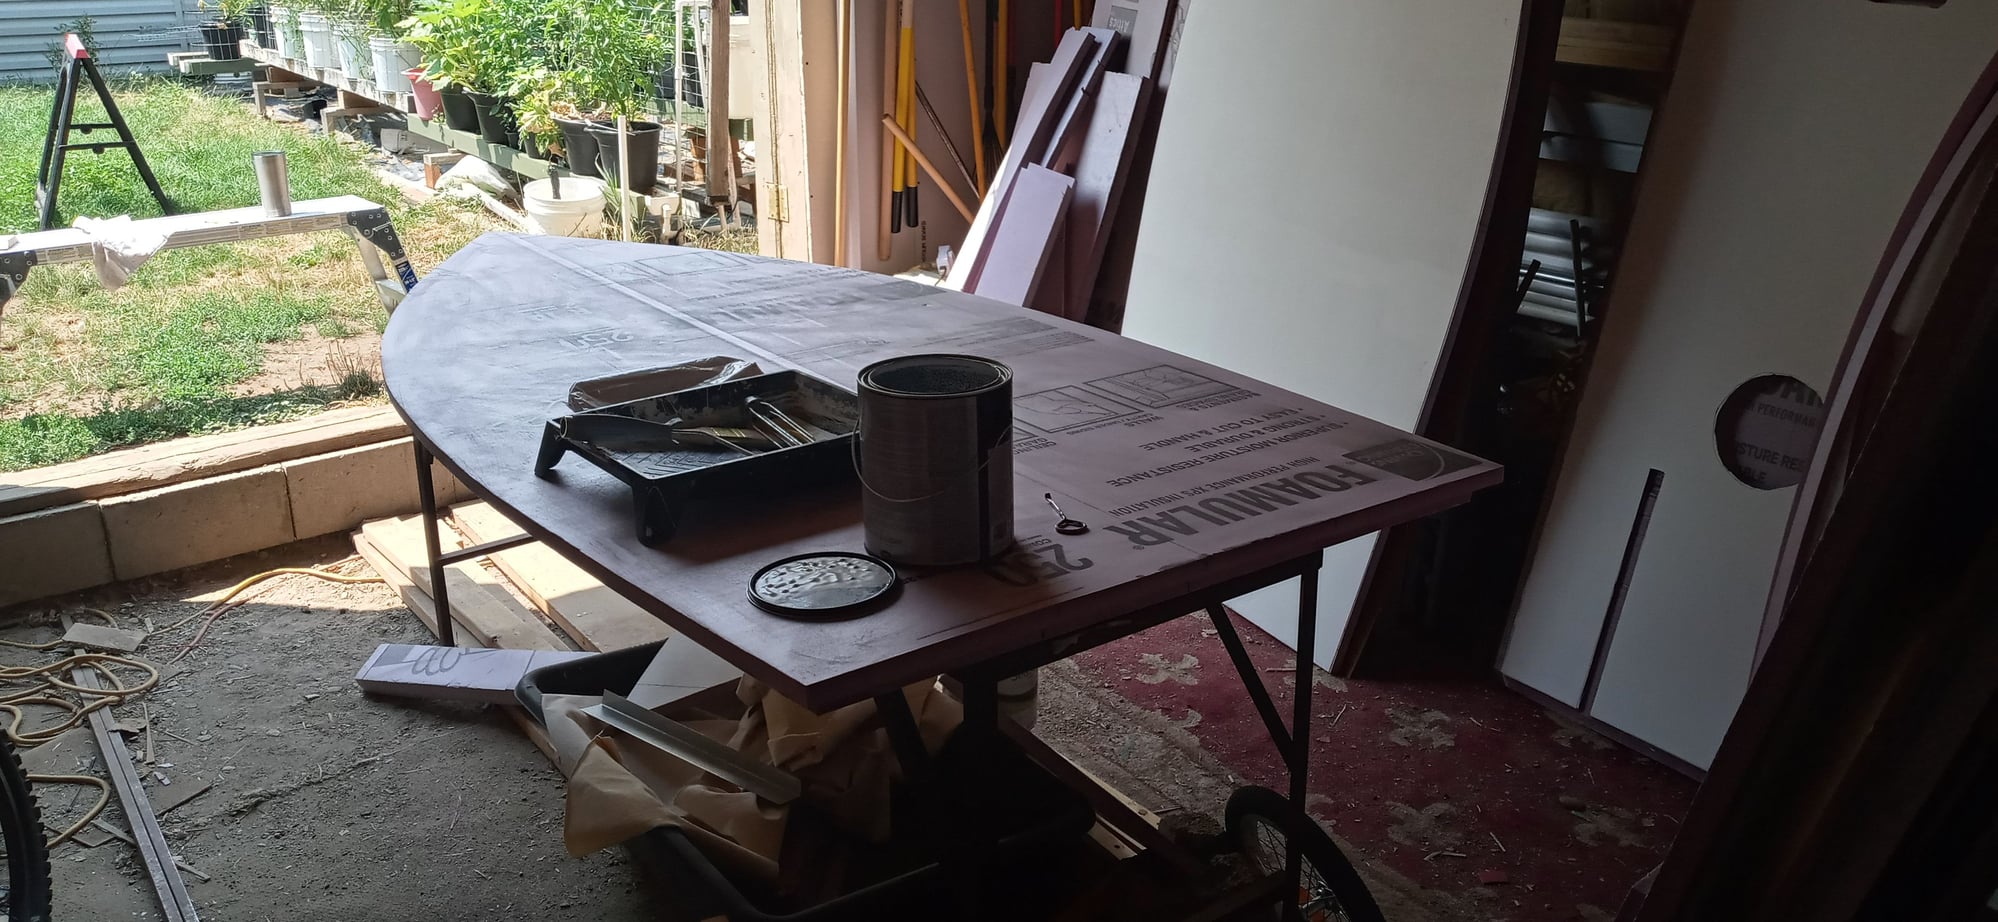
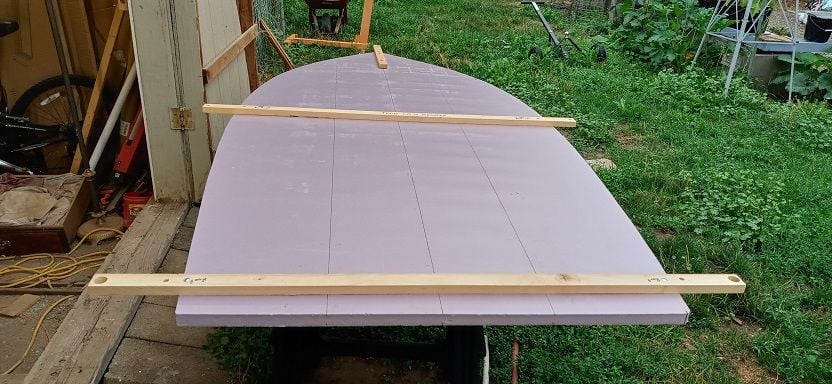
Painted the bottom of the floor in preparation for canvas.
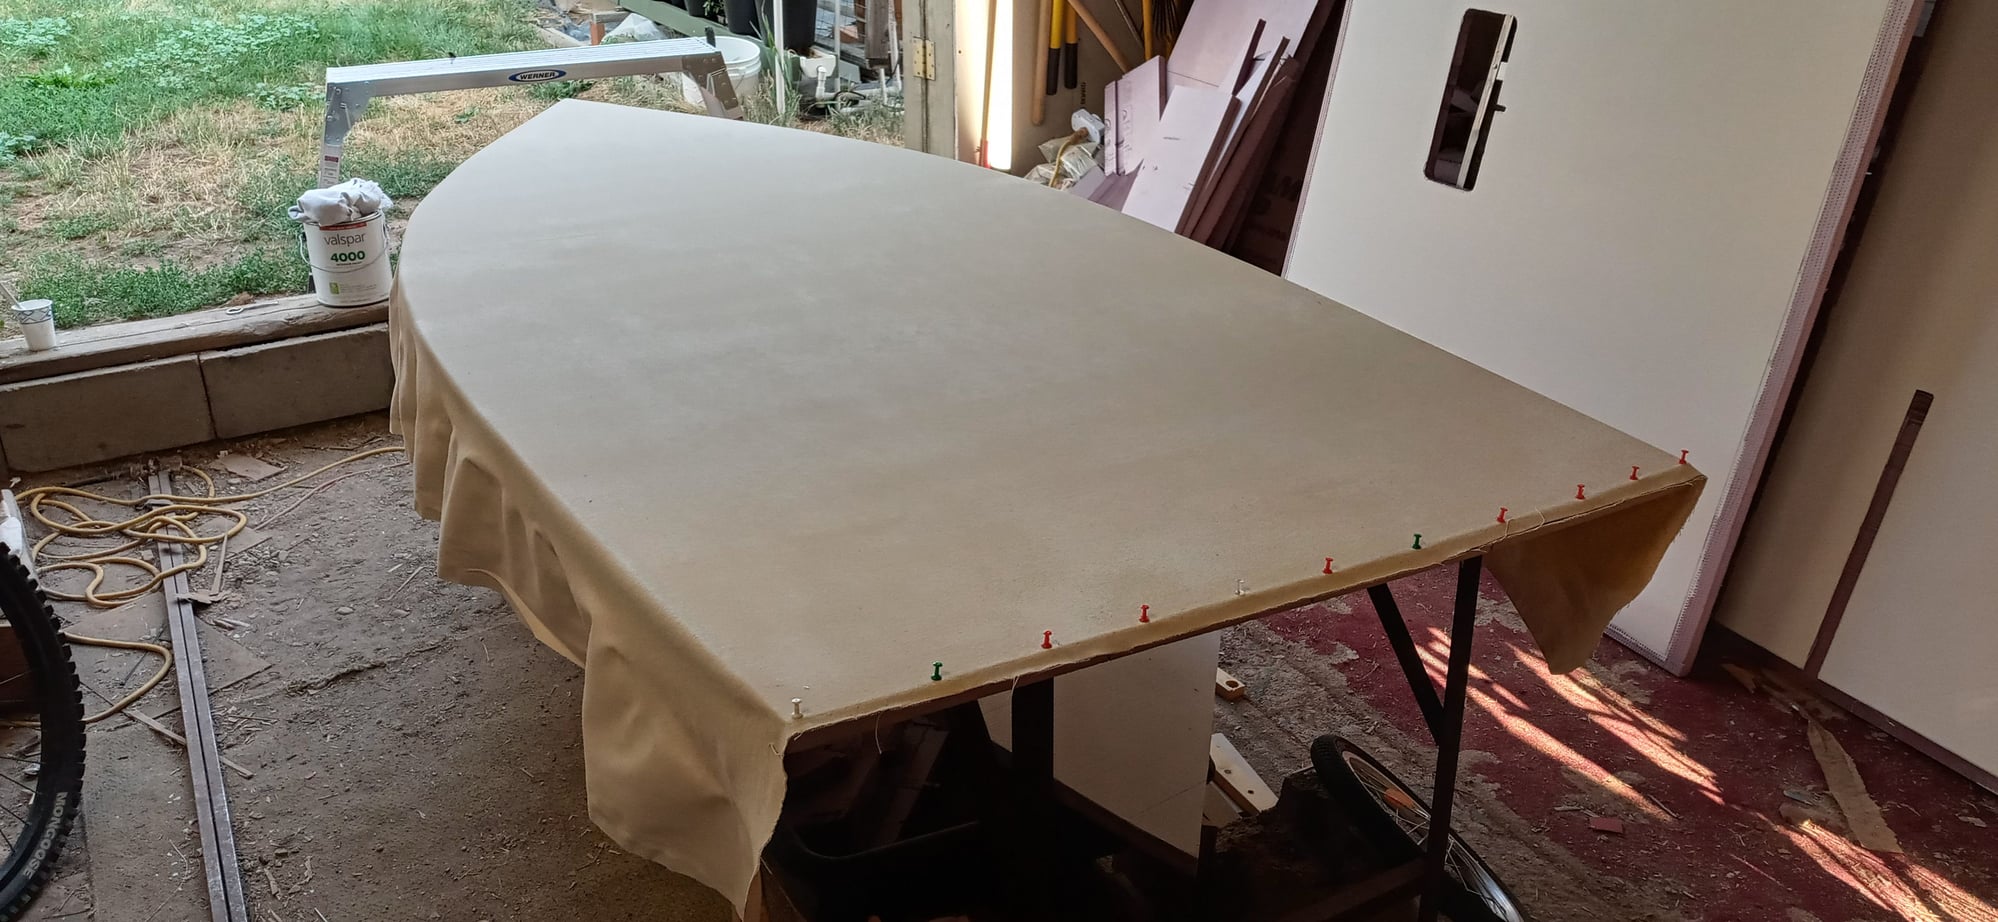
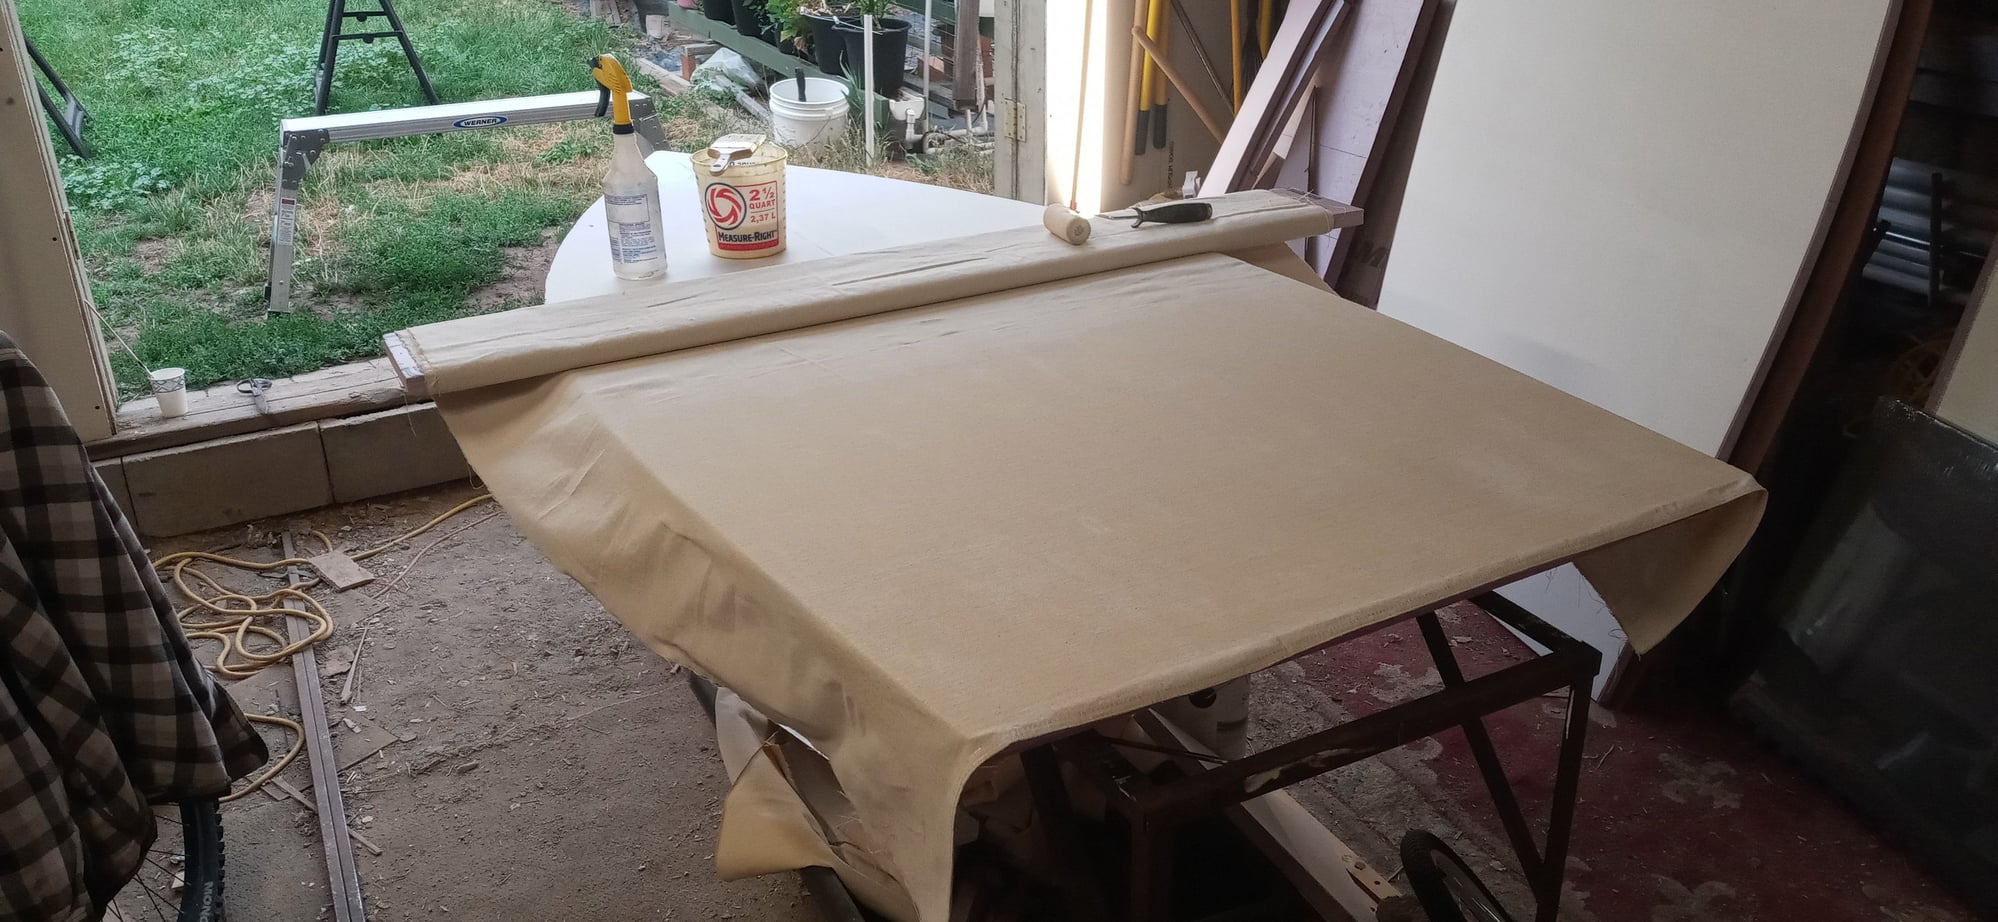
Applied canvas to top of floor.
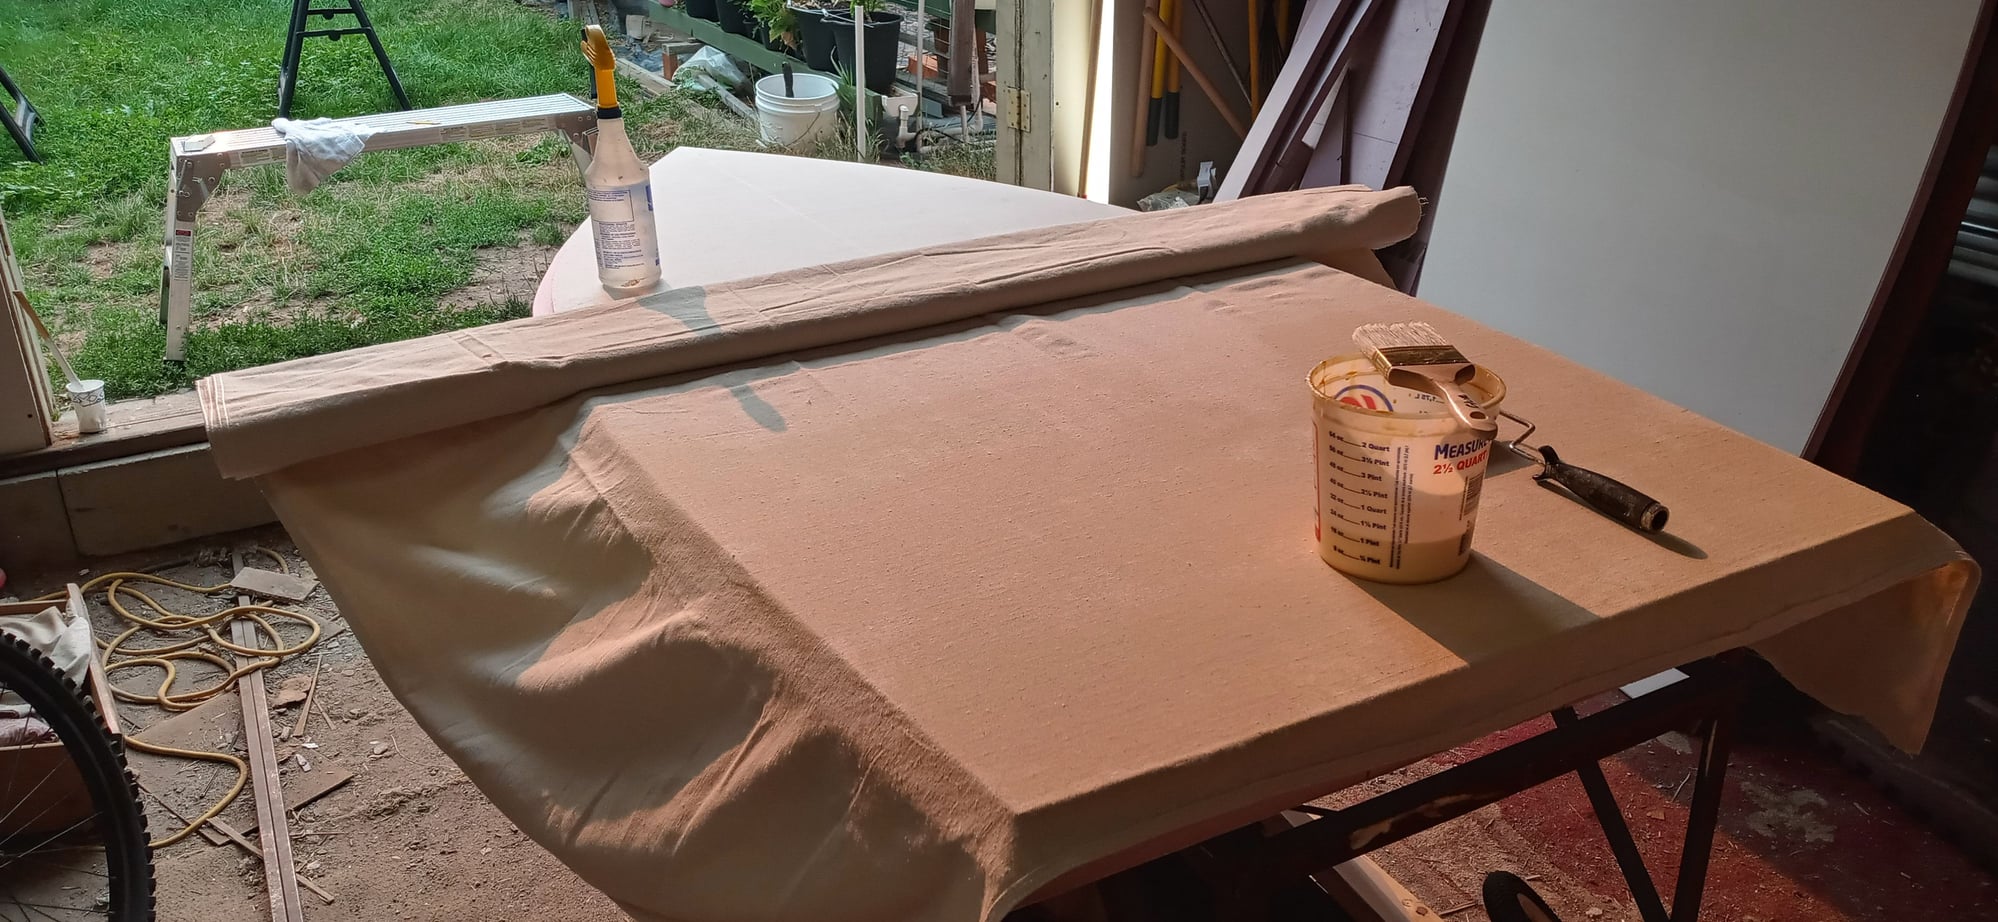
Canvas applied.
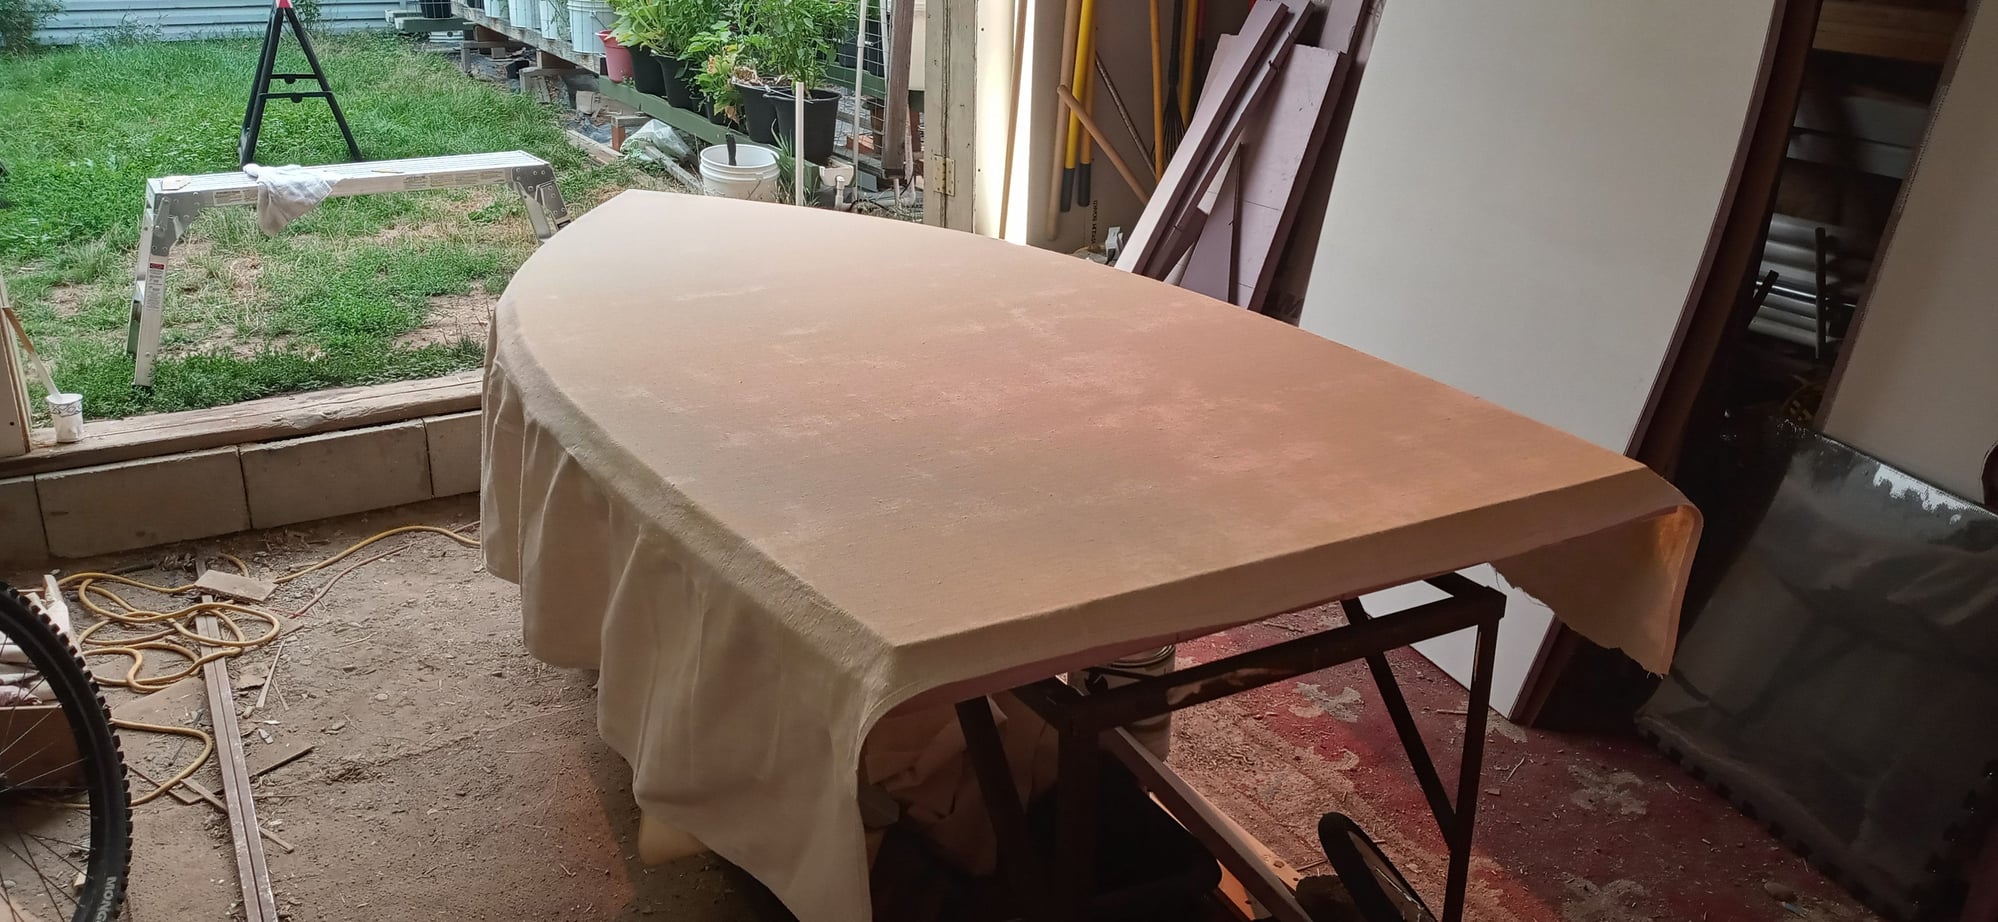
Canvas trimmed.
Applying canvas to bottom of floor.
Canvas applied.
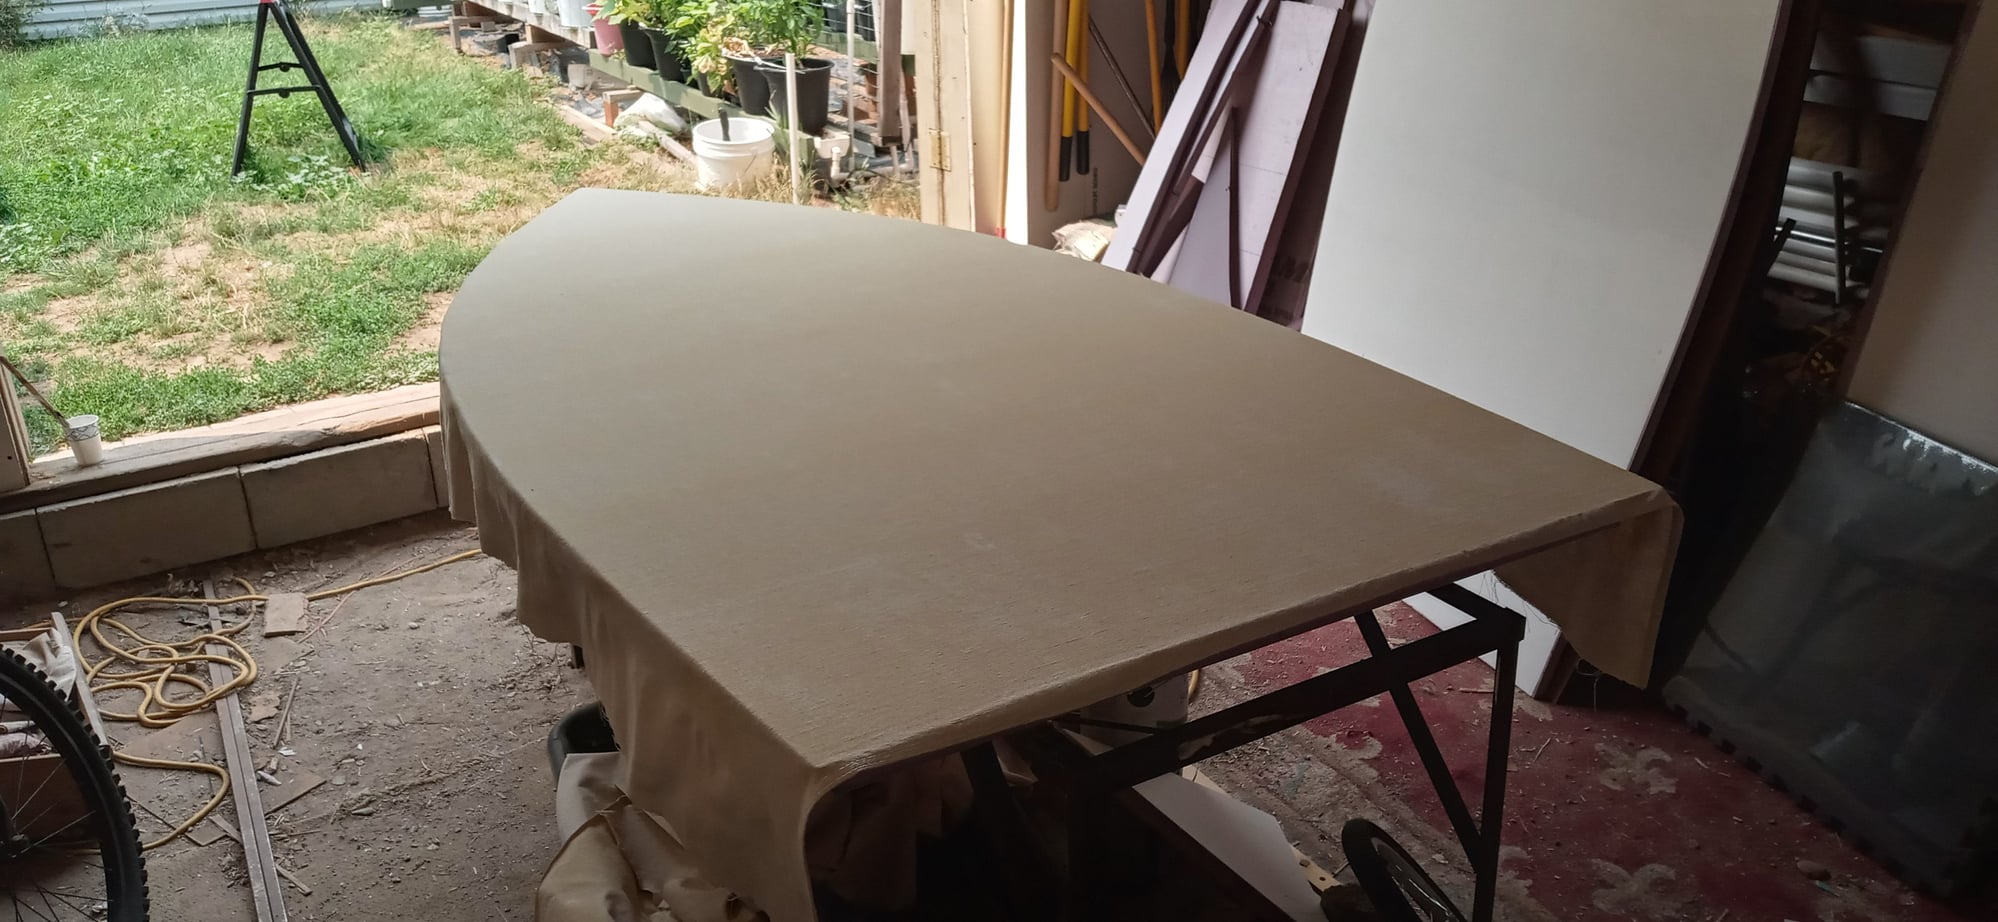
Canvas trimmed.

More to come soon.
Painted the bottom of the floor in preparation for canvas.
Applied canvas to top of floor.
Canvas applied.
Canvas trimmed.
Applying canvas to bottom of floor.
Canvas applied.
Canvas trimmed.
More to come soon.
08-15-21, 07:05 PM
#37
Member
Thread Starter
Getting a bit behind here I see. Well here is the progress since last time.
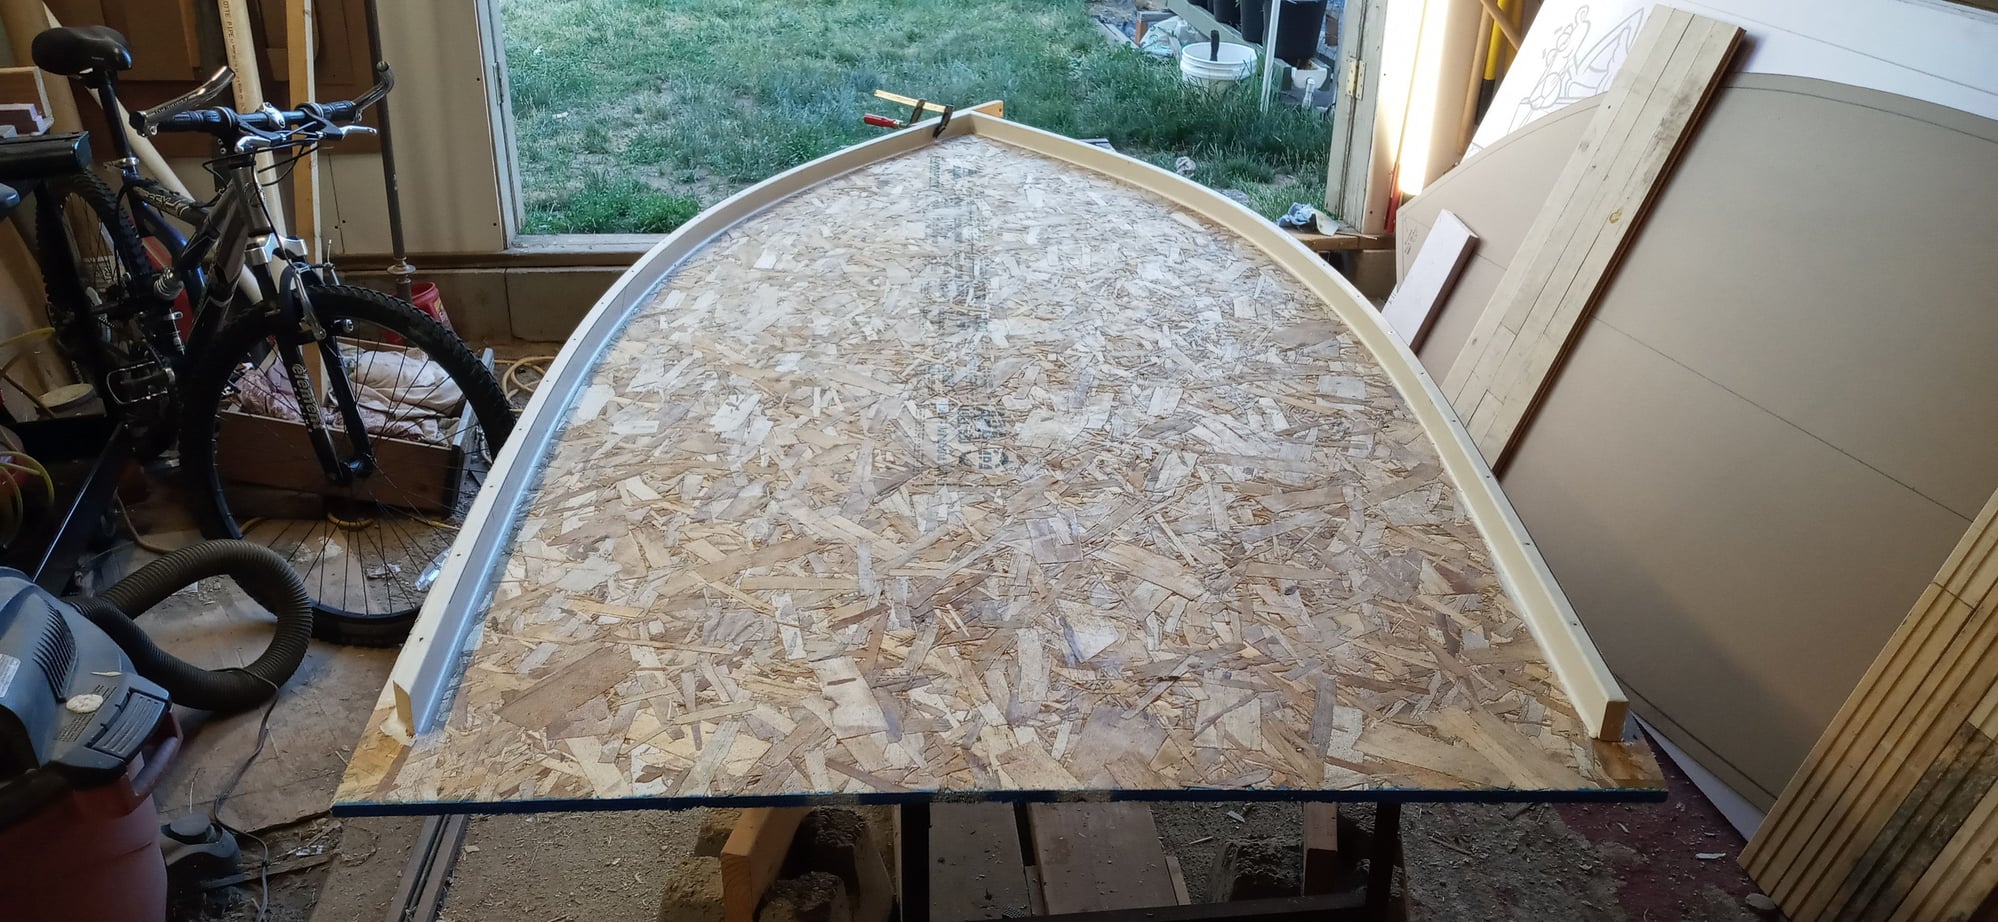
The walls come to a point in the front so I used duct tape to hold the pieces together on the outside. I then applied Gorilla Glue along the seam on the inside before I bent the walls together back together.
I added some spacers on the edge to hold the walls up from the bottom of the floor dado.
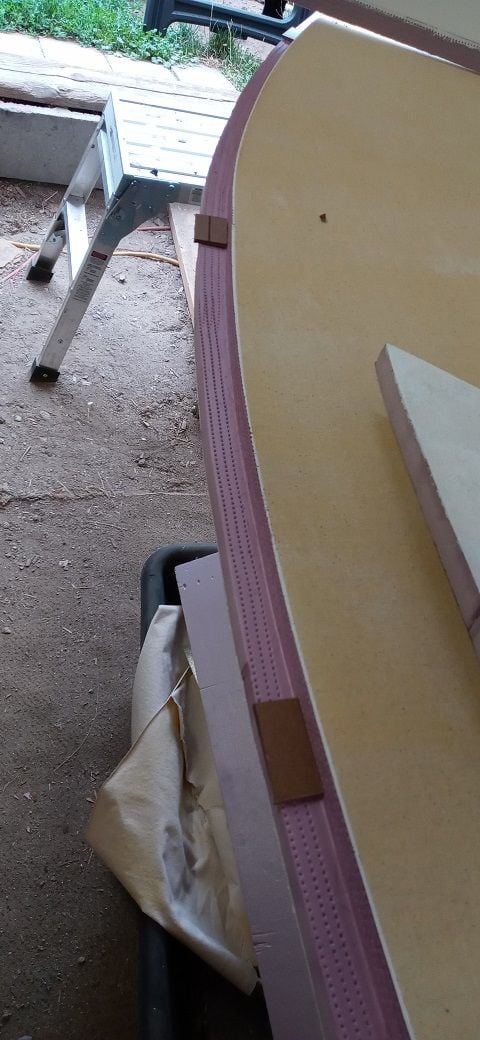
Then the walls are set up to get ready to glue to the floor.
The walls come to a point in the front so I used duct tape to hold the pieces together on the outside. I then applied Gorilla Glue along the seam on the inside before I bent the walls together back together.
I added some spacers on the edge to hold the walls up from the bottom of the floor dado.
Then the walls are set up to get ready to glue to the floor.
08-15-21, 07:17 PM
#38
Member
Thread Starter
First I run glue along the inside edge of the wall dado.
Then I set the nose down into the dado and then bend the walls along the floor profile. I use clamps to hold the walls in place on the back and then check to make sure the nose is slid back all the way. Luckily my measurements all came in so I must of done something right...

Now that the walls are where I want them I apply glue into the crevasse that the shims provided for me.
Then I set the nose down into the dado and then bend the walls along the floor profile. I use clamps to hold the walls in place on the back and then check to make sure the nose is slid back all the way. Luckily my measurements all came in so I must of done something right...
Now that the walls are where I want them I apply glue into the crevasse that the shims provided for me.
08-15-21, 07:25 PM
#39
Member
Thread Starter
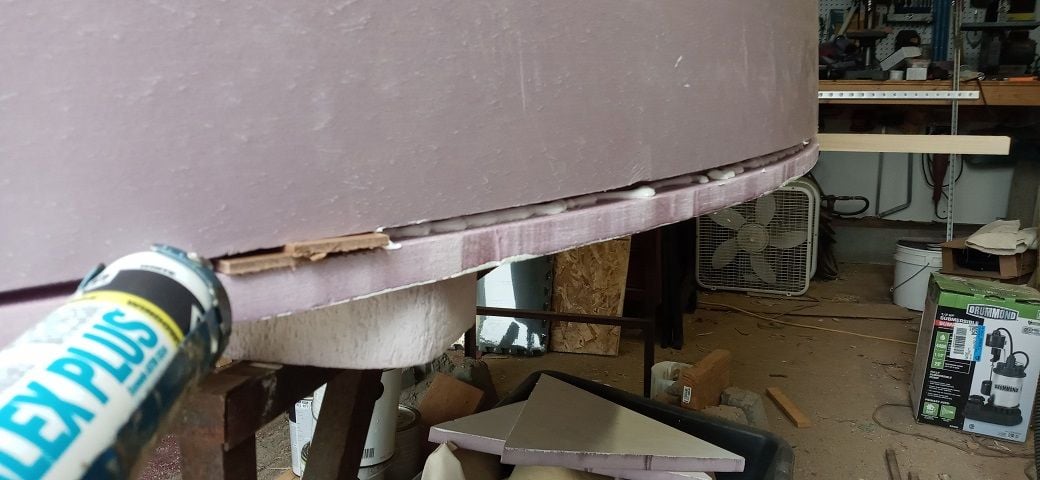
A few shots of the walls after the glue up.
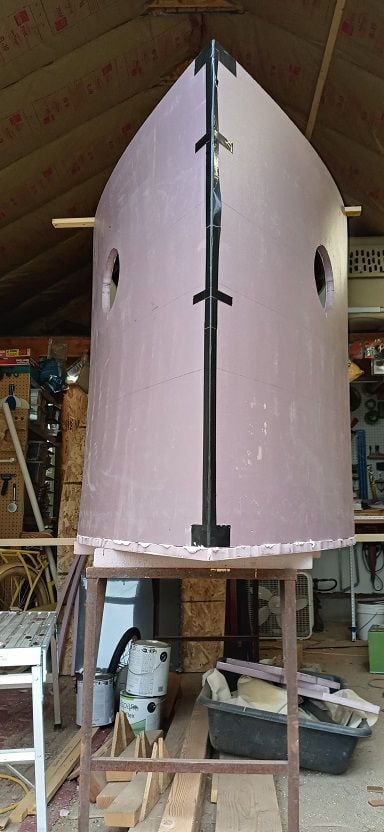
I had a couple places where the walls did not want to butt up to the floor properly so I had to add a few finishing nails to hold the walls in place as the glue dried.

I had a couple places where the walls did not want to butt up to the floor properly so I had to add a few finishing nails to hold the walls in place as the glue dried.
08-15-21, 07:40 PM
#40
Member
Thread Starter
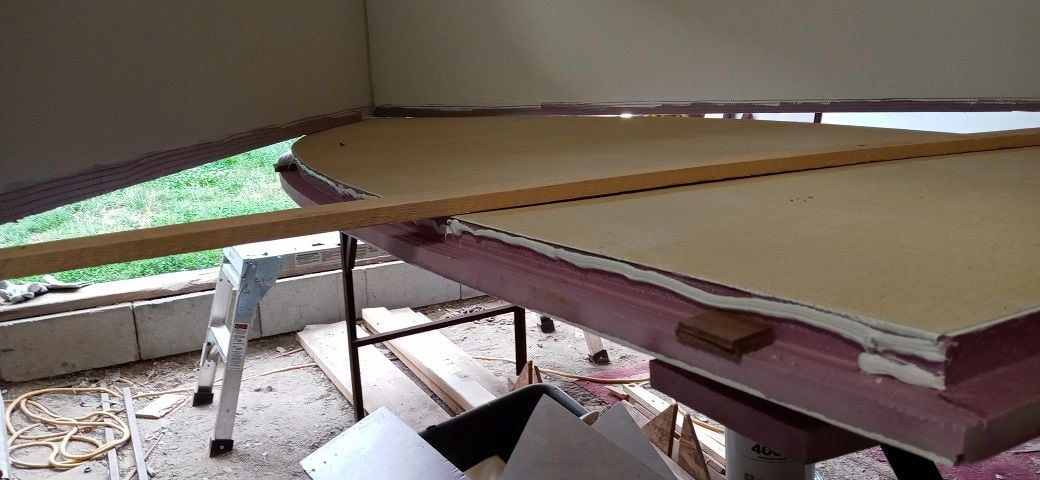
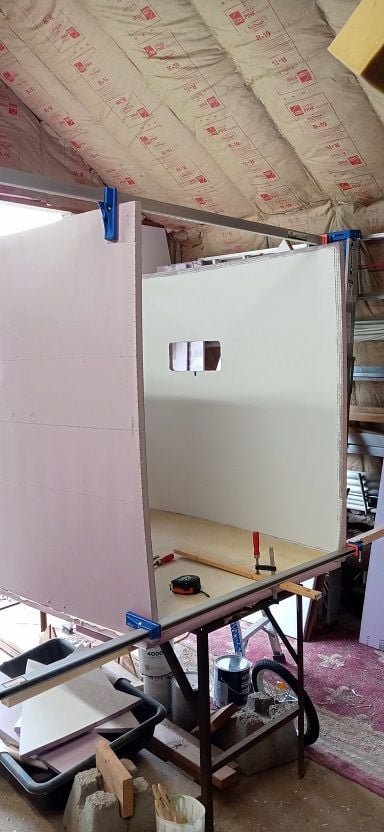
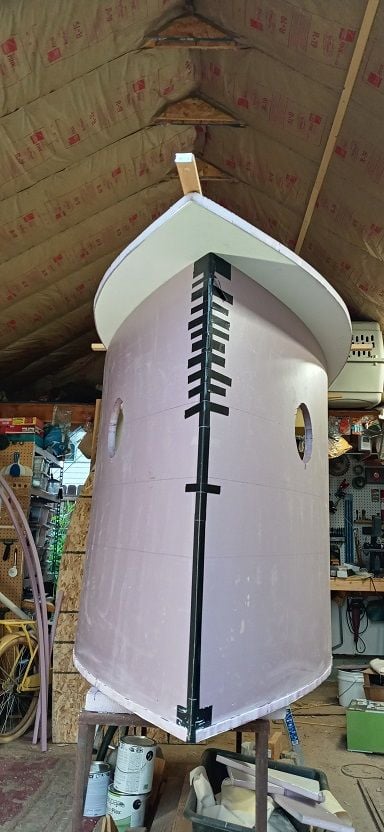
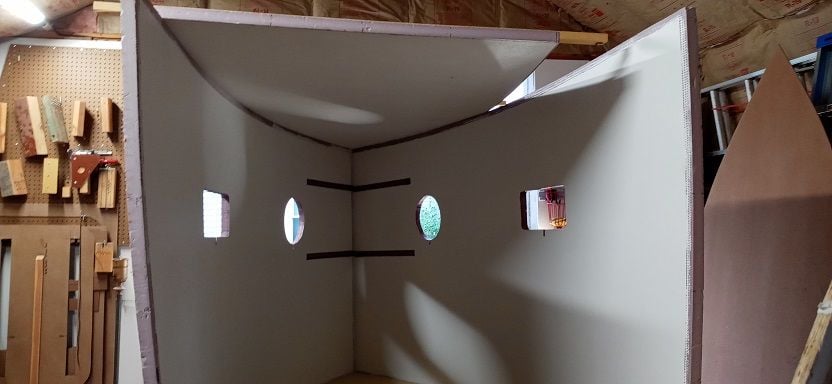
After the walls were dry it was time to raise the roof...
I applied some 1"x2" to hold the roof in place as I installed it and as the glue dried.
Usually I set the roof on top of the walls, but I on this build I decided to install between the walls. This will help hold the curve of the walls at the top since the foam does want to go straight.
I applied some 1"x2" to hold the roof in place as I installed it and as the glue dried.
Usually I set the roof on top of the walls, but I on this build I decided to install between the walls. This will help hold the curve of the walls at the top since the foam does want to go straight.
08-15-21, 07:52 PM
#41
Member
Thread Starter
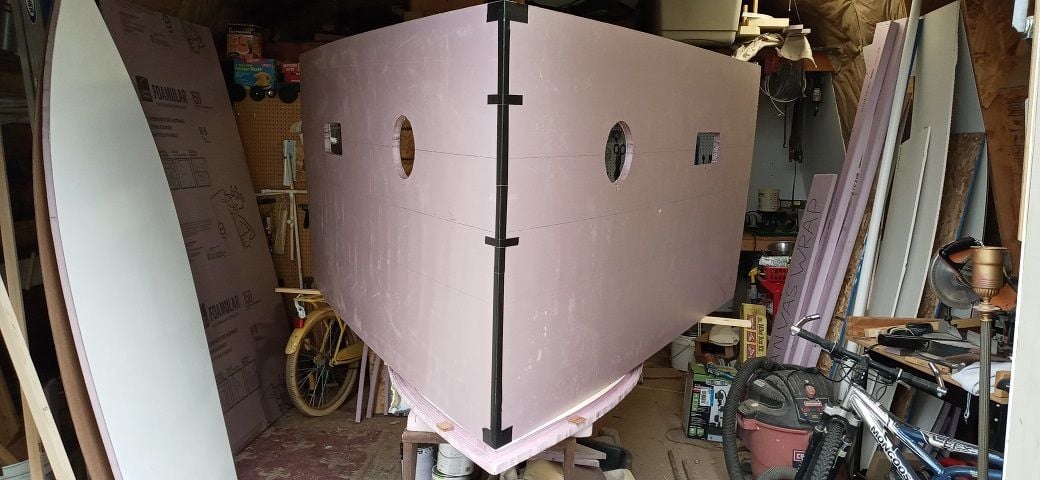
Once the roof was in place I applied glue and then clamped it all together.
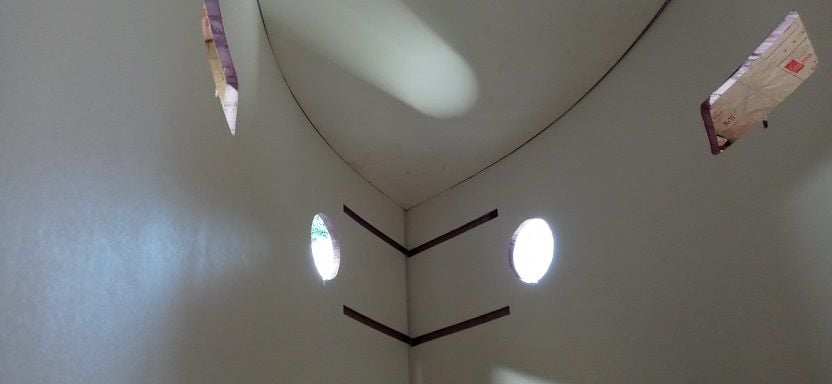
Here is a shot of the temporary roof supports once the roof is installed. They will hold everything even as the glue dries.
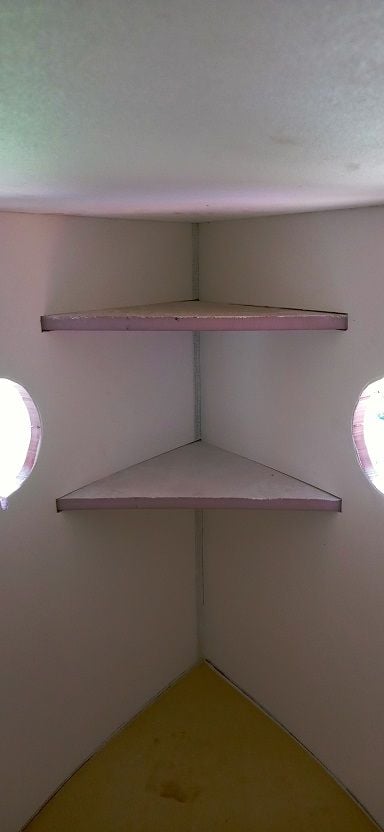
And then I popped the shelves into the shelf dados. They fit perfect! They will also give a lot of extra strength to the front section of the build.
Here is a shot of the temporary roof supports once the roof is installed. They will hold everything even as the glue dries.
And then I popped the shelves into the shelf dados. They fit perfect! They will also give a lot of extra strength to the front section of the build.
08-16-21, 12:34 AM
#42
Senior Member
Join Date: Sep 2015
Location: Left Coast, Canada
Posts: 5,126
Mentioned: 24 Post(s)
Tagged: 0 Thread(s)
Quoted: 2236 Post(s)
Liked 1,314 Times
in
707 Posts
Following with interest. Very curious to see how it turns out. You definitely seem to have a plan 
Fwiw, I just finished two road trips in the last month and a half totalling about 8000 kms using the dodge caravan as a base camp. Mtbing, hiking, paddleboarding and even surfing at long Beach in Tofino.
Fwiw, I just finished two road trips in the last month and a half totalling about 8000 kms using the dodge caravan as a base camp. Mtbing, hiking, paddleboarding and even surfing at long Beach in Tofino.
Last edited by Happy Feet; 08-16-21 at 12:39 AM.
08-16-21, 05:35 AM
#43
Senior Member
some questions:
1. what is the current weight of the project?
2. what is the expected weight of the final product?
3. have you hitched'er up to a non-motorized bike for a trial run in a wallyworld parking lot?
4. what are the odds you'll be able to drag'er uphill against the wind in the rain?
1. what is the current weight of the project?
2. what is the expected weight of the final product?
3. have you hitched'er up to a non-motorized bike for a trial run in a wallyworld parking lot?
4. what are the odds you'll be able to drag'er uphill against the wind in the rain?
08-16-21, 04:15 PM
#44
Member
Thread Starter
Following with interest. Very curious to see how it turns out. You definitely seem to have a plan
Fwiw, I just finished two road trips in the last month and a half totalling about 8000 kms using the dodge caravan as a base camp. Mtbing, hiking, paddleboarding and even surfing at long Beach in Tofino.
Fwiw, I just finished two road trips in the last month and a half totalling about 8000 kms using the dodge caravan as a base camp. Mtbing, hiking, paddleboarding and even surfing at long Beach in Tofino.
08-16-21, 04:44 PM
#45
Member
Thread Starter
some questions:
1. what is the current weight of the project?
2. what is the expected weight of the final product?
3. have you hitched'er up to a non-motorized bike for a trial run in a wallyworld parking lot?
4. what are the odds you'll be able to drag'er uphill against the wind in the rain?
1. what is the current weight of the project?
2. what is the expected weight of the final product?
3. have you hitched'er up to a non-motorized bike for a trial run in a wallyworld parking lot?
4. what are the odds you'll be able to drag'er uphill against the wind in the rain?
2. I am shooting for 50lbs, but clients target was 100lbs. I should still be well under that. Some variables that I do not know the weights for. Still needs a light frame axle and wheels plus outside canvas glue and paint.
3. Not yet since I don't have any frame or wheels on it yet. I do plan to take it for a spin once it all gets together though. I am curious to see how it will perform too.
4. I guess that depends on bicycle gearing and rider stamina and how much extra weight you put in the trailer. If it was raining I would be in the trailer....
08-16-21, 08:46 PM
#46
Full Member
What I would like to see is a report on it once it has been towed through Southern Idaho, Wyoming and Nebraska.
08-21-21, 05:48 PM
#47
Senior Member
Join Date: Jun 2014
Location: Ontario, Canada
Posts: 4,624
Bikes: iele Latina, Miele Suprema, Miele Uno LS, Miele Miele Beta, MMTB, Bianchi Model Unknown, Fiori Venezia, Fiori Napoli, VeloSport Adamas AX
Mentioned: 16 Post(s)
Tagged: 0 Thread(s)
Quoted: 1324 Post(s)
Liked 927 Times
in
640 Posts
1. Current weight is 33lbs. That is with the rear wall in place but not glued.
2. I am shooting for 50lbs, but clients target was 100lbs. I should still be well under that. Some variables that I do not know the weights for. Still needs a light frame axle and wheels plus outside canvas glue and paint.
3. Not yet since I don't have any frame or wheels on it yet. I do plan to take it for a spin once it all gets together though. I am curious to see how it will perform too.
4. I guess that depends on bicycle gearing and rider stamina and how much extra weight you put in the trailer. If it was raining I would be in the trailer....
Good luck and cheers
08-21-21, 08:10 PM
#48
Member
Thread Starter
Thanks! As stated before this is for a e-bike. I looked at a few manufactured units in Europe and they were anywhere between 90-132lbs.Although some were being pulled by non e-bikes. At least in some of the advertisements.
08-22-21, 01:39 AM
#49
Senior Member
the fully-laden bike, including up to 5 gallons water (10 2L soda bottles), was about 175 pounds.
guessing the trailer would account for 40-80 pounds, depending on how much water.
bob weight was 13, and was rated to carry 70.
drug that puppy about 20,000 km over the course of 18 months.
not toooo bad, if young and in good shape......wouldn't wanna do it now.
slow to gain speed, slow to stop. okay once in motion.
hills and mountains were difficult, but doable with 16" or 17" gearing.
most difficult were 1) the short, steep, constant up-n-down parts of northern
new zealand, and 2) the constant headwinds of western australia.
with this here trailer, the weight can be dealt with. just need the proper
gearing and a strong enough rider. the wind is going to be the real
problem, especially side winds. something this large pulled by a bike
is going to be unstable in anything stronger than a light breeze, and
deadly when passed by 18-wheelers at speed.
08-22-21, 08:31 AM
#50
Senior Member
Originally Posted by saddlesores;
...with this here trailer, the weight can be dealt with. just need the proper
gearing and a strong enough rider. the wind is going to be the real
problem, especially side winds. something this large pulled by a bike
is going to be unstable in anything stronger than a light breeze, and
deadly when passed by 18-wheelers at speed.
Random brainstorming follows:... (sorry, that's how I think...)
think about doing something with rigid panels that folded - Origami style. Hmmmm...
I'm thinking about pet crates and how they fold up for storage. Those fold flat (well, a couple of inches thick) for storage. Now if you were to make the bottom 'pan' portion a foot or so high before the sidewall hinges, you could use that 1' high lower portion for carrying food, sleeping bag, etc, and have less 'windage area' when towing. That'd also keep the weight down low for stability.
If you were to build using insulated material (again I'm thinking Lexan opaque greenhouse panels), and cover the hinged areas with waterproof fabric... The problem would be the end walls and how to waterproof those seams, although canvas joints with zippers would probably be sufficient. Proof-of-concept/design can be done on a small scale using corrugated cardboard or 1/4" thick crafting foamboard to work though the problems...