


Another DIY track end install. Lots of Pics.
 04-04-06 | 12:36 AM
#1

Thread Starter
Taking "s" outta "Fast"
Joined: Dec 2005
Posts: 1,989
Likes: 0
From: Zoo York City
*** Another DIY track end install. Lots of Pics.
My girlfriend had reached the performance limits of her 27" wheeled Bianchi touring frame, and was getting the need for a faster/more efficient ride. She was really attached to the frame though as it had a lot of sentimental value, and there wasn't enough space in her apartment to keep two bikes.
While just switching to 700c wheels would have been relatively simple, the geometry of the frame would have remained early 80s touring style with seat and headtube angles in the 70/71 degree range, the wheelbase would be really long, and the rear frame spacing would be 130mm.
So this is where I come in. Itching for a little metalwork, I decided to weld, not braze, track ends onto her old frame to get her angles close to common road geometry, shorten her wheelbase, and respace her frame.
Here are some pics of the process.
Let me know what you guys and gals think:
Original ends after bending to 120mm. Notice that the slots are angled upwards above the chainstay.
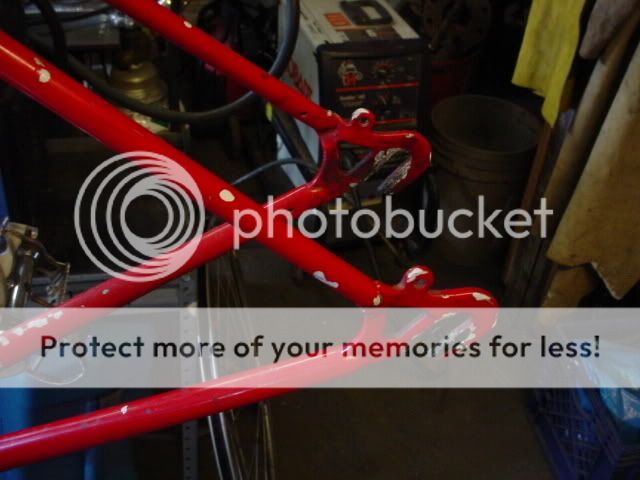
Point of no return. Oh yea, this is my first attempt at frame work.
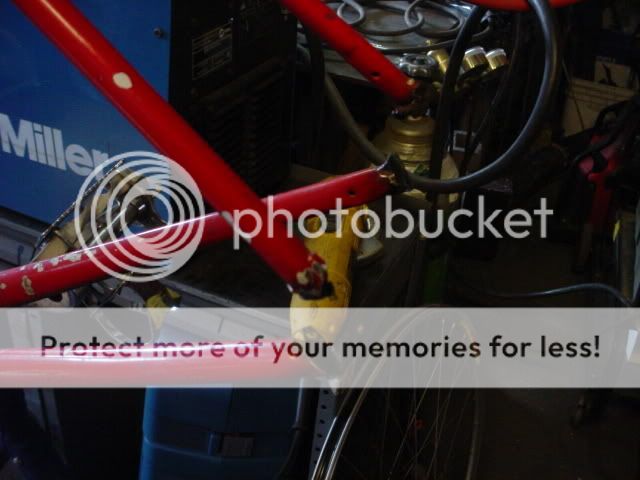
After grinding out slots and getting all the old braze out, the new ends were mocked up and ready to be tacked in.
Roughly aligned:
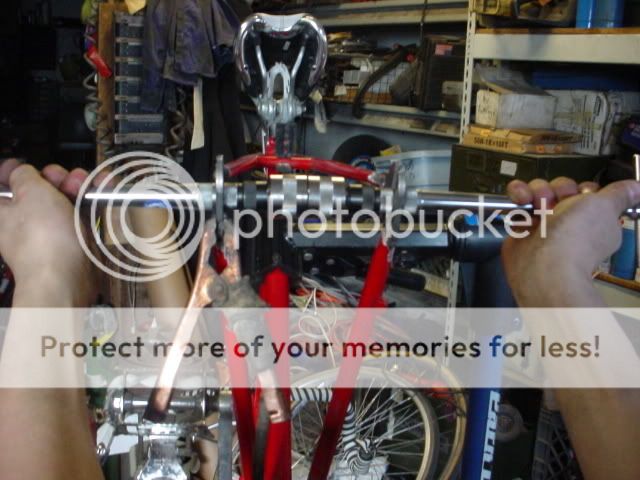
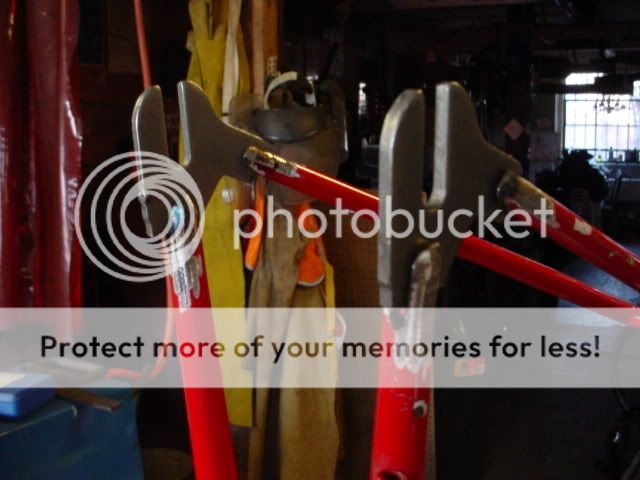
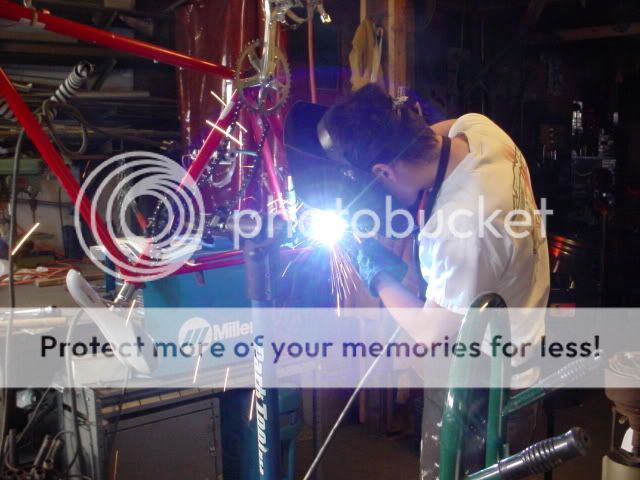
Commence to welding!
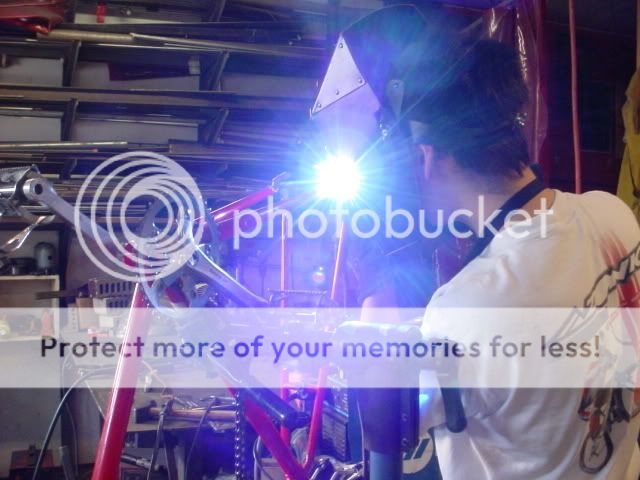
Closeup examples of my welds:

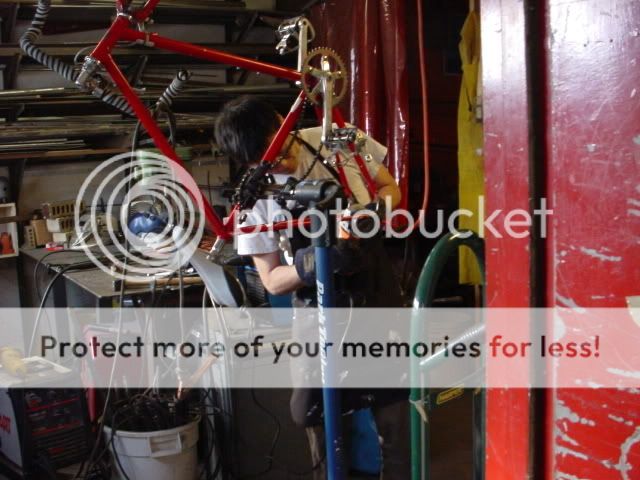
Shaping and contouring the dropouts:
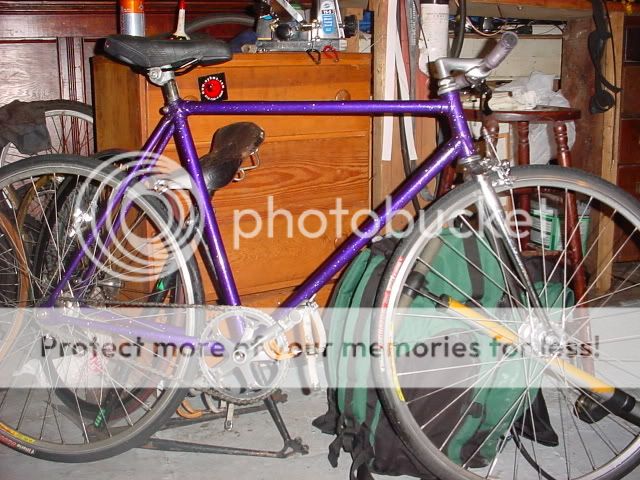
End result:

She's now using flatbars with MTB grips.
New everything except seatpost, saddle, stem, and frame. I'd ride it.

It would have come out a little better but the first welder I used was too hot, and the second welder I ended up using ran out of gas in the middle of the project so I had to carry the welder to a different tank across the shop and use an extension cord. Big voltage drop. You fellow welders know what I'm talking about. Plus, due to time constraints, I only had about two and a half hours to do the work so I was a little rushed.
I only have a rough contour right now, but it could stand to take a little more material out to smooth out the curves. A little work with a flap disk and some metal polish and I think I'll be happy with it.
I don't have the numbers in front of me right now, but using a magnetic angle finder and a tape measure, the BB height was roughly the same (still taller than my fuji!), the wheelbase with the new fork was shortened about 1.25 inches, and the seattube angle steepened by about 2 degrees.
I didn't mess with the bridge because of the seatstay/seatube junction; I thought there would be too much angular preload on a brazed joint that already experiences a lot of shear. Plus this bike gets ridden in all conditions, so I didn't want to risk messing up the fender mount.
The GF likes the improved ride of 700c wheels quite a bit, and has found that her cruising speed is about the same as mine. She even passed me on some of the hills in the Upper East Side. For shame!
While just switching to 700c wheels would have been relatively simple, the geometry of the frame would have remained early 80s touring style with seat and headtube angles in the 70/71 degree range, the wheelbase would be really long, and the rear frame spacing would be 130mm.
So this is where I come in. Itching for a little metalwork, I decided to weld, not braze, track ends onto her old frame to get her angles close to common road geometry, shorten her wheelbase, and respace her frame.
Here are some pics of the process.
Let me know what you guys and gals think:
Original ends after bending to 120mm. Notice that the slots are angled upwards above the chainstay.
Point of no return. Oh yea, this is my first attempt at frame work.
After grinding out slots and getting all the old braze out, the new ends were mocked up and ready to be tacked in.
Roughly aligned:
Commence to welding!
Closeup examples of my welds:
Shaping and contouring the dropouts:
End result:
She's now using flatbars with MTB grips.
New everything except seatpost, saddle, stem, and frame. I'd ride it.
It would have come out a little better but the first welder I used was too hot, and the second welder I ended up using ran out of gas in the middle of the project so I had to carry the welder to a different tank across the shop and use an extension cord. Big voltage drop. You fellow welders know what I'm talking about. Plus, due to time constraints, I only had about two and a half hours to do the work so I was a little rushed.
I only have a rough contour right now, but it could stand to take a little more material out to smooth out the curves. A little work with a flap disk and some metal polish and I think I'll be happy with it.
I don't have the numbers in front of me right now, but using a magnetic angle finder and a tape measure, the BB height was roughly the same (still taller than my fuji!), the wheelbase with the new fork was shortened about 1.25 inches, and the seattube angle steepened by about 2 degrees.
I didn't mess with the bridge because of the seatstay/seatube junction; I thought there would be too much angular preload on a brazed joint that already experiences a lot of shear. Plus this bike gets ridden in all conditions, so I didn't want to risk messing up the fender mount.
The GF likes the improved ride of 700c wheels quite a bit, and has found that her cruising speed is about the same as mine. She even passed me on some of the hills in the Upper East Side. For shame!
Last edited by AfterThisNap; 04-04-06 at 01:11 AM.


 04-04-06 | 06:26 AM
#4

jack of one or two trades
Joined: Jun 2005
Posts: 5,640
Likes: 0
From: Suburbia, CT
Bikes: Old-ass gearie hardtail MTB, fix-converted Centurion LeMans commuter, SS hardtail monster MTB
Nice job! Very well done, especially considering that it's your first foray into framework. The only downside is that she got rid of that awesome striped bar tape.
04-04-06 | 06:26 PM
#6

best-dressed mess
Joined: Oct 2004
Posts: 305
Likes: 0
From: SF -> BK
Bikes: 2 Unicycles duct taped together
Originally Posted by AfterThisNap
No one think it looks like crap? No critque? No "yo momma so fat" jokes?
But on the real, cheers for a DIY job.
04-04-06 | 06:28 PM
#7

King Among Runaways
Joined: Mar 2005
Posts: 4,215
Likes: 1
From: MKE
Bikes: 2004 Bianchi Pista, Cannondale Track, Soma Pake, Schwinn Breeze
He said he wasn't done smoothing and contouring yet.
So, reserve judgement on how it looks.
Otherwise, very rad.
So, reserve judgement on how it looks.
Otherwise, very rad.
__________________
"I owe everyone an apology" - hyperrevue
"I owe everyone an apology" - hyperrevue
 04-04-06 | 06:32 PM
#9
best-dressed mess
Joined: Oct 2004
Posts: 305
Likes: 0
From: SF -> BK
Bikes: 2 Unicycles duct taped together
Originally Posted by hyperRevue
He said he wasn't done smoothing and contouring yet.
So, reserve judgement on how it looks.
Otherwise, very rad.
So, reserve judgement on how it looks.
Otherwise, very rad.
04-04-06 | 06:37 PM
#10
Senior Member
Joined: Feb 2005
Posts: 718
Likes: 0
I think your finishing job looks like crap but that weld bead is totally tits. did you do a bunch of tacks? I'm guessing the stays are too thin to do any fancy torch moves. I'm a little confused. the first welding pic looks like you're tig welding, the next one looks like you're mig welding, but in the background there looks to be a miller dynasty tig machine. then the weld pic looks mig. so which is it? as far as finishing, I'd recommend getting some 3m pads for your grinder. they work really well. I can send you some if you can't find them.

 04-04-06 | 08:46 PM
#14
Thread Starter
Taking "s" outta "Fast"
Joined: Dec 2005
Posts: 1,989
Likes: 0
From: Zoo York City
The shop space(es) was(were) an embarassment of riches, but there were little things like empty tanks and voltage drop that kept things from being perfect. I ended up using the Hobart 140 and an angle grinder despite having a TIG and plasma cutter at my disposal.
The welds were fancy, not just tacks so there was considerable penetration. The mistake was to try and build up the weld so I could grind it off to look like a fillet braze. It will be a lot smoother with some work, but again I only had a few hours to get this far so I rushed the entire process.
Overall the process was very worthwhile IMO. The bike is definitely much quicker and feels much more balanced than it would have with just a fork and wheel swap.
04-05-06 | 06:44 AM
#15
jack of one or two trades
Joined: Jun 2005
Posts: 5,640
Likes: 0
From: Suburbia, CT
Bikes: Old-ass gearie hardtail MTB, fix-converted Centurion LeMans commuter, SS hardtail monster MTB
How are you going to paint the new ends? Get the whole bike in on your group powdercoating?


 05-12-06 | 06:37 AM
#21
jack of one or two trades
Joined: Jun 2005
Posts: 5,640
Likes: 0
From: Suburbia, CT
Bikes: Old-ass gearie hardtail MTB, fix-converted Centurion LeMans commuter, SS hardtail monster MTB
Gorgeous! I can't even imagine the amount of boyfriend points you racked up on this one.
05-12-06 | 07:58 AM
#23

The Legitimiser
Joined: Jul 2005
Posts: 4,849
Likes: 6
From: Southampton, UK
Bikes: Gazelle Trim Trophy, EG Bates Track Bike, HR Bates Cantiflex bike, Nigel Dean fixed gear conversion, Raleigh Royal, Falcon Westminster.
What's the ratios on that? Gearing looks pretty tall. I ask because I'm building a conversion, and only have my experience trying different combos on my road bikes so far to help me choose my gearing!
 05-12-06 | 08:21 AM
#25

Senior Member
Joined: Aug 2004
Posts: 200
Likes: 0
From: somerville, ma
Bikes: circle a.
Originally Posted by 12XU
So how exactly do you have a space like that in the middle of freaking NYC? Trustafarian?