bykemike
Senior Member
close


03-21-26
- Join DateOct 2007
- Locationst augustine fl
- Posts:1,078
-
iTrader Positive Feedback0
-
iTrader Feedback Score(0)
-
Likes:454
-
Liked:259 Times in 105 Posts
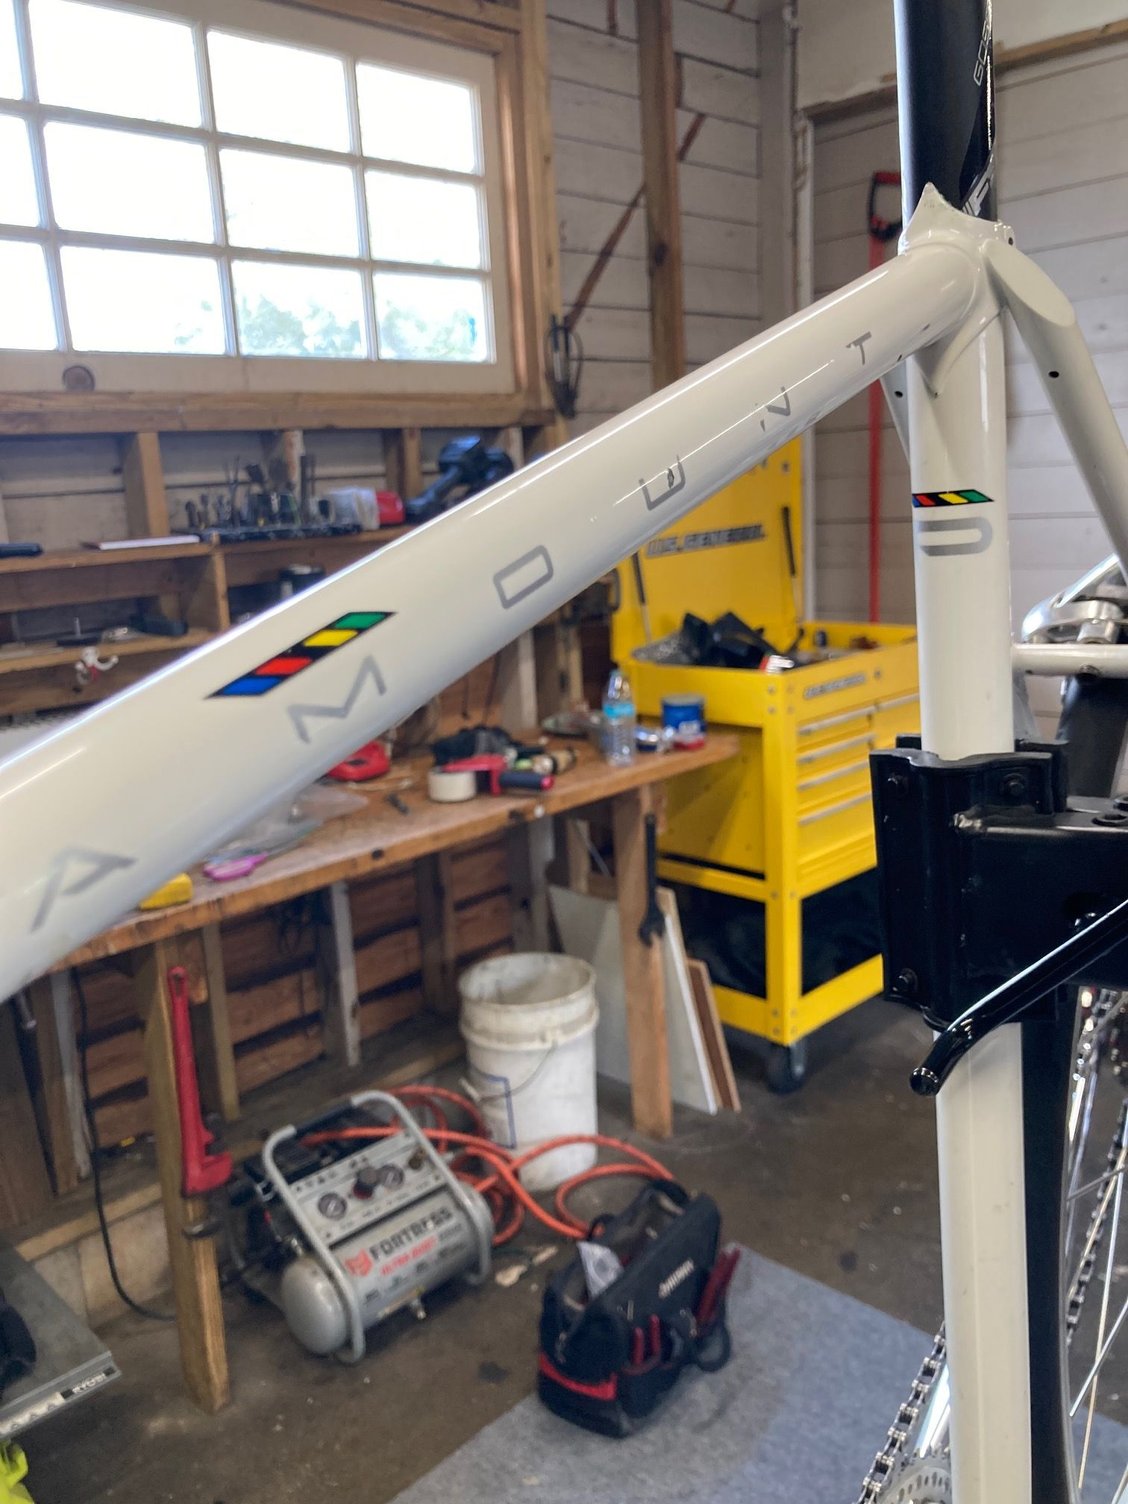
My new to me '86 Paramount track bike just got it's rear brake, it's going to be a road bike for a while. I would dearly love to drill the top tube to put the brake cable inside rather than clamp it outside. Does anyone make a nice smooth entry fixture if I drill the holes to do this? If I am an idiot for even thinking of doing this just say so, I can take it.
veganbikes
Clark W. Griswold
close


03-31-26
- Join DateMar 2014
- Location,location, location
- Posts:18,000
-
iTrader Positive Feedback0
-
iTrader Feedback Score(0)
-
Likes:15,517
-
Liked:6,506 Times in 4,313 Posts
A frame builder could probably do it for you but honestly I wouldn't. It is a nice old Paramount in good condition. I would do clip on guides personally, still would look nice if you got nice ones and potentially less damage to the frame or at least fixable damage. Also clamp to that seatpost please so you don't risk damaging the tubes not designed to be clamped.
bykemike
Senior Member
close
03-21-26
- Join DateOct 2007
- Locationst augustine fl
- Posts:1,078
-
iTrader Positive Feedback0
-
iTrader Feedback Score(0)
-
Likes:454
-
Liked:259 Times in 105 Posts
Thanks Vegan. I just needed a slap about drilling that top tube. I have had other comments about my frame clamping methods, they need work I know. Metal clip on clamps for the brake cable, I'm about to cruise the "Bay for a bit and see what's out there.
veganbikes
Clark W. Griswold
close
03-31-26
- Join DateMar 2014
- Location,location, location
- Posts:18,000
-
iTrader Positive Feedback0
-
iTrader Feedback Score(0)
-
Likes:15,517
-
Liked:6,506 Times in 4,313 Posts
Quote:
Yeah it isn't that exciting. I mean hiding cables is nice but I want a frame designed around it so it is easy to route them otherwise you have a nightmare on your hands are regretting life itself and no fun. Yeah but it is an easy fix, don't clamp the frame just clamp the seatpost.Originally Posted by bykemike
Thanks Vegan. I just needed a slap about drilling that top tube. I have had other comments about my frame clamping methods, they need work I know. Metal clip on clamps for the brake cable, I'm about to cruise the "Bay for a bit and see what's out there.
All City had some nice ones for a while and Problem Solvers has some as well, your local shop probably has a some or can get them and they might even have some of the old AC ones. If not I guess I would look for old Campagnolo ones but those could probably cost a pretty penny these days.
bykemike
Senior Member
close
03-21-26
- Join DateOct 2007
- Locationst augustine fl
- Posts:1,078
-
iTrader Positive Feedback0
-
iTrader Feedback Score(0)
-
Likes:454
-
Liked:259 Times in 105 Posts
I found a number of NOS Campy bar clips, a pack of 3 for $40, they need to be tightened with a screw, ok I guess maybe I'll go with plastic , I have some plastic clips on my Capo..but that is an aluminum Capo, more of a workhorse kind of bike without the look of this Schwinn.
veganbikes
Clark W. Griswold
close
03-31-26
- Join DateMar 2014
- Location,location, location
- Posts:18,000
-
iTrader Positive Feedback0
-
iTrader Feedback Score(0)
-
Likes:15,517
-
Liked:6,506 Times in 4,313 Posts
Quote:
Ehhhh $40 is maybe a little high but not terrible enough to really make me go no way. But someone in the C&V subforum might have some cheaper.Originally Posted by bykemike
I found a number of NOS Campy bar clips, a pack of 3 for $40, they need to be tightened with a screw, ok I guess maybe I'll go with plastic , I have some plastic clips on my Capo..but that is an aluminum Capo, more of a workhorse kind of bike without the look of this Schwinn.
I wouldn't go plastic, I know Jagwire makes some stick on ones with zip ties but the P/S ones are metal and your local shop might have or can get them.

JohnDThompson
Old fart
close

03-31-26
- Join DateNov 2004
- LocationAppleton WI
- Posts:26,256
-
iTrader Positive Feedback0
-
iTrader Feedback Score(0)
-
Likes:353
-
Liked:5,132 Times in 2,823 Posts
A properly executed internal cable routing is much more involved than just drilling a couple holes. I agree with others here that external clamps would be a much better solution. If you have a 1" diameter top tube, Dia-Compe cable clips are readily available and affordable:
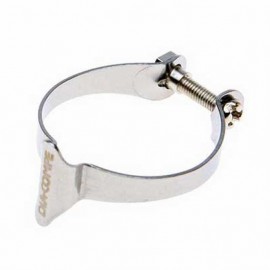
https://www.planetbmx.com/shop/dia-c...-1-chrome.html
https://www.planetbmx.com/shop/dia-c...-1-chrome.html
BTinNYC
...
close
03-31-26
- Join DateOct 2021
- LocationWhitestone and Rensselaerville, New York
- Posts:2,517
-
iTrader Positive Feedback0
-
iTrader Feedback Score(0)
-
Likes:7,854
-
Liked:3,453 Times in 1,337 Posts
Right. Definitely not on a high condition Paramount.
from a serial top tube driller

from a serial top tube driller
bykemike
Senior Member
close
03-21-26
- Join DateOct 2007
- Locationst augustine fl
- Posts:1,078
-
iTrader Positive Feedback0
-
iTrader Feedback Score(0)
-
Likes:454
-
Liked:259 Times in 105 Posts
BT, that is a very nice job. where did you find the (I'm lacking jargon) the thing you silver brazed to the tube? I'm thinking I want to try this on one of my less than top tier frames. I have all the gear to do it except confidence. (maybe that is the most important thing)
One of my track frames came with that done from the builder, he also has a tube inside the frame leading for point to point so when you slide a brake cable in it just pops right out, no snaking! Nice job!!
One of my track frames came with that done from the builder, he also has a tube inside the frame leading for point to point so when you slide a brake cable in it just pops right out, no snaking! Nice job!!
BTinNYC
...
close
03-31-26
- Join DateOct 2021
- LocationWhitestone and Rensselaerville, New York
- Posts:2,517
-
iTrader Positive Feedback0
-
iTrader Feedback Score(0)
-
Likes:7,854
-
Liked:3,453 Times in 1,337 Posts
Framebuildersupply.com
Running a carrier tube through the top tube is the pro method for sure! It keeps water out of the top tube.
I use a MAPP torch and the most expensive part of the project is the silver solder and flux (Harris Safety Silv and Stay Silv Flux black). I got some hints and how-to's from scarlson and the web. The first couple of brazes I used too much solder, not believing the 1 cm of solder had actually flowed completely and then spent a lot of time doing clean-up with file and sandpaper. Some of the good hints: use wire or a metal hose clamp to hold the parts in place (the hose clamp is great for shifter bosses) - keep the torch moving, on and off the part, and focus on the part - the black flux changes a bit when it's hot enough to melt the solder, it's a good indicator.
I use silicone gaskets to keep water out, but next time I'll try a carrier tube.
bykemike
Senior Member
close
03-21-26
- Join DateOct 2007
- Locationst augustine fl
- Posts:1,078
-
iTrader Positive Feedback0
-
iTrader Feedback Score(0)
-
Likes:454
-
Liked:259 Times in 105 Posts
That is an art piece BT!! so nice. I do quite a bit of silver brazing and silver solder (marine air conditioning and refrigeration) but the aim is to make the joints leak free up to 1000 psi or over and looks are a bit on the back burner. I love the look of a nicely done joint but do not go for that for looks sake. I would have to sacrifice a paint job as well. A big deal but I have a frame or two I might be willing to do that.
Have you tried to turn a road frame into a track frame by changing the back drop outs yet? I think about that as well.
BTW, thanks so much for the term "carrier tube", knowing stuff like that might make look more smarter.
Have you tried to turn a road frame into a track frame by changing the back drop outs yet? I think about that as well.
BTW, thanks so much for the term "carrier tube", knowing stuff like that might make look more smarter.
Kontact
Senior Member
close
03-31-26
- Join DateApr 2011
- Posts:12,585
-
iTrader Positive Feedback0
-
iTrader Feedback Score(0)
-
Likes:1,220
-
Liked:4,751 Times in 2,993 Posts
I would try stick-on cable guides run under the top tube. Even if you have to use zip ties to get them to stick to the frame, tiny white ones won't stand out.
bykemike
Senior Member
close
03-21-26
- Join DateOct 2007
- Locationst augustine fl
- Posts:1,078
-
iTrader Positive Feedback0
-
iTrader Feedback Score(0)
-
Likes:454
-
Liked:259 Times in 105 Posts
Quote:
https://www.planetbmx.com/shop/dia-c...-1-chrome.html
Just dropped an order for 3 of these clamps, thanks again JohnOriginally Posted by JohnDThompson
A properly executed internal cable routing is much more involved than just drilling a couple holes. I agree with others here that external clamps would be a much better solution. If you have a 1" diameter top tube, Dia-Compe cable clips are readily available and affordable:https://www.planetbmx.com/shop/dia-c...-1-chrome.html
guy153
Senior Member
close

03-31-26
- Join DateDec 2019
- Posts:1,176
-
iTrader Positive Feedback0
-
iTrader Feedback Score(0)
-
Likes:1,989
-
Liked:377 Times in 283 Posts
Quote:
Which you only get after a bit of practice! Find an old tube and braze similar sized bits of metal to it until you figure it out. Nothing except doing it can really train the eye and hands.Originally Posted by bykemike
BT, that is a very nice job. where did you find the (I'm lacking jargon) the thing you silver brazed to the tube? I'm thinking I want to try this on one of my less than top tier frames. I have all the gear to do it except confidence. (maybe that is the most important thing)
As for your frame, you would probably get away with just drilling it in the butted section an inch or so from the lug, and deburring the hole. But it's not something I would want to do.
bykemike
Senior Member
close
03-21-26
- Join DateOct 2007
- Locationst augustine fl
- Posts:1,078
-
iTrader Positive Feedback0
-
iTrader Feedback Score(0)
-
Likes:454
-
Liked:259 Times in 105 Posts
I went ahead and ordered the clamps from Planet BMX, simple easy and safe. I am going to do some brazing/silver soldering on a donor frame to get the feel of it though. I think it would be a good skill to have and I am halfway there, I just have to melt a hole or two in a tube to get a feel about how much heat is too much heat.
guy153
Senior Member
close
03-31-26
- Join DateDec 2019
- Posts:1,176
-
iTrader Positive Feedback0
-
iTrader Feedback Score(0)
-
Likes:1,989
-
Liked:377 Times in 283 Posts
Quote:
I think you'll struggle to melt a hole in a tube with MAPP. But you will be able to burn the flux if you go too hot. And you will also get a feel for how to make the silver go where you want it to rather than dripping onto the floor Originally Posted by bykemike
I went ahead and ordered the clamps from Planet BMX, simple easy and safe. I am going to do some brazing/silver soldering on a donor frame to get the feel of it though. I think it would be a good skill to have and I am halfway there, I just have to melt a hole or two in a tube to get a feel about how much heat is too much heat.

bykemike
Senior Member
close
03-21-26
- Join DateOct 2007
- Locationst augustine fl
- Posts:1,078
-
iTrader Positive Feedback0
-
iTrader Feedback Score(0)
-
Likes:454
-
Liked:259 Times in 105 Posts
Oh, I know the dripping on the floor effect all too well. When it just pulls into the joint just right is the happy place, the drip is a sign you ae doing something wrong.
JohnDThompson
Old fart
close
03-31-26
- Join DateNov 2004
- LocationAppleton WI
- Posts:26,256
-
iTrader Positive Feedback0
-
iTrader Feedback Score(0)
-
Likes:353
-
Liked:5,132 Times in 2,823 Posts
Quote:
MAPP/air flame is just barely hot enough to melt high silver content rod (~56%). The problem I have with MAPP/air is that it takes a long time to get the tube hot enough to accept the braze, which enlarges the heat-affected zone on the tube. With oxy-acetylene, I can get everything hot enough right-pronto, flow the braze in there cleanly and get out, with minimal heat affected zone and no slop to clean up afterward.Originally Posted by bykemike
I went ahead and ordered the clamps from Planet BMX, simple easy and safe. I am going to do some brazing/silver soldering on a donor frame to get the feel of it though. I think it would be a good skill to have and I am halfway there, I just have to melt a hole or two in a tube to get a feel about how much heat is too much heat.
guy153
Senior Member
close
03-31-26
- Join DateDec 2019
- Posts:1,176
-
iTrader Positive Feedback0
-
iTrader Feedback Score(0)
-
Likes:1,989
-
Liked:377 Times in 283 Posts
Quote:
Interesting to know. And good to have an excuse for when my MAPPing sucks Originally Posted by JohnDThompson
MAPP/air flame is just barely hot enough to melt high silver content rod (~56%). The problem I have with MAPP/air is that it takes a long time to get the tube hot enough to accept the braze, which enlarges the heat-affected zone on the tube. With oxy-acetylene, I can get everything hot enough right-pronto, flow the braze in there cleanly and get out, with minimal heat affected zone and no slop to clean up afterward.
JohnDThompson
Old fart
close
03-31-26
- Join DateNov 2004
- LocationAppleton WI
- Posts:26,256
-
iTrader Positive Feedback0
-
iTrader Feedback Score(0)
-
Likes:353
-
Liked:5,132 Times in 2,823 Posts
Quote:
MAPP/oxygen would be plenty hot, though, and actually has a higher heat density than oxy/propane or oxy/acetylene.Originally Posted by guy153
Interesting to know. And good to have an excuse for when my MAPPing sucks
bykemike
Senior Member
close
03-21-26
- Join DateOct 2007
- Locationst augustine fl
- Posts:1,078
-
iTrader Positive Feedback0
-
iTrader Feedback Score(0)
-
Likes:454
-
Liked:259 Times in 105 Posts
I have one or both of these I use at times:
Small Torch Twin Tip (2#3 Tips) (10stp-c3sp) - Soldering Cleaning Products - Amazon.com
Thermo-Trap Protects material from heat Nu-Calgon 4371-36 | eBay
I find myself in places where heat soak to adjoining components can be fatal to the said component, excellent example of this is an AC System reversing valve on a small system. The valve has to be silver soldered in place but may be assembled with a lower temp solder and may have internal components made of a plastic material,
If I do foolishly accept one of these units into the shop for repair I buy two valves, one to install and a second one to install again after I cook the first one.
bykemike
Senior Member
close
03-21-26
- Join DateOct 2007
- Locationst augustine fl
- Posts:1,078
-
iTrader Positive Feedback0
-
iTrader Feedback Score(0)
-
Likes:454
-
Liked:259 Times in 105 Posts
The reversing valves look like this:
International Comfort Products 1192319 Reversing Valve with 24VAC 50/60HZ Coil | Parts Town
If you do any type of work like this you can instantly spot the issues, keep in mind this component can see 600 psi plus in some instances.
International Comfort Products 1192319 Reversing Valve with 24VAC 50/60HZ Coil | Parts Town
If you do any type of work like this you can instantly spot the issues, keep in mind this component can see 600 psi plus in some instances.