


in case you're wondering how to put on some new handle bars
 05-29-11, 07:44 PM
#1
Senior Member
Thread Starter
Join Date: May 2010
Location: hi / sf
Posts: 92
Mentioned: 0 Post(s)
Tagged: 0 Thread(s)
Quoted: 0 Post(s)
Likes: 0
Liked 1 Time
in
1 Post
in case you're wondering how to put on some new handle bars
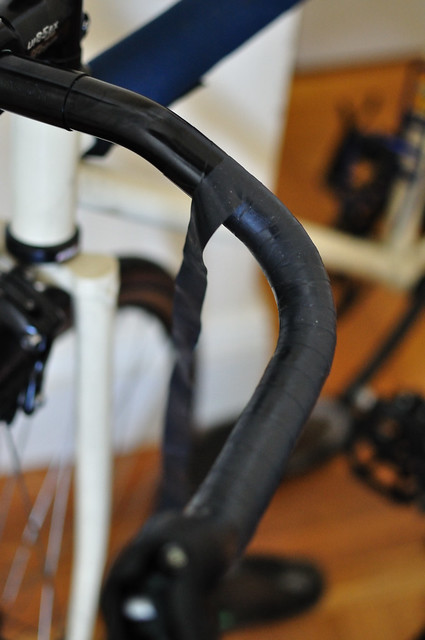
got the black nitto rb-021 for my bike. just thought i'd share the installation sequence 
have to do this in two posts, bike forums won't let me post all my photos in one message.
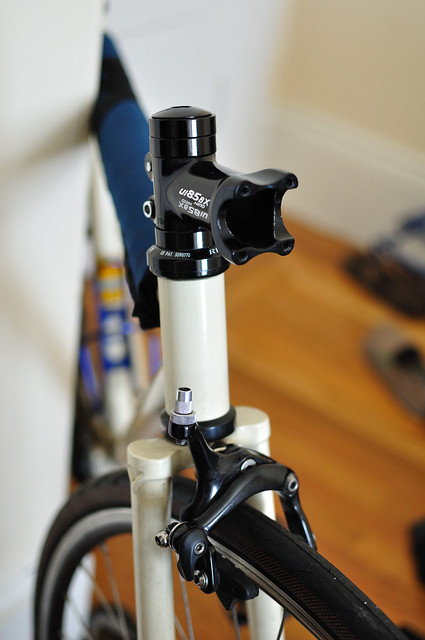
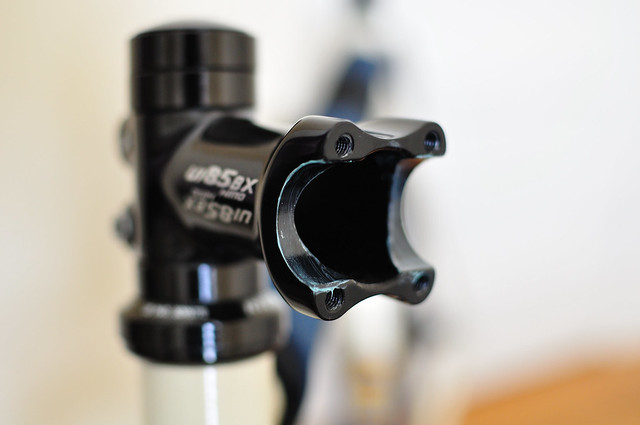
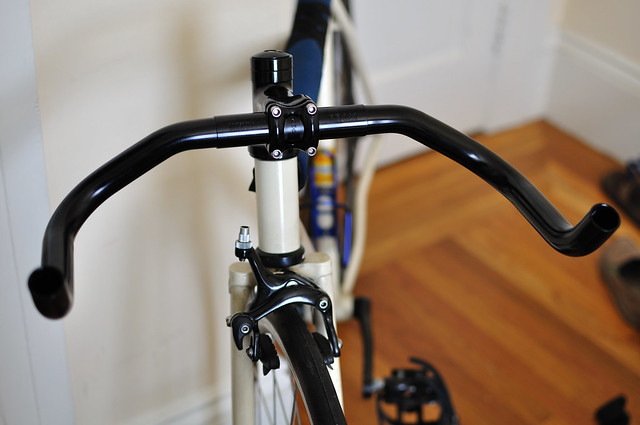
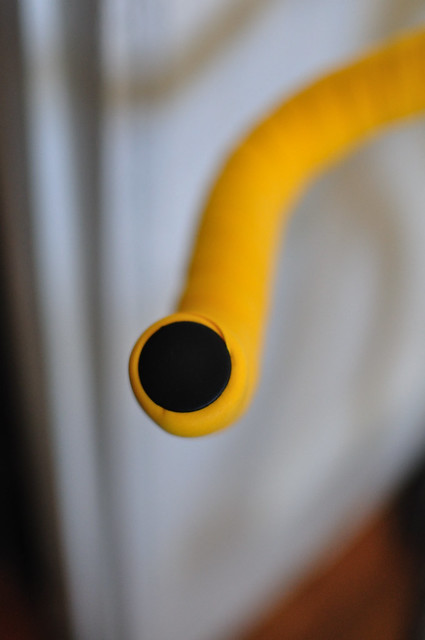
1. remove old bars and brake cable. no need take the entire stem off. just the face plate.
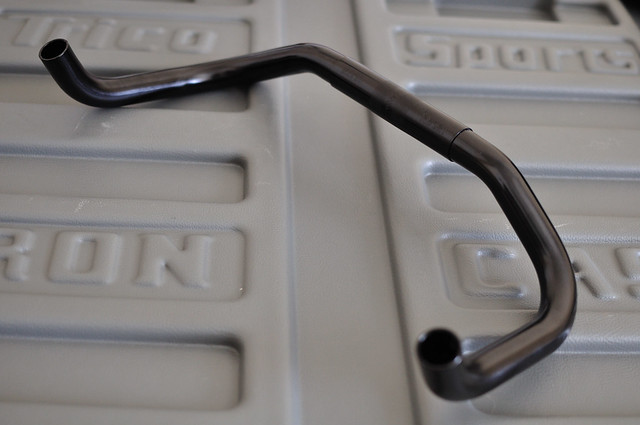
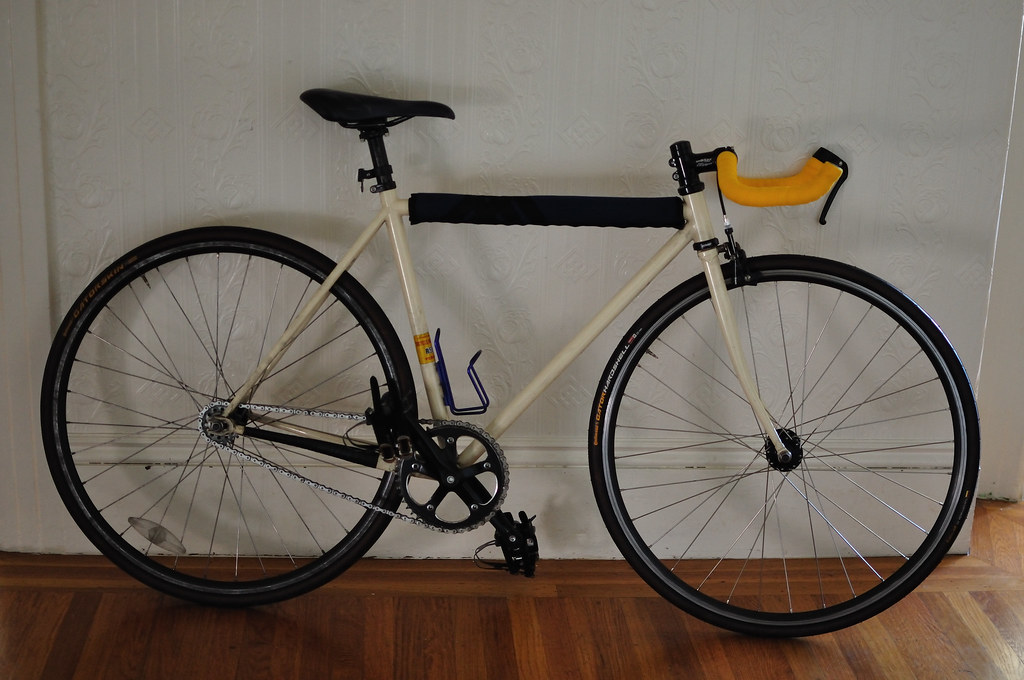
2. check out how awesome the new bars are!
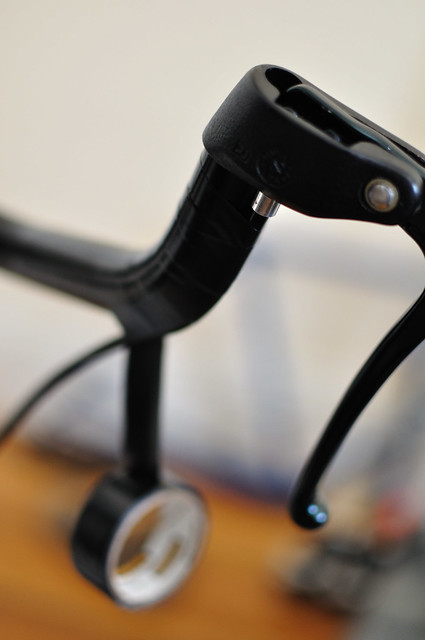
3. lightly grease the part of the stem that touches the handle bars.
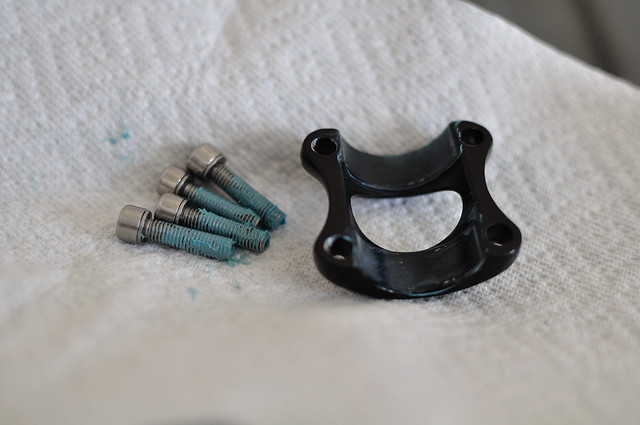
4. lightly grease stem face plate and screws.
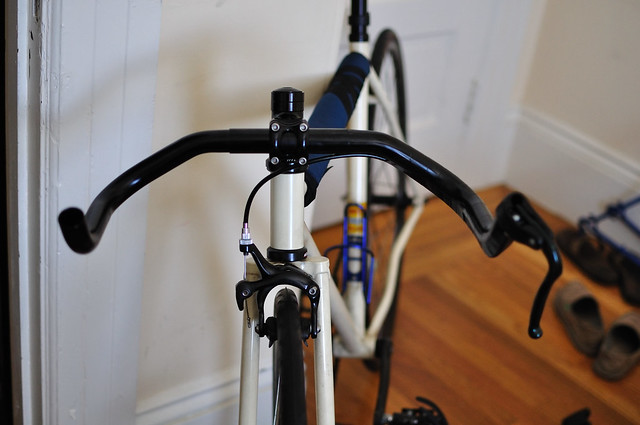
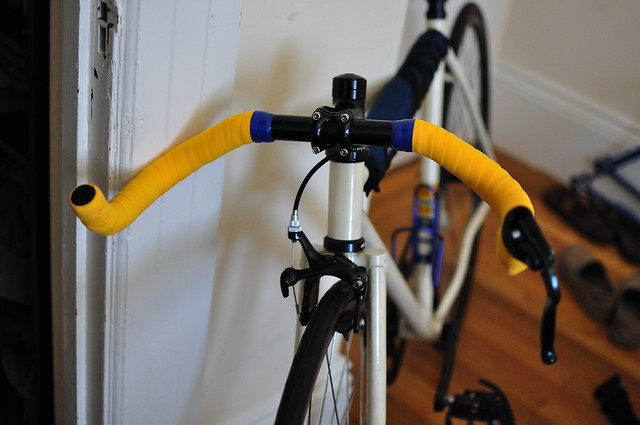
5. adjust bars to where you want them. then check out again how hot they look.
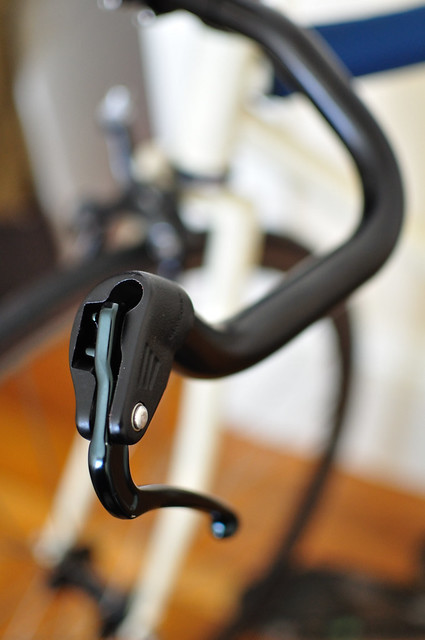
6. lightly grease TT lever.

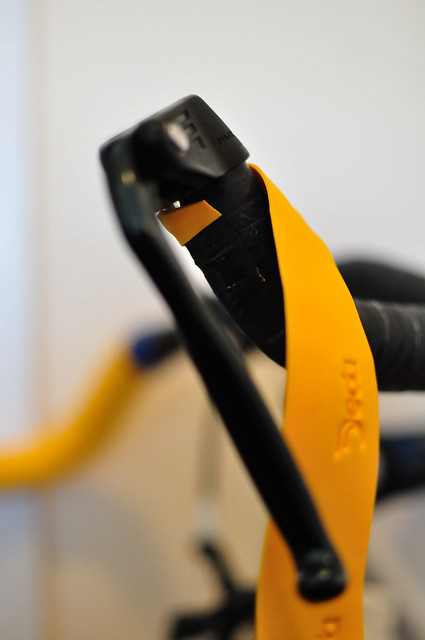
7. insert and tighten TT lever.
8. electrical tape the brake cable housing to the bar.
9. insert brake cable through housing and clamp down in brake caliper. trick for installing brake cable: hold cable hand-tight with calipers clamped all the way down on tire, then tighten down the caliper screw on the brake cable. then pull hard on the brake lever and brake cable will loosen to just where it needs to be.
have to do this in two posts, bike forums won't let me post all my photos in one message.
1. remove old bars and brake cable. no need take the entire stem off. just the face plate.
2. check out how awesome the new bars are!
3. lightly grease the part of the stem that touches the handle bars.
4. lightly grease stem face plate and screws.
5. adjust bars to where you want them. then check out again how hot they look.
6. lightly grease TT lever.
7. insert and tighten TT lever.
8. electrical tape the brake cable housing to the bar.
9. insert brake cable through housing and clamp down in brake caliper. trick for installing brake cable: hold cable hand-tight with calipers clamped all the way down on tire, then tighten down the caliper screw on the brake cable. then pull hard on the brake lever and brake cable will loosen to just where it needs to be.
 05-29-11, 07:45 PM
#2
Senior Member
Thread Starter
Join Date: May 2010
Location: hi / sf
Posts: 92
Mentioned: 0 Post(s)
Tagged: 0 Thread(s)
Quoted: 0 Post(s)
Likes: 0
Liked 1 Time
in
1 Post
part two
10. wrap electrical tape with the sticky side out so that it holds the bar tape in place. do this so that it hangs DOWN on the INSIDE (opposite of the direction you'll wrap the bar tape) so that it holds the bar tape tight.
11. bars with electrical tape, sticky side out. ran out of black tape so i had to use the blue.
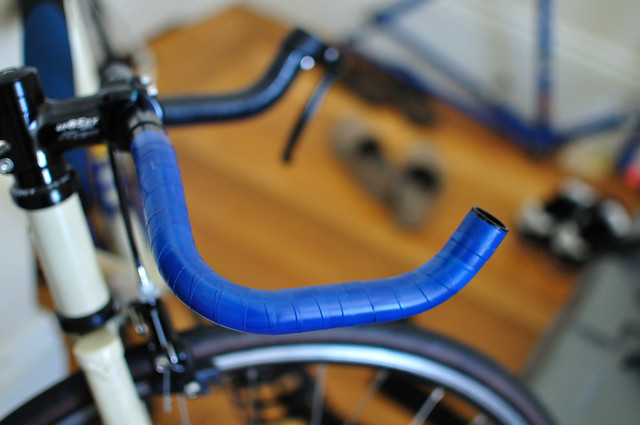
12. start wrapping the bar tape with a little extra on the end (will stuff it inside the bar with the plug later). make sure the tape hangs DOWN on the OUTSIDE so it naturally tightens itself when you're riding.
13. cut the tape at an angle going TOWARDS the CENTER so that the angle of the wrap stays the same at the end but ends flush, then electrical tape down to finish.
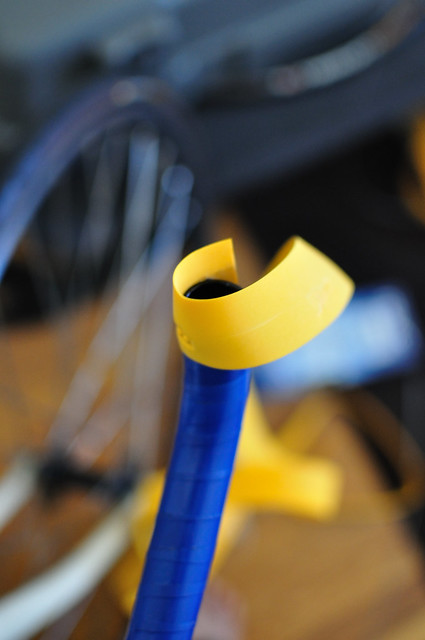
14. stuff the extra bar tape at the end into the bar with the bar end plug.
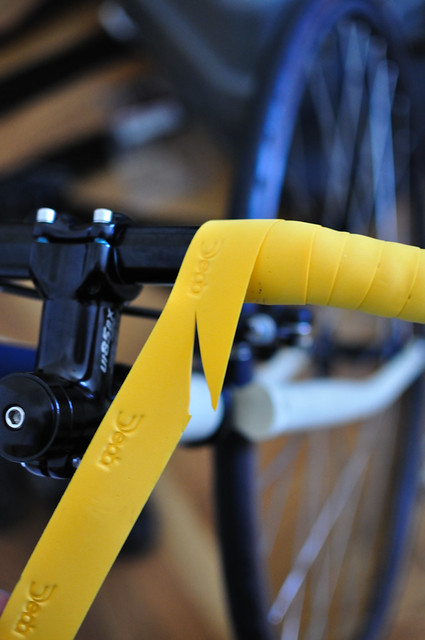
15. for the side with the TT lever, cut the tape at an angle at the beginning so it starts flush to the lever and keeps the angle (cut the angle at the side that touches the lever). this way the tape won't bunch up at the start of the wrap.
16. done! i ended up going to buy more black tape later and switching out the blue here.
17. finished product

18. she needs a bath
11. bars with electrical tape, sticky side out. ran out of black tape so i had to use the blue.
12. start wrapping the bar tape with a little extra on the end (will stuff it inside the bar with the plug later). make sure the tape hangs DOWN on the OUTSIDE so it naturally tightens itself when you're riding.
13. cut the tape at an angle going TOWARDS the CENTER so that the angle of the wrap stays the same at the end but ends flush, then electrical tape down to finish.
14. stuff the extra bar tape at the end into the bar with the bar end plug.
15. for the side with the TT lever, cut the tape at an angle at the beginning so it starts flush to the lever and keeps the angle (cut the angle at the side that touches the lever). this way the tape won't bunch up at the start of the wrap.
16. done! i ended up going to buy more black tape later and switching out the blue here.
17. finished product
18. she needs a bath
05-29-11, 08:05 PM
#3
Senior Member

Join Date: Nov 2010
Posts: 1,869
Bikes: '14 Kona Rove, '06 Bob Jackson
Mentioned: 0 Post(s)
Tagged: 0 Thread(s)
Quoted: 1 Post(s)
Likes: 0
Liked 0 Times
in
0 Posts
Good tutorial, pretty clear explanation on the bar tape wrapping process as well. Probably the best I've seen, nice pics.
And I'm no expert, but I don't really think your stem and screws need that much grease, if any at all.
And I'm no expert, but I don't really think your stem and screws need that much grease, if any at all.
05-29-11, 10:43 PM
#5
on Baby Charlie Concept~

Oooh these D90 shots are impressive. Maybe I should learn to shoot post-2.0 aperture =(
Last edited by muckymucky; 05-29-11 at 11:02 PM.
05-29-11, 11:10 PM
#7
Just smang it.

Join Date: Feb 2011
Location: Bellingham
Posts: 2,295
Bikes: Felt F1X, Trek 2300 Composite, Dawes Deadeye
Mentioned: 0 Post(s)
Tagged: 0 Thread(s)
Quoted: 20 Post(s)
Likes: 0
Liked 1 Time
in
1 Post
I've never done the electrical tape underwrap before and I avoid self adhesive bar tape because of the mess it leaves. My bar tape has been getting frumpy so I might try again with one of those big ass harbor freight electrical tape packs.
05-29-11, 11:22 PM
#8
Chainstay Brake Mafia
Join Date: Mar 2011
Location: California
Posts: 6,007
Mentioned: 5 Post(s)
Tagged: 0 Thread(s)
Quoted: 16 Post(s)
Likes: 0
Liked 11 Times
in
10 Posts
if you wrap the bars tightly you don't need to use electrical tape on the inside.. i actually find it easier to wrap bars without any sticky tape at all. when i first started wrapping bars i would wrap them pretty loose but now i pull it tight as possible which is hard to do with the sticky tape
also if you wrap from the stem to ends of the bar you don't need to use electrical tape anywhere.. though depending on the bike and color scheme it might look better. I wrapped my ironman's bars from the center out, but then added some electrical tape purely for cosmetics
also if you wrap from the stem to ends of the bar you don't need to use electrical tape anywhere.. though depending on the bike and color scheme it might look better. I wrapped my ironman's bars from the center out, but then added some electrical tape purely for cosmetics
05-30-11, 02:43 AM
#9
GONE~
Join Date: Apr 2010
Posts: 6,747
Mentioned: 0 Post(s)
Tagged: 0 Thread(s)
Quoted: 1 Post(s)
Likes: 0
Liked 0 Times
in
0 Posts
05-30-11, 02:46 AM
#10
snob
Join Date: Jul 2009
Location: Vienna
Posts: 1,178
Mentioned: 0 Post(s)
Tagged: 0 Thread(s)
Quoted: 0 Post(s)
Likes: 0
Liked 1 Time
in
1 Post
If I put electrical tape with the sticky side upwards under the bartape, doesn't the tape slip or something? Or do you use double-sticky tape? I always put the bartape directly on the bars, but I'm willing to learn if there's a better way to do it.


 05-30-11, 03:02 AM
#14
Chainstay Brake Mafia
Join Date: Mar 2011
Location: California
Posts: 6,007
Mentioned: 5 Post(s)
Tagged: 0 Thread(s)
Quoted: 16 Post(s)
Likes: 0
Liked 11 Times
in
10 Posts
maybe you wrapped it the "wrong" way? i assume you know that you gotta wrap it so that when you pull on the bars your hand rotates it in a way which tightens the tape.  i will tighten it up as i wrap to make sure it's not slipping, but now that i pull the tape super tight it doesn't slip at all
i will tighten it up as i wrap to make sure it's not slipping, but now that i pull the tape super tight it doesn't slip at all
07-02-11, 02:35 AM
#16
Senior Member
Join Date: Jun 2002
Location: San Jose, CA
Posts: 3,691
Bikes: Too many bikes, too little time to ride
Mentioned: 2 Post(s)
Tagged: 0 Thread(s)
Quoted: 430 Post(s)
Liked 460 Times
in
318 Posts
Never tried Microtex, is that less stretchy than traditional cork wrap? I now reverse-wrap all of my bars. My only complaint is that the tape now goes against the skins at the "elbows" of the bars.
07-02-11, 02:36 AM
#17
Senior Member
Join Date: Jun 2002
Location: San Jose, CA
Posts: 3,691
Bikes: Too many bikes, too little time to ride
Mentioned: 2 Post(s)
Tagged: 0 Thread(s)
Quoted: 430 Post(s)
Liked 460 Times
in
318 Posts
@the OP: Nice tutorial with photos. Probably a few more steps than necessary but well done nonetheless.
07-02-11, 03:22 AM
#18
cowboy, steel horse, etc

Join Date: Sep 2008
Location: The hot spot.
Posts: 44,836
Bikes: everywhere
Mentioned: 71 Post(s)
Tagged: 1 Thread(s)
Quoted: 12768 Post(s)
Liked 7,683 Times
in
4,078 Posts
I never grease stems but I definitely grease stem bolts. Sticky side up electrical tape under the bar tape makes little sense to me.
Nice wrap job, though.
Nice wrap job, though.
07-02-11, 03:48 AM
#19
GONE~
Join Date: Apr 2010
Posts: 6,747
Mentioned: 0 Post(s)
Tagged: 0 Thread(s)
Quoted: 1 Post(s)
Likes: 0
Liked 0 Times
in
0 Posts
They do not stretch very well and I've snapped them once when I was tugging to hard.
07-02-11, 04:26 AM
#20

Foward Leaning Attitude

Join Date: Mar 2005
Location: RHODE-MF-ISLAND
Posts: 851
Mentioned: 0 Post(s)
Tagged: 0 Thread(s)
Quoted: 0 Post(s)
Likes: 0
Liked 0 Times
in
0 Posts
couple of things here irking me. I can appreciate the effort here and applaud you on the time taken to demonstrate for everyone, so don't take this as me trolling about here.
save some electrical tape trees, they are in short supply (you only need a small amount to hold the cable down, the bar tape does the work here) if you wrap the tape tight enough it will never slip and it won't look lumpy around the bends in the bars either
This is about as simple as it needs to be, should take about 3 min a side.
https://youtu.be/WtZ16XM2wSY


