


Custom, handmade or DIY touring gear
 05-12-09, 10:04 PM
#26
Member
Join Date: Apr 2009
Location: Wilson NC
Posts: 45
Bikes: 09 Giant Defy 3
Mentioned: 0 Post(s)
Tagged: 0 Thread(s)
Quoted: 0 Post(s)
Likes: 0
Liked 0 Times
in
0 Posts

 05-14-09, 11:30 AM
#27
member
Join Date: Feb 2008
Location: Ontario, Canada
Posts: 140
Mentioned: 0 Post(s)
Tagged: 0 Thread(s)
Quoted: 1 Post(s)
Likes: 0
Liked 0 Times
in
0 Posts
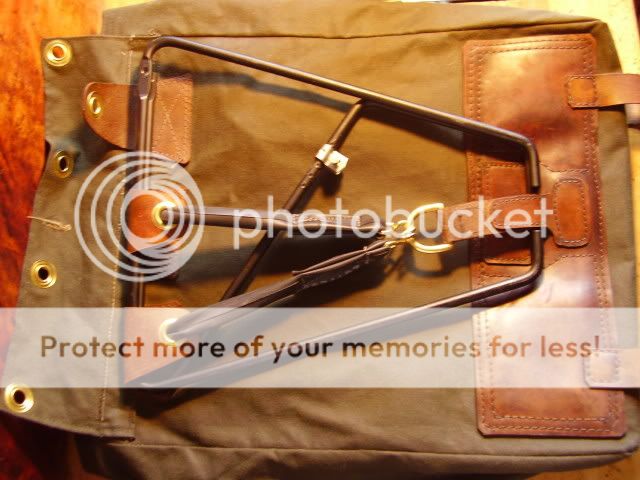
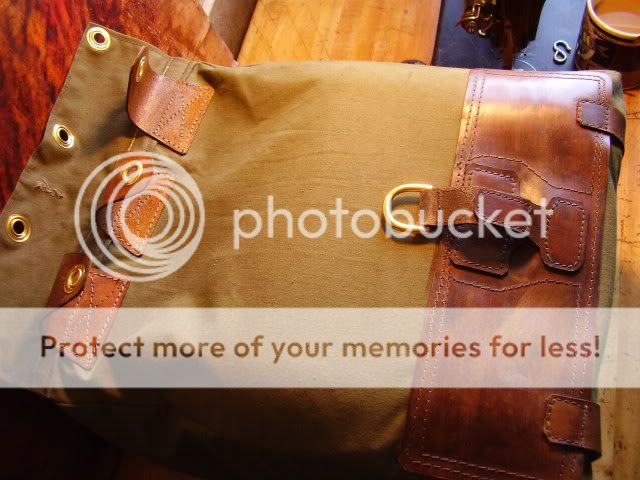
I made these panniers (with kind help) and the racks.
Also made a 1 L fuel bottle holder, mirror attachment, a couple of brake boosters, and a secondary stem (not shown).
Also made a 1 L fuel bottle holder, mirror attachment, a couple of brake boosters, and a secondary stem (not shown).
05-14-09, 02:51 PM
#28
call me T.J.
Join Date: Jul 2008
Posts: 361
Bikes: trek 820
Mentioned: 0 Post(s)
Tagged: 0 Thread(s)
Quoted: 1 Post(s)
Likes: 0
Liked 0 Times
in
0 Posts
Nice looking bags!
Where did you find your reflective fabric? I've been able to find (plastic) reflective tape, but I haven't had much luck with reflective fabric.
Where did you find your reflective fabric? I've been able to find (plastic) reflective tape, but I haven't had much luck with reflective fabric.
05-15-09, 07:18 AM
#29
Senior Member
Join Date: Aug 2008
Location: Downtown Detroit, Mi.
Posts: 781
Bikes: Surly LHT, 94 Cannondale track bike, 80's Cannondale track bike, 60's Raleigh 5 speed, 1888 Eldridge wood wheel track bike and my old 76 DG BMX from when I was a kid.
Mentioned: 0 Post(s)
Tagged: 0 Thread(s)
Quoted: 0 Post(s)
Likes: 0
Liked 0 Times
in
0 Posts
Hi, I don't take the best pictures but here you go.
The bags are soft and hang well when empty or 1/2 loaded and the thick leather helps this so they have no need for side compression straps. They just hang very well and flaten out when empty. The leather on the bottom helps protect the bags, your gear and your bikes chain stays and keeps the bag uniform when not loaded for day to day commuting. I can do special need mounting if needed, Ron.
05-15-09, 07:33 AM
#30
Senior Member
Join Date: Aug 2008
Location: Downtown Detroit, Mi.
Posts: 781
Bikes: Surly LHT, 94 Cannondale track bike, 80's Cannondale track bike, 60's Raleigh 5 speed, 1888 Eldridge wood wheel track bike and my old 76 DG BMX from when I was a kid.
Mentioned: 0 Post(s)
Tagged: 0 Thread(s)
Quoted: 0 Post(s)
Likes: 0
Liked 0 Times
in
0 Posts
Hey thanks!
Tha bar tape is brooks leather and I did the chainstay and the pump handle. I ordered that pump to fit my frame but it was over 1 and 1/2" to short when I got it! So rather than sending it back I cut the plastick handle and used a chunk of an old handle bar to make it longer and covered it with leather. If I could make the body look like wood it would be the ultimate "Fred" pump
 !
05-15-09, 07:43 PM
!
05-15-09, 07:43 PM
#31
member
Join Date: Feb 2008
Location: Ontario, Canada
Posts: 140
Mentioned: 0 Post(s)
Tagged: 0 Thread(s)
Quoted: 1 Post(s)
Likes: 0
Liked 0 Times
in
0 Posts
I bought the reflective tape from www.seattlefabrics.com/products.html They also carry actual reflective fabric by the yard too. Neat stuff.
Also check: Outdoor Wilderness Fabrics www.owfinc.com
Quest Outfitters(www.questoutfitters.com)
Cheers
Last edited by thecrunge; 05-15-09 at 07:48 PM.
06-24-09, 11:44 PM
#32
Senior Member
Join Date: Dec 2007
Location: Boston, MA
Posts: 287
Mentioned: 0 Post(s)
Tagged: 0 Thread(s)
Quoted: 8 Post(s)
Likes: 0
Liked 0 Times
in
0 Posts
So I finally got around to building a pair of trashcan panniers. Each can is a plain 21 quart office trash bin that cost $5 each. Spent another $10 on hardware and reflectors from Home Depot. So $20 for two bucket panniers.
Again, the idea for these came from:
https://www.crazyguyonabike.com/doc/?...doc_id=161&v=0
For the mounting system I borrowed from these bucket panniers:
https://www.bikeforums.net/commuting/400560-easy-built-bucket-panniers.html
I'll eventually get around to a more detailed instructable but building them was pretty straightforward.
Here's the complete pannier
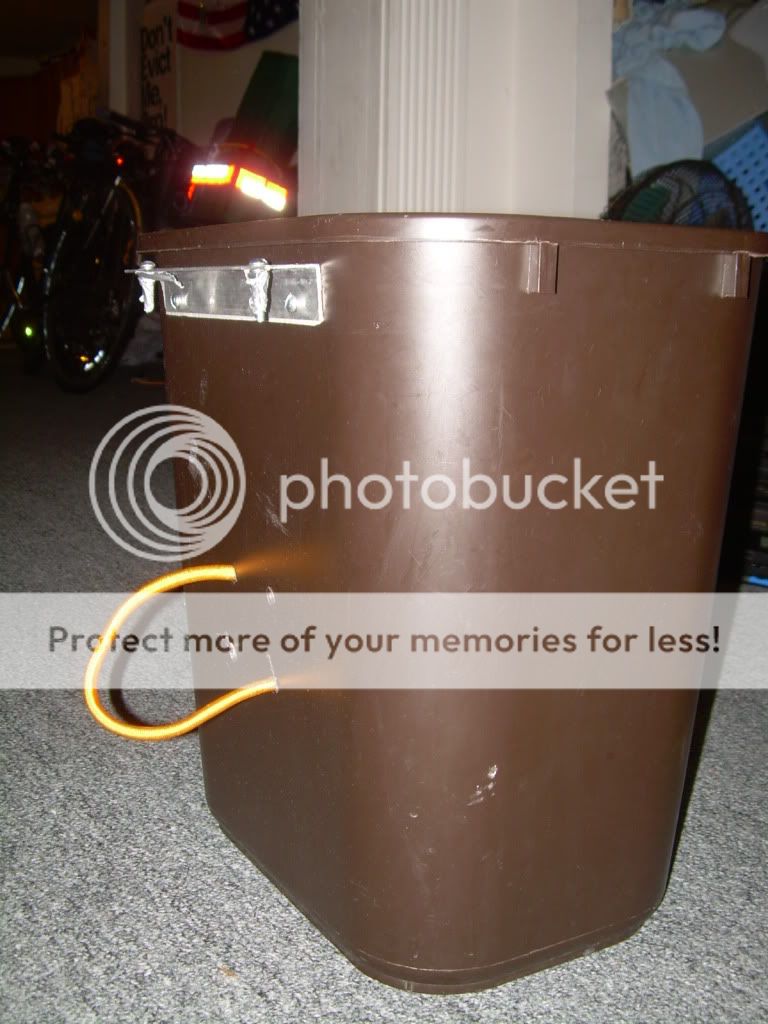
A close up of the mount. I wrapped the bolts with duct tape after they scratched the paint off my rack.

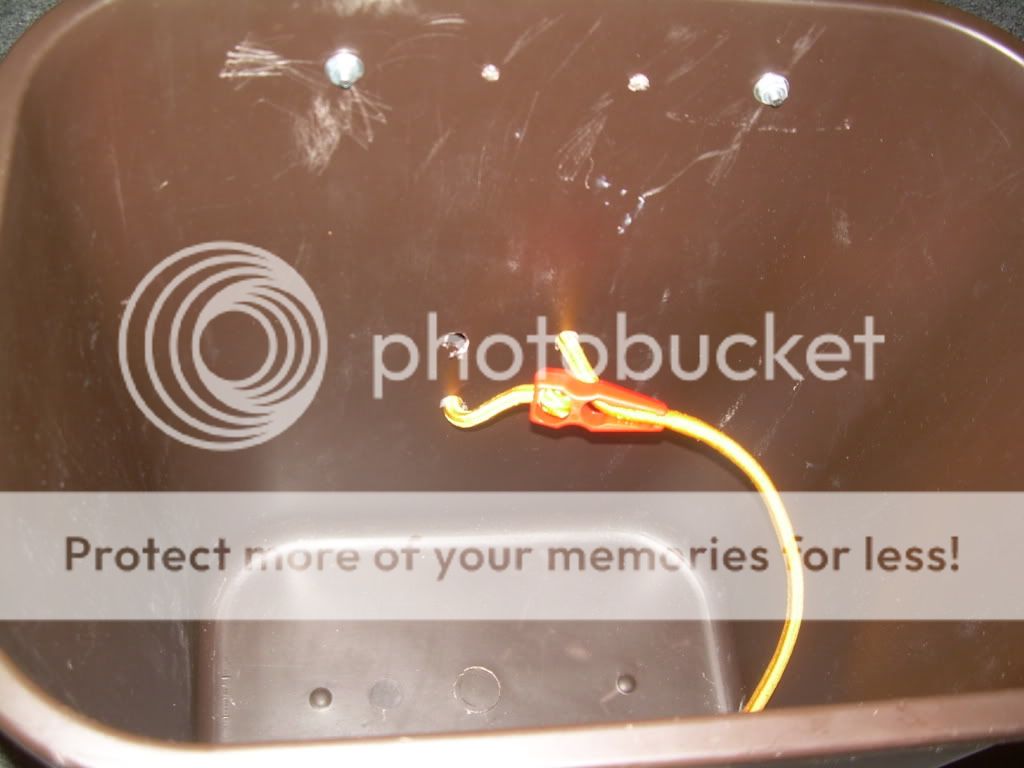
From the inside. I drilled a bunch of holes I didn't use. The bungee came with a kit of bungees, which I wrap around the bottom of my rack and clip it in the inside to keep the bin in place.
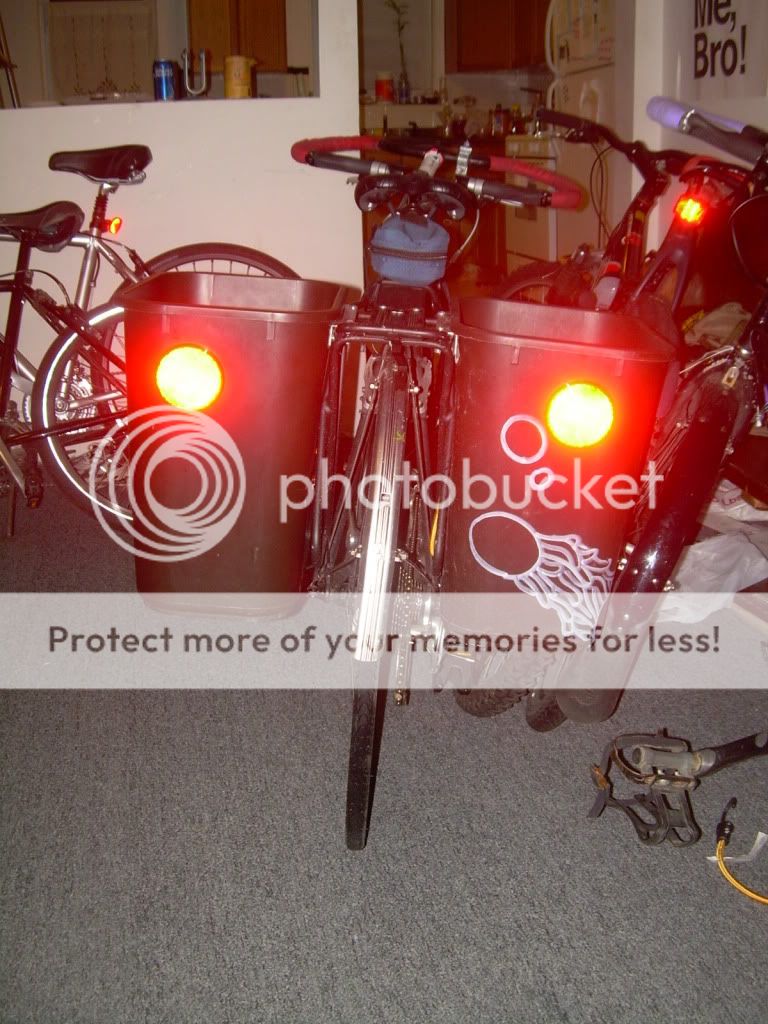
After slapping on the reflectors and letter my brother decorate one, this is what it looks like attached from the rear.
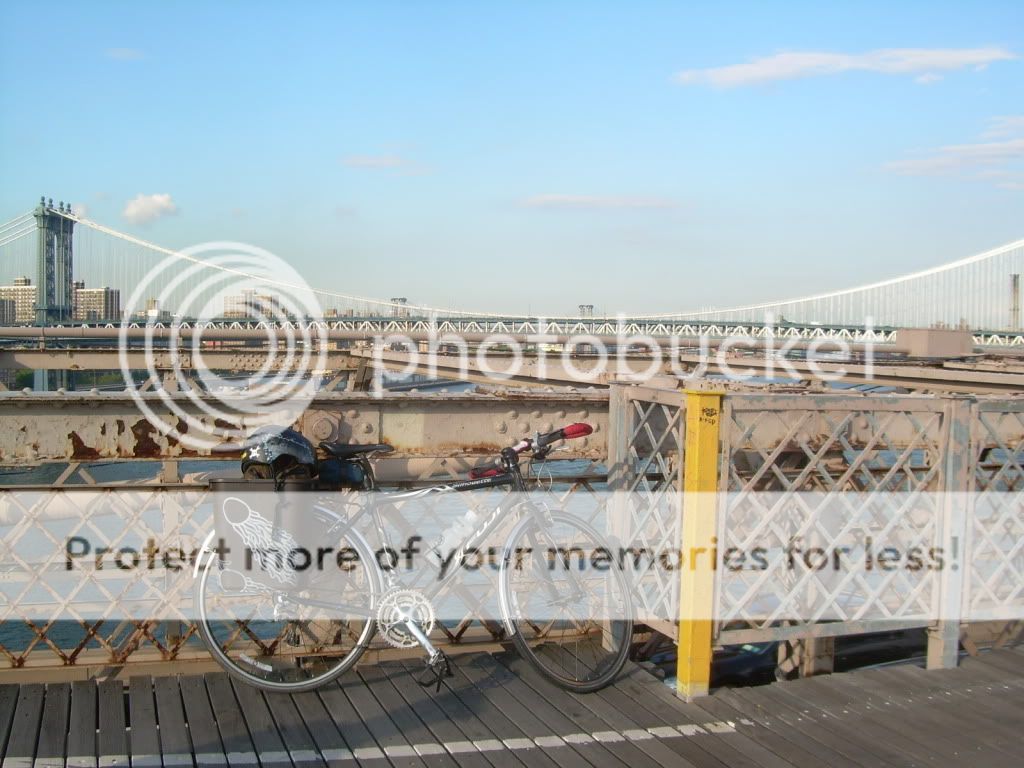
and here it is in action on the brooklyn bridge.
I haven't been touring with them yet, but I've been carrying all kinds of junk with them everywhere for the past few weeks. Next on the list of things to do is fashion a rain fly.
Again, the idea for these came from:
https://www.crazyguyonabike.com/doc/?...doc_id=161&v=0
For the mounting system I borrowed from these bucket panniers:
https://www.bikeforums.net/commuting/400560-easy-built-bucket-panniers.html
I'll eventually get around to a more detailed instructable but building them was pretty straightforward.
Here's the complete pannier
A close up of the mount. I wrapped the bolts with duct tape after they scratched the paint off my rack.
From the inside. I drilled a bunch of holes I didn't use. The bungee came with a kit of bungees, which I wrap around the bottom of my rack and clip it in the inside to keep the bin in place.
After slapping on the reflectors and letter my brother decorate one, this is what it looks like attached from the rear.
and here it is in action on the brooklyn bridge.
I haven't been touring with them yet, but I've been carrying all kinds of junk with them everywhere for the past few weeks. Next on the list of things to do is fashion a rain fly.
06-26-09, 05:20 AM
#33
Member
Join Date: Nov 2008
Location: France and UK
Posts: 46
Bikes: check my signature
Mentioned: 0 Post(s)
Tagged: 0 Thread(s)
Quoted: 0 Post(s)
Likes: 0
Liked 1 Time
in
1 Post
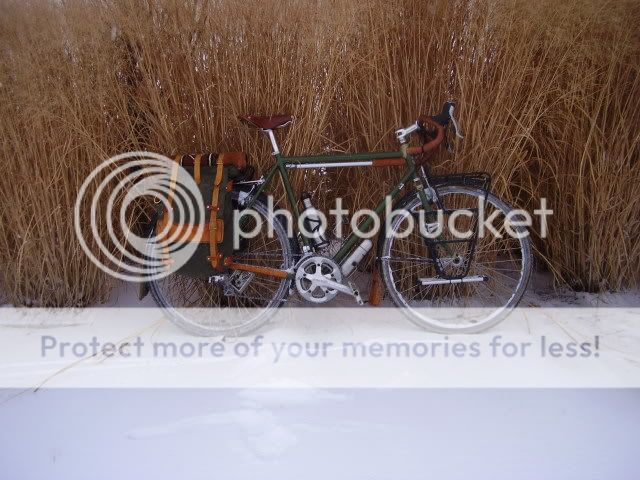
Here's what I did to my luggage rack in order to use big soft motorcycle panniers.
a) shifting the lower rackmounts backwards with two small metal plates
b) fitting two bigger metal plates on the sides of the rack to support the bottom of the panniers and avoid them rubbing against the wheels
c) extending the platform of the rack with, once again, metal bits to allow a rearward position of the panniers and away from my heels.
It is really low tech but it works perfectly for me. Since I did it I rode hundreds of kilometers on rough roads only having once in a while to check of the tightness of the screws, it performed just as I wanted. I noticed no strange feeling from the bike and no damage to the frame as the vibrations are absorbed by the small silver plates.
09-15-09, 04:34 PM
#34
Senior Member
Join Date: Jan 2007
Location: Seattle, WA
Posts: 58
Bikes: S&S coupled Mercian King, 1970 Gitane Tandem, Yuba Mundo, Surly LHT based 3-speed citybike
Mentioned: 0 Post(s)
Tagged: 0 Thread(s)
Quoted: 4 Post(s)
Likes: 0
Liked 0 Times
in
0 Posts
I've made a few bags, one handlebar bag in a similar style to MechanicalRon's, but far less attractive, and one that is basically a stuff sack with a reinforced bottom to sit on my front carrier and a hood-top with a vinyl map case.
I'd like to make some drybag style waterproof racktop bags with anchor straps which would double as compression straps. With mesh/bungee top pockets, it'd be a great place to put the tent or sleep kit, and allow raingear or a wet tent to strap on top, to avoid wetting the sleep kit. With a map case it would make an excellent front bag for my trekking bike.
I'd like to make some drybag style waterproof racktop bags with anchor straps which would double as compression straps. With mesh/bungee top pockets, it'd be a great place to put the tent or sleep kit, and allow raingear or a wet tent to strap on top, to avoid wetting the sleep kit. With a map case it would make an excellent front bag for my trekking bike.
09-18-09, 12:47 PM
#35
Senior Member
Join Date: Feb 2009
Location: Eugene, OR
Posts: 56
Mentioned: 0 Post(s)
Tagged: 0 Thread(s)
Quoted: 0 Post(s)
Likes: 0
Liked 0 Times
in
0 Posts
Made some pretty durable, waterproof bags for only about ten bucks. They have gone on three big trips through spring and summer and held up very well. They are a thick cotton canvas that starches when wet, with a plastic liner sewn in. I have been in downpours in BC and the rain of the southern Oregon coast in March and my stuff has still been dry. The base is corrugated plastic. I highly recommend this system or pattern to the people out there looking for good inexpensive alternatives. There are various pictures of the bike and bags through the link.
https://www.flickr.com/photos/42639192@N03/3931481865/
https://www.flickr.com/photos/42639192@N03/3931481865/
