


Vintage MTB cantilever brake setup - need help
 01-08-17, 10:54 AM
#1
Senior Member
Thread Starter
Join Date: Oct 2015
Posts: 201
Mentioned: 5 Post(s)
Tagged: 0 Thread(s)
Quoted: 72 Post(s)
Likes: 0
Liked 0 Times
in
0 Posts
Vintage MTB cantilever brake setup - need help
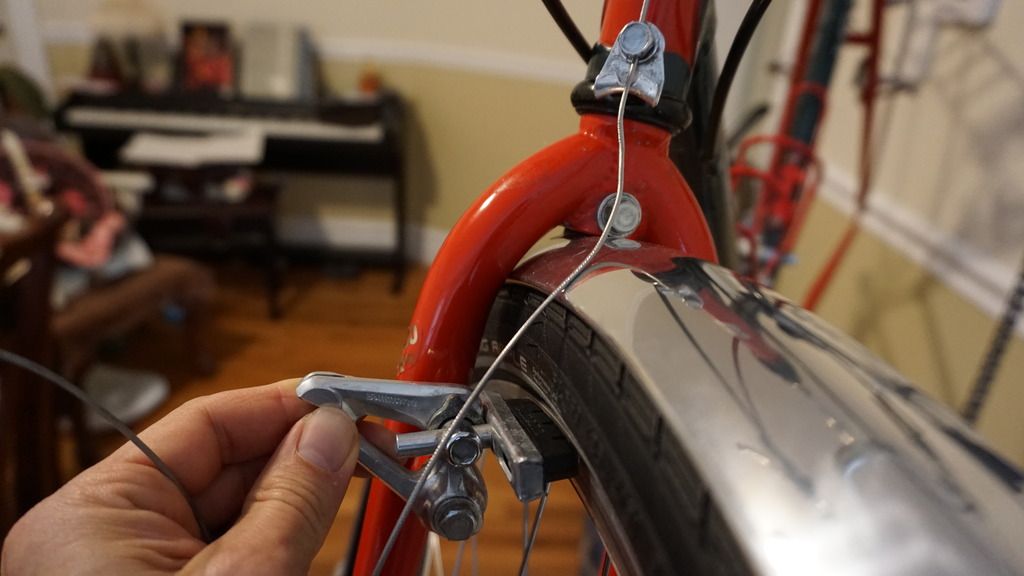
Trying to set up the brakes on my 1986 Bridgestone MB-2. From what little I know of cantilever brakes, I should:
1) Start with the straddle wire at about a 45 degree angle
2) Bring the arms so they are parallel to the ground and the pads are almost touching the rim
3) Lubricate the bosses that the arms sit on, and loctite the screw that holds them on
That's about all I know...
My questions are:
1) Is the straddle wire set up properly in the rear?
2) It looks like I will need a new straddle wire in front, as the one that came with it is a bit too short. Does anyone have a link to a new straddle wire?
3) How do I keep the straddle wire from shifting over to one side? Should I ditch the whole straddle wire thing and go with something more modern? (Trying to keep the vintage look though)
4) How do I keep the brake pads even on both sides of the rim? There is no adjusting screw to adjust spring tension.
Thanks!
 01-08-17, 11:09 AM
#2

Senior Member

Join Date: Feb 2004
Location: St Peters, Missouri
Posts: 30,225
Bikes: Catrike 559 I own some others but they don't get ridden very much.
Mentioned: 16 Post(s)
Tagged: 0 Thread(s)
Quoted: 1572 Post(s)
Liked 643 Times
in
364 Posts
Not the easiest brakes to set up. What are you trying to accomplish?
If your goal is to return the bike to stock, I think that you are doing the right things so just struggle through it. I think that it has more to do with persistence and experience to develop the necessary technique.
If you are setting up the bike for regular use, and the return spring anchor holes are on the right side of the canty studs, I'd upgrade the brakes to something that uses threaded brake pads.
__________________
My greatest fear is all of my kids standing around my coffin and talking about "how sensible" dad was.
My greatest fear is all of my kids standing around my coffin and talking about "how sensible" dad was.
01-08-17, 11:26 AM
#3
Banned
I'm better at working on stuff like that in person ..
Like RG , keep at it.. the ring washer with the tab on it is tapered.. that is your toe in.
My Touring rig, uses that type hardware, though an even more complicated installation.
[Scott-Peterson SE]
Like RG , keep at it.. the ring washer with the tab on it is tapered.. that is your toe in.
My Touring rig, uses that type hardware, though an even more complicated installation.
[Scott-Peterson SE]
01-08-17, 11:48 AM
#4
Mid Tour!

Join Date: Oct 2016
Location: Soon back in Edmonton Alberta
Posts: 569
Bikes: Marin Muirwoods Racked out for this years Tour, Norco Indi 4 racked out from last years tour, Giant Defi II for week-end ripps.
Mentioned: 2 Post(s)
Tagged: 0 Thread(s)
Quoted: 152 Post(s)
Likes: 0
Liked 4 Times
in
3 Posts
Enjoy.
01-08-17, 11:54 AM
#5
Senior Member
Join Date: Feb 2012
Location: Rochester, NY
Posts: 18,089
Bikes: Stewart S&S coupled sport tourer, Stewart Sunday light, Stewart Commuting, Stewart Touring, Co Motion Tandem, Stewart 3-Spd, Stewart Track, Fuji Finest, Mongoose Tomac ATB, GT Bravado ATB, JCP Folder, Stewart 650B ATB
Mentioned: 0 Post(s)
Tagged: 0 Thread(s)
Quoted: 4206 Post(s)
Liked 3,871 Times
in
2,314 Posts
These Shimano cantis can be very nice brakes with good set up. Your guidelines are a good start to best set up.
One trick I sometimes do is to remove the canti from the post and pull it's spring out. Then replace the cani on the post and do initial pad and cable set up. Without the spring tension to fight against I find working with the various bits to be easier. I like my pads' smooth mounting shafts to be very close to parallel to the ground (or square to the rim's brake track). By rotating the wedged "washer" toe in or out can be set. I prefer a traditional straddle cable over the link wire method as you have more adjustability to play with. The straddle wire's fit in the pull up yoke will have some friction and the yoke can be slightly placed off center on the straddle cable to effect pad/rim centering. Pad/rim centering can also be dealt with by moving the pads in or out on their mounts (the eye bolts). Also one can increase or decrease the spring tension by over rotating an arm in the right direction a bit.
Until the next gen of Shimano cantis came out I thought this version was the best on the market. I still have a set on one of my bikes. I would pick this version over the "Low profile" versions that still are available these days. Andy.
01-08-17, 11:59 AM
#6
Senior Member

Join Date: Aug 2007
Location: WI
Posts: 905
Mentioned: 0 Post(s)
Tagged: 0 Thread(s)
Quoted: 2 Post(s)
Likes: 0
Liked 11 Times
in
10 Posts
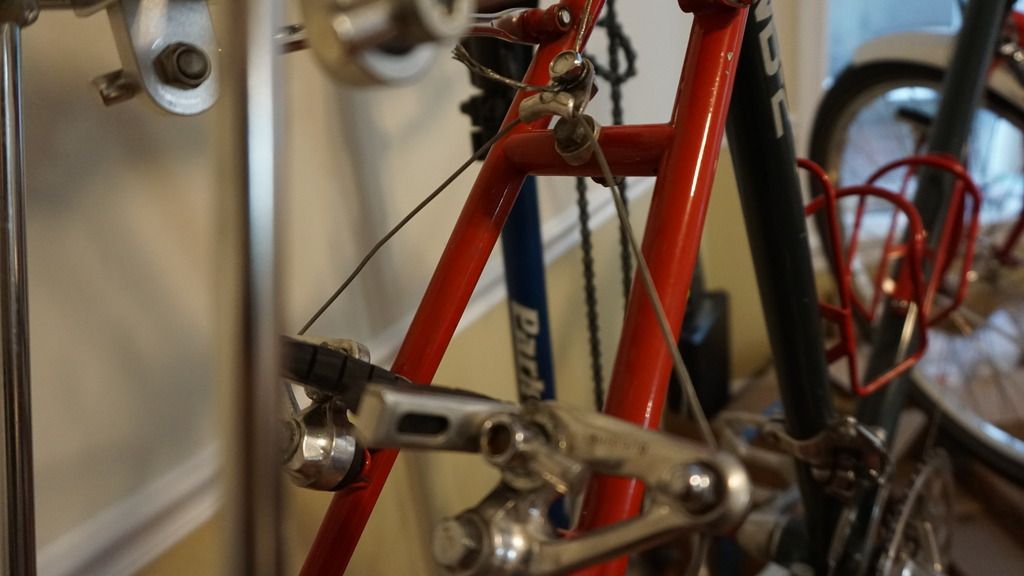
Here are a couple pics of these brakes installed. I'd flip the straddle hangers around.
I may have an extra cable if you need one, but a regular brake cable would likely get the job done.
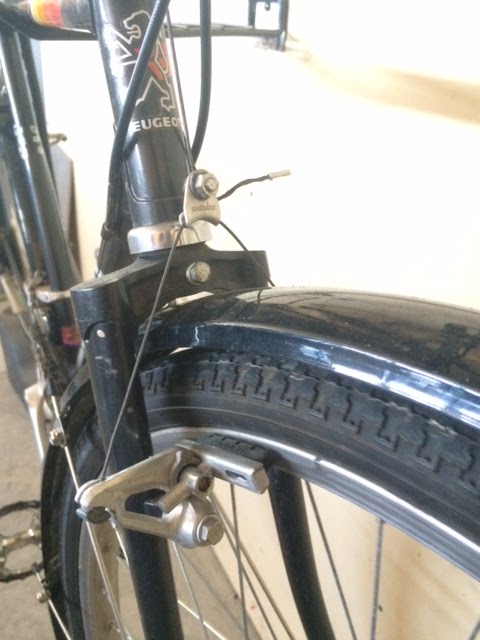
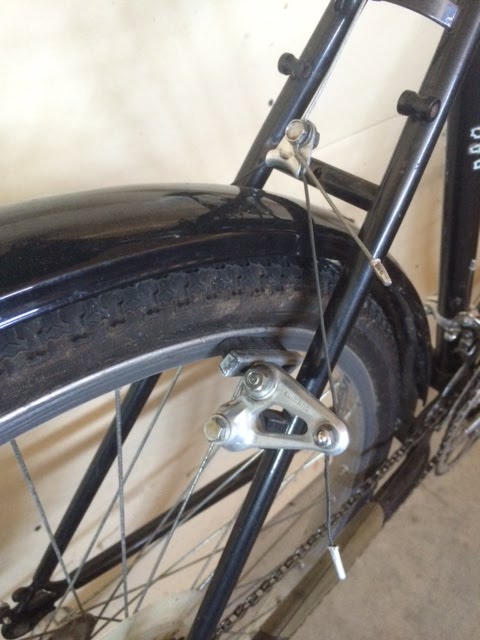
I may have an extra cable if you need one, but a regular brake cable would likely get the job done.
01-08-17, 12:04 PM
#7
Senior Member
Join Date: Aug 2007
Location: WI
Posts: 905
Mentioned: 0 Post(s)
Tagged: 0 Thread(s)
Quoted: 2 Post(s)
Likes: 0
Liked 11 Times
in
10 Posts
3 & 4 - If they aren't sitting evenly then I'd make sure both are moving smoothly on the post. Also a kinked straddle cable could cause uneven tension on one side or the other, or it could cause the cable to not center well in the hanger.
01-08-17, 12:20 PM
#8
Banned
01-08-17, 12:27 PM
#10
Mostly harmless �

Join Date: Nov 2010
Location: Novi Sad
Posts: 4,430
Bikes: Heavy, with friction shifters
Mentioned: 22 Post(s)
Tagged: 0 Thread(s)
Quoted: 1107 Post(s)
Liked 216 Times
in
130 Posts
It's a bit of trial and error. I tried to make these "instructions" as user friendly as possible, not sure if I've accomplished that:
Cantilever brake adjustment - Cycle Gremlin
Cantilever brake adjustment - Cycle Gremlin
01-08-17, 01:42 PM
#11
Senior Member

Join Date: Sep 2010
Location: Roswell, GA
Posts: 8,319
Bikes: '93 Trek 750, '92 Schwinn Crisscross, '93 Mongoose Alta
Mentioned: 30 Post(s)
Tagged: 0 Thread(s)
Quoted: 1438 Post(s)
Liked 1,092 Times
in
723 Posts
01-08-17, 02:47 PM
#12
Senior Member

I have an old Nishiki Ariel with the same brakes, As previously stated, these brakes are not the easiest to set up but once adjusted are pretty darn powerful brakes.
Two things that are key are install two new cables, housing and get two new yoke cables and getting the pads to hit the rim correctly. Don't short-cut on the cables.
You're on the right track for the initial set-up. What you'll want to do is clamp the pads lightly against the rim with a large C-clamp. I modified an old Park spring-type brake third hand to do this but a C-clamp will work also. Or you can have a buddy hold them closed to the rim. Adjust the pads so that they hit the rim dead on and the face of the pad hits the rim flat. This sometimes isn't easy and it takes some trial and error. Once done, the rest of the adjustments are pretty straight forward.

