


Restoring 70's
 05-22-17, 10:14 PM
#26

Senior Member

Join Date: Sep 2005
Location: Oakland, CA
Posts: 3,265
Bikes: '82 Univega Competizione, '72 Motobecane Grand Record, '83 Mercian KOM Touring, '85 Univega Alpina Uno, '76 Eisentraut Limited
Mentioned: 57 Post(s)
Tagged: 0 Thread(s)
Quoted: 1088 Post(s)
Liked 1,205 Times
in
701 Posts
You'll need more penetrating oil - it needs time to work into the contact area. You don't need to immerse it, but you should let it pool if you can so it can sit and work itself down.
Replacements of varying quality can be bought on ebay, but I got mine through Bikesmith. His website has a good explanation of how they're made and the levels of quality, and also counsels you to take careful note of the diameter (8mm vs 9mm vs 9.5mm). Even if it's damaged, save the old pin for reference, as you'll need to closely match the taper (though making sure the new pins match each other is more important than making them exactly match the old taper).
This is probably feeling a bit tedious, but it's really satisfying when you get it right...
Bikesmith page here: Bicycle Crank Cotters
 05-22-17, 10:44 PM
#27
Senior Member
Join Date: Sep 2005
Location: Oakland, CA
Posts: 3,265
Bikes: '82 Univega Competizione, '72 Motobecane Grand Record, '83 Mercian KOM Touring, '85 Univega Alpina Uno, '76 Eisentraut Limited
Mentioned: 57 Post(s)
Tagged: 0 Thread(s)
Quoted: 1088 Post(s)
Liked 1,205 Times
in
701 Posts
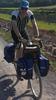
I just watched the video by Bikeman4u that you posted above, and he was incredibly lucky with that particular crank. I've never had one slip out that easily before. You'll be surprised at the amount of force it takes to dislodge one of these things. My right shoulder and back were a little tight the day after I got this one out (cotters in upper left of pic), and I considered these to be pretty easy:

But again, it was satisfying:

But again, it was satisfying:
05-23-17, 09:38 AM
#28
Junior Member
Thread Starter
Join Date: May 2017
Posts: 24
Mentioned: 0 Post(s)
Tagged: 0 Thread(s)
Quoted: 7 Post(s)
Likes: 0
Liked 0 Times
in
0 Posts
This is probably feeling a bit tedious, but it's really satisfying when you get it right...
Bikesmith page here: Bicycle Crank Cotters
Bikesmith page here: Bicycle Crank Cotters
That site looks great, and just in case I found one that should work on Ebay. I would have just hated to sweat, swear and then be disappointed when no replacement could be found.
I think today is arm and shoulder day at the gym, I'm just going to back to the shop instead 😏.
05-23-17, 09:53 AM
#29
Senior Member
Join Date: May 2011
Location: Seattle WA
Posts: 2,841
Bikes: 2009 Handsome Devil, 1987 Trek 520 Cirrus, 1978 Motobecane Grand Touring, 1987 Nishiki Cresta GT, 1989 Specialized Allez Former bikes; 1986 Miyata Trail Runner, 1979 Miyata 912, 2011 VO Rando, 1999 Cannondale R800, 1986 Schwinn Passage
Mentioned: 72 Post(s)
Tagged: 0 Thread(s)
Quoted: 796 Post(s)
Liked 522 Times
in
367 Posts
It appears your bike would use the "adaptor claw" type of rear derailleur one that aligns with the drop out rather than screwing into a dedicated derailleur hanger, pretty standard on entry and mid level 10 speeds of that era, I would suggest find a local bike co-op that sells used parts or what I do with some of my builds is use the SunRace RD M10, not too expensive on Amazon, looks the vintage part and its brand new, I reuse the vintage/original parts when ever I can but sometimes you just need something new to get it all working. Someone may have already mentioned this but if you go to Sheldon Brown site he has a nice article on chain sizing that I have found helpful and lots of other great info too. Good luck with the build and have fun! Love seeing old steel get new life.
05-23-17, 09:59 AM
#30
Senior Member
Join Date: May 2011
Location: Seattle WA
Posts: 2,841
Bikes: 2009 Handsome Devil, 1987 Trek 520 Cirrus, 1978 Motobecane Grand Touring, 1987 Nishiki Cresta GT, 1989 Specialized Allez Former bikes; 1986 Miyata Trail Runner, 1979 Miyata 912, 2011 VO Rando, 1999 Cannondale R800, 1986 Schwinn Passage
Mentioned: 72 Post(s)
Tagged: 0 Thread(s)
Quoted: 796 Post(s)
Liked 522 Times
in
367 Posts
I literally destroyed a crank on one of my early rebuilds attempting to remove the cotters -after that I forked over the cash for a bikesmith cotter press, it wasn't cheap but I like rebuilding old bikes and it has more than paid for itself and its never failed to remove a cotter in the 10 or so times I have used it. If you can find a shop that works on old bikes it can sometimes pay to have them do it just to avoid the aggravation lol but yes it can be a good workout
05-23-17, 10:09 AM
#31
Friendship is Magic

Join Date: Nov 2010
Location: Sacramento, CA
Posts: 22,984
Bikes: old ones
Mentioned: 304 Post(s)
Tagged: 0 Thread(s)
Quoted: 26424 Post(s)
Liked 10,381 Times
in
7,209 Posts
.
...just an additional heads up: When you get to the part where you're reassembling the cranks, you often need to file the tapers on the cotters you buy to something similar to the taper on the old ones, so save at least one of them, and match the new ones accordingly.
Also, you press them in, don't try to pull them in using the fixing nuts or you will strip the threads before they are properly seated.
05-23-17, 10:54 AM
#32
Senior Member
Join Date: Sep 2005
Location: Oakland, CA
Posts: 3,265
Bikes: '82 Univega Competizione, '72 Motobecane Grand Record, '83 Mercian KOM Touring, '85 Univega Alpina Uno, '76 Eisentraut Limited
Mentioned: 57 Post(s)
Tagged: 0 Thread(s)
Quoted: 1088 Post(s)
Liked 1,205 Times
in
701 Posts
If I may, I'd suggest spending more time looking at those videos by RJ the Bike Guy -- I learned a lot from his concise, good quality videos, and I managed to do every bit of work on my recent (and first) restoration myself. Just as one of the great headaches is removing crank cotters (probably the hardest thing you'll tackle on this bike), one of the great joys is learning how much there is to learn about each component. Take your time. There is a lot of great information on these forums, too, which you can search using google. (Don't use this site's search function -- you'll often be disappointed.) And if it isn't obvious by now, we like to help, and we like to answer questions.
 Most of the regular posters on this site have decades more experience than I do...
05-23-17, 06:27 PM
Most of the regular posters on this site have decades more experience than I do...
05-23-17, 06:27 PM
#33
Junior Member
Thread Starter
Join Date: May 2017
Posts: 24
Mentioned: 0 Post(s)
Tagged: 0 Thread(s)
Quoted: 7 Post(s)
Likes: 0
Liked 0 Times
in
0 Posts
Big update:
*Firstly, excuse my pictures. I troubleshooted for about 20 minutes and could not figure out how to get anything else aside from thumbnails. If anyone knows what on earth I need to do, or which website has a forum share link for photos let me know*

This might be a little picture heavy, only because I think for the first time I can actually provide something to this website if anyone references this later. I am happy to announce that I have the bike completely stripped to the frame. Going to sandblast this bad boy this Saturday, which leaves me plenty of time to polish and order parts. First and foremost, new cranks....But here's a picture of the frame as it sits.

After watching what had to be hours of videos last night, I woke up today with a vengeance. It also helped that I figured out how I could get the crank out easily. I think my difficulty all along was that I wasn't supporting the bottom of the crank arm while I was messing with it (shout out to noobinsf, for that suggestion and the replacements online). So, because I don't have a proper bike workshop and had to deal with the pie plate getting in the way, I took a 2x4, drilled out a hole where the crank would invitably come out, and another one near the curvature of the pedal, so all the weight was able to rest on the flat part of the pedal, and zip tied it to the crank arm. Then, I simply set the frame on the wooden block, and clamped the bike itself to the support beam I had near by. From there I was able to use a long piece of steel and a hand-sledge, as well as a tie-rod separator (who said car and bike tools aren't interchangeable?) to finesse the crank out. Naturally the other side was incredibly easy, go figure.


Following that, I reassembled the derailleur after its nighttime Kerosene bath, and this baby looks prime. Got all the muck cleaned out, and honestly its like night and day. The rubber internal wheels would barely spin, now they're great. Hopefully this will alleviate the need to buy a new one. Also, since a few people have been mentioning the adapter claw, I believe I already have one. I simply left it out of the picture because I realize it was still attached to the frame of the bike. But if not, someone suggested a cheap one on Amazon I'd be happy to use in its place, but I want to try to use this first.

And finally, I removed the fork and all of those components simply once I realize how they were attached. One question though, this piece pictured came out when I disassembled everything and I did not have the opportunity to see where it went. Does anyone happen to know? I'm assuming that the pressure I needed to put on the quill stem may have dislodged this? I see the ridges in the side of the top of the fork, but I couldn't find any conical expander nut or anything that made sense. Anyone have any insight?

Thanks for all the help, I absolutely would not have gotten this far without it. I have a very small surprise I'm thinking I'll do after painting, so stay tuned.
*Firstly, excuse my pictures. I troubleshooted for about 20 minutes and could not figure out how to get anything else aside from thumbnails. If anyone knows what on earth I need to do, or which website has a forum share link for photos let me know*
This might be a little picture heavy, only because I think for the first time I can actually provide something to this website if anyone references this later. I am happy to announce that I have the bike completely stripped to the frame. Going to sandblast this bad boy this Saturday, which leaves me plenty of time to polish and order parts. First and foremost, new cranks....But here's a picture of the frame as it sits.
After watching what had to be hours of videos last night, I woke up today with a vengeance. It also helped that I figured out how I could get the crank out easily. I think my difficulty all along was that I wasn't supporting the bottom of the crank arm while I was messing with it (shout out to noobinsf, for that suggestion and the replacements online). So, because I don't have a proper bike workshop and had to deal with the pie plate getting in the way, I took a 2x4, drilled out a hole where the crank would invitably come out, and another one near the curvature of the pedal, so all the weight was able to rest on the flat part of the pedal, and zip tied it to the crank arm. Then, I simply set the frame on the wooden block, and clamped the bike itself to the support beam I had near by. From there I was able to use a long piece of steel and a hand-sledge, as well as a tie-rod separator (who said car and bike tools aren't interchangeable?) to finesse the crank out. Naturally the other side was incredibly easy, go figure.
Following that, I reassembled the derailleur after its nighttime Kerosene bath, and this baby looks prime. Got all the muck cleaned out, and honestly its like night and day. The rubber internal wheels would barely spin, now they're great. Hopefully this will alleviate the need to buy a new one. Also, since a few people have been mentioning the adapter claw, I believe I already have one. I simply left it out of the picture because I realize it was still attached to the frame of the bike. But if not, someone suggested a cheap one on Amazon I'd be happy to use in its place, but I want to try to use this first.
And finally, I removed the fork and all of those components simply once I realize how they were attached. One question though, this piece pictured came out when I disassembled everything and I did not have the opportunity to see where it went. Does anyone happen to know? I'm assuming that the pressure I needed to put on the quill stem may have dislodged this? I see the ridges in the side of the top of the fork, but I couldn't find any conical expander nut or anything that made sense. Anyone have any insight?
Thanks for all the help, I absolutely would not have gotten this far without it. I have a very small surprise I'm thinking I'll do after painting, so stay tuned.
05-23-17, 06:43 PM
#34
Senior Member
Join Date: Sep 2005
Location: Oakland, CA
Posts: 3,265
Bikes: '82 Univega Competizione, '72 Motobecane Grand Record, '83 Mercian KOM Touring, '85 Univega Alpina Uno, '76 Eisentraut Limited
Mentioned: 57 Post(s)
Tagged: 0 Thread(s)
Quoted: 1088 Post(s)
Liked 1,205 Times
in
701 Posts
Great work so far! One thing -- you'll want to remove the headset cups before sandblasting, otherwise they're likely to suffer damage, and you'd need to replace the headset. You can either make tools (I did not, but I know there are videos covering this) or use a tool at a local bike co-op. This is one where it makes sense to use the right tool (either homemade or borrowed) because the fit and quality of the headset can significantly affect ride quality.
05-24-17, 09:49 AM
#35
Senior Member
Join Date: Sep 2011
Location: Baltimore MD
Posts: 3,332
Bikes: '72 Motobecane Grand Record, '72 Gitane tandem, '72 Raleigh Super Course, '73 Raleigh Gran Sport, '73 Colnago Super, '76 Fiorelli Coppi, '78 Raleigh SBDU Team Pro, '78 Trek 930, '81 Holdsworth Special 650B, '86 Masi GC, ’94 Bridgestone RB-T
Mentioned: 67 Post(s)
Tagged: 0 Thread(s)
Quoted: 786 Post(s)
Liked 520 Times
in
281 Posts
Great to see progress.
Re upgrading cranks: Measure the width of the bottom bracket shell (on the frame) to determine if it is the proprietary Raleigh - 71 or 76 mm - or a more standard 68 mm. I have upgraded the cranks on old Raleighs by re-using the BB cups (which had the proprietary Raleigh 26 tpi threading), and fining a square taper BB spindle in the co-op drawer that matched the old spindle bearing race width. Then you have a wide variety of square-taper aluminum cranks to choose from. If it is 68mm, then the BB cups are also probably British standard threading - 1.370" X 24 tpi. In that case you can use whatever 68mm BB you like.
Info on Raleigh threading:
https://www.sheldonbrown.com/raleigh26.html
__________________
The man who dies with the most toys�is dead. - Rootboy
The man who dies with the most toys�is dead. - Rootboy
05-24-17, 05:41 PM
#36
Junior Member
Thread Starter
Join Date: May 2017
Posts: 24
Mentioned: 0 Post(s)
Tagged: 0 Thread(s)
Quoted: 7 Post(s)
Likes: 0
Liked 0 Times
in
0 Posts
Great to see progress.
Re upgrading cranks: Measure the width of the bottom bracket shell (on the frame) to determine if it is the proprietary Raleigh - 71 or 76 mm - or a more standard 68 mm. I have upgraded the cranks on old Raleighs by re-using the BB cups (which had the proprietary Raleigh 26 tpi threading), and fining a square taper BB spindle in the co-op drawer that matched the old spindle bearing race width. Then you have a wide variety of square-taper aluminum cranks to choose from. If it is 68mm, then the BB cups are also probably British standard threading - 1.370" X 24 tpi. In that case you can use whatever 68mm BB you like.
Info on Raleigh threading:
https://www.sheldonbrown.com/raleigh26.html
Re upgrading cranks: Measure the width of the bottom bracket shell (on the frame) to determine if it is the proprietary Raleigh - 71 or 76 mm - or a more standard 68 mm. I have upgraded the cranks on old Raleighs by re-using the BB cups (which had the proprietary Raleigh 26 tpi threading), and fining a square taper BB spindle in the co-op drawer that matched the old spindle bearing race width. Then you have a wide variety of square-taper aluminum cranks to choose from. If it is 68mm, then the BB cups are also probably British standard threading - 1.370" X 24 tpi. In that case you can use whatever 68mm BB you like.
Info on Raleigh threading:
https://www.sheldonbrown.com/raleigh26.html
05-24-17, 05:43 PM
#37
Junior Member
Thread Starter
Join Date: May 2017
Posts: 24
Mentioned: 0 Post(s)
Tagged: 0 Thread(s)
Quoted: 7 Post(s)
Likes: 0
Liked 0 Times
in
0 Posts
Great work so far! One thing -- you'll want to remove the headset cups before sandblasting, otherwise they're likely to suffer damage, and you'd need to replace the headset. You can either make tools (I did not, but I know there are videos covering this) or use a tool at a local bike co-op. This is one where it makes sense to use the right tool (either homemade or borrowed) because the fit and quality of the headset can significantly affect ride quality.
05-24-17, 06:00 PM
#38
Junior Member
"Do you know if that was natural corrosion that caused those to stay in, or simply friction, or do I need to use some sort of adhesive when I reattach them?"
Just friction. You'll need a press to get them back in, which is just some allthread, big washers, and a couple nuts. The really old school way would be to tap them back in with a hammer and a block of wood, but that is too likely to result in a wrecked headset or frame.
Just friction. You'll need a press to get them back in, which is just some allthread, big washers, and a couple nuts. The really old school way would be to tap them back in with a hammer and a block of wood, but that is too likely to result in a wrecked headset or frame.
05-24-17, 06:34 PM
#39
Junior Member
Thread Starter
Join Date: May 2017
Posts: 24
Mentioned: 0 Post(s)
Tagged: 0 Thread(s)
Quoted: 7 Post(s)
Likes: 0
Liked 0 Times
in
0 Posts
"Do you know if that was natural corrosion that caused those to stay in, or simply friction, or do I need to use some sort of adhesive when I reattach them?"
Just friction. You'll need a press to get them back in, which is just some allthread, big washers, and a couple nuts. The really old school way would be to tap them back in with a hammer and a block of wood, but that is too likely to result in a wrecked headset or frame.
Just friction. You'll need a press to get them back in, which is just some allthread, big washers, and a couple nuts. The really old school way would be to tap them back in with a hammer and a block of wood, but that is too likely to result in a wrecked headset or frame.
05-24-17, 09:06 PM
#40
Senior Member

Join Date: Nov 2011
Location: Port Angeles, WA
Posts: 7,922
Bikes: A green one, "Ragleigh," or something.
Mentioned: 194 Post(s)
Tagged: 0 Thread(s)
Quoted: 1627 Post(s)
Liked 630 Times
in
356 Posts
edit
__________________
● 1971 Grandis SL ● 1972 Lambert Grand Prix frankenbike ● 1972 Raleigh Super Course fixie ● 1973 Nishiki Semi-Pro ● 1979 Motobecane Grand Jubile ●1980 Apollo "Legnano" ● 1984 Peugeot Vagabond ● 1985 Shogun Prairie Breaker ● 1986 Merckx Super Corsa ● 1987 Schwinn Tempo ● 1988 Schwinn Voyageur ● 1989 Bottechia Team ADR replica ● 1990 Cannondale ST600 ● 1993 Technium RT600 ● 1996 Kona Lava Dome ●
● 1971 Grandis SL ● 1972 Lambert Grand Prix frankenbike ● 1972 Raleigh Super Course fixie ● 1973 Nishiki Semi-Pro ● 1979 Motobecane Grand Jubile ●1980 Apollo "Legnano" ● 1984 Peugeot Vagabond ● 1985 Shogun Prairie Breaker ● 1986 Merckx Super Corsa ● 1987 Schwinn Tempo ● 1988 Schwinn Voyageur ● 1989 Bottechia Team ADR replica ● 1990 Cannondale ST600 ● 1993 Technium RT600 ● 1996 Kona Lava Dome ●
Last edited by Lascauxcaveman; 05-24-17 at 09:10 PM.
05-24-17, 11:50 PM
#41
Senior Member
Join Date: Nov 2011
Location: Port Angeles, WA
Posts: 7,922
Bikes: A green one, "Ragleigh," or something.
Mentioned: 194 Post(s)
Tagged: 0 Thread(s)
Quoted: 1627 Post(s)
Liked 630 Times
in
356 Posts
But what do I know? I worked out my stuck cotters by backing off the nuts a turn, squirting them with PB Blaster and riding the bike about a mile. Injury or death may result.
")
__________________
● 1971 Grandis SL ● 1972 Lambert Grand Prix frankenbike ● 1972 Raleigh Super Course fixie ● 1973 Nishiki Semi-Pro ● 1979 Motobecane Grand Jubile ●1980 Apollo "Legnano" ● 1984 Peugeot Vagabond ● 1985 Shogun Prairie Breaker ● 1986 Merckx Super Corsa ● 1987 Schwinn Tempo ● 1988 Schwinn Voyageur ● 1989 Bottechia Team ADR replica ● 1990 Cannondale ST600 ● 1993 Technium RT600 ● 1996 Kona Lava Dome ●
● 1971 Grandis SL ● 1972 Lambert Grand Prix frankenbike ● 1972 Raleigh Super Course fixie ● 1973 Nishiki Semi-Pro ● 1979 Motobecane Grand Jubile ●1980 Apollo "Legnano" ● 1984 Peugeot Vagabond ● 1985 Shogun Prairie Breaker ● 1986 Merckx Super Corsa ● 1987 Schwinn Tempo ● 1988 Schwinn Voyageur ● 1989 Bottechia Team ADR replica ● 1990 Cannondale ST600 ● 1993 Technium RT600 ● 1996 Kona Lava Dome ●
Last edited by Lascauxcaveman; 05-25-17 at 12:21 AM.
05-25-17, 06:09 AM
#42
Senior Member
Join Date: Sep 2011
Location: Baltimore MD
Posts: 3,332
Bikes: '72 Motobecane Grand Record, '72 Gitane tandem, '72 Raleigh Super Course, '73 Raleigh Gran Sport, '73 Colnago Super, '76 Fiorelli Coppi, '78 Raleigh SBDU Team Pro, '78 Trek 930, '81 Holdsworth Special 650B, '86 Masi GC, ’94 Bridgestone RB-T
Mentioned: 67 Post(s)
Tagged: 0 Thread(s)
Quoted: 786 Post(s)
Liked 520 Times
in
281 Posts
I've only done this operation 5 or 6 times, but that's how I did it each time. Haven't injured a headtube collar or headset seat yet. It does help to prep the collar with liberal sanding and de-burring plus grease before you pound that sucker in. IMHO, that's all it really takes. The technical term is "interference fit," and the idea is to reduce the interference to a reasonable level before you bang it all together.
__________________
The man who dies with the most toys�is dead. - Rootboy
The man who dies with the most toys�is dead. - Rootboy
05-25-17, 11:11 AM
#43
Senior Member
Join Date: Sep 2005
Location: Oakland, CA
Posts: 3,265
Bikes: '82 Univega Competizione, '72 Motobecane Grand Record, '83 Mercian KOM Touring, '85 Univega Alpina Uno, '76 Eisentraut Limited
Mentioned: 57 Post(s)
Tagged: 0 Thread(s)
Quoted: 1088 Post(s)
Liked 1,205 Times
in
701 Posts
 05-25-17, 01:57 PM
#44
Junior Member
Thread Starter
Join Date: May 2017
Posts: 24
Mentioned: 0 Post(s)
Tagged: 0 Thread(s)
Quoted: 7 Post(s)
Likes: 0
Liked 0 Times
in
0 Posts

