1960's Raleigh "Rough"storation (w/ Pics)
 04-28-12, 08:37 PM
#1
Senior Member
Thread Starter
Join Date: Aug 2010
Posts: 263
Mentioned: 0 Post(s)
Tagged: 0 Thread(s)
Quoted: 0 Post(s)
Likes: 0
Liked 1 Time
in
1 Post
1960's Raleigh "Rough"storation (w/ Pics)
Hello Folks,
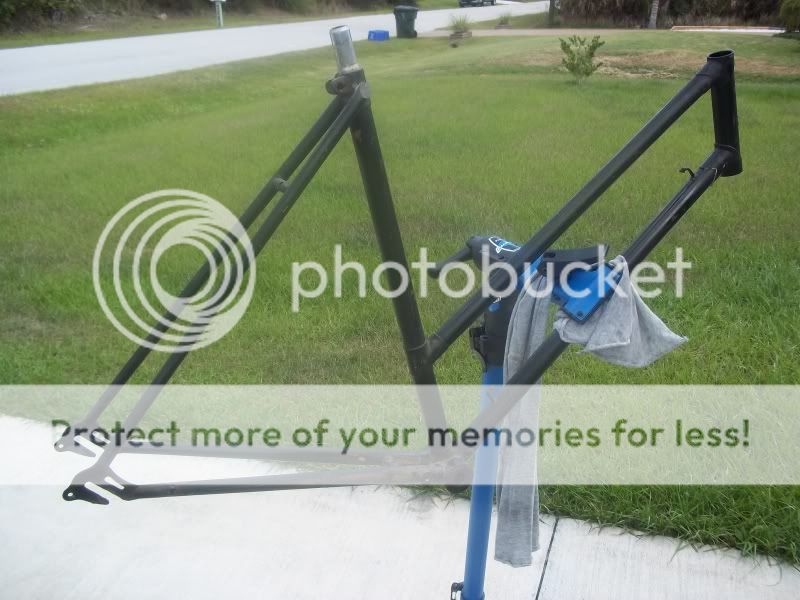
The wife of a dear friend was checking out my Black Lighting the other day> She was talking about her old bike that she rode her whole life. I was curious, so I asked to see the bike in question. She pulled out this 1960's Raleigh. Her parents bought this new 50 years ago. Of course, I was intrigued. I offered to tune it up for her. This is what I brought home....
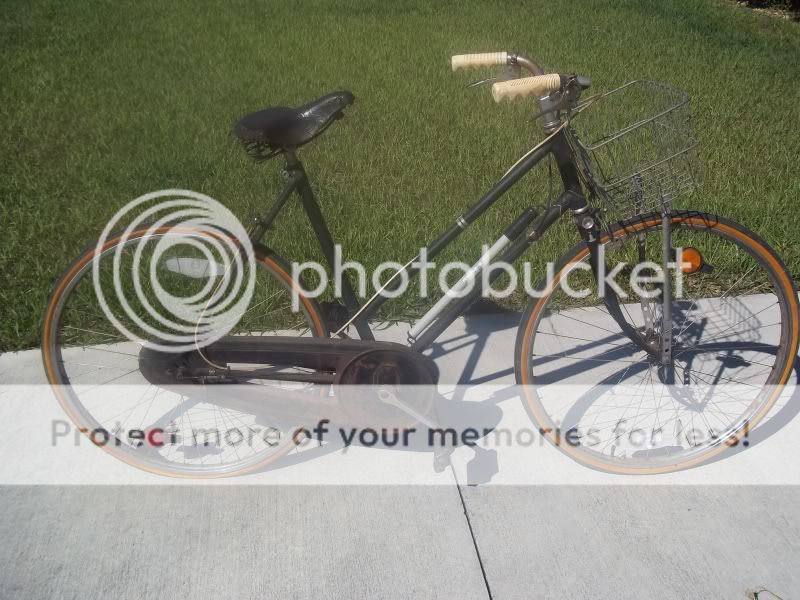
The wife of a dear friend was checking out my Black Lighting the other day> She was talking about her old bike that she rode her whole life. I was curious, so I asked to see the bike in question. She pulled out this 1960's Raleigh. Her parents bought this new 50 years ago. Of course, I was intrigued. I offered to tune it up for her. This is what I brought home....
 04-28-12, 08:46 PM
#2
Senior Member
Thread Starter
Join Date: Aug 2010
Posts: 263
Mentioned: 0 Post(s)
Tagged: 0 Thread(s)
Quoted: 0 Post(s)
Likes: 0
Liked 1 Time
in
1 Post
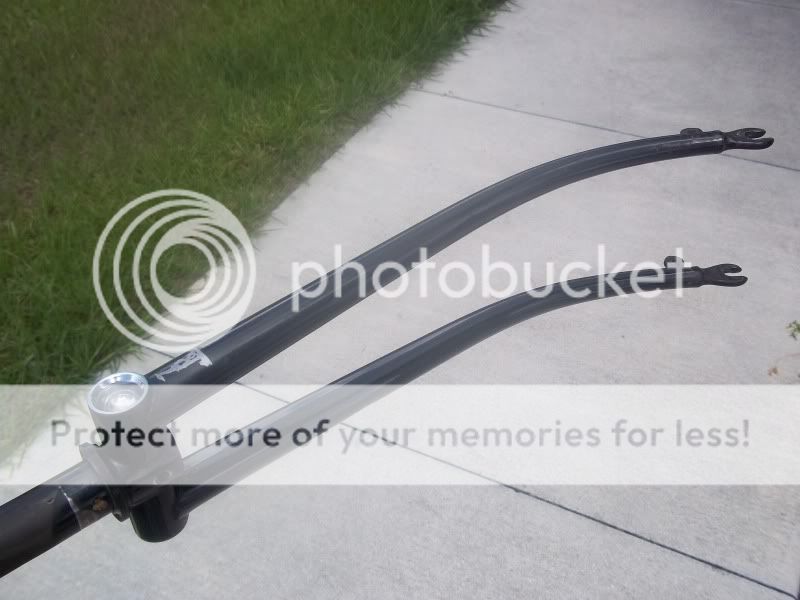
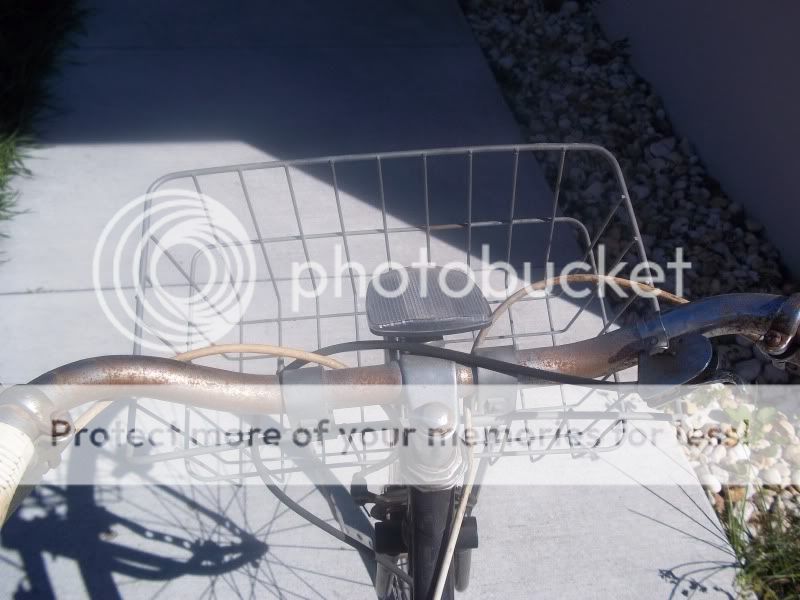
I've had a chance to spend some time with the bike. I cleaned the handle bars with the 000 steel wool and some silicone based cleaner on the grips.
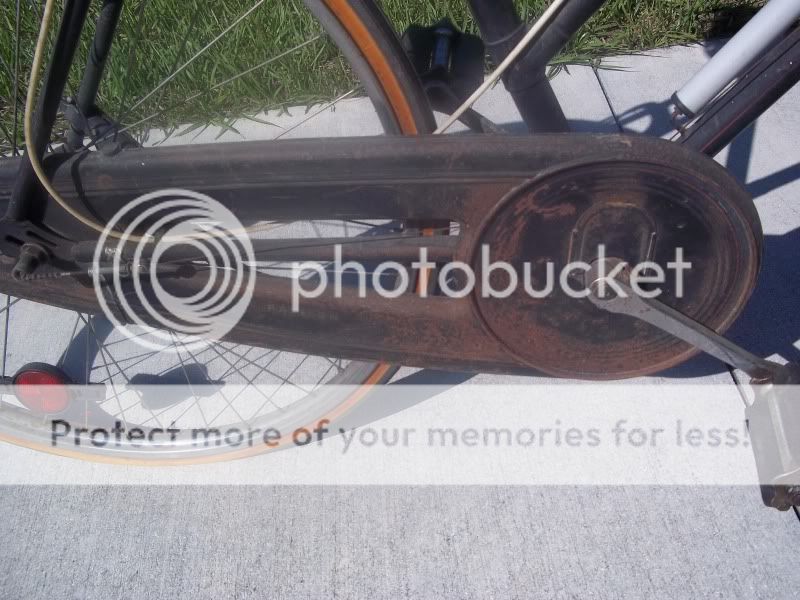
I'm having trouble with one of the crank cotter pins. It is frozen in place. I am reluctant to use my gangster/mafia/thug techniques to remove the pin (any tips would be nice). Underneath the nasty chain cover hides a cool crank that has been hidden from view for decades.
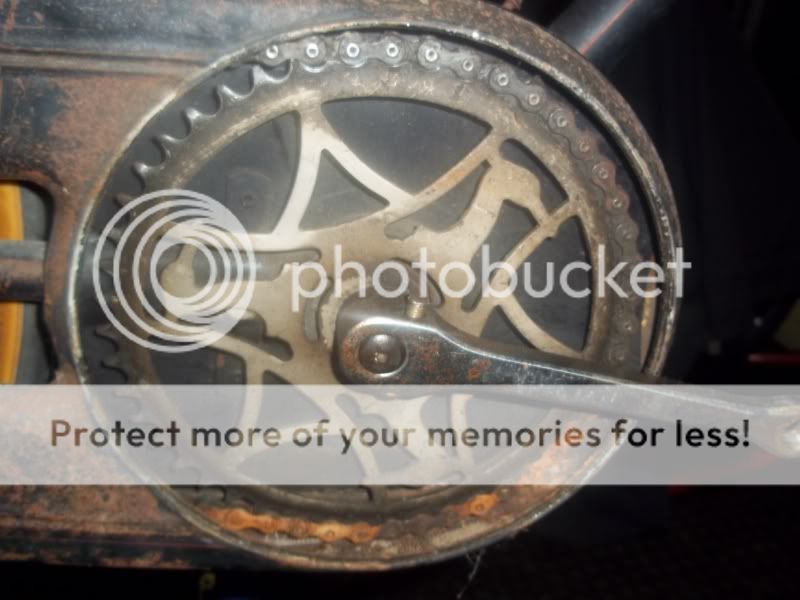
I cleaned off a section to test it's finish. After finding this, I will not be reinstalling the chain guard. It will be packaged in a box for some Raleigh freak who loves punishment to enjoy.
I'm having trouble with one of the crank cotter pins. It is frozen in place. I am reluctant to use my gangster/mafia/thug techniques to remove the pin (any tips would be nice). Underneath the nasty chain cover hides a cool crank that has been hidden from view for decades.
I cleaned off a section to test it's finish. After finding this, I will not be reinstalling the chain guard. It will be packaged in a box for some Raleigh freak who loves punishment to enjoy.
04-28-12, 08:49 PM
#3
Senior Member
Join Date: Sep 2009
Location: Portland,Or
Posts: 1,140
Mentioned: 2 Post(s)
Tagged: 0 Thread(s)
Quoted: 43 Post(s)
Likes: 0
Liked 2 Times
in
2 Posts
Just a tune up?  Edit; Ah,,you added more pictures.
From the sixties? Could it be earlier? I'm curious of the date on the hub.
Edit; Ah,,you added more pictures.From the sixties? Could it be earlier? I'm curious of the date on the hub.
04-28-12, 09:02 PM
#4
Senior Member
Thread Starter
Join Date: Aug 2010
Posts: 263
Mentioned: 0 Post(s)
Tagged: 0 Thread(s)
Quoted: 0 Post(s)
Likes: 0
Liked 1 Time
in
1 Post
The hub is a Sturmey Archer AW 51 ( I would provide more pics but this hub photographs like Amy Winehouse). It needs a bit of rehab.

I think I have a pic of the serial number on the bike.

I think I have a pic of the serial number on the bike.
Last edited by supafast213; 04-28-12 at 09:20 PM.
04-28-12, 09:13 PM
#5


Bicycle Repair Man !!!

I would keep the chain case intact... Heron cranks are lovely but are not rare or uncommon while the full chain case is something one does not see on export models very often.
They also doa wonderful job of keeping everything clean, including your wife.
They also doa wonderful job of keeping everything clean, including your wife.
04-28-12, 09:16 PM
#6
Senior Member
Join Date: Jan 2011
Location: Armenia, Colombia
Posts: 295
Bikes: 1961 Raleigh Sports
Mentioned: 0 Post(s)
Tagged: 0 Thread(s)
Quoted: 0 Post(s)
Likes: 0
Liked 0 Times
in
0 Posts
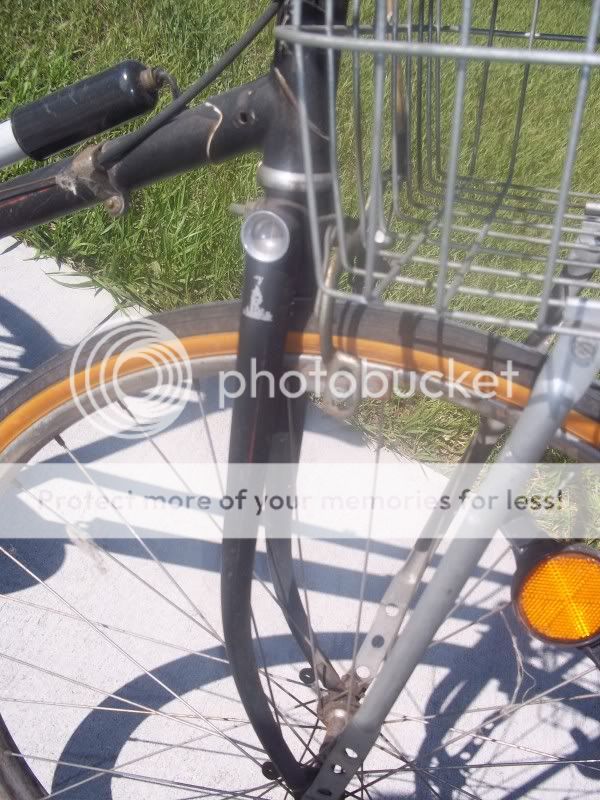
That hole in the downtube lug, is there a similar hole on the other side? It seems like it was a mounting hole for a rear rod brake.
The finish on that chaincase may be shot, but is the steel deformed? It may need only some oven enamel to bring it back to its glory. You might also have to mess around with the spacers in the rear to properly bring down any noises.
Did the original owner have the original fenders? A Raleigh looks really weird with a chaincase but no fenders, putting the cart before the horse.
04-28-12, 09:28 PM
#7
Senior Member
Thread Starter
Join Date: Aug 2010
Posts: 263
Mentioned: 0 Post(s)
Tagged: 0 Thread(s)
Quoted: 0 Post(s)
Likes: 0
Liked 1 Time
in
1 Post
The down tube lug has another hole on the other side. The goal of this build is to get the bike ride able, while replacing as few parts as possible. The brake pads and cables will be new. If I remove the chain guard, it will be preserved with all of the hardware. So far, the crank pin has won the battle. The original/current owner rode the fenders off this bike.
Last edited by supafast213; 04-28-12 at 09:32 PM.
04-28-12, 09:49 PM
#8
www.theheadbadge.com

Join Date: Sep 2005
Location: Southern Florida
Posts: 28,514
Bikes: https://www.theheadbadge.com
Mentioned: 124 Post(s)
Tagged: 0 Thread(s)
Quoted: 2422 Post(s)
Liked 4,396 Times
in
2,093 Posts
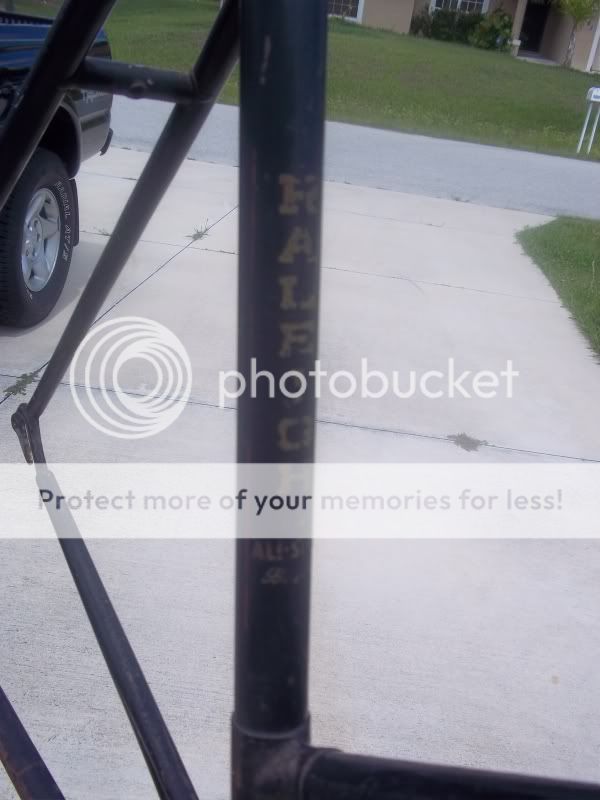
That's a 1951 Raleigh Dawn converted to cable brakes. In addition to the downtube lug hole, the replacement bar and stem are also indicative of a rod brake system since removed.
Mastering the adjustment of a Raleigh chaincase is not difficult. I could understand its removal if it were damaged beyond repair, but it isn't (not only that, it's complete) - and you'll spend more time and effort removing it than readjusting it properly.
If you so consider removing an intact chaincase such as this as a form of "repair," you're only negating your legitimacy as a skilled mechanic. We already have too many slap-dash LBS mechanics who follow this improper philosophy, B.S.ing customers into believing that chaincases and other such items are doomed to fail and unfixable - when the real problem lies in mechanics that don't know jack about how to fix such equipment properly (hence, they seek said scapegoat).
-Kurt
__________________


Last edited by cudak888; 04-28-12 at 09:55 PM.
04-29-12, 04:30 AM
#9
Senior Member

Join Date: Apr 2010
Location: vermont
Posts: 3,081
Bikes: Many
Mentioned: 8 Post(s)
Tagged: 0 Thread(s)
Quoted: 5 Post(s)
Likes: 0
Liked 10 Times
in
10 Posts
Those old Raleighs are nice. You only need to pour motor oil in the holes and air up the tires in many cases. Copper wool is a bit more gentle that the steel wool and won't scratch the chrome.
The cotters are removed with a cotter press. The bottom bracket requires special tools also. In fact, all the bolts are an unusual size. Not metric or fractional.
The cotters are removed with a cotter press. The bottom bracket requires special tools also. In fact, all the bolts are an unusual size. Not metric or fractional.
Last edited by ftwelder; 04-29-12 at 04:34 AM.
04-29-12, 05:37 AM
#10
Senior Member
Thread Starter
Join Date: Aug 2010
Posts: 263
Mentioned: 0 Post(s)
Tagged: 0 Thread(s)
Quoted: 0 Post(s)
Likes: 0
Liked 1 Time
in
1 Post
That's a 1951 Raleigh Dawn converted to cable brakes. In addition to the downtube lug hole, the replacement bar and stem are also indicative of a rod brake system since removed.
Mastering the adjustment of a Raleigh chaincase is not difficult. I could understand its removal if it were damaged beyond repair, but it isn't (not only that, it's complete) - and you'll spend more time and effort removing it than readjusting it properly.
If you so consider removing an intact chaincase such as this as a form of "repair," you're only negating your legitimacy as a skilled mechanic. We already have too many slap-dash LBS mechanics who follow this improper philosophy, B.S.ing customers into believing that chaincases and other such items are doomed to fail and unfixable - when the real problem lies in mechanics that don't know jack about how to fix such equipment properly (hence, they seek said scapegoat).
-Kurt
Mastering the adjustment of a Raleigh chaincase is not difficult. I could understand its removal if it were damaged beyond repair, but it isn't (not only that, it's complete) - and you'll spend more time and effort removing it than readjusting it properly.
If you so consider removing an intact chaincase such as this as a form of "repair," you're only negating your legitimacy as a skilled mechanic. We already have too many slap-dash LBS mechanics who follow this improper philosophy, B.S.ing customers into believing that chaincases and other such items are doomed to fail and unfixable - when the real problem lies in mechanics that don't know jack about how to fix such equipment properly (hence, they seek said scapegoat).
-Kurt
The original goal was to pop it off to service the BB, however, it's taking a little more time to get that done. After creating so much controversy, the chain cases fate will be decided by the owner of the bike, not me.
Last edited by supafast213; 04-29-12 at 05:59 AM.
04-29-12, 07:05 AM
#11
www.theheadbadge.com
Join Date: Sep 2005
Location: Southern Florida
Posts: 28,514
Bikes: https://www.theheadbadge.com
Mentioned: 124 Post(s)
Tagged: 0 Thread(s)
Quoted: 2422 Post(s)
Liked 4,396 Times
in
2,093 Posts
Thanks for the info Kurt, I was wondering about this bikes origins. I'm not sure how to take your last comments about removing the chain case. It's obvious that you feel this is wrong. But there is no need to consider me a lesser mechanic because I don't see the beauty in it. For the record, I'm not an accomplished bike tech. I'm just a cyclist that loves to tinker on bikes. Most of what I've learned has been gleaned from this forum or learned the hard way. I post threads about the bikes I'm working on to get more information, not to flex my "skills".
The original goal was to pop it off to service the BB, however, it's taking a little more time to get that done. After creating so much controversy, the chain cases fate will be decided by the owner of the bike, not me.
The original goal was to pop it off to service the BB, however, it's taking a little more time to get that done. After creating so much controversy, the chain cases fate will be decided by the owner of the bike, not me.
. That, and I've seen so many people get fed false information about chaincases, rod brakes, and similar iconic componentry from local shops that I'm a bit sensitive to their removal - especially when they're mechanically intact.That aside, chaincase adjustment is quite easy. Though the front bolt behind the chainwheel is fixed, the two screws that fix the clamp on the chainstay allow you to rotate the chaincase slightly, allowing you to adjust its clearance with the crankarm. Removal is simply a matter of pulling the rear plates out, and pulling the rear screws and front bolt (after the crankset is removed, of course).
Though I do recommend removal of the chaincase so you can clean behind it, removal of a Raleigh fixed cup is not fun in the least bit, especially on an older machine. I'd highly suggest cleaning the bearing surfaces with your fingers and a rag run through the opposite side of the BB shell, and greasing it up the same way. Use a heavy grease such as Mobile 1 Synthetic to hold the loose bearings in place. Even with a workstand, you'll probably need to angle the bike on its side for ease of dropping the bearings in. I've sometimes slid them through the fixed cup's spindle hole too. Whatever works.
Best of luck.
-Kurt
__________________
04-29-12, 11:42 AM
#12
Senior Member
Thread Starter
Join Date: Aug 2010
Posts: 263
Mentioned: 0 Post(s)
Tagged: 0 Thread(s)
Quoted: 0 Post(s)
Likes: 0
Liked 1 Time
in
1 Post
No problem Kurt. I respect everything you say about bike repair. I get the same way about guitars and motorcycles.
I will be taking your advice on the BB process, however, I have to get through the pesky task of removing a stubborn crank cotter pin first. Having never used or even seen a cotter press, this is what I've come up with...
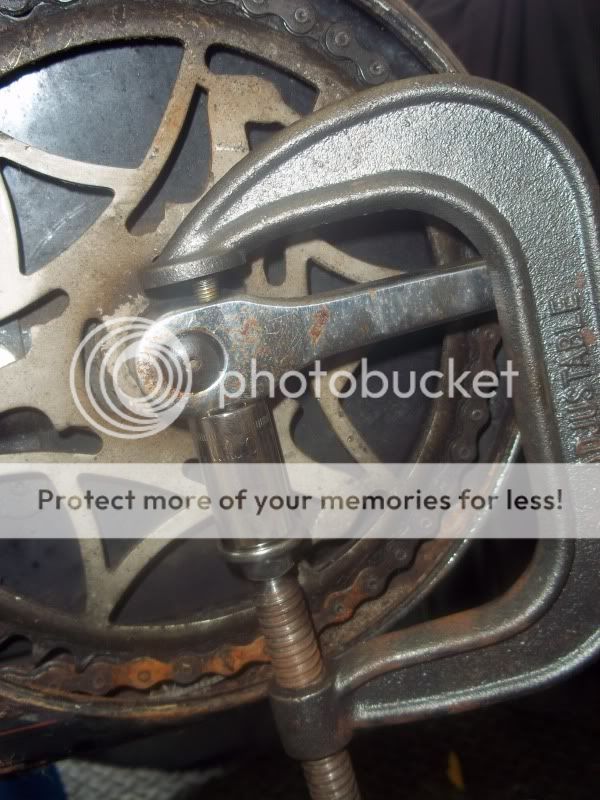
The socket is there to allow the pin to push through the crank arm. I also have a liberal amount of PB blaster soaking it down. I left it preloaded to see if the pin will change it's mind.
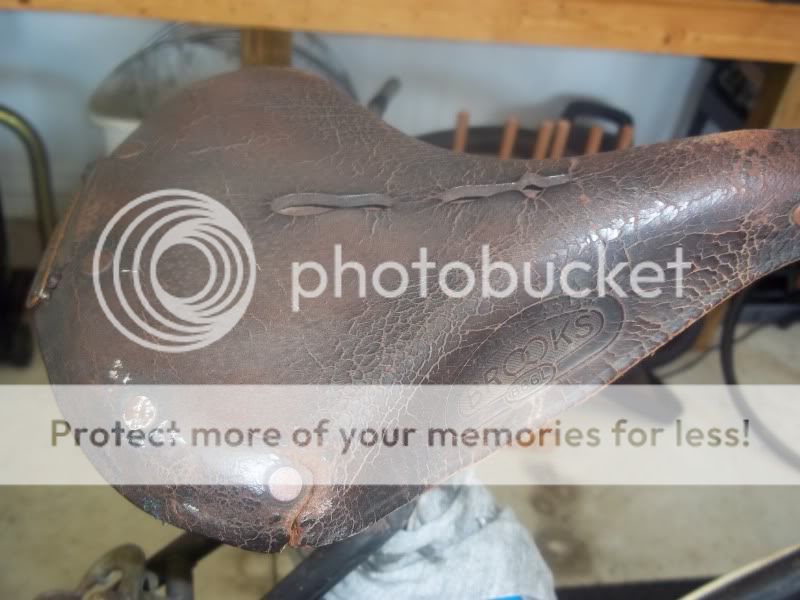
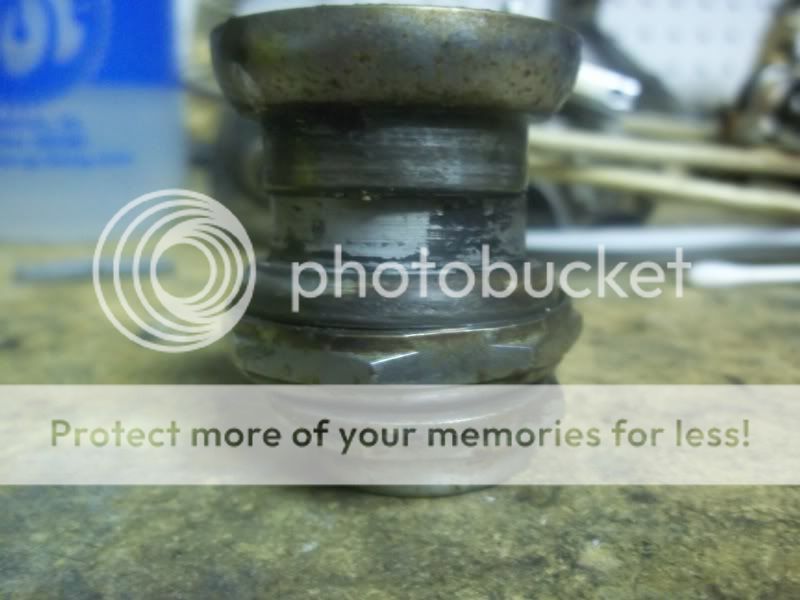
In the mean time, I pulled down the front end for a thorough cleaning. The balls need to be replaced.
Before.
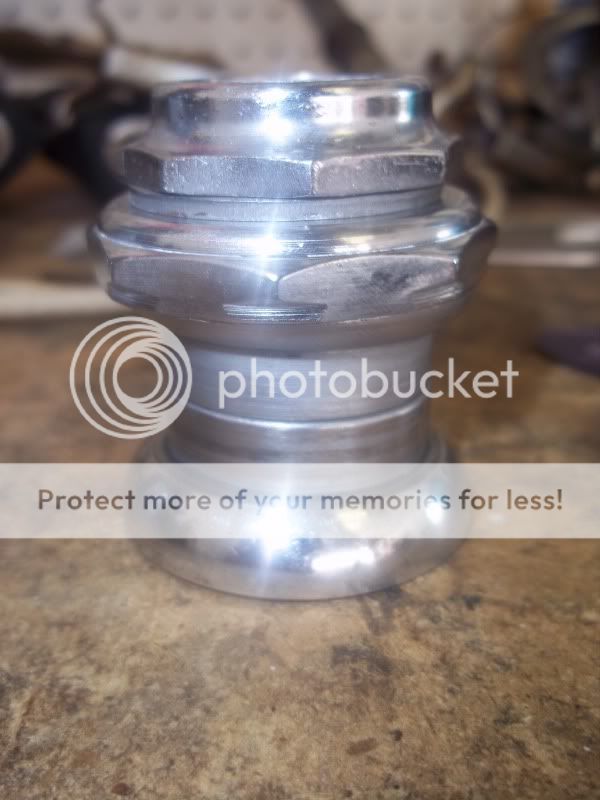
After.
I have zero plans to paint anything on this bike. Is there a good way to bring a little bit of the original shine out of this paint? Also, What do I do about this rusty chain case? It will be removed for cleaning, but I will be reinstalling it after all of the mechanical stuff is sorted. I figured, Kurt's right, and besides, Mrs. Girdy kept it on the bike this long....
I will be taking your advice on the BB process, however, I have to get through the pesky task of removing a stubborn crank cotter pin first. Having never used or even seen a cotter press, this is what I've come up with...
The socket is there to allow the pin to push through the crank arm. I also have a liberal amount of PB blaster soaking it down. I left it preloaded to see if the pin will change it's mind.
In the mean time, I pulled down the front end for a thorough cleaning. The balls need to be replaced.
Before.
After.
I have zero plans to paint anything on this bike. Is there a good way to bring a little bit of the original shine out of this paint? Also, What do I do about this rusty chain case? It will be removed for cleaning, but I will be reinstalling it after all of the mechanical stuff is sorted. I figured, Kurt's right, and besides, Mrs. Girdy kept it on the bike this long....
04-29-12, 11:52 AM
#13

multimodal commuter

Join Date: Nov 2006
Location: NJ, NYC, LI
Posts: 19,808
Bikes: 1940s Fothergill, 1959 Allegro Special, 1963? Claud Butler Olympic Sprint, Lambert 'Clubman', 1974 Fuji "the Ace", 1976 Holdsworth 650b conversion rando bike, 1983 Trek 720 tourer, 1984 Counterpoint Opus II, 1993 Basso Gap, 2010 Downtube 8h, and...
Mentioned: 584 Post(s)
Tagged: 0 Thread(s)
Quoted: 1908 Post(s)
Liked 574 Times
in
339 Posts
This is good. Good photo, and you clearly have the right idea of the technique. It might work better if you put a spacer of some kind between the c-clamp and the threaded end of the cotter so less of the c-clamp's thread is extended; the more thread is out of the c-clamp, the more the bolt will flex, and that flex can cause problems. Other than that, you're doing great. Sometimes, by the way, after you have all the bits in place and you've cranked down on the c-clamp as far as you're comfortable cranking, nothing happens; at this point a gentle tap with a hammer may be all it takes to pop that cotter loose. That is, you hammer on the c-clamp at the top of your photo. Good luck!
04-29-12, 03:53 PM
#15
Senior Member

Join Date: Mar 2008
Location: Rhode Island (an obscure suburb of Connecticut)
Posts: 5,630
Bikes: one of each
Mentioned: 5 Post(s)
Tagged: 0 Thread(s)
Quoted: 8 Post(s)
Likes: 0
Liked 12 Times
in
12 Posts
One trick I've found with the C clamp technique, if you torque it down and it still doesn't come, is to tap it with a hammer. Get a lot of torque on it and then just give it a light tap, not a big hit.
The headset looks great. I love polishing old Raleighs, they reward an honest effort.
The headset looks great. I love polishing old Raleighs, they reward an honest effort.
04-29-12, 05:22 PM
#16
Senior Member
Thread Starter
Join Date: Aug 2010
Posts: 263
Mentioned: 0 Post(s)
Tagged: 0 Thread(s)
Quoted: 0 Post(s)
Likes: 0
Liked 1 Time
in
1 Post
Well Sunday had it's ups and downs. I was able to get some work done but the damned crank cotter won't let go.
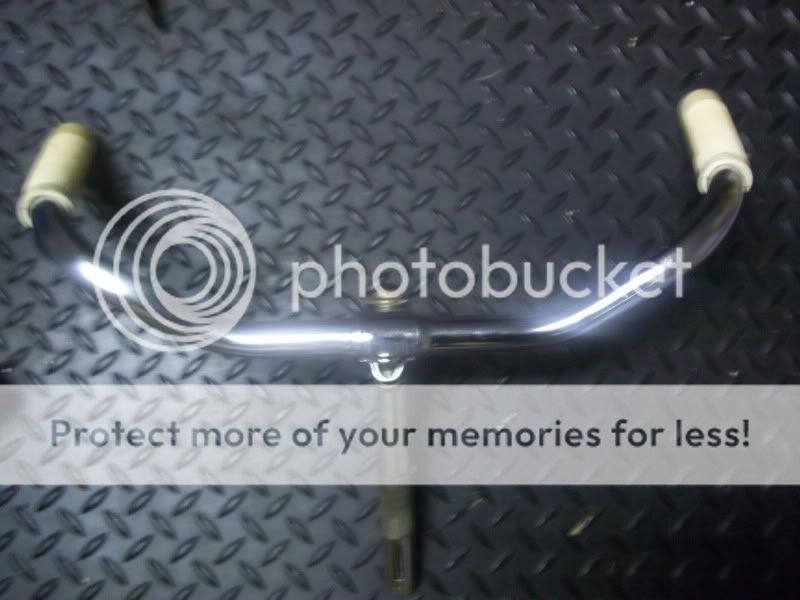
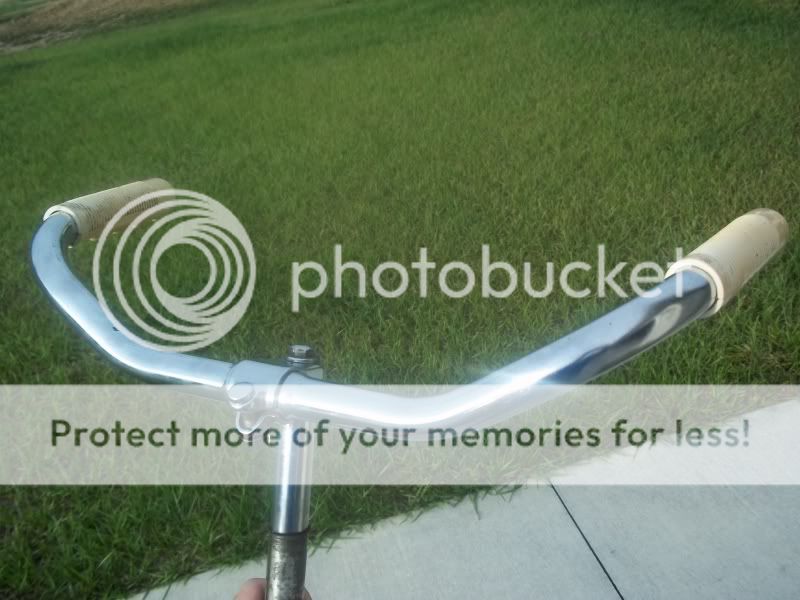
I did get some work done on the handlebar/stem unit. One grip needs some attention.
I found a lizard skeleton in the chain case today. When I dumped it out of the back, the master link circlip came with it. I found the master link and removed it. I could only imagine what a PITA this would have been if the chain came apart while riding.
I spent some time on the wheels today. They're in really rough shape. I can't replace them so I'm considering an acid bath. I've never worked with it, but I'll read up before I do anything.


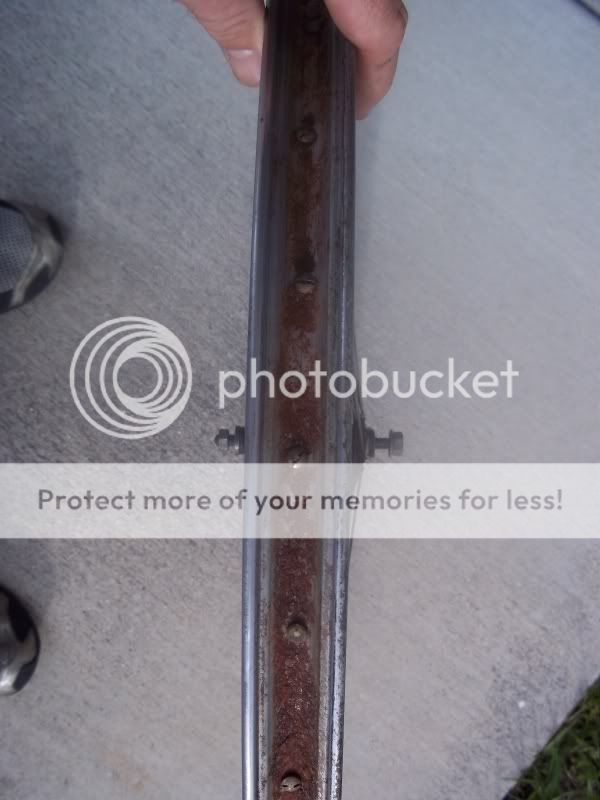
Removing the rear wheel finally exposed the infamous chain case.
You can't UNSEE what you have seen. So I will leave you with a sliver of eye candy...
I did get some work done on the handlebar/stem unit. One grip needs some attention.
I found a lizard skeleton in the chain case today. When I dumped it out of the back, the master link circlip came with it. I found the master link and removed it. I could only imagine what a PITA this would have been if the chain came apart while riding.
I spent some time on the wheels today. They're in really rough shape. I can't replace them so I'm considering an acid bath. I've never worked with it, but I'll read up before I do anything.
Removing the rear wheel finally exposed the infamous chain case.
You can't UNSEE what you have seen. So I will leave you with a sliver of eye candy...
04-29-12, 06:18 PM
#17
www.theheadbadge.com
Join Date: Sep 2005
Location: Southern Florida
Posts: 28,514
Bikes: https://www.theheadbadge.com
Mentioned: 124 Post(s)
Tagged: 0 Thread(s)
Quoted: 2422 Post(s)
Liked 4,396 Times
in
2,093 Posts
Hit the frame with some Meguiars Scratch X or KIT Scratch out. It'll come out shining better than that million-dollar iPhone on wheels.
-Kurt
-Kurt
__________________
04-29-12, 07:06 PM
#18
Senior Member
Thread Starter
Join Date: Aug 2010
Posts: 263
Mentioned: 0 Post(s)
Tagged: 0 Thread(s)
Quoted: 0 Post(s)
Likes: 0
Liked 1 Time
in
1 Post
A more period correct piece of eye candy..

Speaking of flat trackers, The husband of the woman who owns this bike is an accomplished flat tracker from the 60-70's. I met him late in the restoration phase of his 1968 Suzuki A100 Flat Track bike. I helped with some final assembly and was the test rider once it was running. I was the first person to ride this bike in 30 years.

Speaking of flat trackers, The husband of the woman who owns this bike is an accomplished flat tracker from the 60-70's. I met him late in the restoration phase of his 1968 Suzuki A100 Flat Track bike. I helped with some final assembly and was the test rider once it was running. I was the first person to ride this bike in 30 years.
04-30-12, 08:01 PM
#19
Senior Member
Thread Starter
Join Date: Aug 2010
Posts: 263
Mentioned: 0 Post(s)
Tagged: 0 Thread(s)
Quoted: 0 Post(s)
Likes: 0
Liked 1 Time
in
1 Post

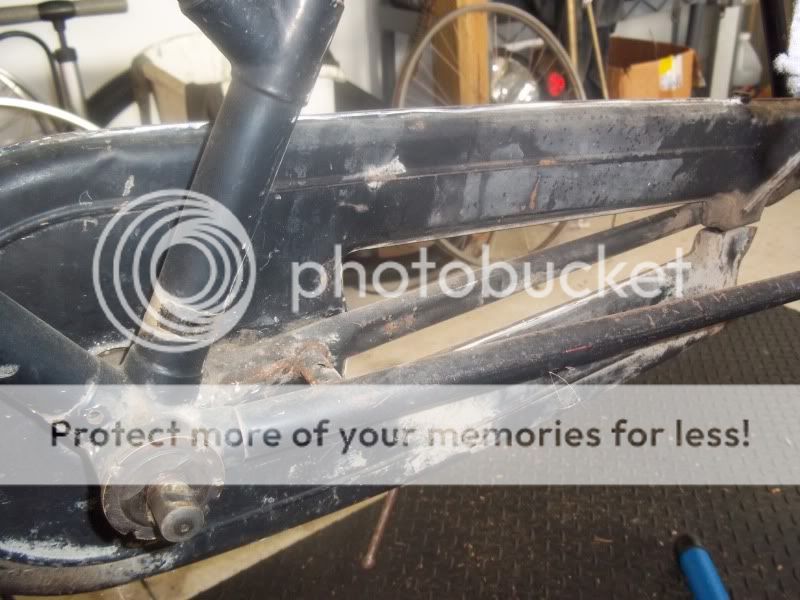
SUCCESS!!! I finally won the battle with the pesky cotter pin. I left the pin preloaded in my makeshift press and added a little bit of heat from a propane torch and CRACK! The pin let go. I pulled the crank and took a picture of victory..

Here is why I wanted to pull the chain case in the first place.

The BB needs attention anyway. I took Kurt's advice on BB dis assembly and pulled everything out from the LH side. I snapped a pic of the error I made in this task. I should've reinstalled a nut onto the cotter threads before adding power. Check out the damage to the threads.
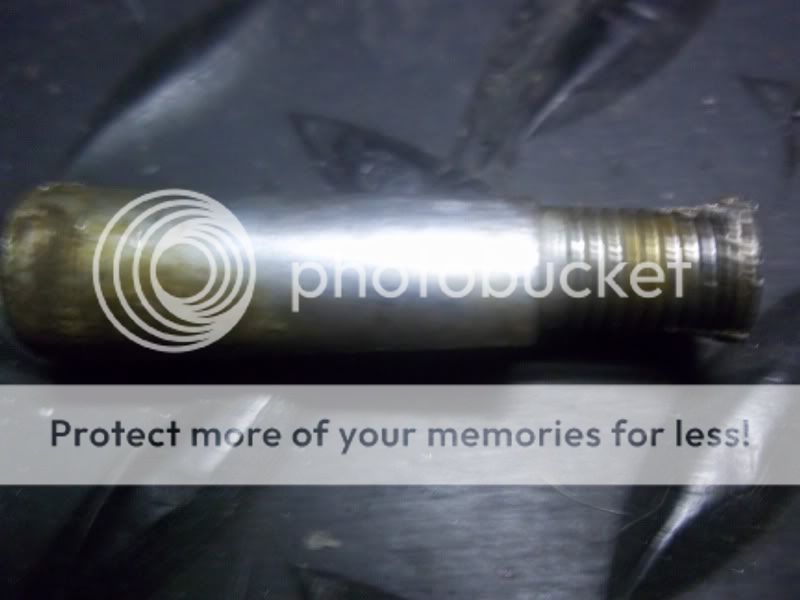
I know, terrible pic, I'm not a great photographer either.
04-30-12, 10:29 PM
#20
www.theheadbadge.com
Join Date: Sep 2005
Location: Southern Florida
Posts: 28,514
Bikes: https://www.theheadbadge.com
Mentioned: 124 Post(s)
Tagged: 0 Thread(s)
Quoted: 2422 Post(s)
Liked 4,396 Times
in
2,093 Posts
All the more reason to get some good replacement cotters from Mark Stonich (BikeSmith Design). You'll be glad you did.
Be sure to use your improvised press to seat the new cotters too - I highly recommend it.
-Kurt
Be sure to use your improvised press to seat the new cotters too - I highly recommend it.
-Kurt
__________________
04-30-12, 11:02 PM
#21
Senior Member

Join Date: Aug 2009
Location: Berkeley, CA
Posts: 7,244
Bikes: '72 Cilo Pacer, '72 Gitane Gran Tourisme, '72 Peugeot PX10, '73 Speedwell Ti, '74 Peugeot UE-8, '75 Peugeot PR-10L, '80 Colnago Super, '85 De Rosa Pro, '86 Look Equipe 753, '86 Look KG86, '89 Parkpre Team, '90 Parkpre Team MTB, '90 Merlin
Mentioned: 87 Post(s)
Tagged: 0 Thread(s)
Quoted: 834 Post(s)
Liked 2,127 Times
in
555 Posts
Cool project. Nice work on the bars/grips & congrats on the cotter pin removal. There are few C&V delights comparable to unsticking a stuck part. Btw, don't throw that cotter pin away. You may be able to salvage it. If not, it may prove useful in matching the cotter face angle should you need to file a new cotter pin.
Now that you have the chaincase removed, you may consider dropping it in a weak concentration of Oxalic Acid (avail at paint stores such as Sherman Williams, or sold as wood bleach in many hardware stores), followed by Meguiar's Scratch X as suggested above to bring the pain back to life.
If you don't want to shell out $50+ for the bikesmith cotter press, I found success with a vise and a socket.
You'll be replacing the chain, right?
__________________
-Randy
'72 Cilo Pacer � '72 Peugeot PX10 � '73 Speedwell Ti � '74 Nishiki Competition � '74 Peugeot UE-8 � '86 Look Equipe 753 � '86 Look KG86 � '89 Parkpre Team Road � '90 Parkpre Team MTB � '90 Merlin Ti
Avatar photo courtesy of jeffveloart.com, contact: contact: jeffnil8 (at) gmail.com.
-Randy
'72 Cilo Pacer � '72 Peugeot PX10 � '73 Speedwell Ti � '74 Nishiki Competition � '74 Peugeot UE-8 � '86 Look Equipe 753 � '86 Look KG86 � '89 Parkpre Team Road � '90 Parkpre Team MTB � '90 Merlin Ti
Avatar photo courtesy of jeffveloart.com, contact: contact: jeffnil8 (at) gmail.com.
05-01-12, 06:10 AM
#22
Senior Member
Thread Starter
Join Date: Aug 2010
Posts: 263
Mentioned: 0 Post(s)
Tagged: 0 Thread(s)
Quoted: 0 Post(s)
Likes: 0
Liked 1 Time
in
1 Post
I'm off from work today. Now that I have over come this delay in the teardown phase, I can move forward with cleaning up the frame. I have been considering the Oxy bath method. I've never done it, but I've read a lot about it on the forums. I will be donating a chain to this project. The parts list so far looks like chain, cables, tubes, ball bearings, and a couple of screws that I had to cut while removing the brake levers. Does anyone know what size ball bearings this bike uses? I'm going to do the steering stem, BB, and both wheels. I would look it up but i'm ready to get out in the garage.
05-01-12, 08:20 AM
#23
Senior Member

Join Date: Dec 2011
Location: Toronto
Posts: 90
Mentioned: 3 Post(s)
Tagged: 0 Thread(s)
Quoted: 0 Post(s)
Likes: 0
Liked 3 Times
in
1 Post
Nice work. I had a month long battle with a cotter pin on a 1966 Raleigh (possibly a Superbe - it had a Dynohub on the front wheel and the lamp bracket, but maybe that was added later? it was blue with white highlights, very battered up). I eventually drilled it out and bashed it out with a hammer. I wish I'd tried your clamp and socket method first though!
Looking forward to seeing the end of this. It amazes me how, underneath all the dirt and grime and surface rust, a lot of these 40-50 year old bikes have parts that still look like new.
Looking forward to seeing the end of this. It amazes me how, underneath all the dirt and grime and surface rust, a lot of these 40-50 year old bikes have parts that still look like new.
05-01-12, 12:46 PM
#24
Senior Member
Thread Starter
Join Date: Aug 2010
Posts: 263
Mentioned: 0 Post(s)
Tagged: 0 Thread(s)
Quoted: 0 Post(s)
Likes: 0
Liked 1 Time
in
1 Post
We made progress today. I'm happy to say that the Scratch x worked out better than expected. I had a nice day in the driveway rubbing on this beauty queen. Of course, the rust is still there but the frame came out decent...
Before
During. I took this pic to show the dramatic difference Scratch x makes. Here I was testing the product on the bottom of the chainstay.
After 4 beers...
You can see that the sun has crept up to the edge of the garage. Time to move this project into the shade.
There is still plenty of rubbing left to do. I was wondering what you guys think about the steering stem/ headbadge. My first instinct is to polish the paint around the badge and leave it alone. I don't want to loose what color is left on the badge.