Originally Posted by
MyBikeGotStolen
Boro, would it be possible for you to upload a picture of your stem shifters with the shifters all the was in the up position? I am about to install a threaded to threadless adapter and am thinking on going the stem shifter route to keep cost low. However, it looks like the threaded stem will not have enough spacing for the stem shifters to go all the way up
Its not a Denali (although I almost picked one up for $50 on CL the other day!), its actually going on a 20 year old mountain bike that I am trying to put a set of drop bars on.
Sorry, I am not at home, to get a picture of my adapter with stem on it!
Sure! Sorry it took me so long to get to this.


For mine (and probably all stem shifters) this would be the smallest chainring (left shifter) with the smallest cog (right shifter). Hope this helps!
Originally Posted by
TexasPedaler
"I still say the stock shifters absolutely suck, and take up valuable real estate on the bars, so TexasPedaler, if you are looking to mod your bike that's where I would start." -Borobike
Thanks Borobike. I have been thinking and researching on the best way to replace the stock Revo Shifters lately even though from my riding habits I have no problem with them other then the fact they take up valued space. I was thinking of going with brifters, but haven't found the right match other then using a Shimano 3 x 8 set. Then again if I am going to go that route, I would most likely upgrade bike all together due to price. So the mod you did is what I would mostly likely do and if you could give a more up close and walk through of parts and how to, that would be great. I know you are busy studying, but if you could that would be great. Here is a pick of my Denali so far which I have put over 500 miles. I replaced the stock drop bar tape, it ripped after 300 miles, pulled of my stock Kenda 700 x 32c tires-replaced with Serfas SECA 700 x 23c Gray band, changed out the Vitesse saddle for a Vader sleek saddle. New tires have just 30 miles on them as I just put them on the other day and my ride is much faster and my average speed has gone from 12 mph to 16mph for an average. Oh, how did you mount your second bottle cage flush to frame? Did you use a drill of some sort? Thanks for the posts again and good luck with your studies. Keep posting when you can.
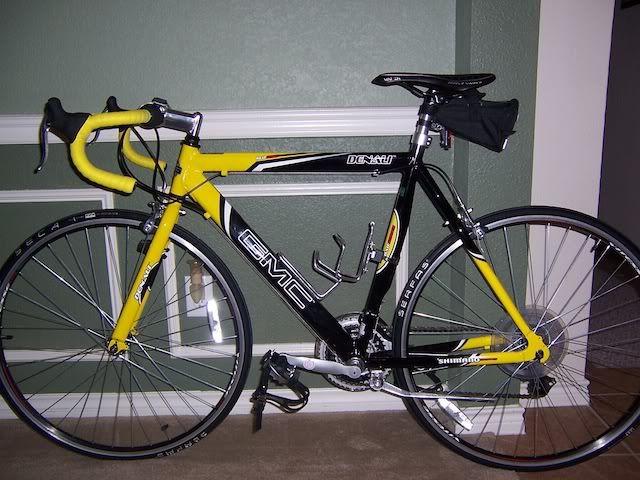
I like that yellow grip tape! Really sets the bike off. I might have to look into that the next time I need to replace my tape.
My flush mounted second water bottle cage is just the standard add-on cage from Wal-Mart. I can't remember if it came with screws or I had to use my own, either way I did have to drill the frame. It's pretty easy to do with good drill bits.
As for the shifters, it's been a while, but it's all pretty straightforward. My shifters came with cables, but even if they didn't, it's every easy to do.
First, you'll need to remove the old cables from the front and rear derailleurs. This is accomplished by loosening the bolts that hold them in on each. You'll also need to cut off the cable end so that the cable can slide through.
Second, you'll need to locate the bolt that holds the shifters down onto the handlebars. I can't remember exactly where that is or how it loosens, it may just be a phillips head screw or it may be an allen head, or something else. Either way, it's easy enough to find and loosen.
Third, you'll need to remove the four allen head bolts that hold the handlebar to the stem. A plate with the four bolts will remove from the front.
Next, there will be some sort of a larger tube in the middle joining the two handlebar pieces. This is held on by another allen head bolt I believe. Loosen that and the two pieces should disconnect.
With the shifters already loosened, they can now slide off either side of the handlebars from the inside. You can re-assemble the handlebars now and put them back on the stem. Make sure everything is nice and tight.
Pull the cable from the shifters (already loosened from the derailleurs) and completely remove the shifters and old cables from the bike.
Loosen the bolt at the top of the stem to remove the stem from the headset. Pull stem and handlebars up and out of the headset.
Take a look at your new shifters. I'm pretty sure all stem shifters are clamp-on, but you definitely need for them to be. Mine tightened on with a simple phillips head screwdriver. Make sure it's loose enough to fit over the bottom of the stem, then slide them up into place. You may now replace the stem back into the headset, and tighten in position. Make sure there's plenty of room for the shifters.
Tighten down the stem shifters into position. Be sure there's plenty of room for their full range of motion.
Next, it's simply a matter of routing cable. You may need to cut your old cable shields to fit (I did) or your shifters may come with them. Once routed, tighten cables down at the derailleurs.
After that, all that's needed is adjusting. If your shifters are friction, you just need to make sure that the shifters work with the full range of motion (most will) and that the upper and lower limits are set correctly. You'll also want to crimp on a couple of new cable ends on the new cables. Very simple!
Hope that helps. It's been a while so I'm a little vague on exactly where to remove the old shifters and cables from the derailleurs, but it should be easy enough to find. Good luck!
.
.
.