Step One: Splitting the frame
The major difference between a belt-drive build and a chain-drive build is a special demand placed on the frame itself. Take a look at your bike. Where you pedal, the chain sits outside the rear triangle, but where the chain drives the wheel it sits
inside the rear triangle. This is accomplished by breaking the chain, threading it through the rear triangle, and re-joining it. You can do no such thing with a belt; it's a continuous, unbreakable loop. For this reason, you need a way of breaking the rear triangle instead. For my conversion project, this meant learning how to cut, machine, and weld metal.
I sketched out a design for a widget that could be inserted into a portion of the drive-side seatstay that would allow me to open and close the rear triangle to get a belt in and out. The device would be secured by two bolts, which when removed would allow me to bend one arm of the rear seatstay just enough to be able to pass a belt through the gap. This depends on your frame being made out of a flexible material. Steel works. I'm guessing that aluminum would not.
I was lucky enough to have a perfectly round seatstay, so I was able to cut it cleanly using a mini pipe cutter – the kind used to cut plumbing pipes.
To machine the plug, I enlisted the help of newfound friend
Tiago Santos. Together, we used a metal lathe and a mini mill to turn my sketches into a reasonably fine looking widget.
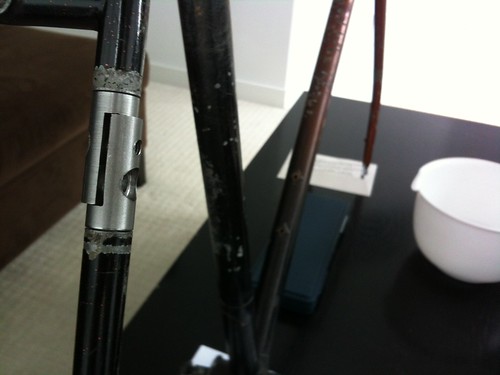
Here are photos of the finished plug, pre-welding.
Side view (click to enlarge)
 Rear view (click to enlarge)
Next up, welding.