Step Four: Beltline adjustment
The first thing that I did was to set about shortening the bottom bracket's spindle. It was long enough for road gearing when I bought it, but I didn't need it that long for my single-speed conversion. I rifled through the spindle bin at
Our Community Bikes, but they didn't have anything shorter. I ended up buying the shortest cartridge bottom bracket they had (107mm) and replacing the entire thing. I'm sort of pumped to have a cartridge bottom bracket, on the promise that they're less prone to creaking. It's also new, so it runs super smooth.
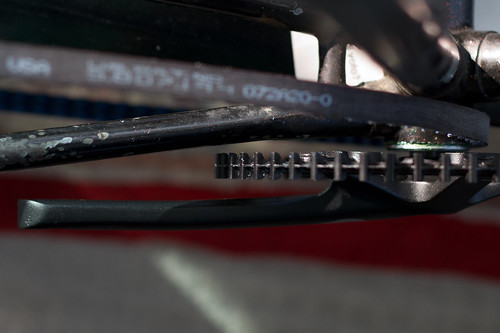
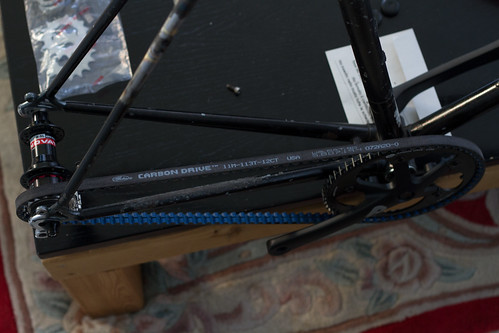
With the 107mm spindle, I was able to get the sprocket this close to the frame. Close enough!
 (Click to enlarge)
Then, I bought a single-speed cog spacer kit from
Our Community Bikes and set to work aligning the rear cog.
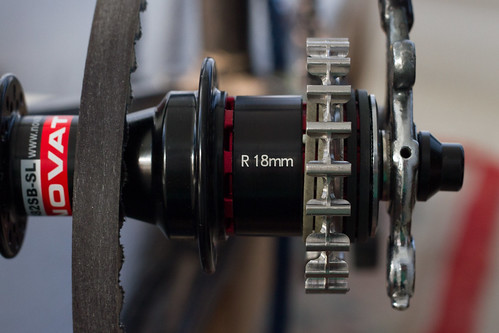
Using a digital caliper, I measured the distance from the centerline of the bike to the edge of the belt on the front crank's sprocket. A measurement of the rear dropouts and some quick math told me exactly where I needed the rear cog to sit on the cassette. I tried a couple of different combinations of spacers before settling on the arrangement pictured. It looks a little janky to me, but I'm told that once it's tightened down tight, it will be alright.
 (Click to enlarge)
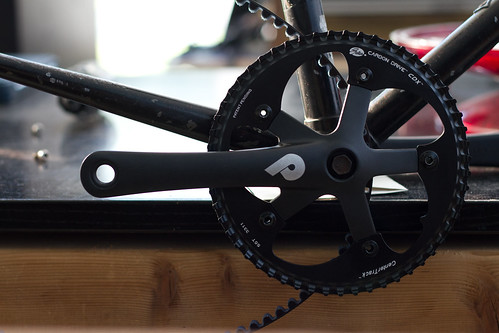
The color scheme of this bike is "black" so I wanted to source all-black parts for the crankset. I had to call 7 bike stores in Vancouver in search of black single-speed chainring bolts, before finding one that did: the unparalleled
Jett Grrl Bike Studio.
I walked into Jett Grrl and was amazed to find a plethora of high-end gear that I'd (up until then) only been able to find on the internet. Tracy, the proprietor, stocks an amazing array of beautiful, quality bike parts. I can't wait for another excuse to visit. This time around, I made off with five black Origin8 single-speed chainring bolts, an Axiom bolt-on skewer set, and one black Pake crankset.
To install the 55 tooth Gates sprocket, I engaged the belt, lightly tightened the chainring bolts, then gave the crank a few turns. As I turned the crank, I could feel the belt loosen and tighten. At the tightest spot, I'd give the beltring a tap with a rubber mallet, tighten the bolts a bit, and repeat. Progressively, the tight spots disappeared as the beltring became centered on the crank spider. At this point, I started to really heave on the chainring bolts, to get them nice and tight. I discovered that this is something you don't do to aluminum chainring bolts – I tightened one far enough to destroy it. So much for sourcing all-black components!
I did manage to find a bolt in Our Community Bikes' bins. It matches closely enough. I'll live.
 (Click to enlarge)
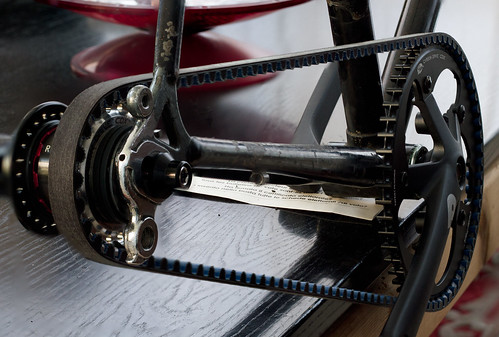
The completed drivetrain:
 (Click to enlarge)
 (Click to enlarge)
Next up, spokes, rims, and a custom wheelbuild!