Originally Posted by
Papa Tom
OK...BIG breakthrough. Don't even ask me what I did differently or how this happened. After what seems like the hundredth time I have reinserted the new BB, backed it off and tried to tighten it, I got it to hit the threads correctly and tightened it ALMOST all the way. Emboldened by having gotten the drive side, I did the same with the left side.
Now I'm going to show you a photo and ask you all a question. First, you have to promise to ignore the greasy mess from my filthy rubber glove all over the frame. That will be gone soon! So be sure to see my question at the end....
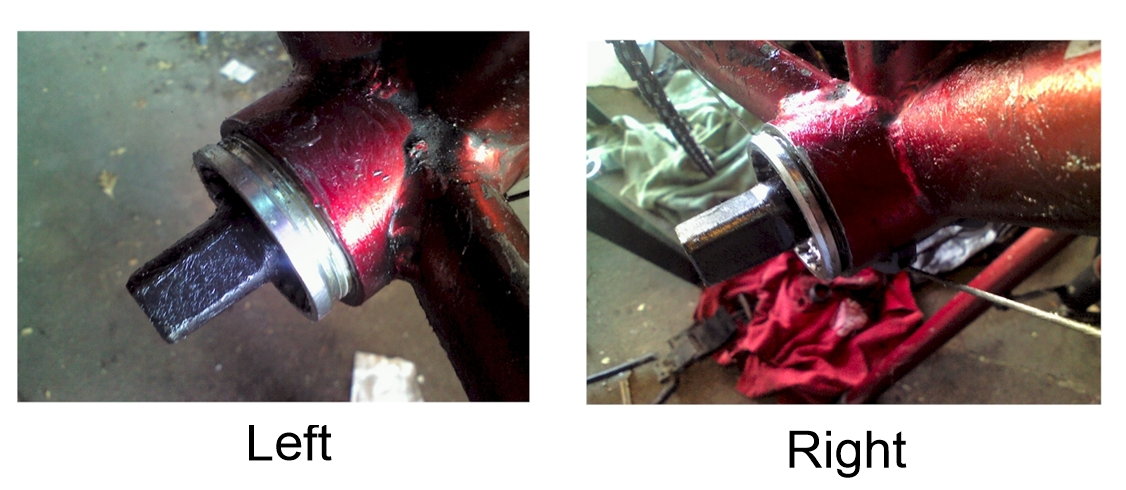
Now, check out how far I was able to tighten both sides with hardly any resistance. At this point, though, I'd have to use a good amount of torque to go any further. The bracket is tight. Can I get away with it like this, or is the 68mm-113 bracket going to make it perfect? Note: The left-side screw-in component (don't know what it's called) of the new bracket is a bit longer than the old one. I tried to get the old one in with no success, thinking this might solve at least part of the problem. Should I try harder?
Looks fine to me. If you got the right side in that far and THEN it got hard, the previous poster is right - it's the threadlocking compound on the cups binding. No way you can cross thread once the cup is in two or three full turns (or more). Plus, you said your threads were pristine, so it's A-OK.
You now need to use a the proper spline tool and wrench to tighten the right side against the BB shell. I do this with an extra long bolt and washers to hold the tool firmly inside the spline and against the the bottom bracket. (A crank bolt is too short - usually. I picked up a 45mm metric bolt from the hardware store. I just use an assortment of axle spacers and large washers to accommodate different spindle lengths of various BBs and the difference between left and right. Just remember to loosen the tool whenever you've broken the cup loose when unscrewing on the left side in the future. You'll damage the bearings if you don't.) Otherwise it will slip when you're applying torque to the tool. My standard procedure is to thoroughly grease the threads of all parts as well as the metal/metal contact points between the cups (they're called BB cups, BTW). Then I insert the right side only all the way in. Then I back it off about a half turn. This "loosens" up the bottom bracket so the left cup can thread into the shell and over the BB cylinder without binding (if your BB shell faces aren't parallel - and they usually aren't from the factory on a mass-produced bike). This allows me to bring the left cup all the way in, save for about a full turn. Then I torque the right side down completely. THEN torque the left cup completely. It's imperative you lock the right side, traditionally called the "fixed cup" in place because, first, it's properly in all the way, and second, its position determines proper spindle (or axle) position for the chainring/chain stay clearance. This, of course, assumes you do not have an adjustable BB, which in this case, you do not.
Once the BB is torqued in place, then reinstall your BB cable guide and bolt (with grease). Then install your cranks... with grease on the tapers! (Oh lord, I just opened a can of worms here...)
PS And regarding the reply saying your spindle looks too long: not to me. Looks absolutely fine. A 113mm spindle hardly sticks out at all. 107 is about the shortest square taper spindle out there, and you're just 6mm wider (3mm on either side, +/-. You should see my 127.5mm spindle. Now THAT has a lot of spindle protruding - and it's a perfect fit for my '90 XT cranks.