My summer schedule finally allowed me to finish the fork. I wanted to get advice from my collogues on how to buff the decoration. Fortunately in my painting supplies were many grits of sandpaper. I started with 80 grit emery and went to 180 and then to 240 emery (because that is what I had in stock). Then I cut sandpaper strips 1" wide and went 400, 500, 600, 800. 1000, 1500. 2000 and finally 2500 grit. By the time I got to 2500, the decoration was pretty shinny and mostly matched to decorations on the frame that had been dulled a bit from use.
I started polishing after the sandpaper with a 4" buffing wheel on my Foredom rotary tool. This didn't work well because because there were too many edges on the small decoration. Using the small felt wheels that come with my Dremel worked great and brought it up to a nice shine. I then masked it with masking tape and I cut to the edges with an Exacto knife.
Painting the fork to match the original frame was a challange. I was told Waterford originally used PPG paint on their frame and I don't use PPG products. I discovered a new to me auto paint supply store semi-near me that specializes in PPG products that matched the color using the old fork as an example. Crossing over different paint brands may create issues. I painted the fork with House of Kolor red primer. Their red primer is not all that different from the PPG final red. I like to do this because if there is a chip, it isn't so obvious. I used the PPG red as a base coat mixed with H of K reducer without any activator. On top of that i put a couple of protective H of K clears. These clears got sanded down for final coating of H of K clears. I use different types of H of K clears for the protective and final coats.
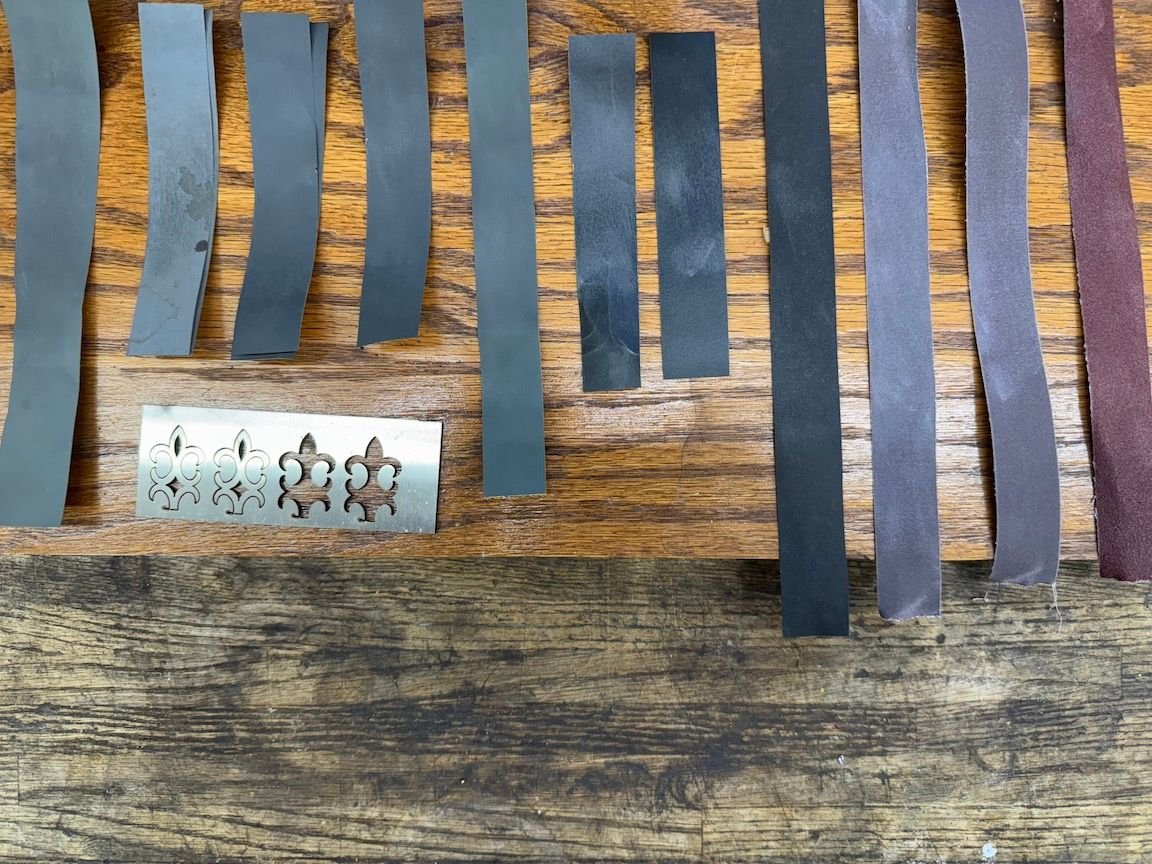 My progressively finer grits of sandpaper I used on the fork decoration
 After sanding with 2500 grit but before a final polish with my Dremel tool
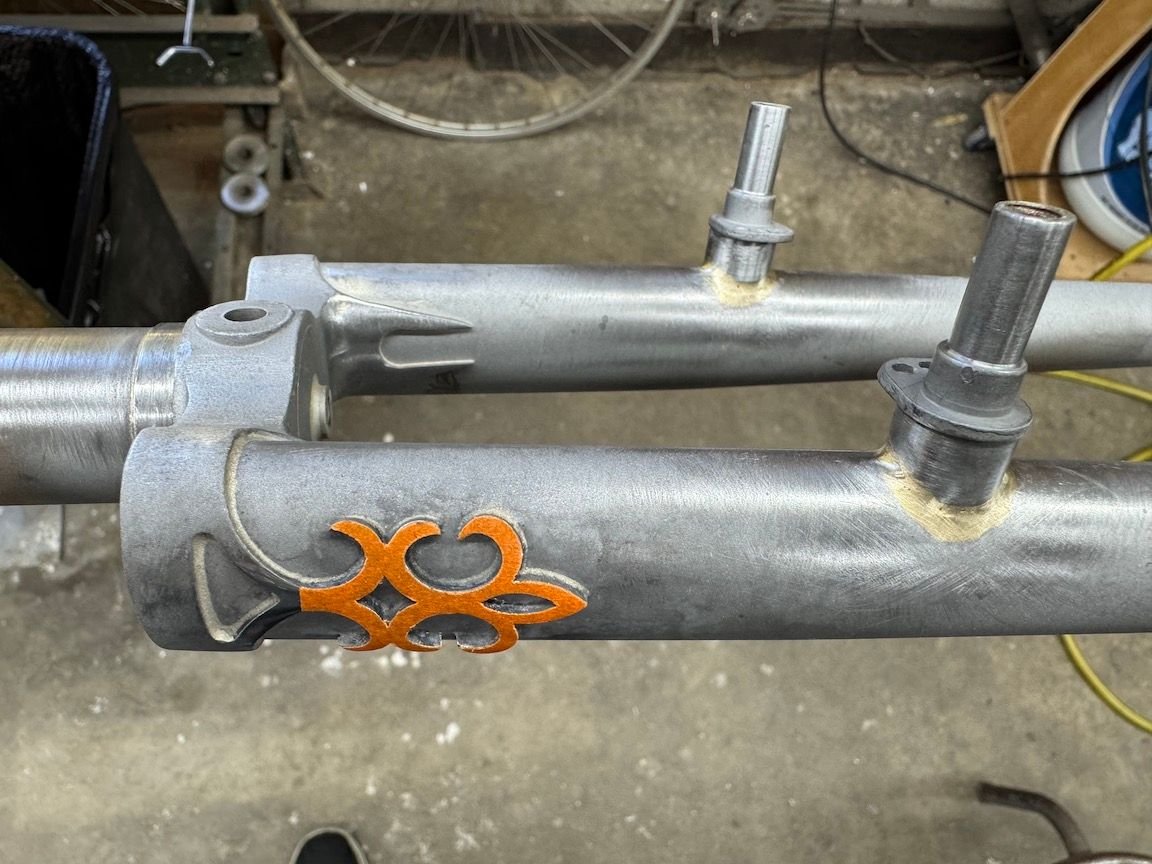 After masking with masking tape
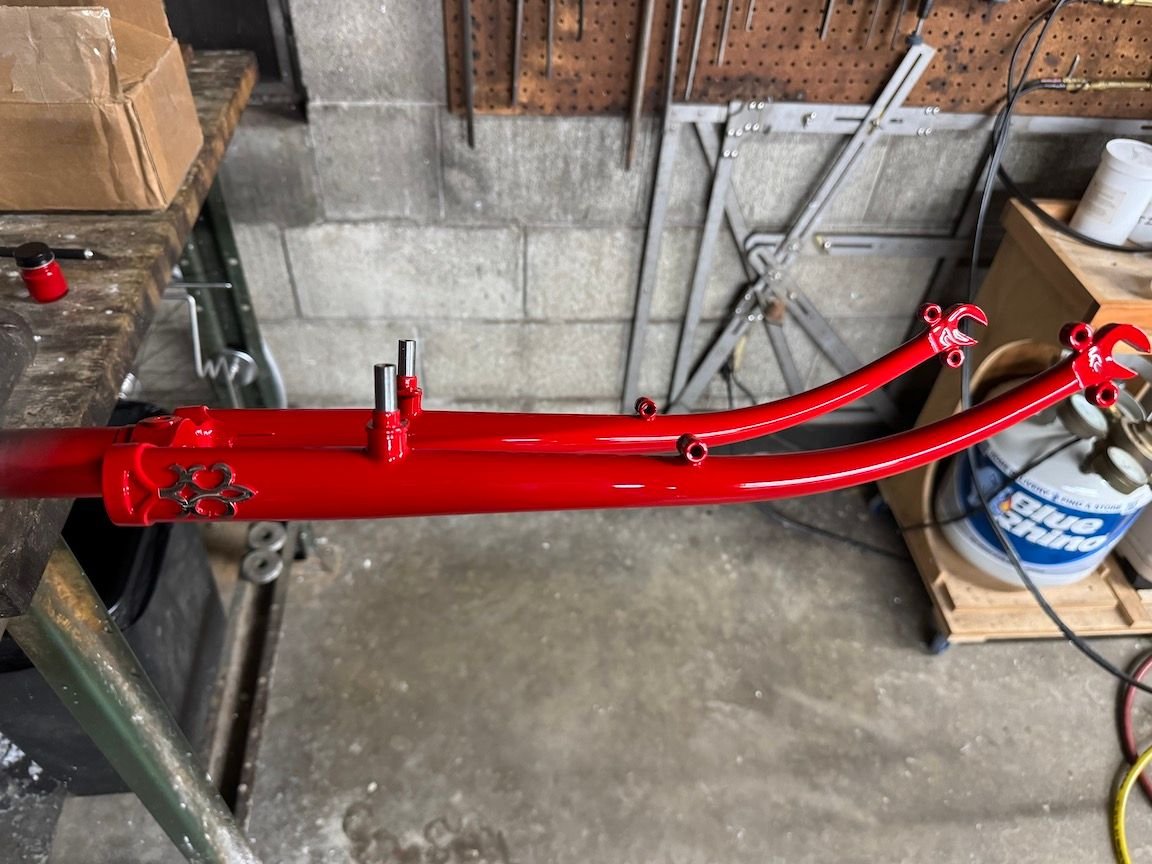 The finished product