Originally Posted by
noglider
Red, really? That doesn't let loose unless you apply heat. I've never used thread-locker there, though blue Loctite makes sense to me. It prevents loosening by vibration, and it releases when you turn the screw with a screwdriver.
Yeah I've used red, and heat to take them off. Maybe not every bike mechanic has a torch handy at all times. I like one of those Bernzomatic air-propane torches that screw onto the little propane cylinder, they even have a piezo-electric sparker built in so they're super easy to use. Also those tiny butane culinary torches are plenty hot for this and have precise pinpoint heat. An electric heat gun will work also, but whatever you use, point the heat away from the paint, heat only the knurled nut.
I freakin hate the later Campy DOs that came with plastic there, bogus move, made me start to hate Campy a little. I always threw those away and used metal ones (typically bright-plated brass) specifically because you could get them tight enough to never loosen when you try to use as intended.
My strong recommendation, sorry if it's been mentioned already, is
use the shortest screws possible, to have minimal stickout in back. If you move the wheel far back, then shorten the screws or remove them completely. The problem with screws sticking out the back is they frequently get bent, and then they can be difficult to remove from the frame. Even straightening a bent screw doesn't return the threads to perfect, so some manner of surgery is needed to get the screw out. That was one of the more common repairs we got in, back when I did frame repairs as part of my job. Some frames needed
EDM to get the old screw out. We didn't have an EDM on the premises but the boss "knew a guy". It wasn't cheap, only worth it for a top-tier bike.
Keeping the screw shorter means less chance of whacking it on something, and less bending leverage when you do. Corrolary to this is
take the screws out whenever it's just a frame, if it's going be kicked around for a while before assembly. Especially if you ship it in a box, those screws will get bent for sure, if left in.
Most people set the screw position once and never change it, so quick adjustment over the full range is not really a feature most people need. So consider the option of a screw put in from the back, run all the way forward until the head hits the dropout, then adjust the screw length until the wheel sits where you want it. No spring needed that way, with the head tight against the dropout it won't vibrate loose. You may need to take one of the screws out to fine-tune the length, like with a file or belt-sander, to make the wheel sit centered between the chainstays. Yeah you're making it non-adjustable, but the advantage is it will never get out of adjustment that way. And no unsafe stickout in back.
Bill Davidson, back in the '70s, used to counterbore the hole in back of the DO, so the head of a socket-head screw would nestle in flush with the back of the dropout. That looked super sano, but that's not a good place to be removing metal from the DO since they already tend to break there sometimes. Still I was tempted to do it on my frame just 'cuz it looked cool. But I didn't. Head of the screw being outside the dropout is OK with me.
Oh yeah, Shimano did that too, on their UF vertical DOs. Sometimes sold as "Dura Ace" dropouts. Trick, but they broke there where they were counterbored for the screw to hide. I repaired a few of those, and also pre-emptively filled the hole with nickle brazing alloy when building a frame with them, because that DO doesn't need an adjusting screw at all. They kinda smacked themselves in the face with that one. Cool dropout though, once you filled in the hole.

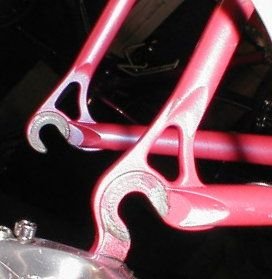
I liked adding a rack/fender eye right where the adjusting screw went, so the raised "land" around the hole looked like it served some purpose... Or I filed the land away, on a special extralight frame I made for my wife. These dropouts got severely lighted from every direction: