Construction tips.
I like to solder my connections. Long experience has taught me that when lights fail�other then a bulb blowing�it�s most often due to a bad connection. Crimp connectors can be used without problem but they are rather bulky.
I�ll show pictures of the final result but I didn�t think to take pictures as I went along�sorry

I won�t go into detail on the pin back lamp because it was more complicated and not that much of an improvement over the Optronics system. It was also my first attempt and really isn�t worth the effort. It�s a little lower in height but not significantly. I like having at least 3 lamps on my bikes and, if I had it to do over again, I�d buy 2 Optronics and put 3 lamps on my bars


The first thing you need to do is to take the Optronics units apart and replace the 50W bulbs they come with. It�s easy to do, you simply twist and pull the front of the lamp. You could use the 50W bulbs but it�ll take more battery capacity and it would just be silly�
The lamp will be plugged into a ceramic pin plug with wires attached that run out the back. There is a rubber grommet behind the plug and an o-ring behind that. Since this is for mounting on car bumper, those seal the lamp and should be left in place. You can simply plug your choice of wattage into the plug and reassemble the lamp head. Nothing more needs be done on the inside of the lamp now.
Now we come to the soldering bit. Be careful since this is where I always get burned
Cut off the connectors that are on the prewired unit. The wires coming out of the bike are a little oily but use them anyway. You may need to use a bit of plumbers flux to get the solder to stick to the wires. Tin the wires on the lamp and, if you are using a switch (you don�t have to but it�s nicer), on the switch. You�ll want to add a bit of wire to the end of the light and switch. How much depends on how far away your battery is. I tend to make them a little short and use an extension cord to the battery so that I can use the lamp on bikes with different water bottle cage locations.
Cut some short sections of shrink wrap and slide them on to the wires before you solder the wires together. Avoid heating the shrink wrap when you solder the wires because it will�well�shrink! I also use a longer section to cover the joints and make the whole thing neater looking.
Solder the wires from one side of the lamp�s lead to one side of the switch. Solder a bit of the speaker wire to the other side of the switch. Make sure you insulate the wires from each other to avoid a short. Use the shrink wrap to do that. On the other lead, wire the speaker wire directly to the lamp�s wire. Slide a section of shrink wrap that you already put on the lamps wires before you go further to seal everything up.
If you are using Dean�s Ultra Connectors (there are other connectors out there that might be better�
Anderson Powerpoles are cleaner and simpler to use
), you�ll want to connect them to the end of the speaker wire.
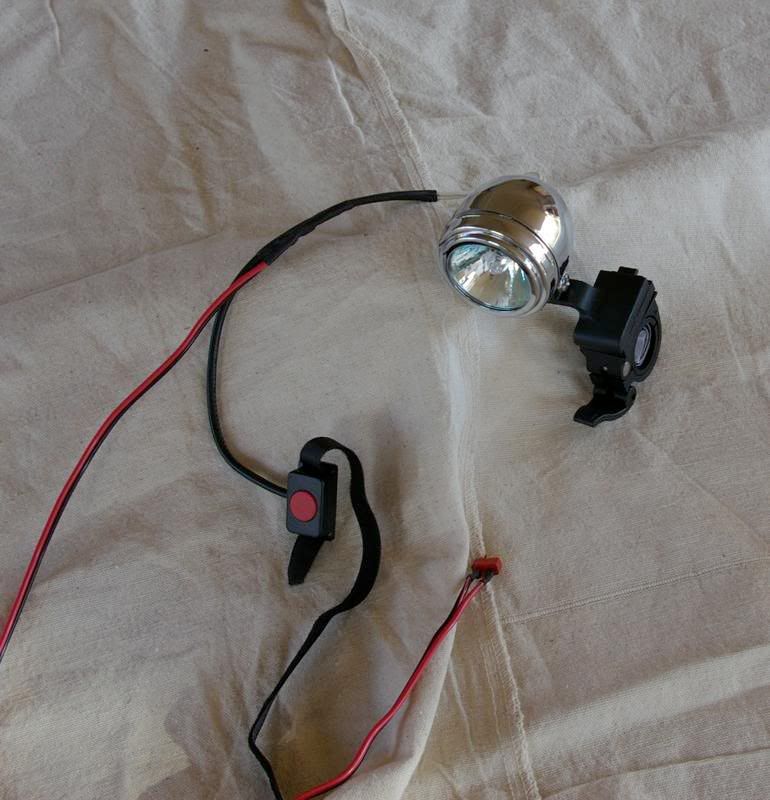
Mount the lamp on the handlebar or helmet mount using the bolts provided by Optronics. The lamp is a little tight in the holder but it will work. Your lamp should look like this.
For helmet mounts, like this.
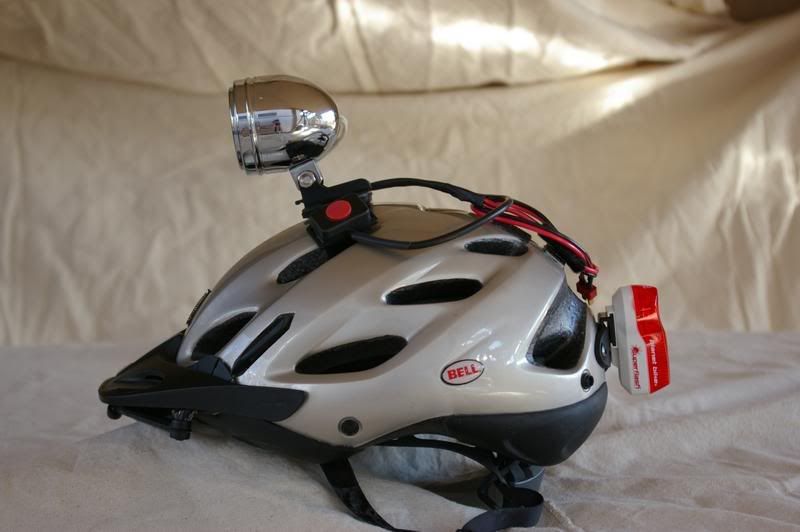
I put the switch on my helmet lamp on a velcro mount and stuck it to the helmet. I'd suggest keeping the helmet lamps tail short so that it doesn't hang down too far off the back of the helmet...which I didn't do here!