


Stuck Bottom Bracket
 11-01-15 | 01:51 PM
#1
Thread Starter
Senior Member

Joined: Mar 2015
Posts: 1,751
Likes: 218
From: Gateway to the Shenandoah Region
Stuck Bottom Bracket
Hey all,
My bottom bracket took a louder turn for the worse. So I decided to change it. After taking off the cranks, noticed loose bearings from the bracket.
So far I've been able to take the sleeve off of the non drive side of the bracket. But having a heck of a time getting the drive side of this bracket to loosen.
I have put the bracket tool onto the BB and screwed it in with a bolt in order to keep it on rather than having it constantly slipping as I try to get this to loosen it's grip. But it seems like I can stand on my wrenches and it will still not loosen. I've pounded on my wrenches with a hammer and also doused the non drive side with wd 40 hoping maybe it will go in and loosen up a bit.
Anyone have any suggestions on how to loosen this thing up? I'm about to give up and just take it to the LBS to have them do this.
By the way, yes, I am trying to loosen it up clockwise.
Thanks!
 11-01-15 | 02:30 PM
#3
Thread Starter
Senior Member
Joined: Mar 2015
Posts: 1,751
Likes: 218
From: Gateway to the Shenandoah Region
It's a square taper on my Crosstrail. I'm attempting to turn it clockwise on the drive side. Or to push/pull the wrench forward.
As far I as I know forward for loosening and back or towards the rear wheels for tightening. Please let me know if I have that wrong.
As far I as I know forward for loosening and back or towards the rear wheels for tightening. Please let me know if I have that wrong.
11-01-15 | 02:59 PM
#4
Nigel
Joined: Mar 2011
Posts: 2,991
Likes: 7
From: San Jose, CA
Bikes: 1980s and 1990s steel: CyclePro, Nishiki, Schwinn, SR, Trek........
11-01-15 | 03:12 PM
#5
SE Wis

Joined: Apr 2005
Posts: 11,551
Likes: 4,331
From: Milwaukee, WI
Bikes: '68 Raleigh Sprite, '02 Raleigh C500, '84 Raleigh Gran Prix, '91 Trek 400, 2013 Novara Randonee, 1990 Trek 970
Some take more persuasion than others. this one took a 3 foot cheater bar on 1/2 drive breaker and a propane torch after soaking in Kroil for a week
11-01-15 | 04:30 PM
#6
Thread Starter
Senior Member
Joined: Mar 2015
Posts: 1,751
Likes: 218
From: Gateway to the Shenandoah Region
I think this is my problem. I only have a regular sized wrench. I need a longer one to give myself leverage and more power.
11-01-15 | 05:14 PM
#7
Senior Member
Joined: Sep 2015
Posts: 1,681
Likes: 102
From: New Jersey
The appropriate shop socket-type tools can be used with an impact gun. I doubt if you have a burly one (or one at all) but it is a thought. If you know a[n auto] mechanic, you may be able to convince them to use theirs for you...just make sure they know to run the tool in 'forward' position. Applying smooth force may restrict you to the above scenario of a 3 foot cheater.
Soak with kroil (available on Amazon), securely attach your removal tool with a bolt/washer, and ideally, have a box wrench that will fit it. A whack with a deadblow hammer will loosen most stuck parts.
Soak with kroil (available on Amazon), securely attach your removal tool with a bolt/washer, and ideally, have a box wrench that will fit it. A whack with a deadblow hammer will loosen most stuck parts.
11-01-15 | 05:30 PM
#8

Senior Member
Joined: Sep 2012
Posts: 903
Likes: 5
From: East L.A.
Bikes: Diamondback Insight, Motobecane Mirage
I had one that made noise, and always wanted to open it up to check the grease/bearings.........couldn't get the bugger off, ruined some threads on one side...........but good thing all I really needed to was loosen the lockring and my creak virtually went away.
11-01-15 | 05:33 PM
#9
Senior Member
Joined: Sep 2012
Posts: 1,666
Likes: 1
From: 6367 km away from the center of the Earth
Just removed mine yesterday with 12" long wrench. My... that was tough. The opposite side of the drive is definitively anti-clockwise. Tried to put one side back just to know which way on the drive side but it looks like it is even harder to put it back than removing it  (I'm waiting for the bottom bracket to arrive)
(I'm waiting for the bottom bracket to arrive)
11-01-15 | 05:40 PM
#10
Senior Member
Joined: Dec 2010
Posts: 6,682
Likes: 4
From: Above ground, Walnut Creek, Ca
Bikes: 8 ss bikes, 1 5-speed touring bike
i have found a 2" ID pipe about 2.5' long slipped over my 12" adjustable (we used to call it a crescent) wrench works wonders. i think the bolts see it coming and just give up. 
then there's the 'ol standby for those unfortunate souls that have managed to booger up the wrench attachment area on the cup...
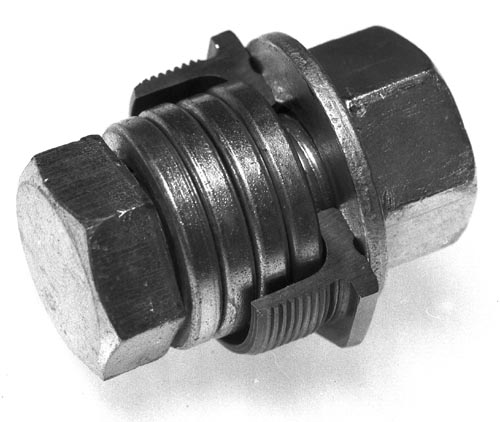
Sheldon's (forgive me) tool.
then there's the 'ol standby for those unfortunate souls that have managed to booger up the wrench attachment area on the cup...
Sheldon's (forgive me) tool.
11-01-15 | 06:51 PM
#11
Thread Starter
Senior Member
Joined: Mar 2015
Posts: 1,751
Likes: 218
From: Gateway to the Shenandoah Region
Just removed mine yesterday with 12" long wrench. My... that was tough. The opposite side of the drive is definitively anti-clockwise. Tried to put one side back just to know which way on the drive side but it looks like it is even harder to put it back than removing it (I'm waiting for the bottom bracket to arrive)
(I'm waiting for the bottom bracket to arrive)I'm now considering, do I want to get a long wrench......or spend the $20 to have my LBS do this. I wouldn't mind having the experience and satisfaction of doing it myself. Plus it gives me an excuse to tell the Wife I need another tool.
11-01-15 | 06:54 PM
#12
Thread Starter
Senior Member
Joined: Mar 2015
Posts: 1,751
Likes: 218
From: Gateway to the Shenandoah Region
i have found a 2" ID pipe about 2.5' long slipped over my 12" adjustable (we used to call it a crescent) wrench works wonders. i think the bolts see it coming and just give up.
then there's the 'ol standby for those unfortunate souls that have managed to booger up the wrench attachment area on the cup...
Sheldon's (forgive me) tool.
then there's the 'ol standby for those unfortunate souls that have managed to booger up the wrench attachment area on the cup...
Sheldon's (forgive me) tool.
11-01-15 | 09:15 PM
#13

Senior Member
Joined: Nov 2010
Posts: 22,994
Likes: 10,498
From: Sacramento, CA
Bikes: old ones
The Hozan tool is kinda hard to come by, and way too expensive if you're only gonna use it a few times. Not all shops have one, and not all shops will want to mess with your project, so you ought to ask in advance and make sure, or they will just tell you it can't be done and to buy a new bike. A torch heating almost always works, but it traashes the paint.
I'm assuming this is a loose ball BB of the old style. If a sealed unit, just forget I said anything.
 11-02-15 | 07:41 AM
#14
Senior Member
Joined: Apr 2015
Posts: 1,102
Likes: 2
From: Morris County, NJ
Bikes: 90's Bianchi Premio, Raleigh-framed fixed gear, Trek 3500, Centurion hybrid, Dunelt 3-spd, Trek 800
Yea, I was looking around the garage and my neighbors garage for something to use for leverage. Nothing......I haven't screwed up the attachment area. Cause after a few slips, I decided to put a 2" bolt with some washers through the BB tool into the BB to hold the tool in. The BB just won't budge with my shorter wrench I have.
Last edited by habilis; 11-02-15 at 08:40 AM.
11-02-15 | 08:29 AM
#15
Senior Member
Joined: Apr 2015
Posts: 1,102
Likes: 2
From: Morris County, NJ
Bikes: 90's Bianchi Premio, Raleigh-framed fixed gear, Trek 3500, Centurion hybrid, Dunelt 3-spd, Trek 800
Yea, I was looking around the garage and my neighbors garage for something to use for leverage. Nothing......I haven't screwed up the attachment area. Cause after a few slips, I decided to put a 2" bolt with some washers through the BB tool into the BB to hold the tool in. The BB just won't budge with my shorter wrench I have.
11-02-15 | 09:29 AM
#16
Senior Member
Joined: Nov 2010
Posts: 22,994
Likes: 10,498
From: Sacramento, CA
Bikes: old ones
The last resort whenever one cylindrical object is threaded into another and won't come loose: Use a hacksaw to make two cuts through the bearing cup all the way down to the shell threads. The hacksaw can just graze the shell threads without harming them - it takes some judgement and cutting parallel to the wall of the shell, not at an angle. When you've made your two cuts, a small section of the cup can be removed, and the rest of the cup will unthread easily. Plumbers use this technique to get a stuck pipe out of a fitting. Unless you have a mini-sawzall, you'll need a stiff hacksaw blade with a handle on one end, and some patience.
11-02-15 | 10:35 AM
#17
Senior Member
Joined: Apr 2015
Posts: 1,102
Likes: 2
From: Morris County, NJ
Bikes: 90's Bianchi Premio, Raleigh-framed fixed gear, Trek 3500, Centurion hybrid, Dunelt 3-spd, Trek 800
Good point. The best blade choice would be the kind with carbide grit fused to it. I've gone through 4" cast iron waste pipes on more than one occasion. I would use a Sawszall, but I'd be reluctant to recommend this to someone who's doing this task for the first time. It's not really hard to do, but if the blade pops out of the cup, it could deface or destroy the frame. Doing it by hand, you'd need a comfortable handle, time, and patience, but it's doable.
11-02-15 | 07:41 PM
#18
Thread Starter
Senior Member
Joined: Mar 2015
Posts: 1,751
Likes: 218
From: Gateway to the Shenandoah Region
Thanks everyone for your advice. I ended up giving up and taking the bike to my LBS to have them replace this square tapered sealed BB. Since they had better tools, they had an easier time taking out the old one. They even noticed how badly it was crunching.
11-03-15 | 08:56 AM
#20
Senior Member


Joined: May 2008
Posts: 10,106
Likes: 2,760
From: Fredericksburg, Va
Bikes: ? Proteous, '65 Frejus TDF, '73 Bottecchia Giro d'Italia, '83 Colnago Superissimo, '84 Trek 610, '84 Trek 760, '88 Pinarello Veneto, '88 De Rosa Pro, '89 Pinarello Montello, 'Litespeed Catalyst'94 Burley Duet, 97 Specialized RockHopper, 2010 Langster
I had a '72 Motobecane Le Champion with a fixed cup that had not been removed. Tried most of what was suggested. Heat applied only to the cup, was the answer, followed with the vise/frame lever approach. No paint damage, which was a mute point since the frame was damaged anyway. Opportunity for careful extractions with success.
__________________
Bikes don't stand alone. They are two tired.
Bikes don't stand alone. They are two tired.
11-03-15 | 09:00 AM
#21
Thread Starter
Senior Member
Joined: Mar 2015
Posts: 1,751
Likes: 218
From: Gateway to the Shenandoah Region
They used similar tools that I used, just larger/longer to give them more leverage to take it off. I had the choice of buying the tools, or just spending the $20 to have them take off the BB and put the new one in. Since this is something that doesn't happen often for me, I decided to make them do it since I didn't care to buy a tool only rarely to ever use.
11-03-15 | 12:04 PM
#22
Senior Member
Joined: Dec 2014
Posts: 3,598
Likes: 330
From: Fernandina Beach FL
Bikes: Vintage Japanese Bicycles, Tange, Ishiwata, Kuwahara
Harbor Freight has a big 2' x 1/2" breaker bar for a very reasonable price. Ever since I got mine I haven't had any problems loosening BBs.
11-03-15 | 04:02 PM
#23


Senior Member
Joined: May 2005
Posts: 6,301
Likes: 14
From: La La Land (We love it!)
Bikes: Gilmour road, Curtlo road; both steel (of course)
11-03-15 | 04:34 PM
#24
Thread Starter
Senior Member
Joined: Mar 2015
Posts: 1,751
Likes: 218
From: Gateway to the Shenandoah Region
Think that's what the LBS had. I didn't realize you could get those that cheap. Well, the next time I have a BB go out, I'm getting one of those! Thanks for the info!
11-03-15 | 04:36 PM
#25
Thread Starter
Senior Member
Joined: Mar 2015
Posts: 1,751
Likes: 218
From: Gateway to the Shenandoah Region