


How do I remove this threaded headset?
 07-11-24 | 01:43 PM
#1
Thread Starter
Senior Member


Joined: Jul 2022
Posts: 595
Likes: 399
From: Central Massachusetts
Bikes: 1987 Miyata 615gt, 1980/81 Lotus Eclair, Trek 420, 1975 Motobecane Grand Jubile
How do I remove this threaded headset?
I’m so sorry if this has been asked a thousand times already but I‘ve searched throughout this site, Sheldon Brown’s site and also Shimano’s site and I can’t find any info about this particular headset. Or very possibly I don’t know exactly what I’m looking for?
This is a threaded headset on a 1980 Lotus Eclair and I don’t believe it’s ever been serviced. When I turn the fork it feels not just gritty but also lumpy.
The parktools tutorial on removing threaded headsets says to hold the threaded race with a spanner and loosen the top locknut but this headset doesn’t appear to have a threaded race? It has I think a keyed washer? Basically a spacer with three square holes. How do I remove the top lock nut?
Any help would be greatly appreciated!

 07-11-24 | 03:24 PM
#4
Senior Member

Joined: Apr 2009
Posts: 39,897
Likes: 3,865
From: New Rochelle, NY
Bikes: too many bikes from 1967 10s (5x2)Frejus to a Sumitomo Ti/Chorus aluminum 10s (10x2), plus one non-susp mtn bike I use as my commuter
To start with you don't want to twist the fork by using high torque on the headset while holding the fork by the wheel. Also note that this headset has two locknuts.
My preferred method is to hold the knurled upper race with pump pliers (Channellocks) while using an open end or adjustable wrench on the hex locknut. Protect the race with an old leather belt to avoid marring it.
Once that locknut is off remove spacers and cable holder then use a hook spanner or hammer and punch to loosen the locking ring. Then the cup will be free to take off by hand.
07-11-24 | 03:26 PM
#5
Thread Starter
Senior Member
Joined: Jul 2022
Posts: 595
Likes: 399
From: Central Massachusetts
Bikes: 1987 Miyata 615gt, 1980/81 Lotus Eclair, Trek 420, 1975 Motobecane Grand Jubile
07-11-24 | 03:30 PM
#6
Thread Starter
Senior Member
Joined: Jul 2022
Posts: 595
Likes: 399
From: Central Massachusetts
Bikes: 1987 Miyata 615gt, 1980/81 Lotus Eclair, Trek 420, 1975 Motobecane Grand Jubile
To start with you don't want to twist the fork by using high torque on the headset while holding the fork by the wheel. Also note that this headset has two locknuts.
My preferred method is to hold the knurled upper race with pump pliers (Channellocks) while using an open end or adjustable wrench on the hex locknut. Protect the race with an old leather belt to avoid marring it.
Once that locknut is off remove spacers and cable holder then use a hook spanner or hammer and punch to loosen the locking ring. Then the cup will be free to take off by hand.
My preferred method is to hold the knurled upper race with pump pliers (Channellocks) while using an open end or adjustable wrench on the hex locknut. Protect the race with an old leather belt to avoid marring it.
Once that locknut is off remove spacers and cable holder then use a hook spanner or hammer and punch to loosen the locking ring. Then the cup will be free to take off by hand.
 07-11-24 | 03:59 PM
#7
Senior Member
Joined: Apr 2009
Posts: 39,897
Likes: 3,865
From: New Rochelle, NY
Bikes: too many bikes from 1967 10s (5x2)Frejus to a Sumitomo Ti/Chorus aluminum 10s (10x2), plus one non-susp mtn bike I use as my commuter
07-11-24 | 04:54 PM
#8
Senior Member
Joined: Jan 2009
Posts: 4,415
Likes: 1,679
From: San Diego, CA
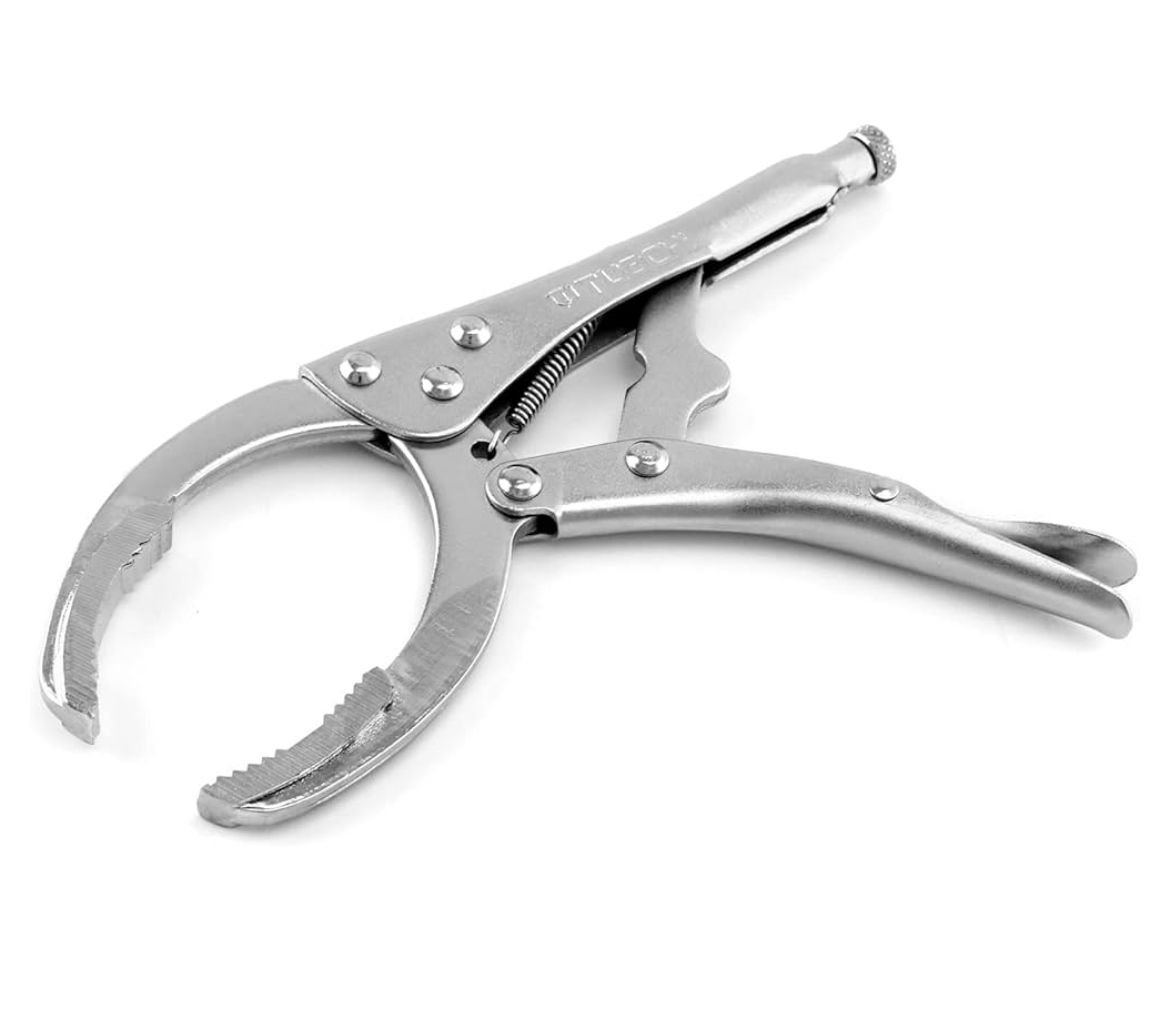
If you have some Channellock type pliers and some type of grinding tools/metal file you can make a very nice tool to service your headset and other notched type of nuts and lockrings. You may need to grind down the thickness of the jaws as well to better fit the lock rings. DIY Lockring Pliers : 3 Steps (with Pictures) - Instructables
Last edited by Crankycrank; 07-11-24 at 04:57 PM.
07-11-24 | 10:39 PM
#10

Mad bike riding scientist

Joined: Nov 2004
Posts: 29,185
Likes: 6,264
From: Denver, CO
Bikes: Some silver ones, a red one, a black and orange one, and a few titanium ones
If you have some Channellock type pliers and some type of grinding tools/metal file you can make a very nice tool to service your headset and other notched type of nuts and lockrings. You may need to grind down the thickness of the jaws as well to better fit the lock rings. DIY Lockring Pliers : 3 Steps (with Pictures) - Instructables
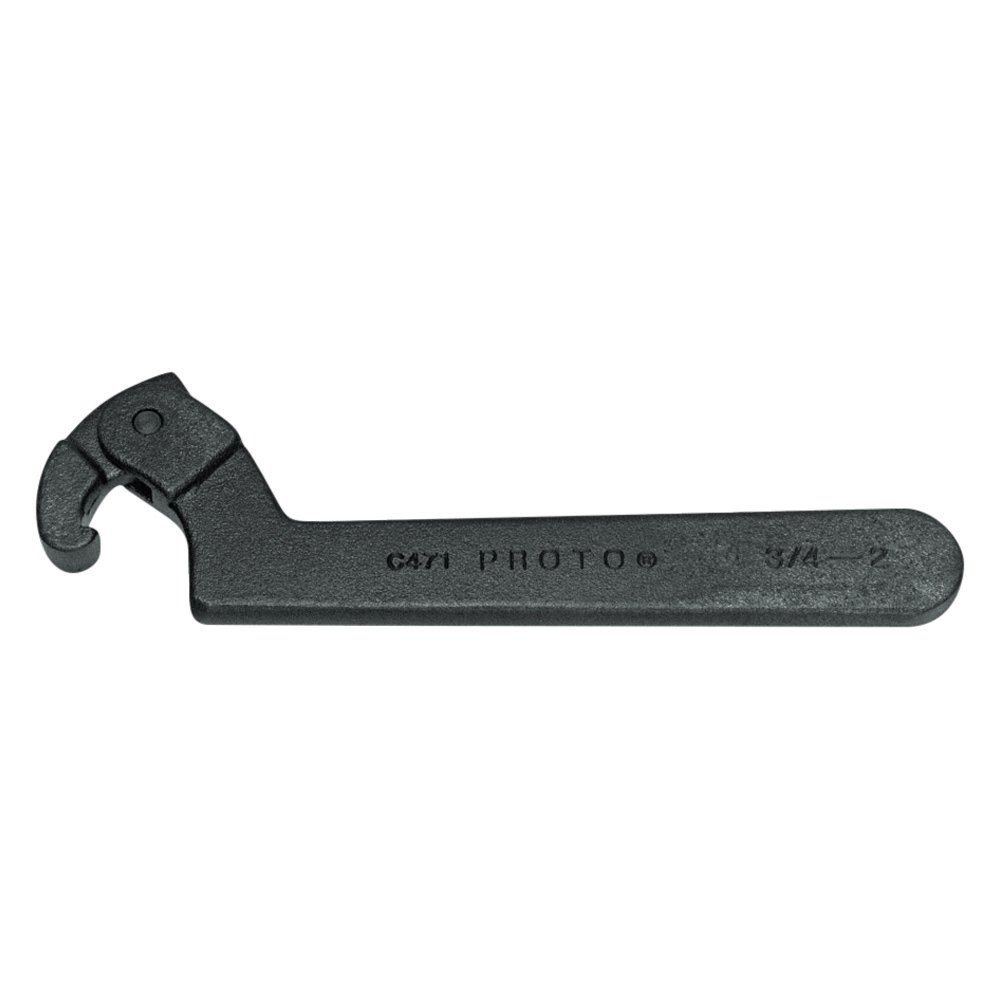
To make matters worse, the hook spanner for the bottom bracket like the Park Tool HCW-5 is too large to work on the headset. The Park HCW-17 might work. An adjustable hook spanner is also a good choice although you need something that is on the smaller side.
But the best tool I ever found for the job was one like the pedal/hook spanner in this tool kit. The tool is totally useless for removing pedals and the hook spanner is too small for the bottom bracket but it works wonderfully for the headset notched lock rings.
__________________
Stuart Black
Dreamin' of Bemidji Down the Mississippi (in part)
Plan Epsilon Around Lake Michigan in the era of Covid
Gold Fever Three days of dirt in Colorado
Pokin' around the Poconos A cold ride around Lake Erie
Dinosaurs in Colorado A mountain bike guide to the Purgatory Canyon dinosaur trackway
Solo Without Pie. The search for pie in the Midwest.
Picking the Scablands. Washington and Oregon, 2005. Pie and spiders on the Columbia River!
07-12-24 | 05:49 AM
#11

Old fart
Joined: Nov 2004
Posts: 26,402
Likes: 5,333
From: Appleton WI
Bikes: Several, mostly not name brands.
If you have some Channellock type pliers and some type of grinding tools/metal file you can make a very nice tool to service your headset and other notched type of nuts and lockrings. You may need to grind down the thickness of the jaws as well to better fit the lock rings. DIY Lockring Pliers : 3 Steps (with Pictures) - Instructables
 07-12-24 | 06:53 AM
#13

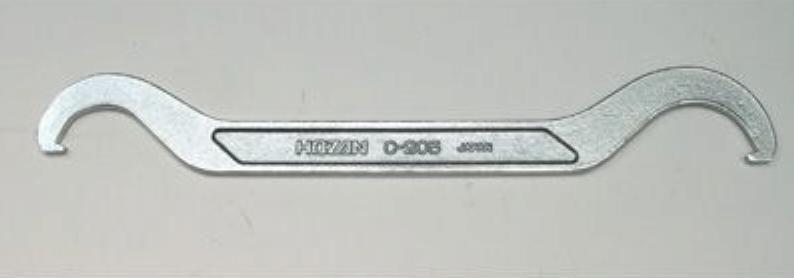
Agree with the above posts from cyccommute and JohnDThompson. You need a lock ring wrench for the ring that's just above the adjustable race.
Or, as Hozan labeled it, a "rock ring wrench."
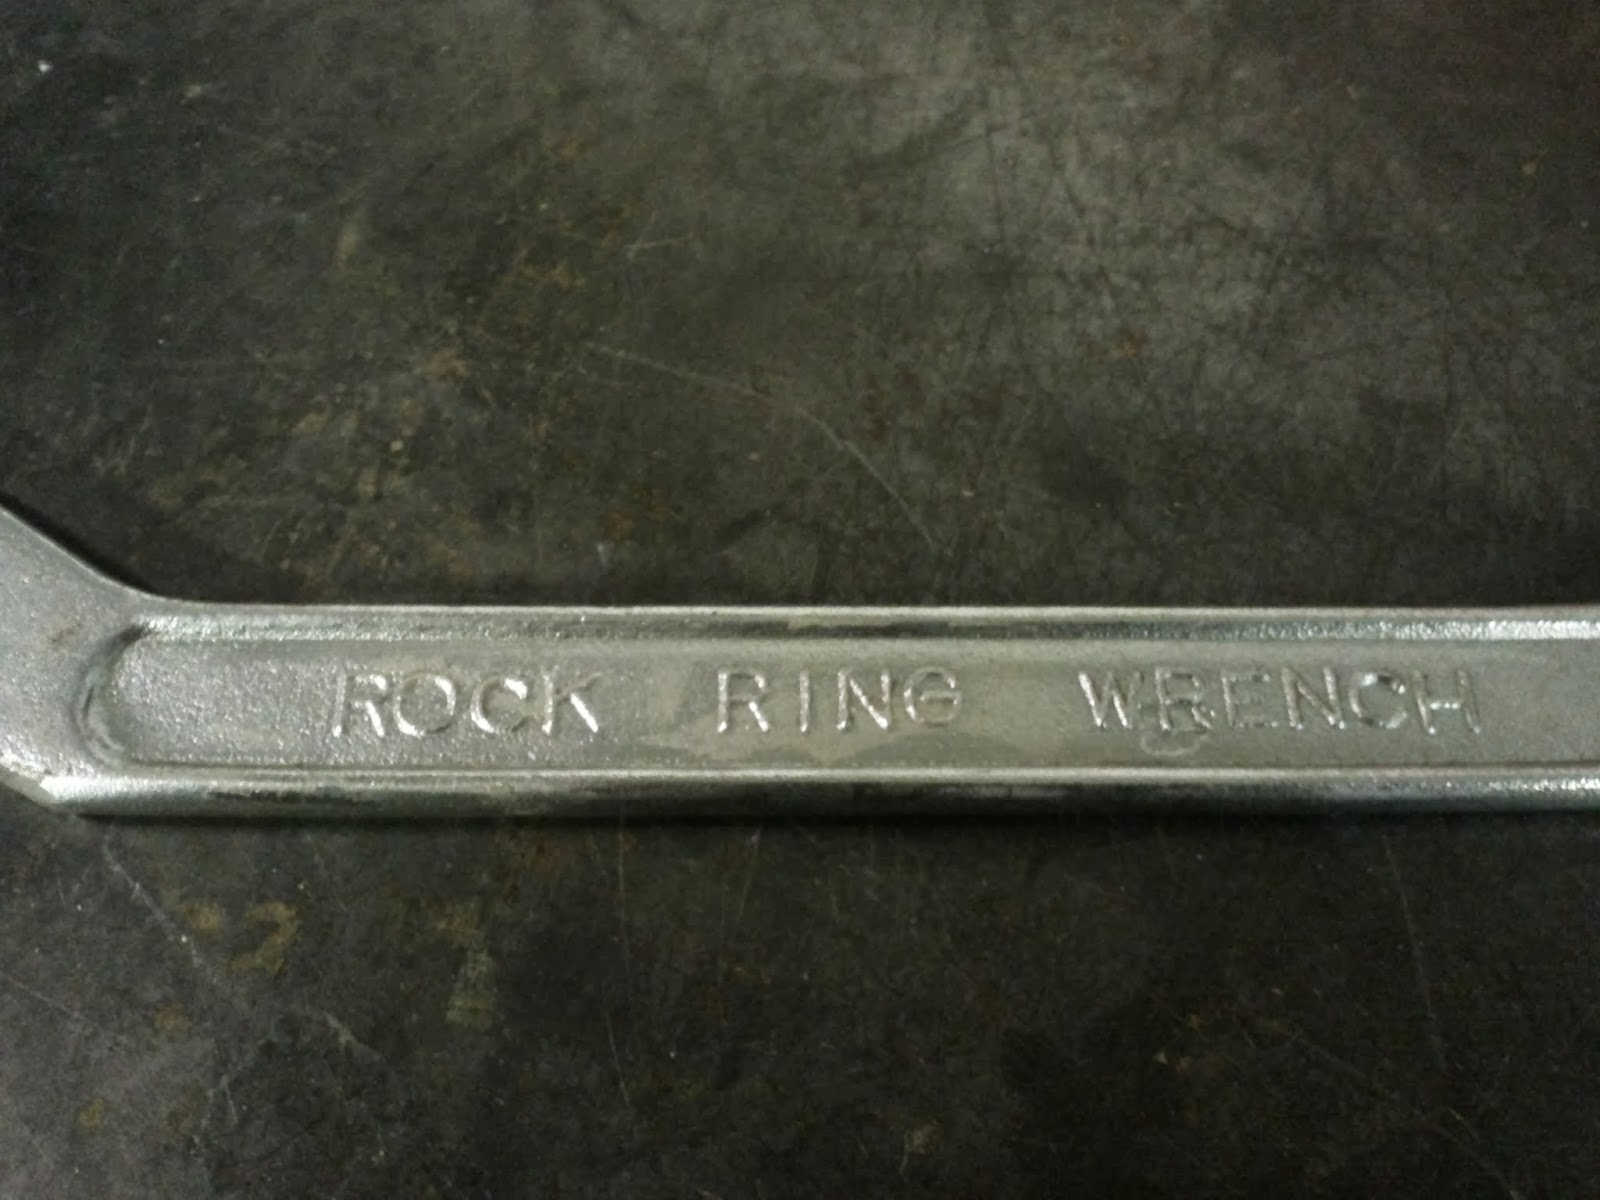
Or, as Hozan labeled it, a "rock ring wrench."
 07-12-24 | 07:15 AM
#14
Senior Member

Joined: Apr 2016
Posts: 3,878
Likes: 1,786
Caveat: while that is an inexpensive and effective lockring tool, it really only works on lockrings with an even number of notches. Most of those headset lockrings have only three notches, and the pliers can't effectively grip them. So, the hook spanner is the tool to use in that case. Hook spanners designed for bottom bracket lockrings have too wide a radius to engage the headset lockring, so you either need a smaller radius hook spanner, like the Hozan C205, or one with a hinged hook.
07-12-24 | 07:58 AM
#15

Senior Member
Joined: Aug 2015
Posts: 4,197
Likes: 2,943
One could leave the handle bars on, secure bars and then loosen the hex, remove bars then pull the locknut
One can secure the adjuster/stop with a wrench and then loosen the hex with another.
One can secure fork and wrench the hex.
One can secure the adjuster/stop with a wrench and then loosen the hex with another.
One can secure fork and wrench the hex.
07-12-24 | 10:01 AM
#16
Senior Member
Joined: Mar 2012
Posts: 1,450
Likes: 982
If you think about how much torque you can apply by holding the front wheel, a tool with a 6 inch handle won't come close. Soat it in PB Blaster, Liquid Wrench, Kroil, etc. for a few days and try again. Another trick would be to heat the lock nut with a hair drier to try to get it to break the rust and corrosion that is holding all this together. And assuming you do get it apart and rebuild it, grease, grease, grease. BTW, the "lumpy" feel you are getting is probably because the headset lower race is fretted. You will see a series of evenly spaced marks on the crown race. The fixes for this is to replace the crown race or to go with loose balls (no bearing retainer) so the balls don't align to the same spot every time.
07-12-24 | 10:19 AM
#17
SE Wis
Joined: Apr 2005
Posts: 11,555
Likes: 4,332
From: Milwaukee, WI
Bikes: '68 Raleigh Sprite, '02 Raleigh C500, '84 Raleigh Gran Prix, '91 Trek 400, 2013 Novara Randonee, 1990 Trek 970
07-12-24 | 07:22 PM
#18

Senior Member
Joined: Sep 2010
Posts: 8,327
Likes: 1,112
From: Roswell, GA
Bikes: '93 Trek 750, '92 Schwinn Crisscross, '93 Mongoose Alta
If you have some Channellock type pliers and some type of grinding tools/metal file you can make a very nice tool to service your headset and other notched type of nuts and lockrings. You may need to grind down the thickness of the jaws as well to better fit the lock rings. DIY Lockring Pliers : 3 Steps (with Pictures) - Instructables
07-13-24 | 07:22 AM
#19
Thread Starter
Senior Member
Joined: Jul 2022
Posts: 595
Likes: 399
From: Central Massachusetts
Bikes: 1987 Miyata 615gt, 1980/81 Lotus Eclair, Trek 420, 1975 Motobecane Grand Jubile
Caveat: while that is an inexpensive and effective lockring tool, it really only works on lockrings with an even number of notches. Most of those headset lockrings have only three notches, and the pliers can't effectively grip them. So, the hook spanner is the tool to use in that case. Hook spanners designed for bottom bracket lockrings have too wide a radius to engage the headset lockring, so you either need a smaller radius hook spanner, like the Hozan C205, or one with a hinged hook.
 07-13-24 | 12:16 PM
#20
Senior Member

Joined: Apr 2011
Posts: 12,752
Likes: 4,866
You don't need a crazy tool. Put the large adjustable wrench on the top locknut and turn CC while holding the handlebars. If you can't get it loose with a foot long wrench, you've got bigger problems.
Once the locknut is off, you can pull the keyed cable stop spacer out. Then any lockring wrench will work because it will be open on top so it no longer needs to be thin. Then take the knurled part off by hand.
You can assemble these headsets with some trial and error the same way, relying on the lockring, cup and keyed spacer to hold a position while the locknut is tightened down against them. That doesn't work very well with regular headsets, but the addition lockring makes it possible.
07-13-24 | 01:30 PM
#21
Thread Starter
Senior Member
Joined: Jul 2022
Posts: 595
Likes: 399
From: Central Massachusetts
Bikes: 1987 Miyata 615gt, 1980/81 Lotus Eclair, Trek 420, 1975 Motobecane Grand Jubile
Thanks Everybody, I finally got it
Something I like about this forum is the answer I’m seeking is often a combo of several different replies so thank you everyone!
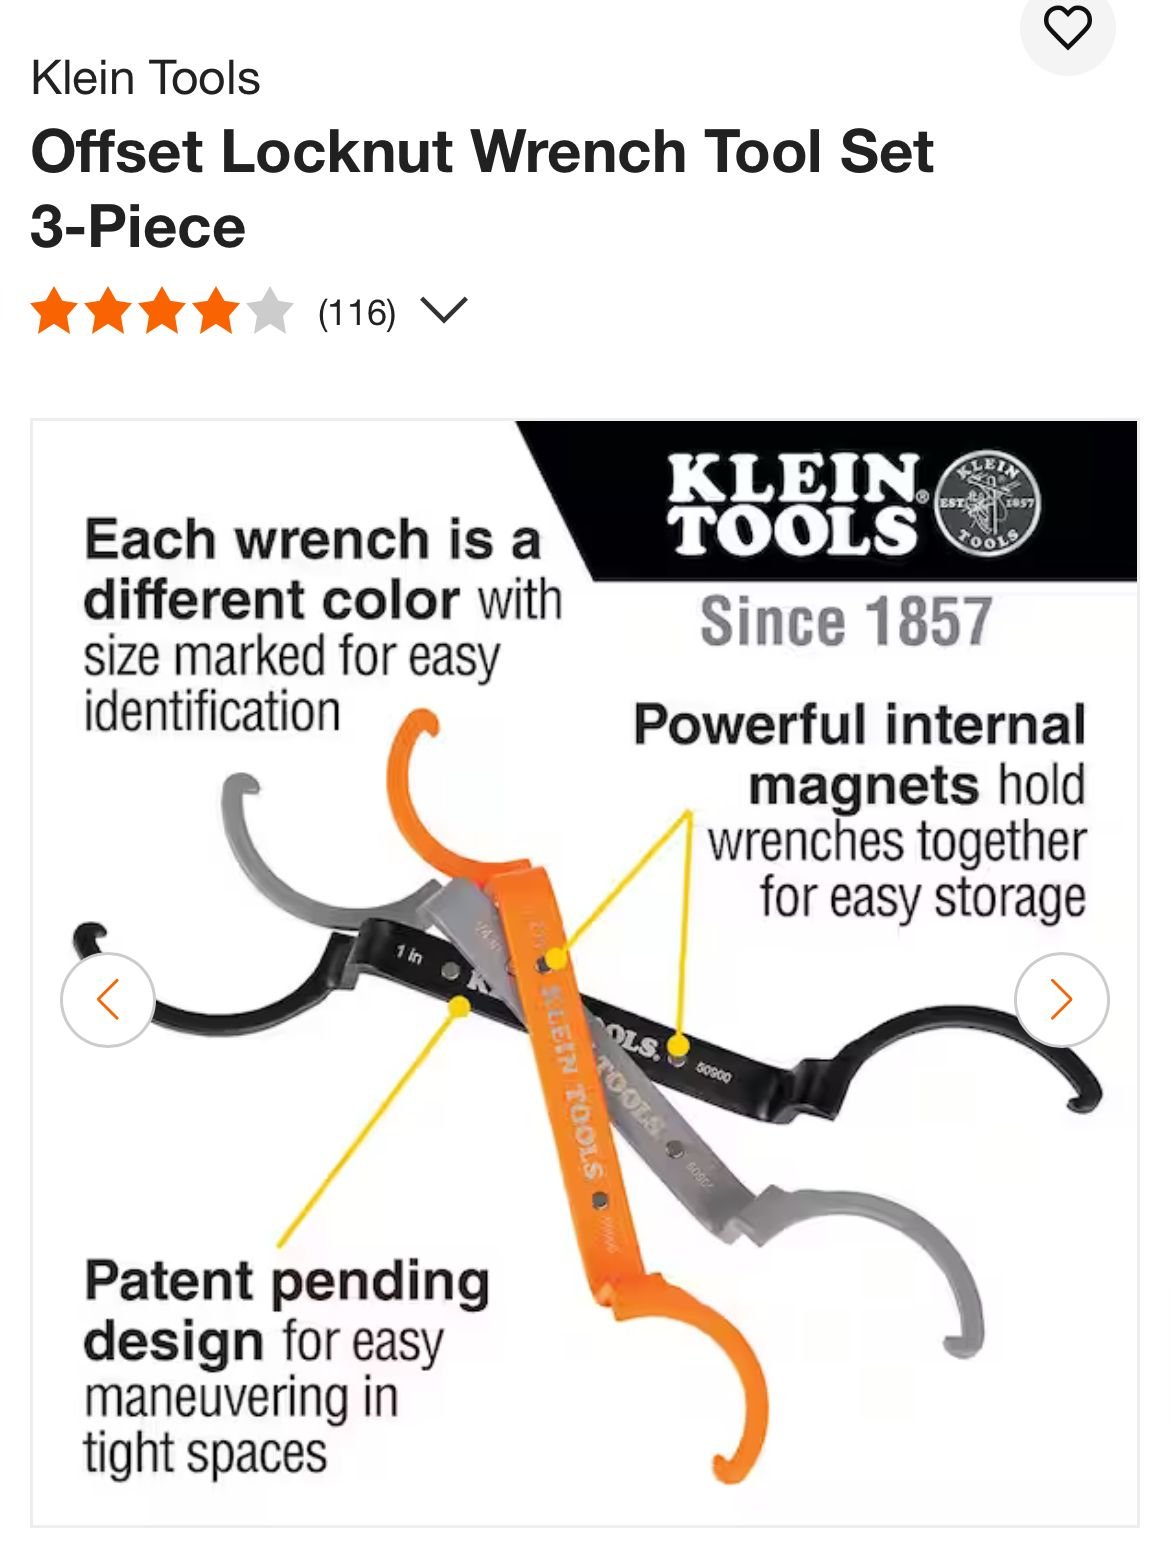
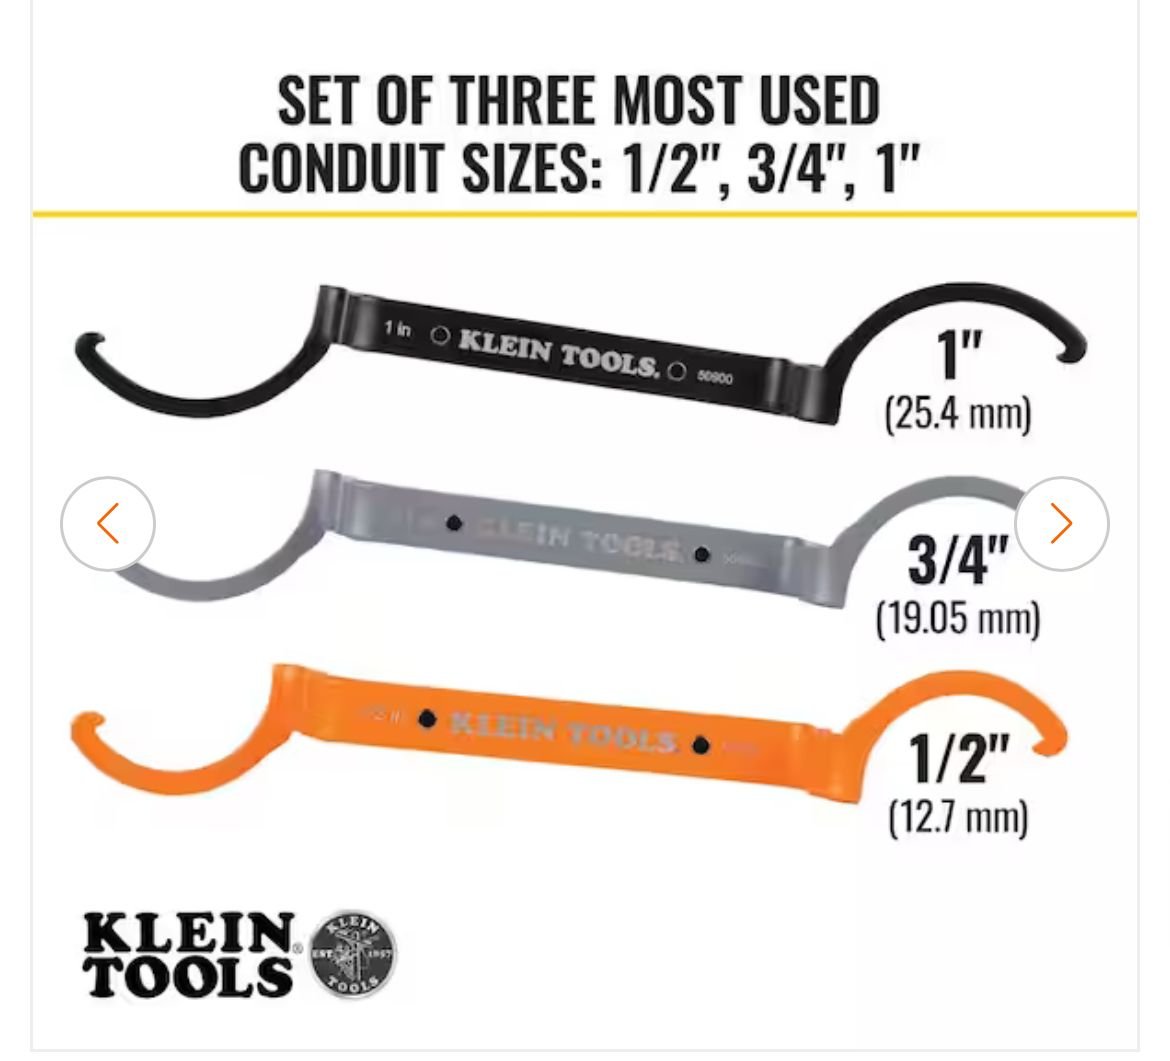
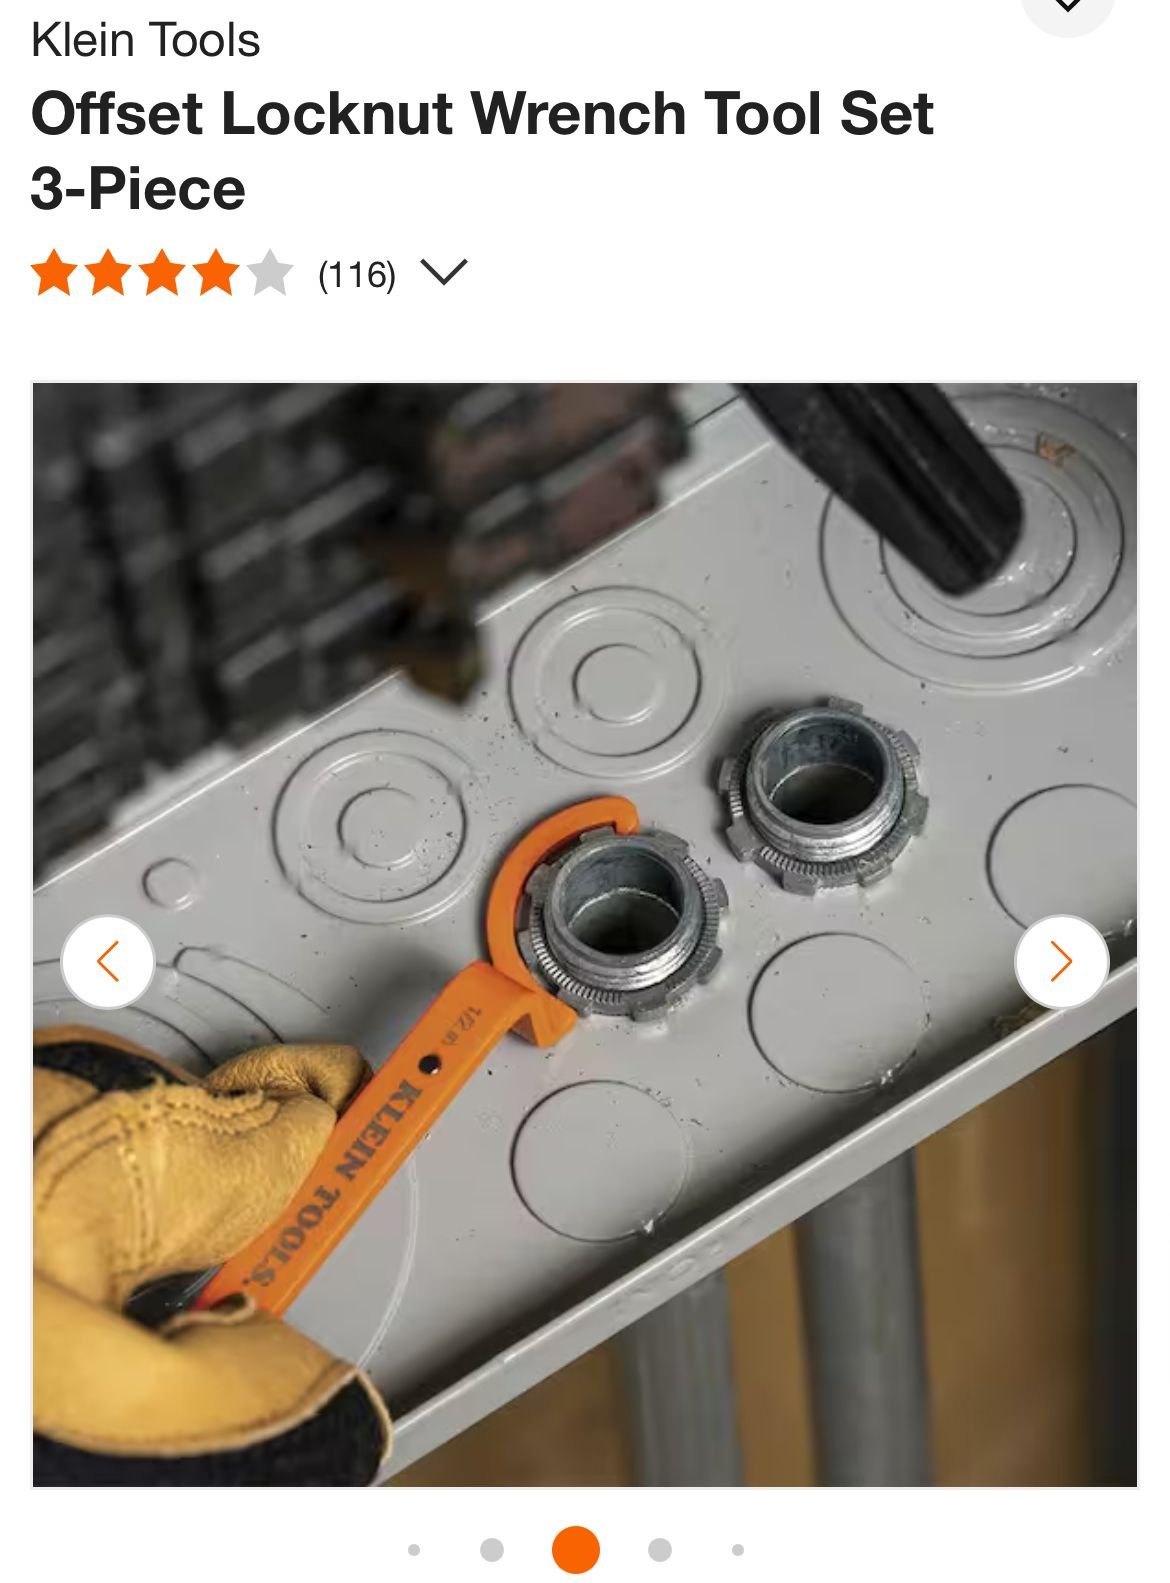
Putting the wheel back on for leverage is what ended up finally working. To pull against that I just used the regular adj. wrench to get the top locknut off and then used that & one of the Klein tools to get the lockring off.
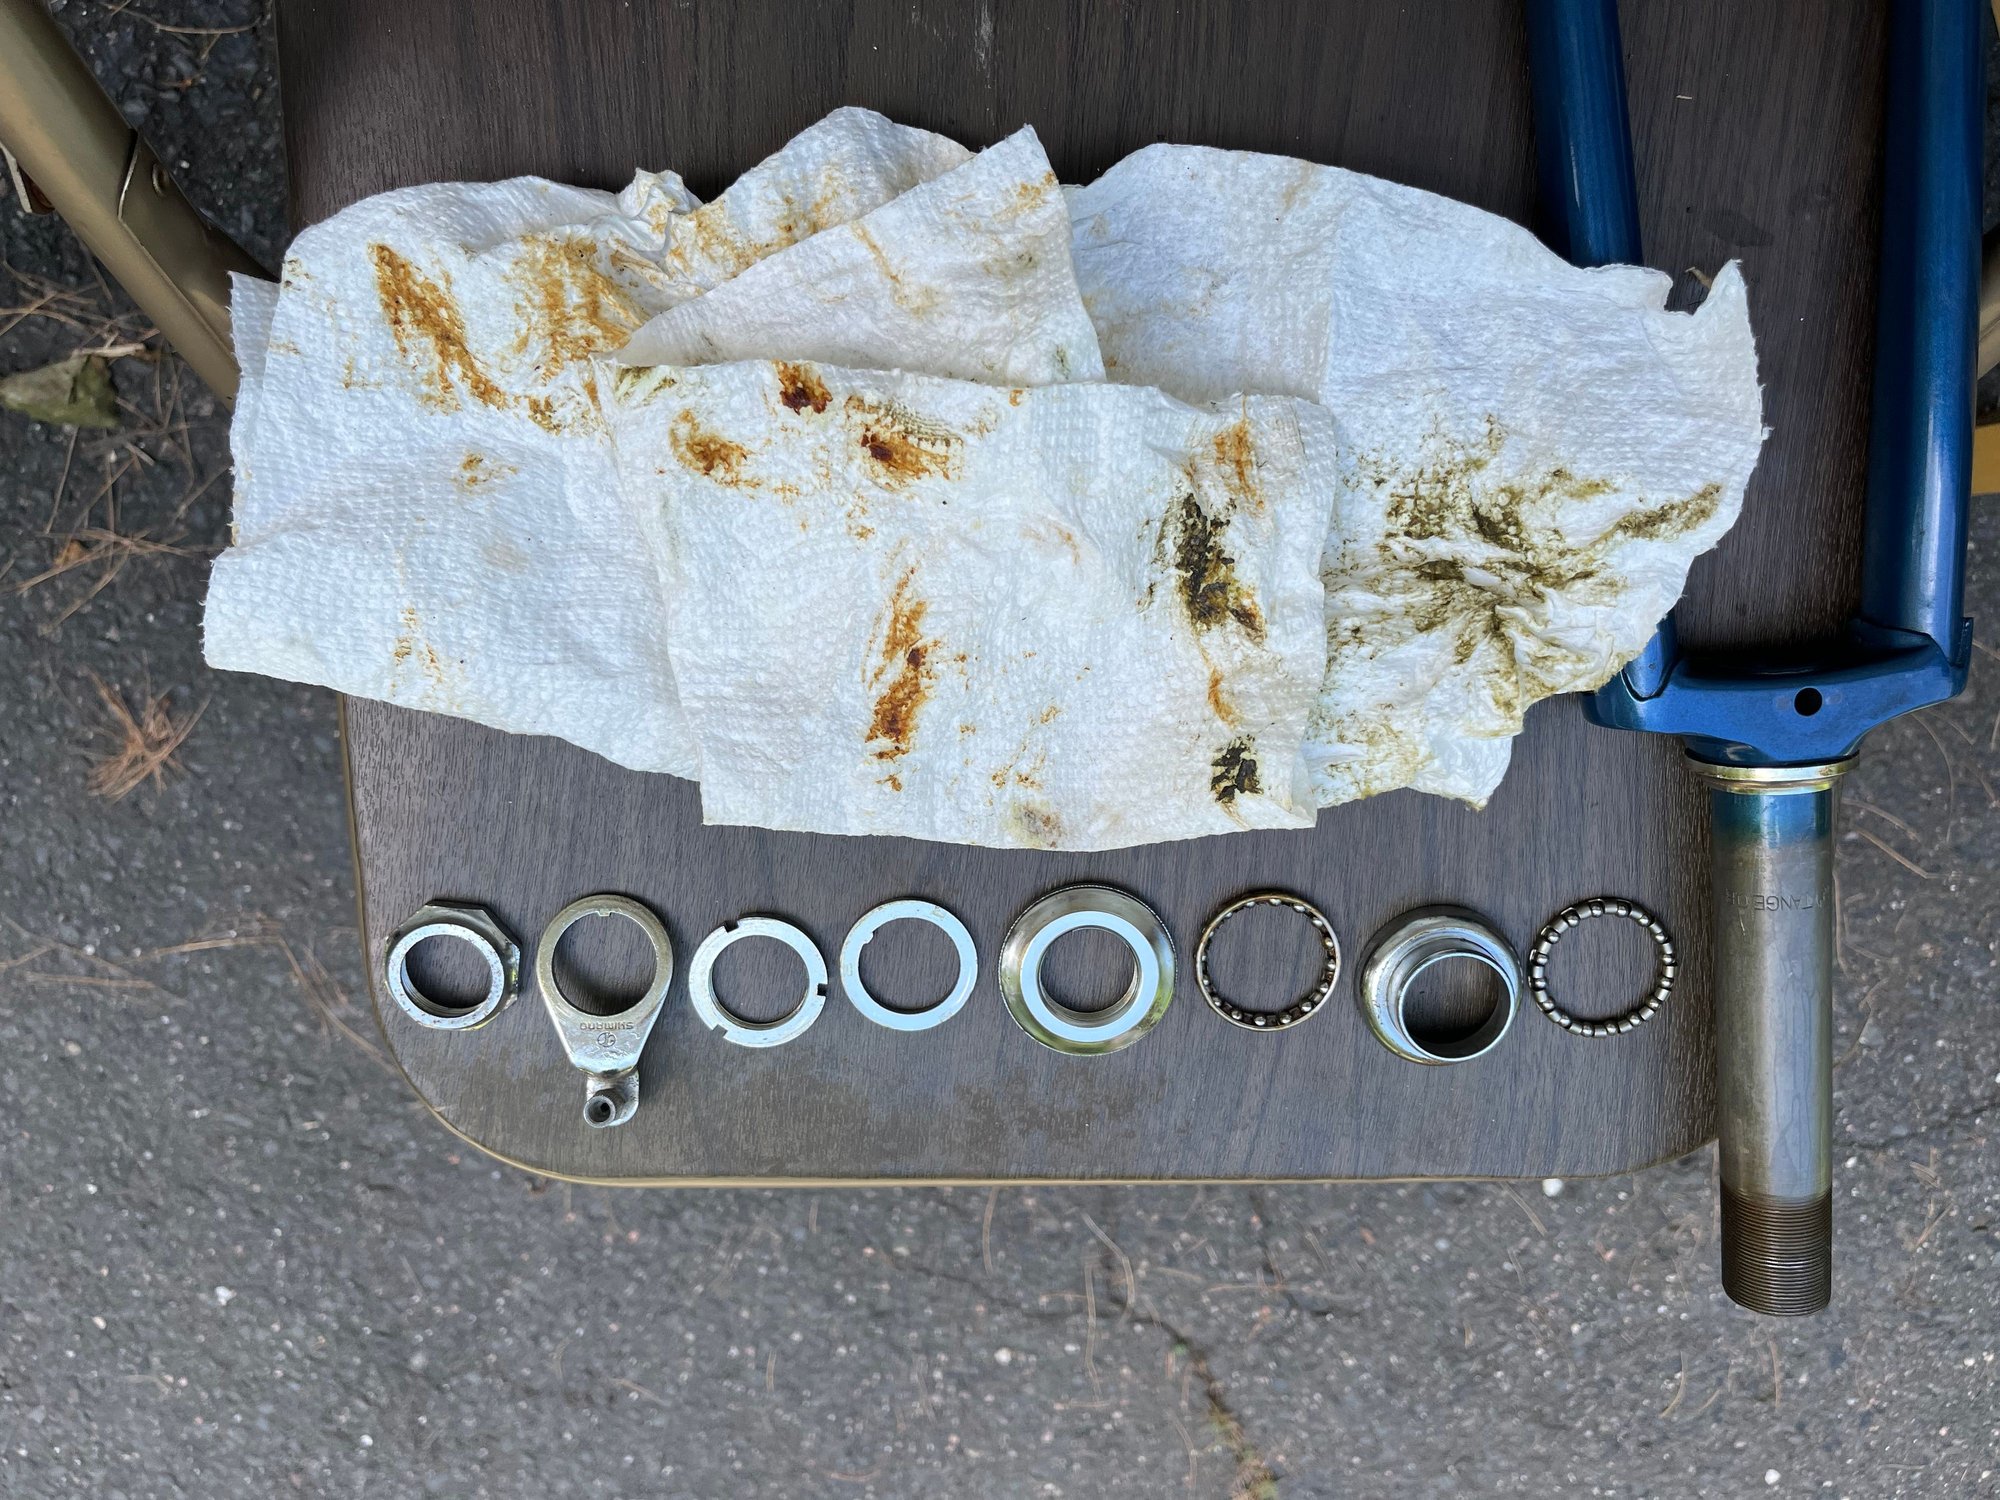
Putting the wheel back on for leverage is what ended up finally working. To pull against that I just used the regular adj. wrench to get the top locknut off and then used that & one of the Klein tools to get the lockring off.
07-14-24 | 03:41 AM
#22

Droid on a mission

Joined: May 2018
Posts: 1,222
Likes: 436
From: Palm Coast, FL
Bikes: Diamondback Wildwood Classic
You pulled one cup?
__________________
JoeTBM (The Bike Man) - I'm a black & white type of guy, the only gray in my life is the hair on my head
 www.TheBikeMenOfFlaglerCounty.com
JoeTBM (The Bike Man) - I'm a black & white type of guy, the only gray in my life is the hair on my head
07-14-24 | 08:50 AM
#23
Senior Member
Joined: Aug 2009
Posts: 3,168
Likes: 1,688
Something I like about this forum is the answer I’m seeking is often a combo of several different replies so thank you everyone!
Putting the wheel back on for leverage is what ended up finally working. To pull against that I just used the regular adj. wrench to get the top locknut off and then used that & one of the Klein tools to get the lockring off.
Putting the wheel back on for leverage is what ended up finally working. To pull against that I just used the regular adj. wrench to get the top locknut off and then used that & one of the Klein tools to get the lockring off.