


Broken Canti Post repaired
 07-06-25 | 02:49 PM
#1
Thread Starter
Newbie
Joined: Jan 2025
Posts: 14
Likes: 4
Broken Canti Post repaired
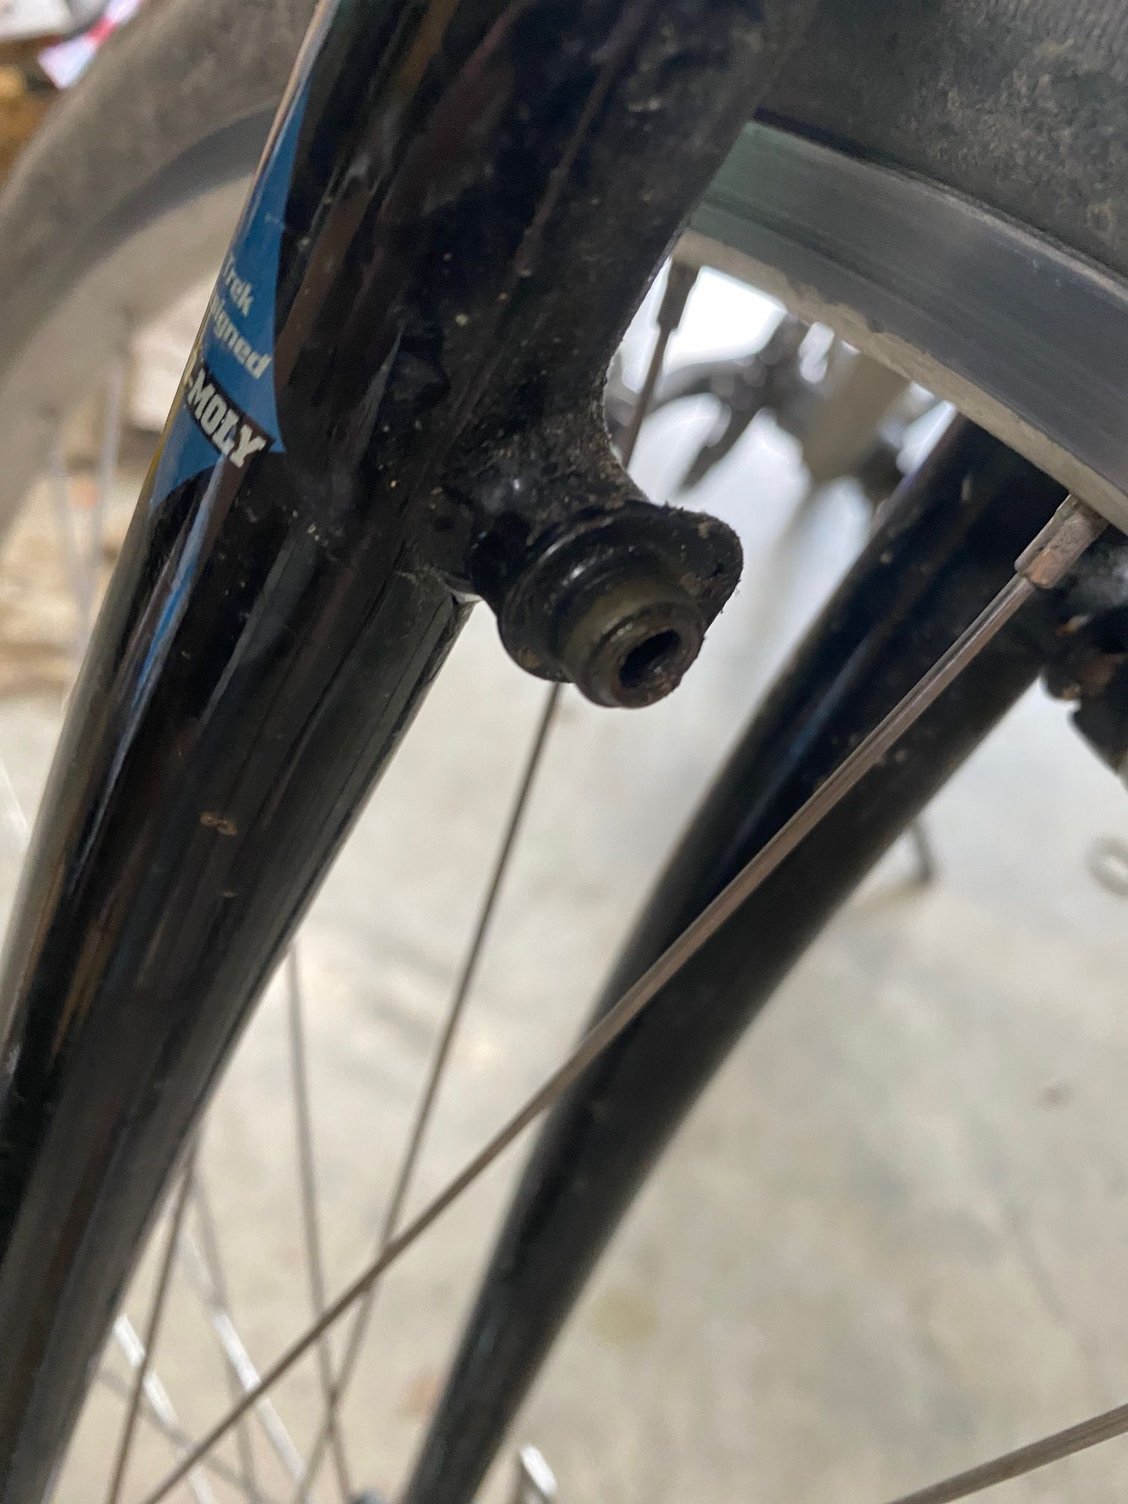
I have a 1998 Trek Multitrack 730 that I purchased used a few months ago. I recently noticed the front right cantilever brake arm was loose and wobbly so I pulled the bolt to see what was going on. I discovered the right front canti post was broken off, and the broken part of the post was missing, so this had clearly happened before I got the bike. Just the bolt was holding the canti arm. That meant that the bolt had to be tightened to hold the brake arm in place, but that prevented the arm from pivoting and with it loosened enough to pivot, the movement of the brake arm apparently had further loosened the bolt.
(I'm going to break this up into multiple posts so I can get my post count up and post pictures, hope that's OK).
(I'm going to break this up into multiple posts so I can get my post count up and post pictures, hope that's OK).
 07-06-25 | 02:49 PM
#2
Thread Starter
Newbie
Joined: Jan 2025
Posts: 14
Likes: 4
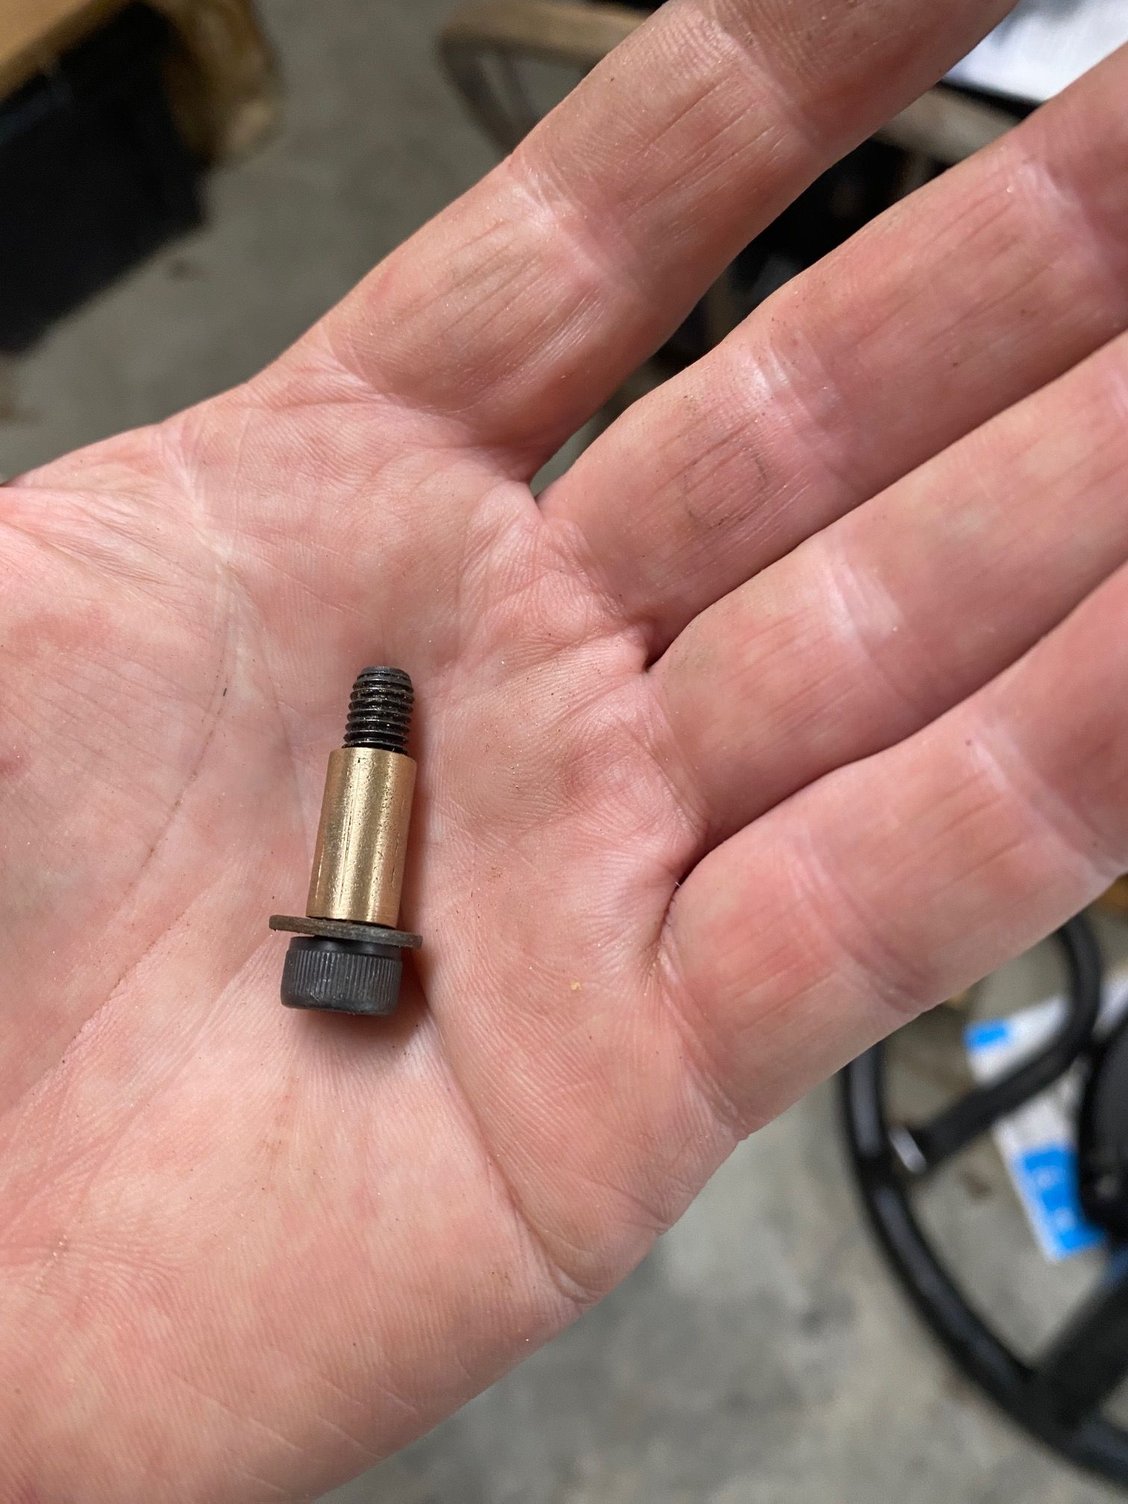
A search of posts here and elsewhere led me to understand this is a common enough problem that there is a "Problem Solvers" repair kit for this purpose consisting of a sleeve and a bolt ($10.85 plus shipping).
https://www.evolvebikes.com/product/...t-182070-1.htm
https://www.evolvebikes.com/product/...t-182070-1.htm
Last edited by bluelick; 07-08-25 at 10:41 AM.
07-06-25 | 02:50 PM
#4
Thread Starter
Newbie
Joined: Jan 2025
Posts: 14
Likes: 4
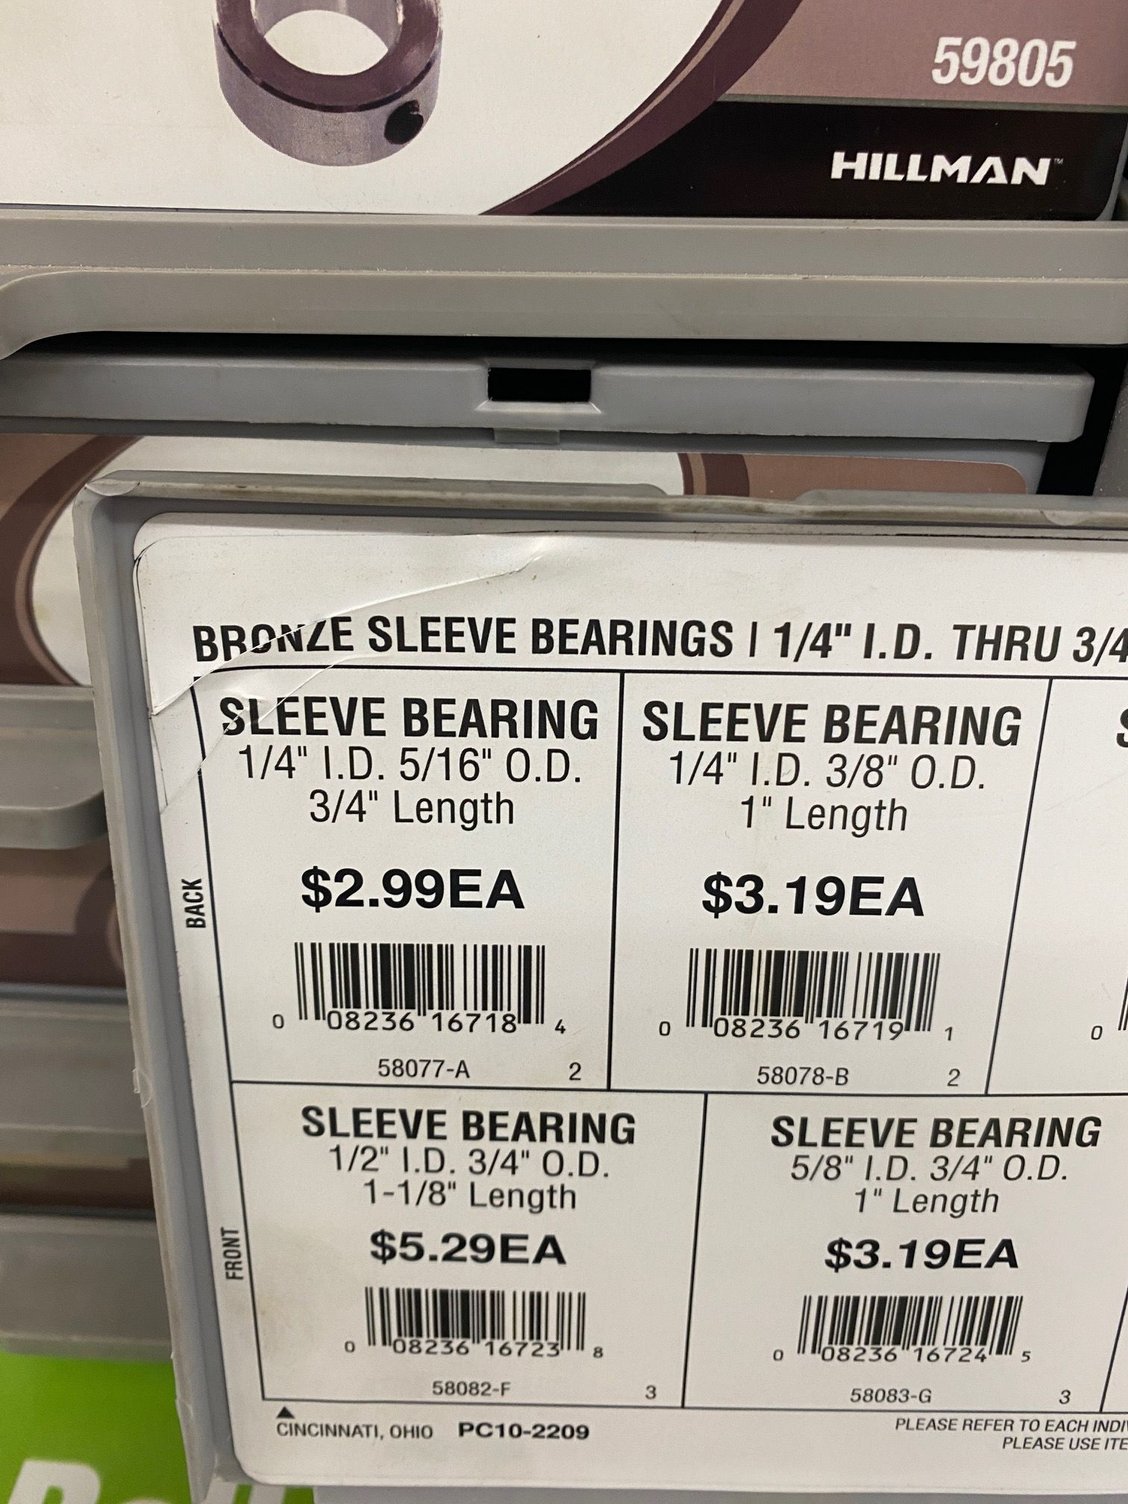
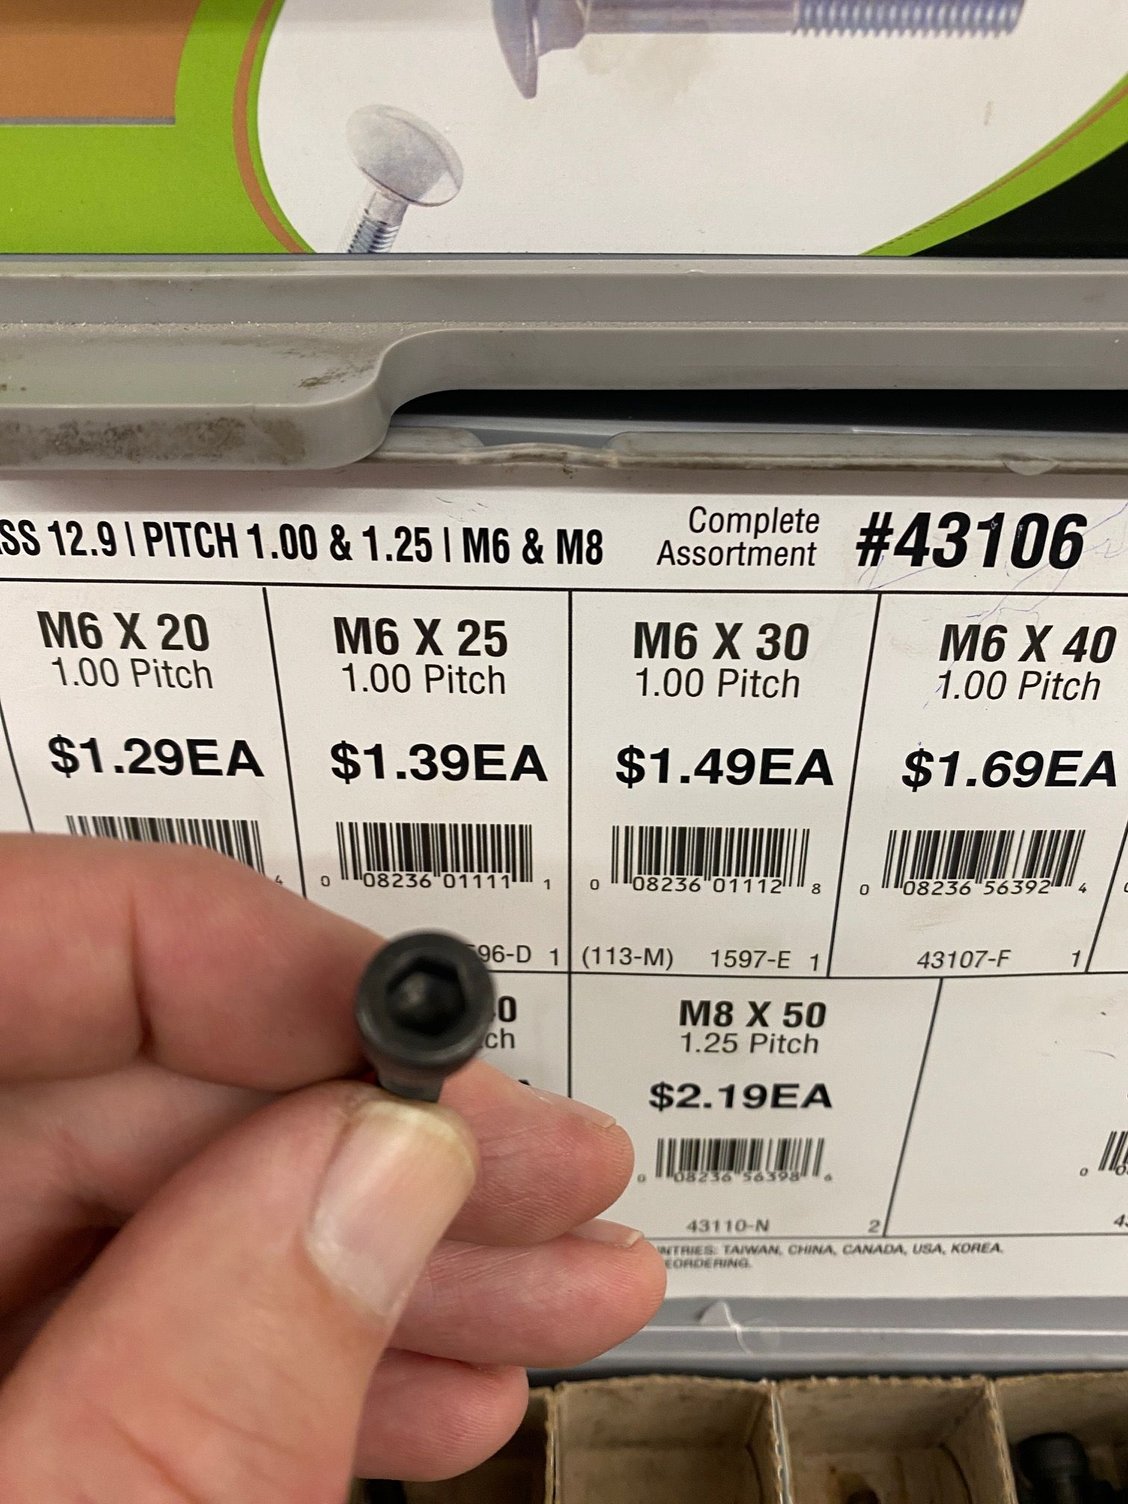
I filed flat the remainder of the original post, then shortened the bronze sleeve to the correct length and put it back together. The bolt is 5mm longer than the original and I verified that the female threads in the base extended beyond the reach of the original bolt. My determination was that I would get decent torsional strength with the repair given the 12.9 class bolt and sufficient thread depth in the mounting plate.
07-08-25 | 10:39 AM
#6
Thread Starter
Newbie
Joined: Jan 2025
Posts: 14
Likes: 4
I encountered one problem that I could have avoided: I used a bench grinder to shorten the sleeve, but holding the sleeve with vice grips while grinding it down deformed it slightly and left grooves from the vice grip jaws, which made it bind in the canti arm bushing. I was able to get it back in shape by fitting it onto the shank of a 1/4" drill bit while carefully squeezing it back into shape. I then chucked the drill bit into my drill press (upside down) and ran the press while holding some sandpaper on the sleeve to smooth it back out. My recommendation to avoid this problem would be to insert a drill bit shank into the sleeve before grinding down the end of the sleeve, and hold the drill bit rather than the sleeve with the vice grips. And a cut off wheel on a dremel tool would have probably worked better than the bench grinder.
 07-08-25 | 02:35 PM
#8
Senior Member


Joined: Feb 2012
Posts: 19,362
Likes: 5,503
From: Rochester, NY
Bikes: Stewart S&S coupled sport tourer, Stewart Sunday light, Stewart Commuting, Stewart Touring, Co Motion Tandem, Stewart 3-Spd, Stewart Track, Fuji Finest, Mongoose Tomac ATB, GT Bravado ATB, JCP Folder, Stewart 650B ATB
Good job. I still have a problem Solvers kit somewhere on my shelves. I've only done a few of these repairs and was initially skeptical to the "strength" of the repair but I've not had one that I repaired come back so figure the repair does a good job. One detail is that I filed the broken off boss base flat to have the sleeve stick up as straight as possible (one photo suggests the base wasn't filed, the text does mention filing the base flat). Andy
__________________
AndrewRStewart
AndrewRStewart
 07-09-25 | 12:05 PM
#9
Thread Starter
Newbie
Joined: Jan 2025
Posts: 14
Likes: 4
Good job. I still have a problem Solvers kit somewhere on my shelves. I've only done a few of these repairs and was initially skeptical to the "strength" of the repair but I've not had one that I repaired come back so figure the repair does a good job. One detail is that I filed the broken off boss base flat to have the sleeve stick up as straight as possible (one photo suggests the base wasn't filed, the text does mention filing the base flat). Andy
07-09-25 | 01:08 PM
#10
With a mighty wind
Joined: May 2015
Posts: 3,471
Likes: 1,521
I can�t quite tell from the picture, but did you double check that the brake post wasn�t removable?
Many have brazed or welded on bosses like yours and the post itself can be unthreaded from it and replaced. Even if you broke the part below where the wrench sits, a reverse screw extractor (ez-out) should do it.
I think you�ve done well but if it�s replaceable, even better.
Many have brazed or welded on bosses like yours and the post itself can be unthreaded from it and replaced. Even if you broke the part below where the wrench sits, a reverse screw extractor (ez-out) should do it.
I think you�ve done well but if it�s replaceable, even better.
07-09-25 | 01:44 PM
#11
Thread Starter
Newbie
Joined: Jan 2025
Posts: 14
Likes: 4
I can�t quite tell from the picture, but did you double check that the brake post wasn�t removable?
Many have brazed or welded on bosses like yours and the post itself can be unthreaded from it and replaced. Even if you broke the part below where the wrench sits, a reverse screw extractor (ez-out) should do it.
I think you�ve done well but if it�s replaceable, even better.
Many have brazed or welded on bosses like yours and the post itself can be unthreaded from it and replaced. Even if you broke the part below where the wrench sits, a reverse screw extractor (ez-out) should do it.
I think you�ve done well but if it�s replaceable, even better.
If this was a critical competition bike or used for heavy off-road riding, I might have wanted to do something else, but I do 8-10 mile rides mostly on a nice paved path, and have no concern about the durability of this repair. I would submit it may be stronger than the other, unbroken side given the circumstantial evidence that this side broke, so it wasn't all that strong to begin with!
