


Better Git it (On) Your (Sole).
 01-26-17 | 04:49 PM
#1

Thread Starter
Senior Member


Joined: Nov 2011
Posts: 7,951
Likes: 688
From: Port Angeles, WA
Bikes: A green one, "Ragleigh," or something.
Better Git it (On) Your (Sole).
Cool down and dig some of that crazy cat Charlie Mingus while you contemplate my interrogative, won't you, Daddy-O?

I recently got these NOS Italian cycling shoes. They were stupid cheap and look great; feel pretty good too. They're going to be my clips-n-straps shoes for vintage events and group rides where we're playing dress-up, now that I own a vintage looking wool jersey and vintage shorts, etc.
First off: I have ZERO interest in nailing, bolting or screwing proper cleats onto these things. But I want to beef up the sole to protect them from pedal wear, and just make them feel a little more solid. Although quite stiff (fresh out of the box) the sole leather is really thin and already slightly dinged up after a single 15-miler. Our one and only cobbler in town shut down and retired a year ago, so I don't have a pro to take these to. I was thinking of gluing on either a thick piece of leather or a lightly textured rubber sole repair patch, each of which are available easily enough online. Not planning on adding a heel, yet, but I may if the other part works out fine. Soooo...
Horsehide glue?
Shoe Goo?
Tubular glue?
Plain old contact cement?
I'm leaning toward the last the one at this point because I've used it on a lot of things and I know If it comes undone, I can redo quickly enough. Anyone here do this sort of thing before?
Dings:

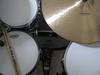
Pedals:
(Probably won't use these much, but quills would do similar damage in different areas)


I recently got these NOS Italian cycling shoes. They were stupid cheap and look great; feel pretty good too. They're going to be my clips-n-straps shoes for vintage events and group rides where we're playing dress-up, now that I own a vintage looking wool jersey and vintage shorts, etc.
First off: I have ZERO interest in nailing, bolting or screwing proper cleats onto these things. But I want to beef up the sole to protect them from pedal wear, and just make them feel a little more solid. Although quite stiff (fresh out of the box) the sole leather is really thin and already slightly dinged up after a single 15-miler. Our one and only cobbler in town shut down and retired a year ago, so I don't have a pro to take these to. I was thinking of gluing on either a thick piece of leather or a lightly textured rubber sole repair patch, each of which are available easily enough online. Not planning on adding a heel, yet, but I may if the other part works out fine. Soooo...
Horsehide glue?
Shoe Goo?
Tubular glue?
Plain old contact cement?
I'm leaning toward the last the one at this point because I've used it on a lot of things and I know If it comes undone, I can redo quickly enough. Anyone here do this sort of thing before?
Dings:

Pedals:
(Probably won't use these much, but quills would do similar damage in different areas)

__________________
● 1971 Grandis SL ● 1972 Lambert Grand Prix frankenbike ● 1972 Raleigh Super Course fixie ● 1973 Nishiki Semi-Pro ● 1979 Motobecane Grand Jubile ●1980 Apollo "Legnano" ● 1984 Peugeot Vagabond ● 1985 Shogun Prairie Breaker ● 1986 Merckx Super Corsa ● 1987 Schwinn Tempo ● 1988 Schwinn Voyageur ● 1989 Bottechia Team ADR replica ● 1990 Cannondale ST600 ● 1993 Technium RT600 ● 1996 Kona Lava Dome ●
● 1971 Grandis SL ● 1972 Lambert Grand Prix frankenbike ● 1972 Raleigh Super Course fixie ● 1973 Nishiki Semi-Pro ● 1979 Motobecane Grand Jubile ●1980 Apollo "Legnano" ● 1984 Peugeot Vagabond ● 1985 Shogun Prairie Breaker ● 1986 Merckx Super Corsa ● 1987 Schwinn Tempo ● 1988 Schwinn Voyageur ● 1989 Bottechia Team ADR replica ● 1990 Cannondale ST600 ● 1993 Technium RT600 ● 1996 Kona Lava Dome ●
Last edited by Lascauxcaveman; 01-26-17 at 04:57 PM.


 01-26-17 | 05:51 PM
#3

If I own it, I ride it

Joined: Nov 2005
Posts: 5,685
Likes: 820
From: Cardinal Country
Bikes: Lejeune(14), Raleigh, Raysport, Jan De Reus, Gazelle, Masi, B. Carr�(4), Springfield, Greg Lemond, Andre Bertin, Schwinn Paramount
I used Liquid Nails to repair a sole that started to separate from the upper. Still holding strong.
01-26-17 | 05:53 PM
#4

Senior Member

Joined: Feb 2008
Posts: 5,304
Likes: 4,800
From: Peoria, IL
too bad that you don't have a cobbler handy. They could glue on some thin tread material or something.
Plan B, I believe, would be to apply a thin layer of Shoe Goo to provide some traction and abrasion resistance.
I'm in a semi-similar situation, but I'm planning on nailing on some Anquetil cleats as soon as I get enough miles on the shoes to mark the soles.

Steve in Peoria
Plan B, I believe, would be to apply a thin layer of Shoe Goo to provide some traction and abrasion resistance.
I'm in a semi-similar situation, but I'm planning on nailing on some Anquetil cleats as soon as I get enough miles on the shoes to mark the soles.
Steve in Peoria
01-26-17 | 06:02 PM
#5

Senior Member
Joined: Apr 2005
Posts: 16,748
Likes: 138
From: Wherever
Contact cement. Either Barges or Weldwood, etc. The trick is having an "anvil" with which to stick inside the shoe, so you can tap the piece-O-leather down all the way around the edges. Short of that, stuff paper towels in the shoe as tight as you can get it, or cedar shoe trees may work, and then wrap the shoe with strong tape, pulling the edges of the new sole tight. Problem with this approach is that the tape may affect the finish on the leather. Masking tape shouldn't.
Having a shoe anvil really helps though as you can hammer the leather down to the cemented surface. Then trim around the perimeter to the final shape.
I know, not many folks have one of those on hand. But I do.
Cool shoes. What brand are they, do you know?
Having a shoe anvil really helps though as you can hammer the leather down to the cemented surface. Then trim around the perimeter to the final shape.
I know, not many folks have one of those on hand. But I do.
Cool shoes. What brand are they, do you know?
01-26-17 | 06:06 PM
#6
Senior Member
Joined: Apr 2005
Posts: 16,748
Likes: 138
From: Wherever
By the way. See those two rivets in the sole? Unless I'm mistaken, those are attached to a steel shank.
I have a pair of Dettos with those and I played hell trying to attached nail-on cleats. Really need a very solid and firm anvil inside to bend over the nails. But since you're not planning on doing that...
You can also, if you want, cement some strips of leather on after the new sole, to act as cleats.
01-26-17 | 06:13 PM
#7

Senior Member
Joined: Feb 2013
Posts: 15,369
Likes: 4,391
From: Alta California
I know some cements cure brittle and then just break up when the shoe is flexed.
Last time I wanted to do a shoe repair went to me local hardware, a huge one, for some Barge and discovered to my horror that despite carrying a dozen or so brands of contact cement they had no Barge. Is Barge still being made?
-----
A bit disappointed, when I saw the thread header was hoping for a fish discussion.

Don't cave men like fish?
-----
01-26-17 | 06:17 PM
#8
Senior Member
Joined: Apr 2005
Posts: 16,748
Likes: 138
From: Wherever
They still make Barge cement.
https://www.amazon.com/Quabaug-Corp-.../dp/B0015TDJKI
I've found this stuff works just as well.
https://www.rshughes.com/p/Dap-Contac...170127001821:s
https://www.amazon.com/Quabaug-Corp-.../dp/B0015TDJKI
I've found this stuff works just as well.
https://www.rshughes.com/p/Dap-Contac...170127001821:s
01-26-17 | 06:40 PM
#9
Senior Member
Joined: Feb 2013
Posts: 15,369
Likes: 4,391
From: Alta California
They still make Barge cement.
https://www.amazon.com/Quabaug-Corp-.../dp/B0015TDJKI
I've found this stuff works just as well.
Dap 00271 Contact Adhesive | RS Hughes Industrial Supply
https://www.amazon.com/Quabaug-Corp-.../dp/B0015TDJKI
I've found this stuff works just as well.
Dap 00271 Contact Adhesive | RS Hughes Industrial Supply
-----
01-26-17 | 07:18 PM
#10
Banned
Joined: Aug 2013
Posts: 6,480
Likes: 450
Sharp looking shoes. What brand / make are they?
Without cleats they are slippery devils and might experience an unexpected slip out of the pedal. Also, they really are not designed for long term riding without cleats. If done, will eventually ruin the shoe sole.
Though once you have the telltale marks on the sole its a fairly simple ordeal. I've learned to set them up fairly quick.
Though before starting, confirm the toeclip is appropriate to length. Basically making sure the ball of the foot / sole is over the pedal axle. One's results my vary and depending on duck footed or pigeon toed. (sorry -not a podiatrist)
Key- I prefer a quick set by hot melt glue for the cleats and prior to tack - nail setting will go for a ride. Only a small few dots suffice for the temporary hold. Line the cleat slot up with the telltale marks on the sole. If after the ride and feels off, I take a putty knife and pop the cleat off, re-set and try again. You don't need a fancy hot melt gluegun. (Harbor Freight or look in the Walmart craft section, even dollar stores have a set-up with sample start pack for under $5.)
For tacks, the hardware store usually has the type with tiny barb like shank. Use a needle nose to hold and take multiple tapping to drive home. Large hits cause trouble or might bend the tack.
Other:
If lucky, its nice to acquire additional shoes, rotate usage and if you have different bikes with pedals / and or weather variation. For example, I have a pair with installed nylon cleats for aluminum cage pedals. I also have a pair with alloy cleats only appropriate with pedals having steel cages. Another spare pair (with nylon cleat) so if my primary are soaked wet and I want to ride the following day.
Heel savers are readily available at Walmart or the like. Simply a small anti-slip piece that tacks on the rear edge of the sole.
01-26-17 | 08:15 PM
#11

Bike Butcher of Portland
Joined: Jul 2014
Posts: 12,427
Likes: 7,918
From: Portland, OR
Bikes: It's complicated.
How would we recognize you without your tan shorts and a short sleeve dress shirt?
__________________
If someone tells you that you have enough bicycles and you don't need any more, stop talking to them. You don't need that kind of negativity in your life.
If someone tells you that you have enough bicycles and you don't need any more, stop talking to them. You don't need that kind of negativity in your life.
01-26-17 | 08:27 PM
#13

Senior Member
Joined: May 2012
Posts: 5,046
Likes: 4,891
From: Point Reyes Station, California
Bikes: Indeed!
too bad that you don't have a cobbler handy. They could glue on some thin tread material or something.
Plan B, I believe, would be to apply a thin layer of Shoe Goo to provide some traction and abrasion resistance.
I'm in a semi-similar situation, but I'm planning on nailing on some Anquetil cleats as soon as I get enough miles on the shoes to mark the soles.
Steve in Peoria
Plan B, I believe, would be to apply a thin layer of Shoe Goo to provide some traction and abrasion resistance.
I'm in a semi-similar situation, but I'm planning on nailing on some Anquetil cleats as soon as I get enough miles on the shoes to mark the soles.
Steve in Peoria
OP sorry for the tangent. I'm very envious of your new shoes!
Brent
01-26-17 | 08:35 PM
#14
Senior Member
Joined: Oct 2013
Posts: 3,454
Likes: 909
From: Connecticut
Bikes: are fun!
Ah um, I can't help with the shoe question, but do love Mingus. That album was a gift to a family member this past holiday season. Think it'll be the soundtrack at work tomorrow.
Nice shoes!
Nice shoes!
01-26-17 | 09:31 PM
#15
Senior Member
Joined: Feb 2008
Posts: 5,304
Likes: 4,800
From: Peoria, IL
Marking the soles by riding is a good way to dial in the angle to set the cleat slot because it will very nicely mimic the angle at which you naturally hold your foot while riding; but my advice is to use the wear pattern for fore/aft placement of the cleat as only a starting point. The marks will occur right at the forwardmost point that the toe clip allows your foot to travel, but unless you are very lucky in toe clip length, you will find that your best cleat position is either a little forward of the marks or a little back from them (in which case you need a longer toeclip.) Pay attention to your feet as you are riding without cleats to try to ascertain whether you would be more comfortable with your feet a little farther forward or a little farther back.
OP sorry for the tangent. I'm very envious of your new shoes!
Brent
OP sorry for the tangent. I'm very envious of your new shoes!
Brent
Steve in Peoria
[/tangent]
01-26-17 | 09:41 PM
#16

Senior Member
Joined: Jan 2017
Posts: 91
Likes: 2
From: SoCal
Bikes: 1972 Raleigh Professional, 1980 Raleigh Gran Sport (frame only), 1989 Diamondback Apex, 1997 LeMond Zurich, 2018 Specialized Diverge running R8020 Ultegra.
I have a pair similar to these but they use bolt on cleats. With the smooth leather soles they were very dangerous while starting and or stopping. I took them to a cobbler and had rubber heels and a very thin rubber layer about 2 inches in length starting at the sole tip and matching the front shape of the sole. This gave be some better shoe surface than just the bare sole. Just had to make certain the the toe piece was thin enough to no interfere with the toe clips. I still needs to find some sort of insole stiffener as just the leather soles a too soft to stand in the pedals...
01-26-17 | 09:49 PM
#17

Senior Member
Joined: Dec 2006
Posts: 7,472
Likes: 549
Northbend posted about adding a sole to some shoes. Iirc he used a Five-10 climbing shoe resole kit.
Here you go: https://www.bikeforums.net/classic-vi...ring-shoe.html
Here you go: https://www.bikeforums.net/classic-vi...ring-shoe.html
Last edited by due ruote; 01-26-17 at 10:02 PM.
01-26-17 | 10:32 PM
#18
Thread Starter
Senior Member
Joined: Nov 2011
Posts: 7,951
Likes: 688
From: Port Angeles, WA
Bikes: A green one, "Ragleigh," or something.
 Maybe a 1/4" heavy neoprene sole is the way to make these things a little grippier. (I normally ride with no foot retention whatsoever, so that should be adequate for me.)
______________
Northbend posted about adding a sole to some shoes. Iirc he used a Five-10 climbing shoe resole kit.
Here you go: https://www.bikeforums.net/classic-vi...ring-shoe.html
Here you go: https://www.bikeforums.net/classic-vi...ring-shoe.html
And thanks to Rootie and Unworthy for the Barge tip; I was hoping someone here would know what the "good stuff" is. [MENTION=29368]rootboy[/MENTION], thx also for the anvil tip. I've got a big old bench vise I can complement with some plywood and padding to really smash those parts together for the gluing. I have a basic plan now.
"Cortina 300?" No markings on the actual shoe, but that's how the seller listed it. Check out the ebay store of seller hulamula, he has several more pairs in smaller sizes. Mine were $51 shipped! As well as a decent quantity of other random vintage bike swag.
____________
__________________
● 1971 Grandis SL ● 1972 Lambert Grand Prix frankenbike ● 1972 Raleigh Super Course fixie ● 1973 Nishiki Semi-Pro ● 1979 Motobecane Grand Jubile ●1980 Apollo "Legnano" ● 1984 Peugeot Vagabond ● 1985 Shogun Prairie Breaker ● 1986 Merckx Super Corsa ● 1987 Schwinn Tempo ● 1988 Schwinn Voyageur ● 1989 Bottechia Team ADR replica ● 1990 Cannondale ST600 ● 1993 Technium RT600 ● 1996 Kona Lava Dome ●
● 1971 Grandis SL ● 1972 Lambert Grand Prix frankenbike ● 1972 Raleigh Super Course fixie ● 1973 Nishiki Semi-Pro ● 1979 Motobecane Grand Jubile ●1980 Apollo "Legnano" ● 1984 Peugeot Vagabond ● 1985 Shogun Prairie Breaker ● 1986 Merckx Super Corsa ● 1987 Schwinn Tempo ● 1988 Schwinn Voyageur ● 1989 Bottechia Team ADR replica ● 1990 Cannondale ST600 ● 1993 Technium RT600 ● 1996 Kona Lava Dome ●
Last edited by Lascauxcaveman; 01-26-17 at 10:56 PM.
01-27-17 | 01:59 AM
#19
Senior Member


Joined: Oct 2015
Posts: 16,073
Likes: 9,429
From: PDX
Bikes: Merz x 5 + Specialized Merz Allez x 2, Strawberry/Newlands/DiNucci/Ti x3, Gordon, Fuso/Moulton x2, Bornstein, Paisley,1958-74 Paramounts x3, 3rensho, 74 Moto TC, 73-78 Raleigh Pro's x5, Marinoni x2, 1960 Cinelli SC, 1980 Bianchi SC, PX-10 X 2
There is a standard protective outsole that is regularly used on cowboy boots, only about an eighth of an inch thick and literally wears like iron. I have it for the second time on my current pair and while I don't wear them often they are over ten years old and show very little wear, stiffen the whole boot and are barely noticeable. Standard fare at any good shoe shop, maybe a little spendy.
And I meant that. Maybe a 1/4" heavy neoprene sole is the way to make these things a little grippier. (I normally ride with no foot retention whatsoever, so that should be adequate for me.)
______________
Now that is really helpful; as far as moving me towards my stated goal. Being a big Northbend fanboi (and hey, who isn't?), I probably read that thread when he first posted it and filed it away in my subconscious; which surfaced long enough to prompt me to start this thread. Thanks for digging that one out
And thanks to Rootie and Unworthy for the Barge tip; I was hoping someone here would know what the "good stuff" is. @rootboy, thx also for the anvil tip. I've got a big old bench vise I can complement with some plywood and padding to really smash those parts together for the gluing. I have a basic plan now.
"Cortina 300?" No markings on the actual shoe, but that's how the seller listed it. Check out the ebay store of seller hulamula, he has several more pairs in smaller sizes. Mine were $51 shipped! As well as a decent quantity of other random vintage bike swag.
____________
Good point. We're going to have to come up with some kinda secret hand signals or something. At least when I'm copping incognito.
Maybe a 1/4" heavy neoprene sole is the way to make these things a little grippier. (I normally ride with no foot retention whatsoever, so that should be adequate for me.)______________
Now that is really helpful; as far as moving me towards my stated goal. Being a big Northbend fanboi (and hey, who isn't?), I probably read that thread when he first posted it and filed it away in my subconscious; which surfaced long enough to prompt me to start this thread. Thanks for digging that one out
And thanks to Rootie and Unworthy for the Barge tip; I was hoping someone here would know what the "good stuff" is. @rootboy, thx also for the anvil tip. I've got a big old bench vise I can complement with some plywood and padding to really smash those parts together for the gluing. I have a basic plan now.
"Cortina 300?" No markings on the actual shoe, but that's how the seller listed it. Check out the ebay store of seller hulamula, he has several more pairs in smaller sizes. Mine were $51 shipped! As well as a decent quantity of other random vintage bike swag.
____________
Good point. We're going to have to come up with some kinda secret hand signals or something. At least when I'm copping incognito.
01-27-17 | 05:31 AM
#20
Senior Member
Joined: Nov 2013
Posts: 2,399
Likes: 1,572
From: Near Pottstown, PA: 30 miles NW of Philadelphia
Bikes: 2 Trek Mtn, Cannondale R600 road, 6 vintage road bikes
Contact cement. Either Barges or Weldwood, etc. The trick is having an "anvil" with which to stick inside the shoe, so you can tap the piece-O-leather down all the way around the edges. Short of that, stuff paper towels in the shoe as tight as you can get it, or cedar shoe trees may work, and then wrap the shoe with strong tape, pulling the edges of the new sole tight. Problem with this approach is that the tape may affect the finish on the leather. Masking tape shouldn't.
Having a shoe anvil really helps though as you can hammer the leather down to the cemented surface. Then trim around the perimeter to the final shape.
Having a shoe anvil really helps though as you can hammer the leather down to the cemented surface. Then trim around the perimeter to the final shape.
BTW: I assume you mean the old school toxic medieval Weldwood contact cement vs the new water based Weldwood. The new water based stuff is a really poor product. Even Weldwood admits the stuff is 'finicky".
Quick solid impacts or firm long duration clamping pressure?
01-27-17 | 05:54 AM
#21
Senior Member
Joined: Apr 2005
Posts: 16,748
Likes: 138
From: Wherever
Prowler,
If you've watched a cobbler, they hammer the stuff down. Of course, contact cement adheres on contact. On a flat workpiece, you can just set it down on the bench and press, or roll it. But a shoe sole isn't flat. So, it requires seating the two pieces home with a smooth faced hammer. Really hard to do unless you have a shoe form or anvil. If not, the only way I can think of is to clamp it. Again, hard to do on an undulating shape. Hence the tape. I used to do the felt soles on my wading boots like that.
I have never even heard of water based contact cement. But, hearing about it here ... I'm going to put another tin of the real stuff on my shopping list.

Thread
Thread Starter
Forum
Replies
Last Post
rmichael
General Cycling Discussion
1
08-02-15 02:59 PM


